
This post may contain affiliate links. Please read our disclosure policy.
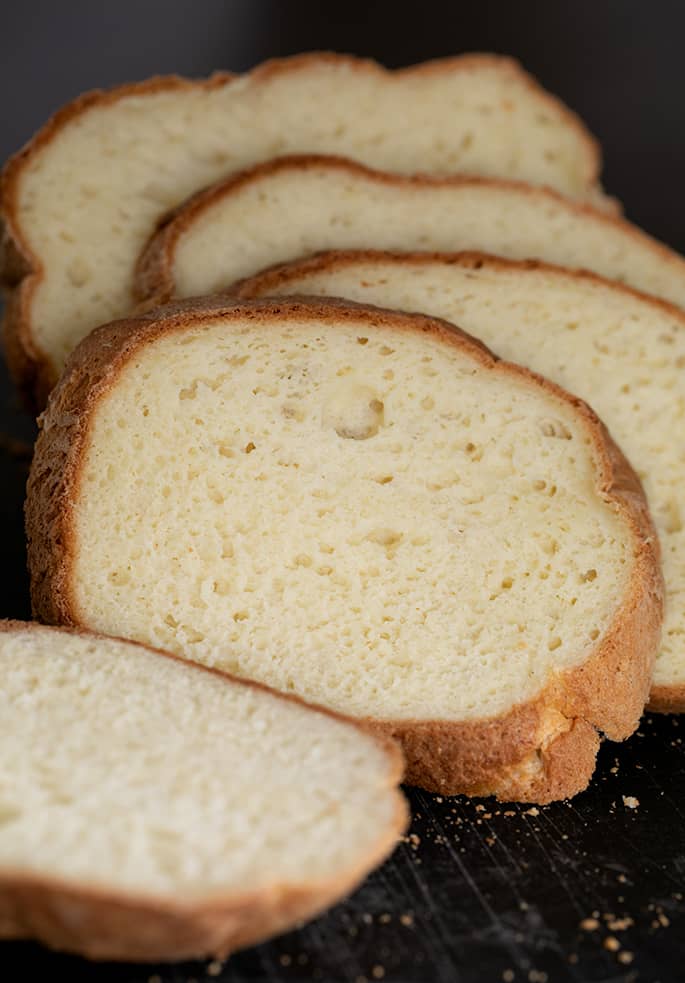
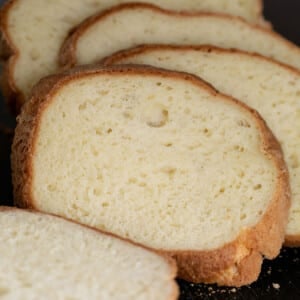
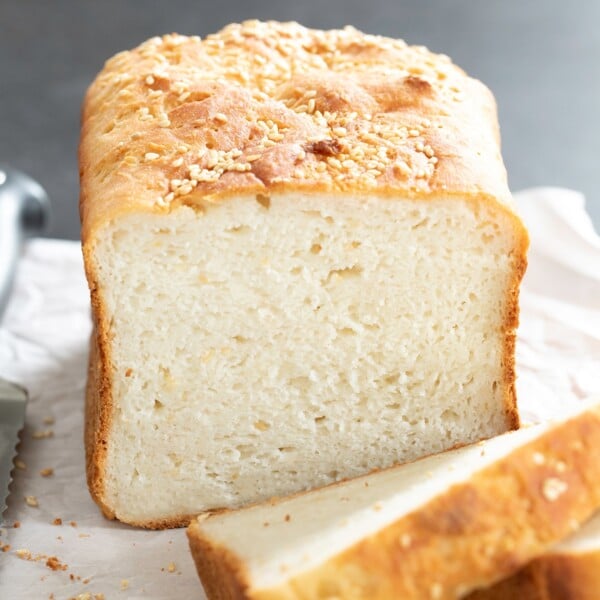
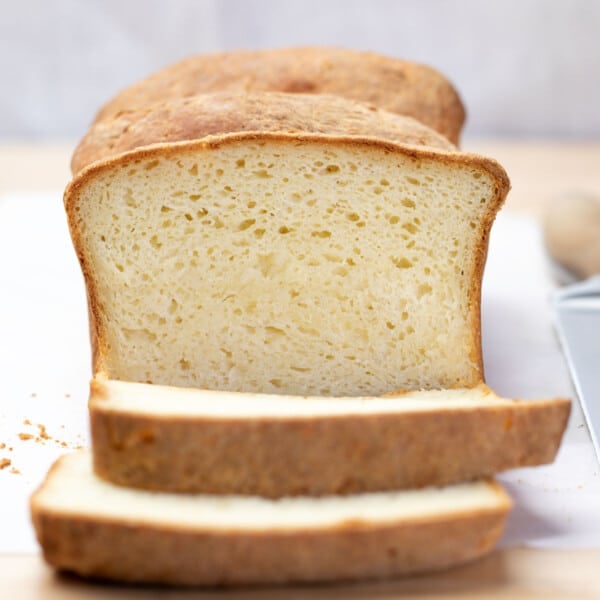
This easy gluten free artisan bread has an open crumb, a crisp crust, and comes together in one bowl—no stand mixer required.
It rises and bakes quickly, making just enough for a family dinner table. It’s the kind of bread that makes a gluten free meal feel like a night out.
My take
How this bread gets a crisp crust and soft center
This loaf is made with just flour, yeast, sugar, salt, milk, and eggs—no stand mixer needed. It’s easier than my classic gluten free sandwich bread and less involved than my gluten free sourdough.
Think of it as an everyday boule: crusty on the outside, soft and airy inside because of the wet dough that rises high, fast. Perfect for tearing, dipping, sandwiching—or turning into homemade bread crumbs.
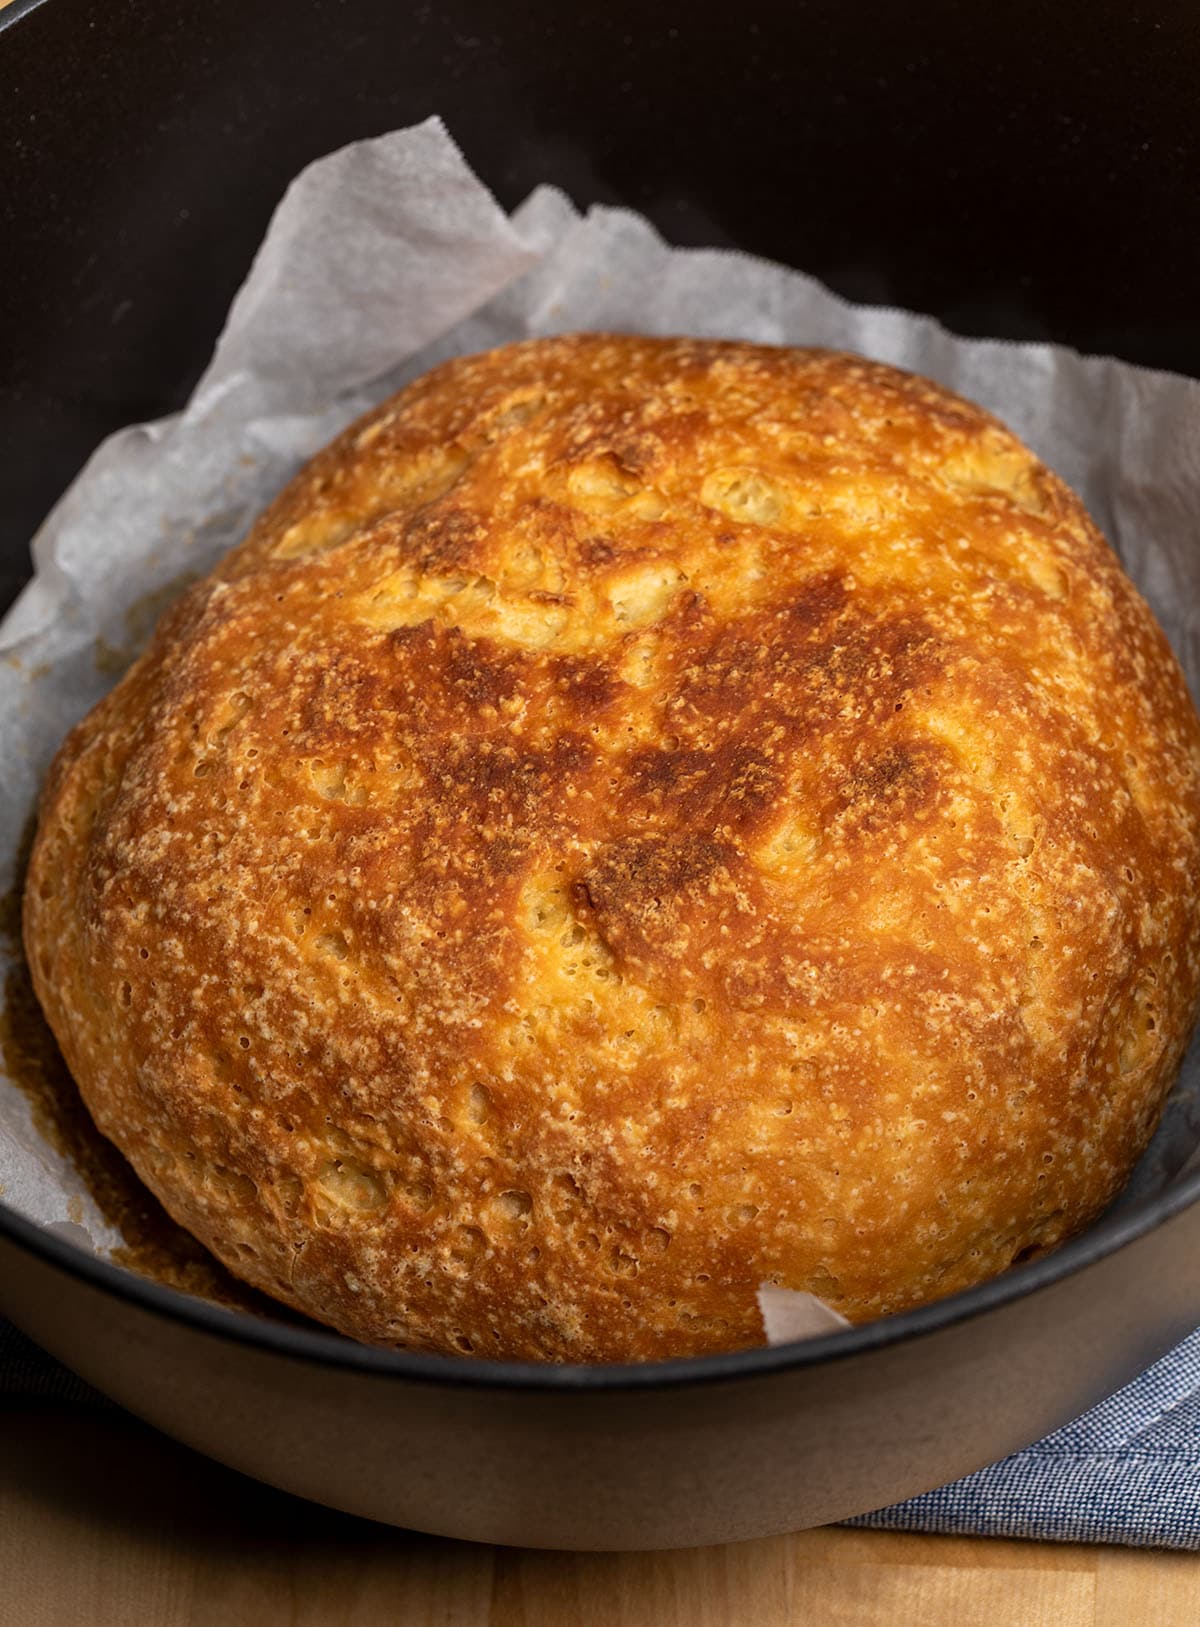
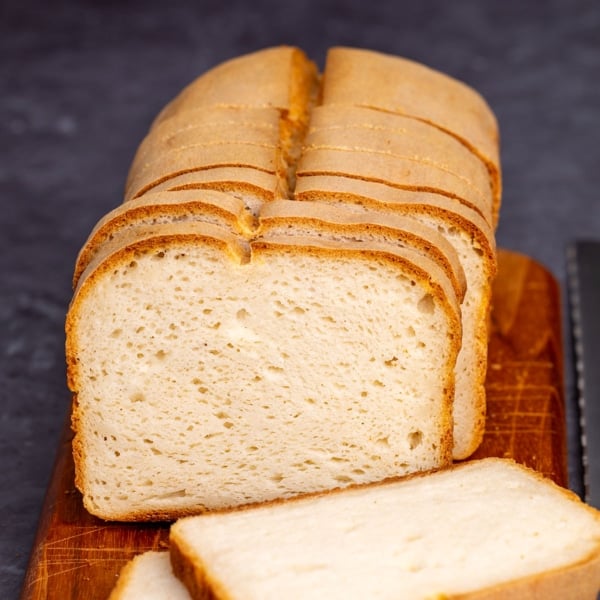
It bakes in a small glass bowl, then gets flipped near the end for a crisp, golden crust all the way around.

what's in it
Recipe ingredients
- Gluten free flour blend – Use a high-quality all purpose blend that includes xanthan gum. It should support a good rise and create a tender crumb.
- Tapioca starch/flour – Adds stretch and height. Even though your flour blend probably includes some, this extra amount makes a big difference.
- Yeast – Instant yeast is easiest. If using active dry, increase the amount slightly (7.5–8g) and activate it in some of the milk first.
- Sugar – Just a bit to feed the yeast and help it rise.
- Baking soda – Promotes browning in the oven.
- Salt – Enhances flavor. I use kosher salt because it’s harder to overmeasure than fine salt.
- Milk – Warm milk activates the yeast and adds richness.
- Egg – Binds the dough, improves rise, and adds color and flavor.
How to make gluten free artisan bread
1. Grease your bowl or pan.
Use a 1 to 1½ quart oven-safe glass bowl for the classic round shape. If you're using something else, check the FAQs for tips.
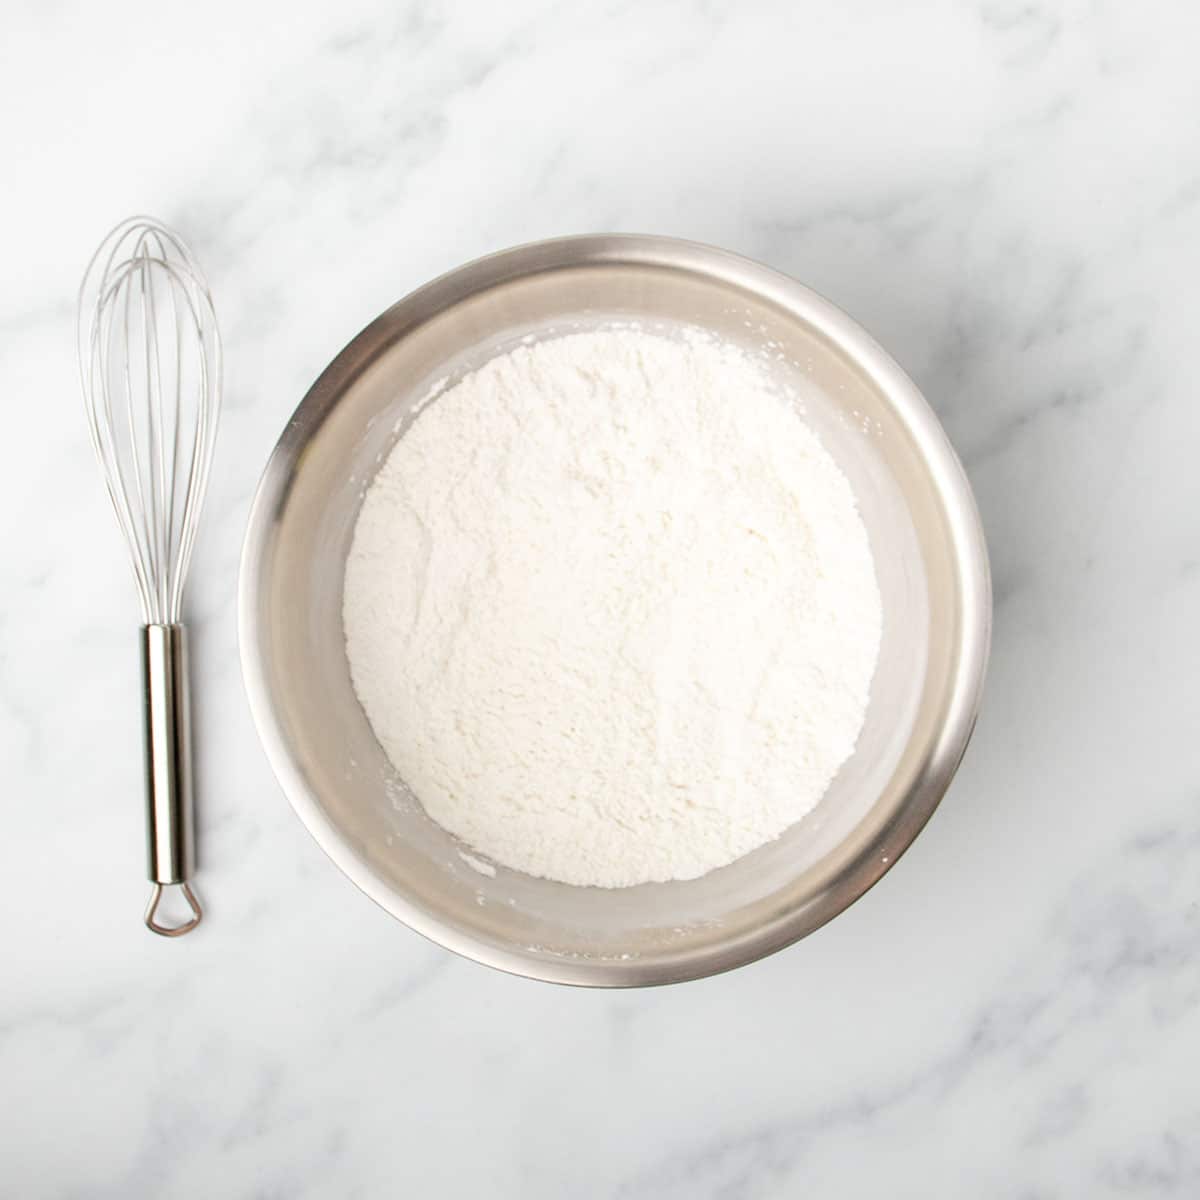
2. Mix the dough.
In a large bowl, whisk together the flour blend, tapioca starch, sugar, yeast, baking soda, and salt. Add the warm milk, beaten egg, and oil, and mix vigorously until a sticky, pale dough forms.


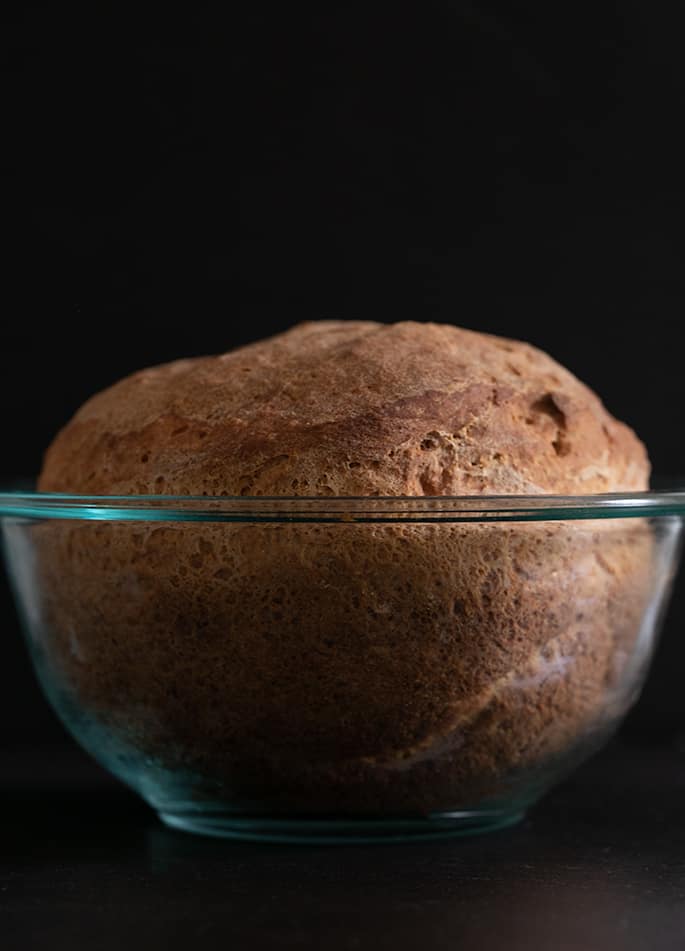
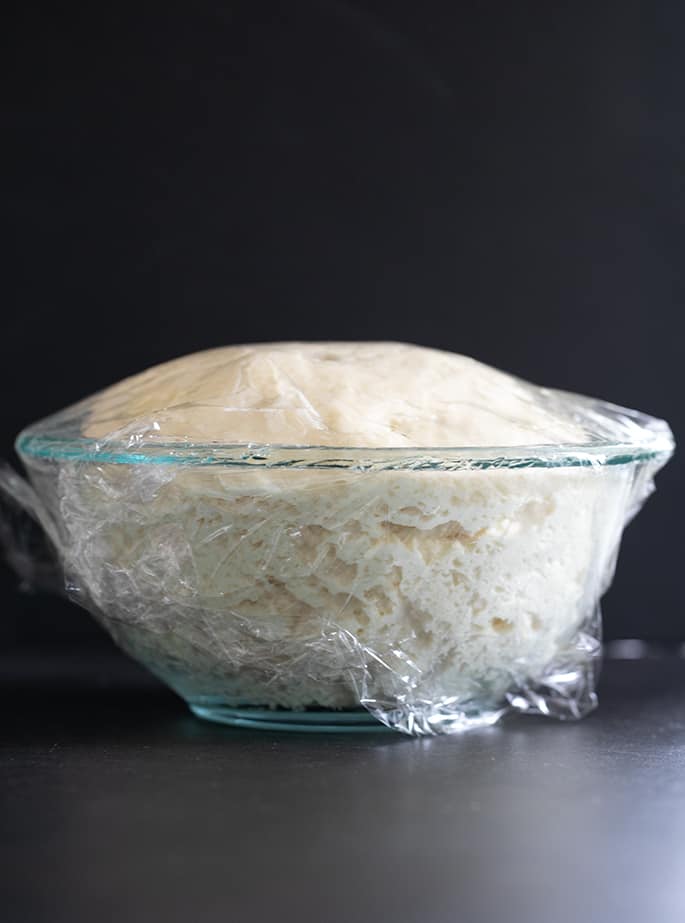
3. Let it rise.
Transfer the dough to the prepared bowl. Smooth the top with wet or oiled hands. Cover lightly with greased plastic wrap and let rise until it’s about 1.5 times its original size—taller, not quite doubled.


4. Bake in two stages.
Bake at 375°F for 30 minutes. Then carefully flip the loaf in the bowl (bottom side up) and return it to the oven. Bake for another 15 minutes, until evenly golden and the internal temperature reaches about 195°F.


5. Cool before slicing.
Turn the bread out onto a wire rack and let it cool completely before slicing—cutting too soon can compress the crumb.
My Pro Tip
Expert tips
No mixer required.
This is one of the few yeast bread recipes on the blog that you can mix entirely by hand—just a bowl, whisk, and spoon.
Expect a wet dough.
It should look sticky and feel loose. Resist the urge to add more flour or your loaf will turn out dense and heavy.
Let it cool fully before slicing.
The bread finishes baking from residual heat as it cools. Cutting too soon compresses the crumb and ruins that airy texture.
Use a serrated knife.
Even cooled bread can squish if you press too hard. Saw gently with a serrated knife instead.
Try a Dutch oven.
For a round loaf with a slightly different texture, you can bake this bread in a 3- or 5-quart Dutch oven. For the larger size, increase the recipe yield from 10 to 15 slices. Shape the dough on parchment into a round about as tall as it is wide, let it rise as usual, and bake uncovered at 375°F. Start checking at 40 minutes for a 3-quart, 55–60 minutes for a 5-quart.
substitutions
Ingredient substitutions
To make it dairy free:
Use unsweetened, unflavored plant-based milk like almond milk. Avoid canned coconut milk or oat milk—they’re too low in moisture.
To make it egg free:
Swap the egg for a “chia egg” (1 tablespoon ground white chia + 1 tablespoon warm water, mixed and gelled). Two egg whites (50 g) also work, but result in a slightly denser loaf, so aquafaba as an egg white replacement should work similarly.
If you don’t have tapioca starch:
You can substitute more all purpose gluten free flour. The bread will rise a bit less and have a tighter crumb, but it still works.
If using active dry yeast:
Increase the amount from 6 g to about 7.5 g (just use a little more than 7 grams). Be sure to activate it in some of the warm milk until foamy before mixing.
If you need to avoid yeast:
Try my yeast free gluten free bread. It’s a different style but a good alternative.
If you need to skip added tapioca starch:
It may be tempting to leave it out if your flour blend already includes it, but don’t. This recipe depends on the extra tapioca for stretch and rise. Without it, your loaf won’t be as tall or airy.

Gluten Free Artisan Bread Recipe
Ingredients
- 1 ⅝ cups (227 g) all purpose gluten free flour blend, (See Recipe Notes)
- 1 ⅝ teaspoons xanthan gum, omit if your blend already contains it
- ⅜ cup (54 g) tapioca starch/flour
- 2 teaspoons (8 g) granulated sugar
- 2 teaspoons (6 g) instant yeast
- ¼ teaspoon baking soda
- 1 teaspoon (6 g) kosher salt
- 1 cup (8 fluid ounces) warm milk, (about 95°F)
- 1 (50 g (weighed out of shell)) egg, at room temperature, beaten
- 1 tablespoon (14 g) extra virgin olive oil
Instructions
- Grease a 1 or 1 1/2 quart glass oven safe bowl and set it aside. If you don’t have a glass bowl, you can use a small round pan or cast iron skillet with high sides. If using an aluminum pan that isn’t dark in color, raise the oven temperature to 400°F (as written and described below, the oven temperature is 375°F).
- In a large bowl, place the flour, xanthan gum, tapioca starch/flour, sugar, and yeast, and baking soda, and whisk to combine well. Add the salt, and whisk again to combine well.
- Create a well in the center of the dry ingredients and add the milk, egg, and oil, and mix vigorously. The bread dough/batter should come together and lighten a bit in color as you mix.
- Transfer the dough/batter to the prepared baking bowl, skillet, or pan, and smooth the top with clean, wet hands or a moistened spatula. Do not compress the dough at all.
- If you aren't using a bowl or pan with high sides, using a light touch and wet or oiled fingers, try to shape the dough so that it's about as tall as it is wide, to mimic the shape in the photos of the dough in the bowl. Your dough will definitely spread more during baking, though, and may take less time to bake.
- Cover the dough completely with an oiled piece of plastic wrap. Be careful not to compress the dough, but cover the bowl securely.
- Place it in a warm, moist place to rise for about 45 minutes, or until the dough has increased to about 150% of its original size. In cool, dry weather, the dough may take longer to rise; in warm, moist weather, it may take less time to rise.
- When the dough is nearing the end of its rise, preheat your oven to 375°F.
- After the dough has risen, remove the plastic wrap. Place the bowl in the center of the preheated oven and bake for 30 minutes, or until the bread is lightly golden brown all around.
- Remove the bread from the oven and rotate the loaf in the bowl, so it’s upside down. Return the bread to the oven and bake until the crust has darkened slightly all around, and the bread sounds hollow when thumped anywhere, on the bottom or top, about another 15 minutes.
- The internal temperature of the bread should reach about 195°F on an instant-read thermometer.
- Turn the bread out onto a wire rack to cool completely before slicing and serving.
Video
Notes
Nutrition
Nutrition information is automatically calculated, so should only be used as an approximation.
make ahead/leftovers
How to store and refresh this bread
Room temperature:
Store your loaf in an airtight container at room temp for up to 2 days. A zip-top bag or plastic storage box works well.
To refresh a dried loaf:
Run the whole loaf quickly under lukewarm tap water, then bake at 300°F for 10 to 12 minutes. For individual slices, drizzle with water and toast.
Freezer storage:
Let the loaf cool completely, then freeze in a zip-top bag with as much air removed as possible. It will keep well for up to 3 months.
To defrost:
Leave the bread on the counter overnight. Refresh as above before serving, if needed.
Troubleshooting & FAQs
Most often, it’s from adding too much flour or using too little liquid. Make sure the dough looks wet and sticky—that’s what gives you a light crumb. Using the wrong flour blend or skipping xanthan gum can also lead to dense bread.
Yeast dough needs time and the right conditions. Make sure your yeast is active, your milk is warm (but not hot), and your kitchen isn’t too cold or dry. Be patient—it may take longer than 45 minutes.
Use a small round pan or cast iron skillet with high sides. Try to shape the dough so it’s as tall as it is wide. If your pan is aluminum and light in color, raise the oven temp to 400°F for a better crust.
Maybe! This dough is wet enough to work in some machines. If yours makes a larger loaf, scale up the recipe yield to 15 or 20 slices. Make sure it only uses one rise cycle. You can also use my gluten free bread recipe for a bread machine for the perfect loaf in a bread maker.
You can try it, but the dough will spread. Bake at 400°F to help the crust form quickly. Shape the dough into a round on parchment and bake uncovered.

What to serve with this bread
This crusty loaf is perfect for dipping, dunking, and tearing into pieces at the table. Here are a few ways to turn it into a full meal:
- Gluten Free Meatballs – Slice, toast, and rub with garlic for easy homemade gluten free garlic bread.
- Creamy Gluten Free Broccoli Cheddar Soup – Nothing soaks up soup like a warm hunk of this bread.
- Gluten Free Cream of Mushroom Soup – Classic comfort food pairing


Have made this twice now – we all love it. Would have made another but out of the GF flours (difficult getting to the store as my hubby will not let me go and insists he go with his protective gear of course). Thanks so much.
I’m so glad, Eve! I hope you get more flour soon. ?
I used Bob’s Redmill 1:1 flour and active dry yeast but followed all of the directions. I didn’t have an oven safe bowl so I used my Dutch oven but it was just too big and the dough/batter spread out thin but otherwise looked good. But when we tasted it the bread turned out really bitter and salty. I’m very confused as to why that happened.
As I explain on my gluten free flour blends page which is linked to in every recipe that calls for an all purpose gluten free flour blend, Brittni, Bob’s Red Mill flour blends generally will not work in my recipes. Using a much larger container was also part of the reason for your result, but mostly it was your flour blend. Please see my gluten free flour blend page here.
For Anne McCracken, maybe Nicole can confirm this, but potato starch and potato flour may be the same thing. If potato starch can work, look for a Kosher food area in your store, if available. There may be canisters of potato starch.
I’m afraid, no, they’re not the same thing at all, Janet! Potato flour is a powder ground from cooked, dried, whole peeled potatoes, and contains nutrients like fiber and protein. Potato starch is a completely flavorless starch, that is more like the pure starch left behind after peeled potatoes are washed. If you can find pure dried potato flakes, you can grind them into a flour and use that in place of potato flour, but with mixed results.
Absolutely delicious thank you! I mixed my own flour blend using equal parts 1-1, almond and potato and I added some dry dill and ground caraway. Such an easy and delicious recipe. Thanks again!
Hi, Claire, I’m glad you were pleased with your results using those flours. For others’ benefit, please use an all purpose gluten free flour as directed in the recipe.
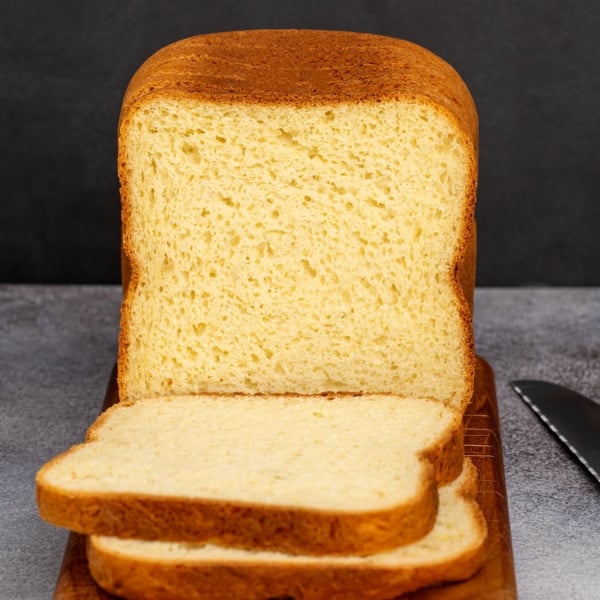
This recipe is fantastic!! The bread size is a bit too small for my family. Do you think it would work if I made two of them separately but then combined them into one bowl for proofing and baking? Would I need to make any changes?
No, you cannot double the recipe and proof and bake them in the same bowl, Kim. For a similar recipe in a larger size, I recommend using my recipe for gluten free white sandwich bread, linked in the recipe. Here’s another link.
So. I’ve never made bread before and after receiving this recipe in an email, I decided to jump into the fray. It tastes fabulous!! But it didn’t rise and it was very dense… I take full responsibility for all of that. I’m sure my milk wasn’t warm enough, pretty sure my pan wasn’t the right size. And I’m not sure if 375° in a convection oven is the way to go. Plus, I don’t think I baked it long enough but it was already pretty brown after 30 mins. All of that aside, I baked bread today! Yay me!! And I was slathering hot, fresh, out of the oven bread with gobs of fresh butter and shoving it in my mouth. Absolute Heaven! I’m making this again tomorrow and I’ll do things a little differently. Thank you for such a tremendously wonderful bread recipe – and all your recipes. They are the absolute best!
It sounds like you didn’t allow the dough to rise long enough, and then you baked it in a too-hot oven, and didn’t bake it long enough. A convection oven temperature should be lowered 25°F from the directed temperature for a conventional oven. It runs about 25°F hot. Baking in a too-hot oven bakes the outside very quickly, and the inside doesn’t have a chance to bake fully before the outside is overbaked. So imagine if you fix those issues how much you’ll like it! ? Thank you for disclosing the issues up front, by the way. I often am told a recipe was followed “to a T” even when it wasn’t. ❤️
Hey Nicole i love the smell of fresh baked bread i only had a Corning ware dish so used that couldn’t turn it over but it looks like it worked guess i will have to wait for the cool down to find out
Hi Nicole. The Better Batter flour recipe asks for 2 TBSP potato flour. I cannot find it anywhere where I live. Will the Artisan Bread recipe still turn out without it?
I’m afraid you can’t make the mock Better Batter without potato flour, Anne, no. I can only suggest that you try making the mock Cup4Cup blend instead.
Hi Nicole I live in Australia and we don’t have Better Batter flour. Which one of your flour blends would you recommend I make for an all purpose flour? I get confused with the mock better batter and better than mock and cup for cup?♀️ My daughter and I are both Coeliac and I’ve tried so many different flours.
In these uncertain times of Co-vid 19 I just want to bake but sometimes the results of my efforts are discouraging…. scones in particular just aren’t the same anymore! I have your bread book and GF on a shoestring but not sure which flour to try. Please can you advise? Also I’m in Queensland with high humidity a lot of the time.
Hope you are keeping well
Regards Christina Wharton
Hi, Christina,
If you’re able to get the ingredients, start with the mock Better Batter. If you can’t find some of the more difficult ones, like pure powdered pectin or potato flour, then try the Better Than Cup4Cup. I really do explain it all on the gluten free flour blends page, so just read through that carefully and it should soothe your worries.
I tried this tonight, and was surprised at how well it turned out! Even with my oven doing crazy things with the temp, the bread was soft and delicious, with a great texture. Thanks, Nicole!
I’m so glad, Sadie! I really like that it’s so simple, and that it doesn’t make too much bread. I’m so happy you’re enjoying it too.