
This post may contain affiliate links. Please read our disclosure policy.
The simplest recipe for gluten free artisan bread, that can be mixed by hand in one bowl with the most basic pantry ingredients, is here. It's your everyday loaf of bread.
What you'll love this recipe
This is a very pared down gluten free no-knead bread recipe that doesn’t call for much more than gluten free flour, yeast, a touch of sugar, salt, milk, and eggs. You don't need to use a stand mixer unless you want to, and it doesn't require a loaf pan or a baking stone.
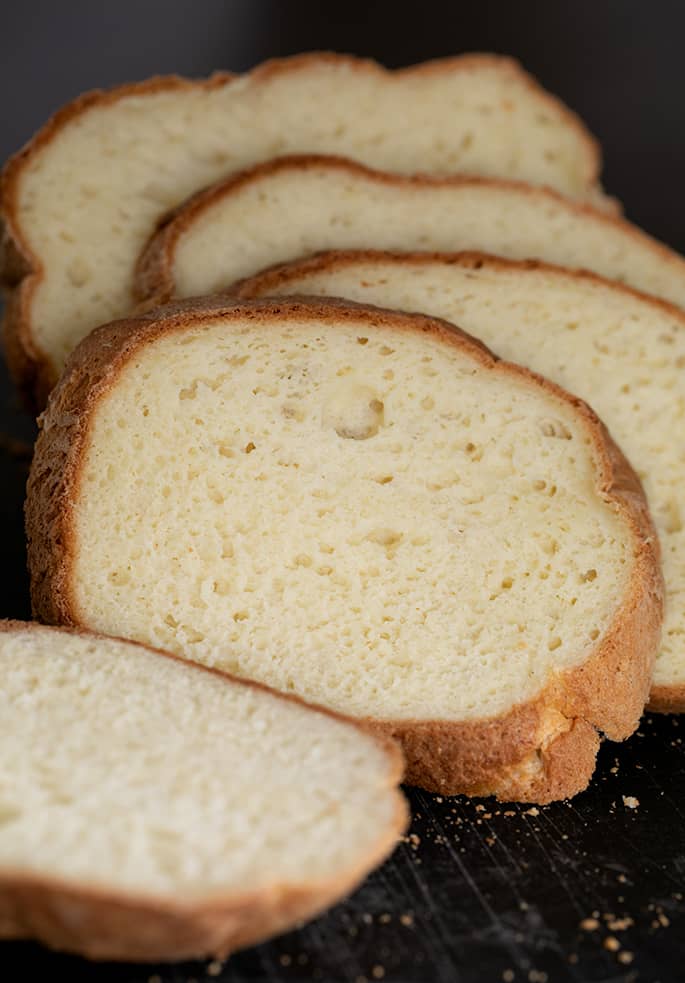
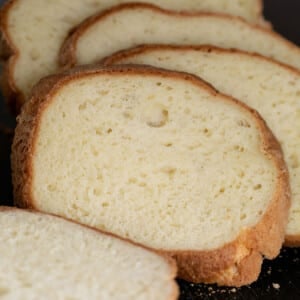
Think of it like a table bread, not a big loaf of gluten free bread for sandwiches. It's like a gluten free crusty boule — the sort of everyday bread you can slice and make into sandwiches or tear into chunks to serve with your favorite soup. It would be perfect for making into gluten free bread crumbs too.
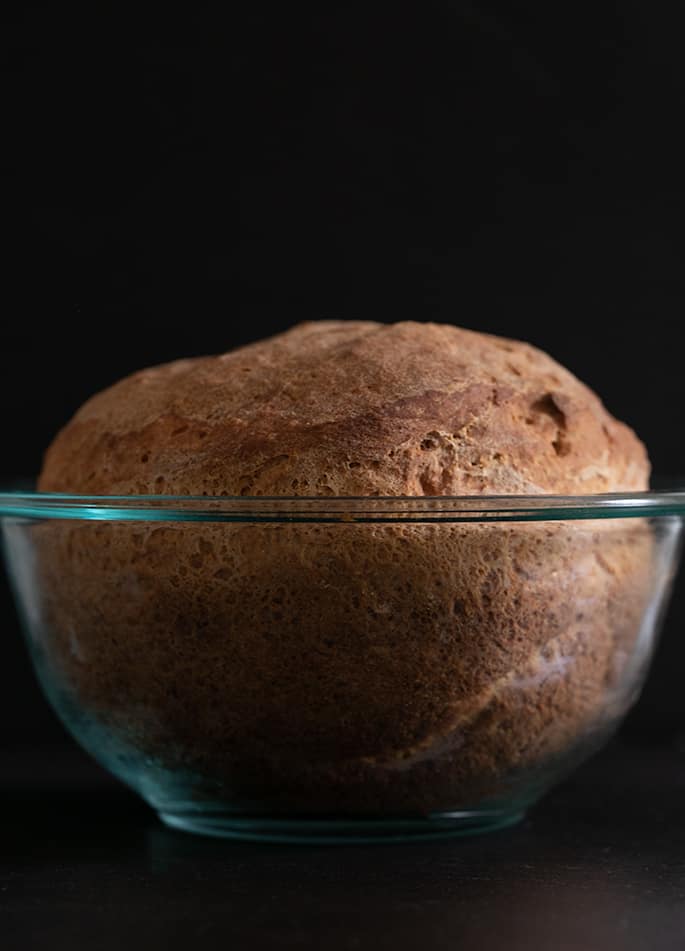
The crumb is open and tender, and the crust is thick but never hard to chew. Baked in a small oven-safe glass bowl, and turned over for the last 15 minutes of baking, the bread has a light brown crust that extends all around the loaf.
Oh, and at this point, it should go without saying, but it tastes like “real” bread!
what's in it
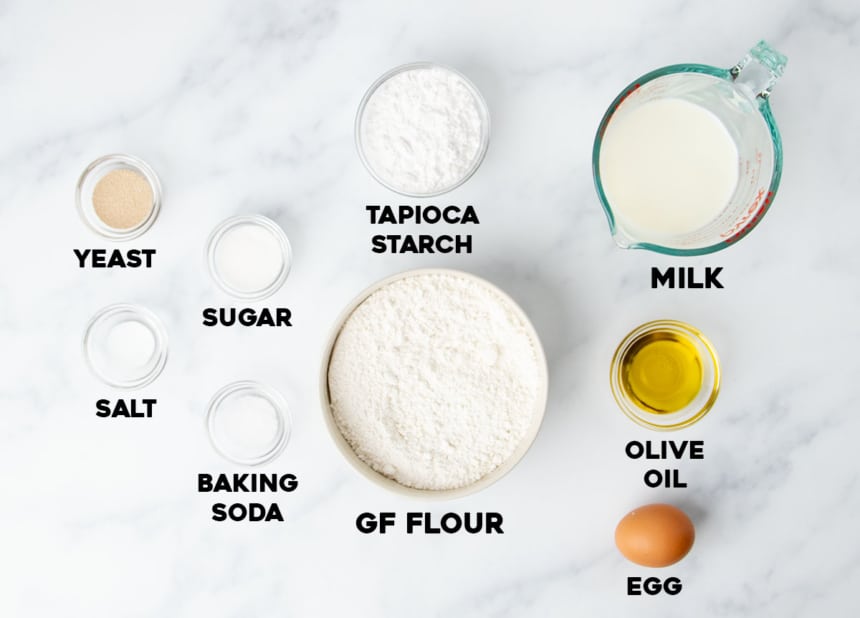
Recipe ingredients
- Gluten free flour blend – I like Better Batter or Nicole's Best (with added xanthan gum) here because they support the rise of yeast bread and still make a very tender loaf. You need a well-balanced blend, and particularly since they reformulated Cup4Cup, I can't recommend it especially for yeast bread
- Tapioca starch/flour – This starch helps add stretch to your gluten free artisan bread and lets it rise higher. You add this ingredient separately even though all good all purpose gf blends will already have some tapioca starch.
- Yeast – I use instant yeast for its simplicity, but you can use active dry yeast if that's all you have; just use 25% more active dry yeast by weight (here, almost 8 grams)
- Sugar – You only need a bit of sugar to feed the yeast and produce the bubbles that help your gf bread rise
- Baking soda – Helps the bread to brown in the oven
- Salt – Adds a little flavor and complements the other ingredients; I bake with kosher salt since it's much harder to overmeasure than fine table salt
- Milk – Warm milk adds flavor, richness, and moisture to activate the yeast so your dough rises
- Egg – Eggs act as a binder, assist the rise, and give the bread a richer taste and color
How to make gluten free artisan bread
Begin by preparing a 1 1/2 quart oven safe glass Pyrex bowl. This small bowl will help create the round shape that we are seeking.
Make the dough
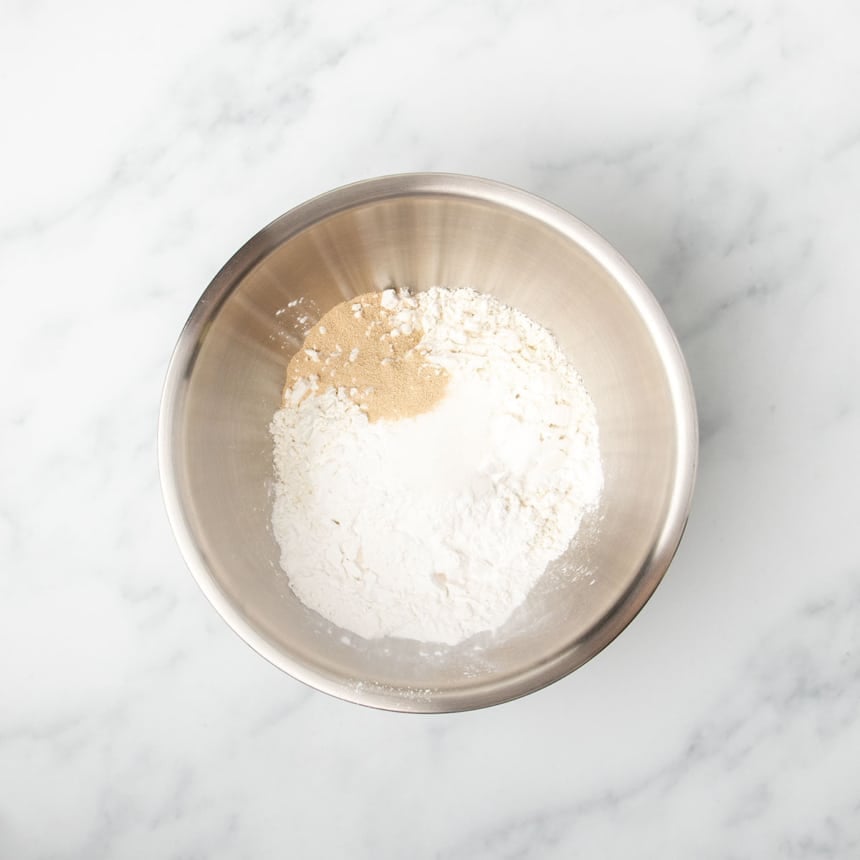
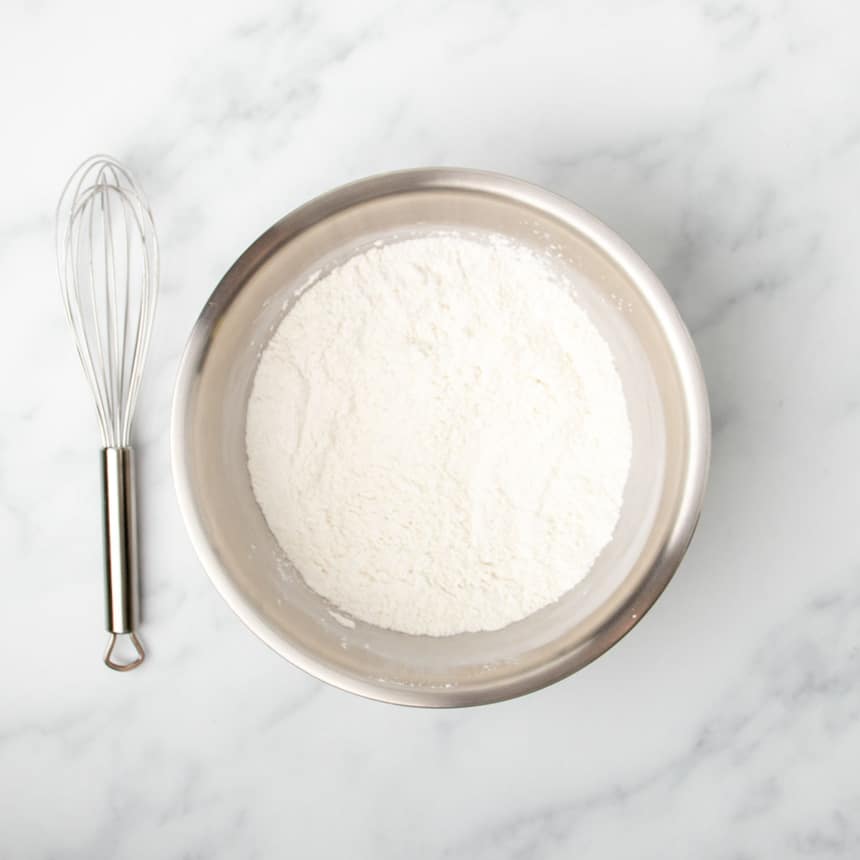
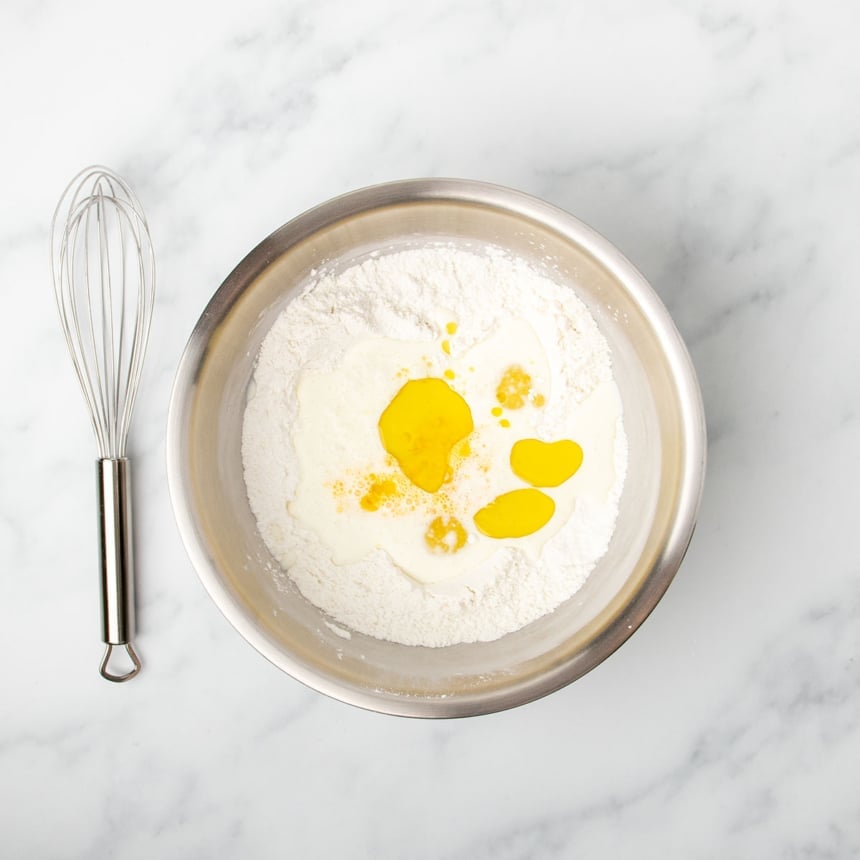

- Since we don't need to use a stand mixer to make this bread, whisk together all the dry ingredients except salt (gluten free flour blend (including xanthan gum), tapioca starch, sugar, yeast, and baking soda), then add the salt. We don't add the salt and the yeast together at the same time because we don't want to risk them clumping together and the salt inhibiting yeast activation once we add the liquid.
- Add the liquids (milk, beaten egg, and olive oil), and mix vigorously to create a dough that is relatively light in color (it will lighten in color as you mix).
Shape and let it rise

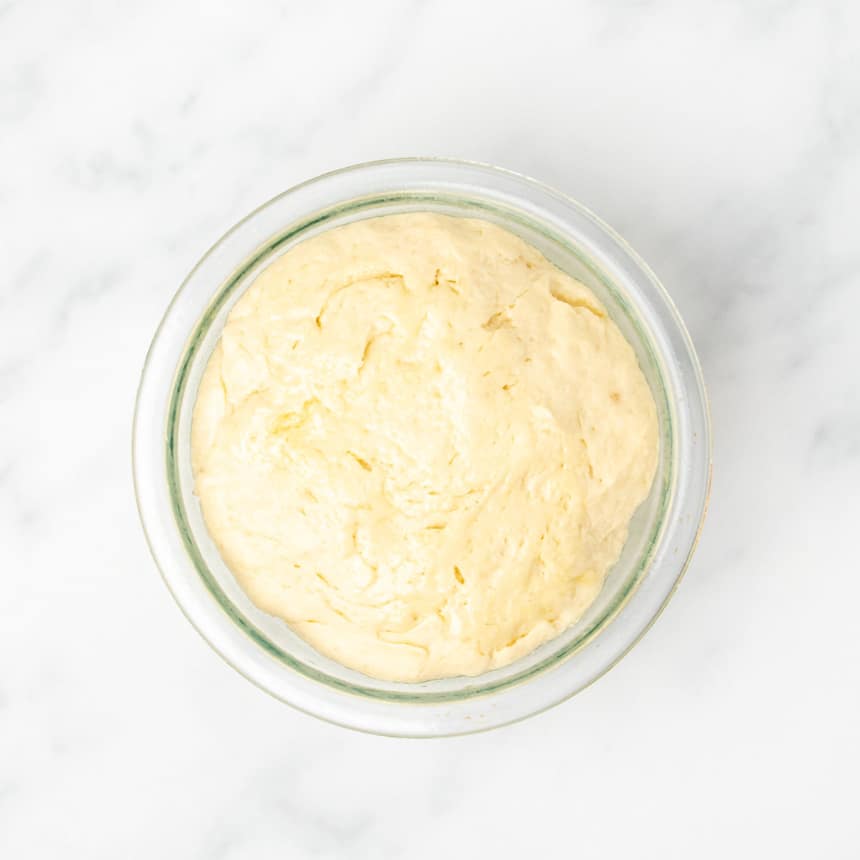
- Transfer the dough to the prepared bowl, and smooth the top so there are no sharp bits sticking up that will burn in the oven. This is a very wet dough, and it's best handled with wet or oiled hands.
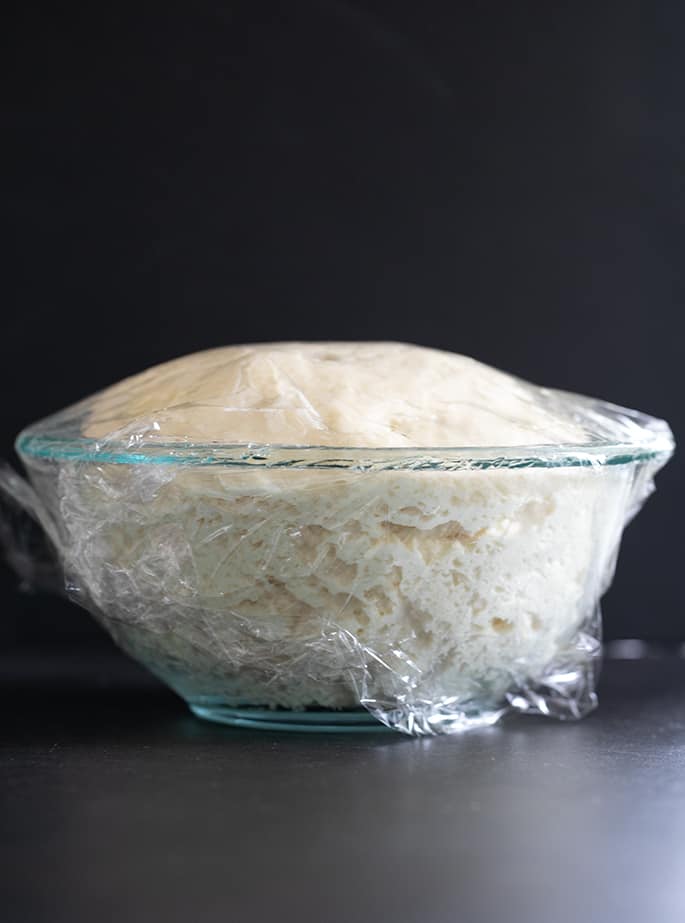
- Cover the dough, and allow it t rise until it's about 1.5 times as large as it is right after the dough is mixed. It won't become 2 times as large, or double, like conventional wheat-containing dough does. The dough should rise relatively quickly, since it's so wet and moisture enhances yeast performance, but it will rise more slowly in a cool, dry environment, so be patient.
Bake at 375°F, and then let cool
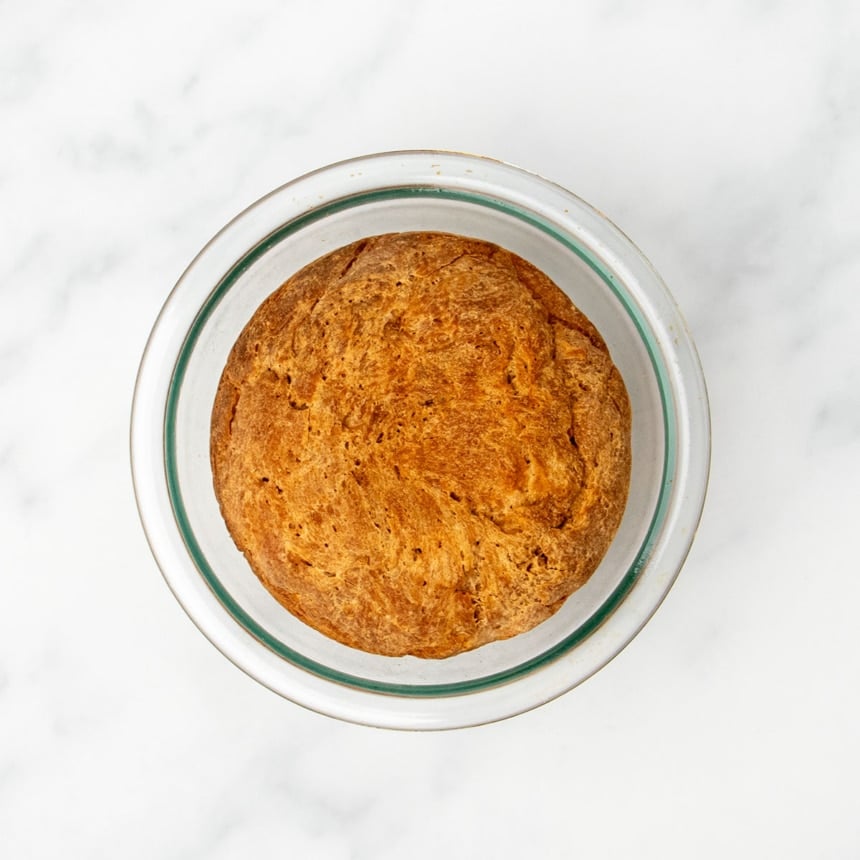
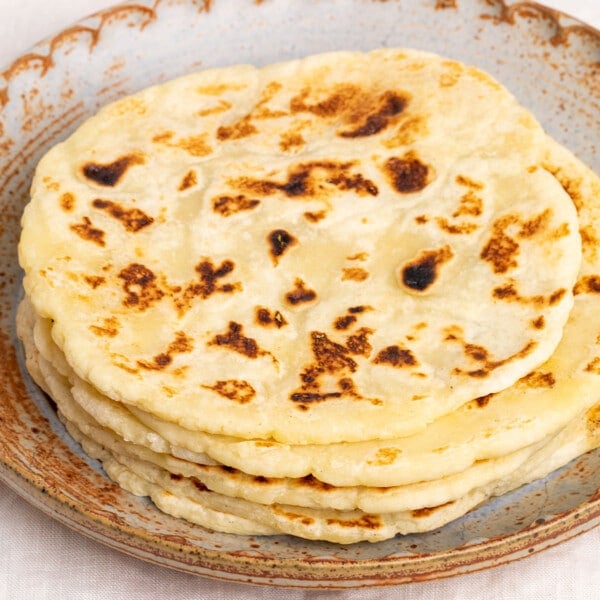
- Finally, bake the bread for 30 minutes, then carefully turn the dough over in the bowl so the bottom of the bread is now on the top. The first image you see above is before it was inverted.
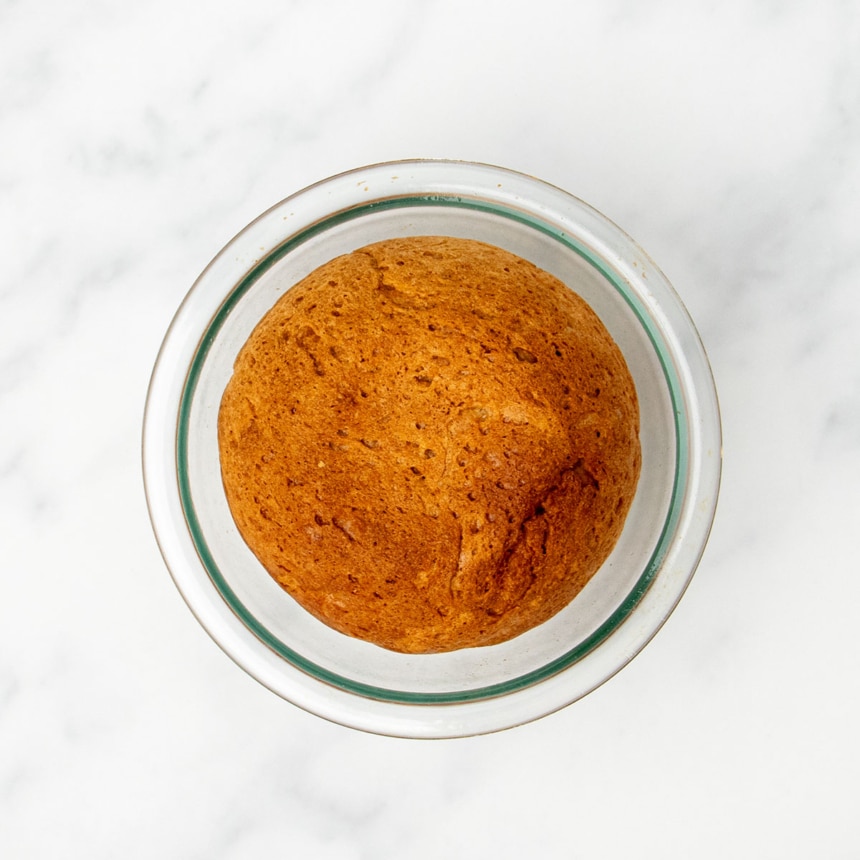
- Continue baking for about another 15 minutes so the bread is evenly brown all over and baked all the way through. The bread is done baking when the internal temperature is about 195°F on an instant read thermometer.
- Now for the hardest part: let it cool before you slice it! If you don't, you'll smush and flatten the crumb and your slices will be wet and compressed.
My Pro Tip
Expert tips
You don't have to use a stand mixer
Unlike all of my other yeast bread recipes, this gluten free artisan bread does not have to be made in a stand mixer. Just mix the ingredients of this gluten free artisan bread recipe with a whisk and mixing spoon.
Expert the dough to be wet
If you're new to gluten free bread baking and have only ever worked with “normal” bread dough, you know that the traditional stuff is workable and easy to handle. That won't be the case with your gluten free bread dough — or more appropriately, your gf bread batter.
The dough will look wet and feel very sticky. Don't add more gluten free flour to help firm it up, or you'll end up with a dense loaf that doesn't rise very high.
Give the bread dough time; it will rise
If you are new to yeast bread baking, especially gluten free yeast bread baking, you may be nervous that your dough won't rise properly. Please keep in mind that yeast has a very wide temperature range in which it is active, but reproduces at different rates.
At lower room temperature, it will rise, just not as quickly. At higher temperatures, it will rise more quickly. But if you place it in a hot environment, you risk killing the yeast.
Just be patient. Over-proofed bread, that breaks through and has something of a pockmarked appearance, is bread that has been left to proof after it's done. It's based upon rise, not upon time.
Let your freshly baked bread cool completely
Even after you take your gf artisan bread out of the oven, it will continue to cook as the residual heat and steam burns off.
For this reason, you must let your bread cool completely before slicing. I know fresh bread is irresistible, but don't rush this step or you'll end up with squished bread.
Use a serrated bread knife for easier slicing
Another way to avoid smashing your bread (even after you've allowed it to cool completely) is to use a serrated bread knife, and saw back and forth without pressing down hard. The little teeth on this type of knife cut right through the bread rather than mash it down.
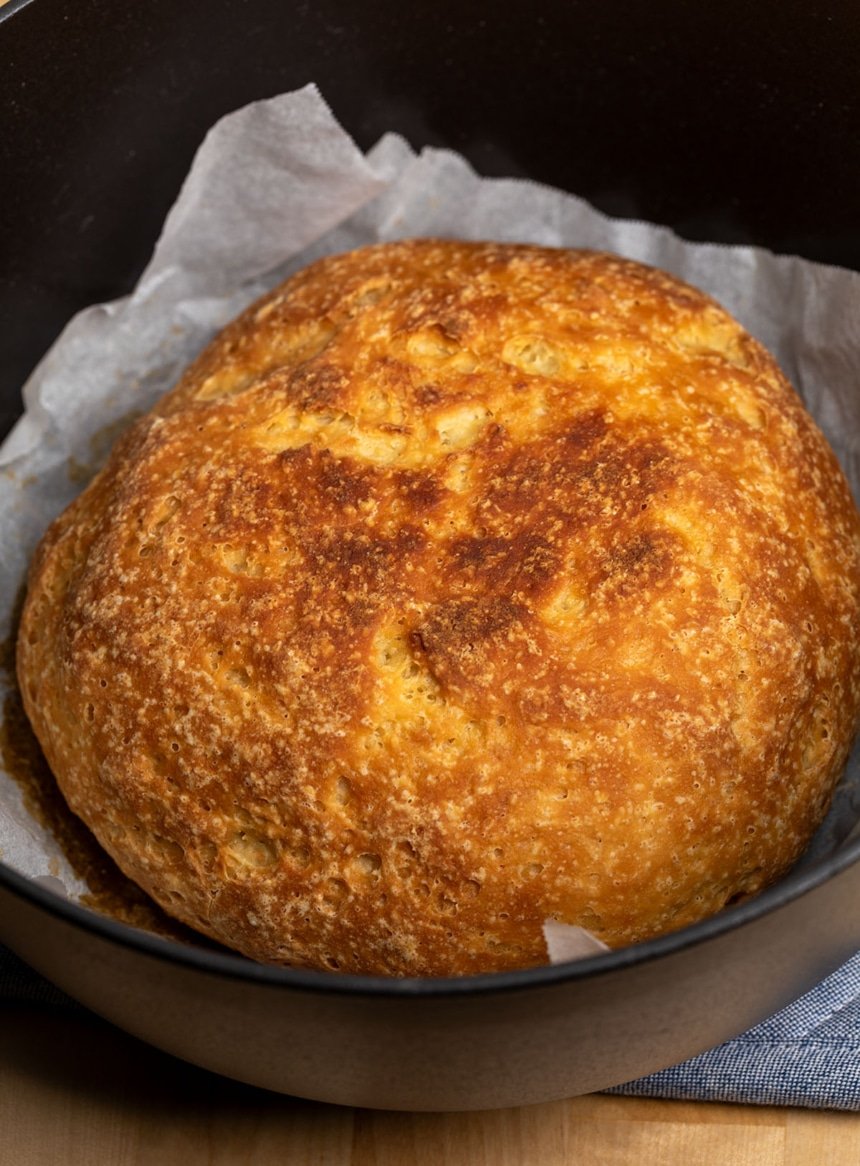
Making this bread in a Dutch oven
If you'd like to make this bread in a Dutch oven or other oven-safe, heavy bottom pot you can! Here's what I recommend to make it in a 5 quart Dutch oven:
- Increase the yield in the recipe card below by 50% from 10 slices to 15 slices
- Make the bread dough as directed (just beat 2 eggs and measure out 75 grams total for 1 1/2 eggs)
- Cut a piece of parchment paper big enough to line the bottom of your pot, and place it in the pot
- Transfer the dough to the paper, wet your hands well, and shape the dough gently to make it about as tall as it is wide to mimic the shape it would take in a bowl
- Follow the rising and baking instructions in the recipe.
- Bake uncovered for about a total of 50 minutes to 1 hour or until it reaches 195°F internally and sounds hollow inside. Do not turn the bread over during baking.
For a 3 quart Dutch oven, don't increase the yield, and otherwise follow the same instructions but watch the baking time at about 40 minutes.
Serving suggestions
I feel like the honest answer is “anything you please!”, but I will admit that there are some recipes that pair with this gf artisan bread like no other. Here are a few of my favorites:
- Creamy Gluten Free Broccoli Cheddar Soup – use the bread to soak up every last drop
- Gluten Free Cream of Mushroom Soup – soup and bread, a match made in heaven
- Gluten Free Meatballs – make this into homemade garlic bread
substitutions
Ingredient substitutions
Here are my best educated guesses for how to remove any additional allergens in this recipe you may have in your family.
Dairy free
This recipe can easily be made dairy-free by replacing the dairy milk with your favorite nondairy milk. I recommend using something unsweetened that has a similar consistency to cow's milk, like almond milk. Avoid oat milk or coconut milk from the can, which don't have enough moisture.
Egg free
There is only one egg in this recipe, so it can likely be replaced with a “chia egg” (1 tablespoon ground white chia seeds + 1 tablespoon lukewarm water, mixed and allowed to gel). I've also made the recipe with 2 egg whites (50 g) in place of a whole egg, and it's a bit denser but the recipe still works.
Tapioca starch/flour
I've also made this recipe with an all purpose gluten free flour (specifically, Better Batter) in place of tapioca starch/flour. It works, but it doesn't rise as high and the crumb is tighter.
Instant yeast
In place of instant yeast, you can always use active dry yeast by multiplying the amount (by weight) of the instant yeast (here, 6 grams) by 1.25 or 125%. Here, that would mean 7.5 grams of yeast, which is clearly difficult to measure precisely but just add a bit more after you reach 7 grams.
Active dry yeast has a thicker coating around the yeast, so you should soak it in some of the liquid in the recipe (here, milk) until it foams before adding it with the rest of the milk.
If you don't have yeast at all, I'm afraid there is no substitute in this recipe. But we do have plenty of yeast-free bread options like our yeast free gluten free sandwich bread.

FAQs
No, traditional artisan bread is not gluten free because it uses gluten-containing wheat flour.
But if you've been searching for an artisan-style gluten free bread that tastes like real bread, you don't have to look any farther. This gf bread recipe is so good, no one will know that it doesn't contain gluten.
Artisan bread usually just describes homemade bread that's made in smaller batches. Unlike traditional sandwich bread that comes out looking the same every time you bake it, gluten free artisan bread may different slightly each bake. How long you let the bread rise, the gluten free flours you use, and any other ingredients you add all work to create a unique loaf with every bake.
I recommend using Better Batter's original blend or Nicole's Best multipurpose flour for gluten free bread recipes. Be sure to add I don't recommend using Cup4Cup for yeast bread, even though I really like it for many other applications. Especially since they changed the formulation in 2024, it really doesn't work for yeast bread, so please avoid it here.
I suggest avoiding almond flour and garbanzo bean flour — they're not all purpose gluten free flours and they won't work in a recipe like this that calls for an all purpose flour blend.
The best way to determine whether your gluten free no knead bread is done baking is to use a thermometer. Stick it in the center of the loaf, but don't go so far down as to touch the bottom of the pan. Your bread is ready when the thermometer reads at least 195°F.
There are several possibilities why this gluten free artisan bread recipe didn't turn out for you:
You used too much flour or not enough milk — don't be afraid of a wet batter! It needs to be wet to be light later.
You used the wrong gluten free flour blend — Your blend should contain the right balance of gf flours like white rice flour, brown rice flour, and potato flour for a strong blend that is still able to produce an airy result.
Your gf flour didn't contain xanthan gum — you need this gluten alternative to bind everything together.
Your bread didn't rise enough — rise time will vary based on temperature; let your bread dough increase to 150% of its original size, no matter how long it takes. That means that it's 50% bigger than when it started. In a 1 quart bowl, it will rise to the top.
Your bread wasn't done baking — make sure to use a thermometer so you can tell when your bread is ready, and use a standalone analog oven thermometer to gauge your oven's temperature.
Rising takes time, and lots of patience. If you follow the recipe as written, don't make ingredient substitutions, measure by weight, and allow your yeast bread dough enough time, it will rise. If your kitchen environment is cool and dry, it will simply take longer to rise. Overproofing is a function of too much rise, not too long a rise, so be patient!
No problem! If you don’t have a glass bowl, you can use a small round pan or cast iron skillet with high sides. Just try to shape the dough so that it's about as tall as it is wide, to mimic the shape in the photos of the dough in the bowl. Your dough will definitely spread more during baking, though, and may take less time to bake. If you use a round aluminum baking pan that is light in color, it won't get as hot as or retain heat as well as a cast iron pan or glass bowl, so increase the oven temperature by 25°F to 400°F.
No! Every good all purpose gluten free flour blend has tapioca starch (also known as tapioca flour) as an ingredient. This gluten free artisan bread dough is made using an all purpose gluten free flour blend with additional tapioca starch/flour for more stretch and a higher rise. Do not ever just leave an ingredient out of a recipe. Every ingredient has its purpose!
No, if your blend already contains xanthan gum, please omit that ingredient from the recipe.
I haven't tried making this in a bread machine, so I'm not sure, but the dough is wet enough that it might work. If your bread machine makes a larger loaf, consider increasing the yield of the recipe from 10 slices to 15, or even 20 to double the amount of dough. Make sure your machine uses only one rise.
Maybe! You can try shaping it as described for baking in a Dutch oven and baking it at 400°F since a sheet pan will not retain heat as well as a pan or bowl with sides.
If you'd like to try baking this bread in a standard 9-inch x 5-inch loaf pan, increase the yield from 10 slices to 15 slices to increase the amount of dough by 50%, follow the same instructions for the rise, and bake at 375°F for about 50 minutes to 1 hour. I haven't tried it, but I think it should work!
All yeast bread is always best the day it is baked. If you'd like to bake it a day ahead of time, I recommend letting it cool, wrapping it tightly in plastic wrap and storing it at room temperature. Then, to refresh it before serving, run the loaf under cold water, place it on a baking sheet, and bake in the oven at 300°F until the crust is crisp and the loaf sounds hollow, about 12 minutes.
make ahead/leftovers
Storage instructions
If you plan to eat your gluten free bread throughout the week, you can store it on the kitchen counter in an airtight container, like a plastic food container or zip-top bag.
An easy way to “save” yeast breads that have dried a bit is to run the whole loaf of bread under lukewarm water from the tap, and bake at a very low temperature (300°F) for 10 to 12 minutes. You can refresh individual slices by drizzling with water and toasting them.
Freezing it
Let your fresh loaf cool completely, and then place it inside a zip-top freezer bag with as much air squeezed out as possible. Your bread will stay for up to three months.
When you ready to eat it, remove it from the freezer and let it defrost on the counter overnight. Refresh it as described above.
Easy Gluten Free Artisan Bread Recipe
Ingredients
- 1 ⅝ cups (227 g) all purpose gluten free flour blend, (I used & highly recommend Better Batter; please click thru for appropriate blends)
- 1 ⅝ teaspoons xanthan gum, omit if your blend already contains it
- ⅜ cup (54 g) tapioca starch/flour
- 2 teaspoons (8 g) granulated sugar
- 2 teaspoons (6 g) instant yeast
- ¼ teaspoon baking soda
- 1 teaspoon (6 g) kosher salt
- 1 cup (8 fluid ounces) warm milk, (about 95°F)
- 1 (50 g (weighed out of shell)) egg, at room temperature, beaten
- 1 tablespoon (14 g) extra virgin olive oil
Instructions
- Grease a 1 or 1 1/2 quart glass oven safe bowl and set it aside. If you don’t have a glass bowl, you can use a small round pan or cast iron skillet with high sides. If using an aluminum pan that isn’t dark in color, raise the oven temperature to 400°F (as written and described below, the oven temperature is 375°F).
- In a large bowl, place the flour, xanthan gum, tapioca starch/flour, sugar, and yeast, and baking soda, and whisk to combine well. Add the salt, and whisk again to combine well.
- Create a well in the center of the dry ingredients and add the milk, egg, and oil, and mix vigorously. The bread dough/batter should come together and lighten a bit in color as you mix.
- Transfer the dough/batter to the prepared baking bowl, skillet, or pan, and smooth the top with clean, wet hands or a moistened spatula. Do not compress the dough at all.
- If you aren't using a bowl or pan with high sides, using a light touch and wet or oiled fingers, try to shape the dough so that it's about as tall as it is wide, to mimic the shape in the photos of the dough in the bowl. Your dough will definitely spread more during baking, though, and may take less time to bake.
- Cover the dough completely with an oiled piece of plastic wrap. Be careful not to compress the dough, but cover the bowl securely.
- Place it in a warm, moist place to rise for about 45 minutes, or until the dough has increased to about 150% of its original size. In cool, dry weather, the dough may take longer to rise; in warm, moist weather, it may take less time to rise.
- When the dough is nearing the end of its rise, preheat your oven to 375°F.
- After the dough has risen, remove the plastic wrap. Place the bowl in the center of the preheated oven and bake for 30 minutes, or until the bread is lightly golden brown all around.
- Remove the bread from the oven and rotate the loaf in the bowl, so it’s upside down. Return the bread to the oven and bake until the crust has darkened slightly all around, and the bread sounds hollow when thumped anywhere, on the bottom or top, about another 15 minutes.
- The internal temperature of the bread should reach about 195°F on an instant-read thermometer.
- Turn the bread out onto a wire rack to cool completely before slicing and serving.
Video
Nutrition
Nutrition information is automatically calculated, so should only be used as an approximation.


I love this bread. I made it with KAF Measure for Measure. As I can not have eggs and don’t have any chia seed I used 3 tablespoons of aquafaba. I baked it in a 1 quart cast iron bean pot. The loaf did not brown much and did not raise avove the edge of the pot. However it is delicious. It slices well. I do plan to try the chia egg. I use a flax egg in pancakes/waffles but am not always happy with the texture.
Anyways….Nicole thank you for the recipe and substitute information. This will make a nice rotation with your English Muffin loaf.
Hi, Lari, I’m really glad you were happy with the results. Your loaf didn’t brown much or rise enough because of the flour blend you’re using. I’m afraid I don’t recommend any of the King Arthur Flour blends since they’re poorly balanced and tend to be gritty. Since you allow yeast bread to rise, the grittiness tends to soften so it’s not as much of an issue, but the poor balance of ingredients remains, unfortunately.
I live in Columbus Ohio and can not find any yeast at this time. Is this a problem in other parts of country?
I would try the recipe above if I had yeast. Thank you for the recipe. Dottie
I addressed that issue in the post as best I could, Dottie. I promise I’m doing all I can, but I can’t deliver!
Fot clarity, a recipe that needs 45 minutes to rise should not say it has 10 minutes prep time, i should say 10 minutes ACTIVE PREP TIME and 45 minutes inactive prep time. Shame on me for not reading the recipe all the way through before I started…
I just ordered a set of three glass Pyrex mixing bowls (1 qt, 1.5 qt and 2.5 qt clear bowls) just so I could try this recipe. This size loaf will be perfect for me as I live alone.
I think you’ll get a ton of use out of the bowls in that set, Lois. I have a few shapes and I use them daily for many different things.
I’ve got some whey from straining yogurt and am wondering if that might work as a sub for the milk. Best guess? Thanks!
I would make the recipe first exactly as written before modifying it at all, Leigh. Then, if you decide to try the whey, you’ll be able to decide if it’s going in the right direction.
Hi Nicole,
My daughter and I are gluten free. This is by far the easiest gluten free recipe I have ever made. The bread is delicious and light and airy. This will be my new go to for bread. My girls love the bowl shape too.
Thank you for all your wonderful books and recipes. You have made this gluten free journey delicious!
That’s so great, Paige! That is the idea, right? Ease and taste!!
Hi Nicole,
I’m pretty new to Gf baking though i’ve been baking for a few years now. I had an issue while making this lovely recipe, i made it two times already the taste was amazing but every time i put the proofed bread into the hot oven, the middle falls back and i don’t know how to fix this. Could you help me with it?
Thank you!
Any baked good that rises and then falls as it cools was likely baked in a too-hot oven. Please see the blog FAQs for more complete information.
Can I use a stainless steel bowl instead? I don’t have a glass bowl and am not going into stores at all these days (compromised lungs and being over 70). I still have some commercial GF bread but not much and all of it is disappearing quickly from the stores these days. Besides, I like the idea of a fresh that day loaf and this recipe sounds wonderful. I just ordered your baking book, too. Thanks for all the work you put into this. I love to bake and when I first discovered by wheat intolerance about 6 years ago, I was bereft. Since then, though, I have found many sources for good recipes and have made up a few of my own. Cheers, Cherie
Most stainless steel bowls are not oven-safe, Cherie. I wouldn’t chance it. I describe other pans you could try using in the recipe. Maybe try one of those?
I do not have a ovenproof glass bowl. Would this recipe work in a bread machine or regular loaf pan?
Thanks, Mia
Please see my response Yvonne about bread machines, Mia. If you’re going to be using a regular loaf pan, please use my recipe for gluten free white sandwich bread.
Can this be baked in a glass loaf pan?
For a loaf pan, I would recommend using my recipe for white sandwich bread, Suzi! Just reduce the oven temperature around 25°F to account for the heat of the glass.