This post may contain affiliate links. Please read our disclosure policy.
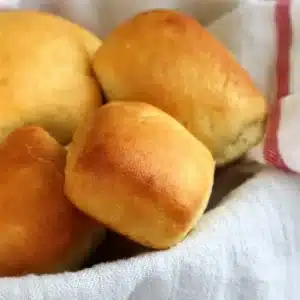
These gluten free Texas Roadhouse rolls are tender, light and fluffy, but they're safely gluten free. Let that bread basket pass you by and try these instead!

Why I love these gluten free Texas Roadhouse rolls
Up front true confession: I've never been to a Texas Roadhouse Restaurant. I looked them up and it turns out that they opened a location right near me. I'd totally be in it for the rolls, though, and since they don't make them gluten free … well you know how that goes.
The bread dough, like the others in the style of those in this new Gluten Free on a Shoestring Bakes Bread style, does better with a slow first rise in the refrigerator. I prefer at least 12 hours for that cold rise.
I have also made it in one day, by allowing the dough to rise and then just chilling it a bit in the refrigerator for easier handling. Although the dough is a bit harder to handle and the rise is not exactly as uniform, it still works quite well.
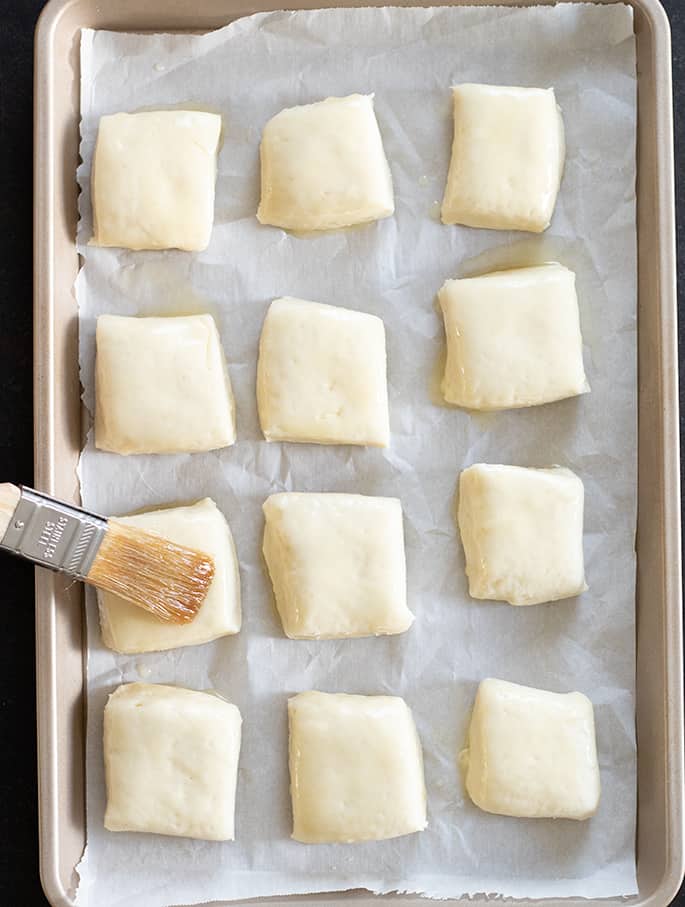
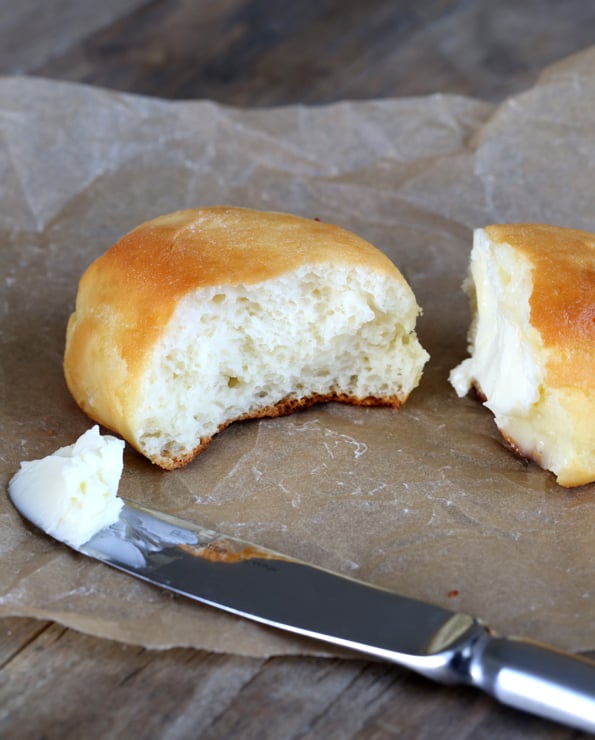
The secret to that thin, crackly, buttery crust is to brush the rolls with honey butter both right before and right after baking. And they bake just until the tops are lightly golden brown.
The blunt edges on the four sides of these square rolls coax the shaped rolls to rise up instead of out. So they're just these puffy, sweet little pillows of gluten free bread, like you never thought you'd taste bread again.

This style of gluten free bread requires dairy
I wrote a book about gluten free bread called Gluten Free on a Shoestring Bakes Bread in 2013. It was the book that I demanded to write, and the one that I refused to write unless I felt confident that I had developed a method that was more familiar and truly limitless.
To make the “new style” of gluten free bread recipes possible, I developed a DIY gluten free bread flour blend that made possible a gluten free dough that could be shaped and handled without much extra liquid, like the batter-style gluten free bread recipes do.
But it absolutely requires dairy in the form of whey protein isolate, a nearly pure form of casein (milk protein) that behaves remarkably like gluten in the oven. I like Opportuniteas brand grass red whey protein isolate.
The gluten free bread flour blend also requires Expandex, a chemically modified tapioca starch that you can find rather easily today on Amazon. The name of the company that packages and sells it there seems to change names every now and again.
Note for readers outside the U.S.
In the U.K. and many other places under the name “Ultratex 3,” which requires just a different proportion of ingredients. Please see the full discussion here on the Resources page.
To be clear, the batter-style bread recipes, like our lovely white loaf of gluten free bread, absolutely still work and many (many) readers consider them family staples. I am among them!
But sometimes, like with these gluten free Texas Roadhouse-style rolls, I want more. And this is how we do it.
In the bread book, I do recommend two dairy-free protein powders that can be used instead of whey protein isolate, but they require you to use 150% of the liquid in each recipe and the results just aren't the same.
If you can't have dairy, I recommend using some of our other bread recipes, like this one for yeast-free gluten free dinner rolls. There are also ways for you to make yeasted gluten free dinner rolls with all purpose gluten free flour, instead of the gluten free bread flour in this recipe, and make substitutions for the dairy-containing milk and butter.
Is it worth trying this new type of gf bread dough?
You can imagine that my answer is yes, because I know what this type of gluten free bread dough. makes possible. And that feeling can be really inspiring, even if you don't use it very often.
If this is your first introduction to my GFOAS Bakes Bread-style bread, you may be overwhelmed. And I get it.
The whole thing sounds kind of wonky and overly complicated, even though it's designed to simplify as much as possible. It's unfamiliar, and the bread flour calls two ingredients (whey protein isolate and Expandex) that might not sound, well, delicious.
But they make things possible that weren't possible in gluten free baking before. And everything new can sound overwhelming—and is likely to be demonized.
When I published the first edition of my very first cookbook in 2011, my reliance on an all purpose gluten free flour was criticized by nearly everyone in the gluten free community.
That includes such standard-bearing publications as Gluten Free Living—even though they eventually came around and use the same type of blends in all their baking. Have a look at the earliest reviews on Amazon of the first edition of that book. Some are rough.
But all these years later, we're still here, baking better gluten free food. I'm not going to stop pushing that rock up the hill.
Ingredients and substitutions
Dairy: I'm afraid that dairy really is an essential part of this newer style of gluten free bread recipes. Please see the complete discussion above.
Egg: There is only one egg in this recipe, so I think you should be able to replace it with one “chia egg” (1 tablespoon ground white chia seeds + 1 tablespoon lukewarm water, mixed and allowed to gel).
Honey: The honey butter that we use for brushing the rolls before baking is what creates that beautiful thin crust on the outside of the rolls—and helps them brown so beautifully. If you can't have honey, you can either leave it out or replace it with Lyle's golden syrup or corn syrup.

Gluten Free Texas Roadhouse Rolls
Ingredients
For the rolls
- 3 cups (420 g) Gluten Free Bread Flour, plus more for sprinkling (please click thru for full info on how to make my bread flour)
- 2 teaspoons (6 g) instant yeast
- ¼ cup (50 g) granulated sugar
- 1 teaspoon (6 g) kosher salt
- 4 tablespoons (56 g) unsalted butter, at room temperature
- 1 (50 g (weighed out of shell)) egg, at room temperature
- 1 cup (8 fluid ounces) warm whole milk, (about 95°F)
For brushing
- 3 tablespoons (42 g) unsalted butter
- 1 tablespoon (21 g) honey
Instructions
Prepare the raw bread dough.
- Place the bread flour, yeast, and sugar in the bowl of your stand mixer, and use a handheld whisk to combine well. Add the salt, and whisk to combine.
- Add the butter, egg, and milk, and mix by hand (with a large mixing spoon or Danish whisk) until just combined.
- Place in the stand mixer fitted with the dough hook attachment, and mix on medium speed for about 5 minutes. The dough will be quite sticky, but should be smooth and stretchy.
- Spray a silicone spatula lightly with cooking oil spray, and scrape down the sides of the bowl. Transfer the dough to a lightly oiled bowl or proofing bucket large enough for the dough to rise to double its size, and cover with an oiled piece of plastic wrap (or the oiled top to your proofing bucket).
- Place the dough in the refrigerator for at least 12 hours and up to 5 days.
Alternative method to use the dough the same day.
- To use the dough the same day it is made, after making the dough, set the covered dough to rise in a warm, draft-free environment to allow it to rise to double its size (about 1 hour).
- Once it has doubled, place it in the refrigerator for at least 15 minutes or until it is chilled. This will make it much easier to handle. Then, continue with the rest of the recipe instructions.
When you're ready to bake.
- Line a large rimmed baking sheet with unbleached parchment paper, and set it aside.
- Turn out the chilled dough onto a lightly floured surface and using a very light touch, sprinkle the dough with more flour and knead it lightly until it’s smoother.
- Fold the dough over on itself, and knead again, sprinkling very very lightly with more flour only as essential to prevent sticking. Do not work too much additional flour into the dough or you will lower the hydration ratio and the dough will not rise properly.
- On a lightly-floured surface with a floured rolling pin, roll out the dough into a 6-inch x 8-inch rectangle, a bit more than 1/2-inch thick.
- Using a pizza cutter or metal bench scraper, cut out 12 approximately 2-inch squares of dough, each with 4 very blunt edges.
- Place the rolls about 2 inches apart from one another on the prepared baking sheet, cover with lightly oiled plastic wrap, and set in a warm, draft-free location to rise until nearly doubled in size (about 45 minutes, but rising time will vary greatly depending upon the rising environment).
- As the dough is nearing the end of its final rise, preheat your oven to 350°F.
- Once the dough has finished rising, place the 3 tablespoons unsalted butter and honey in a small, heat-safe bowl, and heat in a short burst in the microwave or in a double boiler until melted.
- Mix the honey and butter together well, uncover the rolls, and brush each generously but carefully with the honey butter.
- Place the pan in the center of the preheated oven and bake until the tops of the rolls are lightly golden brown (about 12 minutes).
- Remove the rolls from the oven and brush once more with the honey butter before serving warm.
- Store any leftovers, once completely cooled, in a tightly sealed freezer-safe bag in the freezer. Refresh very briefly in the microwave before serving.
Video
Nutrition information is automatically calculated, so should only be used as an approximation.




My dough was very runny, similar to pancake batter, but I poured some into a muffin tin and cooked for a few extra minutes and it turned out fine!
I used Bob’s Red Mill in the gluten free bread flour mixture, and maybe a 1/6th cup more while in the mixer because I thought it would help thicken up.
I didn’t brush with honey because this was just a shot in the dark experiment but no need to knead it out, just pour into a muffin tin!
I’m afraid you just can’t use Bob’s Red Mill gluten free flour blends in my recipes, particularly in yeast bread, and especially in a recipe like this one which calls for my gluten free bread flour blend, Stuart. I discuss the bread flour blend quite a bit in the text of the post and in the recipe card itself.
Could I substitute egg white protein for the whey?
No, Haley, I’m afraid that does not work the same at all. When I was developing the bread flour blend, I tried using egg white protein powder and it was a disaster. Egg whites are very drying.
Nicole,
The dough is on its first rise by the fireplace. Can’t wait to try it!
Would love to try this recipe
I followed this recipe exactly, even weighing everything in grams’ but it was much too wet to roll out. It chilled for more than 24 hours. How can you tell when you make the dough if it is right consistency?
Did you make any substitutions, Karen, including in the flour blend? This recipe is only designed for my specific gluten free bread flour blend, and will not work with any substitutions. You also must measure by weight. I’m afraid without being there with you, I can’t be sure where you veered from the recipe, but it might be worth your checking the Bread FAQs page here on the blog.
Could I replace the egg with flax or chia? We have egg allergies. Also do you know of any adjustments I would need to make for for high altitude? I’m at 5200 feet.
Please see the Ingredients and substitutions section for your first question, Connie. And I’m afraid I don’t have any experience baking at high altitude, so I can’t offer any guidance except to point out that gluten free baking doesn’t require adjustments for high altitude baking outside of conventional adjustments.
Is it possible to freeze the dough for future baking ? If so, what steps are necessary?
I discuss freezing the rolls in the recipe instructions, Eileen. I don’t ever recommend freezing raw yeast dough, though, no.
Where do you buy and what brand of whey protein isolate do you use? thanks!
Hi, Lisa, I linked to the ingredients on the flour blends page, but I also meant to link to them in the recipe post—and I will make that edit right away! Thank you for asking this question. I really like Opportuniteas brand grass-fed whey protein isolate, but there are others.