
This post may contain affiliate links. Please read our disclosure policy.
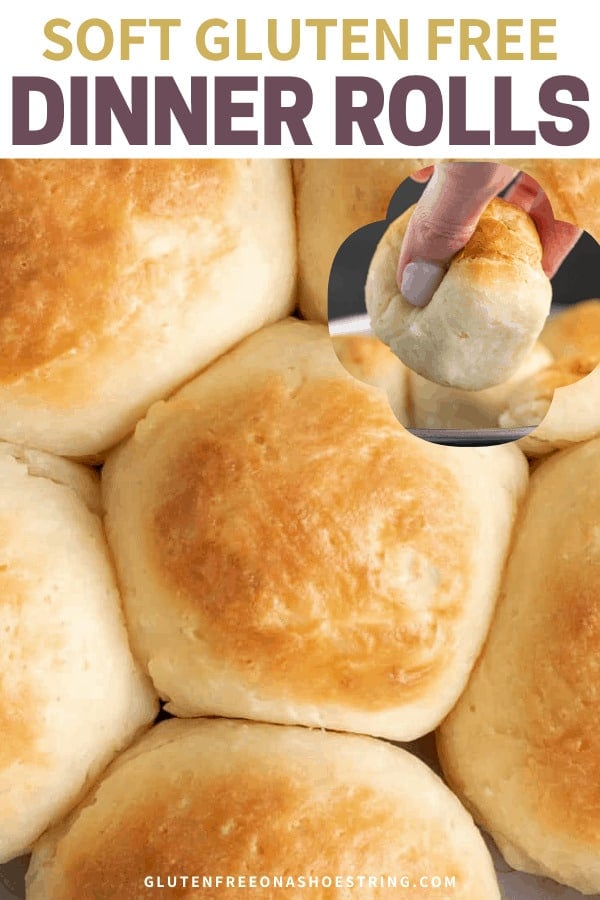
Soft homemade gluten free dinner rolls that are quick and easy enough for busy weeknights, but still fit for any holiday table or celebration. Never go without bread again!
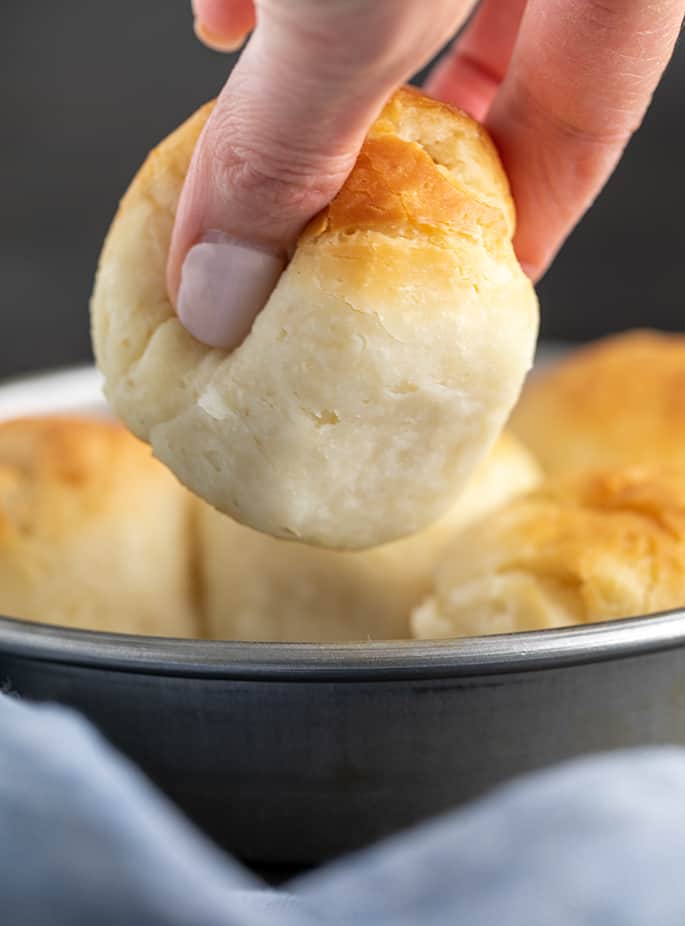
Table of Contents
- Why this is the best gluten free dinner rolls recipe
- What's the best gluten free flour for these gf dinner rolls?
- How to get gluten free dinner rolls to rise
- More tips for making the best gluten free rolls
- Gluten free bread rolls: storage tips
- Gluten free dinner rolls: substitutions
- FAQs
- Gluten Free Dinner Rolls Recipe | Soft, Squishy Yeast Rolls
Why this is the best gluten free dinner rolls recipe
These rolls are highly enriched, which just means that they have plenty of butter and milk in the recipe. Plus, the addition of nearly 1 full cup of tapioca starch helps provide a lot of stretch to the rolls, as baked, and makes the dough very easy to shape with almost no added flour.
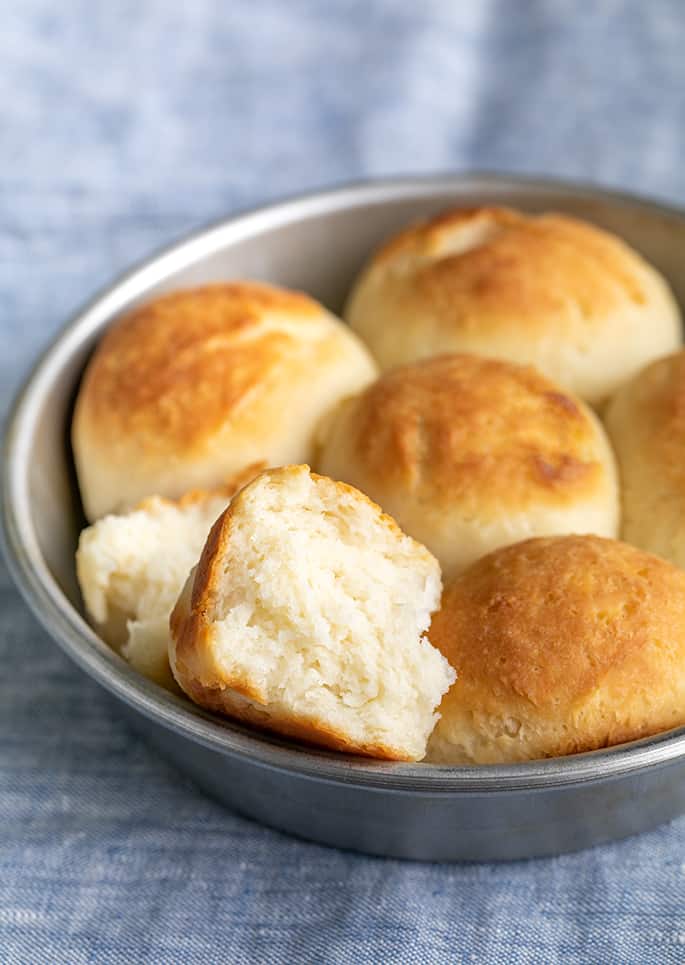
These gluten free dinner rolls are soft and squishy, so they're ideal for serving with any homestyle meal. Imagine them on the side of your plate of gluten free meatballs, since they're easy enough for a weeknight.
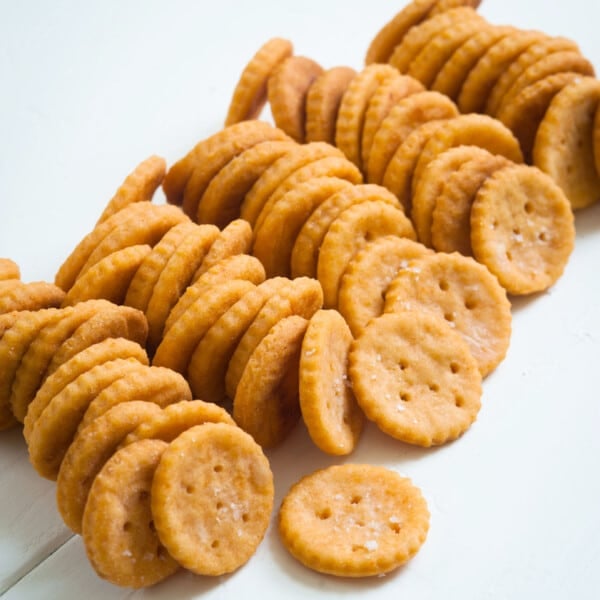
They're also perfect for your holiday table. I've made our recipe for gluten free Texas Roadhouse rolls many times for Thanksgiving, but they're more of an appetizer-type roll.
For our next holiday season, I think I'll be making this gluten free rolls recipe as they're made for soaking up the last bits of gluten free gravy from that holiday plate.
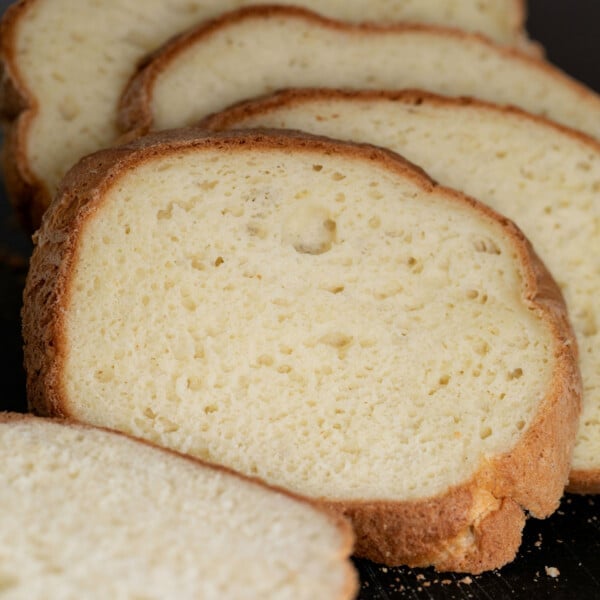
What's the best gluten free flour for these gf dinner rolls?
To make gluten free bread, the base blend I recommend is Better Batter or my mock Better Batter all purpose gluten free flour blend.
Even when our bread recipe calls for our gluten free bread flour, which we’re not using here, the base is (mock Better Batter). It has the right balance of gluten free flours when you need a recipe to hold its shape during rising and baking.
Adding nearly a full cup of tapioca starch/flour to the recipe lightens the gluten free rolls without diluting the strength of Better Batter. It also provides elasticity to the raw dough, which makes for easier shaping, and to the baked rolls.
If you can’t have tapioca starch/flour, you can try replacing it both in the mock Better Batter and as a separate ingredient in this recipe with superfine glutinous rice flour (which is just rice flour made from starch, short-grain white rice). I have had some success with that substitution, but can’t promise results.
More gluten free yeast roll ingredient notes
- Instant yeast – This recipe calls for instant yeast, but if you don't have any on hand or would prefer to use active dry yeast, you’ll need to hydrate the yeast first in some of the milk. You’ll also need 15 grams of active dry yeast rather than just 12 grams of instant yeast.
- Sugar – The primary role of the sugar is to “feed” the yeast so that your gf rolls come out big and fluffy. But the sugar also complements the salt in this recipe, giving you that delicious balance of flavors.
- Milk – Warm milk activates the yeast, so it can start feeding and doing its thing. It's important that the milk isn't too hot; otherwise, you'll kill the yeast and won't get your rise.
- Butter – Butter adds richness to these easy gluten free rolls and also helps with their rise.
- Egg whites – These egg whites contribute a lot to the recipe: they add structure, assist with the rise, and they help the gf yeast rolls hold their shape.

How to get gluten free dinner rolls to rise
This is a yeasted gf bread recipe, so you must provide a proper environment for the commercial yeast to reproduce after it’s exposed to the milk in the recipe. Yeast rises at a very high range of temperatures.
The desired dough temperature appears to be 78°F, but I don’t spend much of any time worrying about that. I typically set yeasted dough to rise on top of my oven (never inside), and turn the oven on to about 300°F. The ambient heat provides just enough warmth to help the dough rise uniformly.
Yeasted dough will rise at lower temperatures, even in the refrigerator at 40°F, just more slowly. A slower rise creates more of that somewhat sour, yeasty flavor in the dough, and is best for leaner, non-enriched bread doughs that don’t have much, if any, fat.
The worst placement for getting rolls to rise is somewhere too hot. Slow-rising dough can be very frustrating, but a too-hot temperature risks killing the yeast and preventing any rise at all.
Enrichments like the milk, egg whites, and butter in these gluten free rolls help the dough rise more quickly. But rising times for yeasted dough like these dinner rolls can vary significantly.
A dry climate will also inhibit yeast growth, so you can try adding a tablespoon of additional warm milk or water to the dough if you tend to struggle with getting yeast dough to rise. Don’t add too much, though, or the rolls are likely to overproof and then deflate as they cool (leaving them gummy inside).
More tips for making the best gluten free rolls
Measure out your gluten free flour correctly
If you've tried some of my other gluten free bread recipes, you've likely seen this tip — that's because it's such an important one. The success of your gluten free baking really relies on precision. If you want to achieve the same results I do, you need to do exactly as I do.
When it comes to gluten free flour, you want to ensure you use precisely the amount that I do. That's impossible to achieve with a measuring cup, but it's very easy to do with a kitchen scale.
Definitely use a stand mixer
You really need to use a stand mixer for this gluten free yeast rolls recipe. It's honestly the only way to ensure you get the smooth dough that's necessary for the fluffiest, squishiest rolls.
If you don’t have a stand mixer, you can get away with using a food processor fitted with a steel blade.
Unfortunately, a hand mixer won't work, and there's absolutely no way to adequately mix this dough by hand.
Eat your homemade gluten free rolls right away
Eat your gluten free baked goods straight from the oven! That's not something you'll see me say often, if ever. But that's really what you should do with these gluten free rolls.
Unlike other gluten free bread recipes, these rolls are meant to be eaten quickly. They come out of the oven maintaining their shape, so you don't have to worry about them deflating or falling apart.
Worried that you won't be able to scarf down all these rolls in one sitting? Consider halving the recipe by cutting every single ingredient amount in half.
If you make 8 rolls instead of 16, you probably won't have any trouble eating them all before night's end. Only baking for 1 or 2? Try cutting the recipe down to 25%.

Gluten free bread rolls: storage tips
Storing leftover gf dinner rolls
While I don't recommend it, you can store leftover rolls if you made too many. Because yeast breads tend to get harder the longer they sit around, you want to take care to make sure you store your rolls in an airtight container.
They'll stay good at room temperature for around 2 days, and I suggest sprinkling them lightly with water and then popping them into the microwave for 10 or 15 seconds or the toaster oven at 300°F for a few minutes to refresh them before eating.
Making gluten free yeast rolls in advance
From start to finish, this gluten free bread rolls recipe takes about 2 hours to complete. This means these rolls aren't something you can whip up last minute.
I know what you're thinking: “I'll just make the dough and freeze it until I need it!” But I don’t ever recommend freezing raw yeast dough. It may not rise after having been frozen.
“That's okay,” you say. “I'll leave the dough in the fridge until I need it!” I also don’t recommend letting the dough rise in the refrigerator for more than 24 hours, as the oven rise tends to be very irregular during baking when you do that.
So what do you do when you want to make gluten free rolls ahead of time? Parbake and freeze. Using this method, your dinner rolls will last at least a month.
How to parbake these gf rolls
To parbake the rolls, follow the recipe through baking (be sure to separate the raw rolls, leaving about 2-inches between one another), but only set the oven to 300°F. Bake for about 15 minutes or until the rolls appear puffed and are no longer wet inside.
Remove the rolls from the oven, and allow them to cool completely. Freeze in a single layer, and then wrap tightly in freezer-safe wrap. Eliminate as much air as possible, as air is what causes freezer burn.
When you're ready for your dinner rolls, just defrost them at room temperature and then finish baking them at the original 375°F until fully browned and 190°F inside.
Gluten free dinner rolls: substitutions
Gluten free, dairy free dinner rolls
If you can’t have dairy, try replacing the melted butter with melted vegan butter. Melt and Miyoko’s Kitchen brands are my favorite.
In place of dairy milk, any unsweetened nondairy milk should work. Avoid using anything nonfat, though, as richness is the goal.
Gluten free, egg free dinner rolls
There are 2 egg whites in this recipe, and they provide structure to the rolls. You may be able to replace them with aquafaba, or the brine from a can of unsalted chickpeas.
Sometimes aquafaba is a perfect substitute for egg whites in baking, and other times it appears not to work. I’m afraid I’m not experienced enough in this sort of substitution to predict the likelihood of success.
How to use active dry yeast instead of instant yeast in these gf rolls
I always bake with instant yeast (which is also called bread maker or rapid rise yeast) in yeasted recipes like this one. You cannot eliminate the yeast in this recipe, but you can make dinner rolls with our recipe for yeast free gluten free dinner rolls.
You cannot replace the yeast in this recipe with wild yeast sourdough. Sourdough recipes are entirely distinct.
If you prefer to use active dry yeast, you’ll need to use more, and to “proof” the yeast in some of the milk first. The general rule of thumb is to use 25% more active dry yeast than instant yeast, by weight. Here, that’s 15 grams of active dry yeast in place of 12 grams of instant yeast.

FAQs
there are a lot of reasons why your gf dinner rolls may not have risen. Most can be traced back to not following my recipe to a point. Here are some examples:
– Using too much flour will reduce the hydration ratio of the dough, preventing the yeast from activating; not using enough sugar won't give the yeast the food it needs to do its job.
– Improper temperatures: If your milk is too cold, it will slow down activation of the yeast; if it's too hot, it will kill it. You also won't get a good rise if you leave your gluten free yeast dough in the fridge without a tight-fitting lid or in a drafty part of the kitchen.
– Expired yeast: Bad yeast can also be a culprit. If you're not sure whether yours is good, add a bit to a mixture of warm water and sugar. If it's not frothy after 10 minutes, your yeast is no good
Dense gluten free rolls are usually the result of too much flour. This is why I always suggest that you measure yours out using a kitchen scale rather than rely on a measuring cup. Be careful, as well, about incorporating too much flour into your rolls during shaping, which will also lower the hydration ration and reduce or eliminate yeast activity.
Yes, making and freezing gluten free buns is a great way to save time.
To do this, follow my instructions above for shaping and parbaking your rolls. Freeze them once they're completely cool, and then let them defrost before popping them back into the oven to finish baking before dinner.
If you only have active dry yeast, you can use it here but you'll need to use 25% more per recipe, and to dissolve it in some of the milk before combining the milk into the other ingredients. Here, the recipe calls for 12 grams of instant yeast, so you'd need 15 grams active dry yeast.
Yes, yeast absolutely can and does work with gluten free flours. The secret to getting your gluten free dough to rise is to take exacting care when measuring out ingredients and use the proper gluten free flour blend, as specified in the recipe.
No! The recipe calls for both the amount of flour blend stated plus additional tapioca starch as an additional ingredient. You can never just leave out any ingredient in any recipe and expect results, unless that ingredient is listed as optional. All good quality all purpose gluten free flour blends contain tapioca starch; this recipe calls for more than the average, all purpose amount.
No, these rolls will not hold their shape if you shape and then let them rise for that long, even in the refrigerator.
Gluten Free Dinner Rolls Recipe | Soft, Squishy Yeast Rolls
Ingredients
- 3 ¼ cups (455 g) all purpose gluten free flour blend, Better Batter is ideal here; click through for recommended flour blends
- 3 ¼ teaspoons xanthan gum, omit if your blend already contains it
- ⅞ cup (105 g) tapioca starch/flour, plus more for sprinkling
- 4 teaspoons (12 g) instant yeast, See Recipe Notes
- ¼ cup (50 g) granulated sugar
- 1 teaspoon kosher salt
- 1 ⅝ cup (13 fluid ounces) warm milk (about 90°F)
- 8 tablespoons (112 g) unsalted butter, melted and cooled (plus more for brushing)
- 2 (50 g) egg whites, at room temperature
Instructions
- In the bowl of a stand mixer (See Recipe Notes), place the flour, xanthan gum, tapioca starch/flour, instant yeast, and granulated sugar, and whisk to combine well. Add the salt, and whisk again to combine.
- Add the milk, melted butter, and egg whites. Using the paddle attachment, beat vigorously. The mixture will come together in a clump and clear the sides of the bowl. Keep beating until it begins to look whipped, and sticks to the side of the mixing bowl again (about 6 minutes total).
- Transfer the mixture to a lightly oiled bucket or bowl with a very tight-fitting lid. The container should be large enough for the dough to nearly double (although it won’t double fully).
- Set the container aside for at least 2 hours at room temperature, and up to 24 hours in the refrigerator. Do not let the dough rest/rise for too long, or your rolls will rise much more irregularly after shaping.
- If you’ve let the dough rest in the refrigerator, remove it from the cold and place it, still covered, on the kitchen counter. Allow it to warm to room temperature before working with it.
- Grease a quarter sheet pan or multiple round cake pans for baking, and set them aside. You will later decide if you’d like to crowd the rolls, and have them rise then bake touching, or have them separate.
- Divide the dough into 16 equal portions, each 2 1/2 ounces in weight. Working with one piece at a time, knead the dough in your clean, dry hands, without adding any additional flour of any kind, pinching any seams that separate.
- Flour a clean, dry work surface very lightly with tapioca starch, and coax the dough into a round. The dough should be firm, but easy to work with.
- Place the shaped rounds of dough in your chosen baking pan either touching (they will rise mostly up), or a bit more than 1-inch apart, taking care not to crowd them (the will rise up and out).
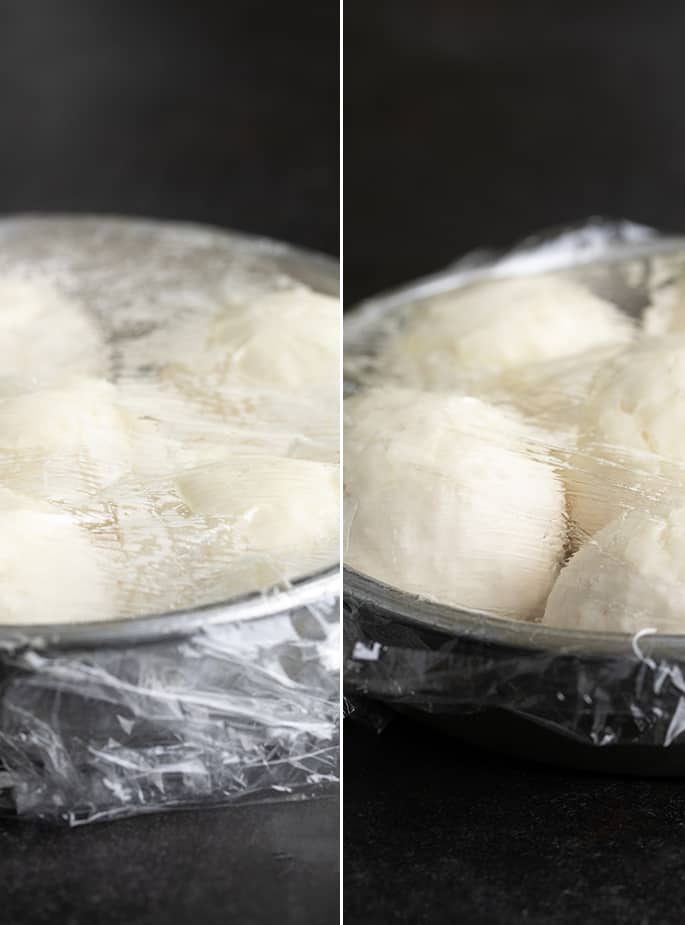
- Cover the pan with lightly greased plastic wrap, place in a warm, draft-free location, and allow to rise until about 150% of their original size.
- This rise can take anywhere from 45 minutes to hours, depending upon the ambient temperature in your kitchen. Overproofing is not very likely, and can be detected when the surface of your raw rolls begins to take on a pockmarked appearance.
- When the rolls are nearing the end of their rise, preheat your oven to 375°F. Once the rolls are properly risen, remove the plastic wrap from the pan(s), and brush generously on all exposed sides with melted butter.
- Place the baking pan(s) in the center of the preheated oven and bake until an instant read thermometer inserted into the center of each roll reads about 190°F.
- If there is any space between the rolls after they’ve risen, they will take around 20 minutes until fully baked.
- If the rolls are touching one another, lower the oven temperature to about 350°F at 18 minutes and continue to bake for about another 5 minutes or until the proper internal temperature is reached in the center roll.
- Remove the pan from the oven, and with the rolls still in the hot pan, brush again with melted butter and serve immediately.
Video
Notes
If you’d like use active dry yeast in place of instant yeast, you’ll need to hydrate the yeast first in some of the milk. You’ll also need 15 grams active dry yeast to replace 12 grams of instant yeast. For the stand mixer
If you don’t have a stand mixer, I recommend making the dough in a food processor fitted with the steel blade. I don’t recommend a hand mixer, or trying to mix by hand. Originally published on the blog in 2021; in 2022, some text resources added, but recipe, photos, video unchanged. Nutrition information. Nutrition information is an estimate, per roll, and is provided as a courtesy created using an online nutrition calculator. It should not be relied upon.
Nutrition
Nutrition information is automatically calculated, so should only be used as an approximation.


Can u change things to Australian standards please to make things easier. Thanks.
No, I can’t do that. I live in the U.S., and my readership is primarily here.
The rolls turned out beautifully! I used potato starch instead of tapioca flour, since I was all out. The dough was not sticky, very easy to work with, and proofed quickly. My husband proclaimed that THESE are the rolls I should make for all of our bread needs now. Thank you!
I’m glad you enjoyed the results, Emily. For others’ benefit, potato starch does not have the stretchy properties of tapioca starch and I don’t generally recommend it as a substitute for it.
I was nervous about making a yeasted GF bread for the first time. I did have the recommended flour on hand, I measured everything out on a scale, and gave myself plenty of time. They turned out pretty good! I may have added a little extra yeast (the scale was jumpy) so I’m not sure if the sour flavor was intended or due to 1/4 tsp extra yeast. Since I don’t have a lot of experience I was wondering if adding 1 tsp sugar to the recipe would throw off the process? I also watched the video but was left wondering how much kneading I was supposed to do to the measured out portions? Just enough to shape it? or actually work it as traditional bread is worked for 30 sec-1 min?
This recipe already has 1/4 cup (50 g) of granulated sugar in the ingredients. You aren’t kneading the dough for any reason other than smoothing it out and shaping it. Just follow the instructions on handling combined with the how-to video. The process you’re describing is for gluten development, which of course we don’t have here.
I want to use your gluten free flour blend to make your gluten free dinner rolls, however your flour recipe calls for tapioca flour/starch AND your gluten free dinner roll recipe calls for tapioca flour/starch…please clarify
The recipe calls for both the amount of flour blend stated plus additional tapioca starch as an additional ingredient. Please follow the recipe precisely as written.
I really want to love this recipe! But this is the second time I’ve tried it, and in spite of using the correct flour and other ingredients, measuring perfectly with a kitchen scale, and following the directions as well as I could, they still wouldn’t rise well and turned out dense and yeasty. I can’t figure out what I’m doing wrong! I’m pretty good in the kitchen, but this recipe just seems to go right over my head.
There are many ways in which you could have deviated from the recipe as written, Megan, despite using the correct flour and using a scale. My first guess is that you added flour during shaping which lowered the hydration ratio which will prevent a rise. I’m not able to guess what else might have happened, but that’s my assumption.
Hello,
You should really change the overview at the beginning of the recipe for the rising time and overall time to make this recipe. It is very misleading to have it say 1 hour rising when in the recipe it says 2 hours rising then another 45 minutes when shaped. Very misleading
The recipe states that rising can take anywhere from 45 minutes to hours depending on the rising environment, DZ. That is the only proofing. The first time is a resting period, which I agree should be added to the total time. I’ve done that now. I apologize for the confusion.
My rolls cracked a bunch. Did I not knead enough or let the the dough rest enough?
I imagine you incorporated flour into the rolls during shaping and didn’t shape them smoothly, Kaitlin. I can only guess, but that’s my guess!
I used king aurthur measure to measure flour and I too had sticky/wet results. What advise can you offer other than use your type of flour.
You can’t use that flour blend in any of my recipes, and it works particularly poorly in yeast bread recipes. I discuss that on the all purpose gluten free flour blends page on the blog. I’ve tried working with the flour to make baking with it in yeast bread possible, and I have never once had good results. I’m afraid it simply doesn’t work. The flour blend is the most important part of a recipe, since we are already replacing conventional flour. A bad blend just won’t work to make a good recipe.
When the rolls are rising in the pan, can they sit in refrigerator overnight before baking?
No, they can’t. They’ll over proof.
I am making to take die Thanksgiving dinner. Need to take them cooked so they will likely be cooled for a few hours before we eat. Recommendations? Is that close enough to eat right away?
Please see the text of the post under the heading “Gluten free bread rolls: storage tips.” You can either treat them like leftover rolls and handle them according to those recommendations, or parbake them and finish baking when you get there. A few hours should be fine, though. Just be sure to cover them tightly and not to overbake them.