
This post may contain affiliate links. Please read our disclosure policy.
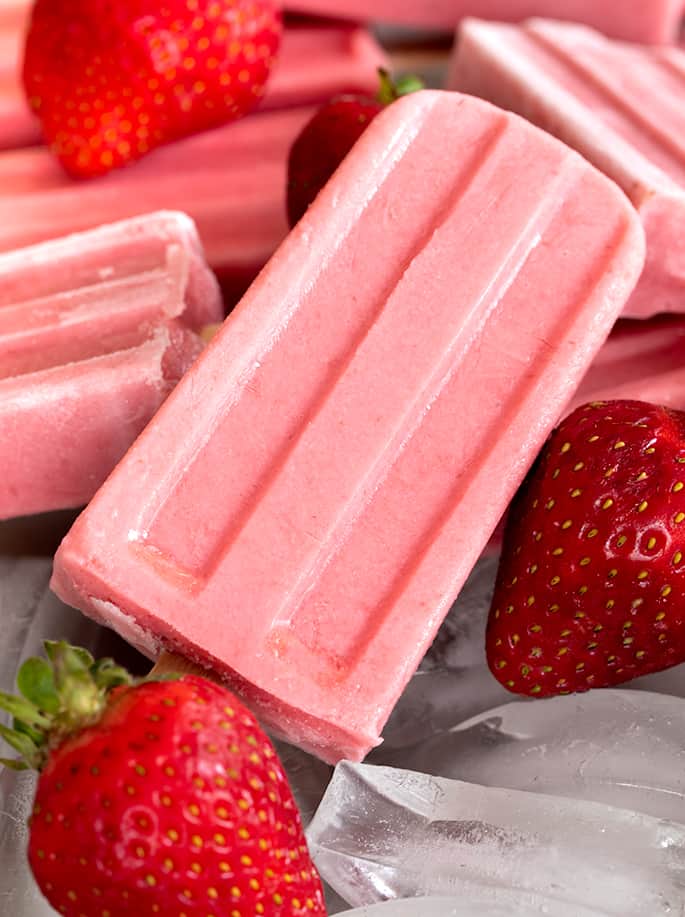
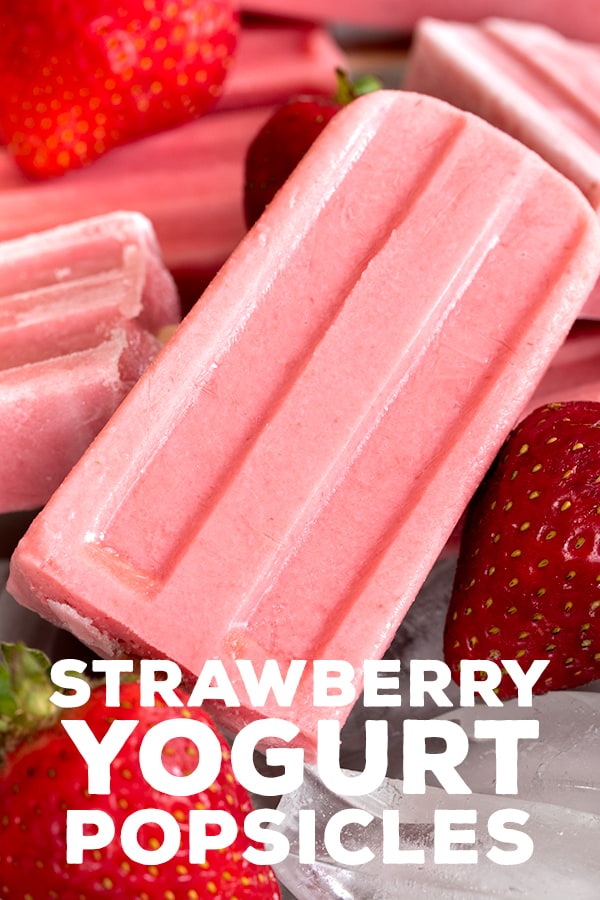
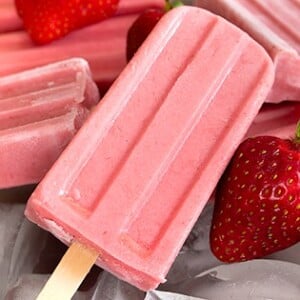
Smooth and creamy, naturally gluten free strawberry yogurt popsicles are perfect for a refreshing breakfast on the go, or an afternoon snack. Make them with fresh or frozen berries.
How to make homemade strawberry yogurt popsicles
Like smoothies, it's tempting to think that you can make a great popsicle with literally any mixture at all, from simple fruit juice to plain, melted ice cream. But that just isn't the way it works. When you're making popsicles, it's important to keep in mind that the same rules that apply to homemade ice cream apply to homemade popsicles.
Any water in your popsicles will become icy when frozen, as water freezes solid. Sugar and fat don't freeze solid.
But with popsicles, you can get away with an icier product since it's meant to be eaten very cold and is licked, rather than eaten with a spoon. These popsicles are made with half plain yogurt and half strawberry puree.
The strawberry puree is super simple but really special and versatile. In fact, we've used something similar many times before…
How to make the strawberry mixture for these popsicles?
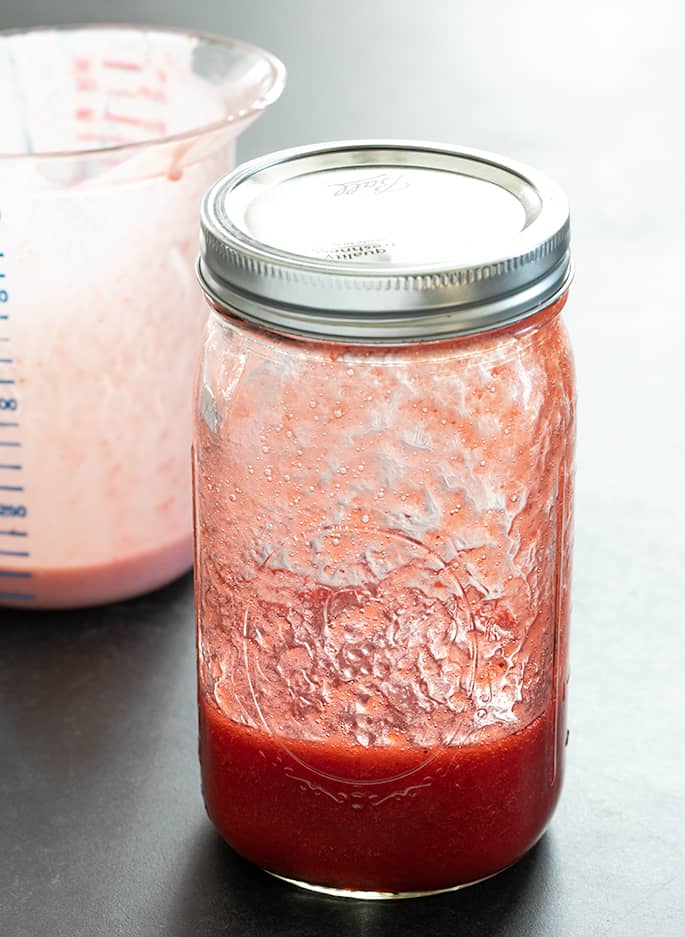
The strawberry puree that makes up half of the recipe for these popsicles is a really simple mixture of hulled strawberries, sugar, a pinch of salt, and water. The mixture is cooked over medium-high heat for about 10 minutes or until the strawberries are very soft and everything has been reduced by about one-quarter.
When the mixture thickens, all of the added sugar is fully dissolved and the moisture is reduced. You'll notice that it pours slowly, because of the reduced liquid and the natural pectin in the strawberries.
Pass it through pretty much any fine mesh strainer to remove the seeds. But a larger strainer will make it easier to stir the mixture to help it strain more quickly. Be sure to press down firmly on the puree as you strain to separate all of the liquid from the seeds.
If you do use frozen strawberries, use 1 pound of strawberries in place of 1 1/2 pounds of fresh strawberries. And reduce the water by at least half, since the frozen strawberries will be a bit icy.
Other recipe ideas to use this strawberry mixture
The strawberry puree is little more than slightly sweetened strawberries that have been cooked, pureed, and strained of seeds. You can also use it in our no bake strawberry cheesecake, which is one of my favorite recipes of all time.
The mixture is also perfect for making naturally flavored strawberry cupcakes with a rich strawberry frosting. You could probably also use the strawberry puree in place of the roasted strawberry mixture in our homemade roasted strawberry ice cream recipe.
What's the best popsicle mold?
I've purchased so many awful popsicle molds over the years. Not wanting to be wasteful, I tried and tried to find ways to use them successfully before throwing in the towel.
But good news! I've wasted time and money, so now you don't have to!
My favorite silicone popsicle mold (affiliate link, please shop around!) is the same one that I used for our homemade fudgesicles. It's a lay-flat mold that makes a really fancy-looking popsicle and holds the stick comfortably in place.
When I used the silicone popsicle mold for these strawberry yogurt popsicles, I also added some miniature chocolate chips to the top right after pouring in the mixture. Chocolate and strawberry are a great combination, and it just looked pretty. ?
Just look for a popsicle mold with a lid that holds each of the popsicle sticks in the center of each pop.
How to remove the popsicles from a traditional mold
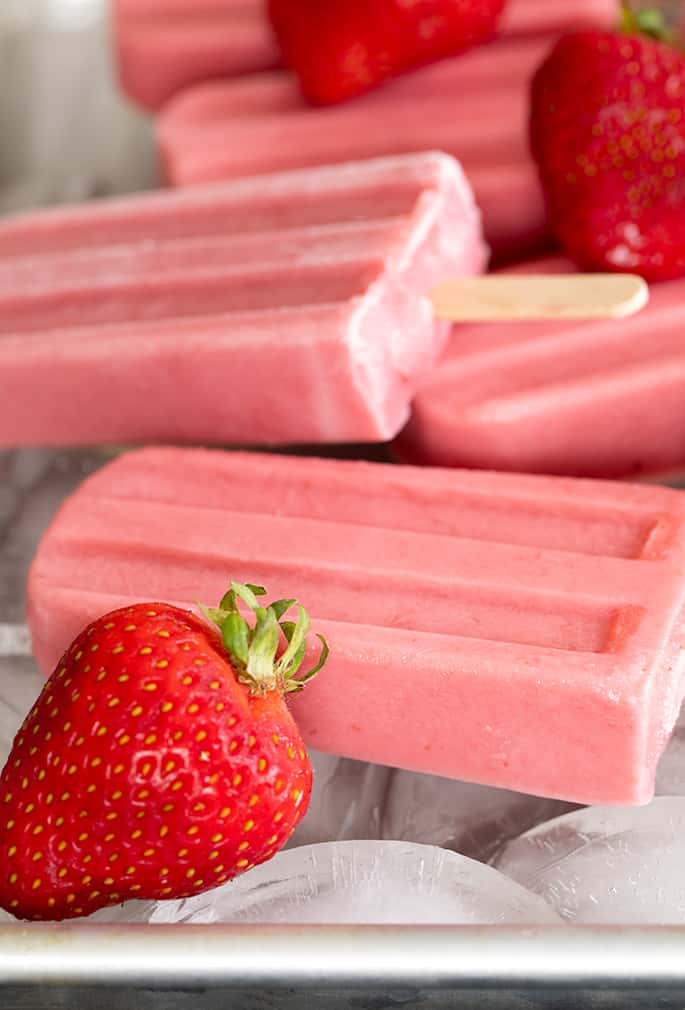
The easiest way to remove the pops from the standard mold (the one you see in the photos here) is by running it under hot water briefly. The idea is to melt the outermost layer of the pops just enough so that they slip right out of the mold when you pull on the stick.
Be sure to freeze the pops completely before you attempt to remove them from the mold. Otherwise, the stick will slip out of the pop when you pull on it.
If you're using a silicone mold, it couldn't be easier to remove the pops. Just peel the silicone mold away from the pop!
Ingredient substitutions
Dairy free
It's so easy to make this recipe dairy-free, just by using your favorite nondairy plain yogurt. My favorite nondairy yogurt is coconut-based since I find that the soy-based ones have a strange texture and flavor.
Replacing the strawberries with another fruit
I think that this recipe would work perfectly with any sort of berry (especially blueberries). Since you can quickly and easily strain out the seeds, even blackberries or raspberries should work just fine.
You can also use frozen berries, whether strawberries are in season or not. During peak strawberry season, though, I like to use fresh berries since I can select just the right container of berries from the grocery store—and they're reasonably priced.
Refined sugar/sugar-free
In place of granulated sugar, you can use a similar amount of honey or Lyle's Golden syrup. I'd avoid using any sugar with a stronger flavor, like coconut palm sugar, since it will compete with the flavor of the berries.
If you'd like to try making this refined sugar-free, you can try using granulated erythritol or Swerve granulated sugar replacement. Stevia drops might even work fine. The sugar is there only for sweetness.
Fresh Strawberry Yogurt Popsicles
Ingredients
- 1 ½ pounds fresh strawberries, washed, hulled and sliced
- ¼ cup (50 g) granulated sugar, (± 2 tablespoons (25 g))
- ⅛ teaspoon kosher salt
- ½ cup (4 fluid ounces) lukewarm water
- 1 ½ cups (12 fluid ounces) plain yogurt, by volume
- Honey, to taste
Instructions
Make the strawberry puree.
- In a medium-size, heavy-bottom saucepan, place the strawberries, sugar, salt, and water, and stir to combine. If your berries aren’t very sweet, use the extra 2 tablespoons of granulated sugar.
- Place over medium heat and cook, stirring occasionally, until the strawberries are softened, and the liquid has reduced by about 1/4.
- Remove from the heat and puree the mixture using a stick blender, if you have one. Otherwise, allow the mixture to cool until no more than warm to the touch, and place the mixture into a blender and process until smooth.
- Pass the strawberry puree through a fine mesh sieve to remove the seeds, stirring and pressing firmly with a spatula to speed up the straining and avoid wasting any of the liquid.
- Transfer the mixture to a separate container to cool to room temperature. Alternatively, cover and store the strawberry puree in the refrigerator for up to 1 week.
Make the popsicle mixture.
- In a large spouted measuring cup or another container with a pouring spout, place equal amounts plain yogurt and strawberry puree, by volume. Whisk and mix until completely combined. Add honey to taste.
Make the popsicles.
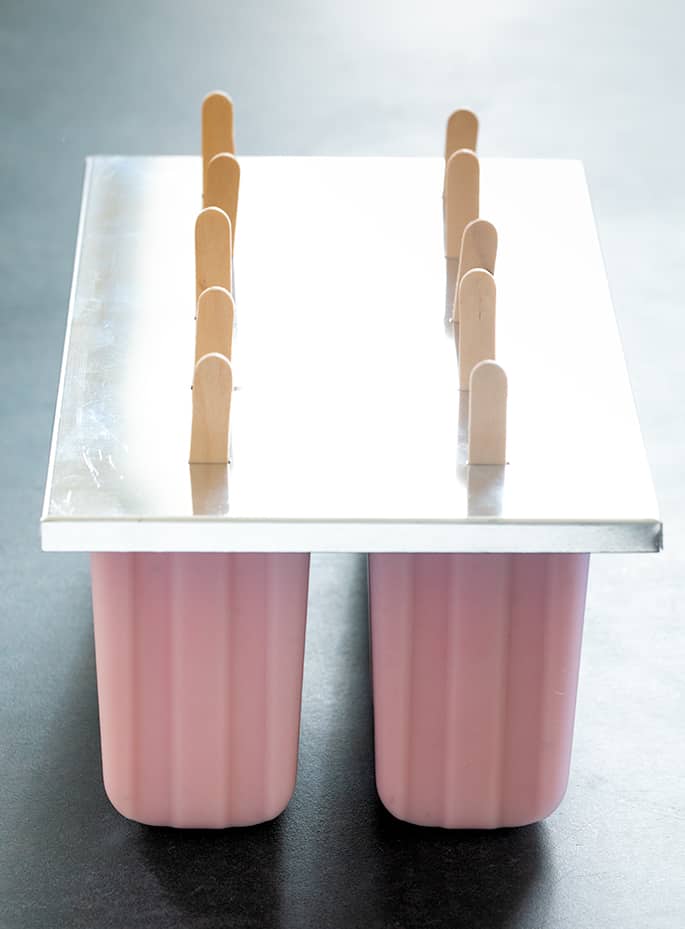
- Pour the mixture into popsicle molds, leaving enough space for the mixture to expand when it freezes. Add popsicle sticks into the center and place on a flat surface and then into the freezer until solid.
- Unmold the pops and serve frozen.
- Once fully frozen, the unmolded pops can be piled into a freezer-safe lidded container and stored in the freezer until ready to serve one by one.
- The strawberry puree can be doubled or tripled and stored in a sealed container in the refrigerator for up to 1 week. If you don’t have a popsicle mold, you can improvise with ice cube trays or small cups (reusable or disposable).
Video
Nutrition
Nutrition information is automatically calculated, so should only be used as an approximation.


Delicious popsicles! I made this recipe with about 1 TBSP of honey added and it produced 12 regular-sized popsicles in my popsicle molds. My kit came with clear storage bags and I fit 2 in each and frozen them for later. Great recipe but it makes, 12, not 6 like the recipe says.
I’m glad you enjoyed the popsicles, Gail. You got 12 smaller popsicles because you used smaller molds.
These are the best homemade popsicles I have ever made! I love that I can sweeten to taste. These had an intense strawberry taste but were nice and creamy. Thank you so much for this recipe!
That’s great to hear, Laurie. Bright strawberry taste, but creamy is exactly what they’re meant to be, so that’s a success for sure!
Can I just make just a regular frozen treat with this recipe? Just me and I don’t want popcicles
Hi, Candace, I’m afraid I’m not sure what you mean by a regular frozen treat. If you’d like to make a simple strawberry frozen yogurt, I have a separate recipe for that. You can’t just freeze this as is and scoop it later. It will freeze solid. I hope that’s helpful!