
This post may contain affiliate links. Please read our disclosure policy.
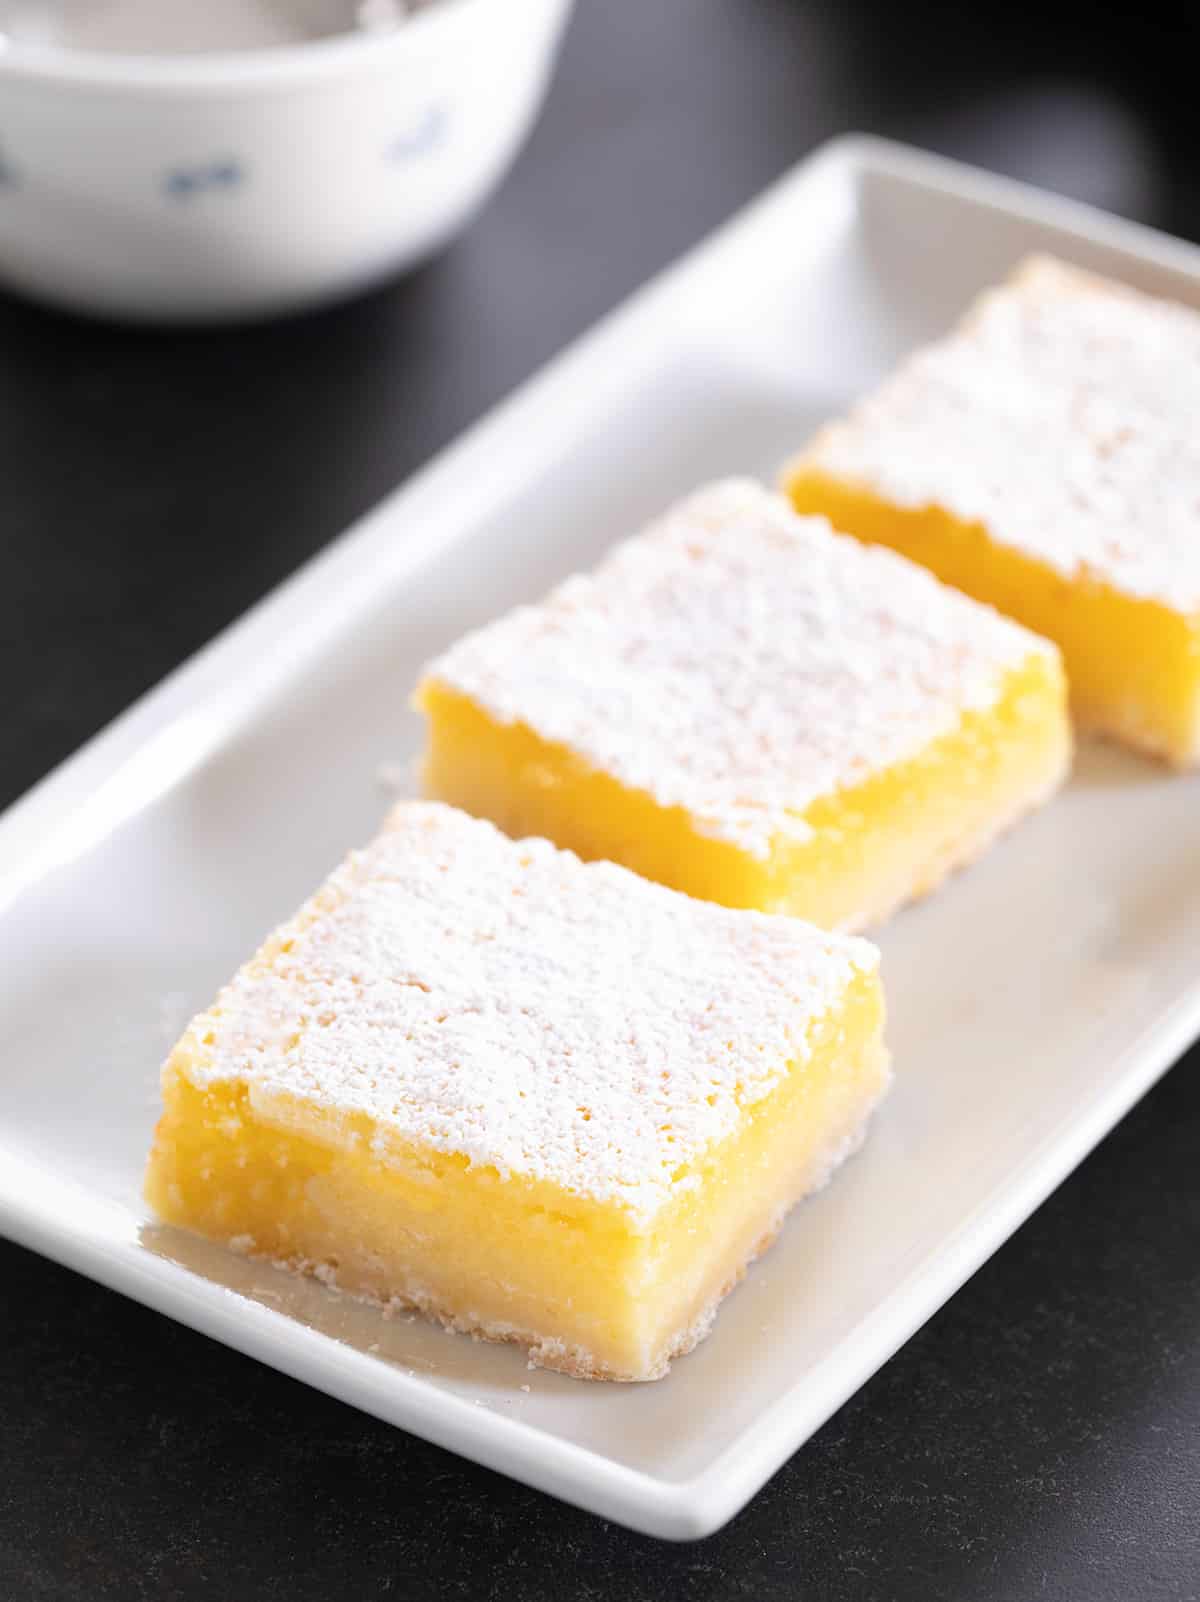
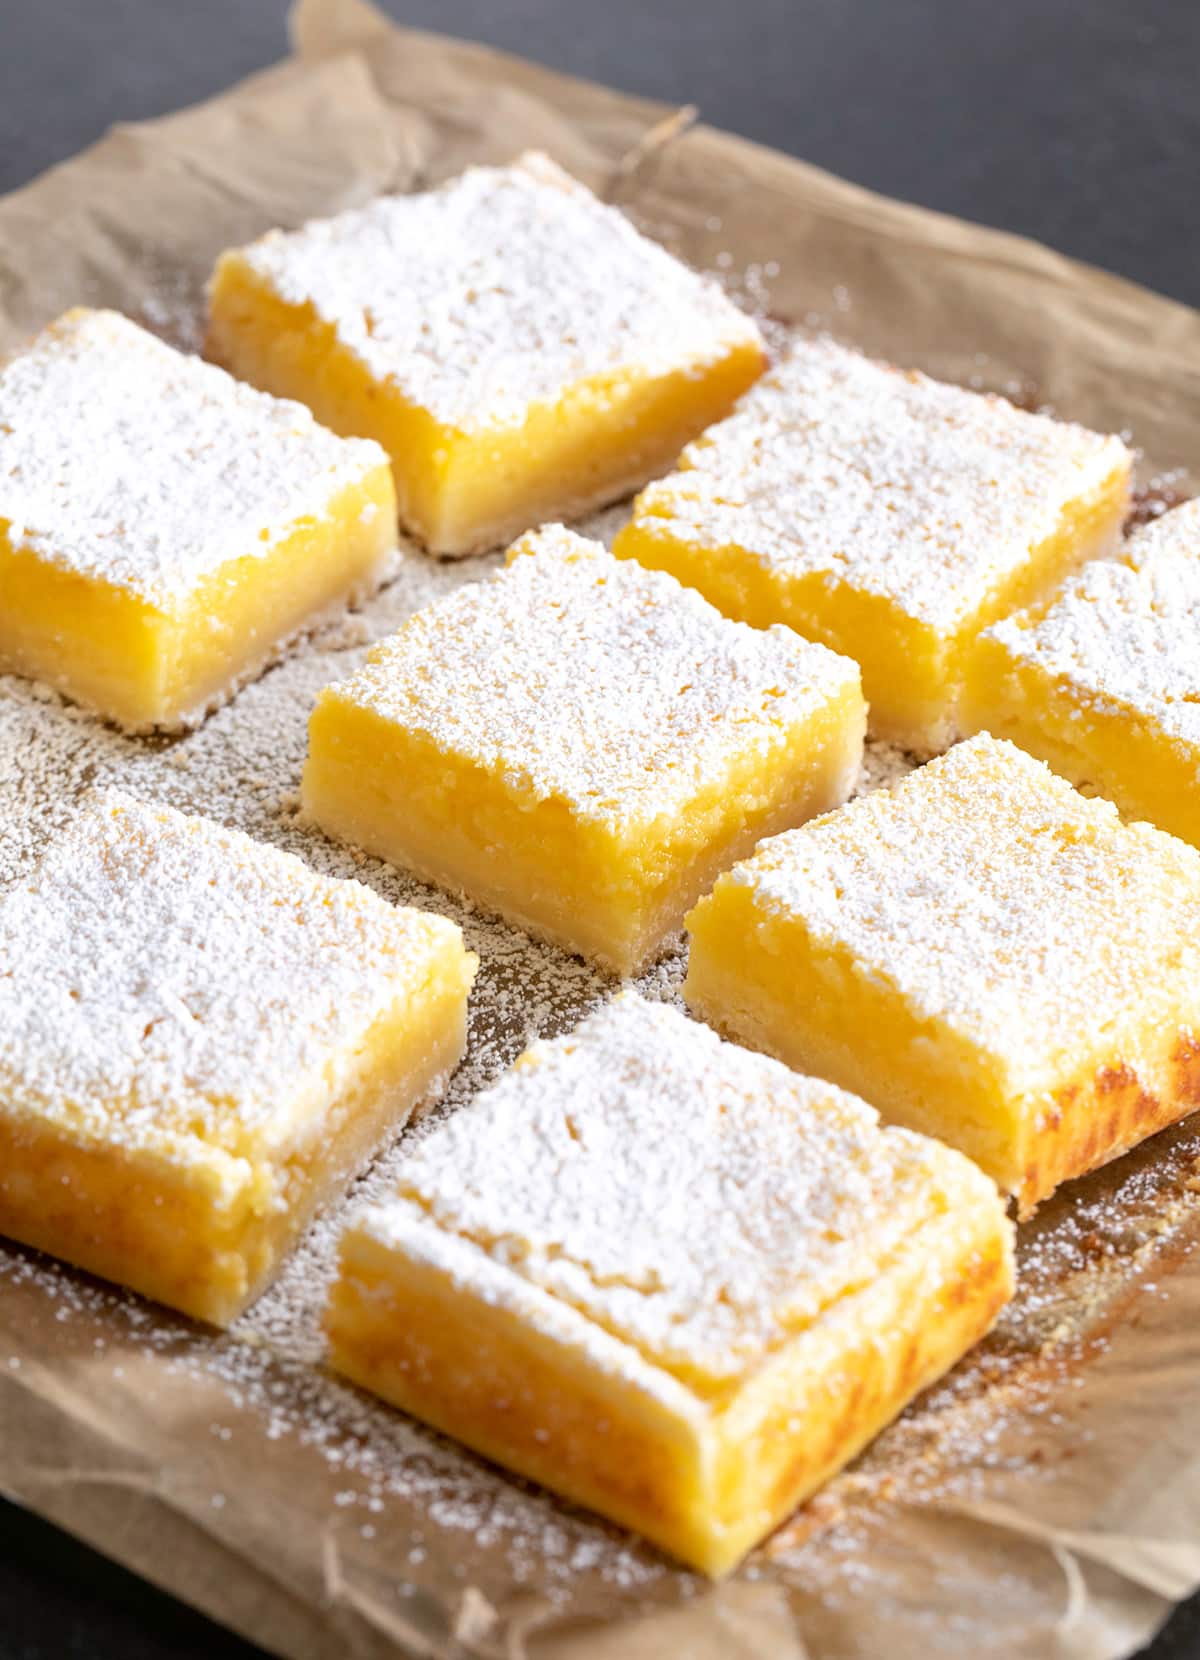
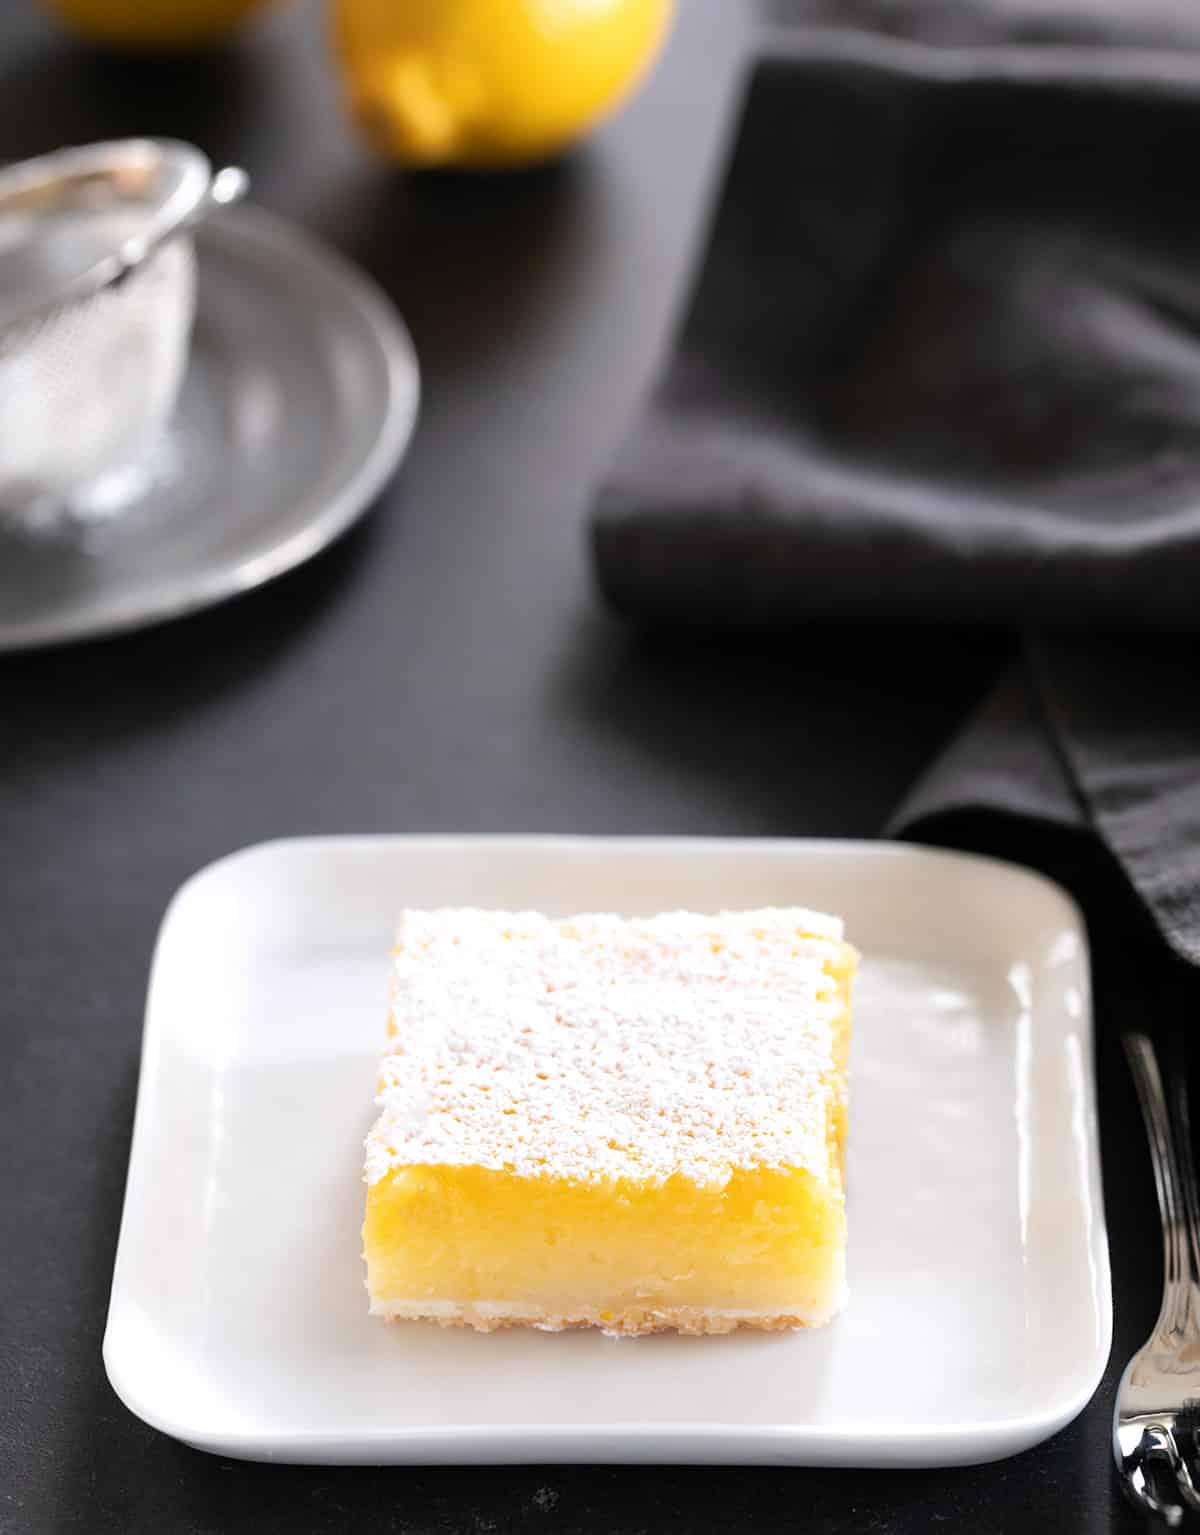
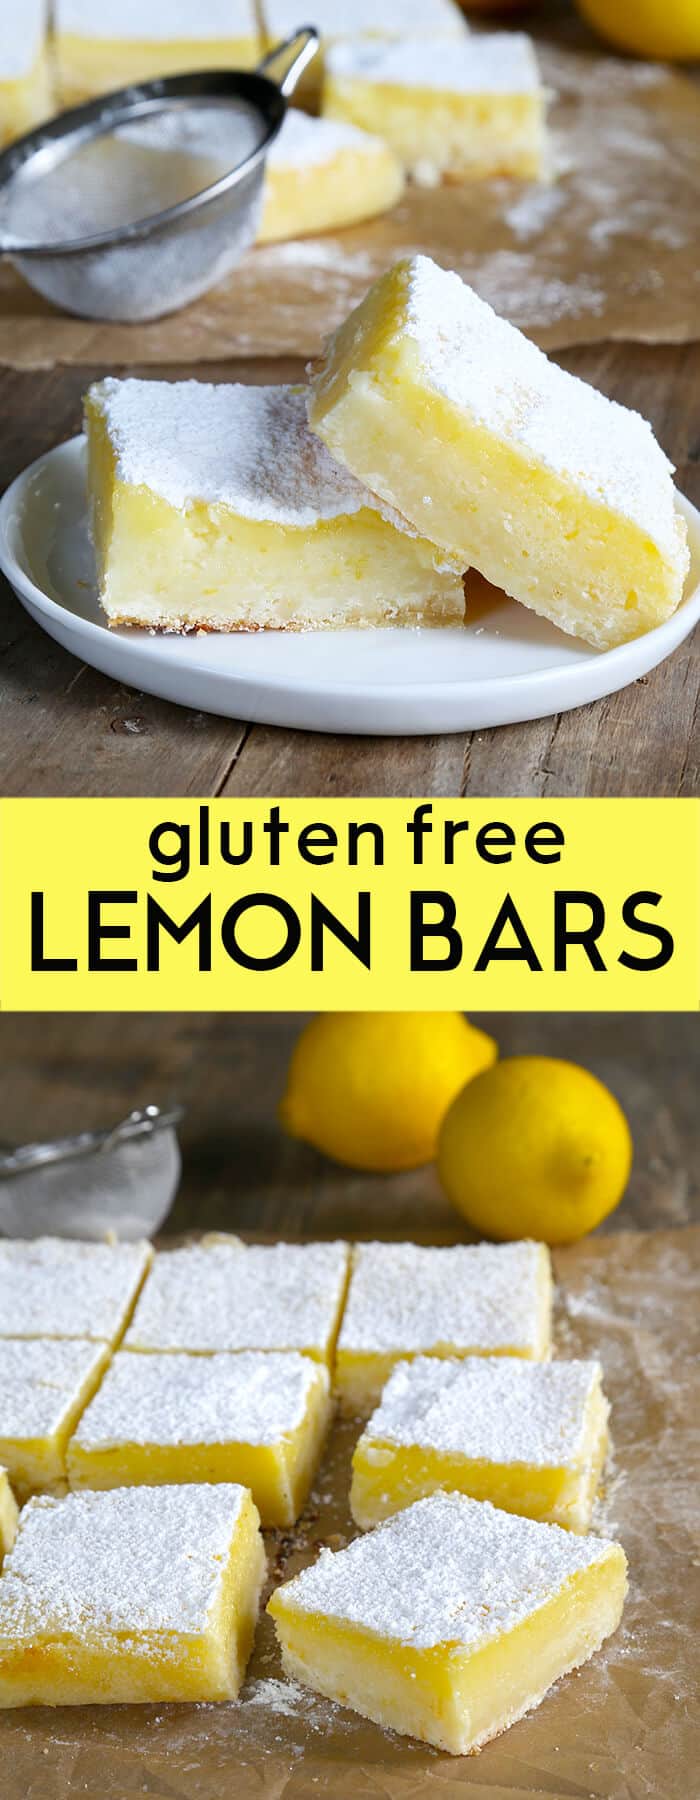
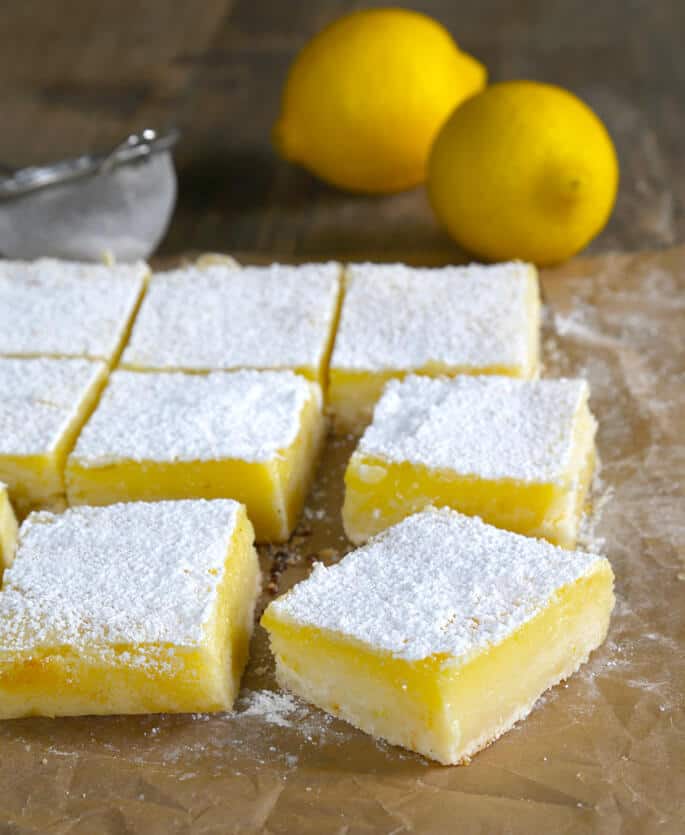
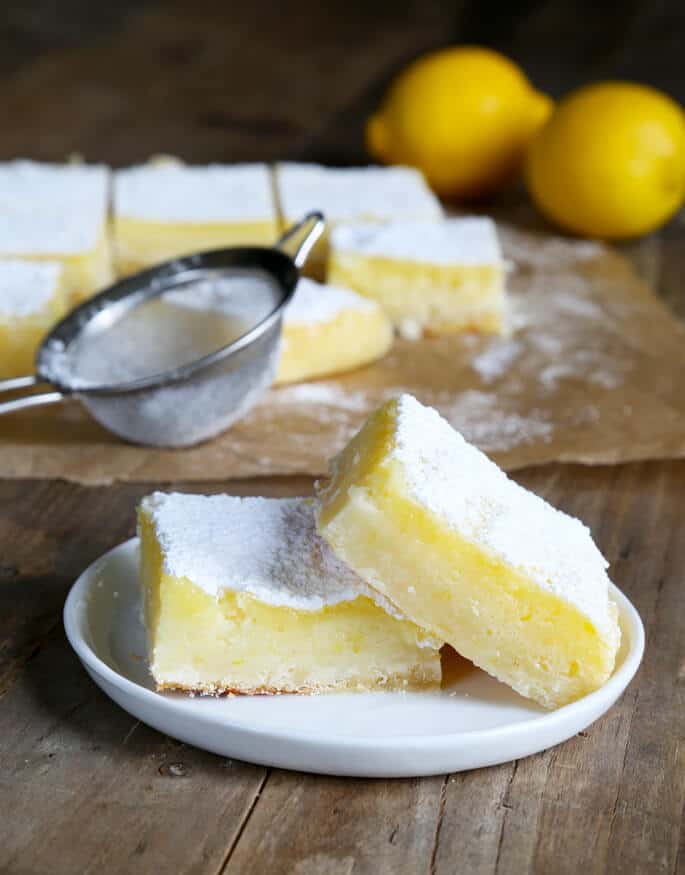
These gluten free lemon bars have a crisp, buttery shortbread crust and a smooth, bright lemon custard filling that sets just right every time. They’re simple to make, slice neatly, and deliver that classic balance of sweet and tart without any guesswork.
Why this recipe works
The texture is exactly what you want from classic lemon bars, and is even better without gluten. The crust bakes up tender but sturdy, with just enough chew to hold its shape under the filling without turning soft or greasy.
The filling is smooth, creamy, and full of real lemon flavor. Fresh lemon zest flavors the crust, not just the custard, so every bite tastes balanced and bright instead of flat or overly sweet.
The filling sets properly because you’re not guessing when it’s done. Since ovens vary, I give you multiple doneness cues so you can use your best judgment and pull it at just the right moment. That’s how you avoid a filling that’s underbaked or firm and rubbery.
“I’m the only gf person in the room but everyone loved it! Custard is so lemony and delicious.” Shannon
“I have made it many times and am making it again to bring to my 101 year-old grandpa who loves lemon bars.” Jennifer
Recipe ingredients
Here's a bit about the ingredients you'll need to make these bars, how to select the best of each, and what they do to contribute to the best result:
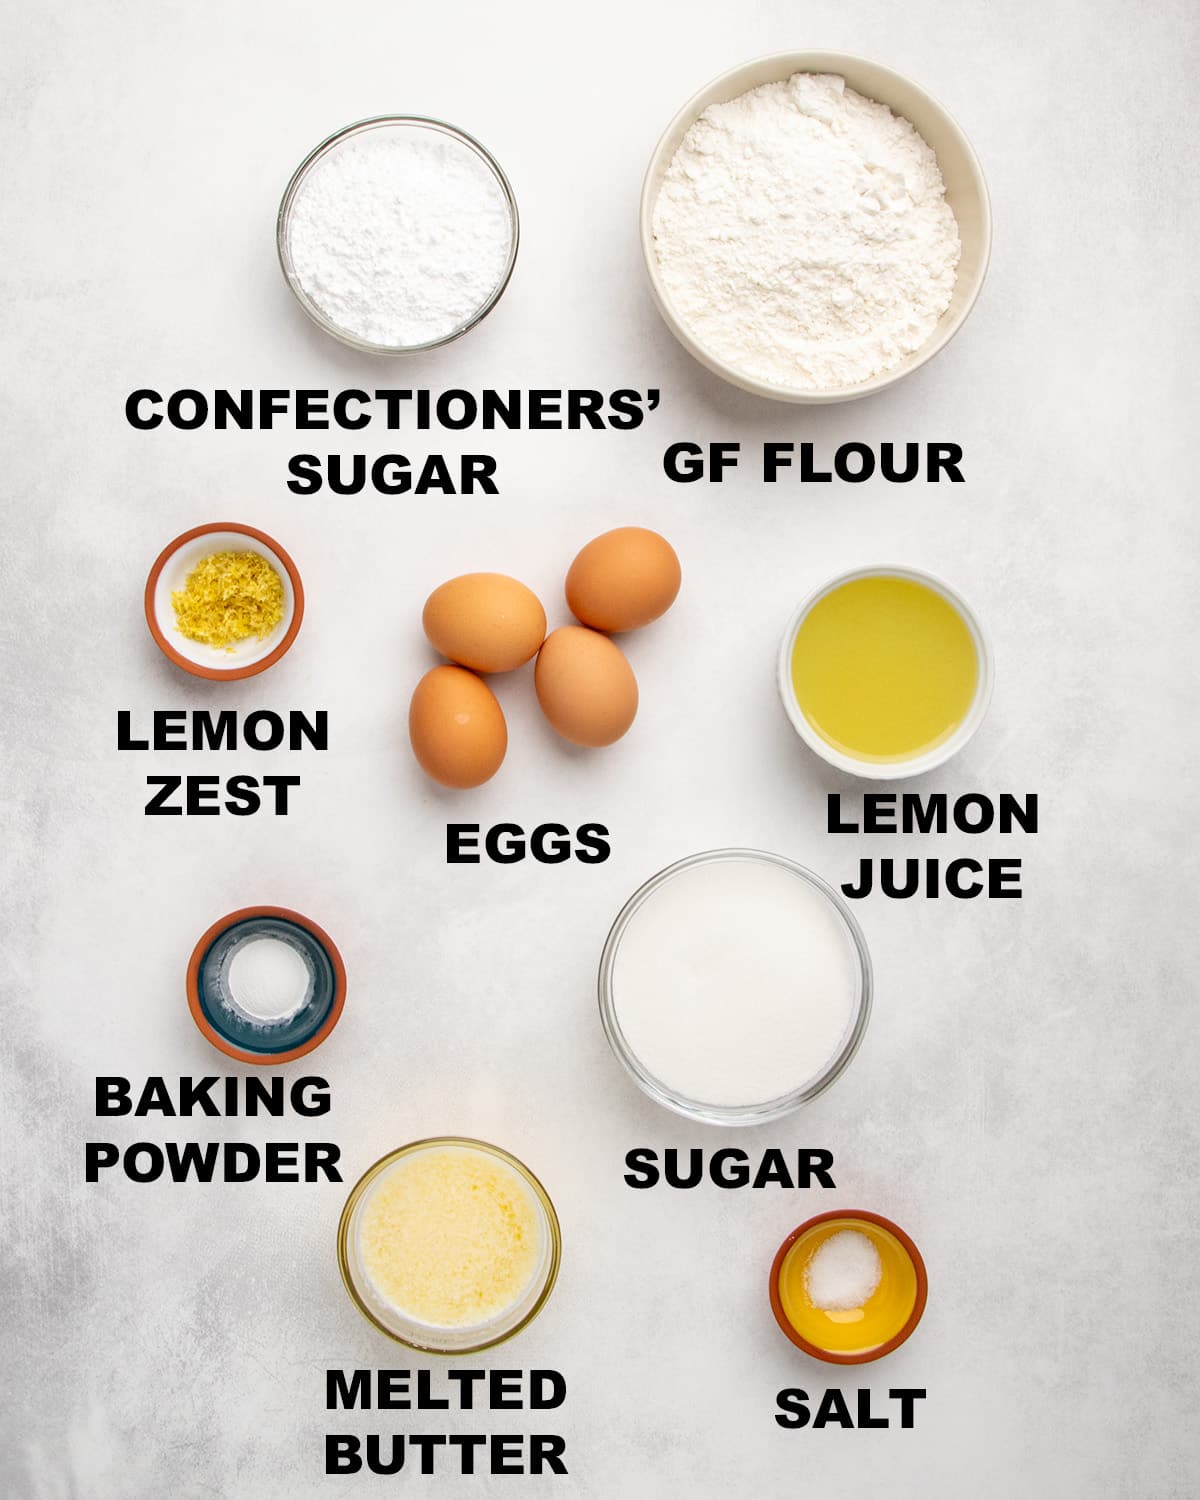
- Gluten free flour blend: Both the shortbread-style crust and the filling require a gluten free flour blend with superfinely ground rice flour as a base, without any xanthan gum. I’ve found that adding a binder like that makes the crust more chewy and the filling gummy, not smooth. The flour blend adds structure to both components of the bars. You can use my 3-ingredient blend or Nicole's Best. If you choose to use King Arthur Flour's gf blend without xanthan gum, I highly recommend sifting it multiple times before you measure to ensure there's no grittiness.
- Confectioners' sugar: In the crust, it adds sweetness and helps create a lightly crispy crumb that melts in your mouth. We dust more on top for extra sweetness and because it looks pretty (and covers any imperfections in the top of the bars).
- Granulated sugar: In the filling, it balances out the tartness of the lemon and ensures that the filling is smooth since the sugar dissolves in the lemon juice.
- Lemon juice: We use a lot to add tons of fresh lemon flavor. As it bakes, the taste intensifies, so avoid bottled juice in favor of freshly-squeezed. And strain out the pulp and seeds before measuring, to make sure you have enough.
- Lemon zest: Adds extra lemon flavor since it contains all of the essential lemon oils. Be sure not to grate down all the way to the bitter white pith.
- Butter: Brings the shortbread crust together, provides buttery flavor and richness, and makes the crust crisp on the outside.
- Eggs: Thicken and bind the custard filling, setting into a creamy structure that holds as the bars cool.
- Salt: Balances the sweetness and brightens the other flavors.
- Baking powder: Gives the filling a bit more rise for a slightly lighter-textured custard.
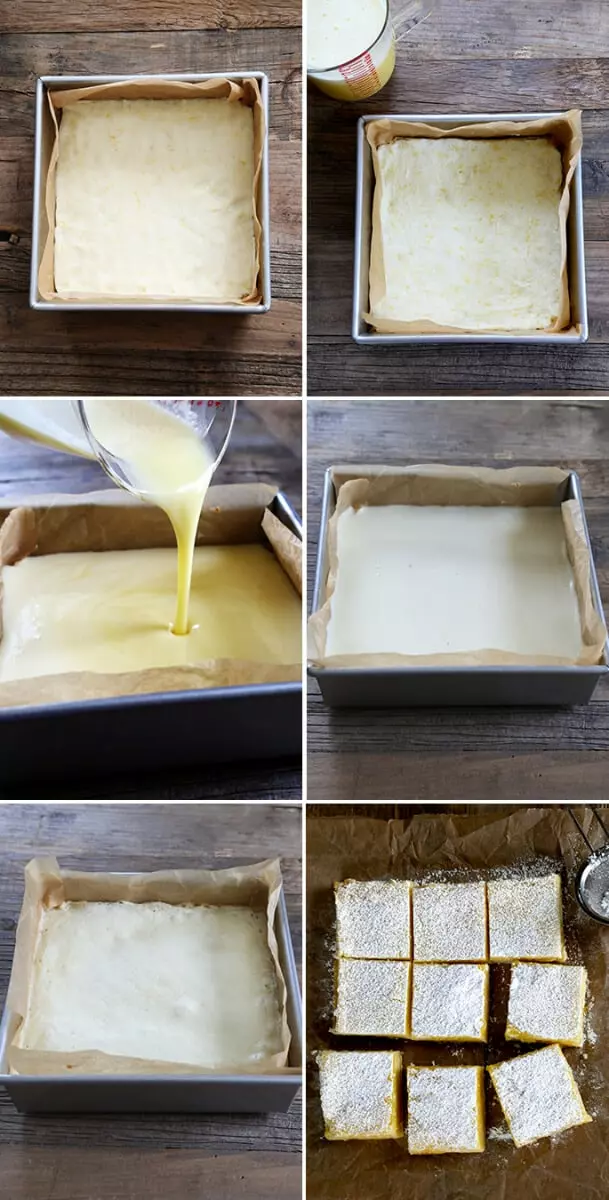
How to make gluten free lemon bars (step by step photos)
To make these bars, you have to place the pan in the oven twice. This visual guide includes an explanation of the reason behind each step in the recipe. For full ingredient amounts, see the recipe card below.
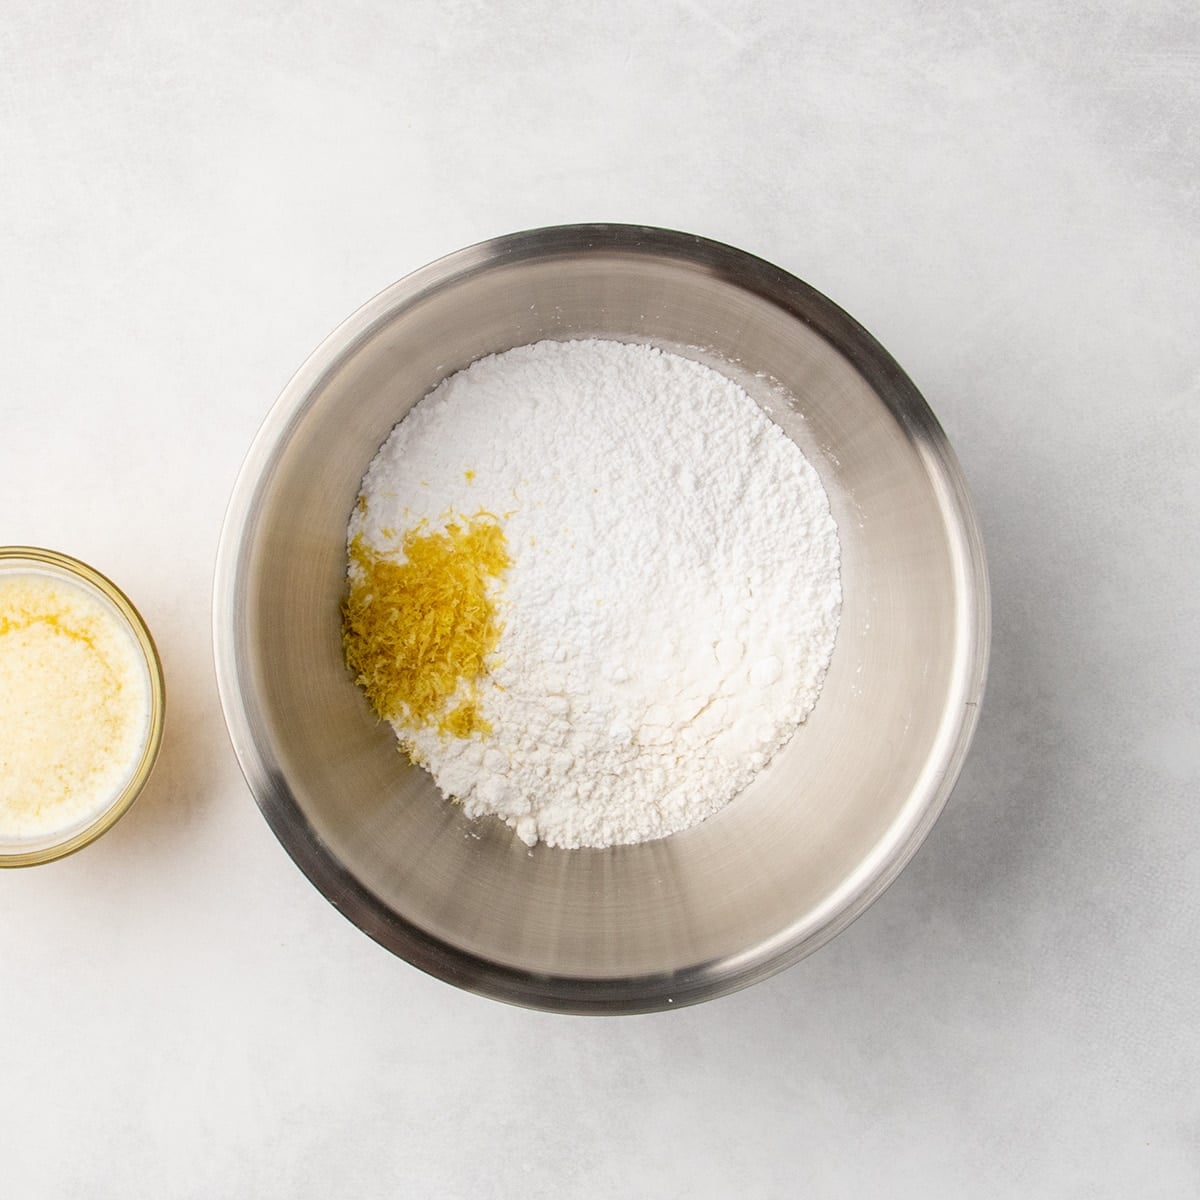
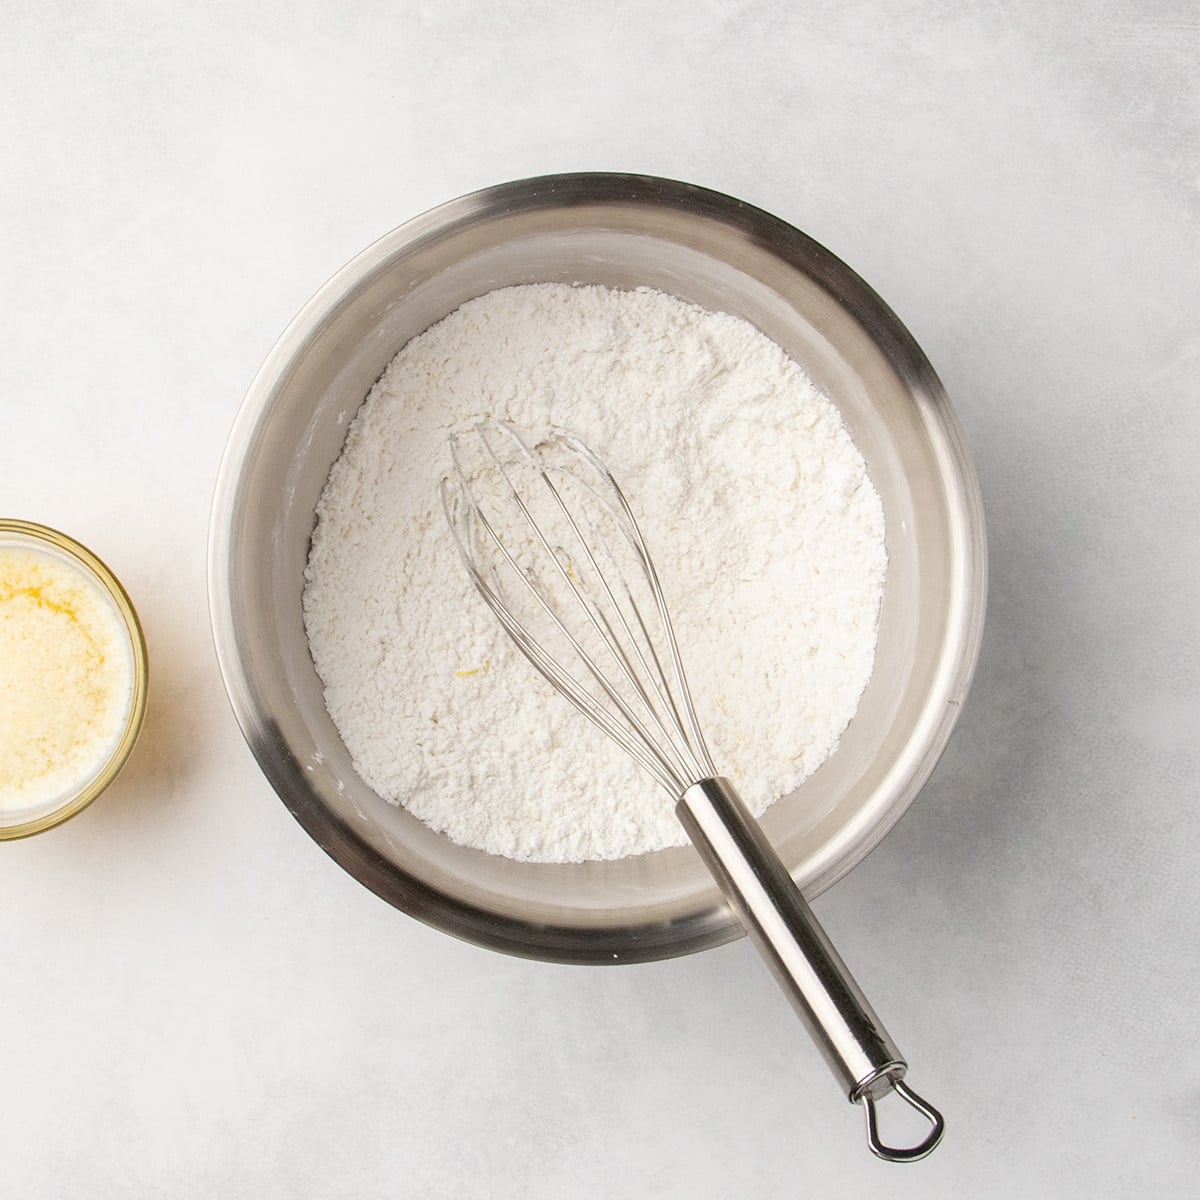
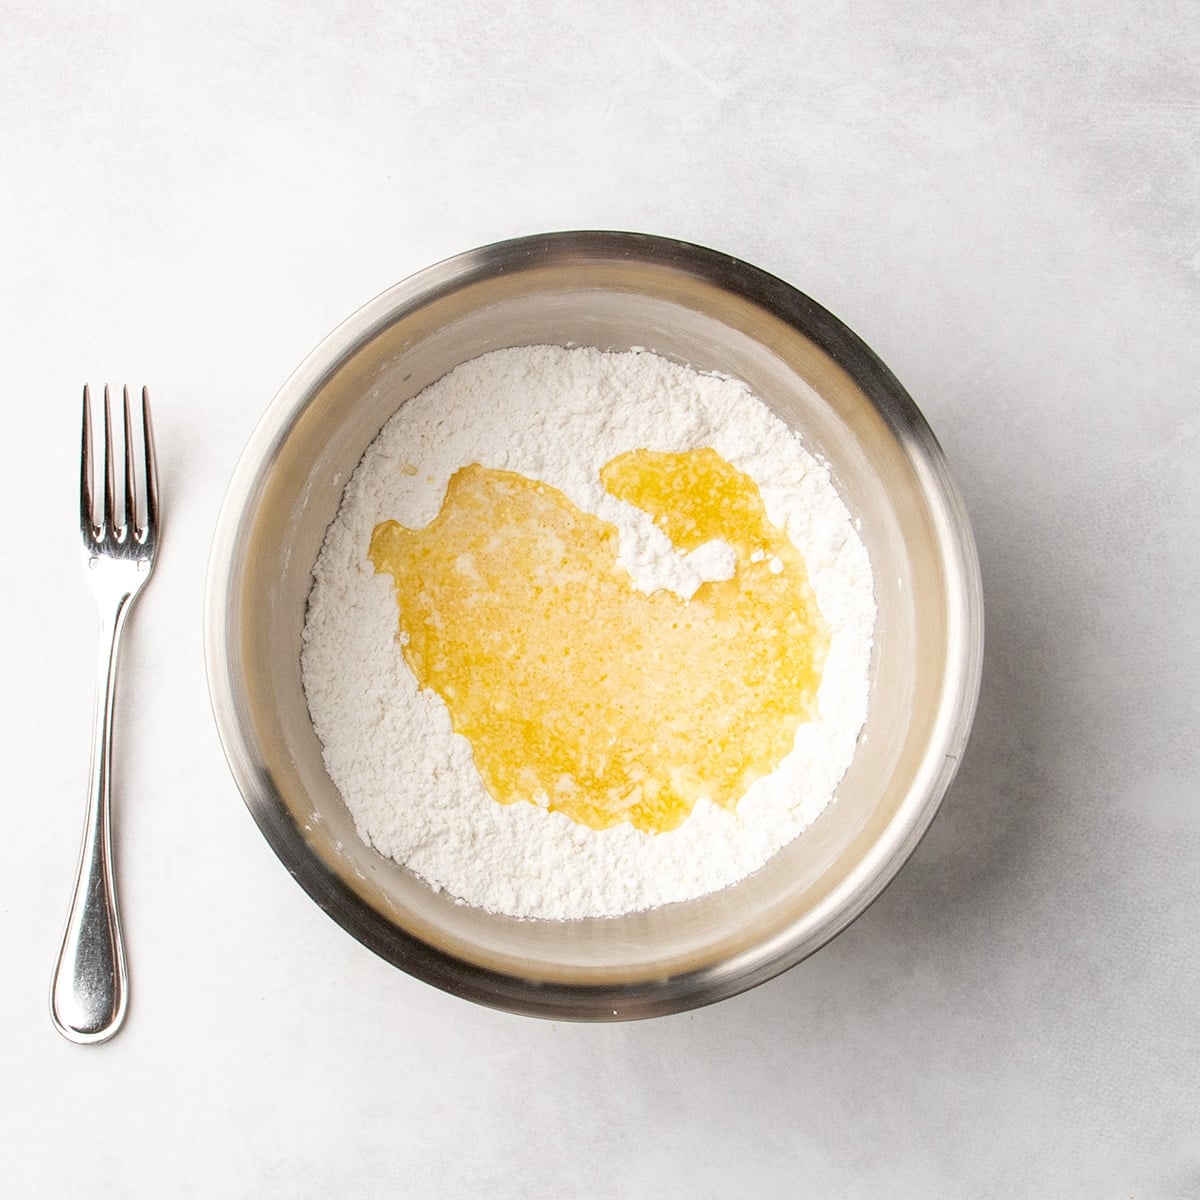
For the crust: whisk dry ingredients
Whisk together all of the dry ingredients to make the shortbread-style cookie crust of these bars, including the flour blend, confectioners' sugar, salt, and lemon zest. The lemon zest will stick to itself, so keep whisking until everything is fully combined, with no clumps.
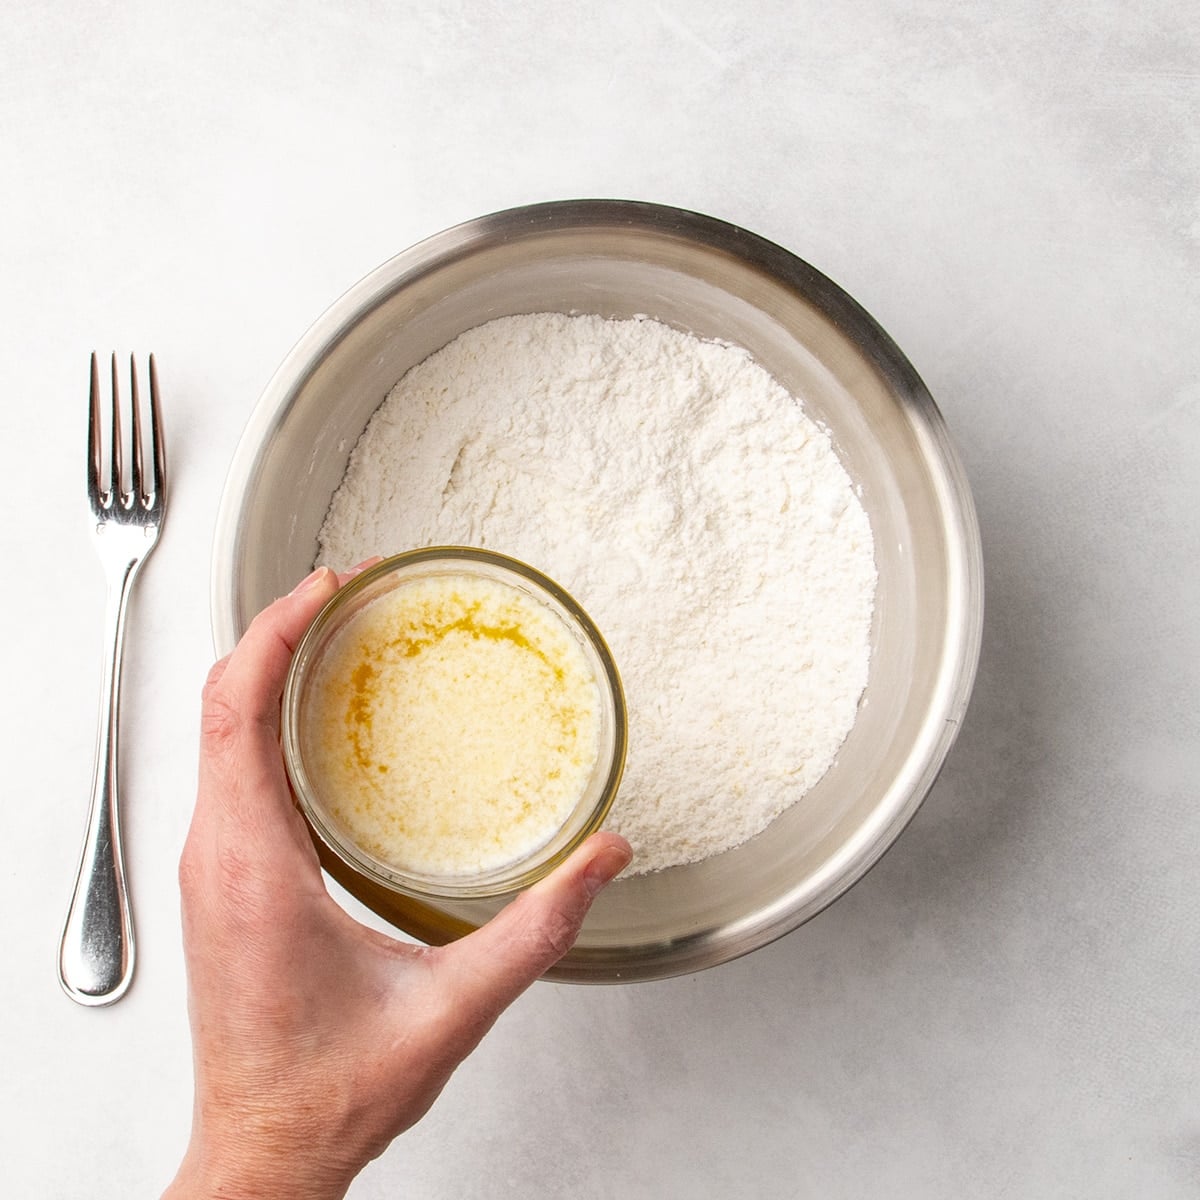
Add melted butter
The only remaining ingredient to bring the crust together is 9 tablespoons of melted unsalted butter. I melt the butter in the microwave on medium power, stopping just before it's fully liquid, as the residual heat will melt the rest and it cools more quickly and doesn't cook, losing moisture.
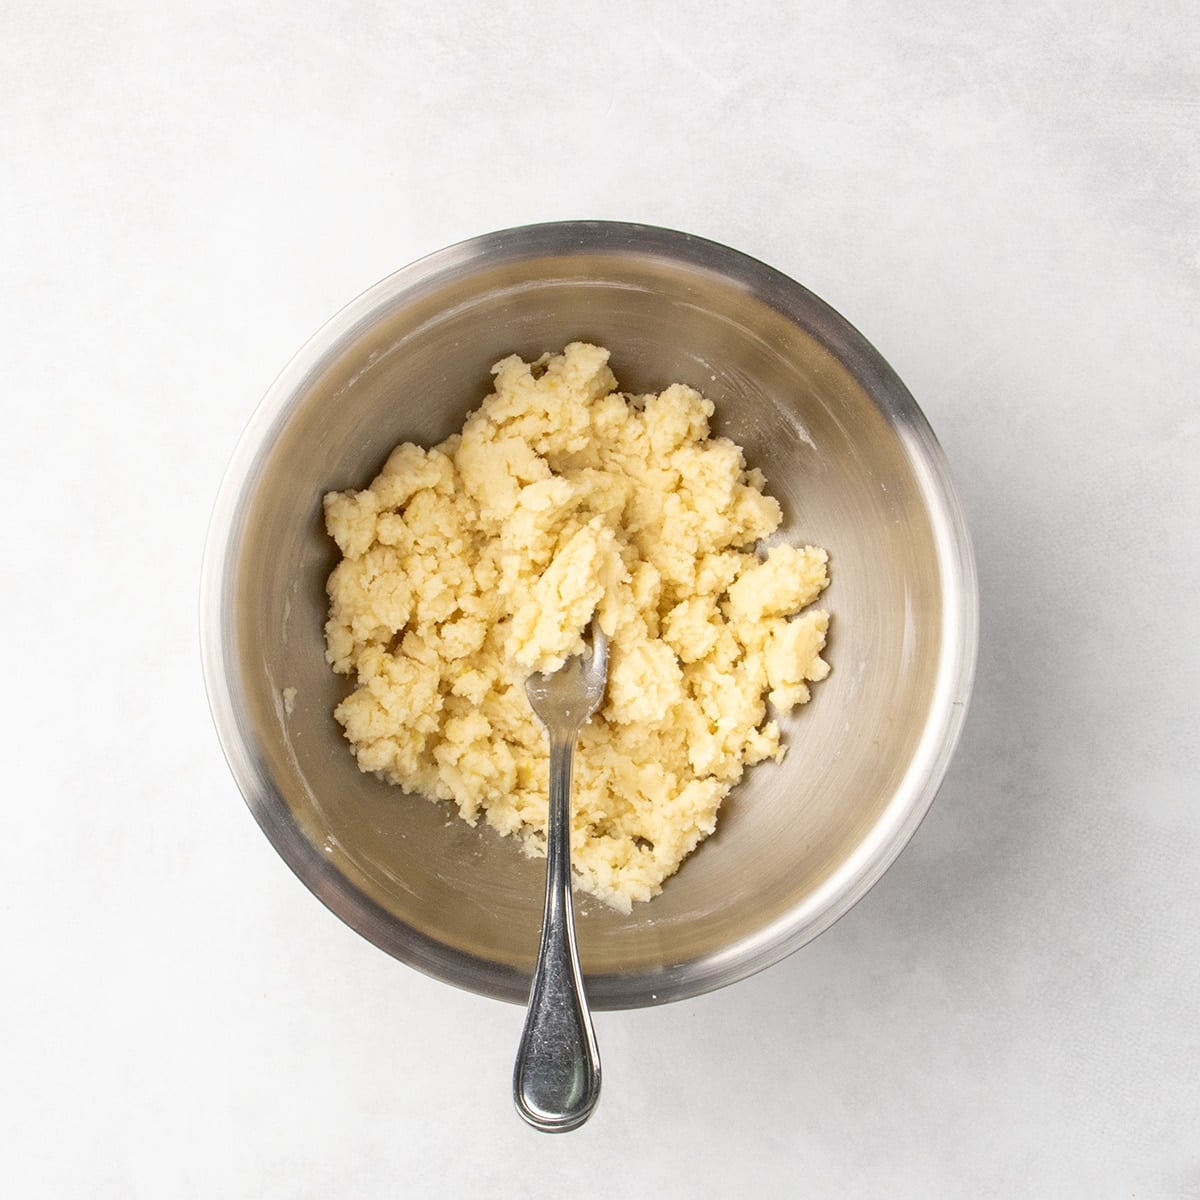
Mix into clumps
I prefer to mix the butter into the dry ingredients with a fork to create large, fully incorporated clumps that are easy to scatter evenly in a fully lined and greased pan. To keep the parchment paper in place during baking, you can clip all 4 sides with small binder clips.
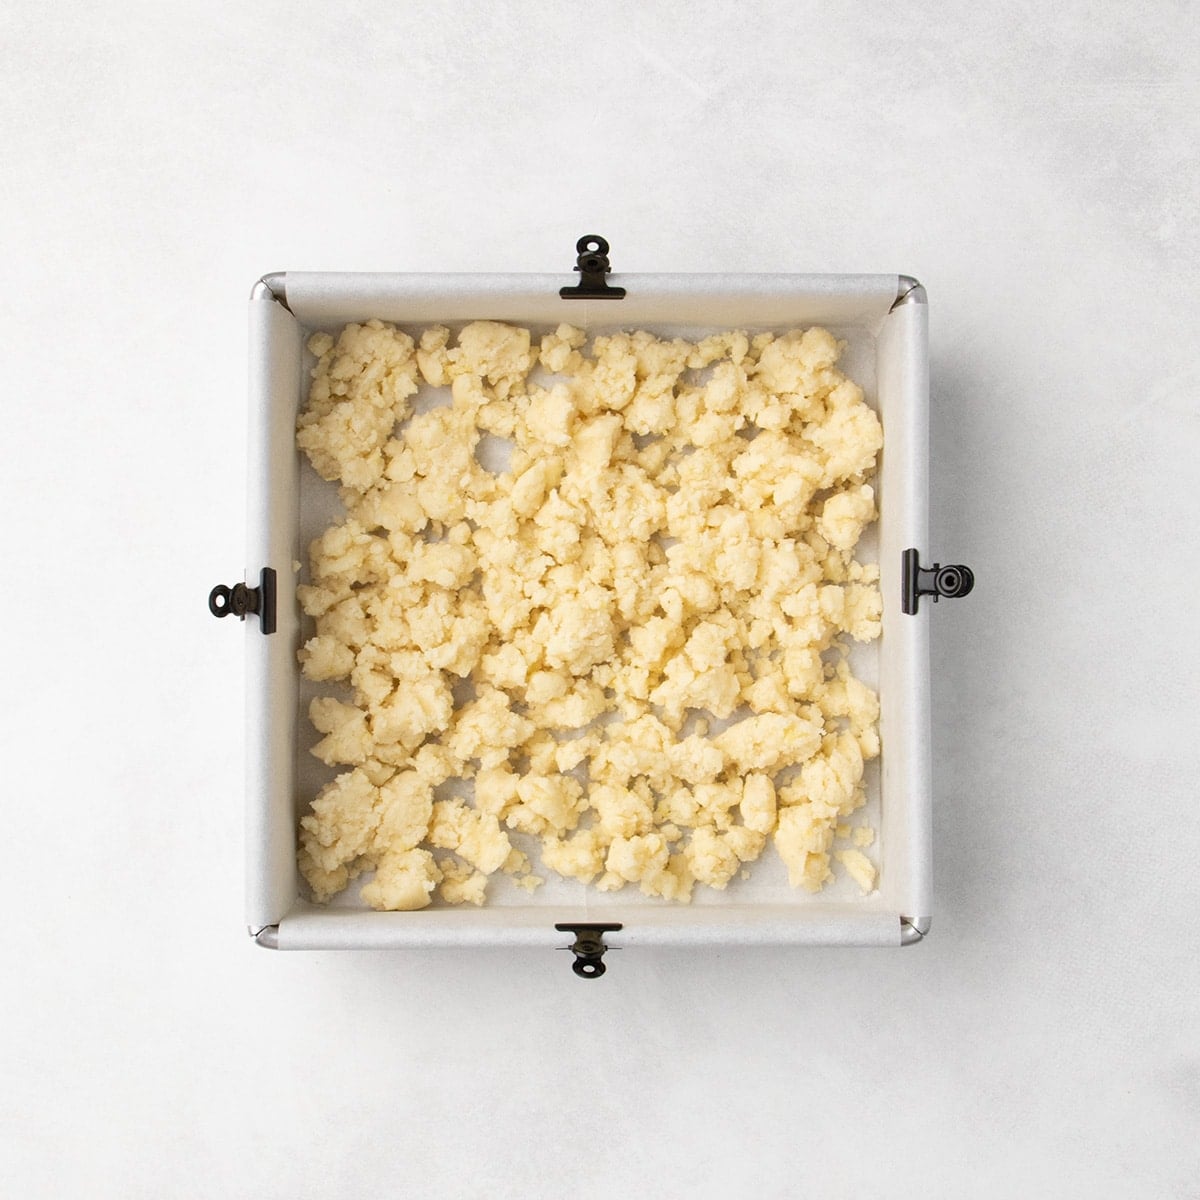
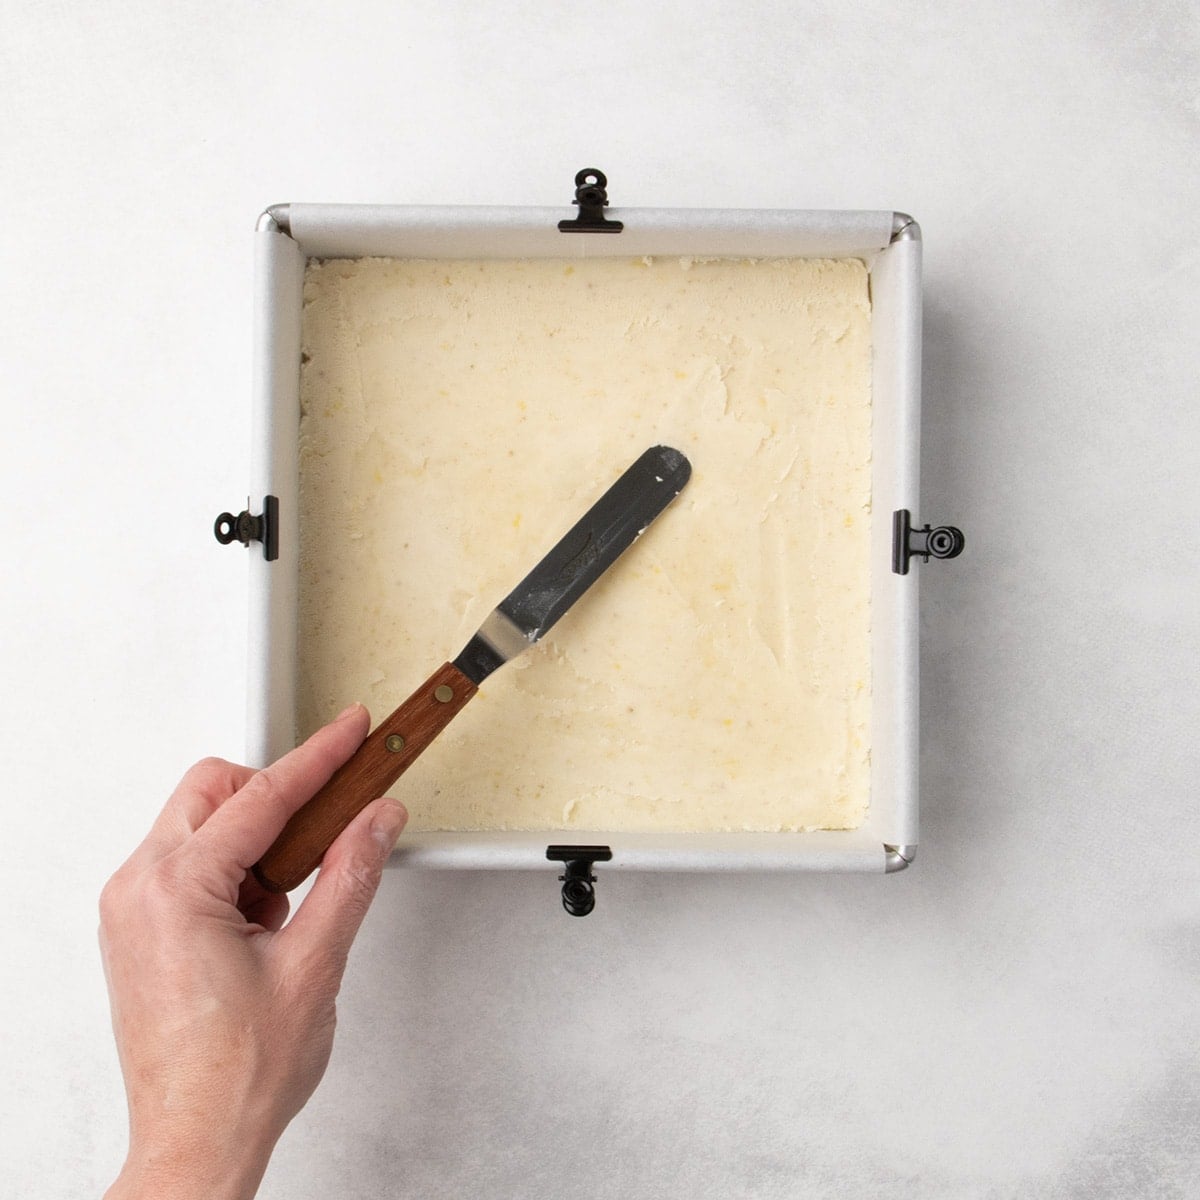
Smooth the crust
Use a small offset spatula or butter knife to press down on the cookie clumps, smoothing them into an even layer on the bottom of the prepared pan. Don't press down too hard or you'll compress the crust and it won't bake as evenly.
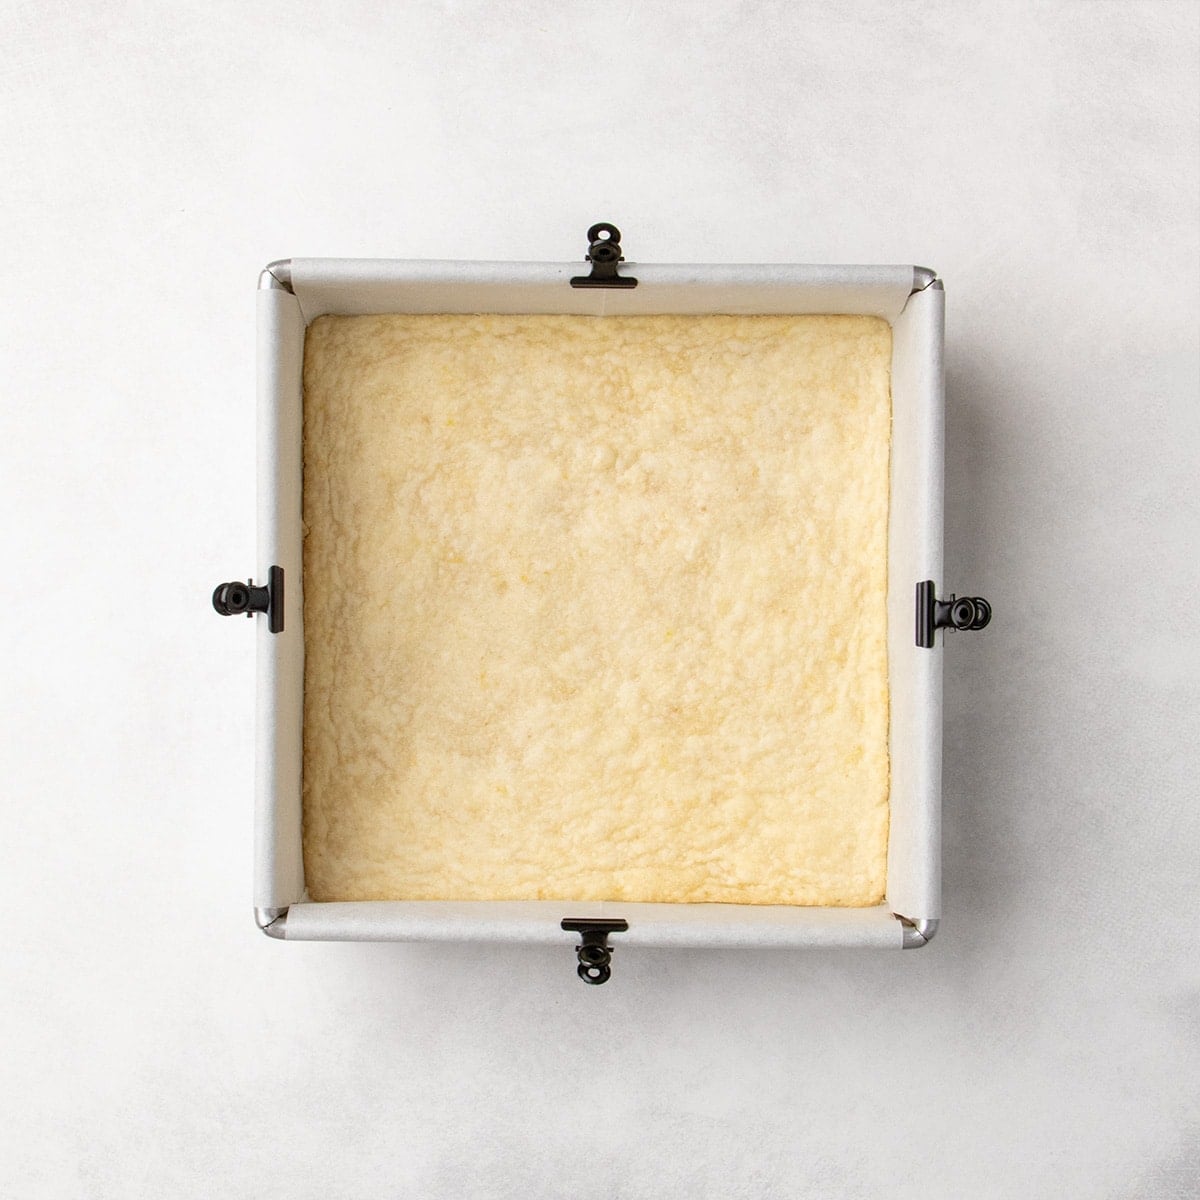
Parbake it
To seal the crust and ensure it doesn't get soggy once you add the liquid filling, partially bake it first at 325°F for about 15 minutes. As it parbakes, the crust will turn shiny as the ingredients melt, then lose its shine and the crust will turn very pale and matte. Let it cool briefly while you make the filling mixture. This also prevents you from having to overbake the filling just to get the crust firm enough to hold it.
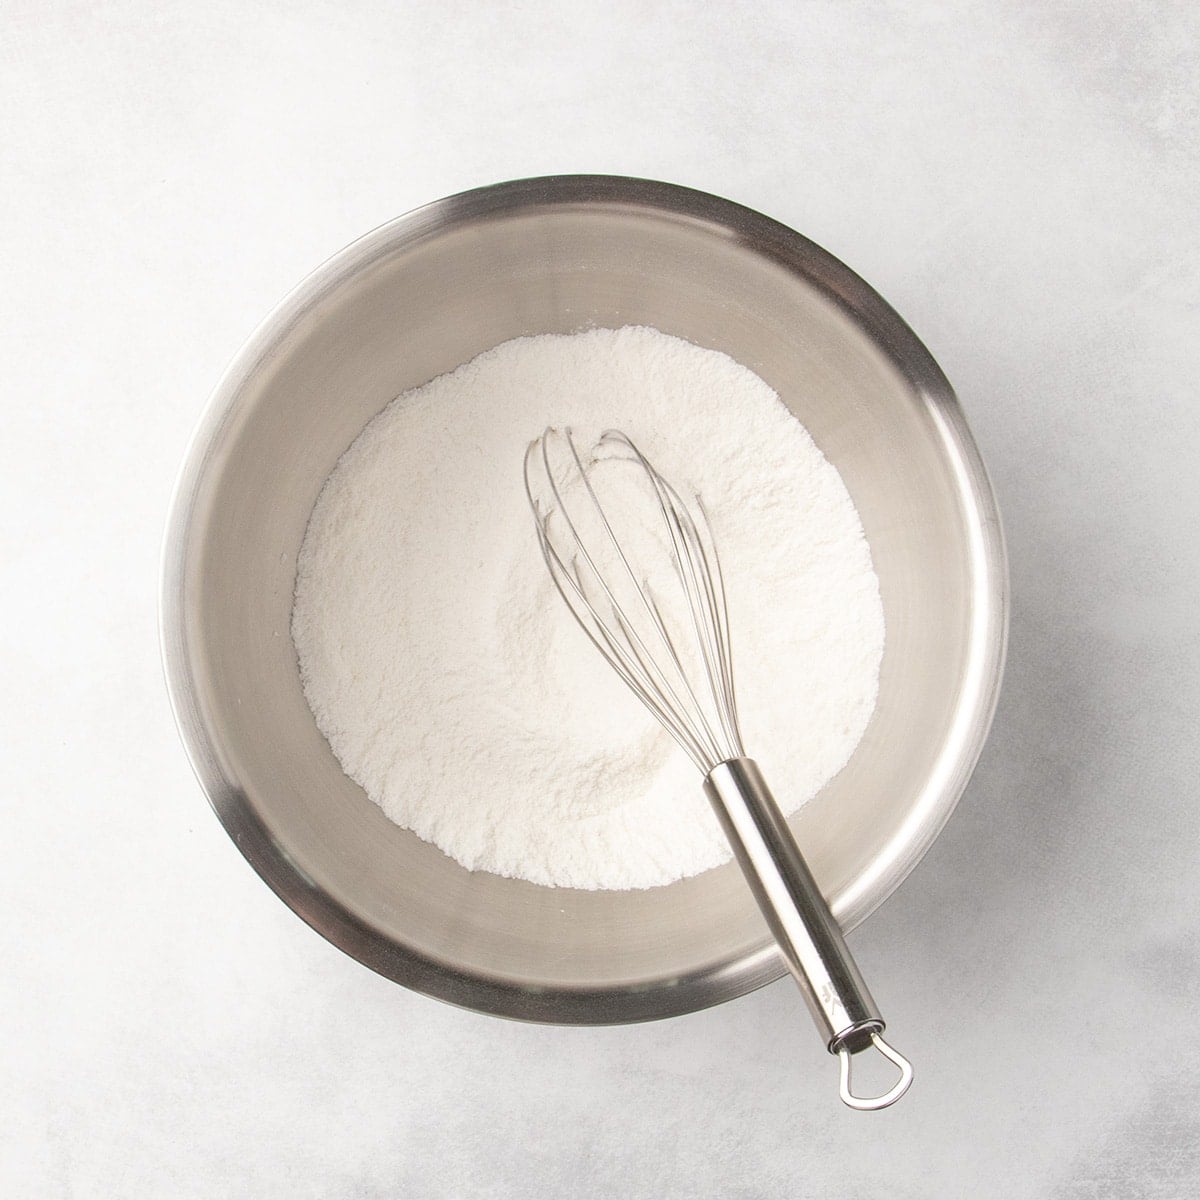
For the filling: whisk dry, then wet ingredients
In a separate mixing bowl, whisk together the remaining 2/3 cup of the flour blend, granulated sugar and a bit of baking powder. Whisk fully to avoid any pockets of leavening which will cause uneven baking and can taste off.
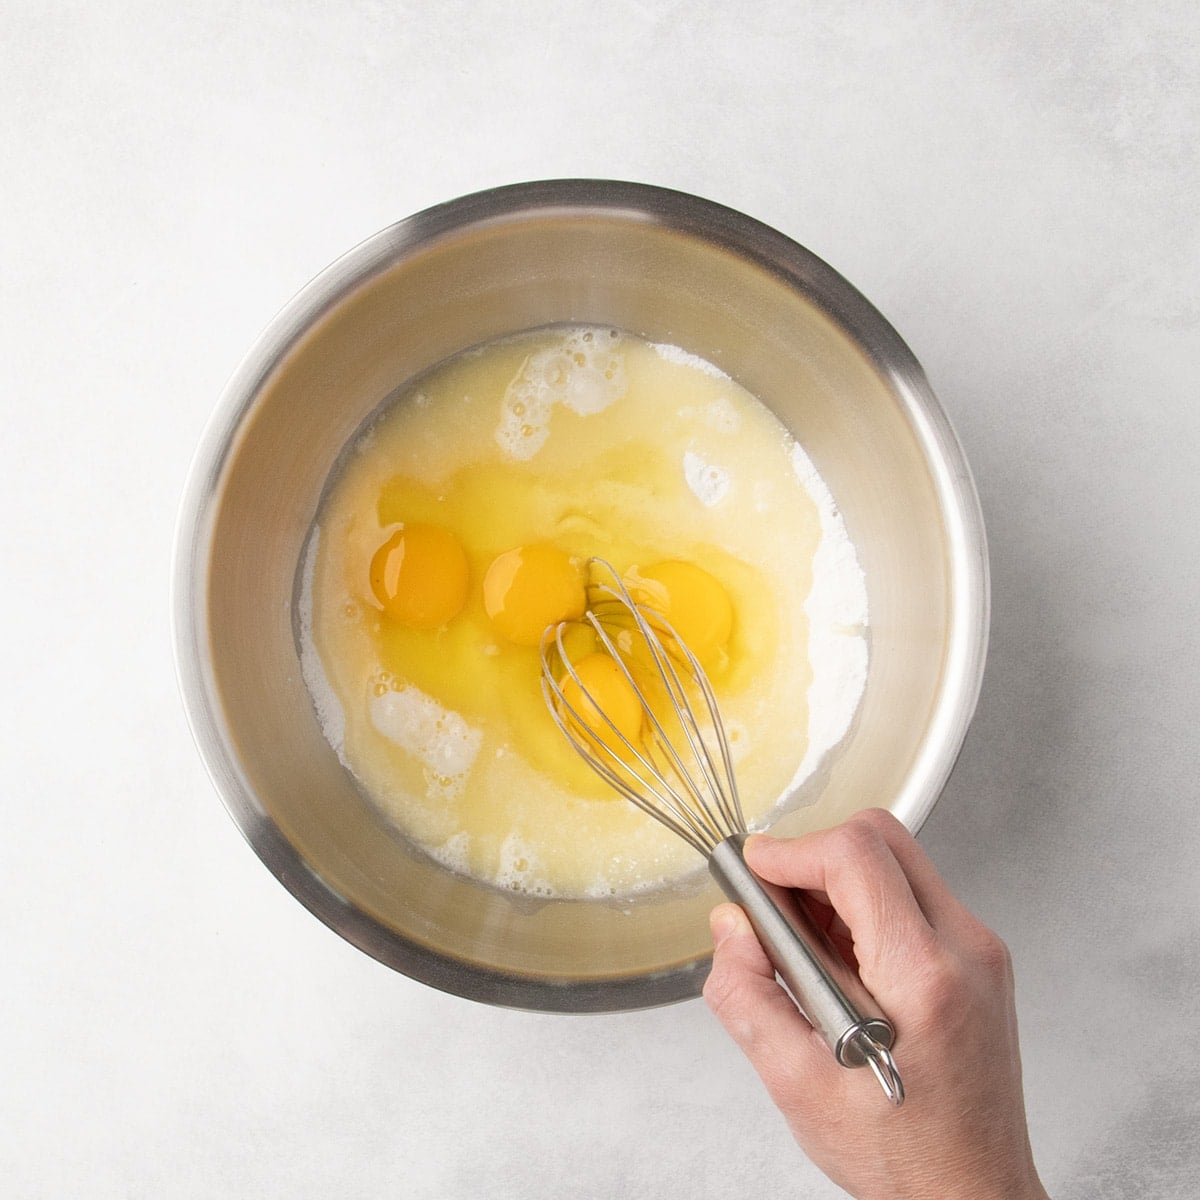
Add 2/3 cup of fresh-squeezed and strained lemon juice and 4 eggs to the mixing bowl, and whisk to combine. Whisk fully to ensure that everything is smooth and fully combined, and the eggs well-beaten, but not so roughly that introduce too many air bubbles.
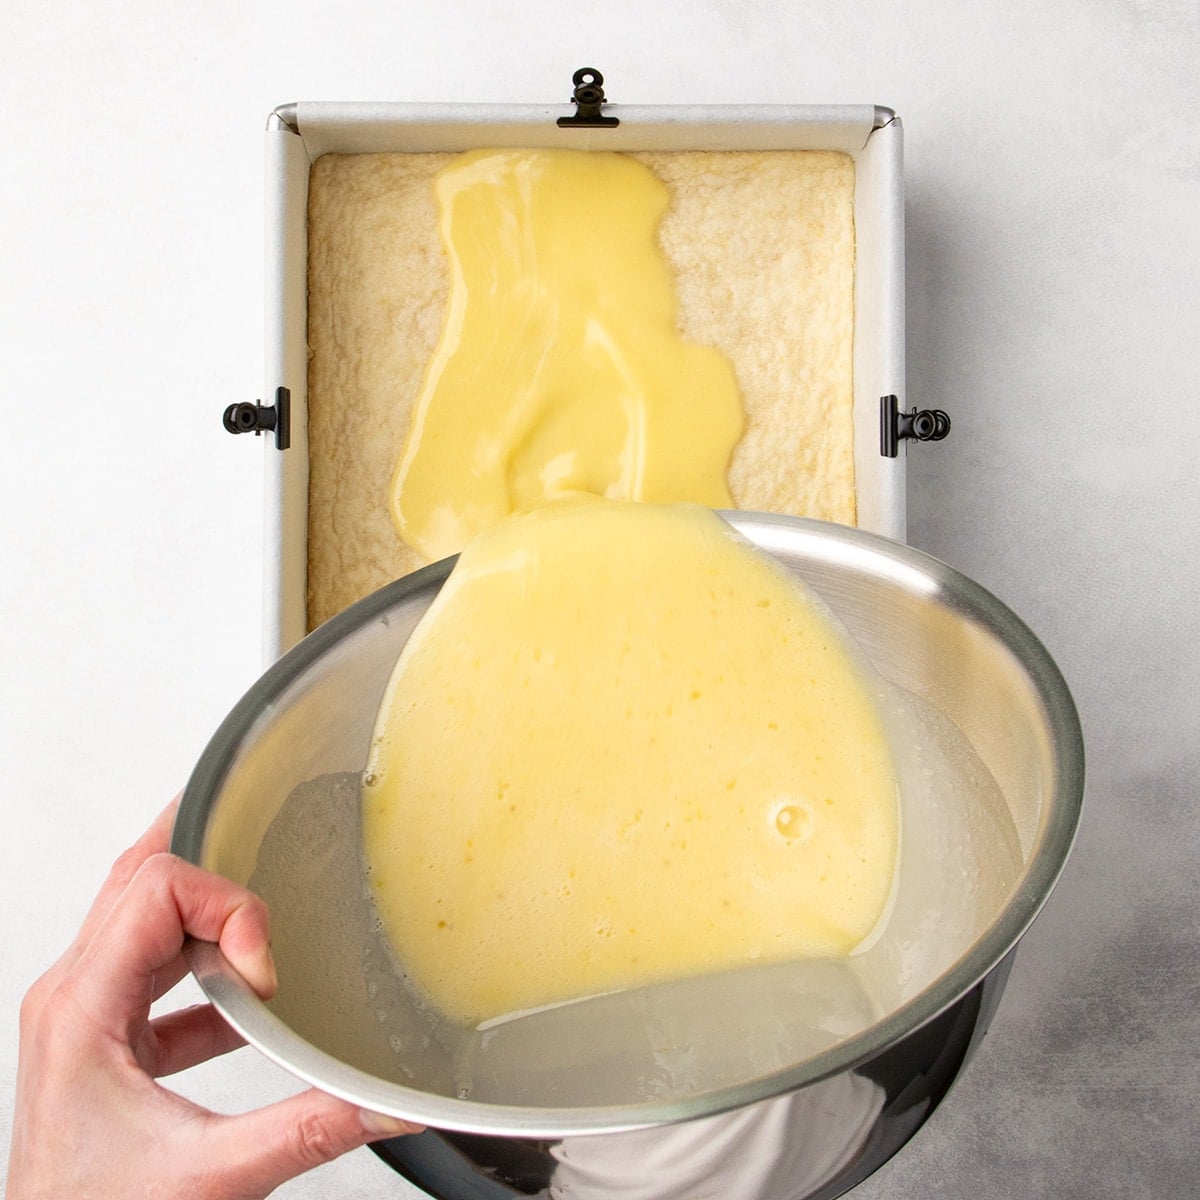
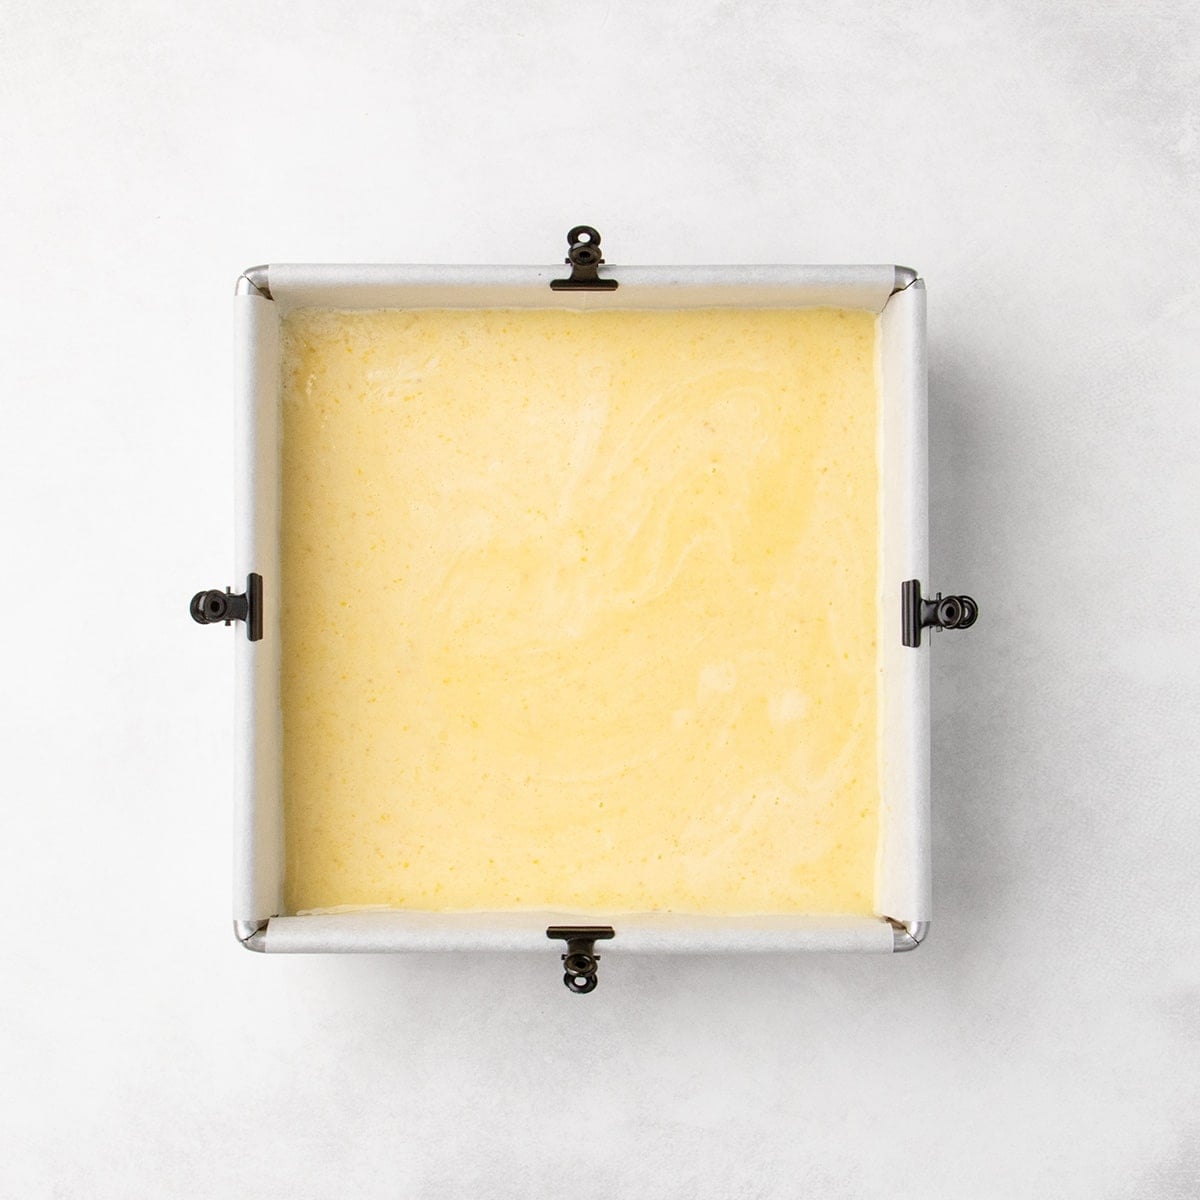
Combine crust and filling
Pour the smooth filling into the partially baked crust. It will be thin enough to smooth itself into an even layer. Tap the bottom of the pan a few times on the counter to help break as many air bubbles as possible for a filling that bakes as smoothly as possible.
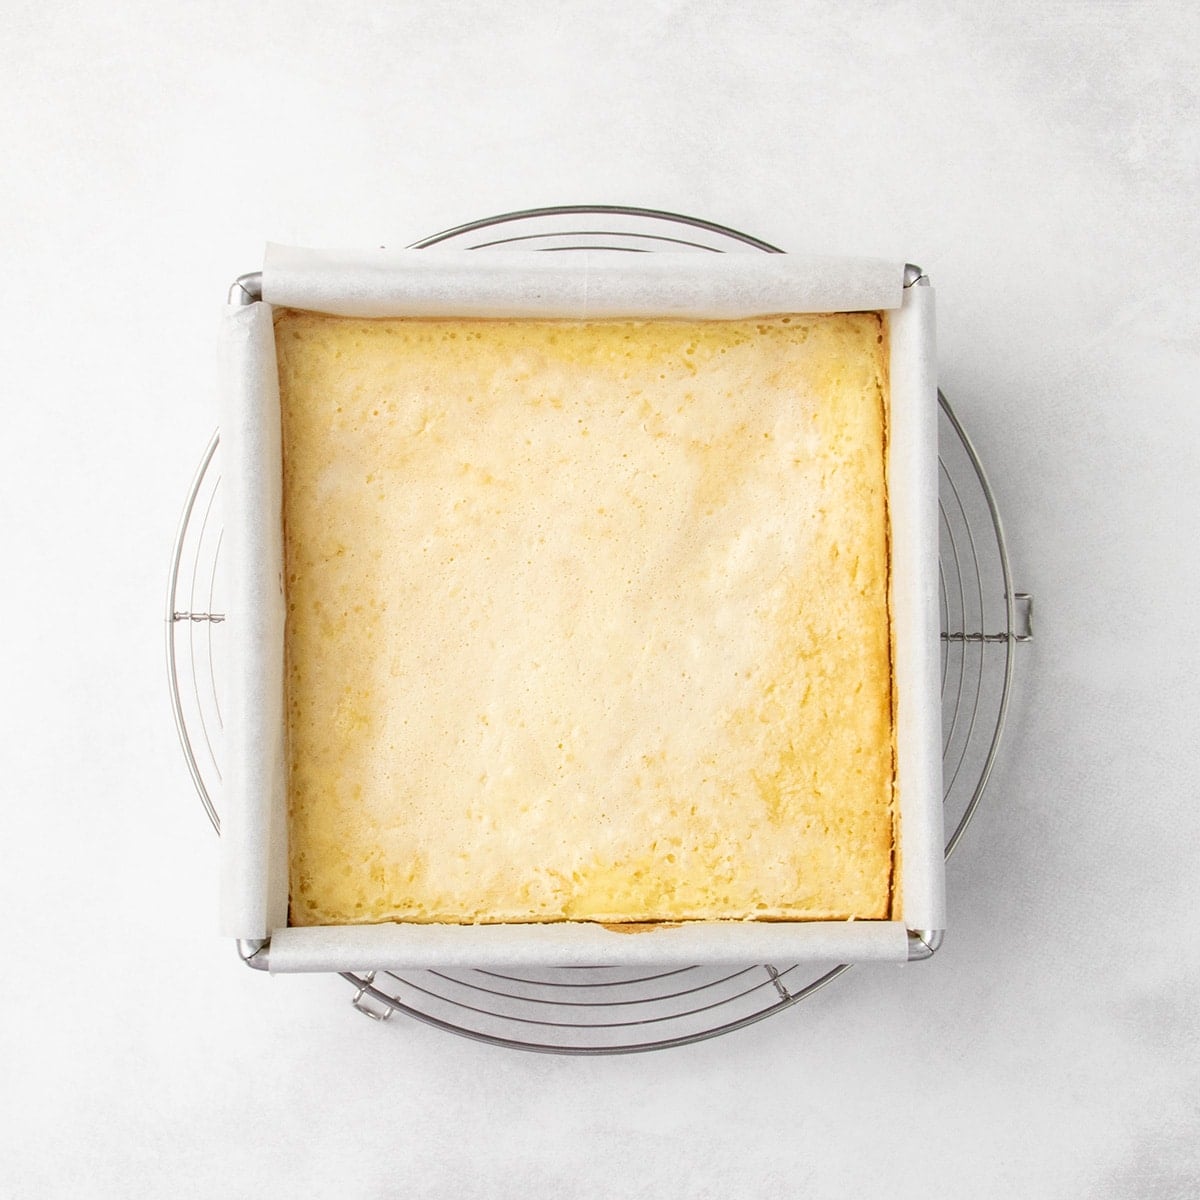
Finish baking the bars
Bake the crust and filling together for about 25 minutes. The filling may seem like it's going to remain liquid for the first 18 to 20 minutes, until it finally appears set. When it's done baking, the filling will have begun to pull away from the sides of the pan, will look uniformly risen across the top, and will only jiggle a bit in the center when you shake the pan gently back and forth, much like gluten free cheesecake.
Chill and slice
Remove the baked bars from the oven, place them on a wire rack, and let them cool in the pan for at least 20 minutes. This allows the pan to release any residual hot air from the oven so you don't trap condensed steam, making the bars soggy. Refrigerate the bars for at least 2 hours to allow the egg custard to set enough to allow you to slice it.
Expert tips
Use fresh lemon juice
Like in our gluten free lemon pie, bottled lemon juice tends to taste bitter, and the heat of baking intensifies flavors. If the flavor isn't great at the start, it will be worse after baking. Conventional lemons are available year-round, and there are even seedless ones that have more juice per lemon. Be sure to strain any pulp and seeds away before you measure the 2/3 cup of juice you need.
Whisk the filling fully, but gently
The filling mixture is quite thin, since it starts out as mostly liquid, then thickens in the oven as the eggs set with some stability added by the added flour. If you whisk the filling too vigorously, you'll create more air bubbles in the mixture which will break through the surface during baking.
If you've created too many bubbles, just let the filling sit for a while to allow the bubbles to break through, tapping the filling flat on the counter to help them burst. You can't eliminate every bubble though, so don't stress.
Allow for setting time
The lemon filling slices cleanly on top of the shortbread crust, but only if you allow it enough time to set in the refrigerator. Chilling allows the egg-based filling to set so that it's firm enough to slice.
Ingredient substitutions
Here are my suggestions for how you might be able to avoid some of the ingredients in these bars, and where you can't:
Dairy free
For the butter in the crust, I recommend using half Spectrum brand nonhydrogenated vegetable shortening and half block-style vegan butter to mimic the flavor profile and moisture content of dairy butter. For vegan butter, I like Melt or Miyoko's brand.
Egg free
There are 4 eggs in this recipe. I don't believe that you can replace all 4 of them with an egg substitute and achieve anything like the texture of these smooth, creamy custardy bars.
Lemon alternatives
In place of freshly squeezed lemon juice, try lime juice or orange juice, along with the corresponding zest.
Storage suggestions
These bars can be stored in a sealed container in the refrigerator for 3 to 5 days. If you've already dusted them with confectioners' sugar, it will likely absorb into the bars so you'll have to dust them again before serving.
For longer storage, freeze the bars uncovered just until firm (about 1 hour), then wrap each bar individually with plastic wrap for up to 3 months. They won't freeze solid, so they'll defrost quickly even in the refrigerator. Before serving, dust with confectioners' sugar.
Gluten Free Lemon Bars Recipe
Ingredients
For the crust
- 1 cup (140 g) gum-free gluten free flour blend, (See Recipe Notes)
- ½ cup (58 g) confectioners’ sugar, plus more for dusting
- ½ teaspoon kosher salt
- 1 tablespoon finely grated lemon zest, from 1 large lemon
- 9 tablespoons (126 g) unsalted butter, melted and cooled
For the filling
- ⅔ cup (93 g) gum-free gluten free flour blend, (See Recipe Notes)
- 1 cup (200 g) granulated sugar
- ¾ teaspoon baking powder
- ⅔ cup (5.33 fluid ounces) freshly squeezed lemon juice, juice of 4 to 5 medium lemons, strained of seeds and pulp
- 4 (200 g out of shell) eggs, at room temperature
Instructions
- Preheat your oven to 325°F. Grease an 8-inch square baking pan, line with criss-crossed pieces of parchment paper that overhang the sides, and grease the parchment paper. Set the pan aside.
Make the crust
- In a medium-sized bowl, combine 1 cup (140 g) of the flour blend, confectioners’ sugar, salt and lemon zest and whisk to combine, breaking up any clumps of lemon zest.
- Add the melted butter and mix with a fork until well-combined. The mixture will be clumpy.
- Scatter the clumps evenly across the bottom of the prepared baking dish. Then use a small offset spatula or knife to press the mixture into a smooth, even layer on the bottom of the dish.
- Place the baking dish in the center of the preheated oven and bake for about 15 minutes or until no longer shiny. When it's done, it will have a matte look to it and be very pale in color.
- Allow the crust to cool briefly while you make the filling.
Make the filling
- In a separate large mixing bowl, place the remaining 2/3 cup (93 g) flour blend, granulated sugar, and baking powder, and whisk to combine.
- Add the lemon juice and the eggs, and whisk until smooth. The mixture will be very thin. Make sure there are no dry patches and the eggs are fully combined.
- Pour the filling into the baked crust.
Bake
- Return the pan to the center of the oven. Bake until just set (25 to 30 minutes).
- The filling is set when it does not jiggle more than a tiny bit in the center when the pan is shaken gently back and forth. It will also likely have begun to pulled away from the sides of the pan and should look uniform across the top.
- Remove the pan from the oven. Place the pan on a wire rack and allow the bars to cool, still in the pan, for about 20 minutes.
Chill the bars
- Cover the top of the pan with plastic wrap, and chill in the refrigerator until firm (at least 2 hours).
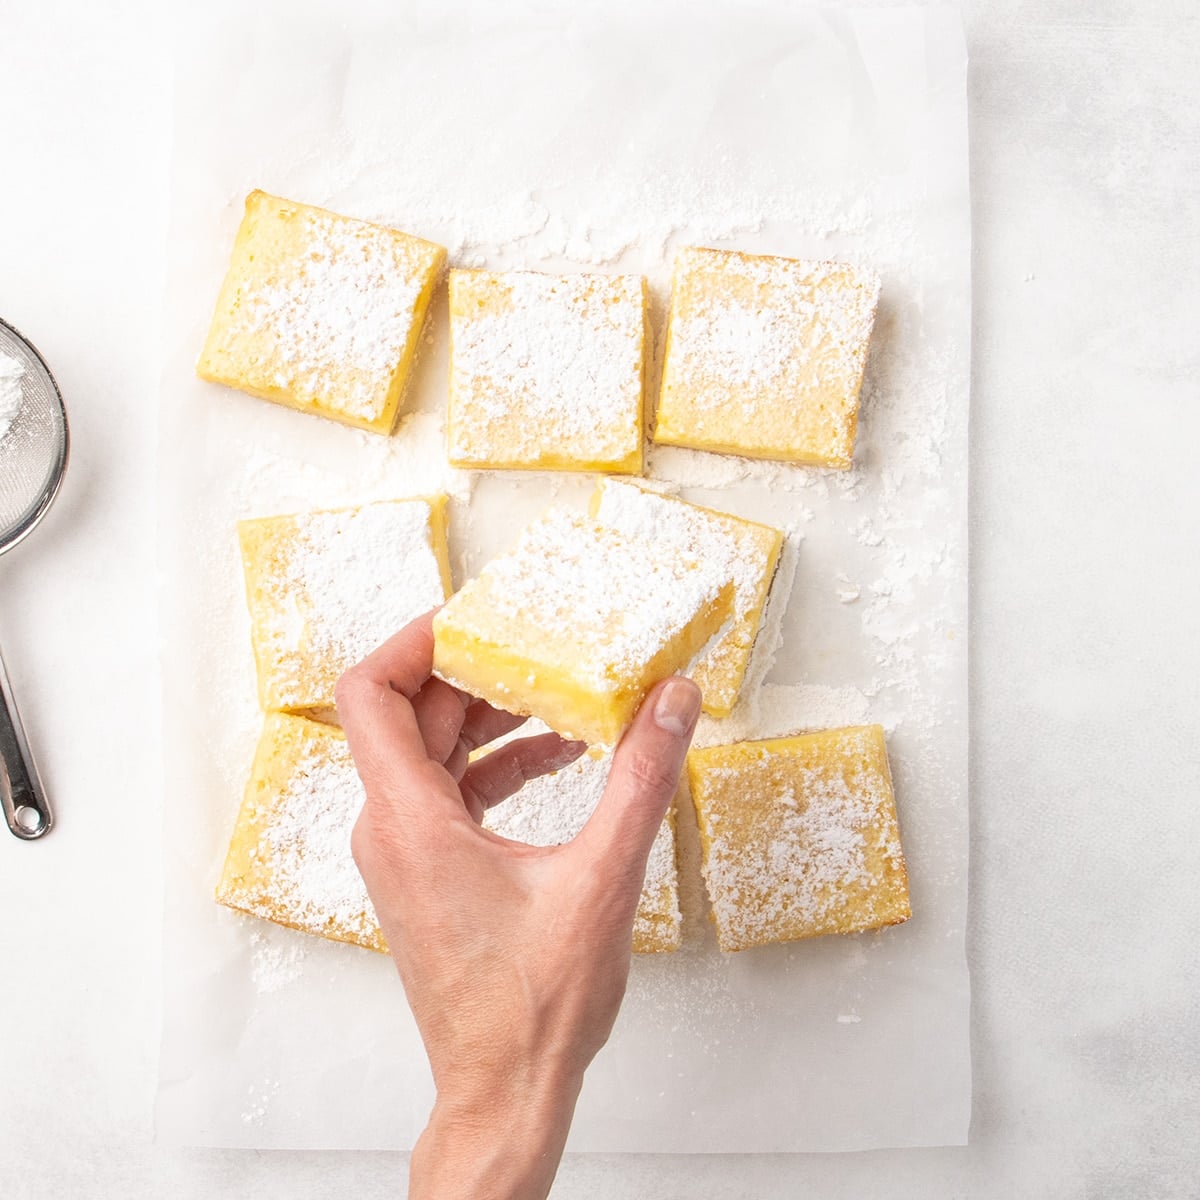
- Remove the bars from the pan by running a butter knife or thin spatula around the perimeter of the baking dish, then lifting the bars out of the pan by the overhung pieces of parchment paper.
- Pull the paper away from the sides of the baked bars to expose the sides. Use a very sharp knife to slice into 9 equal squares. Separate the bars from one another.
- Dust the top of the cut bars with confectioners sugar. Serve chilled.
Video
Notes
Nutrition
Nutrition information is automatically calculated, so should only be used as an approximation.
FAQs
One average-sized fresh lemon, when squeezed, will produce about 3 tablespoons of fresh lemon juice. This recipe requires 2/3 cup of juice (or just over 10 tablespoons), so you'll need about 4 lemons to get enough juice.
I don't recommend using bottled lemon juice, as it tends to be bitter, and baking with it will only intensify its bitterness. There are some bottled lemon juice brands, like Best Select, that people swear taste like fresh-squeezed. If you have a brand of bottled lemon juice that has juice you love the taste of, then use it!
Yes, you can make these lemon squares with a graham cracker crust if you'd like. Just follow my gluten free graham cracker crust recipe, which uses my homemade graham crackers.

More lemon dessert recipes
Here are a few more of my favorite gluten free lemon dessert recipes.
- Gluten Free Lemon Cookies – Buttery-rich and light, these delightful lemon cookies melt in your mouth, and call for only 15 minutes of prep time.
- Gluten Free Lemon Brownies – The chewy consistency of a brownie with the bright flavor of citrus.
- Gluten Free Lemon Cake – If you've ever had the lemon cake at Olive Garden, try this tender, lemon-rich copycat recipe.


This is one of my favorite recipes of yours! Turns out delicious every time! My granddaughter loves them, and she doesn’t usually eat gluten-free. Thank you so much!
You’re so welcome, Aimée! Thank you for sharing that about your granddaughter. That’s the best!
Hi Nicole, do you have suggestions on how to transport a large amount of these bars? I’m thinking of stacking them in a container with layers of wax paper in between. Do you think they’ll hold up and not stick to each other too much, or do you have other recommendations for what to do? Thanks!
Custard bars are notoriously difficult to transport, K. You most definitely cannot stack them on top of one another for any length of time and have them remain completely undamaged. I would recommend baking and chilling them in the pan, without slicing them into bars, and transport them as unsliced. When you get where you’re going, chill them again, then slice and serve. If you’d like to transport more than a single batch, I’d recommend baking them each separately and transporting each batch chilled and unsliced.
this lemon bars are the bomb. I’ve made them several times for my daughter She can’t tolerate gluten and lemon bars are her favorite. I followed the recipe and got the different flours and brands recommended. Its been the best and I only use the blend for the lemons bars. recently we had a baby shower and I brought the lemon bars since lots of people are gluten free. I was or should I say the lemon bars were the star of the shower.
That’s so great to hear, Aminta! Thank you so much for sharing your experience. It’s so kind of you to make the bars to bring to the baby shower. I hope you didn’t outshine the mom-to-be! :)
These bars are excellent !! – Served a small slice of both lemon squares & Lime squares on the same plate with the dusting of powdered sugar looked very nice. The only small change I made was to add a extra yoke for stability of the filling. The first time making them filling was too soft, with the attempt using a additional egg it set up better.
I also found that it had to cook in the oven a additional 10 minutes, my guess is the oven temp was not correct on my stove. As long as I know that then I can adjust my bake times.
This recipe was simply okay. I have an accurate kitchen with scale, temperatures, sizes of pans, and followed the recipe to a T. This author blames poor reviews for the mistakes of people and not for potentially needing to alter instructions for clarity and will likely do the same with mine, but I’m well versed in cooking, baking, and what good food would taste like. They weren’t bad. They were simply okay. If you’re looking for “the best” as advertised, find a different recipe.
I hope you find what you’re looking for.
Thank you for the recipe. It didn’t work out for me. The curd was not soft and felt too floury. Perhaps I over cooked it. I cooked it for 15 minutes but made it in a larger pan. Perhaps, it dried more than what it should have. Perhaps it needed more lemon or less flour. No sure what happened but the curd is not good.
You can’t make this recipe, as is, in a larger pan. It will almost always overcook as significantly more of the mixture is exposed to the hot air of the oven. If you make the recipe as written, rather than deviating from it as you describe, it works.
This was a real miss for me. I followed the instructions, but the filling was super thin and soupy. It took ages to set up and was not fantastic when it did. I’ve had other great recipes from this site so I will try more from here, but this one was a miss.
Since you aren’t asking for help troubleshooting to figure out where you went wrong, I won’t provide any, which is a shame since the recipe will work when made as written.
Thank you for these very delicious bars! I found my crust did not firm up… it was still quite crumbly and buttery. Any ideas on what could have caused this so I have try better next time! Thanks so much!
Hi, Rachel, I’m afraid I really don’t know, but I’d always look first to any ingredient substitutions, and here the flour blend is particularly important as is measuring everything by weight. If you used the wrong flour blend and/or measured by volume, that would unbalance such a simple recipe. In addition, did you bake the crust enough before adding the custard and returning it to the oven? It may have simply been underbaked. I’d also recommend using an oven thermometer, as most ovens are out of calibration by as much as 20°F.
Can you freeze these lemon bars?
Please see the text of the post under the heading “Can you freeze lemon bars?”
Seems tasty, but really wish the ingredient mentioned that the flour was divided. Because of the scrolling back and forth I ended up putting all the flour into the base, then had to do some complicated math to try to salvage it. Would you consider mentioning that the flour is divided in the ingredient list or listing the ingredients for the base and the custard separately?
Mine have also taken substantially longer to cook- we were 10 min over for the crusts and we’re at 15 min over for the custard currently. (We separated into two pans because of the increased volumes from the error).
I understand your concern and that sounds frustrating that you measured improperly and the recipe didn’t turn out precisely for that reason, but the instructions are broken out by crust and custard, and state in the first instance to use 1 cup (140 g) of the flour.