This post may contain affiliate links. Please read our disclosure policy.
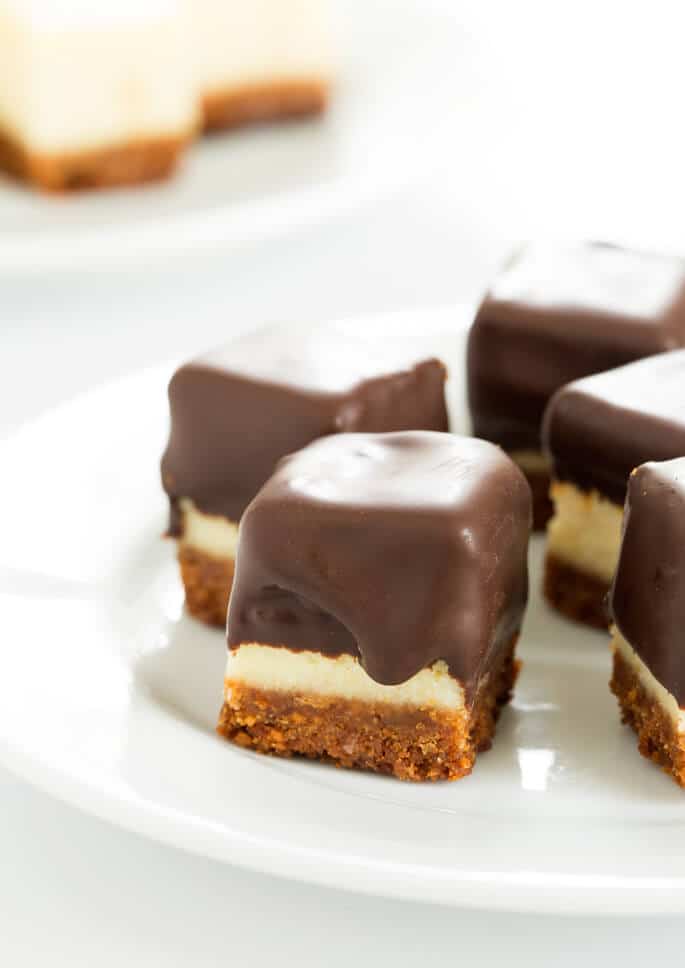
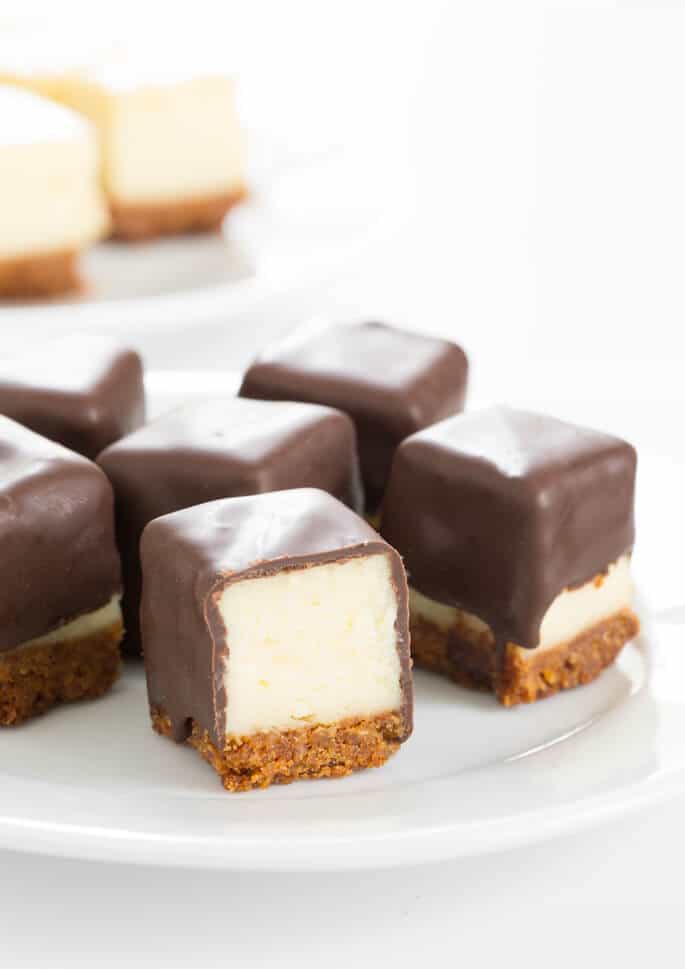
Cheesecake bites are nothing more than little chocolate-covered morsels of creamy cheesecake. No special equipment and no water bath needed, since chocolate covers any cracks. SO good!
What makes these mini cheesecake bites recipe special?
These cheesecake bites aren't made in miniature muffin tins, since that seems harder—and makes larger bites that are harder to dip in chocolate. Make a cheesecake in a square pan with the classic, creamy and perfect 8 ounces cream cheese-1/3 cup sugar-1 egg mixture, but add some cornstarch for stability. Then slice.
Most often, I go with a classic graham cracker cookie crust, but the combination of chocolate cookie made into a cookie crust and cheesecake is undeniably delicious. You can even go with no crust at all. Just bake the cake a wee bit longer to ensure that the cheesecake is stable enough to slice into bites.
Since these cheesecake bites are covered in chocolate, there is absolutely no need to stress about cracks in the cheesecake (see what I did there? stress? cracks?). The chocolate coating will cover a multitude of ills.
If you ever want to impress with a lovely edible hostess gift, try something in miniature. There's just something about taking an otherwise ordinary, classic cheesecake, slicing it into 1-inch squares, and dipping them in chocolate. I promise you these will be the first treat to go at a party!
What are cheesecake bites made of? Ingredient notes
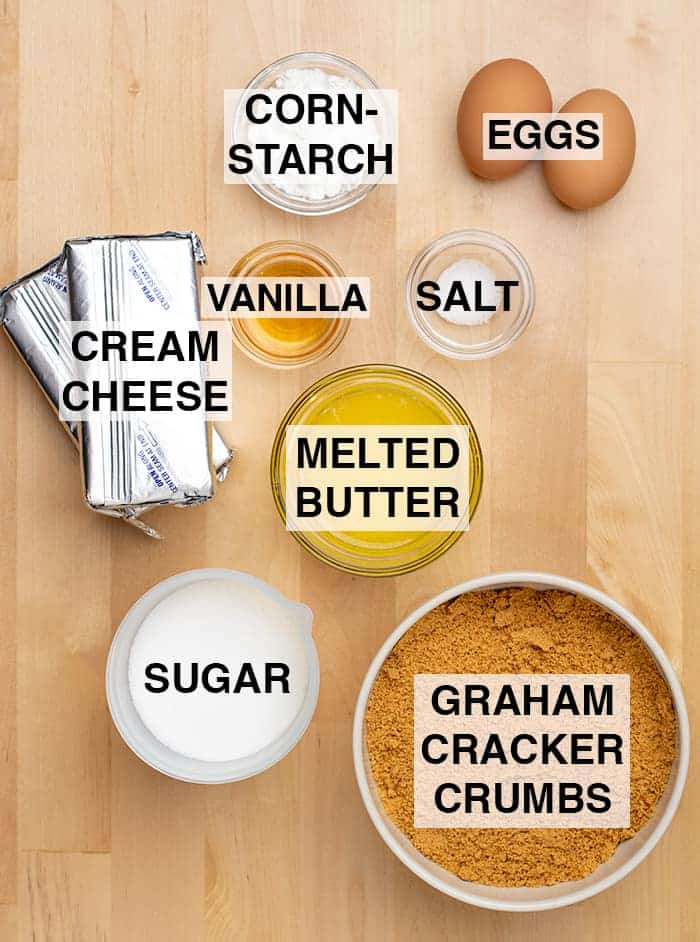
Cheesecake bites are made with only a few ingredients: cream cheese, sugar, cornstarch, salt, and vanilla for the filling, and melted butter and cookie crumbs for the base. If you want them topped in chocolate, you'll also need chopped chocolate and some coconut oil.
- Cream cheese – Make sure your cream cheese comes in blocks, not a tub where more air will have been added to it already, and that it's fully at room temperature, or it will clump and not combine properly.
- Granulated sugar – Sugar is a sweetener and also a tenderizer here. You can reduce the sugar by about 1/4 cup (50 g) without affecting taste or texture that much.
- Cornstarch – The starch helps to stabilize the cheesecake, which is especially important here since we're baking it into an 8-inch square and then slicing it into mini cheesecakes.
- Salt – Salt helps bring out the other flavors and balances the sweetness.
- Vanilla extract – A touch of vanilla adds some depth of flavor.
- Cookie crumbs – The cookie crust that's classic for cheesecake is made with your favorite type of crunchy cookies or sweet crackers, like graham crackers, that are crumbled into fine crumbs in a blender or food processor.
- Melted butter – We add melted butter to our finely ground cookie crumbs to help hold them together.
- Chopped chocolate – I like to use bittersweet chocolate here, but you can use whatever chocolate you like best. Since we're using it for dipping and want it to set, if you're careful in melting it so it doesn't seize, you can even use chocolate chips.
- Virgin coconut oil – Adding some coconut oil to the melted chocolate helps make dipping easier, and helps the chocolate coating set properly after dipping.
How to make cheesecake bites
Rather than making mini cheesecake bites in miniature muffin tins, I prefer to make a single square cheesecake in an 8-inch square pan and slice it into minis afterward. The preparation is much faster, and I prefer the smaller bites, too.
Make the cookie crust for your cheesecake bites
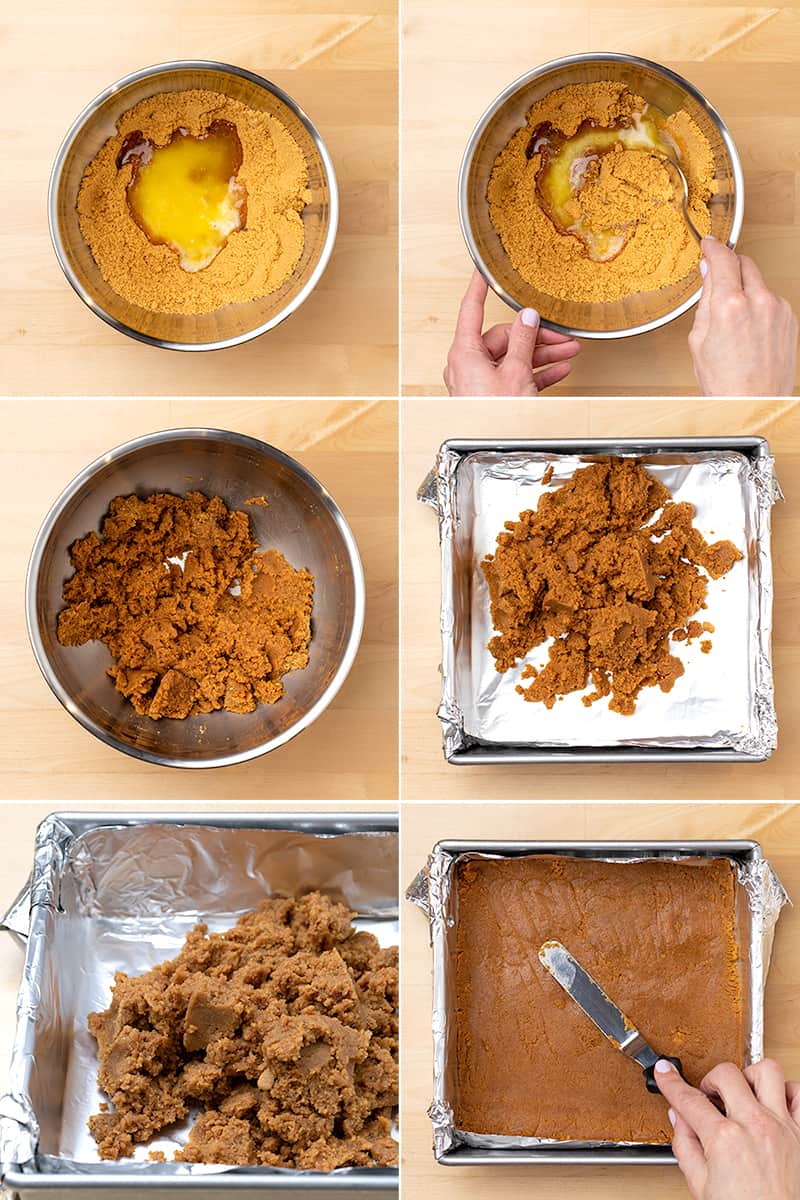
Almost any sort of crunchy cookie can be ground into relatively fine crumbs that are just right for a graham cracker crust. Crunchy cookies are best because they have less moisture, which leads to clumping.
I take my gluten free graham crackers and ground them into fine crumbs in my blender, in batches since I don't have a big blender. Then, I add melted butter to the finely ground crumbs, which creates moist, buttery cookie crumbles.
Finally, press the cookie butter mixture into the bottom of a prepared square baking pan and set the pan aside. Be sure your pan is lined with nonstick aluminum foil or parchment paper to help get the cheesecake out of the pan using the liner as handles.
Make the cheesecake filling
I have a basic formula for making a classic, never-fail, classic cheesecake, and it's always served me well. For this recipe, I essentially doubled it:
- 8 ounces block cream cheese, at room temperature
- 1/3 to 1/2 cup (66 to 100 g) granulated sugar
- 1/8 teaspoon kosher salt
- 1 large egg, at room temperature
- 1/2 teaspoon pure vanilla extract
In this recipe, since the cake is sliced into 1-inch square bites, it must be quite firm without being overbaked. So I depart a bit from my usual formula and add 2 tablespoons of cornstarch to help stabilize the cake. It doesn't affect the flavor at all, just the texture a bit for the better when making mini bites.
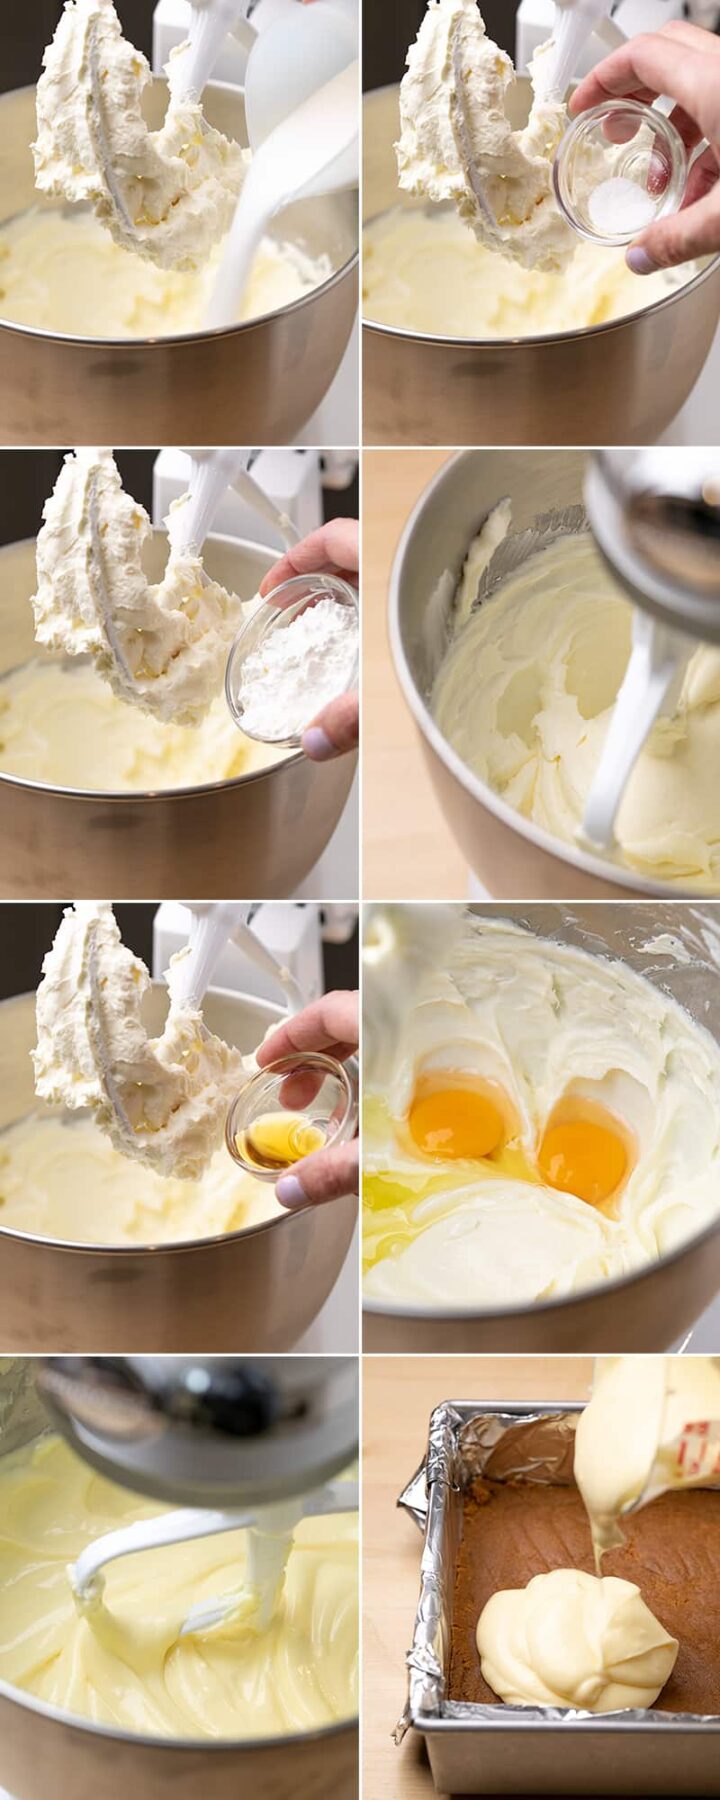
The method for making the cheesecake filling is quite simple: In a stand mixer fitted with the paddle attachment, beat the cream cheese, sugar, cornstarch, and salt until light and fluffy. Then, add the egg and beat until smooth. If you over beat the egg, your cheesecake is much more likely to crack.
How to make no bake cheesecake bites
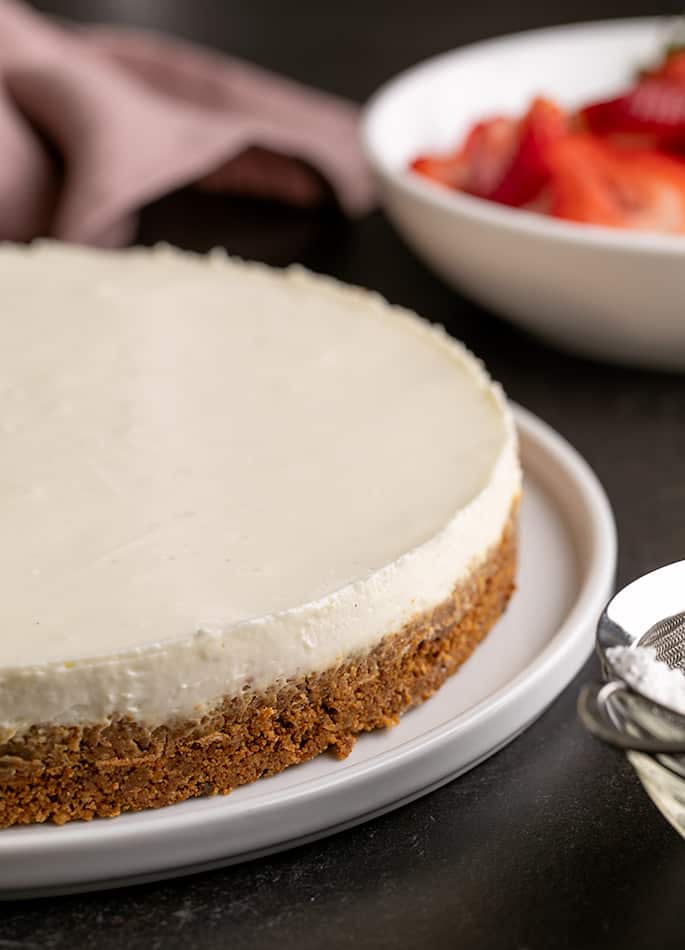
If you don't have time, or you can't have the eggs that are essential to make cheesecake, you can make cheesecake bites with a base recipe of no bake cheesecake with gelatin. That cheesecake sets in the refrigerator in 2 hours or less, and slices so clean. You could even make it crustless, and then cover the bites completely in chocolate.

How to make chocolate-dipped cheesecake bites
These bites are creamy, sweet and delicious on their own. They're amazing party food just as they are, without any chocolate. But if you're game, you can really level them up with a simple chocolate coating.
Melt the chopped chocolate either in a double boiler, or in the microwave at low power in quick bursts, stirring in between. Add the coconut oil right after, and mix until it melts. Then, let the mixture sit for a few minutes to allow it to thicken a bit so it holds on the bites.
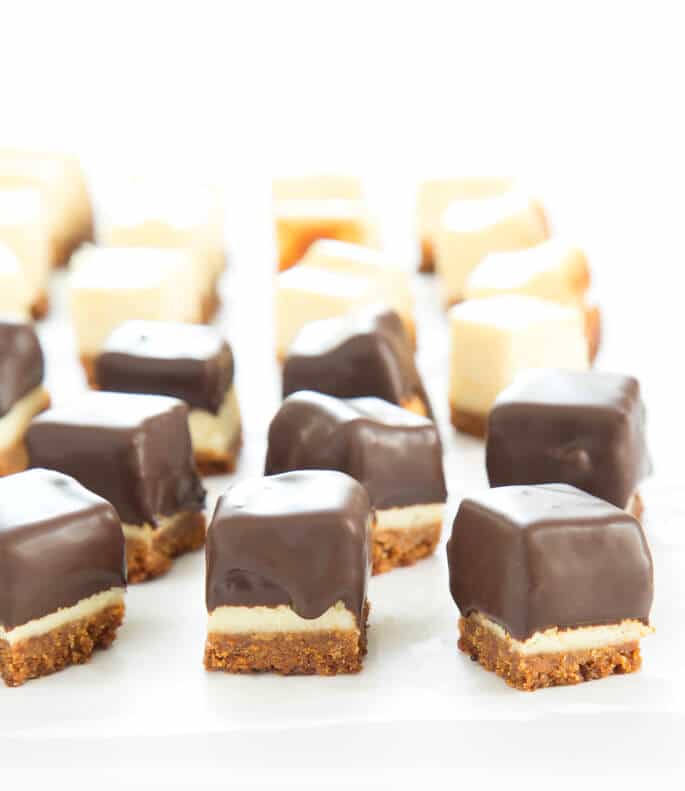
Unlike dipping something like gluten free “thin mints”, you don't have to immerse these cheesecake bites fully in melted chocolate. Instead, you'll simply hold the crust with your thumb and forefinger, invert the bite, and immerse just the cheesecake portion in melted chocolate.
Place the bites right side up on a piece of parchment, and let them set. That's all!
Storing mini cheesecake bites
These mini cheesecakes, like all cheesecake, should be refrigerated in an airtight container, so it doesn't spoil. Cheesecake also has the best texture when it's served still chilled.
Can you freeze them?
Yes, you can freeze mini cheesecake bites in a tightly sealed container, and they should last about a month. Whether refrigerated or frozen, if you've dipped them in the chocolate coating, chilling the bites may cause the chocolate to bloom or develop a harmless white cast, but it won't affect the taste.
Mini cheesecake bites ingredient substitutions
These mini cheesecake bites are made gluten free by using gluten free crunchy cookie crumbs. If you don't have to be gluten free, use whatever crunchy cookies you like and nothing else changes!
If you need to avoid other allergens, like eggs, I recommend you use our no bake cheesecake recipe instead of this one for the filling. Otherwise, you must use eggs.
If you're avoiding dairy, I'm afraid I don't know of any possible replacement for cream cheese that I have tried that actually tastes like cream cheese. I believe that's why most vegan cheesecake recipes use something like cashews in place of nondairy cream cheese.
You can make these bites without cornstarch, though, if corn is a problem. Just use arrowroot in its place. Potato starch might also work, and it's worth trying superfine rice flour, too.
In place of virgin coconut oil, you can use vegetable shortening to help set the chocolate mixture.
FAQs
How can I prevent my cheesecake from cracking in the oven?
I can't remember the last time I had a cheesecake crack in the oven. The secret is to bake the cake at no more than 325°F/163°C. Baking low and slow ensures an even, and stable, rise.
If you're really worried (no stress!), once the filling is set, turn off the oven and prop open the door. Let the cake sit in there for about 10 minutes, or until the oven temperature reaches about 200°F on your oven thermometer.
Make sure your oven is at the right temperature
Most ovens run hot, and drift out of calibration no matter what you do. The simplest solution is to purchase an expensive, simple oven thermometer (affiliate link; shop around for a Rubbermaid oven thermometer), and replace it often. Ensuring the proper oven temperature is a cornerstone of good baking!

Mini Cheesecake Bites
Ingredients
For the crust
- 1 ½ cups (225 g) crunchy gluten free cookie crumbs , (I used my “Nabisco” GF Honey-Maid Graham Crackers)
- 5 tablespoons (70 g) unsalted butter, melted and cooled
For the filling
- 16 ounces (16 ounces) packaged block cream cheese, at room temperature
- ¾ cup (150 g) granulated sugar
- ⅛ teaspoon kosher salt
- 2 tablespoons (18 g) cornstarch, (or try arrowroot)
- 2 (100 g (weighed out of shell)) eggs, at room temperature
- 1 teaspoon pure vanilla extract
For the chocolate coating
- 8 ounces bittersweet chocolate, chopped
- 2 tablespoons (28 g) virgin coconut oil
Instructions
- Preheat your oven to 325°F. Line an 8-inch square baking pan with nonstick aluminum foil or parchment paper that overhangs the sides of the pan on at least 2 opposite sides. Set the pan aside.
Prepare the crust.
- In a medium-size bowl, place the cookie crumbs and the melted butter, and mix until all the crumbs are moistened.
- Place the cookie crumb mixture in the prepared pan and press firmly into an even layer on the bottom of the pan and very slightly up the sides. Set the pan aside.
Prepare the filling.
- In a medium-sized bowl, place the cream cheese and beat with a hand mixer (or the paddle attachment in a stand mixer) until light and fluffy.
- Add the sugar, salt, and cornstarch, and beat to combine well. The mixture should appear whipped.
- Add the eggs and vanilla, and beat until just combined and smooth (do not overbeat). The mixture should be pourable.
- Pour the filling on top of the prepared crust, and spread it into an even layer. Bang the bottom of the pan on the kitchen counter a few times to release trapped air bubbles.
Bake.
- Place the pan in the center of the oven and bake until just set (about 30 minutes). The filling is set when it does not jiggle more than a tiny bit in the center when the pan is shaken gently back and forth.
- Remove from the oven and allow to cool in the pan for about 20 minutes.
Chill the cheesecake.
- Cover the cooled pan of cheesecake tightly with plastic wrap and place it in the freezer until very firm (about 2 hours).
Slice into bites
- Remove the cheesecake from the freezer, remove the plastic wrap, and lift the remove from the pan.
- Using a sharp knife, slice into 64 1-inch squares, cleaning the knife frequently to ensure clean edges.
Make the coating.
- Place the chopped chocolate and coconut oil in a large, deep bowl with high sides. Melt over a double boiler or in the microwave, stirring occasionally, in 30-second increments at 60% power.
- Allow the chocolate to sit at room temperature until it begins to thicken a bit.
Dip the bites.
- Holding each bite by the crust with your fingertips, dip it into the chocolate coating at least halfway up the sides.
- Place, crust side down, on a piece of parchment paper. Allow the bites to sit until the chocolate is set.
- Store any leftovers in a sealed container in the refrigerator or the freezer for longer storage.
Video
Notes
Nutrition information is automatically calculated, so should only be used as an approximation.




I want to make a 9×13 pan. Do I double recipe? ( so 4 blocks of cream cheese?) Also, how long does it bake for?
I haven’t tried baking this in a larger pan, Gina, so I don’t know for sure. An 8-inch x 8-inch pan holds about 8 cups of batter, and a 9-inch x 13-inch pan holds about 14 cups of batter, which is 1.75 times more. You’d need to multiply the ingredients by 1.75 to make enough batter (this recipe makes 64 bites, so you’d need to put 112 bites in the yield, which is 1.75 times as much), and figure out the baking time as you go. You’ll have to experiment!
Excellent recipe..I’ve made 4 times so far just made them again this time I stored them in the freezer after fully prepared…over the top so good. Thank you for sharing your recipe
Can I substitute regular table salt for the Kosher salt?? If so, how much ??
Kosher salt is commonly used in baking recipes because it’s much harder to overmeasure than table salt. You can use an equal amount of table salt, but take extra care not to use too much or your cheesecake will taste actively salty.
Excellent recipe. I substituted the sugar with Stevia to make it sugar free. Turned out great.I will definitely be making this again and again and again…
I’m thinking to make these as mini cheesecakes tomorrow in my mini muffin pan and use those to dip instead of cutting up a cheesecake. Sounds easier to me. Hoping it works out.
You’ll have to be really careful about how much you bake them, Jody, since they will dry out easily. Good luck!
Made these yesterday for a dinner party. Big hit! Two small changes to the recipe.I drizzled the chocolate on top of the cheesecake after freezing for about 10 minutes. Then put back in the freezer and once the chocolate was set, sprinkled coarse sea salt on top. Back in the freezer til I took them to dinner. Easy to make, will make again!
That sounds delicious, Annie! I might have to steal that. :)
Hi, can I substitute sugar for honey? Thanks from Brazil.
Liquid sugar like honey is not a proper substitute for granulated sugar, Maria. You’d need a different recipe, I’m afraid.
Thank you for posting this recipe. My son was just diagnosed with celiac and we made this for his prom dessert. It was perfect!
That’s great to hear, Sarah! And I know that newly diagnosed feeling. I promise you can make him whatever he craves!
Another 5 Star! Easy and delish. Glad the chocolate was bitter sweet otherwise it would have been too sweet. Family ate the whole batch in under 24 hours.
I have made these for my friends using your graham cracker recipe for the crust. They are wonderful and my friends were shocked to find out they were gluten free. A great recipe.
That’s so great to hear, Cathy! Thank you for letting me know. :)