This post may contain affiliate links. Please read our disclosure policy.
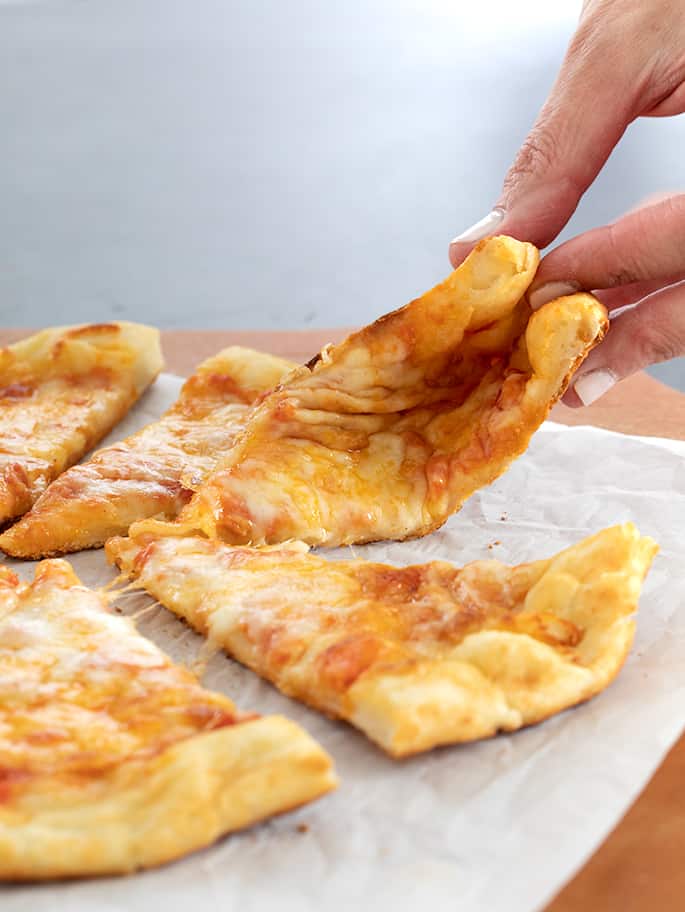
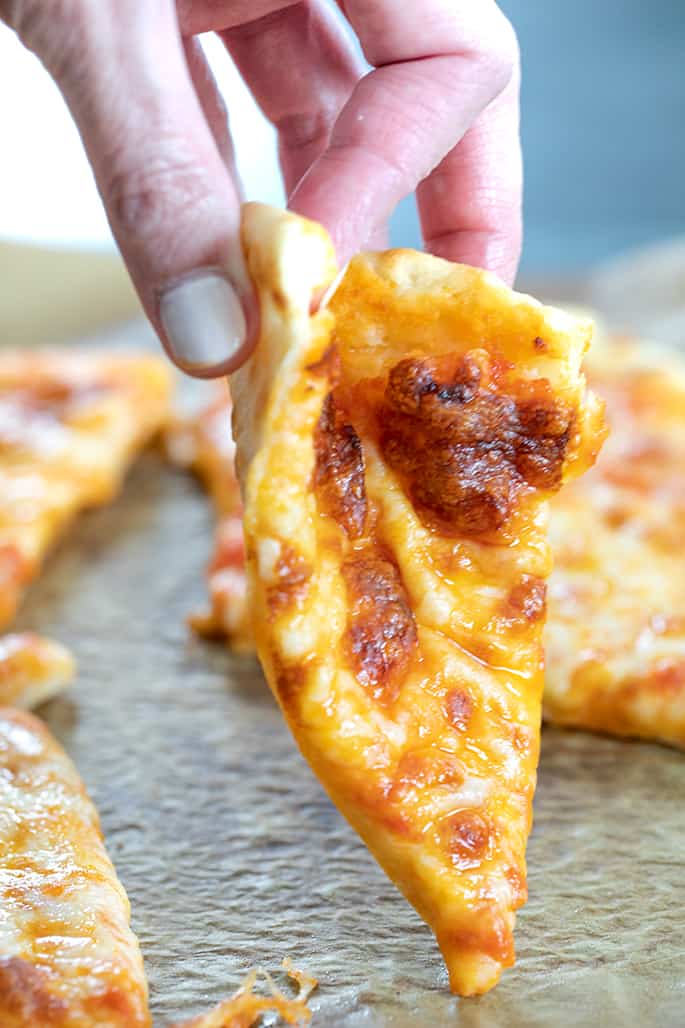
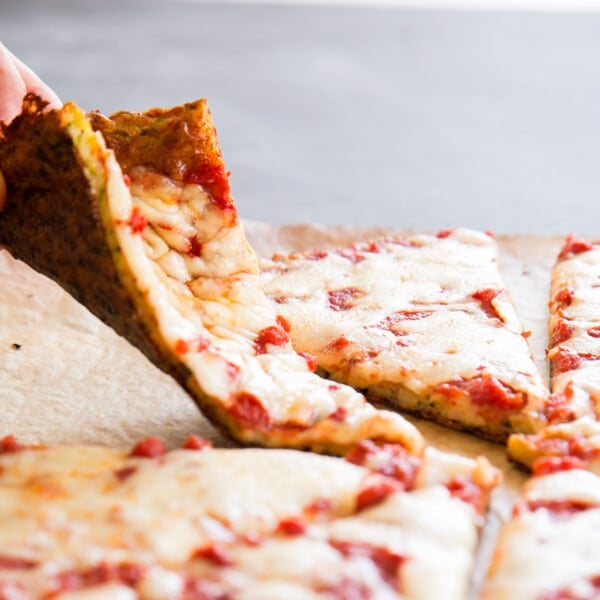
This NY-style stretchy gluten free pizza crust is a real thin crust pizza that actually folds in half when you grab a slice, and has that famous chew!
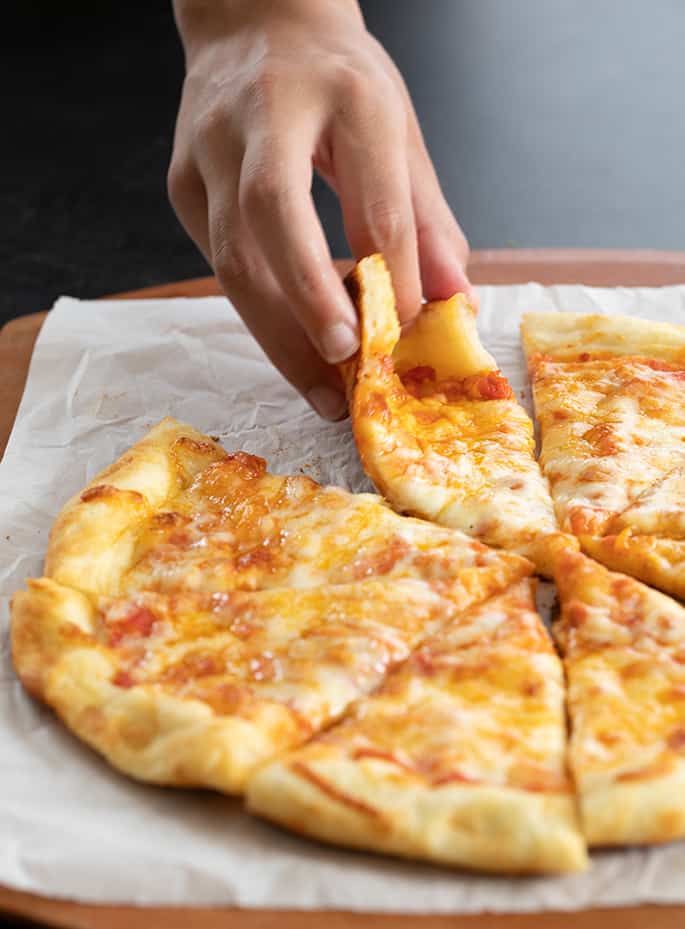
Table of Contents
- What makes this gluten free stretchy pizza crust different
- Stretchy gluten free pizza crust ingredients
- Equipment you'll need to make stretchy gluten free pizza crust
- Tips for nailing this gluten free stretchy pizza crust recipe
- How to store GF stretchy pizza crust
- Stretchy Gluten Free Pizza Crust: substitutions and alterations
- FAQs
- Stretchy Gluten Free Pizza Crust Recipe
What makes this gluten free stretchy pizza crust different
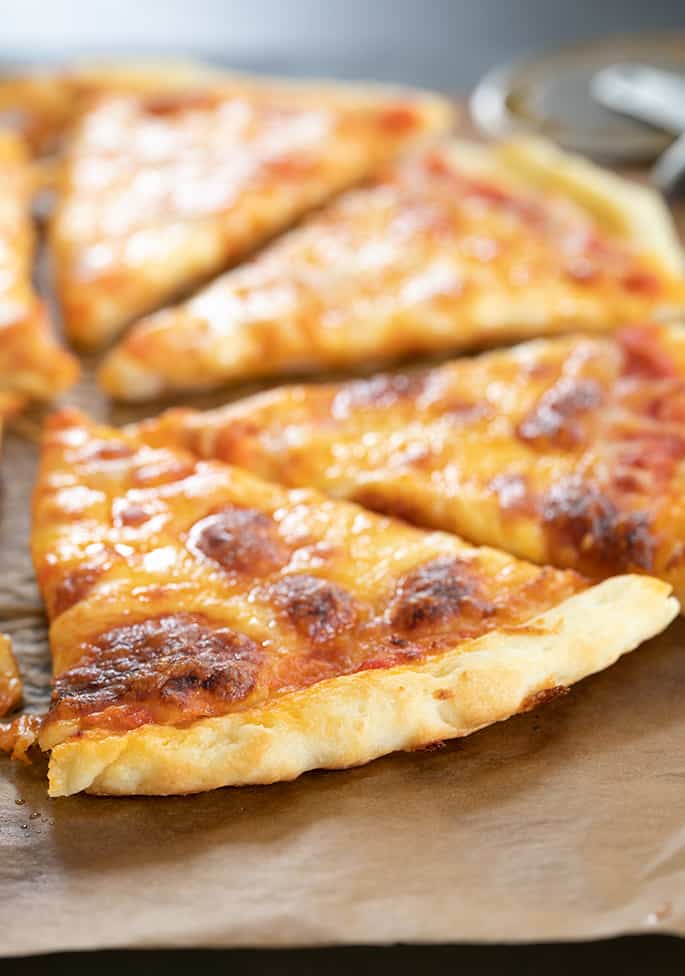
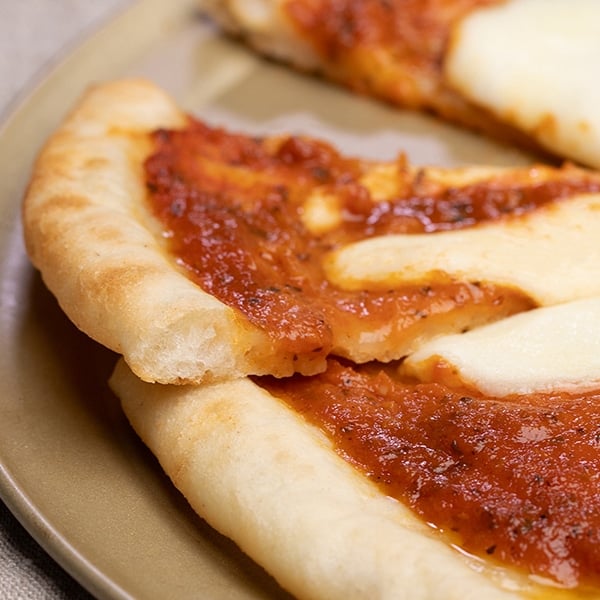
This pizza crust is “NY style” because it has a thin, chewy crust that folds in half on the horizontal when you grab a slice. It's only slightly crispy on the very, very outside, like in darker spots underneath the pie and on the edges.
Almost no matter how thin you make it, you're not going to have a cracker-like crust. A super crispy crust is not a bad thing. But it's just not the texture we're going for here.
They say the price of a slice of pizza in New York City tracks the price of a subway ride (or what used to be a subway token (I might be a bit older than you think!). When I lived in Manhattan and then Brooklyn, I don't remember ever ordering a whole pie except for delivery.
You generally buy pizza by the slice, and then you eat it walking down the street. And if you're going to eat it walking down the street (which is admittedly kind of gross, but I was in my 20s and had no clue), you're going to want to fold it in half. You end up finishing it way too fast, but again, you don't know that's bad because you're 20.
Why this is the best stretchy pizza crust recipe
I've made plenty of gluten free pizza crusts, but I think this one might be my favorite. It's fresher than any prepackaged crust you'll buy at the store, and it offers that authentic New York City-style flavor and texture, despite not having a trace of gluten.
On top of that, this New York-style pizza crust recipe doesn't take long to put together. If you're making it from scratch, you can have a homemade pizza on the table in less than an hour, with little of that being active time.
Of course, you can also make the raw crust ahead of time and store it in the fridge for up to three days. Just imagine it: Fresh, New York-style pizza, on the table within 25 minutes. If that doesn't make you a hero in the eyes of the hungry family on pizza night, I don't know what will.
Stretchy gluten free pizza crust ingredients
Is this the best New York pizza crust? I'm going to say yes, for all the reasons above, but also because it only takes a few ingredients to recreate the classic taste of an NYC pie.
- All purpose gluten free flour blend – I often recommend Better Batter in my gluten free recipes, but I'm serious this time — it really is the best for the job. This gluten free flour blend is the only one that's given me that firm, chewy texture for which New York-style pizza is known.
- Tapioca starch/flour – Tapioca flour plays a huge role in giving our New York-style pizza crust its chewy texture
- Instant yeast – I prefer instant yeast as it's easier to work with, but you can prepare active dry yeast for this recipe too. You'll need 25% more yeast, by weight, if you use active dry yeast, and you'll have to hydrate it first in some liquid from the recipe. Then, add it to the raw crust mixture when you add the rest of the water, and proceed as directed.
- Sugar – The sugar serves as the “food” for the yeast to feed.
- Warm water – Warm (not hot) water activates the yeast without killing it.
- Salt – Salt actually plays many roles: it offers the NY pizza crust more flavor, and regulates the yeast so it doesn't overproof.
Equipment you'll need to make stretchy gluten free pizza crust
You don't need a lot of ingredients for this New York-style pizza crust recipe, and you don't need a lot of equipment either.
- Stand-up mixer with paddle attachment or food processor – I prefer my stand mixer since it's always on the counter, but you can prepare this pizza crust recipe with a food processor — just make sure it's large enough to accommodate all the ingredients and don't overprocess the mixture or it may turn to almost a liquid.
- Rolling pin – A rolling pin can help you roll out your stretchy pizza crust recipe; though, I find that using my hands (after making sure they're oiled!) is super helpful
- Pizza stone or baking sheet – A hot pizza stone will give you the best pizza crust, but if you don't have one, you can just flip over a baking sheet and use that.
Tips for nailing this gluten free stretchy pizza crust recipe
Give your raw stretchy gf pizza crust time to chill
Though I say in the NY style pizza crust recipe below that you can use your raw crust mixture after just an hour in the fridge, I highly recommend that you leave it there longer. Like, overnight or longer, longer.
This is because the longer you let the pizza raw mixture sit, the more it will ferment and the flour will absorb more of the liquid, making the dough a bit easier to handle. Fermentation is just a fancy way of saying that the yeast eats up all the sugar (its fuel). Why does this matter? As yeast ferments, it changes the aroma, flavor, and texture of the raw crust.
If you want a gluten free pizza crust that really tastes what you'd find in NYC, let your raw crust mixture sit in a sealed proofing bucket in the refrigerator for at least a few hours.
How to handle the raw gluten free pizza crust
To get this pizza crust to be chewy and foldable, you need what's called a high hydration ratio. That just means how the amount of water compares to the amount of flour. Here, the hydration ratio is nearly 85%.
In our most lovely basic gluten free pizza dough recipe, the hydration ratio is only 60%. That's actually low for a conventional pizza recipe, but I think we know by now that gluten free baking is just different in so many ways.
An 85% hydration ratio means that this is a wet dough, and we need to keep it that way if we want a chewy, foldable crust. When you're handling the dough, you don't add any more flour at all. You shape it with wet or oiled hands. It's not fun, but it works.
You'll notice that, even after shaping, the raw gluten free pizza dough isn't smooth. It's kind of dimply.
Try not to judge it like I am. I'm judging it pretty hard, since I've been avoiding this sort of sad-looking gluten free bread dough for years, but here, it works like no other.
Don't forget the pizza stone (or pan) for baking
You know how some prepackaged pizzas say that you can cook directly on the rack rather than on a pizza stone or pizza pan? Yeah, that's not going to fly with this NY style pizza crust.
The reason is simple: the crusts of prepacked pizzas are typically parbaked. That means they've got the rigidity to hold it together without the help of a pizza pan.
Since we're cooking our New York pizza crust raw, it will just fall through the gaps if you put it directly on the rack. And that's no good!
Why I don't like to parbake this thin stretchy gluten free pizza crust
I've tried making this pizza by parbaking the crust, which usually involves baking the crust alone, without any toppings until it's just set. You can then remove it from the parchment paper, add your toppings, and bake again until everything is bubbling and set. But your crust may not be truly foldable if you do that.
To make sure that we have exactly the right chew and texture (I know, stop saying those words, but I can't!), I prefer to top the crust when it's raw but shaped. Then, we bake it in a very hot oven for no more than 10 minutes. In fact, I usually bake it for less.
If you're baking it on a pizza stone, you should consider pulling out the crust after just 8 minutes. The edges may not be perfectly browned and gorgeous, but the bottom should be just right.
How to store GF stretchy pizza crust
One of my favorite things about this gluten free stretchy pizza crust recipe is that you can mix the dough and then pop it in the fridge for later use. And when I mean later, I mean up to three days later.
After mixing the gluten free dough using your mixer, transfer it to a container with a tight-fitting lid that's been well-oiled. I usually use a light coating of extra virgin olive oil, but also use non-stick spray.
From there, just make sure it's covered tightly. Use the cover that came with your container or tightly cover the bowl with cling film. It's important that the container stay tightly covered so that the fridge doesn't dry out your dough.
When you're ready to make pizza, divide out enough for your pie, and put the rest back in the fridge for another day.
Can I make this stretchy gf pizza crust and freeze it?
Since this question is getting asked a lot, I'm adding this right to the text. I don't ever recommend freezing raw yeasted dough. It may kill the yeast.
If you aren't satisfied with keeping the raw dough in a sealed proofing bucket in the refrigerator, and just baking it right before you serve it, you can try parbaking but only the classic sense of the technique. That means baking it just until set at a low temperature.
Here, that would mean to bake the shaped crust, plain, at 300°F for less than 10 minutes, until just set. Then let it cool, wrap it tightly, and freeze it. When you're ready to serve, defrost the crust mostly (at room temp), top, and bake at 450°F as directed.
But I really really recommend not parbaking it at all, just making the dough and storing it in the refrigerator until you're ready to bake and serve it. It really comes together in minutes that way.
Since everything is measured by weight, you can also cut the recipe in half and just make one pizza. It's sooooo good cold!
A better way to save a little time
I get it — even though it doesn't take a ton of time to make this gluten free pizza dough from scratch, if you can find a way to shave off even a few minutes, you're going to take it.
What I recommend you do instead is create your own New York-style pizza crust mix by mixing all the dry ingredients in this recipe — except for the yeast. Once you've got those ingredients tossed together, store the mix in a zip-top bag, mason jar, or other airtight container.
When you're ready for pizza, all you have to do is add the yeast and wet ingredients, and continue with the recipe.
Stretchy Gluten Free Pizza Crust: substitutions and alterations
Choosing a gluten free flour blend
I try to develop recipes that can be relatively agnostic about which of my recommended all purpose gluten free flour blends you choose, since I know not everyone has access to the same ingredients. But this recipe is designed to create an especially specific texture.
For that reason, I highly recommend using either Better Batter or my mock Better Batter in this otherwise very simple recipe. It's a sturdy flour that is best for creating a chewy crust that doesn't puff up too much like a blend like Cup4Cup would.
Using the proper flour blend here also helps us avoid using any other enrichments or stabilizers, like Expandex modified tapioca starch or eggs.
Tapioca starch/flour substitute?
First off, if you're at all unfamiliar, tapioca starch is the same as tapioca flour. It's like flammable and inflammable having the same exact meaning. Why, universe, why??
Tapioca starch, the starch from the cassava root (not the same as cassava flour, which is actually the whole root), has unique stretchy properties when used in baking. That's why we can use it alone to make things like Against The Grain-style tapioca rolls.
It has no substitute, I'm afraid. And some brands, like Bob's Red Mill, are of inconsistent quality. I buy tapioca starch from nuts.com. It's not expensive, and seems to have a shelf life of approximately forever.
Gluten free dairy free NY-style gluten free pizza crust
The only dairy in this recipe would be in the cheese that you select for your topping. If you're dairy-free, my favorite shredded cheese brand is Violife, but Follow Your Heart is also quite good. Even Daiya has gotten a lot better in recent years.
For a more flavorful crust
If you'd like to add a little more oomph to your NY pizza crust, I've got a couple of ideas:
- Add dried herbs — just mix in a tablespoon of Italian seasoning when making your gluten free pizza dough. The longer you let the dough sit, the more flavor the herbs will impart.
- Baste the crust — create a simple baste using butter, vegan butter, or olive oil with garlic and dried herbs. When you pull the pizza out of the oven, give the crust a quick brush.
FAQs
What is New York-style pizza crust?
New-York style pizza crust is thin and stretchy, but it's not cracker crisp. Instead, the crust is super flexible and chewy, allowing you to fold it up for big bites. Pretend you're walking down the street on your way to the subway. :)
I'm not going to go so far as to say it's going to feel like you've caught a flight to the Big Apple when you prepare my gluten free pizza thin crust recipe — but I guarantee you won't soon forget it!
What's the best flour for gluten free New York-style pizza crust?
I highly recommend that you use Better Batter (or my recipe for mock Better Batter) for this gluten free pizza recipe. Its blend of sturdy gluten free flours is perfect. And even though Better Batter has tapioca starch in the blend, you still need that extra amount of the starch in your pizza dough.
What's the best yeast for a stretchy gf pizza crust?
I reach for instant yeast because it's ready to go straight from the container. It has a very thin inactive coating on the yeast, so it doesn't have to be proofed like active dry yeast does.
If you use active dry yeast, you must use 25% more yeast, by weight (here, that would be 7.5 grams active dry yeast; just let your digital scale reach 7 grams, then add more very slowly and stop before it reads 8). Plus, you'll need to make a yeast mixture with warm water to break down the yeast's outer shell.
Why is my stretchy pizza crust so sticky?
To give this New-York style pizza crust that chewy, foldable texture we crave, the dough has to be wet. And unfortunately, a wet dough is going to be a sticky dough.
Resist the urge to add more gluten free flour when preparing this recipe. Instead, coat your hands in oil to make it easier to work the pizza. I promise, the effort will be worth it.
What's a good pizza sauce recipe for this gluten free pizza crust?
There are several prepackaged tomato sauce mixes that will go wonderfully with this gluten free pizza. But if you'd like to make your own, I've got a tomato sauce recipe that will provide the perfect base.
Personally, I think the tomato sauce comes out perfectly as-is for pizza, but you may want to add more garlic or dried herbs to your liking.
Can I freeze a prepared stretchy gluten free pizza crust?
Absolutely! After allowing your gluten free pizza to cool completely, pop it into a zip-top bag or wrap it tightly with cling film.
If you have an old box sitting around (Amazon boxes work perfectly!), cut out a round to place under the pizza before you slide it into the freezer. This will ensure that the pizza holds it shape as it freezes.
When you're ready to eat your frozen pizza, take it straight from the freezer to a preheated 300°F oven or toaster oven. Heat the pizza for about 10 minutes, or until the cheese has melted and the crust is softened.
Stretchy Gluten Free Pizza Crust Recipe

Equipment
- Stand mixer with paddle attachment or food processor
- Rolling Pin
Ingredients
- 2 cups (280 g) all purpose gluten free flour blend, (Better Batter highly recommended)
- 1 teaspoon xanthan gum, omit if your blend already contains it
- ¼ cup (36 g) tapioca starch/flour
- 2 teaspoons (6 g) instant yeast
- 1 ½ teaspoons (6 g) granulated sugar
- 1 teaspoon kosher salt
- 9.5 ounces warm water, (about 95°F)
- 2 tablespoons extra virgin olive oil
- Cooking oil spray
- Your favorite pizza toppings
Instructions
To make the pizza crust.
- In the bowl of your stand mixer fitted with the paddle attachment or your food processor fitted with the metal blade, place the flour, xanthan gum, tapioca starch, yeast, and sugar. Whisk to combine with a separate, handheld whisk. Add the salt, and whisk again to combine well.
- Add the water and olive oil, and mix on medium speed in your stand mixer or pulse in your food processor until the dough begins to come together.
- Turn the mixer to high speed or your food processor on and process for about 2 minutes.
- Transfer the dough to an oiled container with a tight-fitting lid or a greased bowl and cover tightly.
- Refrigerate the dough for at least an hour and up to 3 days.
To make pizza.
- When you’re ready to make the pizza, place a pizza stone or overturned rimmed baking sheet in the oven and preheat it to 450°F.
- Divide the dough into two equal portions, and work with one at a time (place the other back in the container and back in the refrigerator). The dough will be super soft, and should only be handled once you’ve either wet your hands with water or coated them in cooking oil spray (or just olive oil).
- Place the first piece of dough on a clean sheet of parchment paper. Working from the center of the dough out to the edges, begin to press it into a round about 12-inches in diameter.
- Grease or wet your hands as necessary to help prevent sticking. If it’s useful, oil your rolling pin and use it to help roll out the dough.
- Create a smooth, slightly raised edge around the perimeter of the dough by pressing the edges with one hand toward the palm of your other.
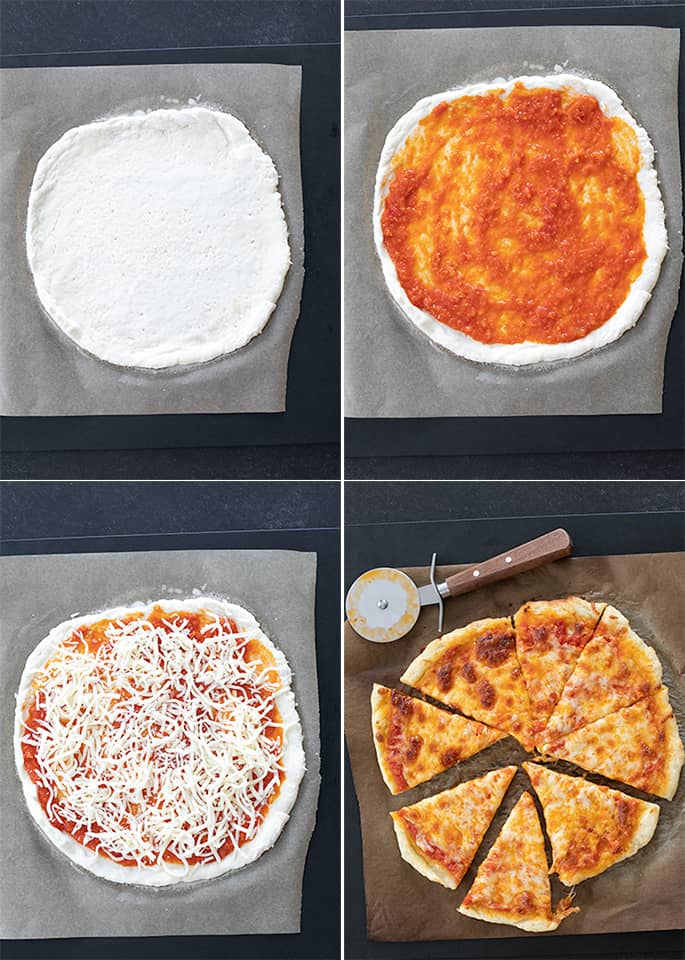
- Spray the shaped dough with cooking oil spray, concentrating it on the edges. Top the dough with sauce, cheese, and any other toppings you like best.
- Transfer the shaped and topped dough, still on the parchment paper, to a pizza peel or other flat surface like a cutting board, and transfer it to the hot oven.
- Bake for 8 to 10 minutes, or until the crust has begun to crisp on the underside, brown on the edges, and the cheese is brown and bubbling. Do not overbake.
- Remove from the oven, allow to set for just a few minutes, then slice and serve hot.
Video
Notes
Nutrition information is automatically calculated, so should only be used as an approximation.





OMG! This is the closest thing to real pizza that I’ve ever had since I went Celiac! I did use a pizza stone, so my crust was pretty white, and I was doubtful, but once I started to chew…oh mama! Pizza crust that actually chews rather than splinters. Thank you!
I am going to put half in the freezer, and I’ll check back with you once I bake it up, and see what I get. I have made the Cup for Cup pizza dough mix, and that was decent, and better than anything frozen or on the shelf, like Scharr. I have a frozen dough ball of that too, so I’ll have to see how that is after baking.
I’ve been baking for 50 years, and it’s so interesting (and expensive) learning a new way to bake!
I really don’t recommend you freeze the raw dough, Meg, but at least you’ve been cautioned! I’ve never tried any of the pizza dough mixes, but I’ve thought about trying them. I actually bought an Authentic Foods pizza dough mix, but I haven’t made it yet since it’s so expensive and if I like it, I’ll be mad. And if I don’t, I’ll be mad. ?
I made this for our supper tonight and it was wonderful! I used a combo of 100g Bob’s Red Mill all-purpose flour and 180g Steve’s bread flour blend from Authentic Foods (I love this flour). Thanks so much, Nicole!
I made this tonight. My husband and I LOVED it. We’re from New Jersey and are used to NY style pizza. This is the closest gluten-free equivalent we’ve encountered. Thank you!
You’re so welcome, Janice. Thank you for letting me know how you and your husband liked it!
Thank you so much. I have wanted a pizza like this for years and the fact it had no eggs is absolutely wonderful.
I’m so glad, Jen! I think I had secretly wanted a pizza like this for years, too. ?
I hope this isn’t a dumb question but will this come out if mixed only w/ a whisk. I don’t have a mixer or food processor but am dying to use my Better Batter!!
Hi, Mary Beth, I’m afraid you can’t use a whisk, no. You could try mixing it really vigorously with a wooden spoon for a while.
I’ve been trying to be gluten free for a little over a year now. I have Celiac Disease. ,
Mostly eating gf, but we really love pizza. Can I make this crust, but we like it thin and crispy. How would I do that?
Hi, Barbara, if you prefer a crispy crust, this one is not the right one to choose. I have a number of other pizza recipes on the blog (just use the search function) but for a classic “thin crust” pizza, my recipe is only in my bread book. You should be able to find something on the blog that suits your needs pretty well, though.
Dear Nicole, thanks for another kind post. If you have available in your region, I would like to suggest the GF Mulino Caputo flour, called Fioreglut. It provides an amazing result for pizza and focaccia as well. Another suggestion for those who love pizza is to invest in an oven that can reach the proper temperature for pizza. There are affordable options in the market and this improves a lot the final result.
Hi, Fernando, I’m familiar with Caputo gluten free flour, but I’m not comfortable using or recommending anyone use a gluten free flour that contains “gluten free wheat starch.”
Love this! Grabbing my bowl…
I’m sure you never have anything left to freeze in your house, but I’m the lone celiac person in my house. Can you freeze the second portion of dough?
Thank you for all of your insight. You are my new Christopher Kimball!
Hahaha, Meg, actually sometimes we do have leftovers to freeze because when I’m recipe testing I make the same thing 4, 5 and 6 times! I don’t ever recommend freezing raw yeasted dough, I’m afraid, though. Sometimes, it kills the yeast. You can parbake the crust, but only the classic sense of the technique: baking it just until set at a low temperature. Say, bake the crust, plain, at 300°F for less than 10 minutes, until just set. Then let it cool, wrap it tightly, and freeze it. Then, defrost mostly (at room temp), top, and bake at 450°F as directed. Hope that helps!
Whoa. I seriously never thought this was possible with GF baking. Looks amazing and I love the research and science you’ve put into this, Nicole! Thank you for sharing- can’t wait to try it!
Thank you so much for the kind words, Amy. Ever since the start, it’s been clear to me that I need to be first and foremost a self-taught fake research scientist if I’m going to make what we’re missing! Anyway, that’s the fun part. ?