
This post may contain affiliate links. Please read our disclosure policy.
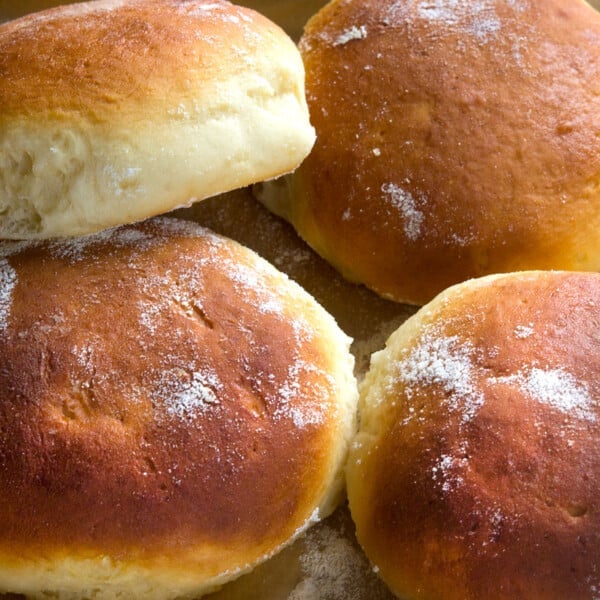
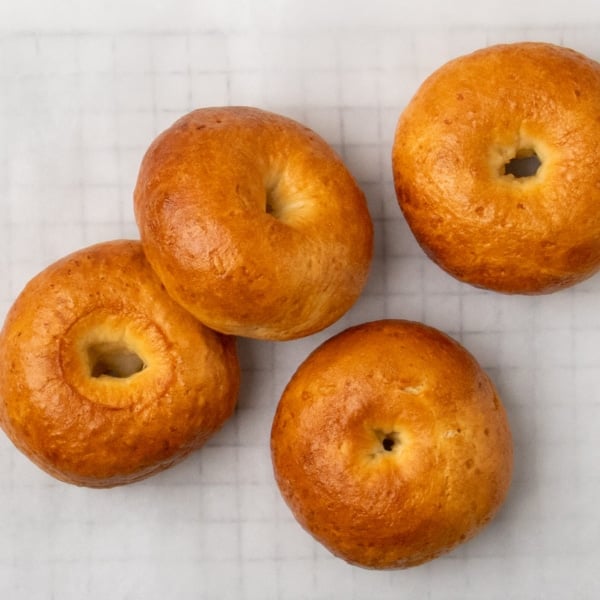
This recipe for homemade Against the Grain-style gluten free tapioca bread is just like the original. The recipe is really simple and, because it's not yeasted, doesn't take long to make (no rising time!). The result is deliciously cheesy rolls that are light and crisp outside and cheesy and chewy inside.
Why you'll love this tapioca bread recipe
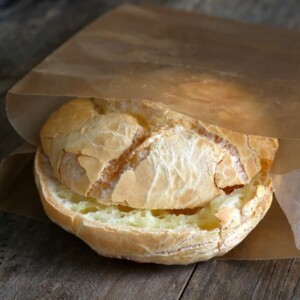
A few years ago, in a pinch, I bought a package of Against the Grain original rolls. They were so expensive (nearly $9 for 4 rolls!) that it was really really (really) hard to pull the trigger. But my family loved them. So I did the only thing that seemed reasonable to me. I made my own copycat version asap.
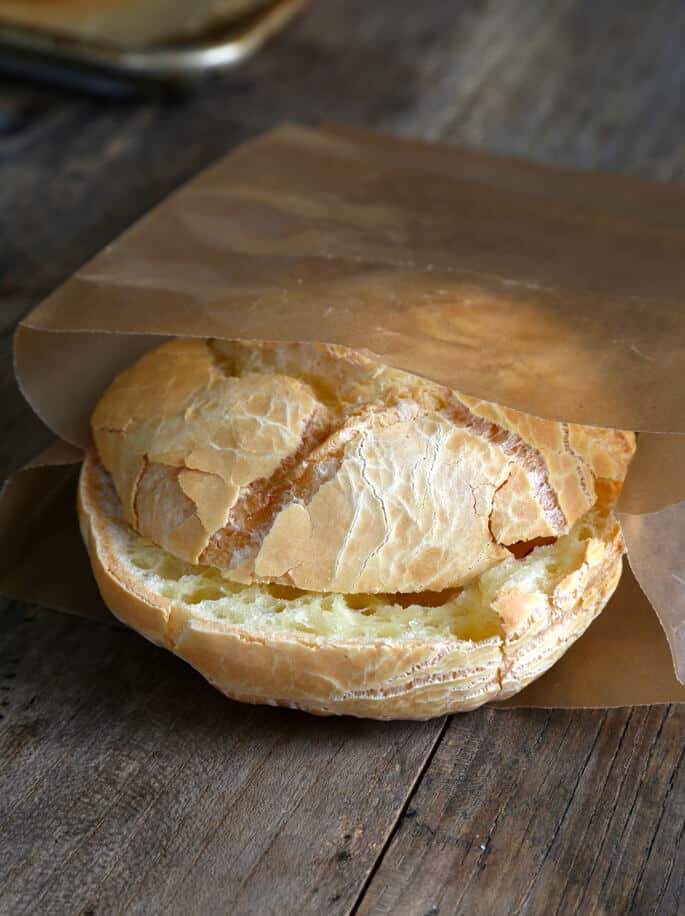
This is not a bread recipe, though, like any other. It's made of just tapioca starch/flour, eggs, milk, cheese, and oil. These rolls are chewy and cheesy, and almost remind me of popovers in texture but with a delightfully crisp and almost flaky crust.
I'd argue that these Against the Grain copycats are better than the original. They're really fast to put together, have a beautiful cheesy flavor and a delightfully chewy texture. And, of course, they're affordable!
Secrets to tapioca bread success
I originally wrote about these rolls in 2013. Along the way, I've made these gluten free rolls so many times that I've modified the method a bit, both to simplify the process and to handle the issues that sometimes come up.
I never post a recipe unless I make it successfully and can repeat my own success multiple times. But over the years, I have seen some issues pop up that I didn't anticipate years ago.
Quality of ingredients
The quality of your ingredients, especially the tapioca starch/flour, can greatly affect the outcome of your rolls. Make sure to use a high-quality tapioca starch for the best results.
Use your food processor
You do need a food processor to make this recipe. I've tried making it in a blender, and I'm afraid I've failed. If you only have one of the mini prep food processors, don't despair! Just split the entire recipe in half and make it in two parts.
If you have issues with your food processor stalling during preparation, it is likely that the tapioca flour has clumped at the bottom of the bowl and the blade has become stuck. Opening the top and stirring the dough to loosen it will get it working again. Do make sure you add the tapioca flour after you add the cheese, eggs and oil.
Temperature matters
Right after preparation, the dough will be very sticky. Wrapping the dough in plastic wrap and chilling it will allow you to divide it into portions.
When I first made this recipe, I cooked part of it on the stovetop before processing everything together. Over time, I realized that step wasn't necessary—and that the recipe worked better when the ingredients began at room temperature, or even chilled. Processing the dough in the food processor with add heat, which is part of why we will have to chill it before shaping no matter what the temperature of your ingredients at the start.
Add the milk slowly, and sparingly
The amount of milk that it makes sense to add to this dough is perhaps the most important variable in the recipe. Depending upon how much moisture is in your ingredients, the quality of your tapioca starch, and even your food processor, you may need more or less milk.
You will always need less than 1 full cup (8 fluid ounces) of milk. You may even find that you prefer to make the recipe with a bit less than 5 fluid ounces (which is itself less than 2/3 cup).
If you want the dough to be very easy to handle, use a bit less than 5 fluid ounces of milk the first time you make the recipe. The dough will be much easier to handle, especially after chilling, but watch the baking time like a hawk. They will likely be fully baked in less than 20 minutes.
If the raw dough in the food processor falls too easily off a spatula, you've probably added too much liquid. Try adding more tapioca starch/flour and processing until smooth.
If you've gone too far in adding liquid, even after adding a bit more flour, rather than truly shaping the dough you may have to scoop it onto the baking sheets with an ice cream scoop and baking it for a bit longer.
You're not kneading the dough in the traditional sense, anyway. You're just coaxing it into a roll shape. The oven does the rest.
Let the steam escape
After the initial 20 minutes of baking, quickly open the oven and slice a small hole in the top of each roll to let steam escape. This helps to prevent the rolls from becoming too moist inside, which could cause them to collapse as they cool and make slicing difficult.
Be mindful of timing
Keep a close eye on the baking time. If you've used less milk, the rolls might be fully baked in less than 20 minutes. If the dough was more liquid, you might need to bake it for a bit longer.
Tapioca bread ingredient substitution suggestion
Like other simple recipes, each ingredient is crucial to the success of this recipe. It does not take substitutions well. Here are the details:
Can I make this recipe dairy-free?
If you can't have regular cheese, I'm afraid you simply cannot make this cheese bread recipe. I have tried making it with homemade Miyoko's Kitchen recipe cheese, and it failed. I have tried making with all different brands of dairy-free packaged shredded cheese, and it failed. But you can still choose another gluten free bread recipe that suits your needs.
I had developed a recipe for a copycat of the dairy-free Against The Grain rolls and posted it on the blog years ago. The post disappeared somehow in a redesign years ago, and I have no other record of it. It's gone for good.
Can I use a different type of cheese in this recipe?
This recipe works best with pre-grated low moisture mozzarella cheese. It contains anti-caking ingredients, often starch, that prevent the dough from becoming too sticky and not holding its shape during shaping and baking.
I know it's less than ideal to use an ingredient with additives, but there are certainly more additives in the packaged rolls. I do not stress such things, but it's a personal decision.
Can I replace the eggs in this recipe?
There are two eggs in this recipe, and they do a lot of heavy-lifting. In fact, they're responsible for the entire rise. I don't think you could make this recipe with an egg replacement at all.
Can I use a different type of flour instead of tapioca starch/flour?
For tapioca bread, you have to use tapioca flour. And, in general, if a recipe calls for tapioca starch or cassava flour, then you really can't substitute it with anything else equally and get the same results. Superfine sweet white rice flour is the starchiest, stretchiest rice flour, but it won't create the same results as tapioca.
Tapioca starch is the key ingredient has no true equal in the world of gluten free flours, so there is nothing else that will replace it with certain success. I've seen people suggest trying potato starch, corn starch, and brown rice flour, but those just won't work.
The quality of the one you use matters a whole lot. I can only recommend purchasing it from nuts.com, Authentic Foods, and Vitacost.com. Bob's Red Mill tapioca starch/flour is of inconsistent quality and I recommend against it.
The tapioca starch/flour sold in bulk in Asian food stores is also very inconsistent and frequently contaminated with other ingredients, sometimes gluten-containing ones. I also recommend against using that.

Additional optional ingredients
While the original recipe for these Against the Grain-style gluten free rolls is delicious on its own, there are several ways you can customize this tapioca bread recipe to suit your personal tastes:
- Herbs and Spices: Consider adding a pinch of dried herbs like rosemary, thyme, or oregano to the dough for a savory twist for a different flavor profile.
- Seeds and Nuts: For added texture, consider incorporating seeds or nuts into your dough. No more than a few poppy seeds or sesame seeds can be mixed into the dough or sprinkled on top before baking, but you can brush the tops of the rolls with an egg wash and sprinkle the seeds on top.
- Cheese Variations: While the recipe calls for low-moisture mozzarella cheese, feel free to experiment with other types of cheese for different flavors. Smoked gouda or provolone cheese might work, but you really need to watch the moisture content if it's not pre-shredded. Just ensure the cheese you choose melts well and isn't too wet.
- Garlic or Onion Flavored Rolls: Add garlic or onion powder to the dough for more flavor and a rich aroma.
- Sweet Variations: For a sweet take on these rolls, add a bit of granulated sugar to the dough and incorporate dry add-ins like raisins, dried cranberries, or even chocolate chips. Just don't add more than a handful or it will change the moisture balance of the dough.
FAQs
The rolls can be stored at room temperature for up to 2 days in an airtight container. For longer storage, slice them in half, wrap them tightly, and freeze. They can be defrosted at room temperature for 30 minutes before toasting and serving, or defrosted in the microwave and served warm. Be sure not to overcook them in the microwave or they'll become stiff and hard.
A food processor is necessary for this recipe to ensure that all the ingredients are thoroughly combined. If you only have a mini prep food processor, you can split the recipe in half and make it in two parts.
If the dough is too sticky, try adding more tapioca starch/flour and processing until smooth. If you've added too much liquid, you may have to scoop the dough onto the baking sheets with an ice cream scoop and bake it for a bit longer. The dough also may not hold its shape properly during baking if it's too wet, so it's better to add more tapioca starch until it holds its shaped when scooped.
The original recipe does not contain any added sugar, so it is already sugar-free. However, do note that the natural ingredients used, such as milk and cheese, do contain some natural sugars. If you're following a strict sugar-free diet, you'll need to take this into account.
Tapioca bread has a unique taste and texture. It's often described as being slightly sweet and very smooth, with a chewy texture.
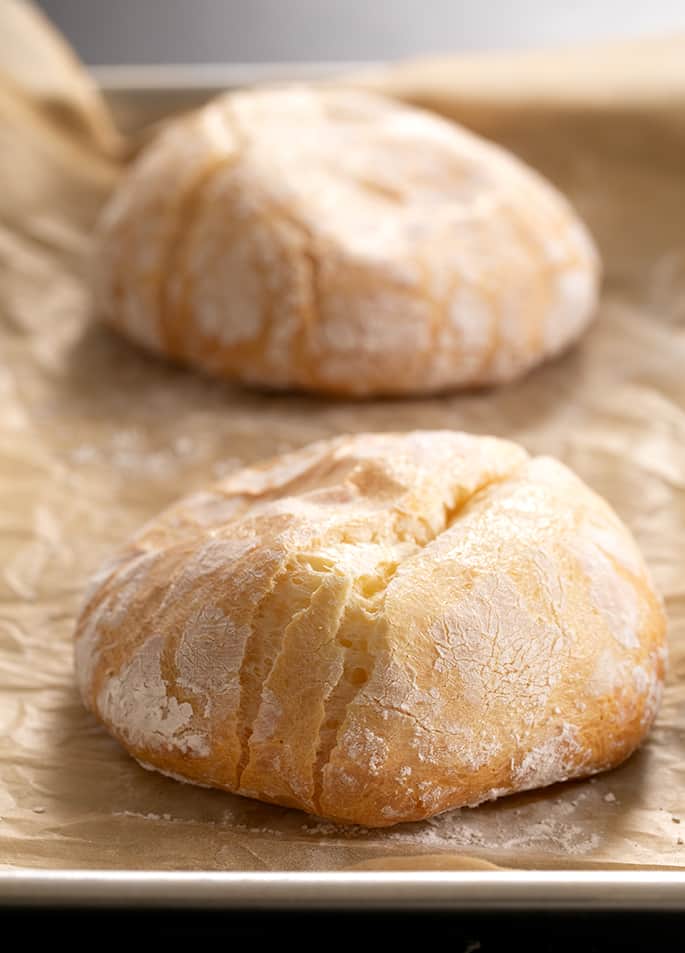
In this specific recipe, the bread will also have a mild, cheesy flavor due to the mozzarella cheese used. The crust of the bread is typically crisp and can become almost flaky when baked. It's a delightful combination of textures that I think you'll really enjoy.
This isn't the same as Brazilian cheese bread but it has similar ingredients, just prepared a different way to create an airier, larger roll with preshredded mozzarella cheese, which has a milder flavor. Pan de bono is also made with eggs and cheese, but it's made with a combination of masa harina and tapioca flour.
Tapioca starch and tapioca flour are two names for the very same ingredient. Tapioca flour or starch is a flour made from the starch of the cassava root.
Tapioca Bread | Against the Grain-Style Rolls
Equipment
- Food processor fitted with steel blade
Ingredients
- 5 ounces low moisture mozzarella cheese, pre-shredded, packaged
- 2 (100 g (weighed out of shell)) eggs, at room temperature
- ¼ teaspoon kosher salt
- 3 tablespoons (42 g) neutral oil, (grapeseed, canola, vegetable all work fine)
- 2 ½ cups (300 g) tapioca starch/flour, plus more for sprinkling
- 5 fluid ounces low fat or whole milk, plus more, up to 2 ounces more per batch
Instructions
- Preheat your oven to 375°F. Line rimmed baking sheets with unbleached parchment paper and set it aside.
Make the dough.
- Add all ingredients except milk to food processor in the order listed, then add about 1/4 cup milk. Process with chute open for about 2 minutes.
- Add more milk very slowly until the mixture comes together. Add between 5 and 7 fluid ounces of milk, depending upon the moisture in your other ingredients.
- Process for at least another minute. The dough will be very sticky and, when scooped with a silicone spatula, should fall off of it in a clump. The dough should not be dry and will firm up as it chills.
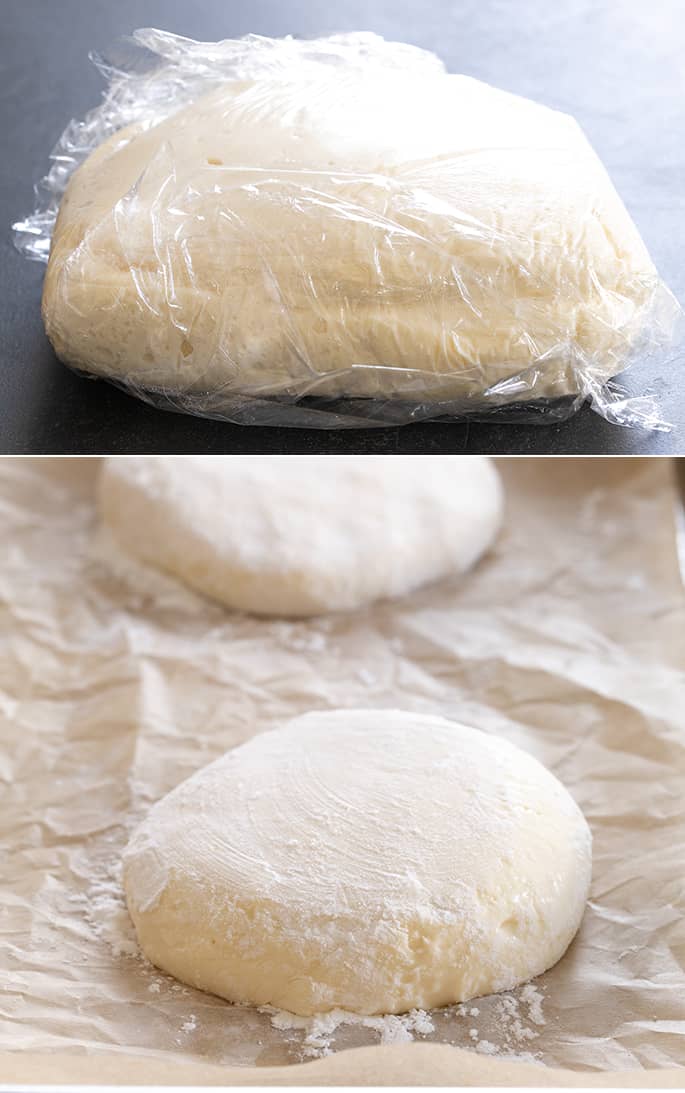
- Transfer the dough to a large piece of plastic wrap, wrap tightly and chill for at least 30 minutes. To hurry it along, you can place the dough on a plate or small cutting board and chill it in the freezer. It will not freeze solid.
Shape the dough.
- Remove the dough from the freezer and unwrap the plastic.
- Sprinkle a flat surface generously with tapioca starch, place the dough on top and sprinkle it with more tapioca.
- Using a bench scraper or sharp knife, divide the dough into 6 equal parts.
- With hands that have been dusted lightly with tapioca flour, gently shape each piece into a round then flatten into a disk about 1/2-inch tall, sprinkling with more flour as often as necessary to prevent sticking.
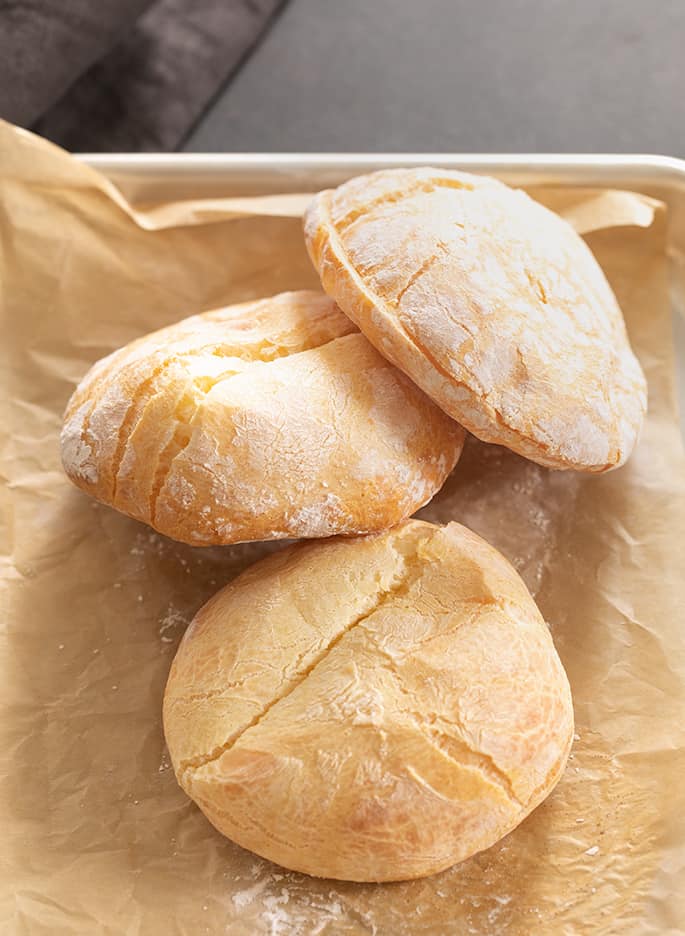
- Place the rounds about 2 inches apart on the prepared baking sheet. Using a sharp knife, score each roll twice on top at a 45° angle, about 1/8-inch deep.
Bake the rolls.
- Place the baking sheet in the center of the preheated oven and bake for 20 minutes.
- Working quickly, open the oven and slice a small hole in the top of each roll to allow steam to escape.
- Close the oven door and continue to bake until lightly golden brown all over and firm on top, another 5 to 10 minutes depending upon the moisture in your raw dough.
- Remove from the oven and allow to cool briefly before serving.
Storage suggestions.
- Allow any leftover rolls to cool completely before slicing in half, then wrapping them tightly and freezing.
- Defrost at room temperature for 30 minutes before toasting and serving, or defrost in the microwave and serve warm.
Video
Notes
Nutrition information is automatically calculated, so should only be used as an approximation.


Wanting to try this for long loafs instead of rolls, do you think it would be successful?
I’m afraid I really don’t know, Lindsey. If you try it, let us know how it turns out!
Absolutely brilliant cant eat any grains or lactose or even xanthan gum so i have been living on potatoes and pancakes for twenty years. You have given me bread back again. Cannot tell you how grateful i am. (Works with lactose free cows milk cheddar).
Wow, Penny, I’m so glad you found this recipe, then! I’m actually kind of surprised that this recipe worked for you with cheddar instead of mozzarella cheese. I assume you used more milk, since cheddar has a lot less moisture than even preshredded mozzarella. Thank you so much for sharing your experience!
Hi, Mary, I highly recommend using preshredded cheese, as I discuss in the text of the post.