This post may contain affiliate links. Please read our disclosure policy.
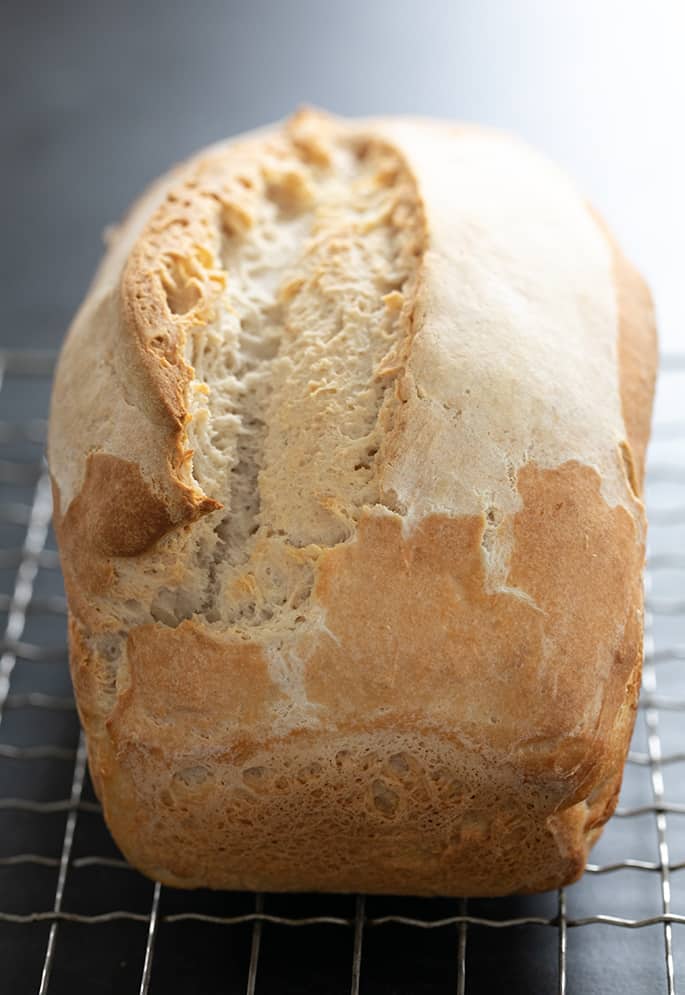
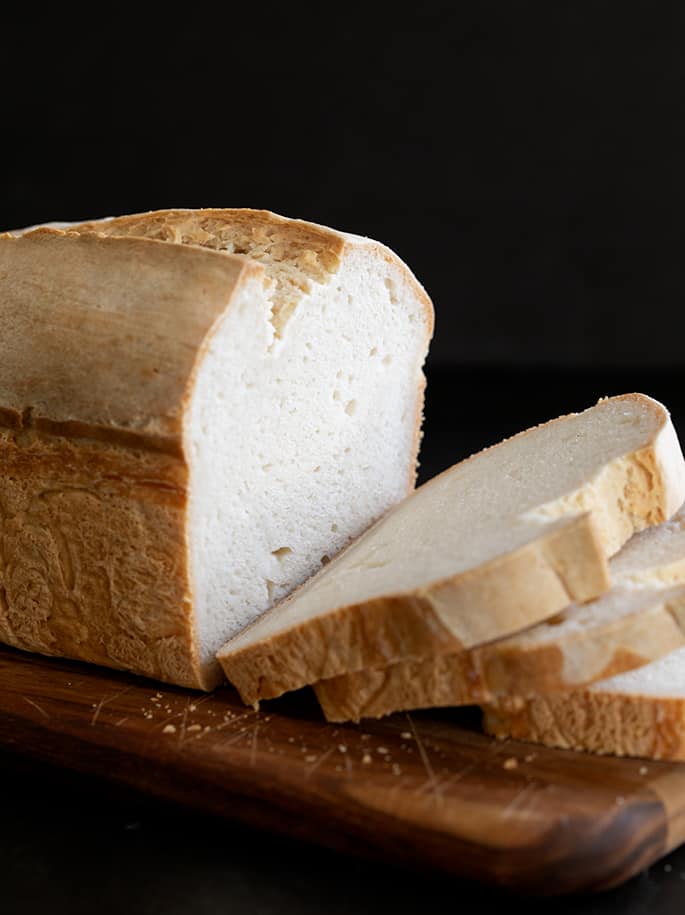
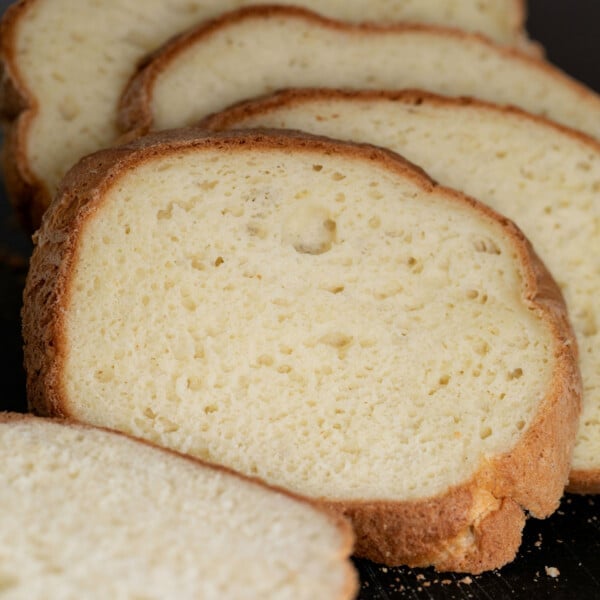
This flavorful loaf of gluten free sourdough bread is made with the simplest wild yeast gluten free sourdough starter. Your basic loaf of sandwich bread, no commercial yeast needed.
Why make pure wild yeast gluten free sourdough bread?
This recipe for a standard loaf of gluten free sourdough bread and our simplified recipe for gluten free sourdough starter are not designed to be a deep dive into all things sourdough. Our goal here is much simpler.
Indeed, this is a loaf of authentic gluten free sourdough bread, made without any commercial yeast at all. But these recipes are designed to scratch the itch for a fuller-bodied yeasty tasting bread, and to help you enjoy fresh homemade bread if you don't have any commercial yeast.
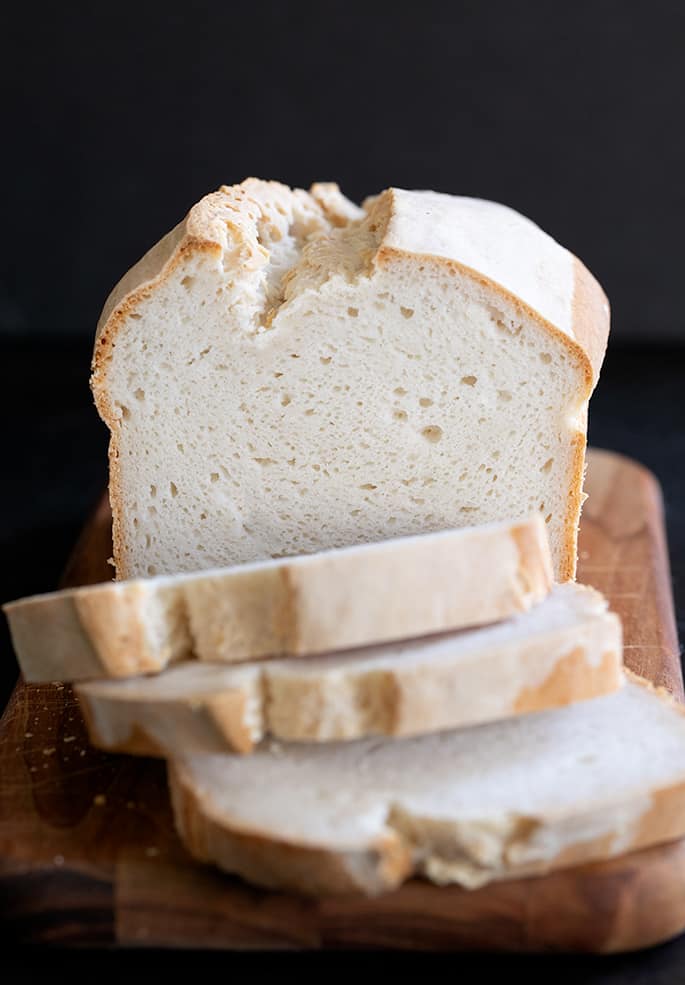
Think of it more like a workhorse kind of white sandwich bread that's great for lunches. In my bread book, GFOAS Bakes Bread, I have a whole chapter on wild yeast sourdough recipes and we go deep.
Here, we go simple. The rules are a little relaxed, but the process takes less work. And frankly I believe that the deep dive in Bakes Bread really illustrates why I still love traditional cookbooks that can really explore a whole subject.
How to bake gluten free sourdough bread
How to use a gluten free sourdough starter
Before we begin discussing how to make bread with your active, fed wild yeast sourdough starter, let's first make sure you have one (click thru earlier in this paragraph)! If you don't, no worries at all you've come to the right place.
Keep in mind that a wild yeast sourdough starter (one made without any commercial yeast, which is a single strain of yeast) takes at least 5 days to become active. And it will perform best after about 10 days.
You can speed things up by adding a bit of commercial yeast to your starter. If you have commercial yeast on hand and you need a loaf of bread today, I recommend our simplest gluten free bread recipe.
But if you've been confused by sourdough starters in the past, try to stick with us. We've simplified the process significantly, so click through above.
It includes an instructional video to bring it to life, and frequently asked questions to help soothe your worried sourdough soul.
How to feed your gluten free sourdough starter for use
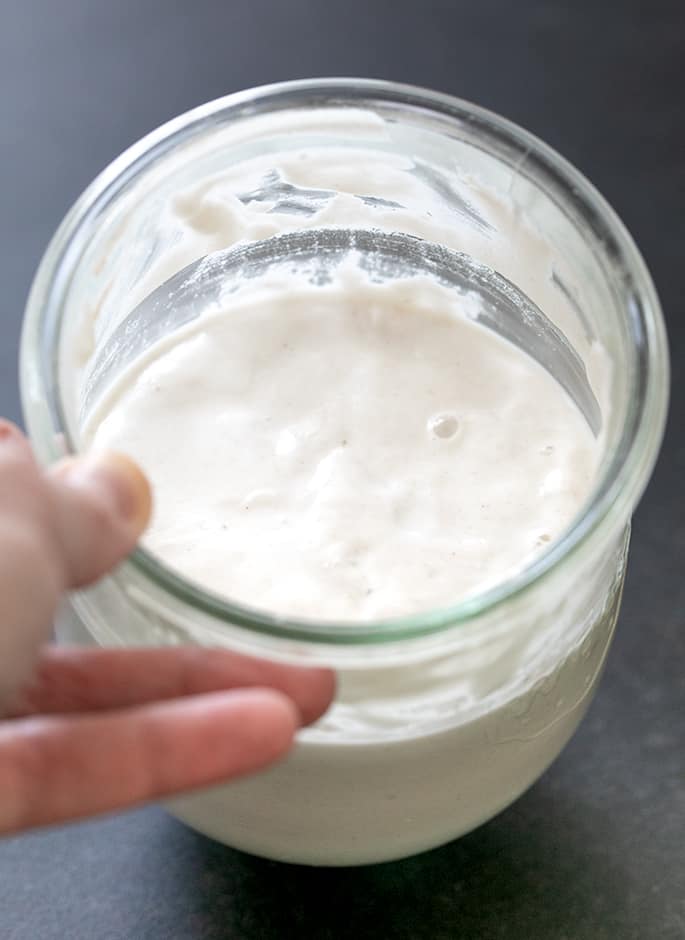
Your starter must have been “fed” or “refreshed” within the previous 12 hours for it to work in this recipe. Do not proceed with an active starter that hasn't been fed recently. The yeast will have consumed its available food and simply won't be active enough to give a proper rise to a whole loaf of bread.
Once your starter is mature and active, it will need to be refreshed or fed at least once a week to keep it active. That way, when you are ready to bake with it, the wild yeast is alive and waiting for you.
To refresh or feed your sourdough starter, either to keep it active once a week or because you are preparing to bake with it:
- Remove your mature starter from the refrigerator.
- Discard about 1/3 of the volume (including any clear liquid or hooch from the top).
- Add 1/2 cup (70 grams) gum-free gluten free flour and 1/2 cup (4 fluid ounces) spring water or distilled water. Mix with a nonreactive spoon.
- Cover the starter and allow it to sit, covered, at room temperature for about 2 hours or until it is bubbling and active. It is now ready to use in baking.
- Once you've removed the amount of active, fed starter that you need for baking, repeat the process to feed or refresh the starter, then cover it again and allow it to sit on the counter for 12 hours before returning it to the refrigerator for another week, until it needs to be fed again.
Gluten free sourdough bread: ingredients and substitution suggestions
Gluten free dairy free sourdough bread
You should be able to replace the dairy in this bread recipe successfully. The milk can be replaced with unsweetened nondairy milk (my favorite is almond milk), or even with water. If you replace the milk with water, your loaf will simply be a bit less tender but it should still rise.
I haven't tried replacing the butter with a nondairy replacement, but you should be able to use your favorite vegan butter alternative. I only recommend using a butter alternative like Melt or Miyoko's Kitchen brand vegan butter or Earth Balance, and not oil.
Tapioca starch/flour
When I was first testing this recipe, I made it with 3 1/2 cups of all purpose gluten free flour, and the dough didn't rise as readily and the crumb was tighter. I much prefer the recipe made with 1/2 cup of tapioca starch/flour.
If you don't have tapioca starch, you can try using arrowroot in its place, or even another 1/2 cup of all purpose gluten free flour. I'm afraid I can't predict exactly what results you'll get, though.
FAQs
Since this bread is made with a very simple, liquid sourdough starter, it will not rise like the breads in Bakes Bread. If you have that book, turn to the opening section of the sourdough chapter. You'll find a photo of sourdough bread dough that literally popped like a can of biscuits when I opened it after its refrigerator rise.
This recipe is for a batter-style bread, not our bread recipes that call for the more complex gluten free bread flour so it has only one rise. And produces a more ordinary loaf. But when you're baking with limits, “ordinary” can be amazing, especially when it comes to fresh homemade bread.
This rise takes quite a bit of time. In all of my recipe testing, I'm yet to see a rise that took less than 3 hours, and have even let it rise for 8 hours without overproofing.
If you’re unsure about whether or not the bread has proofed enough, allow it to keep rising.
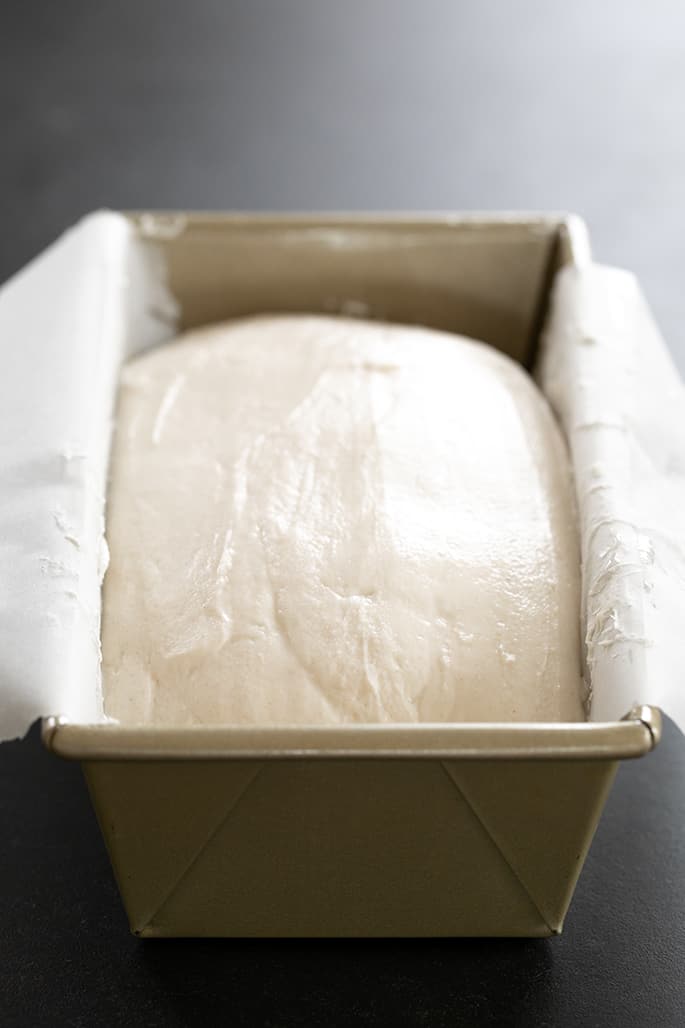
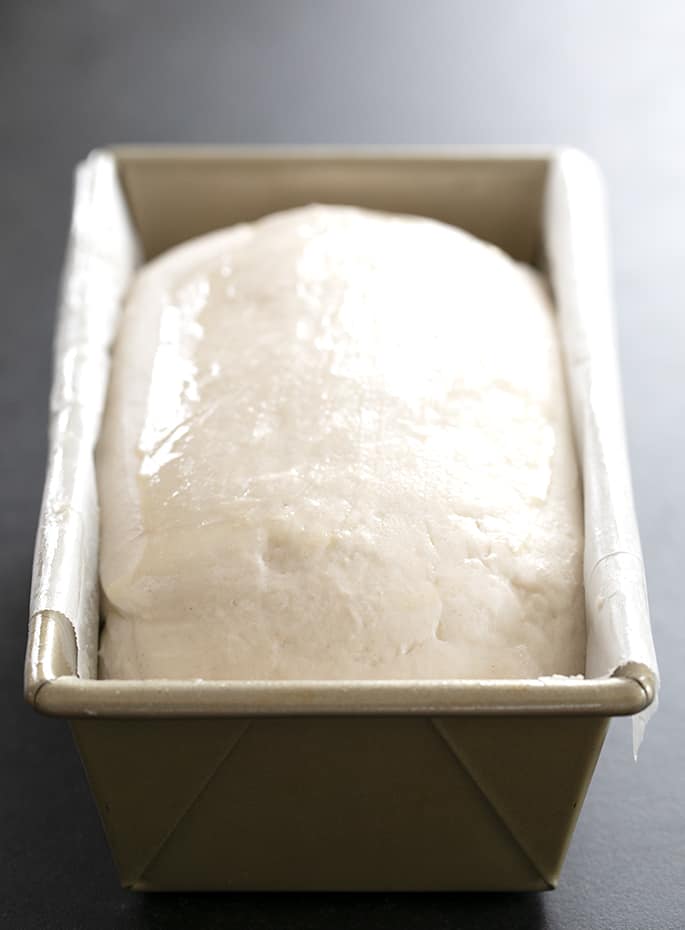
The dough should rise to about 150% of its original size when it's done proofing. That means that it should be 50% bigger than when it started. Unlike conventional bread, this loaf will not double in size, or rise to 200% its original size. Unlike bread made with conventional yeast, it will have more oven spring, where the yeast speeds up the fermentation process in the beginning of baking before a crust forms, so it will get considerably bigger during baking.
Overproofed dough like this tends to have little dimples on the surface, and that tends to take much longer to happen here than it does in a recipe made with conventional yeast. Once those dimples start to form, your bread shouldn't rise any longer.
Yes, since this recipe rises so slowly without overproofing, you can make the dough before bedtime, shape it in the loaf pan, cover the pan, and set it to rise during the night. When you wake up, bake the loaf and enjoy. You can also start the process in the morning, let it rise and bake about an hour before dinnertime.
When this loaf is done baking, the center of the loaf will read 200°F on an instant read thermometer and the loaf will sound hollow when thumped quickly on the underside with a finger.
How to make gluten free sourdough bread
Gluten Free Sourdough Bread Recipe
Equipment
Ingredients
- 3 cups (420 g) all purpose gluten free flour blend, (I used & highly recommend Better Batter; click thru for details)
- 1 ½ teaspoons xanthan gum, omit if your blend already contains it
- 9 tablespoons (68 g) tapioca starch/flour
- 2 tablespoons (25 g) granulated sugar
- 1 ½ teaspoons (9 g) kosher salt
- ¾ cup (165 g) gluten free wild yeast sourdough starter, fed within previous 12 hours (See Recipe Notes)
- 1 ½ cups (12 fluid ounces) warm milk, (about 95°F), plus more by the tablespoon
- 4 tablespoons (56 g) unsalted butter, at room temperature
Instructions
- Grease a standard 9-inch x 5-inch loaf pan and line with parchment paper. Set the pan aside.
- In the bowl of a stand mixer fitted with the paddle attachment or a large bowl with a hand mixer fitted with dough hooks, place the all purpose flour, xanthan gum, tapioca starch/flour, granulated sugar, and salt, and mix or whisk to combine well.
- Add the starter, 1 1/2 cups of milk, and the butter, and beat on medium speed to combine. This is a batter-style bread dough, so it won’t resemble traditional bread dough, but rather a soft cookie dough.
- Turn the mixer up to medium-high speed and beat until the dough has taken on a whipped appearance (about 5 minutes). The dough should be tacky to the touch, but should hold its shape when scooped.
- If your dough feels at all dry to the touch, add more milk by the tablespoon, beating it in until well-combined, until the dough reaches the proper consistency.
- Transfer the bread dough to the prepared loaf pan. Using a moistened spatula, press the dough into every corner of the loaf pan and spread the top into an even layer.
- For a more traditional loaf shape, pile the dough a bit more toward the center in a dome.
- Cover the loaf pan with lightly oiled plastic wrap and allow it to rise in a warm, draft-free place until it’s reached about 150% of its original size, at least 4 hours. It will not fully double in volume, and will rise more in the oven than it does raw.
- Even traditional yeast bread dough will take longer to rise properly in colder, drier weather and less time in warmer, more humid weather.
- This wild yeast sourdough bread will take longer to rise than any other, and will depend in part upon the age of your starter.
- This bread dough is much less likely to overproof and take on that pock-marked appearance than bread made with conventional yeast. If you’re unsure about whether the bread has proofed enough, allow it to keep rising.
- When the bread is nearing the end of its rise, preheat your oven to 400°F.
- Remove the plastic wrap and, using a sharp knife or lame, slash the top of the loaf from one short end to the other about 1/4-inch deep.
- Place the pan in the center of the preheated oven and allow to bake for 30 minutes.
- Reduce the oven temp to 350°F, rotate the pan 180° around, and continue to bake until center of the loaf reads 200°F on an instant read thermometer (about 30 minutes more).
- The crust won’t darken very much, but the loaf should sound hollow when thumped quickly with a finger.
- Remove the pan from the oven and allow the bread to cool for about 10 minutes in the pan before transferring to a wire rack to cool completely before slicing and serving.
- To freeze the bread, cool the loaf completely, then slice, wrap tightly and freeze the slices. Defrost as many slices at a time as you need in the toaster.
Video
Notes
- Remove your mature starter from the refrigerator.
- Discard about 1/3 of the volume (including any clear liquid or hooch from the top).
- Add 1/2 cup (70 grams) gum-free gluten free flour and 1/2 cup (4 fluid ounces) spring water or distilled water. Mix with a nonreactive spoon.
- Cover the starter and allow it to sit, covered, at room temperature for about 2 hours or until it is bubbling and active. It is now ready to use in baking.
- Once you've removed the amount of active, fed starter that you need for baking, repeat the process to feed or refresh the starter, then cover it again and allow it to sit on the counter for 12 hours before returning it to the refrigerator for another week, until it needs to be fed again.
Nutrition information is automatically calculated, so should only be used as an approximation.





Nicole,
Do you think that your bread flour blend would work in this recipe?
Definitely not, Rosemary! That blend is only for recipes that are written for it (the ratios are completely different) and doesn’t create batter-style breads like this one. If you have my bread book, I’d use the starter and instructions in there for sourdough bread using the bread flour blend.
Hi! I’m a newbie at gf sourdough and sourdough in general! I just began making my starter and did it with a cup of better batter mix, but noticed how “gummy” it was and realized that maybe I shouldn’t use a mix with xanthum gum for the starter.. what is your recommendation? Is better batter ok to use in a starter or should I use something without xanthum gum in the starter and then only use the better batter In the recipes I’m baking? Does that make sense? Thanks so much for your help, I definitely need it!! :)
Please see the post on the sourdough starter, Jenna. I discuss what flours to use (and how you can’t use Better Batter) there.
I have been feeding my starter for about a week, I have seen it double but when I went to make the bread it did not rise. I left it for 8 hours and nothing. So I’m going to start over with my starter and see if I did something wrong! Thanks for the recipe I have missed sour dough so much!
How old was your starter when you used it to make the bread, Kelli, and how recently had you fed it? That’s where I’d have a look for where things went wrong.
I made this and the flavor is good. However, it did not rise sufficiently. It’s heavy. I think I fed the starter too close to when I used it. How long should you wait after you feed the starter to using it?
I like to feed the starter the night before, then leave it out and make the dough in the morning, Mary Ann. It may have just been that you needed to let it rise longer. It is very very temperature-dependent.
Hi…Does anyone have the nutritional break down on this recipe? Thank you
Hi, Carol, I’m afraid that particularly with variations in ingredients in our sourdough starter, universally-applicable nutrition information would not be at all useful. Feel free to plug your specific ingredients into an online calculator, like sparkrecipes.
Worked like a charm! Started your recipe for the wild yeast last week and made my first loaf today. Thank you so much for this!
So exciting, Rosemary!! Thanks for the update! ?
Best gf bread I’ve ever made! Used your Better Than Cup4Cup blend and just did 70g more of it to substitute the tapioca (figured the blend was high enough in starch) It came out perfectly! Dark golden crust and soft insides perfect for soaking up sinful amounts of butter! Full disclosure I’m gluten sensitive not Celiac – meaning I very occasionally misbehave – so today I used some of my Dad’s 3 year old regular wheat starter instead. Now that I know this recipe likes me (I’m legit cursed with breads) I’ll definitely be getting a proper gf starter going! You’re a life saver, Bless!
That’s exciting, Liz! I’m so glad you found your groove, even if it was with a wheat starter. Onward!
I am so excited to try this, my starter is almost ready. I have your Bread book but lack several ingredients, I have all of these though, yeh! I did sourdough for years before GF and now I am back at it and love this version. Thanks for your determination to overcome this new hurdle, life is a journey for sure.
You’re so welcome, Penny. I’m so glad this simpler version appeals to you. I love this: “Thanks for your determination to overcome this new hurdle, life is a journey for sure.” Your comment is giving me strength! ?
so excited to make this in the morning. My starter has been fed for 3 days now and looks great. Thank you in advance for all the work going into this. It is greatly appreciated.
You’re so welcome, Lisa! I’m excited for you. :)
Is this doable in a bread maker? What if you mixed it all first THEN put it in the bread maker…
I don’t use or recommend use of a bread maker Olinda. They vary quite significantly from brand to brand and are truly unnecessary.