This post may contain affiliate links. Please read our disclosure policy.
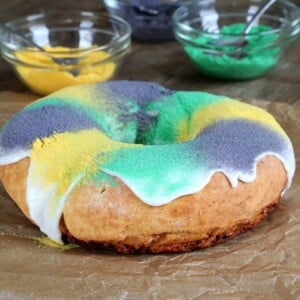
Make this recipe for gluten free king cake and celebrate Mardi Gras with all your old favorites. The rich, tender bread with the fragrant filling and the beautiful colored decorations is back!
What makes this recipe for gluten free king cake so good
If you're missing the rich, tender, and perfectly sweet taste of king cake, it's time to bring it all back! Baking any king cake is something of a labor of love, since it's a shaped, enriched bread that must be filled, shaped, and then decorated—but it's worth it!
This dough is similar to our recipe for Gluten Free Chocolate Pull-Apart Bread, but the dough is made with sour cream, which makes the dough truly lovely to work with. It also makes the finished bread tender and fabulous.
About food coloring, and plastic babies!
I know many of you are very, very anti-food coloring. You can leave the food coloring out of the equation, of course. I have no problem with some food coloring in my life, here and there, plus I couldn't very well show you a gluten free King Cake that didn't have the traditional Mardi Gras colors of green, purple and gold, now could I!
I didn't bury a plastic baby doll in this King Cake. I am terrified of even the prospect of a melting plastic baby doll in my oven.
I've already done enough damage to house and home in my kitchen over the years. If anyone knows how to pull this sort of stunt without melting the baby, let us know in the comments!
FAQs
Can I use any gluten free flour blend I like to make this gf king cake?
No! This gf bread dough recipe is specifically designed to be made with our gluten free bread flour blend. This is a highly specialized flour blend, made with a combination of Better Batter classic blend gf all purpose flour, Expandex modified tapioca starch, and whey protein isolate. Please click through for full details!
Can I make gf king cake with another gluten free bread dough?
I think so! I would recommend trying the raw dough from our recipe for gluten free hot dog buns. It's also an enriched gluten free bread dough that holds a shape during baking without rising too much.
Can I make this gf king cake recipe dairy-free?
Maybe! If you use the alternate gluten free bread dough referenced above, follow the suggestions in that recipe for replacing the dairy ingredients. The dairy in the gluten free bread flour just cannot be successfully replaced, especially in shaped bread like this gluten free king cake.
The butter in the filling for this recipe can easily be replaced with vegan butter. My favorite brands are Melt and Miyoko's Kitchen. The milk in the glaze can be replaced with water, or a nondairy milk.
How to make gluten free king cake for Mardi Gras
Gluten Free King Cake for Mardi Gras!
Equipment
- Stand mixer or hand mixer fitted with dough attachment
Ingredients
For the bread
- 3 ¼ cups (455 g) gluten free bread flour blend, (you must use this specific blend of flour; please click through) plus more for sprinkling
- ¼ teaspoon cream of tartar
- 2 teaspoons (6 g) instant yeast
- ¼ cup (50 g) granulated sugar
- ½ teaspoon (3 g) kosher salt
- 2 tablespoons (28 g) unsalted butter, at room temperature
- 8 ounces sour cream, at room temperature
- 1 (50 g (weighed out of shell)) egg, at room temperature, beaten
- 3 ounces warm water, about 95°F, plus more as necessary
For the filling
- 4 tablespoons (56 g) unsalted butter, melted
- ½ cup (100 g) granulated sugar
- 2 teaspoons ground cinnamon
For the toppings
- 2 cups (230 g) confectioners’ sugar
- 1 tablespoon (14 g) unsalted butter, at warm room temperature
- 2 tablespoons (1 fluid ounce) milk, at room temperature, plus more by the 1/4 teaspoon if necessary
- ¾ cup (150 g) superfine sugar, (or granulated sugar, pulsed a few times in a blender or food processor)
- Green, Yellow, Blue and Red, liquid food colorings
Instructions
Making the bread dough.
- In the bowl of your stand mixer, place the flour blend, cream of tartar, instant yeast and sugar, and use a handheld whisk to combine well. Add the salt and whisk to combine well.
- Add the butter, sour cream, egg and 3 ounces water, and mix on low speed with the dough hook until combined. Raise the mixer speed to medium and knead for about 5 minutes.
- The dough should be a lovely, smooth, enriched dough. If necessary to achieve the desired texture, add the remaining 1 ounce of water and knead again until smooth. The dough should climb up the dough hook during kneading but remain intact and smooth.
- Spray a silicone spatula lightly with cooking oil spray, and scrape down the sides of the bowl. Transfer the dough to a lightly oiled bowl or proofing bucket large enough for the dough to rise to double its size, spray the top of the dough with cooking oil spray, and cover with an oiled piece of plastic wrap (or the oiled top to your proofing bucket).
- Place the dough in the refrigerator for at least 12 hours and up to 3 days.
Preparing the dough for shaping.
- On baking day, turn out the chilled dough onto a lightly floured surface and, using the scrape and fold kneading method: Using a very light touch, sprinkle the dough with more flour and knead it lightly, sprinkling with flour when necessary to prevent it from sticking, scrape the dough off the floured surface with a floured bench scraper, then fold it over on itself.
- Repeat scraping and folding until the dough has become smoother. This dough should not need much work to become smooth. Do not overwork the dough or you will incorporate too much flour and it will not rise properly.
Shaping, filling and assembling the dough.
- Line a large, rimmed baking sheet with unbleached parchment paper and set it aside. On a lightly greased piece of unbleached parchment paper, using a floured rolling pin, roll the dough into a rectangle that is about 18-inches by 14-inches, and about 1/4-inch thick.
- In a small bowl, place all the filling ingredients and mix to combine well.
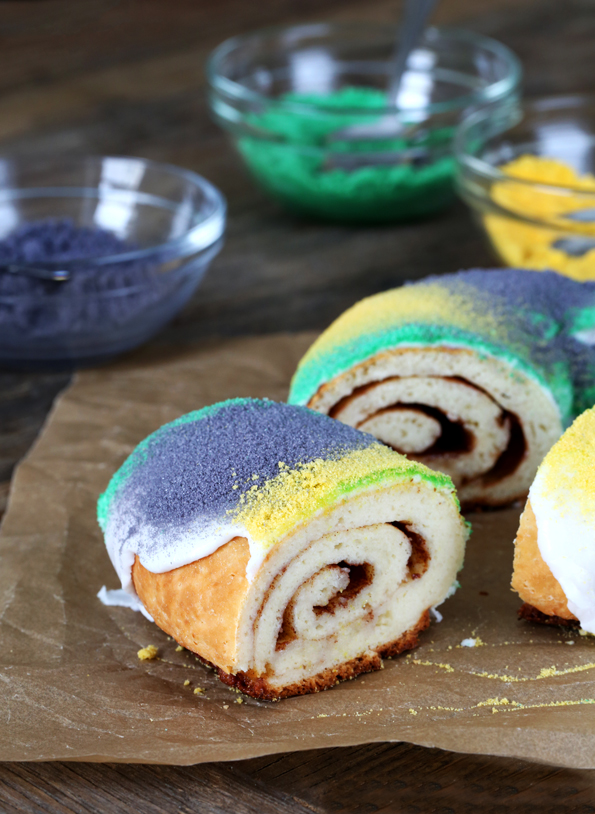
- With a large, dull knife or offset spatula, spread the filling evenly over the entire surface of the dough, leaving a 1-inch border clean all around the perimeter. Using the parchment paper to aid you, beginning at one of the long sides, roll the dough tightly into a cylinder and pinch the seam and the ends closed securely.
- Transfer to the prepared baking sheet, seam side down, join the ends together and pinch them closed securely. Sprinkle the top and sides of the dough generously with bread flour to provide the dough a cloak to rise into.
- Cover with greased plastic wrap and set in a warm, draft-free location to rise for about 40 minutes, or until it reaches about 150% of its original size. Do not overproof.
- As the dough is nearing the end of its rise, preheat your oven to 350°F.
Baking the bread.
- Once the dough has finished rising, remove the plastic wrap and place the pan in the center of the preheated oven.
- Bake until lightly golden brown all over (about 30 minutes). Allow to cool for about 10 minutes on the pan before turning out onto a wire rack to cool completely.
Glazing and decorating.
- While the bread is cooling, make the glaze and colored sugars.
- To make the glaze, mix the confectioners’ sugar, butter and 1 tablespoon milk into a thick paste. Add the remaining tablespoon milk one teaspoon at a time, mixing well, until you have a glaze that is smooth and thickly pourable.
- If it is very hard to stir, it needs another drop or two of milk. Set the glaze aside briefly.
- To make the colored sugars, divide the superfine sugar into 3 separate small bowls.
- To one bowl, add about 5 drops of yellow food coloring, and mix well, pressing the food coloring into the sugar with the back of a small spoon until the sugar is a uniform yellow color.
- To a second bowl, repeat the process with about 5 drops of green food coloring.
- To the final bowl, repeat the process with about 3 drops each of the red and blue food colorings (red + blue = purple).
- Once the bread is cool, mix the glaze (adding a few more drops of milk if necessary to return to the proper consistency).
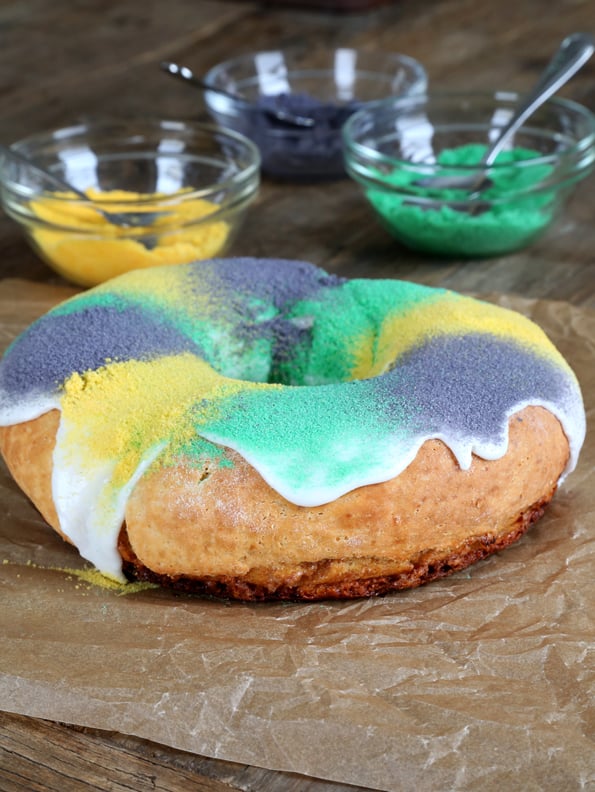
- Pour the glaze over the top of the bread, allowing it to drizzle, and immediately decorate with the 3 different colored sugars in alternating bands.
- I used a small mesh sieve to distribute the sugars without their clumping.
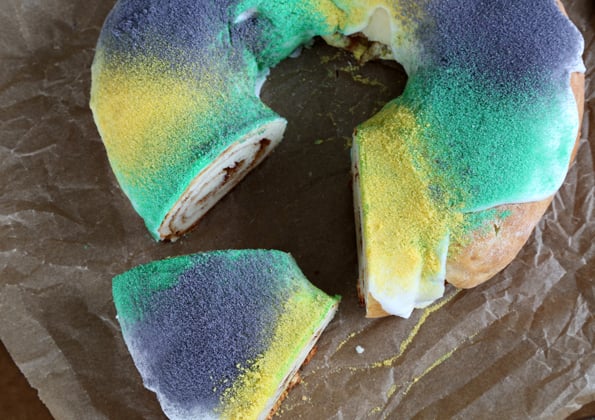
- Slice and serve.
Nutrition information is automatically calculated, so should only be used as an approximation.





I have now tried this recipe twice, both times using King Arthur bread flour. (Which FYI is gluten-free but does have deglutenized wheat so it is not wheat free if that’s a concern for anyone.) Both times the dough was quite dry, even though I added a second egg the next time, and I needed to add more liquid in the kneading. Obviously could be due to the different flour 🙂
All of that said, it was quite tasty and we ate it in about a day!
I haven’t tried this recipe with King Arthur’s Gluten Free Bread Flour, Rae, but I have tried other of my gf bread recipes here on the site with it, and I do like it. It does tend to need a bit more liquid than my recommended blends, though, which I have also found with Caputo fioreglut, which is a similar blend. I would also mention that you should be sure to measure flour and all possible other ingredients by weight, not volume, or the tendency is to overmeasure it otherwise.
I was introduced to your blog when I came across your gluten-free cornbread recipe. But the recipe for this king cake doesn’t seem conducive to a shoestring budget since gluten-free flours tend to be rather pricey….at least in my neck of the woods LOL! And I see you hail from upstate NY which is where I live (in the Buffalo area). I did enjoy the cornbread recipe though, using all cornmeal instead of a mixture of cornmeal and flour like most recipes was pure genius :D….though when I made it recently it was a little bland because I forgot the salt LOL. I’m gonna take a look at your other recipes and see if I find anything that tickles my fancy :)
I don’t live in Upstate New York, Joseph. If you would like to see where I order the products in my gluten free pantry: https://glutenfreeonashoestring.com/stock-your-gluten-free-pantry-baking/ It isn’t possible to bake gluten free at all without using gluten free flours.
I don’t have an intolerance to gluten myself but when I make things for events such as pot lucks and bake sales I try to satisfy as many of the major diets I possibly can on my limited budget, vegan, nut-free, and gluten-free usually being the top diets I try to satisfy, I’ll try to make it soy-free too. And I did find your blend to make a gluten-free all-purpose flour and I do have the equipment for grinding my own rice flour (I have a grain mill attachment for my Kitchen Aid mixer). But when I want to make something gluten-free I try to find recipes for the baked good in question that don’t take any flour at all (like for example for a gluten-free chocolate cake I’ll try to find a recipe for flourless chocolate cake and I do have a couple recipes that I haven’t tried yet and I also found a recipe for flourless peanut butter cookies
Joseph, you commented on a recipe for Gluten Free King Cake. You cannot make a yeasted gluten free bread without gluten free flours. I have a few flourless baking recipes on the site (just search “flourless”), but naturally gluten free foods are not the focus of this blog.
I know. Sorry about the dissertation. It was just my natural verbosity and active mind at work. I didn’t mean to make it sound like a criticism. You do have some interesting recipes from what I can see. And as I said I do have a kitchen aid mixer along with a grain mill attachment for it so I could grind my own rice flour and thus the recipe that I did eventually find on your blog for high quality gluten-free all-purpose flour shouldn’t be as expensive to make as it would be if I had to buy rice flour. I’d probably have to buy the other starches and flours and gums but since the percentages of those other things in the flour blend aren’t as high the supply I buy should last awhile.
I think you should just use my recipe, Laura!
The baby is placed under the king cake after the cake is cooled and decorated. Whoever gets the baby brings the next king cake.
Note: the baby represents Jesus, which is what makes ita King cake.