
This post may contain affiliate links. Please read our disclosure policy.
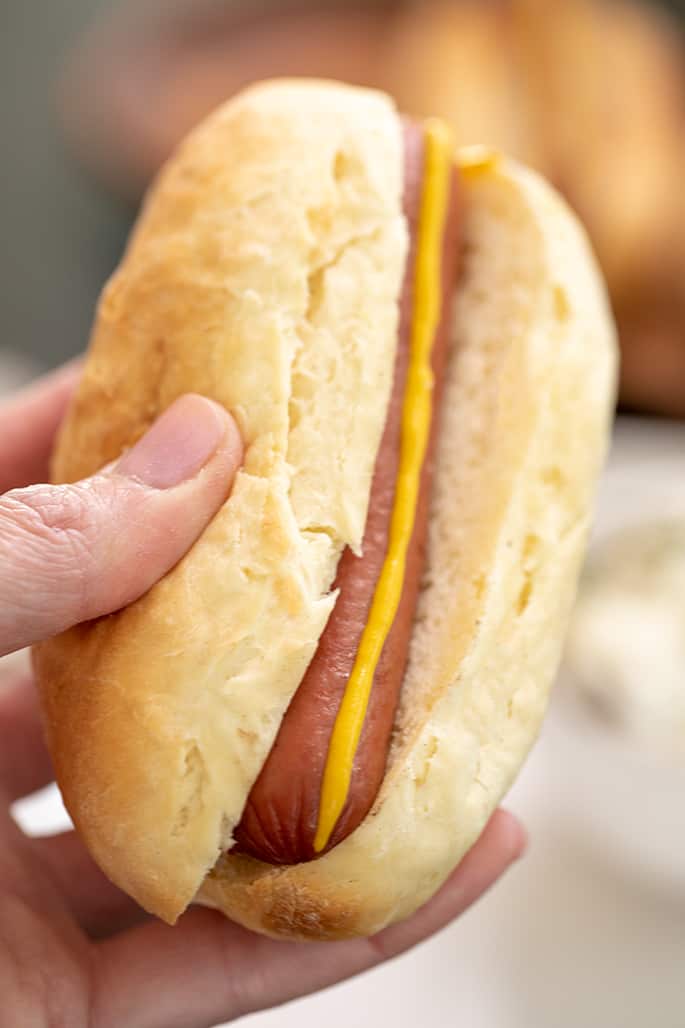
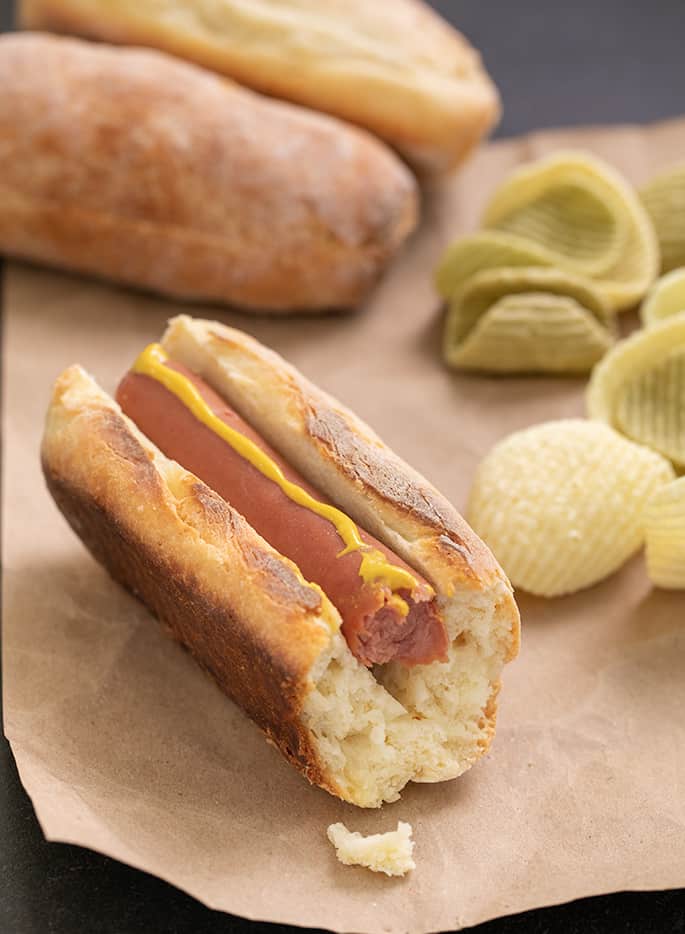
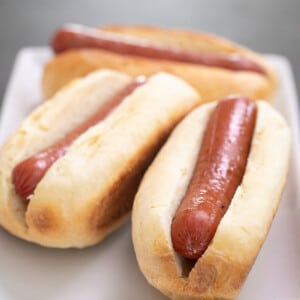
These soft, squishy gluten free hot dog buns are better than anything you can buy at the grocery store. Fire up the grill!
Why make instead of buy?
If you got here by searching for “gluten free hot dog buns near me,” that means you're looking to buy buns. But wait! Give me 2 minutes to try to convince you that it's better (and easy!) to make them yourself.
There are plenty of companies that make packaged gf hot dog buns these days. Schar, Canyon Bakehouse and Udi's all sell gluten free hot dog buns.
But even the best among them, which I would say is probably Schar, simply don't hold up to scrutiny. They fall apart, and they're far from squishy.
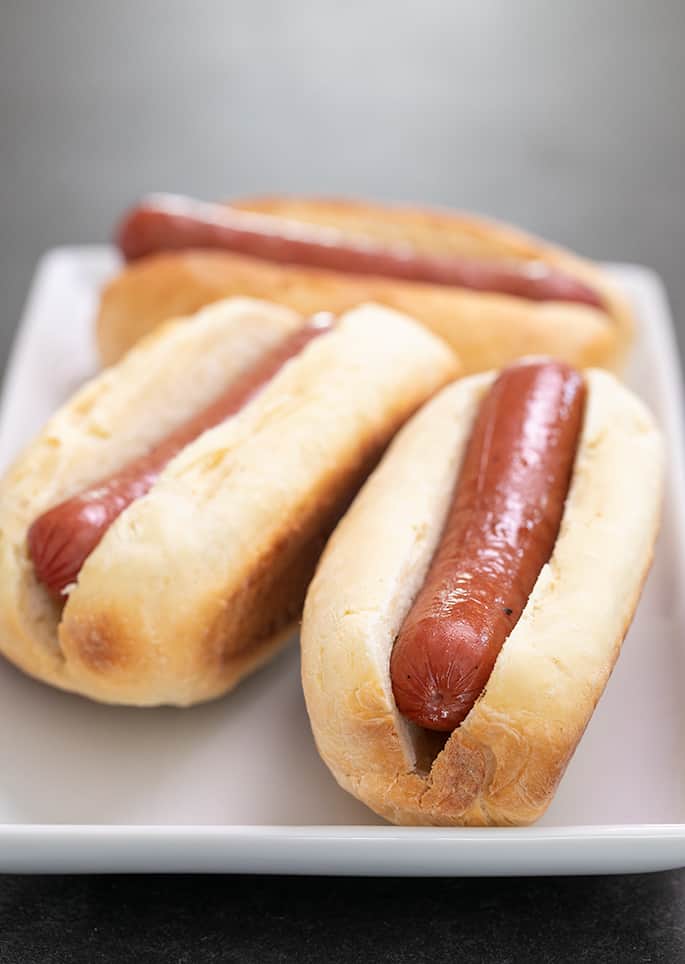
Not everyone has time or the inclination to make homemade hot dog buns every time, of course. But this recipe makes a classic, squish bun that has a very light, browned crust and is perfectly fluffy inside. Make it at least once, so you know that the packaged kinds need to improve their product.
You may still buy packaged buns from time to time. I may, as well! But I know that they're not good enough, and I don't believe it has to be that way. Let's pressure them to make them at least as good as gluten free packaged breads, which are really quite good.
Tips for making buns
How to shape these gf hot dog buns
This bread dough is pretty highly enriched, with milk, melted butter, and an egg. When it's ready for shaping, it should be tacky to the touch, but not especially wet.
The dough should rest for at least 2 hours before you handle it. This will allow the flours to absorb the moisture in the other ingredients, making the dough easier to work with.
When you begin to shape a divided one-sixth of the dough into the shape that will become a hot dog bun, you should begin with clean, dry hands and no additional flour. If the dough is too sticky to shape like that, try letting it rest for longer and working with it a bit cold.
How to get a nice, even rise
The moment you add additional flour to the dough, you are likely to add pleats to the dough that will separate as the dough rises and bakes. If you shape the dough without additional flour, you can pinch together any pleats or breaks in the dough, and they should disappear.
The shaping is finished on a very lightly floured surface, with a tiny bit of extra tapioca starch/flour, just to smooth the top. That gives the dough a nice smooth cloak to rise into.
Keep in mind that overproofing is not ever the result of having let your raw yeast dough rise too long. It's the result of letting the dough rise too much.
In cold, dry weather, the dough will take longer to rise. In warm, humid weather, it will rise more rapidly. Patience is key!
Ingredients and substitution suggestions
If you can't have dairy, try replacing the melted butter with melted vegan butter. Melt and Miyoko's Kitchen brands are my favorite.
In place of dairy milk, any unsweetened nondairy milk should work. My favorite is unsweetened almond milk, since it still has some fat, and that adds welcome richness.
Egg free hot dog buns
There is only one egg in this recipe, so I think you could replace it with one “chia egg.” Place 1 tablespoon ground white chia seeds and 1 tablespoon lukewarm water in a small bowl, then mix and allow to sit until it gels.

The role of tapioca starch/flour
There is a fair amount of tapioca starch/flour in this recipe. It's in addition to whatever tapioca starch you'll find in your all purpose gluten free flour (as most good GF flour blends will contain it).
If you can't have or can't find tapioca starch, you can try replacing it with superfine sweet white rice flour (also called glutinous rice flour). It has a similar, although not exact, sticky, stretchy quality.
About the instant yeast in this yeast bread recipe
You must use some form of commercial yeast for this recipe. I always bake with instant yeast (which is also called bread maker or rapid rise yeast).
If you prefer to use active dry yeast, you'll need to use more, and to “prove” the yeast in some of the milk in the recipe before you add it to the rest of the mixture. The general rule of thumb is to use 25% more active dry yeast than instant yeast, by weight.
Storage
These hot dog buns, like all fresh bread, are best the day that they're made. But it's not always practical to make the bread dough, shape, let rise, and bake them all on the same day you plan to serve them. Good news, though! They freeze incredibly well.
I don't recommend freezing raw yeast bread dough, particularly shaped breads, for two reasons. It's always possible that the yeast won't survive the freezing. Plus, shaped breads really rely on a controlled rise so they don't lose their shape. But there are two ways to make the buns ahead of time:
If you want to parbake your buns
If you'd like your gluten free hot dog buns to be fresh-baked but you can't devote the time to the whole process on the day you plan to serve them, try parbaking them first. Go through the whole recipe up through step 11 below just as it's written.
In Step 12, preheat your oven to 300°F instead of 350°F. Then, coat the rolls in oil just as instructed in step 13, and place them in the preheated oven. Bake them until they are just set but not browned at all (about 15 minutes). Let them cool completely, wrap each individually in freezer-safe wrap, and freeze fully. They should last that way for up to 2 months.
The day you plan to serve them, let them defrost at room temperature. When you’re ready to enjoy them, preheat the oven to 350°F, sprinkle the rolls with some lukewarm water, then bake until just browned (about 10 minutes). Fresh buns!
If you don't want to parbake them
If you don't care about having them fresh-baked, just bake them according to the recipe instructions, then let them cool completely. Wrap each individually in freezer-safe wrap, and freeze fully. They should last that way for up to 2 months.
When you're ready to enjoy the, let them defrost completely at room temperature, and serve. You can also toast them lightly to make them taste fresh-baked.
Gluten Free Hot Dog Bun Recipe
Ingredients
- 2 ¼ cups (315 g) all purpose gluten free flour blend, (I used Better Batter; click thru for details)
- 1 teaspoon xanthan gum, omit if your blend already contains it
- ⅝ cup (75 g) tapioca starch/flour, plus more for sprinkling
- 1 tablespoon (9 g) instant yeast
- ¼ cup (50 g) granulated sugar
- ½ teaspoon kosher salt
- 1 ⅛ cups (9 fluid ounces) warm milk, (about 95°F)
- 1 (50 g (weighed out of shell)) egg, at room temperature
- 4 tablespoons (56 g) unsalted butter, melted and cooled
- Extra virgin olive oil, for drizzling
- 6 gluten free hot dogs, for serving (optional)
Instructions
- Grease a rectangular baking pan very lightly (or use a nonstick baking pan). The ideal pan is rectangular and about 5-inches wide. (See Recipe Notes.)
- In the bowl of a stand mixer, place the flour, xanthan gum, tapioca starch/flour, instant yeast, and granulated sugar, and whisk to combine well. Add the salt, and whisk again to combine.
- Add the milk, egg, and melted butter. Using the paddle attachment, beat vigorously. The mixture will come together in a clump and clear the sides of the bowl. Keep beating until it begins to look whipped, and sticks to the side of the mixing bowl again (about 5 minutes total).
- Transfer the mixture to a lightly oiled bucket or bowl with a tight-fitting lid. The container should be large enough for the dough to nearly double (although it most definitely won’t double).
- Set the container aside for at least 2 hours at room temperature, or up to 24 hours in the refrigerator. Do not let the dough rest/rise for too long, or your rolls will rise much more irregularly after shaping.
- If you’ve let the dough rest for in the refrigerator, remove the dough from the refrigerator, and allow it to warm until it’s no longer cold to the touch before working with it.
- Divide the dough into 6 equal portions with a sharp knife or metal bench scraper. Working with one piece at a time, knead the dough in your clean, dry hands, without adding any additional flour of any kind, pinching any seams that separate.
- Begin working the dough into a cylindrical shape, just in your hands, and then place on a *very* lightly floured surface to finish shaping into a cylinder about 4.5 inches long. Spread a tiny bit of additional tapioca flour on the outside of the cylinder to smooth the surface.
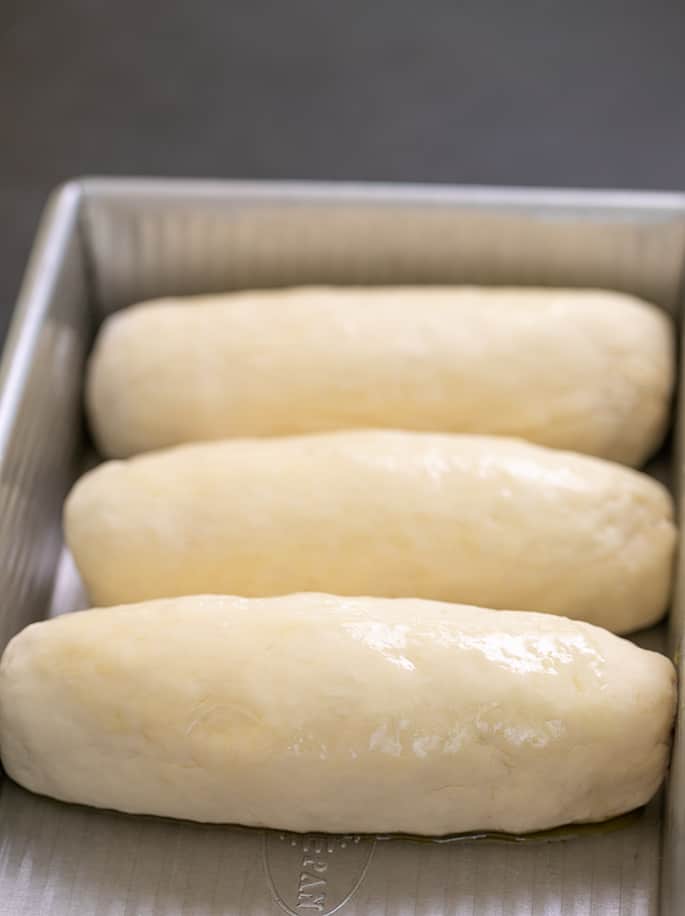
- Place the shaped pieces of dough, a bit more than 1-inch apart, in the prepared pan, taking care not to crowd them.
- Cover the pan with lightly greased plastic wrap, place in a warm, draft-free location, and allow to rise until about 150% of their original size.
- This rise can take anywhere from 45 minutes to hours, depending upon the ambient temperature in your kitchen. Overproofing is not very likely, and can be detected when the surface of your raw buns begins to look cratered and uneven.
- When the rolls are nearing the end of their rise, preheat your oven to 350°F.
- Remove the plastic wrap and drizzle the shaped and risen rolls very lightly with olive oil. Using clean, dry hands or a pastry brush, spread the oil evenly over the top and sides of the risen rolls.
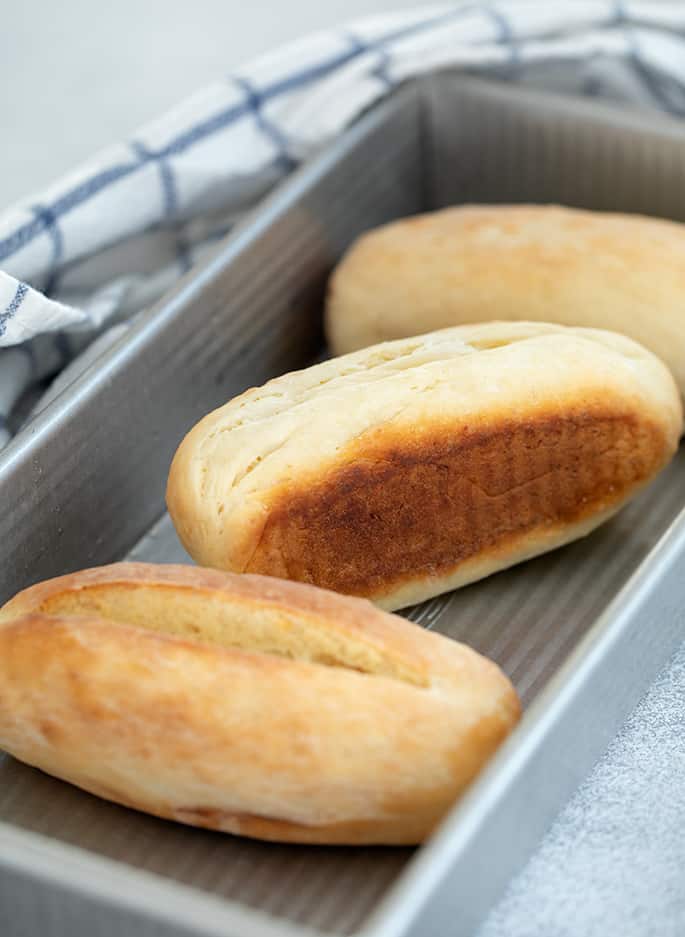
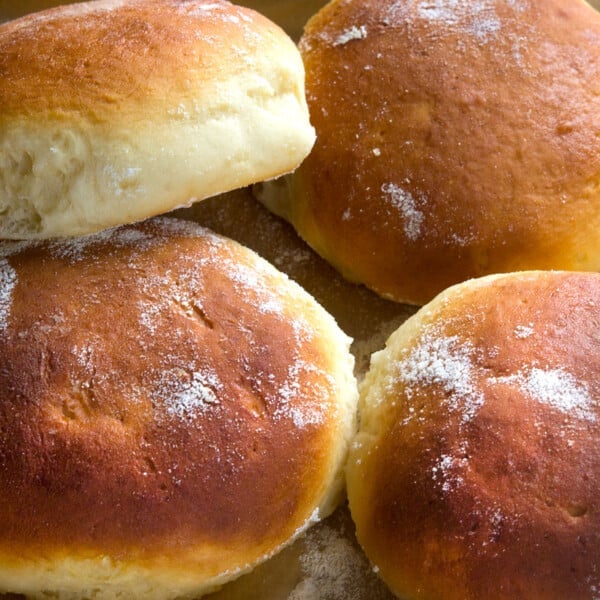
- Place the baking pan in the center of the preheated oven and bake for about 20 minutes or until the rolls are lightly golden brown all over and firm to the touch.
- An instant read thermometer inserted into the center of each roll should read about 190°F.
- Remove the pan from the oven, and with the rolls still in the hot pan, cover it loosely with a tea towel and allow the rolls to cool for about 10 minutes. This will help keep the rolls, and even the crust, relatively soft.
- Slice each bun along one long side, toward the center, about 2/3 of the way through the bun, to create a space for a hot dog. Place a cooked hot dog in each bun, along with any toppings, and serve.
Video
Notes
Nutrition
Nutrition information is automatically calculated, so should only be used as an approximation.


Hi, I love the recipes of yours that I have made in the past, so I’d like to try this one for the hot dog buns that I need to make today (I’ve been craving hot dogs for weeks, I have some in the freezer but don’t like any store bought buns including Franz).
However, I don’t have a stand mixer. Is it possible to get good results using either my Zojirushi (BB-PAC20, it’s the 2 lb, top of the line model) bread machine or a good strong electric hand mixer (which has no problem plowing through the stiffest cookie doughs)?
Hi, Shelby, I’ve never had a good packaged gluten free hot dog bun either. I recommend trying a food processor using the plastic attachment, but you need to be very careful not to heat the dough or overprocess it. I don’t recommend your bread machine, no, and recommend against a hand mixer because it would add way too much air into the dough.