

This post may contain affiliate links. Please read our disclosure policy.
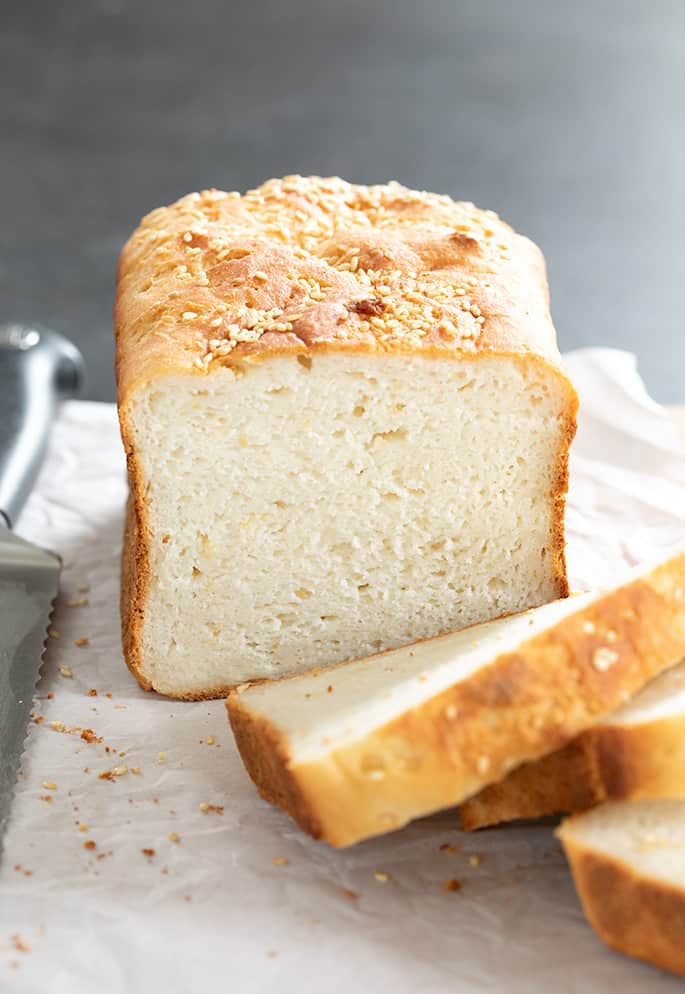
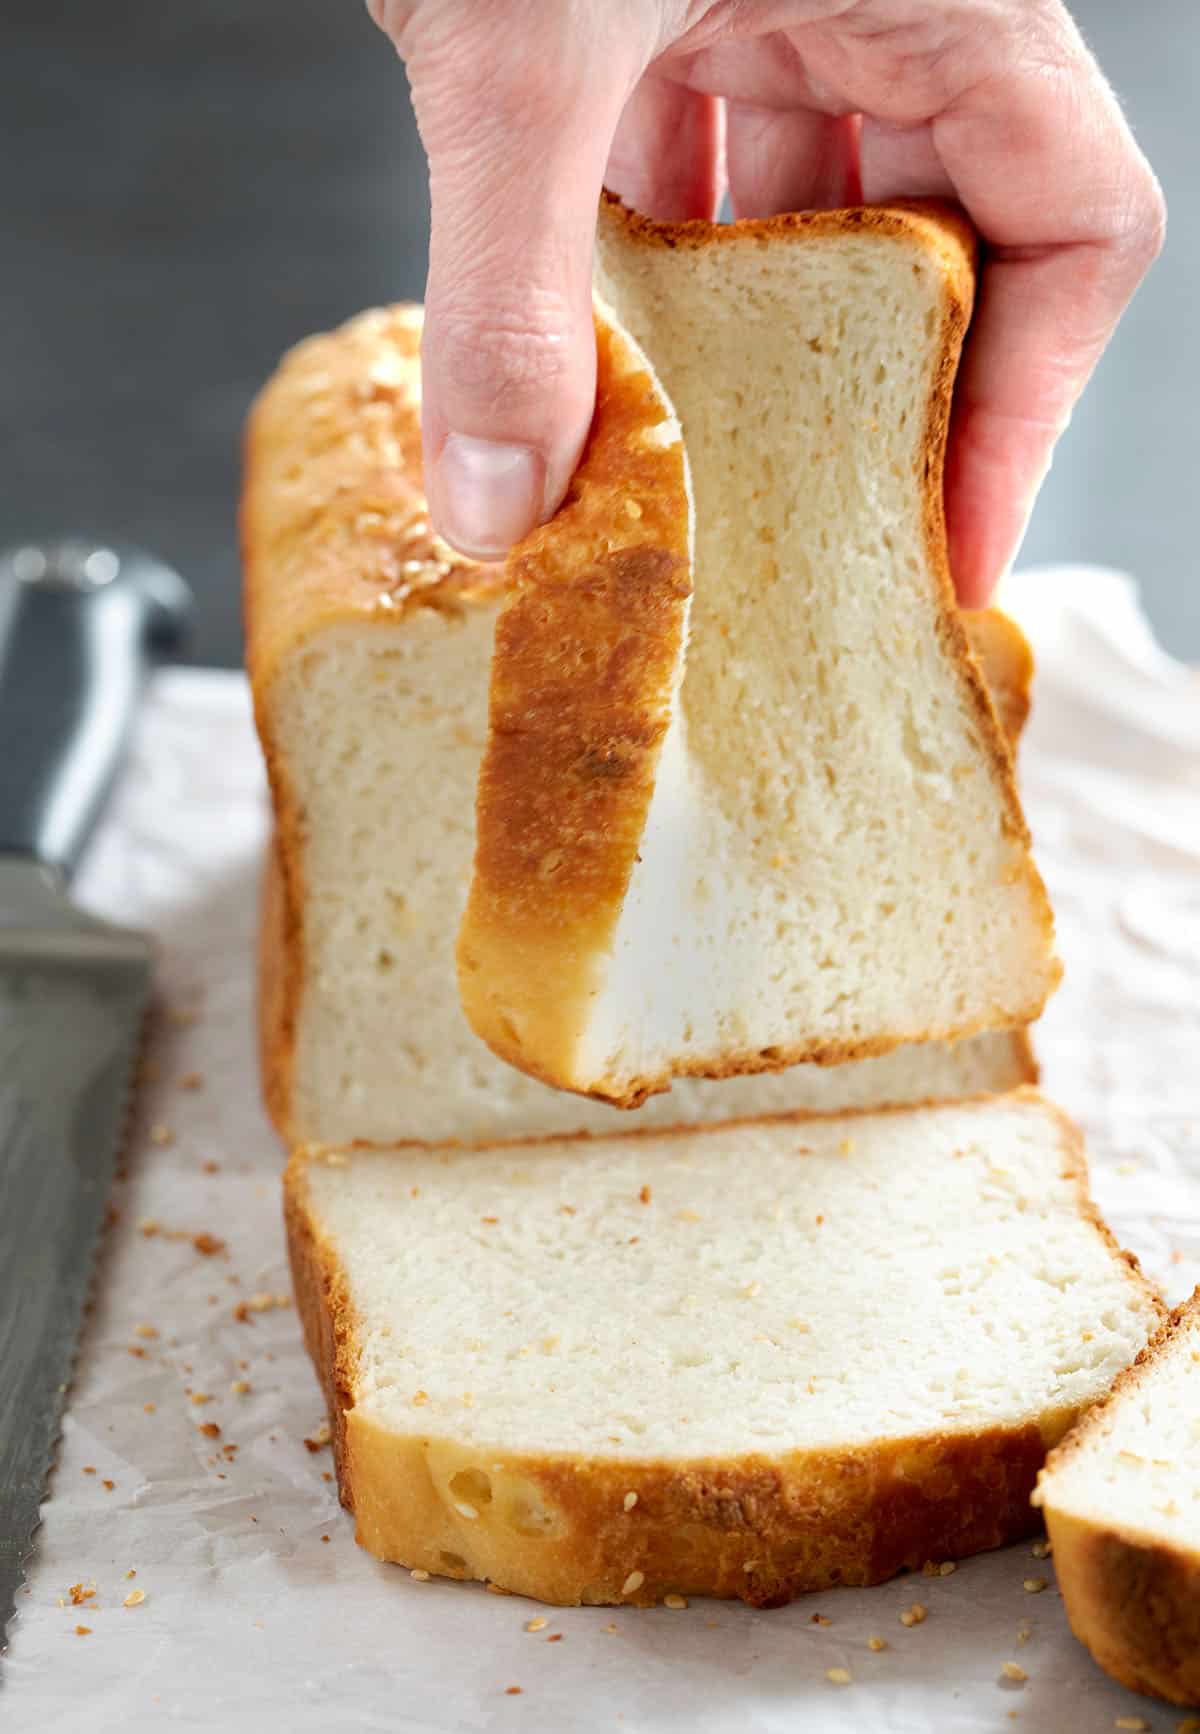
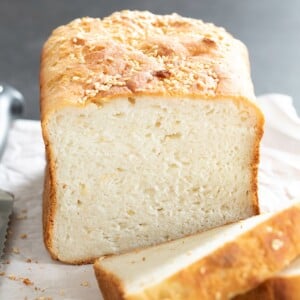
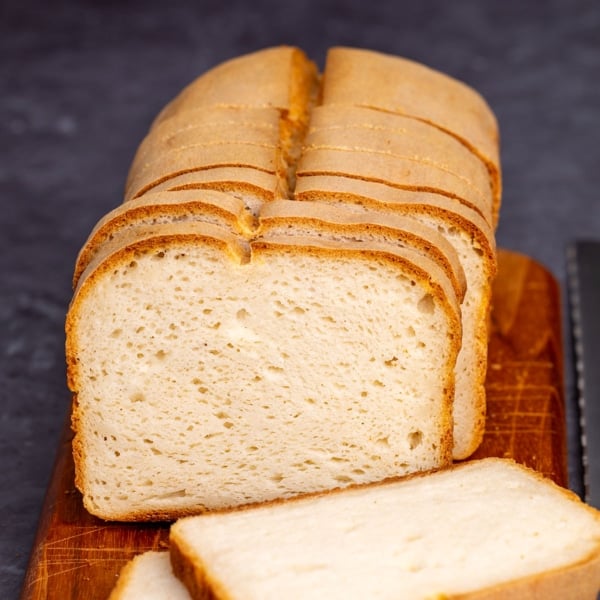
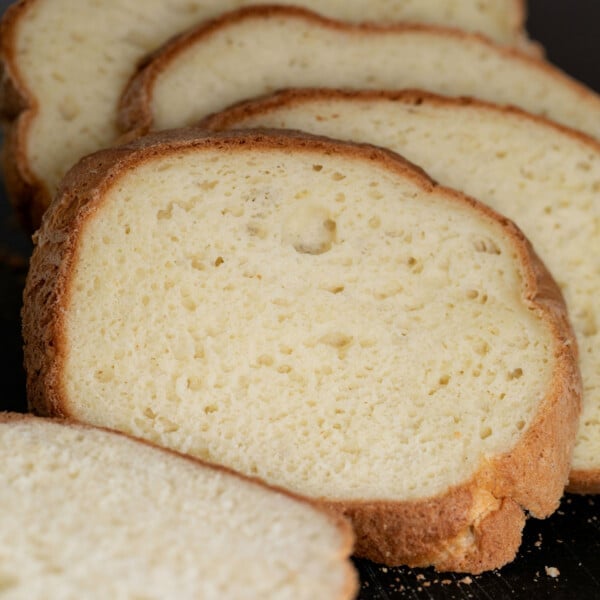
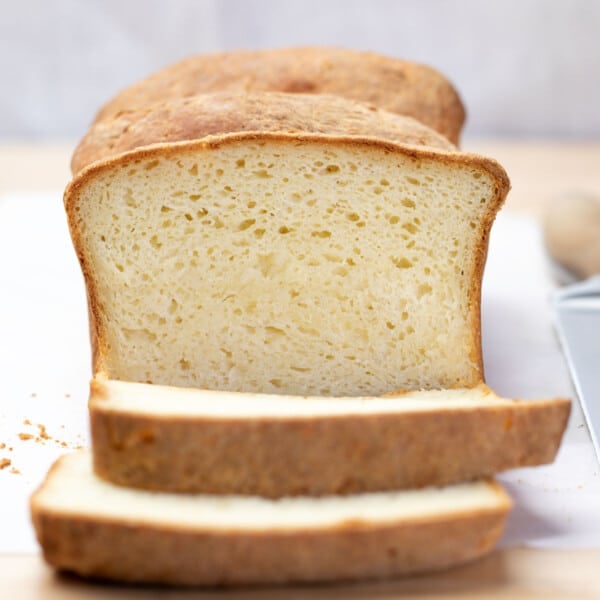
With a soft, tender crumb and a beautiful bakery-style crust, this easy white gluten free bread recipe is the original—and still the best. It bends and squishes like the “real thing,” and comes together in just 4 simple steps.
This is the loaf readers make weekly for school lunches—and the one bakery owners have told me they sell to customers in their gluten free shops. It's been my family's favorite bread since I started making it in 2011!
Read this before you bake
This special recipe, along with my expert tips, is all you need to create a bread with a full rise and a tender crumb that won’t collapse as it cools.
The recipe below is just as it appeared in my flagship gluten free cookbook in 2011. I’ll explain how and why we use ingredients like cream of tartar, vinegar, and egg whites, along with a good gluten free flour blend and a well-aerated dough, to build structure without gluten.
Once you understand how they work together, you won’t need to rely on overpriced store-bought loaves ever again.
Key ingredients explained

You don’t need anything fancy to make this classic gluten free sandwich bread—just a few pantry staples and fridge basics.
- Gluten free flour – Many high-quality all purpose gluten free flour blends will work to provide enough structure to support a good rise. Make sure yours, like Better Batter's original blend, Nicole's Best multipurpose blend (with 3 teaspoons added xanthan gum), King Arthur Flour's Gluten Free Bread Flour, or Caputo Fioreglut flour, is designed to be used in yeast bread.
- Instant yeast – Helps give the bread a proper rise without proofing or activating it first. If you use active dry yeast, you'll need to soak it first in the warm milk in the recipe. Make sure it becomes foamy and bubbles within about 5 minutes, or your yeast is not good.
- Sugar – Just enough to feed the yeast and help tenderize the loaf without making it taste sweet.
- Milk – Adds richness and helps tenderize the bread and create an open crumb.
- Butter – Gives the bread flavor and just enough moisture for tenderness without weighing it down.
- Egg whites – Help bind the dough, add lift without adding flavor or color. Especially in gluten free bread, egg whites work hard to help hold the rise so the bread doesn't collapse as it cools.
- Salt – Essential for flavor.
- Vinegar – Reacts with the cream of tartar to help with rise; apple cider vinegar in particular seems to encourage yeast to rise in a stable way.
- Cream of tartar – One of 3 elements of baking powder, it reacts with the vinegar to assist the bread's rise and helps the egg whites maintain it as the bread cools.
This simple combination gives you a reliable dough with a stable rise that bakes up soft, tender, and perfect for slicing.

4 Easy Steps To Make Gluten Free Bread
This recipe comes together in one bowl using a stand mixer fitted with the paddle attachment. The dough is smooth and thick—more like a batter than a traditional bread dough—and bakes into a soft, sliceable loaf with very little hands-on time.
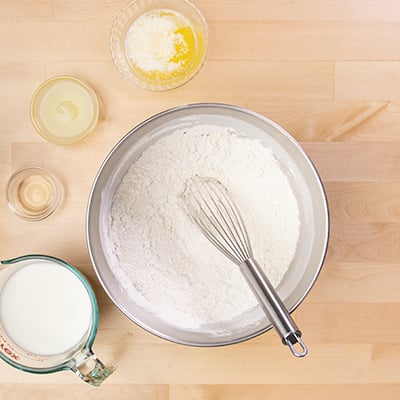
1. Whisk the dry, then add the wet.
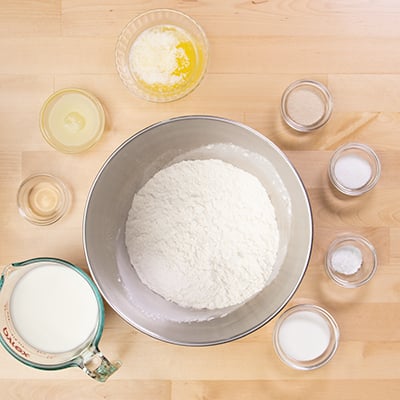
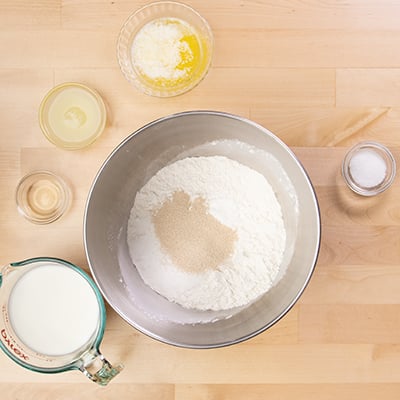
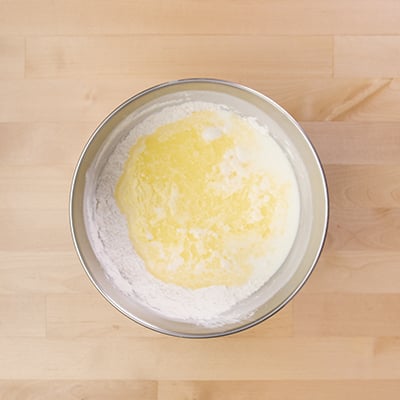
In the bowl of a stand mixer, whisk together all the dry ingredients except the salt (flour, xanthan gum, instant yeast, cream of tartar, and sugar). Then whisk in the salt to make sure the salt, which inhibits rise, doesn't clump together with the yeast.
Add the warm milk, melted butter, vinegar, and egg whites. Remember to proof active dry yeast, if using, in the warm milk first.
2. Beat the dough until fluffy
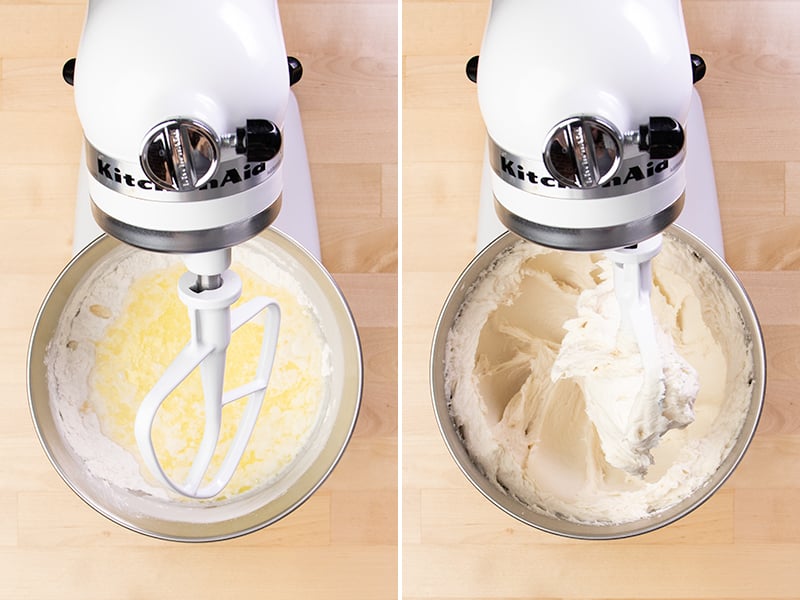
With the paddle attachment, use my tested method for beating until the dough becomes smooth and whipped-looking. You can see that texture in the photos below and in the how-to video that I narrate, and we talk about it in my gluten free pizza dough post.
Scrape down the sides of the mixing bowl to ensure that all the ingredients in their proper amounts are incorporated fully. The dough will gather in the center of the bowl, then stick to the sides as you continue mixing.
The dough will be thick and sticky—not a dough you can handle easily with your hands, but it should be easy to scrape cleanly off the sides of the mixing bowl.
If you live in a very dry climate and your dough seems to be drier than what you see here, try slowly mixing in 1 to 2 tablespoons of warm water to reach the proper consistency. Don't add too much, or the bread will be gummy after baking.
3. Transfer, rise, and bake
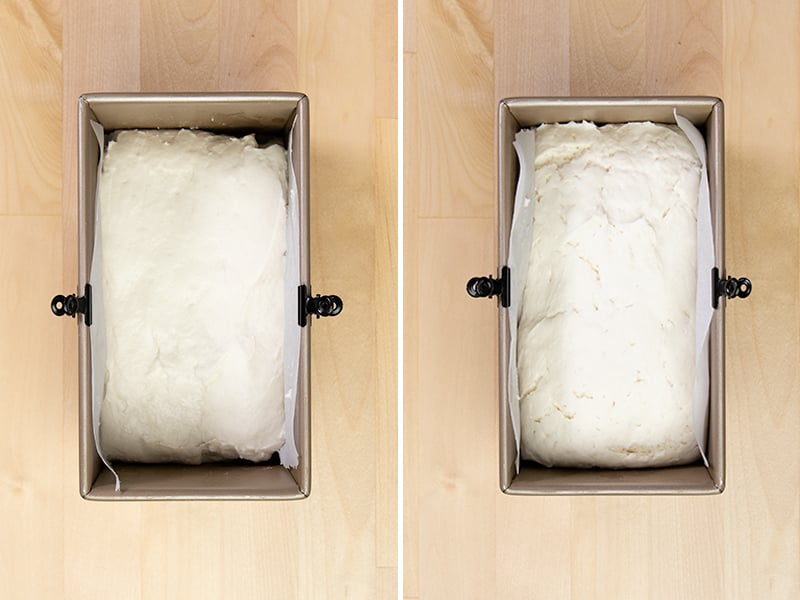
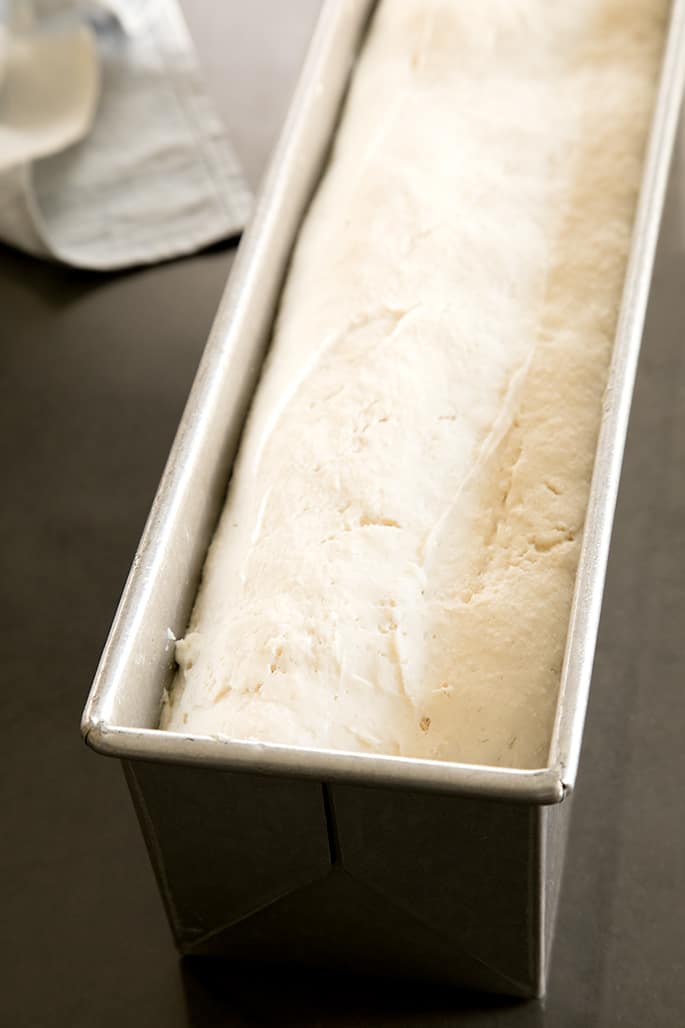
Scrape the dough into a greased loaf pan and smooth the top using a wet spatula.
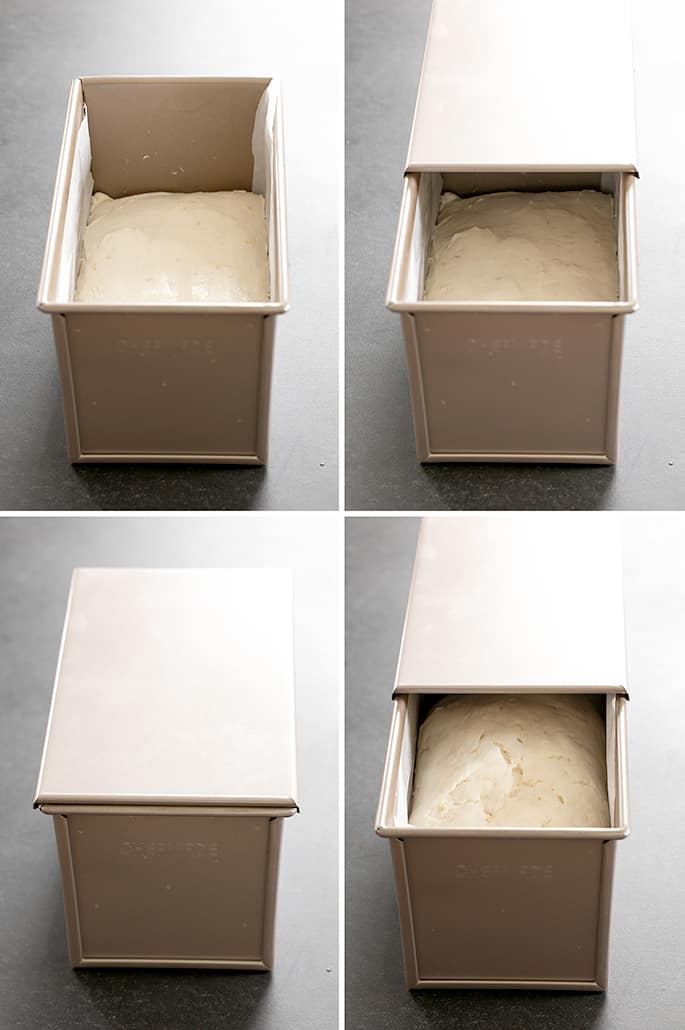
Cover the loaf pan with plastic wrap and let it rise until it’s about 50% larger (it won’t double). When the top of the risen dough starts to break in spots and crater, don't let it rise any longer.
Bake at 375°F for about 50 minutes, or until the loaf reaches an internal temperature of 205°F and sounds hollow when tapped. If it doesn't feel firm enough, lower the oven temperature to 300°F and bake up to 20 minutes longer.
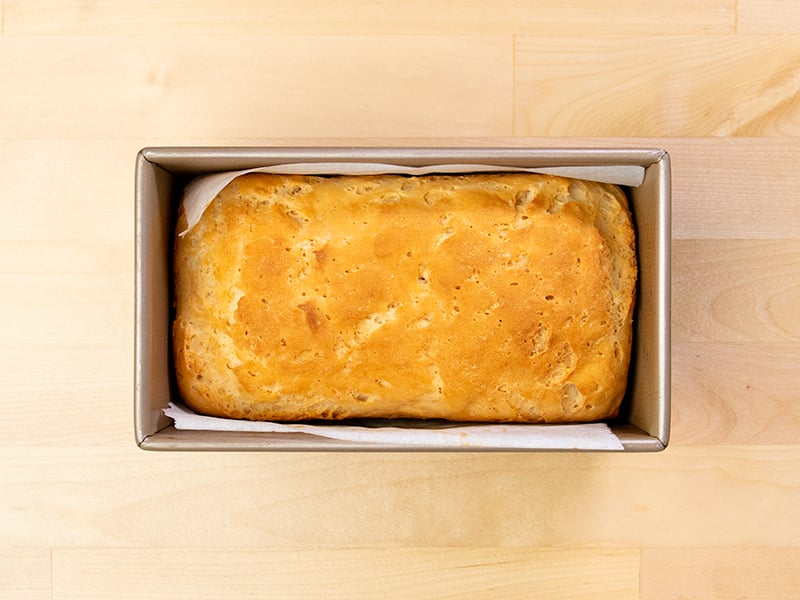
4. Cool completely before slicing
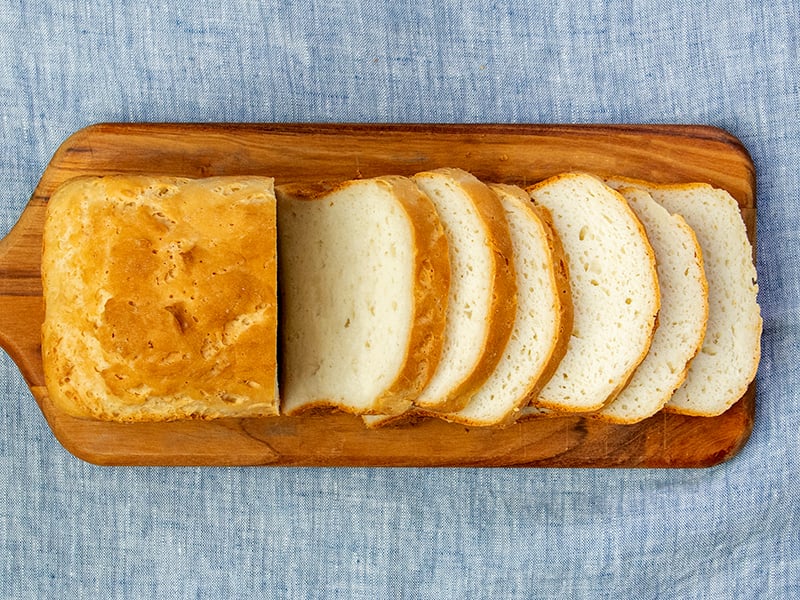
Let the bread rest in the pan for 10 minutes, then move it to a wire rack. Allow it to cool completely before slicing to avoid squished or gummy pieces.
It's especially important to allow the starches in gluten free bread to cool completely, so cool for a full 2 hours if you have the time.
Expert tips
I've been baking gluten free bread since 2009. After all these years, here are my go-to tips for making yeast bread-baking a success:
Use a pan with high sides
A loaf pan with high sides helps the bread rise up—not out. Gluten free bread dough is wetter and more fragile, so upgrading from a classic 2½-inch-tall loaf pan to one with 4-inch sides can make a big difference. A 1 pound Pullman pan has high, straight sides (and often a lid) and would be ideal here.
Proof slowly
A slow rise is a stable rise. Cover your dough loosely with greased plastic wrap and don't try to speed its rise too much. Let it rise slowly and steadily, and not much past the top of the loaf pan. Once the rise starts to break through the top of the dough, bake it.
Choose ingredients carefully
Avoid making ingredient substitutions unless absolutely necessary, and then use my suggestions to make good choices.
Use a digital kitchen scale
Choose your gluten free flour blend carefully and measure it by weight using a digital kitchen scale for accurate results. Then ignore the volume measurements since they're not standard or precise.
Make a smooth dough
Beat the ingredients well, ideally using a stand mixer, to activate the xanthan gum and aerate the dough for a smooth, assisted rise.
Bake the bread fully
Be sure to bake your bread until it reads at least 205°F on an instant read thermometer. If the loaf seems underbaked at all after removing it from the pan, place it on a baking sheet, reduce the oven to 300°F, and bake until the crust is firm all around, up to 20 minutes more.
Use an oven thermometer
Most ovens run hot—mine included. A basic oven thermometer helps you bake at the correct temperature. Replace it regularly to avoid surprise temperature swings that can cause your loaf to fall by causing rapid oven spring and a burned crust and wet middle.
Cool it completely
Let the bread sit in the pan for 10 minutes, then transfer to a wire rack. Remove any paper liner that traps moisture so the crust stays crisp, and let it cool for 1 to 2 hours to prevent gumminess.
Use a serrated knife
Once the loaf is completely cool, slice it with a serrated bread knife for clean cuts—no squishing, no tearing.
Ingredient substitutions
It's best to avoid substituting ingredients, especially in gluten free bread baking, but if you must avoid other allergens, here's how:
Dairy-free
- Use block-style vegan butter; Melt and Miyoko's Kitchen are my favorites.
- If using Earth Balance Buttery Sticks, reduce the salt to 1 teaspoon—they have more moisture and may cause the loaf to sink slightly as it cools.
- Choose any unsweetened, unflavored nondairy milk with a consistency similar to cow’s milk.
Egg-free
- Replace the 2 egg whites with 1 “chia egg” (1 tbsp ground chia + 1 tbsp lukewarm water, mixed and gelled).
- Some readers have also had success with 1 egg’s worth of Bob’s Red Mill Egg Replacer.
- Aquafaba is another option.
Xanthan gum-free
- Replace xanthan gum with 20 grams of psyllium husk powder.
- First, hydrate it in the milk and let the mixture gel. Then add it when you’d normally add the milk, and beat well to incorporate.
- Note: The texture will be a bit more rustic and chewy, and it may rise less.
Using active dry yeast
- This recipe calls for instant yeast (aka rapid rise or breadmaker yeast).
- To substitute active dry yeast, use 10 grams (3 tsp), soaked in some of the milk until foamy before adding.
- Want a version without commercial yeast? Try my gluten free sourdough bread instead.
Add seeds for texture
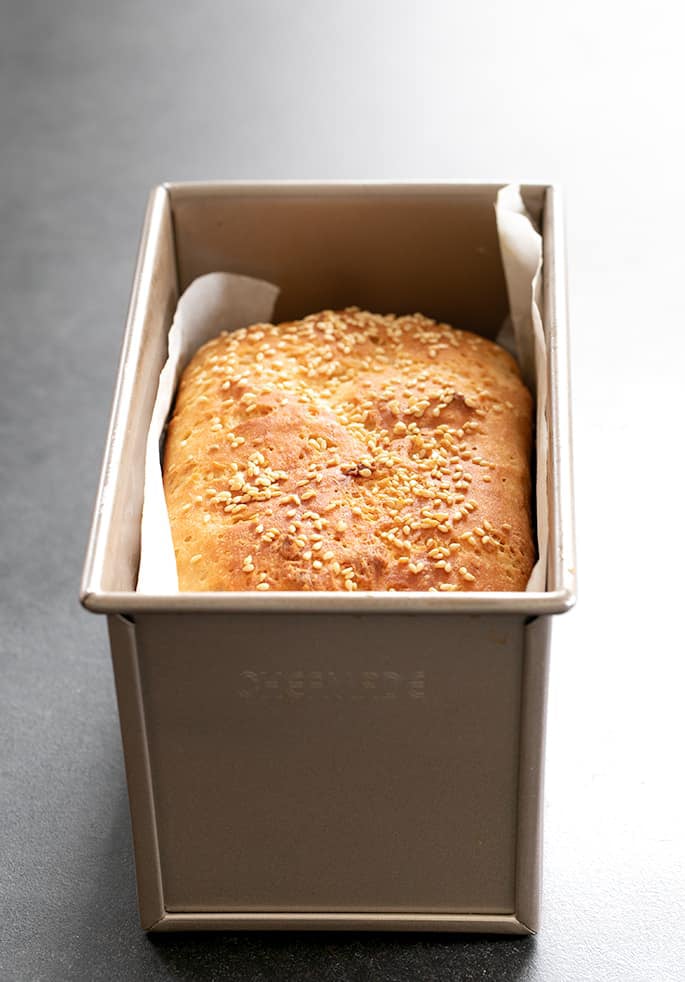
- Sprinkle the risen dough with sesame, chia, sunflower, pumpkin seeds—or even finely chopped nuts—for a flavorful crust and added crunch.
Bake with me
Gluten Free Bread Recipe
Equipment
- Stand mixer fitted with paddle attachment for a smooth dough (See Recipe Notes)
- Digital kitchen scale for weighing ingredients precisely
- Instant read thermometer for gauging doneness of the loaf
Ingredients
- 3 cups (420 g) all purpose gluten free flour blend, (See Recipe Notes)
- 3 teaspoons xanthan gum, omit if your blend already contains it
- 2 ½ teaspoons (8 g) instant yeast, (See Recipe Notes)
- ¼ teaspoon cream of tartar
- 2 tablespoons (25 g) granulated sugar
- 2 teaspoons (12 g) kosher salt
- 1 ½ cups (12 fluid ounces) warm milk, (about 95°F) (See Recipe Notes)
- 4 tablespoons (56 g) unsalted butter, melted and cooled (plus more for brushing if using seeds) (See Recipe Notes)
- 1 teaspoon apple cider vinegar
- 2 (50 g) egg whites, at room temperature (See Recipe Notes)
- Toasted sesame seeds for sprinkling, optional
Instructions
- Grease or line a 9-inch x 5-inch loaf pan (ideally one with 4-inch sides), or a 1-pound Pullman-style loaf pan (with a lid) and set it aside. You can also line the bottom and sides of the pan with a piece of parchment paper.
- In the bowl of a stand mixer fitted with the paddle attachment, place the flour blend, xanthan gum, instant yeast, cream of tartar and sugar. Whisk together with a separate, handheld whisk. Add the salt, and whisk again to combine.
- Add the milk, butter, vinegar and egg whites, and mix with the paddle attachment on low speed. Scrape down the sides of the mixer bowl as necessary during mixing to ensure no dry patches.
- Turn the mixer to medium-high speed and mix for about 3 minutes. The dough will be thick, smooth and quite wet, and should become slightly whipped in appearance.
- Scrape the dough into the prepared loaf pan. Using a wet spatula, smooth the top.
- Cover the dough with lightly oiled plastic wrap (and the lid of a pullman pan on top if using), and allow it to rise in a warm, draft-free place for 30 to 45 minutes or until it’s about 150% of its original size. That means that it's about 50% bigger than when it started (it won't double).
- The dough may take longer to rise properly in colder, drier weather and less time in warmer, more humid weather. Be patient!
- When the dough has nearly reached the end of its rise, preheat the oven to 375°F. The dough is starting to overproof if the top of the loaf starts to break and craters start to appear.
- Remove the lid if using, and the plastic wrap. Using a sharp knife or lame slash the top of the loaf about 1/4-inch deep (optional). If using the optional seeds, brush the top of the risen bread gently with melted butter, and sprinkle with the seeds.
- If using a Pullman pan, grease the inside of the lid of the pan, and slide it into place on top of the pan.
- Place the pan on the middle rack or top oven rack (whatever is appropriate for your oven) of the preheated oven.
- Bake for 45 minutes to 1 hour. If using a Pullman pan, remove the lid after about 40 minutes of baking and return the pan to the oven to finish baking.
- The loaf is done when the internal temperature of the bread reaches about 205°F on an instant-read thermometer and a toothpick inserted in the center comes out mostly clean (not wet).
- The outside will form a thick, brown crust (thinner and less brown if you've used a pullman pan with a lid), and the loaf will sound somewhat hollow inside when you tap it firmly but gently with your forefinger.
- To ensure that it has baked fully, remove the loaf from the oven, and then from the pan. If it has reached the proper internal temperature but seems soft on the outside at all, place the loaf back in the pan or on a lined baking sheet, and return it to the oven. Reduce the oven temperature to 300°F and continue to bake until the crust is stiff all around, up to another 20 minutes.
- Remove the loaf from the oven, and allow the bread to cool for about 10 minutes in the pan (if it hasn't been removed). Transfer the bread to a wire rack, remove any parchment paper, and allow the loaf to cool completely (ideally at least 1 hour and up to 2). Slice the cool loaf into 10 equal slices with a serrated knife.
- Wrap the cooled loaf and any slices tightly in plastic wrap and store at room temperature for up to 2 days.
- To freeze this bread, cool completely and then wrap tightly, and freeze. Defrost the whole loaf at room temperature, still wrapped.
- You can also slice a cooled loaf and wrap each slice separately, and freeze. Defrost as many slices at a time as you need in the toaster.
Video
Tell Google you trust GFOAS!
Notes
For best results, use a high-quality all purpose gluten free flour intended for gluten free yeast bread, like Better Batter's original gluten free blend, Nicole’s Best multipurpose gluten free flour blend (with 3 tsp xanthan gum), King Arthur gluten free bread flour (try adding 2 tbsp more milk), or Caputo Fioreglut. Avoid King Arthur Measure for Measure gluten free flour, Cup4Cup, and Bob’s Red Mill 1-to-1. For DIY blends, see the All Purpose Gluten Free Flour Blends page. Always measure by weight, not volume, for accuracy. Using active dry yeast
Substitute 10g (about 3 tsp) for instant yeast. Proof in some of the milk until foamy before adding. Dairy-free
Use a block-style vegan butter like Melt or Miyoko’s
Use any unsweetened, unflavored nondairy milk with similar consistency to cow’s milk (not fat-free) Egg-free
I like 50 grams aquafaba best (the brine from a can of unsalted chickpeas) or Bob’s Red Mill egg replacer. Mixing tips
A stand mixer with paddle attachment is strongly recommended. You can try pulsing the dough in a 7-cup food processor with plastic blade until smooth. Mixing by hand is possible, but results may vary. Adapted from the book Gluten-Free on a Shoestring: 125 Easy Recipes for Eating Well on the Cheap Second Edition, by Nicole Hunn. Excerpted by arrangement with Da Capo Lifelong, a member of the Perseus Books, LLC, a subsidiary of Hachette Book Group, Inc. Copyright © 2017.
Nutrition
Nutrition information is automatically calculated, so should only be used as an approximation.
? Using a bread machine?
This recipe is designed for a conventional oven. For a bread machine version, head over to my gluten free bread machine recipe.
make ahead
Storage tips
Room Temperature Storage
Let the bread cool completely, then wrap the unsliced loaf tightly in plastic wrap or another airtight wrap. Store at room temperature for up to 2 days.
How to refresh stale bread
If the bread feels dry or stale, sprinkle or brush slices lightly with lukewarm water, then toast on low heat. This helps the bread reabsorb moisture and softens the crumb.
Freezing Instructions
To serve: Toast slices straight from the freezer—no need to defrost first.
Whole loaf: Cool completely, then freeze the entire loaf unsliced for best results.
Pre-sliced: Slice the loaf first, then wrap each slice individually in freezer-safe wrap. Or, separate slices with small pieces of parchment paper and freeze together.

FAQs
Here are the most common reasons:
• You're using the wrong flour blend or didn't measure by weight.
• You substituted active dry yeast but didn't use enough or didn’t proof it properly.
• Proofing conditions were off—too cold, too hot, or too short.
• Incorrect hydration from mismeasured liquid or dry ingredients.
It’s ready when:
• The internal temperature reaches 205°F or slightly higher;
• The crust is deep golden brown and feels firm; and
• It sounds hollow when thumped on the bottom.
Most often, sinking is due to:
• Overproofing — the dough rose too high and collapsed.
• Too much yeast — causing a fast rise with poor structure.
• Too much liquid — leading to instability during baking.
• An oven that’s too hot — baking the outside before the inside is set.
Many readers say their usual altitude adjustments work well here. For guidance, try the King Arthur Flour guide for high altitude baking.
Yes, with some modifications:
• Use a 7-cup food processor with a plastic blade, pulsing just until the dough is smooth (don’t overprocess or heat the dough).
• Some readers have made the bread by hand, but the dough will not be as smooth, and may not rise well.










My loaf was dense so I would like a better rise, any suggestions? I love the flavor and texture, just would like a better rise.
Hi, Kathleen, if you didn’t make any ingredient substitutions, including using one of my recommneded flour blends, and measured by weight (if not, you likely overmeasured the flour, which is nearly unavoidable), it’s almost certainly just that it needed more time to rise. Rise time is extremely environment-dependent, and can vary significantly from one location to another, one day to another. Overproofing is not determined by time, but by rise. I hope that’s helpful!
Thank you so much for this!!! My husband and son have to eat gluten free and it has been so difficult! Especially for my son because hes too young to understand… He just knew bread hurts his tummy and all the other bread I gave him is yucky. Tonight I made this and oh my goodness!! I am so surprised. The only thing I’d change, is I wish I could make it taller. It rises, but the slices are small. Can I add baking powder to increase how much it raises?? Thanks so much for this recipe. It’s delicious even for me, who doesn’t have to eat GF!
It sounds like you’re not letting the dough rise long enough, Gabby. The recipe rises fully when made as written with one of my recommended gluten free flour blends, measured by weight, and if it’s fully proofed.
Can water be substituted for the milk?
Hi, Kathleen, no, I don’t recommend that. To replace the dairy in this recipe, please see my suggestions in the substitutions section of the post.
I made it with water, no problem!
Delicious!
Also substituted avocado oil for the butter.
Still came out great!
Making more!
Hi Nicole! I am a long time subscriber and use sebela of your recipes as staples in our gluten free home. ? I tried baking this bread yesterday for the first time and wanted to ask for some feedback. I let it rise over an hour in a warm draft free room and it still didn’t seem big enough but I went ahead and baked it anyway. It turned out beautiful and tasted pretty good but is pretty dense and heavy. Should I have let it rise longer? Also seemed to have a pretty strong yeast flavor. Is that also due to not rising long enough? Thank you in advance! ??
Hi, Julia, if it was dense and heavy, assuming you used a good, well-balanced flour blend with a superfine rice flour that is designed for yeast bread baking and beat it in a stand mixer for long enough, then it most likely did not rise enough. Rising time can really vary, and is a function of ambient environment as well as the temperature of the ingredients that you used in the dough. If it didn’t seem big enough, it’s almost for sure that you didn’t let it rise long enough. As far as the strong yeast flavor, you may just be particularly sensitive to that since it’s unlikely it would have been rising long enough to have pronounced flavor development.
Thanks so much! You’re the best. And sorry for my typo above. It should have said “several” not sebela. ☺️ I will bake it again for sure, as we are all loving it!
WOW!!! Second time making this. And it is SO good. Came out even better than the first time which was already really good! I substituted Almond Milk (Malk) and Miyoko’s Cashew butter since if I can be dairy free too it is better. I cut the salt in half because the only Miyoko’s here is the salted kind. I even used King Arthur Cup for Cup because it was all I had. The only adjustment I made was that the dough wasn’t just sticky but was actually tilting into batter territory. So I just very slowly added some flour (maybe about 1/4 c?) until it had the same consistency as the video (that was so helpful! thanks). It is really hard to tell it is gluten-free! It looks a lot like the bread in the pictures and video and it just tastes great!!! I love that I am getting the hang of this!
Thank you so much for these recipes! I’m wondering what bread to venture into next? Any suggestions?
What type of kosher salt i should use its a great variety out there kosher salt flakes, fine, baking kosher salt which one??? Doing on grams accordingly with the recipe I get confused why is more salt than sugar on the recipe please help???
Vernice, kosher salt is not really variable. It’s distinct from table salt, which is a very fine grind, and very similar to flaked sea salt. There is more salt than sugar because this is not a sweet recipe. The sugar is only to help feed the yeast and minimally tenderize the crumb. The salt controls the yeast and gives the bread flavor. I discuss the role of each ingredient in the text of the post, if you’d like more detail.
i have only TWO 2 inch bread pans . can i make this recipe by adding a portion of the dough to one pan and the other portion to another pan? or will it not turn out the same.
Hi, Gillian, I’m afraid I’m not sure what you mean by 2-inch bread pans, but if you’re speaking about the height, I’m afraid that isn’t enough support on the sides for the dough to rise. And if you’re speaking about any other dimensions, that is just way too small in general.
Oh my good golly! After struggling to find an acceptable gluten free bread on so many different store shelves, I took a chance on this recipe! JACKPOT!!! It was moist enough to be enjoyable, toasted well, though it didn’t brown much, and held together with a tomato and mayo sandwich that I have been craving!! I will never buy store bought gluten free bread again! Now I am anxious to try the other bread type recipes like the buns and the tortillas!
For the first time ever I have finally found a great, simple, easy to follow bread recipe, that turned out better than expected!
My family could not tell the difference between their regular bread and my gluten-free loaf.
I am really enjoying trying out all your recipes.
Thank you
The Yeast was the only thing that didn’t match. Up teaspoon/gram. It only took about 1.5 t to get to 8g. Bread turned out well though for a first attempt!
Could you add jalapenos and cheddar to this? Or would I need to find an altered recipe?
Grant, your comment about the volume and weight illustrates why I recommend you ignore the volume measurements and focus only on the weight. Volume measurements are inherently unreliable and not standardized. You could probably add a small amount of diced jalapenos and cheese to the top of the bread, but if you add it to the dough, or add too much, it will make the loaf more dense so I don’t recommend it. I have a separate recipe for cheese bread you can find by using the search function.
Yum! Just baked a loaf last night & t turned out great. Thanks
I’m so glad to hear that, Shakira! Thank you for taking the time to share your experience!