

This post may contain affiliate links. Please read our disclosure policy.
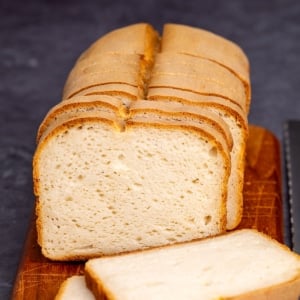
This flavorful loaf of gluten free sourdough bread is made with the simplest homemade gluten free sourdough starter. Once your starter is ready, you can make and bake your loaf the same day!
After writing a whole book on gluten free bread baking, here I simplified the sourdough process down to mixing the dough, letting it rise, and baking it within a few hours. And there’s no complicated schedule to worry about!

“The texture is like real (gluten) bread — soft and spongy with a firm crust. This has become my go-to recipe for making bread routinely. I haven’t bought any gluten-free bread since discovering this recipe!”
Why this recipe works
This gluten free sourdough recipe and our simplified gluten free sourdough starter are not a deep dive into all things sourdough. Instead, we’re keeping it super simple with a 2-ingredient starter, and a 7-ingredient bread (including salt and sugar). Think of it more like a tangy kind of white bread that’s great for lunches.
Here, the rules are a little relaxed, unlike in my bread book where I have a whole chapter on wild yeast sourdough recipes. This process takes less work, and you still get a yeasty, tangy loaf of sourdough bread after a single day of baking (and about 20 minutes of active time).
If you have commercial yeast on hand and you need a loaf of bread today, I recommend our simplest gluten free bread recipe. But if you can be patient, sourdough bread baking is worth the time.

If you are enjoying making bread, you must try out both my gluten free pumpkin bread and gluten free banana bread recipes.
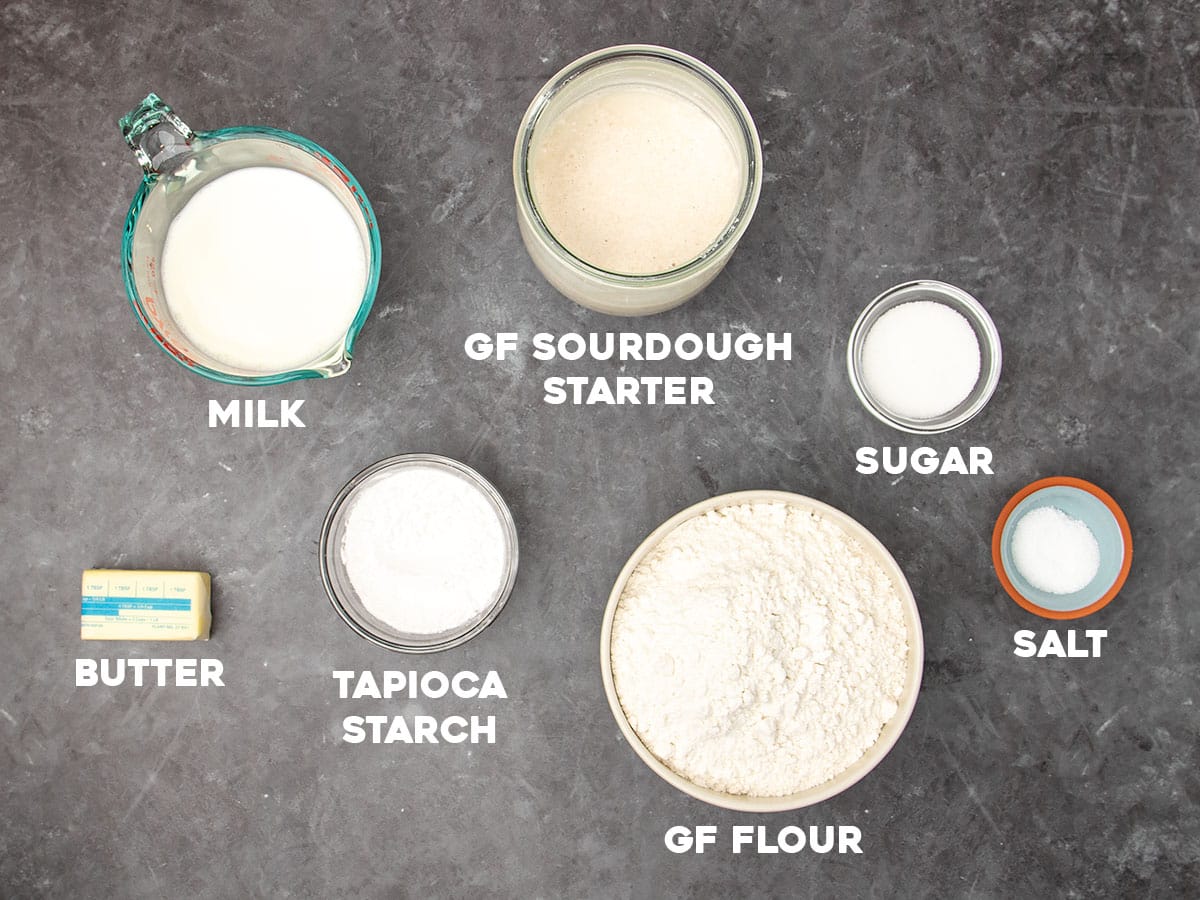
Recipe ingredients
Here’s what you need to make this bread, plus a few words about the role each ingredients plays in a successful loaf of bread:
- Gluten free flour blend: Provides the structure in this bread that traps the carbon dioxide gas that the yeast in the sourdough starter release. I recommend a high quality all purpose gluten free flour blend that is made to be used in yeast bread, like Better Batter’s original blend, Nicole’s Best multipurpose blend (with 3 teaspoons added xanthan gum), King Arthur Flour’s Gluten Free Bread Flour, or Caputo Fioreglut flour. Avoid blends like King Arthur Flour’s all purpose gluten free flour, which is not appropriate for yeast bread and will not support a full rise.
- Tapioca starch: All of my recommended all purpose gluten free flour blends already contain tapioca starch/flour as an ingredient, but you need to add more here. This bread rises much better and has a softer, more tender crumb when you add more tapioca starch to the loaf by helping the bread retain moisture, especially during its long rise.
- Sugar: Granulated sugar helps feed the yeast and locks in moisture.
- Salt: Brightens the other flavors in the bread.
- Gluten free sourdough starter: Provides all of the leavening in this recipe, in the absence of commercial yeast. This recipe is formulated to be made with a very wet starter. If your starter is different, you can still use it but you’ll need to change the proportions slightly as I describe in the substitution/sourdough starter section below.
- Butter: Adds buttery flavor, some moisture, and helps keep the crust from getting too hard.
- Milk: Adds moisture to bring the dough together, and a bit of fat to keep the crumb soft. If you can, use whole milk for maximum flavor.
Equipment
Here are the simple tools you’ll need to make this recipe:
- Digital kitchen scale: Measuring everything by weight, not by volume, for the starter and everything else, will give you predictable results the first time, and every time. The simple Escali scale is great; nothing fancy needed.
- Stand mixer with paddle attachment: Creating a smooth dough that rises well works best with a stand mixer with the paddle attachment. If you don’t have one, you can pulse the dough a few times in a large food processor (a plastic blade is ideal). You can also try mixing really hard by hand with a Danish dough whisk.
- Loaf pan: You don’t need a fancy Banetton basket for this loaf. A standard loaf pan works great. You could also bake this loaf in a hot Dutch oven for a crispier crust. Just shape the dough with wet hands into a dome on a small piece of parchment paper, heat the Dutch oven, place the loaf inside on the paper and bake.
Expert starter tips
If you’ve been confused by sourdough bread because of an overly complicated starter recipe in the past, stick with me. All that matters is that you can use the right ingredients combined in the right way, and judge when the bread is risen enough for baking.
A sourdough starter is a fermented mixture of flour and water that captures and cultivates yeast from the flour and the surrounding air. It’s different from commercial yeast you buy in the store, which is a single, isolated strain of yeast.
If you’ve come here from our gluten free sourdough starter recipe (a mixture of gluten free flour and water), you’re more than halfway there. If not, create your starter using that recipe, then come back in 5 to 10 days. If you’d like to use a different gluten free starter, you may need to use some less starter and more moisture as explained in the substitutions section of the post.
If your starter is active, but hasn’t been fed within the last 8 to 10 hours, feed it first according to the instructions in your starter recipe. If you’re using the GFOAS starter recipe, discard 1/3 of the volume, mix in 4 fluid ounces bottled water and 70 grams gluten free flour blend without xanthan gum, close the lid loosely, and let it sit for about 2 hours or until bubbling again. Then you’re ready to begin.

How to make gluten free sourdough bread (step by step photos)
Once your starter is ready for baking, making the bread dough is quick and easy. Here’s how you’ll make it in your own kitchen, but for full ingredient amounts, scroll down to the recipe card below:
Whisk dry ingredients
Whisk together the dry ingredients in the bowl of a stand mixer (gluten free flour blend including xanthan gum, add tapioca starch, some sugar and salt) to prevent clumping.
Beat in wet
Add the wet ingredients (sourdough starter, milk, and butter) to the bowl of dry ingredients, and beat with the paddle attachment until very well combined. It should stick to the sides of the bowl and take on a somewhat whipped appearance, which means that you’ve added enough to give it a head start in rising.


Let the dough rise
Transfer the raw bread dough to a prepared loaf pan, and smooth the top. Cover and let rise until it’s about 50% bigger than when it started. It won’t double, and rising will take at least 3 hours, and often up to 6 hours or more. Sourdough always rises more slowly than commercial yeast since it contains less active yeast than commercial, which is highly concentrated in isolated baker’s yeast.
Bake the bread
Cut a 1/4-inch deep slit down the middle of the risen loaf to avoid uneven rise and splitting of the loaf. Bake at 400°F for 30 minutes to create “oven spring” or a rapid final release of carbon dioxide by the yeast before they die.
Finish baking at 350°F so the bread doesn’t burn before it’s finished baking all the way to the center. The internal temperature will be at least 200°F when it’s done.


Let cool on a wire rack, then slice the loaf and serve!

Ingredient substitutions
Sourdough starter
This recipe is written to use the flour and water gluten free sourdough starter recipe on this blog, a very wet starter with a a “hydration ratio” of 160%. That means that, for every 1 gram of flour, there are 1.6 grams of water.
To try making this recipe using a different sourdough starter, you only have to rebalance the amount of water to flour in the starter. For example, if your starter has equal parts gluten free flour and water (a 100% hydration ratio), add some water (or more milk) to increase the hydration. Instead of the 165 grams of starter called for in this recipe, try 100 grams of that equal-parts water-and-flour-starter and 65 grams of water in this recipe.
Dairy free
Milk and butter add richness and tenderness to the bread. If you’re dairy free, the milk can be replaced with unsweetened and unflavored nondairy milk (my favorite is almond milk). For the butter, try a vegan butter alternative like Melt or Miyoko’s Creamery brand or Earth Balance buttery sticks, not oil, which is all fat instead of a combination of fat and moisture, like butter.
Tapioca starch/flour
In place of tapioca starch (also called tapioca flour), you can try using glutinous white rice flour, which also has similar stretchy qualities. You can also make this recipe with 3 1/2 cups (490 grams) all purpose gluten free flour, replacing the tapioca starch/flour with more of your chosen flour blend, but it’s a better bread with 3 cups all purpose and added tapioca starch.
Storage instructions
Fresh homemade bread is always best the day it’s baked. Once cool, you can wrap this loaf tightly in plastic wrap and it will stay fresh at room temperature for 1 to 2 days.
For longer storage, you can wrap it tightly unsliced, or slice it and place it in a freezer-safe Ziploc bag and freeze the bread for up to 2 months. Remove as much air as possible from the bag, since air creates freezer burn. Defrost the whole loaf to slice if unsliced, or defrost by the slice in the toaster oven.
Refresh bread that’s begun to go stale by sprinkling it with lukewarm water and baking in a 300°F oven for about 10 minutes. It will taste fresh as the day it was baked.
Gluten Free Sourdough Bread Recipe
Tell Google you trust GFOAS!
Equipment
- Stand mixer fitted with paddle attachment (or try pulsing in a food processor)
- Glass jar for starter with loose-fitting or cloth lid
- Nonreactive (no metal) spoon or spatula silicone, plastic, wood all work
Ingredients
- 3 cups (420 g) all purpose gluten free flour blend, (See Recipe Notes)
- 3 teaspoons xanthan gum, omit if your blend already contains it
- 9 tablespoons (68 g) tapioca starch/flour
- 2 tablespoons (25 g) granulated sugar
- 1 ½ teaspoons (9 g) kosher salt
- ¾ cup (165 g) gluten free wild yeast sourdough starter, fed within previous 12 hours (See Recipe Notes)
- 1 ½ cups (12 fluid ounces) warm milk, (about 95°F), plus more by the tablespoon
- 4 tablespoons (56 g) unsalted butter, at room temperature
- Melted butter, for brushing on top to help browning (optional)
Instructions
- Grease a standard 9-inch x 5-inch loaf pan and line with parchment paper. Set the pan aside.
- In the bowl of a stand mixer fitted with the paddle attachment or a large bowl with a hand mixer fitted with dough hooks, place the all purpose flour, xanthan gum, tapioca starch/flour, granulated sugar, and salt, and mix or whisk to combine well.
- Add the starter, 1 1/2 cups of milk, and the butter, and beat on medium speed to combine. This is a batter-style bread dough, so it won’t resemble traditional bread dough, but rather a soft cookie dough.
- Turn the mixer up to medium-high speed and beat until the dough has taken on a whipped appearance (about 5 minutes). The dough should be tacky to the touch, but should hold its shape when scooped.
- If your dough feels at all dry to the touch, add more milk by the tablespoon, beating it in until well-combined, until the dough reaches the proper consistency.
- Transfer the bread dough to the prepared loaf pan. Using a moistened spatula, press the dough into every corner of the loaf pan and spread the top into an even layer.
- For a more traditional loaf shape, pile the dough a bit more toward the center in a dome.
- Cover the loaf pan with lightly oiled plastic wrap and allow it to rise in a warm, draft-free place until it’s reached about 150% of its original size, at least 4 hours. It will not fully double in volume, and will rise more in the oven than it does raw.
- Even traditional yeast bread dough will take longer to rise properly in colder, drier weather and less time in warmer, more humid weather.
- This wild yeast sourdough bread will take longer to rise than any other, and will depend in part upon the age of your starter.
- This bread dough is much less likely to overproof and take on that pock-marked appearance than bread made with conventional yeast. If you’re unsure about whether the bread has proofed enough, allow it to keep rising.
- When the bread is nearing the end of its rise, preheat your oven to 400°F.
- Remove the plastic wrap and, using a sharp knife or lame, slash the top of the loaf from one short end to the other about 1/4-inch deep.
- Brush the top of the risen loaf generously with melted butter before baking as an optional step to aid the loaf in browning.
- Place the pan in the center of the preheated oven and allow to bake for 30 minutes.
- Reduce the oven temp to 350°F, rotate the pan 180° around, and continue to bake until center of the loaf reads 200°F on an instant read thermometer (about 30 minutes more).
- The crust may not darken as much as you expect, but the loaf should sound hollow when thumped quickly with a finger.
- Remove the pan from the oven and allow the bread to cool for about 10 minutes in the pan before transferring to a wire rack to cool completely before slicing and serving.
- To freeze the bread, cool the loaf completely, then slice, wrap tightly and freeze the slices. Defrost as many slices at a time as you need in the toaster.
Video
Notes
- Discard 1/3 of the volume
- Mix in 4 fluid ounces spring or distilled water and 70 grams gum-free gluten free flour or another gluten free flour blend without xanthan gum (Nicole’s Best works great) with a stainless steel or wooden spoon or silicone spatula. Avoid aluminum.
- Close the lid loosely
- Let it sit for about 2 hours or until bubbling again
Nutrition
Nutrition information is automatically calculated, so should only be used as an approximation.
FAQs
This recipe is for a batter-style bread, not our bread recipes that call for the more complex gluten free bread flour so it has only one rise. It produces an everyday, but flavorful loaf of bread with a crisp crust and a soft crumb.
This rise takes quite a bit of time. In all of my recipe testing, I’m yet to see a rise that took less than 3 hours, and have even let it rise for 8 hours without overproofing. If you’re unsure about whether or not the bread has proofed enough, allow it to keep rising unless you begin to see pockmarks or uneven holes breaking through the surface.
The dough should rise to about 150% of its original size when it’s done proofing. That means that it should be 50% bigger than when it started. Unlike conventional bread, this loaf will not double in size, or rise to 200% its original size.
Yes, since this recipe rises so slowly without overproofing, you can make the dough before bedtime, shape it in the loaf pan, cover the pan, and set it to rise during the night. When you wake up, bake the loaf and enjoy. You can also start the process in the morning, let it rise and bake about an hour before dinnertime.
Try adding 20 grams of psyllium husk powder to the milk and letting it gel first, then adding it when the instructions say to add the milk. You can reduce the xanthan gum called for in the recipe, if you’re adding it separately, to 2 teaspoons, but without any xanthan gum, the bread will sink as it cools.
Yes. All yeast bread takes longer to rise in cool, dry environments than in moist, wet environments, but it will rise. Just be sure you’ve covered the dough as it rises so it doesn’t dry out, and be patient while it rises, however long it takes.
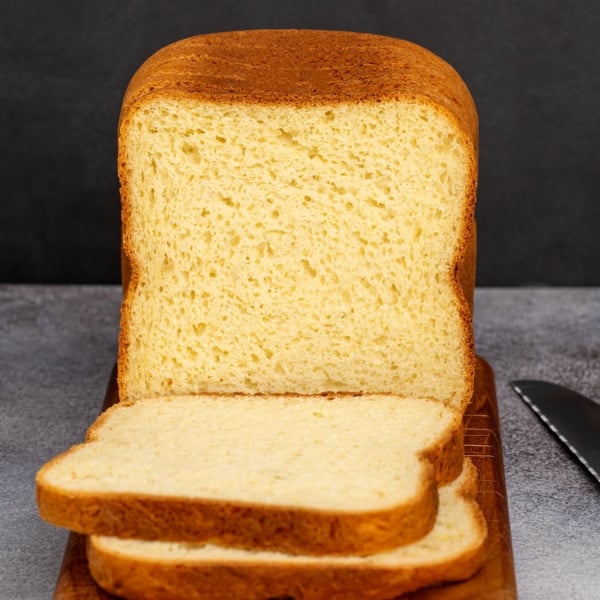
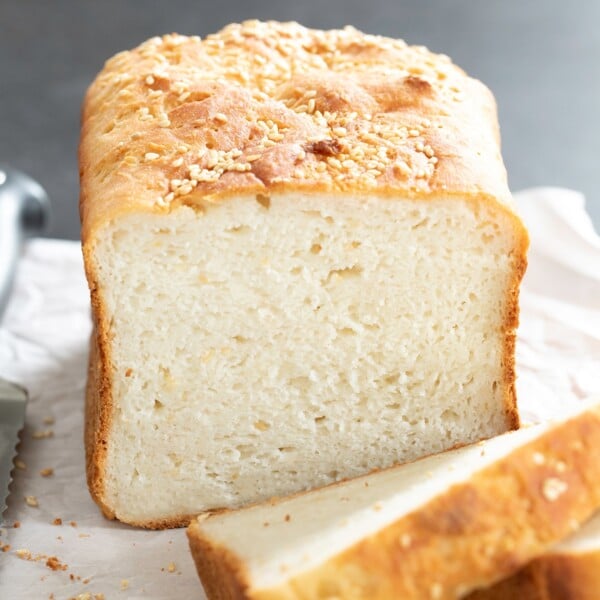
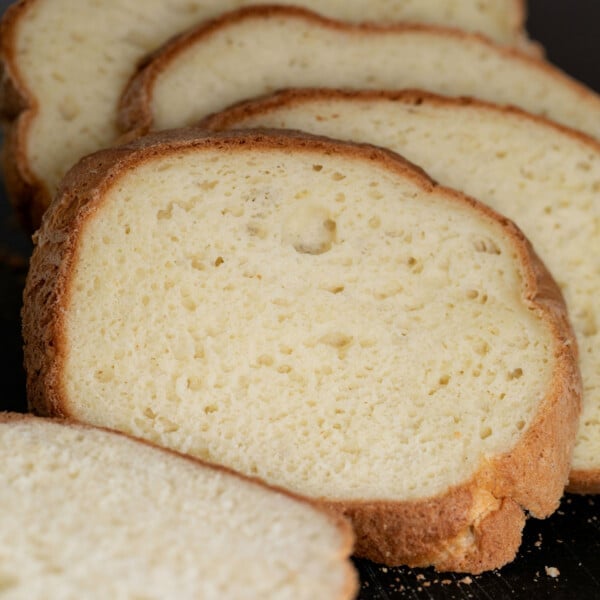
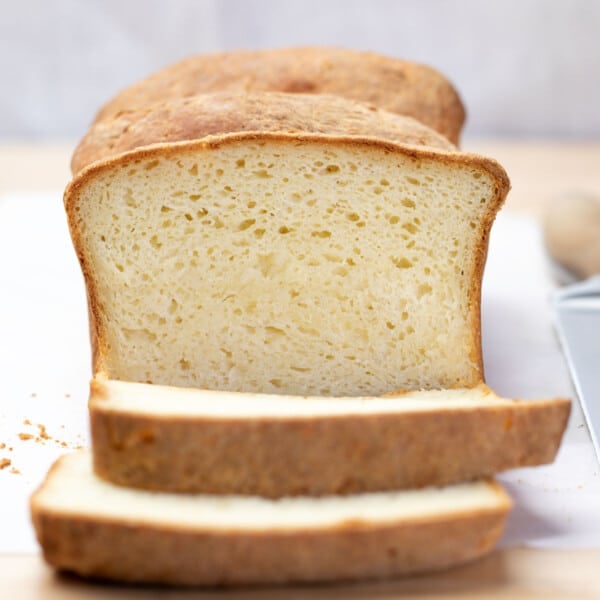










I’ve been using this recipe for just over a year now and it makes really good gf sourdough! My issue is that the top is not at all like the picture. Mine cracks badly-sometimes to the point where the loaf is nearly impossible to slice because huge hunks of the top are cracking off. I’ve added a steam bath in the bottom of the oven during proofing and baking, which has helped with the crumb a lot. I’ve tried scoring to see if that would help but the dough is too sticky to score well. I weigh and measure all ingredients and follow the directions but I can’t figure out how to solve this. Any help would be appreciated!
Hi, Heidi, I’m glad you reached out since you sound really satisfied with the recipe otherwise but could use some troubleshooting help. What gluten free flour blend do you use? It sounds like something that would happen with either a blend that’s too high in starch, has grainy rice flour that doesn’t fully combine, or doesn’t have enough binders like xanthan gum.
I am making my 4th loaf today. None of them, even when they doubled during the rise, have remained tall – they end up being a loaf of bread that is 2-2.5 inches tall and super dense. They taste good just not a nice sized loaf. I have reread your directions a number of times and still don’t know what I am doing wrong.
Thanks for any tips!
When baked goods rise and then fall as they cool, they usually aren’t baked all the way through. That’s usually due to a too-hot oven which bakes the outside too quickly before the inside can bake all the way to the center, which is necessary to hold the rise. I use and recommend a stand-alone oven thermometer, and replacing it regularly, since most ovens run hot. You also need to be careful to let the loaf cool completely before slicing it, or you’ll crush the loaf as the starches won’t have had a chance to rearrange and crystallize, setting their structure. I hope that’s helpful!
Would this recipe work with a potato flake starter?
Hi, Lauren, as long as it’s an active gluten free starter that is about 60% moisture, it should work. But I’ve never tried it and can’t promise results unless you use my wild yeast sourdough starter without ingredient substitutions.
Can the tapioca starch/flour be substituted for anything a little more common like cornstarch? The recipe sounds great though!
No, I’m afraid cornstarch won’t have the same effect at all, Brendan, which is to create more flexibility in the dough. Please see the text of the post in the “ingredient substitutions” section under “Tapioca starch/flour” for more suggestions
I made this with King Arthur’s all purpose and used grams for all the measurements. Followed step by step and it turned out amazing! This was my first time ever making my own starter and sourdough bread? Thank you so much!! Can’t wait to share with other people ?
So glad to hear you had great luck with the starter and bread, Sarah! You’re so welcome, and thank you for sharing your experience!
This is my third try on this recipe and while the loaf was higher, it was still wet, dense and almost but not quite soggy on the bottom.
I used about 1/2 cup of starter fed with 70 gms of your gum free blend and 1/2 cup of distilled water about 5 hours before making the dough. It was very bubbly and active when I started.
I have been converting my own starter to your flour/water proportions for a couple of weeks and have fed it with your gum free blend the last three or four times.
I followed the recipe exactly, used your BetterBatter blend and used one additional tablespoon of milk to get the right consistency. The batter did not seem too wet when I put it into the bread pan. The dough was tacky and held its shape well.
I let it rise for 13 1/2 hours, and while time isn’t the point, it “appeared” to have risen 1 1/2 times the height. At this point, I was getting concerned about overproofing it.
I took it out when the instant read thermometer read 203 degrees and let it set for 10 minutes before turning it out on a rack to cool. I didn’t cut into it for about 4 hours.
It was beautiful in appearance and even browned nicely, which doesn’t always happen. The flavor is heavenly.
I feel like the bread has that wonderful taste I’ve been craving but the density and texture needs work. It doesn’t look light and fluffy like your photo but dense, particularly at the bottom.
I’m not giving up, but I apparently still need some help!
Thank you.
Barbara
Hi, Barbara, that density at the bottom of the loaf means that it hasn’t risen fully, I’m afraid. I know it must be frustrating, but it’s very unlikely that you’re going to overproof this bread. You’re getting close!
Thank you, Nicole. I suspected that might be the case. It’s very hard to tell if it has risen 1 1/2 times in the pan, but I will let it rise even longer next time!
I went exactly by your instructions and it didn’t rise. I didn’t add any extra milk. If I didn’t get the dough sticky enough could that cause it to not rise? Update: I made it a second time. This time I added yeast. Still didn’t rise.
Too little moisture could cause the recipe not to rise, yes, Debbie. You didn’t say anything about the starter that you used, and if you didn’t use my recipe for a wild yeast sourdough starter, which has much higher hydration, the recipe won’t work without correcting the imbalance. Plus, your starter simply may not have been mature enough, which is very common. I try to talk about all of these things in the text of the post as much as possible without scaring anyone off!
Hi Nicole, I made this bread yesterday, after converting my King Arthur fed sourdough, to your gum free blend, as you suggested.
I nearly cried while it was baking – and when I tasted it. It tasted just like the (easy peasy) sourdough bread I made for my family 40 years ago. The first two recipes I used (both King Arthur) didn’t taste like sourdough at all. I suspect it might be the long rising time for your recipe.
HOWEVER, the loaf turned out very dense and wet. The batter seemed as you described it should look. I let it rise for 6 1/2 hours and it “appeared” to have risen enough. I checked it with my instant read thermometer (205 degrees) before taking it out of the oven and I didn’t touch it until the next morning.
I think it may have needed to rise more, despite what it looked like? Or did I miss something else?
I terms of your new subscription service, count me in! I am going to get this recipe right if it kills me and I just might need you more!
Thank you.
Hi, Barbara, as I discuss in the text of the post, a fully risen loaf is never a function of how much time it has risen, and always a function of how much rise there is. So if it hadn’t risen enough, it needed more rising time. I’m not sure if you mentioned what flour blend you used, but if you used King Arthur Flour’s measure for measure flour, this recipe will not work. Their gf bread flour may work, but it will definitely produce a shorter loaf as it has (in my opinion) too much binder.
Sorry, I thought I mentioned that I used your MockBetterBatter blend (this has been my go to flour blend for well over a decade). I suspected it needed more time. Next time, I will let it rise over night (or more). Thank you.
Hi Nicole, can I make this in a bread making machine?
I’m afraid I don’t think that will work, no, Courtney.
Thank you for your response, Nicole. I don’t mean to be a “needy patient”, but I think I am more confused than ever.
I entirely believe in your recipes (is it possible it’s been 15 years?), and I want to try this recipe. All my other attempts at gf sourdough sandwich bread have been blahhhh.
I am using King Arthur Bread flour to feed my (own) starter. KA describes it as being “thirsty.” I maintain a small starter (20 gms) to save on expensive flour. When I am ready to bake, I build it to 90 gms over three days. For instance, tonight I will use 90 gms of flour, 90 gms of starter and 180 gms of water.
I see you recommend for every 1 gram of flour, using 1.6 grams of water (I am currently using 1:2). Can I simply do that when I make my bread batter or would you recommend I “convert” my starter beforehand? By convert, I mean start using a gum free flour to feed at the ratios you recommend.
King Arthur has xanthan gum in it but KA recommends using it to feed starter. I believe I saw you suggest gum free flour to feed, but honestly, it’s confusing. Is that right?
I plan to use your MockBetterBatter flour to make this recipe, if that helps.
Tomorrow is the day I am trying this recipe. I’ve had disappointing results with two other recipes. I am hopeful about this one but nervous about using my own starter.
Thank you for your ongoing support. Is there somewhere I can “buy you a cup of coffee”? Owning three of your books and attending one of your online lessons (which was awesome) doesn’t seem enough here… :)
Barbara
Hi, Barbara, I hope I’m not too late to respond, but yes, I do think it would be worthwhile “converting” your sourdough starter before you use it in my sourdough bread recipe. I have had success using King Arthur Flour’s gluten free bread flour blend in some of my bread recipes, but it is quite starchy and has both psyllium husk and xanthan gum in it, both of which are really water-absorbing. It’s not necessarily a bad thing, but you do have to account for it (which their gf sourdough bread recipe should have done). And thank you for looking for more ways to support me! On Monday of next week, I’m going to launch an “ad-free” version of my site for a low annual cost. Over time, I intend to increase the offerings of that membership to include more individual access to me for troubleshooting and learning. I would love it if you were to join!
I will definitely check out your ad free site, Nicole.
Thank you as always, for helping me through this process. Though it’s been 17 years, I still seem to have a lot to learn!!
Thank you, Barbara. You and me both, 20 years and still learning!