This post may contain affiliate links. Please read our disclosure policy.
Missing that extra-special blend of 11 herbs and spices in KFC chicken now that you're gluten free? This gluten free fried chicken will be a welcome addition to your family traditions!
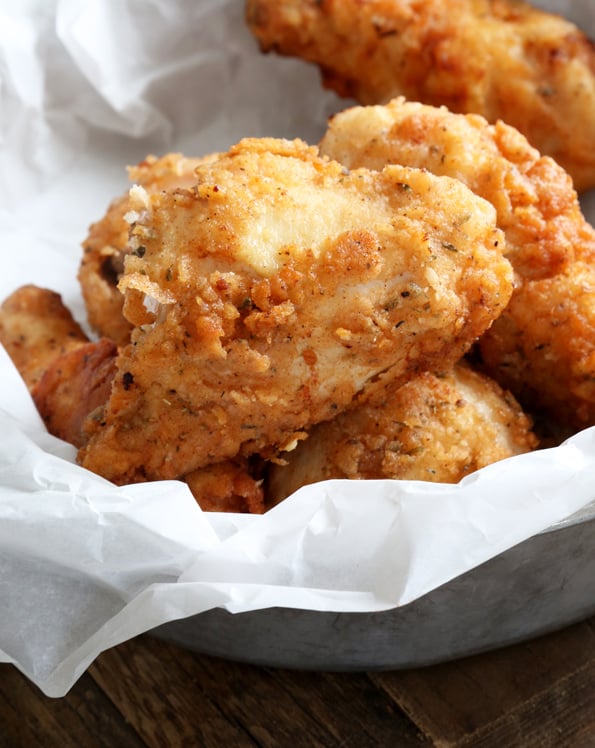
Table of Contents
- The best gluten free fried chicken (better than KFC)
- Ingredients for my KFC extra crispy gluten free fried chicken recipe
- How to make gluten free fried chicken that tastes like KFC
- Tips for making the best gluten free Kentucky fried chicken
- Serving gluten free KFC-style chicken
- How to store leftover gf fried chicken
- Gluten free fried chicken: substitutions
- FAQs
- How to make gluten free fried chicken without deep-frying it
- Gluten Free Fried Chicken | Copycat KFC Chicken Recipe
The best gluten free fried chicken (better than KFC)
Is KFC chicken delicious? Absolutely.
Is KFC chicken gluten free? Absolutely not.
And for that one reason, I insist that my gluten free fried chicken is better. Of course, that's not the only reason. I've also got an irresistibly crunchy coating and super moist meat to offer.
You might associate making fried chicken with lots of work, but again, mine is a winner because it doesn't require a ton of hands-on preparation. It does take a little bit of time, but that's because there's marinating and frying to account for.
Once you bite into this incredible gluten free fried chicken, you'll be blown away by the crispy, flavorful coating and the moist, juicy meat.
Can you eat gluten free at KFC? Sadly, no, but when you pair my awesome fried chicken with popular KFC sides, and you'll feel like you're having takeout, without ever having to leave your house.
Ingredients for my KFC extra crispy gluten free fried chicken recipe
- Chicken – I use split breasts and drumsticks when I make this KFC chicken recipe at home, but you're free to use any bone-in or boneless pieces you'd like.
- Buttermilk – The buttermilk tenderizes the chicken as it marinates, keeps it moist, and imparts a lovely flavor.
- Yogurt – The thicker yogurt will stick to the chicken pieces as you remove them from marinating and add to the seasoning. As the chicken rests before frying, the coating will turn into a paste that won't fall off during cooking.
- Gum-free gluten free flour blend – It's important that you use a blend that does not contain xanthan gum or another substitute. I recommend you use the blend I describe in the recipe below because it's just perfect.
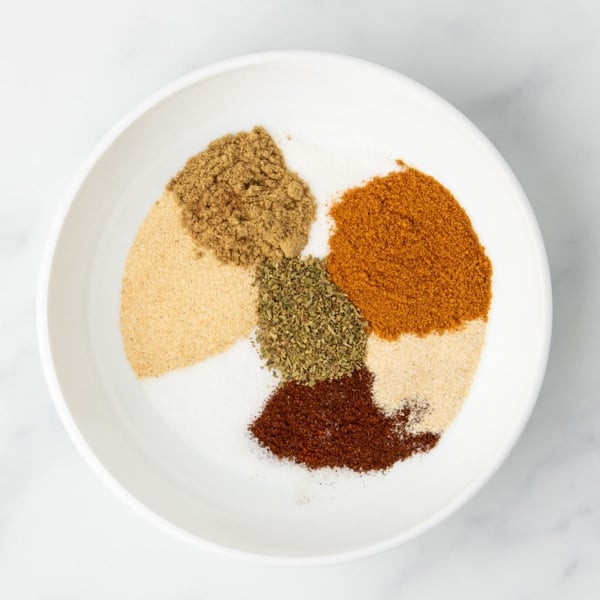
- Spices – We use a lot of spices to recreate the Colonel's iconic blend. Of course, you're free to adjust slightly to match your tastes and preferences, but even if there's one element that isn't a regular favorite of yours, considering trying the blend as is just once.
- Oil – You need to have enough frying on hand as you may need to periodically add more to the fryer depending on how much chicken you're making. And be sure to use a neutral oil (no flavor of its own) that has a high “smoke point” so it doesn't burn.
How to make gluten free fried chicken that tastes like KFC
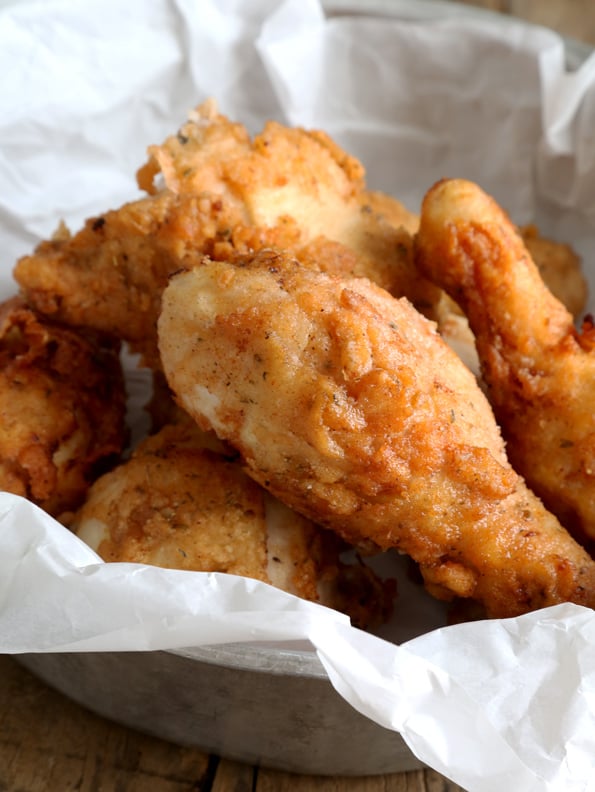
How to fry chicken is the sort of thing that anyone who has ever done it has a bunch of opinions about. This recipe for gluten free fried chicken KFC-style is all about the blend of 11 herbs and spices (plus a touch of sugar—it really goes a long way to making a truly delicious fried chicken!).
And yes—you do have to use a basic gum-free gluten free flour blend. If you use an all purpose gluten free flour blend with xanthan gum, you’ll be very, very sorry with the gummy mess that you have on your hands (and on your chicken).
There isn’t much to making this chicken, beyond soaking it in buttermilk, and then blending up the flours, herbs, and spices. But promise me you’ll read through the whole recipe at least once before getting started?
It’s not very long and doesn’t have too many steps at all. But each ingredient and each step is there for good reason.
Allowing the flour blend and spices coating to soak into the chicken for about half an hour before frying really helps the coating stick to the skin, rather than slide right off in the frying oil.
Maybe you’re spending the weekend at the beach (lucky you!) and want a picnic (don't forget the best gluten free pasta salad!). Maybe you’re just looking for an extra special weekend meal.
Try serving up some of this gluten free fried chicken. It’s amazing right out of the fryer, but some may say it’s even better piled into containers and eaten at room temperature (or cold!) the next day. Let the celebrations begin!
Tips for making the best gluten free Kentucky fried chicken
Make your gluten free chicken seasoning in advance
There are a lot of great spices that make up my KFC seasoning recipe. Of course, it doesn't take a lot of effort to mix spices, but because there are so many of them, it is a bit of a process.
To cut down on preparing gf fried chicken the next time the mood strikes, consider making a big batch of seasoning and storing it for later. That way, when the family is begging for chicken, you just have to pull the seasoning from the pantry and move right on to the next step.
Start making gluten free fried chicken the night before
For best results, my KFC chicken recipe calls for at least 4 hours of marination. However, you can marinate overnight for even better flavor and to save some time.
Combine this tip with my make-in-advance seasoning one, and fried chicken can easily become a fast, weekday dinner idea.
Monitor the frying oil's temperature carefully
I understand being in a rush to get dinner on the table, but rushing and making fried chicken don't go together very well.
If you drop your chicken pieces into the oil before it's hot enough, you risk the coating falling off or the chicken absorbing too much oil.
But if you fry chicken in oil that's too hot, the batter will brown and even start to burn before the inside has enough time to cook.
Take it from me: Follow my temperature suggestions, monitor them regularly, and take your time.
Clean your hot oil as you fry
As you fry your copycat gluten free Kentucky fried chicken, bits and pieces of the coating will separate from the chicken. It won't be a lot if you followed my preparation tips to a tee, but those small fragments will continue to cook as you remove cooked chicken and add new pieces.
To keep your oil from getting to sludgy, be sure to periodically remove these bits (preferably before they burn!) using a spider ladle. You won't get every bit as some will be tiny, but do aim to pick out as much as you can.
Serving gluten free KFC-style chicken
Round out your KFC copycat chicken dinner with some of these classic sides:
- Gluten free buttermilk biscuits
- Gluten free cornbread
- Mashed potatoes with gluten free turkey gravy
- Gluten free mac and cheese
- Gluten free green bean casserole

How to store leftover gf fried chicken
It's best to prepare and eat this gluten free fried chicken recipe on the same day. The chicken will be its crispiest straight out of the fryer and then progressively loose that delicious crunch.
If you do have leftovers, you can store them in the fridge for 2 to 3 days. When it's time to reheat, I recommend popping your chicken into the oven for 10-15 minutes or until heated through. This is the best way to restore some of the chicken's crunch.
If you're in a rush, you can also reheat fried chicken in the microwave, but beware that it won't be nearly as crispy.
Gluten free fried chicken: substitutions
Gluten free, dairy free KFC chicken
To turn this into a dairy free recipe, you need to substitute the buttermilk and yogurt.
To swap out the buttermilk, you can make a blend of unsweetened non dairy milk and non dairy plain yogurt. Use equal parts of each and mix well.
For the yogurt, just use the same non dairy plain yogurt you used in the buttermilk substitute.
Choosing a gluten free flour mixture
Personally, I've not tried making this KFC recipe with anything other than my basic gum-free gluten free flour blend, which contains white rice flour, potato starch, and tapioca starch. That's primarily because this blend has been absolutely perfect!
However, if you do want to try something else, I'll caution you that you want to avoid any gums. This means that an all purpose flour won't work; believe me, you'll have a gummy, mushy mess on your hands!
FAQs
There are some gluten free options at KFC, such as its green beans, corn on the cob, and uh… a few dipping sauces. So is KFC gluten free? Absolutely not if you're craving fried chicken, biscuits, mac and cheese, or even some fries.
Nearly everything at this restaurant contains wheat (including its grilled chicken, which has a wheat flour-based seasoning sprinkled on it during the cooking process), and cross-contamination is a major concern — so if you are highly sensitive to gluten, it's best that you just stay away.
I recommend that you use a gum-free gluten free flour blend. This is flour mixture that doesn't contain xanthan gum or any substitute for it.
As we aren't baking with the flour, we don't need a binder. As it is, a binder just makes a mess out of things. For perfect results, you just need white rice flour, potato starch, and tapioca starch.
For my gluten free KFC crispy chicken recipe, I use bone-in breasts and drumsticks. However, you can make substitutions as needed. If you prefer boneless chicken, use thighs. Be sure to monitor them carefully while frying as boneless chicken cooks much faster.
If you want a crispier coating, consider removing the skin from the chicken, blotting the meat dry as much as possible, and applying the coating right to the meat.
Any neutral oil with a high smoke point will work for frying gluten free fried chicken.
Personally, I like to use peanut oil, but you can also use a blend of canola oil and vegetable shortening.
Only have vegetable oil on hand? That will work just fine too.
No, not with the gluten free fried chicken recipe as written, because this chicken's coating is specifically designed for frying. The chicken has to be completely surrounded by hot oil to seal the batter. However, you can make the baked “fried” chicken recipe option below in an air fryer. Be sure to spray the raw coated chicken very liberally with cooking oil spray when you get to that step of the baked recipe below.
I designed and thoroughly tested this KFC recipe using a gum-free gluten free flour. You won't get the same results if you try to substitute breadcrumbs — the texture will be completely different, and the breadcrumbs will probably burn before the chicken is thoroughly cooked. Breadcrumbs are used in a different manner if you want to bake the chicken instead of deep-frying it. See those instructions below.
Here a few tips for keeping your flour mixture on the chicken and not the bottom of the fryer:
After coating the chicken in the faux KFC fried chicken batter, be sure to let it sit for 30 minutes. This will allow the buttermilk mixture and seasoning to form a thick paste that will stick to your chicken.
Don't ovecrowd your fryer as the coating will fall off as the chicken pieces move against one another.
Flip your gluten free fried chicken pieces using tongs and gentle pressure. Turn each chicken piece one at a time.
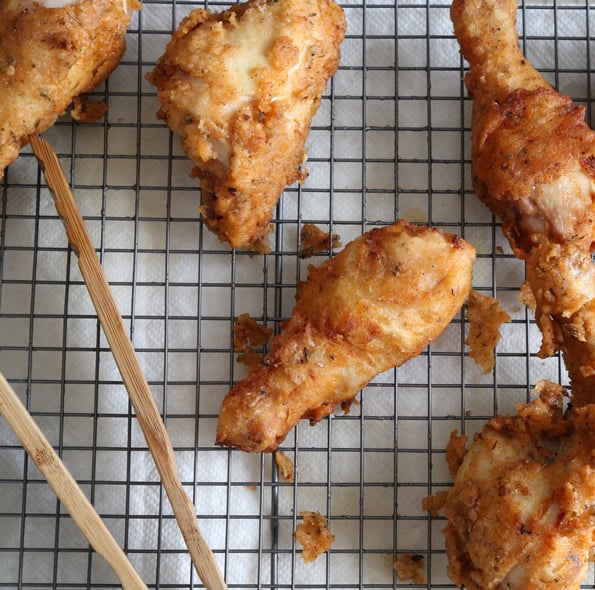
Leave your fried chicken on a cooling rack to cool. This will further help strengthen the coating.
The only way to be certain that your gluten free fried chicken is done is to use a thermometer. Your chicken is ready when each piece reads at least 165°F.
You can't rely on visual appearance when frying chicken as the coating will darken faster if your heat is too high, even if the inside still needs more time. For this reason, don't try to rush the process: Set your temperatures as I describe, and keep that thermometer handy.
How to make gluten free fried chicken without deep-frying it
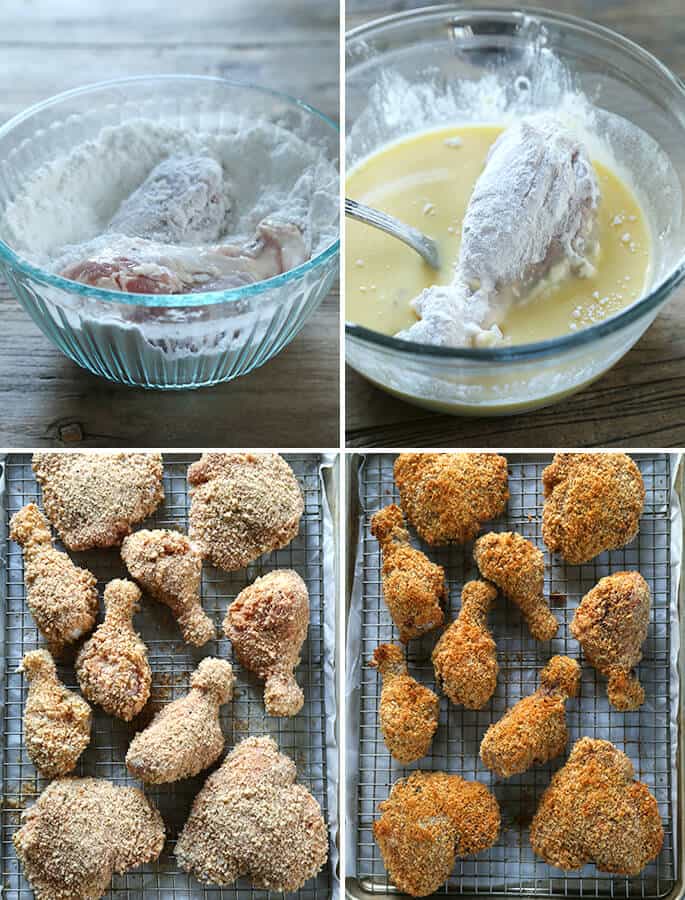
If you really want the taste of KFC but you don't want to go through the time and trouble of deep-frying it, you can bake your “fried” chicken in the oven with similar results. The herbs and spices are the same as in the fried chicken recipe below, but the coating ingredients are slightly different.
The substitute ingredients you'll for baked gluten free “fried” chicken
You need the same same spices (freshly ground black pepper, kosher salt, smoked Spanish paprika, dried oregano, dried thyme, dried parsley, ground cumin, ground cinnamon, onion powder, garlic powder, chili powder, and granulated sugar) in the same amounts.
In place of the chicken, buttermilk, yogurt, and flour blend that you see below for fried chicken, you'll need the following ingredients:
- 4 pounds bone-in raw chicken parts (no skin, if possible)
- 1 cup (140 g) basic gum-free gluten free flour blend (92 g superfine white rice flour + 31 g potato starch + 17 g tapioca starch/flour)
- 1 cup (8 fluid ounces) buttermilk, at room temperature
- 1 egg (50 g, weighed out of shell) at room temperature, beaten
- 1 1/4 cups (200 g) Panko-style gluten free bread crumbs
- Cooking oil spray
How to prepare your baked gluten free “fried” chicken
The chicken is prepared differently when you bake it, rather than frying it, since you want it skinless, but bone-in. And rather than letting the chicken soak in a buttermilk and yogurt mixture, and then sit in a flour mixture, you will set up a dipping station and dip the chicken parts first in flour, then in a buttermilk and egg mixture, then in breadcrumbs mixed with the spices. Here's how to do it:
- Preheat your oven to 375°F. Line a large rimmed baking sheet with unbleached parchment paper, place a wire rack on top and spray the rack light with cooking oil to grease. Set the pan aside.
- If you only have skin-on chicken, just carefully pull off the skin and discard it.
- If you have any large pieces of chicken like bone-in breasts, use poultry shears or a very sharp knife to slice them in half horizontally, through the short center.
- Set up a dipping station for coating the chicken three times before placing it on a lined prepared baking sheet/wire rack.
- In a medium-size shallow bowl or pan, place the basic gum-free flour blend.
- Next to it, place the buttermilk and eggs, and beat to combine well.
- Finally, in a separate, medium-size bowl or pan, place the bread crumbs, and all the spices from the recipe below, and mix to combine well.
- Dip the prepared chicken pieces first in the flour blend, coating evenly on all sides.
- Next, dip the floured chicken in the egg and buttermilk mixture, allowing any excess to drip off
- Finally, place the chicken in the bread crumb and spice mixture, pressing the chicken down firmly on both sides to ensure that the bread crumbs adhere to the chicken on all sides.
- Place the chicken pieces about 1 inch apart from one another on the wire rack in the prepared baking sheet.
- Spray the prepared chicken pieces lightly with cooking oil spray.
- Place the chicken in the center of the preheated oven and bake for about 50 minutes, or until golden brown all over and breasts have reached 165°F on an instant read thermometer and thighs/drumsticks have reached 175°F.
- Remove from the oven and allow the chicken to sit for a few minutes before serving.

Gluten Free Fried Chicken | Copycat KFC Chicken Recipe

Equipment
- Electric deep fryer or deep fry thermometer and large stock pot
Ingredients
- 4 pounds bone-in skin-on chicken parts, (I used 2 split chicken breasts and 4 drumsticks) (See Recipe Notes)
- 1 ½ cups (12 fluid ounces) buttermilk
- 1 cup (224 g) plain yogurt, (or you can use 1 additional cup buttermilk in place of the yogurt)
- 2 cups (280 g) basic gum-free gluten free flour blend, (184 g superfine white rice flour + 62 g potato starch + 34 g tapioca starch/flour) (yes, you do have to use this blend!)
- 1 teaspoon freshly ground black pepper
- 1 ½ teaspoons kosher salt
- 1 ½ teaspoons smoked Spanish paprika
- ½ teaspoon dried oregano
- ½ teaspoon dried thyme
- ½ teaspoon dried parsley
- ¼ teaspoon ground cumin
- ¼ teaspoon ground cinnamon
- ½ teaspoon onion powder
- ¼ teaspoon garlic powder
- ¼ teaspoon chili powder
- 3 tablespoons (36 g) granulated sugar
- Neutral oil, for frying (peanut oil is ideal, but a mixture of half canola oil and half nonhydrogenated vegetable shortening works very well, too)
Instructions
- In a large, zip-top bag or large bowl, place the chicken parts, buttermilk and yogurt, and stir to coat the chicken parts fully. Squeeze out all the air if using a zip-top bag before sealing the bag. If using a bowl, cover the bowl tightly with plastic wrap.
- Place the chicken in the refrigerator to marinate for at least 4 and up to 16 hours.
- Once the chicken has finished marinating, in a medium-size bowl, place the flour blend, pepper, salt, paprika, oregano, thyme, parsley, cumin, cinnamon, onion powder, garlic powder, chili powder, and sugar, and whisk to combine well.
- Pour all the dry ingredients into a large, zip-top bag.
- Line a large rimmed baking sheet with parchment paper and set it aside.
- Remove the chicken parts from the marinade, about 2 at a time, and place in the bag of dry ingredients, seal the bag and shake to coat the chicken parts fully.
- Remove the chicken from the dry ingredients and place on the prepared baking sheet.
- Allow the coated chicken to sit at room temperature for about 30 minutes to allow the dry ingredients to form a thick paste on the chicken. This will help the coating stick to the chicken during frying.
- While the chicken is sitting, prepare the frying oil by placing about 3-inches of frying oil in a large, heavy-bottom pot, Dutch oven, or deep fryer.
- Clip a deep-fry/candy thermometer to the side of the pot or fryer, and place the oil over medium-high heat. Bring the oil temperature to 350°F.
- Place the coated chicken parts in the hot oil, taking care not to crowd the oil. To prevent the chicken from sticking to the bottom of the pot, hold each piece with tongs or a spider in the hot oil just above the bottom for about a minute to allow the bottom skin of the chicken to seal.
- Fry until golden brown all over, about 7 minutes on each side.
- Turn the heat down to bring the oil temperature to 325°F and allow the chicken to continue to cook until the internal temperature of each piece reaches nearly 165°F (about 10 minutes more).
- Place the chicken on a wire rack placed over paper towels to drain and cool before serving.
Notes
- 4 pounds bone-in raw chicken parts (no skin, if possible)
- 1 cup (140 g) basic gum-free gluten free flour blend (92 g superfine white rice flour + 31 g potato starch + 17 g tapioca starch/flour)
- 1 cup (8 fluid ounces) buttermilk, at room temperature
- 1 egg (50 g, weighed out of shell) at room temperature, beaten
- 1 1/4 cups (200 g) Panko-style gluten free bread crumbs
- Cooking oil spray
How to prepare your baked gluten free “fried” chicken
The chicken is prepared differently when you bake it, rather than frying it, since you want it skinless, but bone-in. And rather than letting the chicken soak in a buttermilk and yogurt mixture, and then sit in a flour mixture, you will set up a dipping station and dip the chicken parts first in flour, then in a buttermilk and egg mixture, then in breadcrumbs mixed with the spices. Here's how to do it:- Preheat your oven to 375°F. Line a large rimmed baking sheet with unbleached parchment paper, place a wire rack on top and spray the rack light with cooking oil to grease. Set the pan aside.
- If you only have skin-on chicken, just carefully pull off the skin and discard it.
- If you have any large pieces of chicken like bone-in breasts, use poultry shears or a very sharp knife to slice them in half horizontally, through the short center.
- Set up a dipping station for coating the chicken three times before placing it on a lined prepared baking sheet/wire rack.
- In a medium-size shallow bowl or pan, place the basic gum-free flour blend.
- Next to it, place the buttermilk and eggs, and beat to combine well.
- Finally, in a separate, medium-size bowl or pan, place the bread crumbs, and all the spices from the recipe below, and mix to combine well.
- Dip the prepared chicken pieces first in the flour blend, coating evenly on all sides.
- Next, dip the floured chicken in the egg and buttermilk mixture, allowing any excess to drip off
- Finally, place the chicken in the bread crumb and spice mixture, pressing the chicken down firmly on both sides to ensure that the bread crumbs adhere to the chicken on all sides.
- Place the chicken pieces about 1 inch apart from one another on the wire rack in the prepared baking sheet.
- Spray the prepared chicken pieces lightly with cooking oil spray.
- Place the chicken in the center of the preheated oven and bake for about 50 minutes, or until golden brown all over and breasts have reached 165°F on an instant read thermometer and thighs/drumsticks have reached 175°F.
- Remove from the oven and allow the chicken to sit for a few minutes before serving.
Nutrition information is automatically calculated, so should only be used as an approximation.


