
This post may contain affiliate links. Please read our disclosure policy.
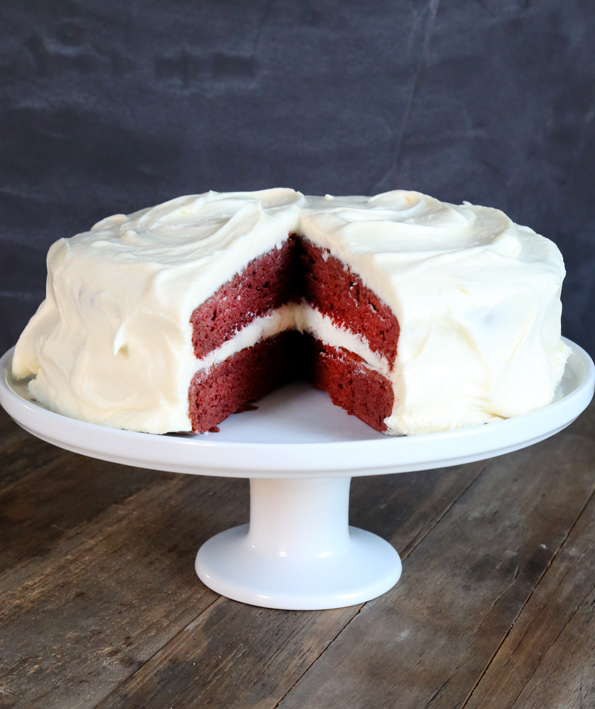
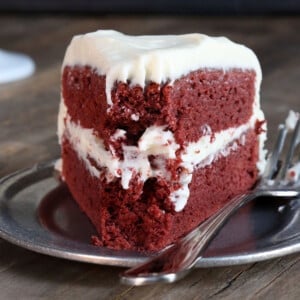
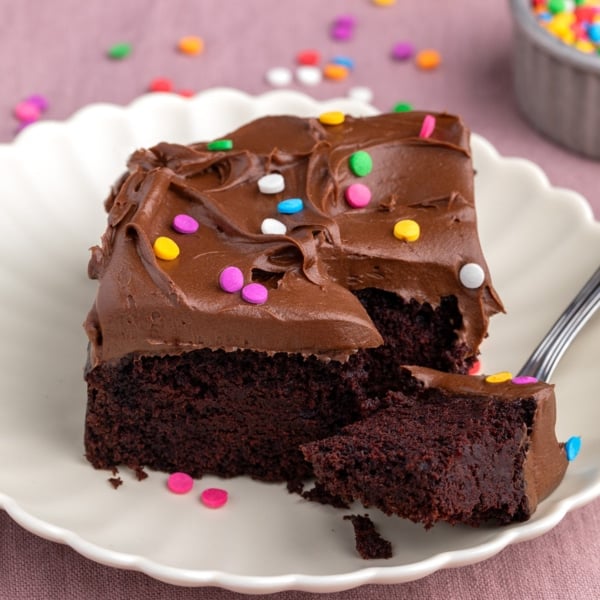
This classic gluten free red velvet cake is everything you remember red velvet to be. Moist and tender, lightly chocolate cake that is my go-to recipe whenever I want to please chocolate and non-chocolate lovers alike!
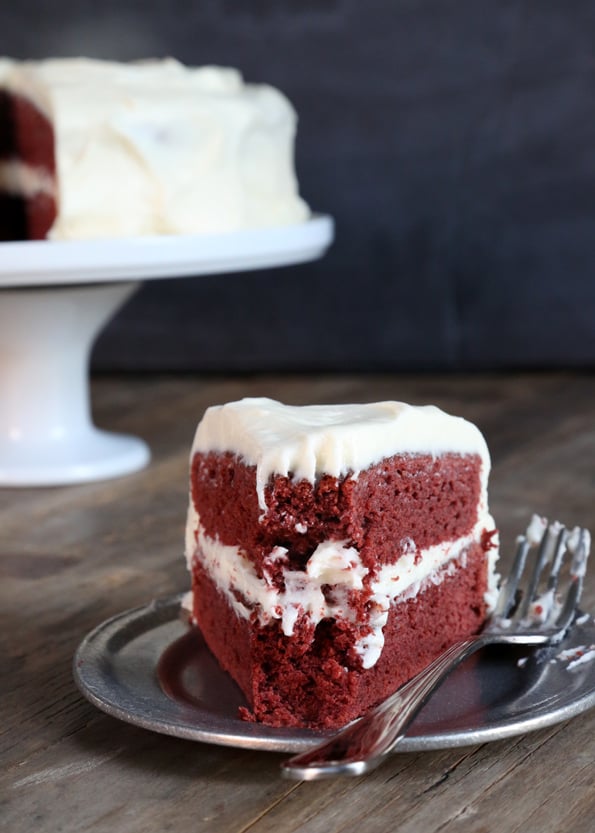
Table of Contents
What's special about this gluten free red velvet cake
Is it age that gives us an appreciation for chocolate? I never would have thought so, until I started serving cake to small children. But it seems, given the choice, little kids will always pick vanilla cake over chocolate.
I have 3 children. Two of them love chocolate. The third, my gluten free son, simply isn't a chocolate lover. With every birthday he celebrates, I expect the chocolate-lover in him to awake.
So far, no go. So when I make his birthday cake, and I want it be something everyone loves, I go with red velvet.
It's also not an overly sweet cake, which means that the cream cheese frosting is all the more important. Remember that cream cheese frosting is not a stiff buttercream, so it will stay softer and more spreadable even when you slice into the cake.
Can you make gluten free red velvet cake without food coloring?
Yes! You can make gf red velvet cake without food coloring.
We've talked about red velvet here on the blog before, but even though I know I might upset some by using red food coloring, I don't really tire of it. Neither does my family.
My kids love red velvet cake, and even though it's really just moist chocolate cake with red food coloring, its real charm lies in its flavor. It's not a deep chocolate cake.
There's no melted chocolate in the batter, and there isn't even an overwhelming amount of cocoa powder. It's just right, and tends to please chocolate cake lovers and vanilla cake lovers alike.
If you're not comfortable using red food coloring, by all means just leave it out! I know that there are other recipes on the Internet that make red velvet cake with beet powder, but that changes the entire recipe and I honestly don't think it's worth the bother.
Gluten free red velvet cake ingredients and substitution suggestions
I haven't tried this recipe with substitutions and can't promise results other than if you follow the recipe precisely as written. However, based on my experience, these are my best educated guesses for how to replace dairy or eggs in this recipe if you can't have either of those:
Dairy free red velvet cake
The dairy in this cake is in the form of butter and milk. In place of the butter, you can try using vegan butter. My favorite brands are Miyoko's Kitchen and Melt.
In place of cow's milk, you can use your favorite unsweetened nondairy milk. I like unsweetened almond milk best because it has some fat, like regular milk so it adds some of the richness of cow's milk.
Egg free red velvet cake
There are 3 eggs in this cake, and I typically only feel comfortable suggesting that a recipe with 2 eggs or less may work well with an egg replacer. In general, though, I like using a “chia egg” for each egg as a replacement (for each egg: 1 tablespoon ground white chia seeds + 1 tablespoon lukewarm water, mixed and allowed to gel).
FAQs
Red velvet cake gets its light chocolate flavor from having much less cocoa powder than chocolate cake, and a slight tang from both the apple cider vinegar in the cake and the deliciously tangy, sweet cream cheese frosting.
Red velvet cake is a lighter chocolate cake, much like devil's food cake, but red velvet cake is made with milk or buttermilk, so it tends to have a more open, less dense crumb, and devil's food cake is made with sour cream, so its crumb is more dense.
Red velvet cake also usually has food coloring in it, but that's only to mimic the slight red color that the small amount of cocoa powder used to be thought to give the cake.
Natural unsweetened cocoa powder is best in this cake, as the acid in the cocoa powder that is alkalized in Dutch-process cocoa powder is neutralized here by the baking soda in the batter. Plus, Dutch-process cocoa powder tends to have a deeper, richer chocolate flavor than natural, and this is not a rich chocolate cake.
No! The food coloring is entirely optional, and is only used to give red velvet cake a deep red color, not change the flavor at all. If you do use food coloring, however, be sure to use only gel food coloring. Liquid food coloring is not concentrated enough to be used in a small amount, so it adds additional unwanted liquid to the cake—and can be bitter in large amounts.
How to make classic gluten free red velvet cake, step by step
Classic Gluten Free Red Velvet Cake
Equipment
- Electric mixer
Ingredients
For the red velvet cake
- 2 cups (280 g) all purpose gluten free flour blend, (I used Better Batter; please click thru for full info on appropriate blends)
- 1 teaspoon xanthan gum, omit if your blend already contains it
- 6 tablespoons (54 g) cornstarch, (or try arrowroot)
- 1 teaspoon kosher salt
- 1 ¼ teaspoons baking powder
- ½ teaspoon baking soda
- 6 tablespoons (30 g) natural unsweetened cocoa powder
- 11 tablespoons (154 g) unsalted butter, at room temperature
- 1 ¼ cups (250 g) granulated sugar
- 3 (150 g (weighed out of shell)) eggs, at room temperature, beaten
- 1 ½ teaspoons pure vanilla extract
- 1 ¼ teaspoons apple cider vinegar
- 1 cup (8 fluid ounces) milk, at room temperature
- Red soft gel paste food coloring, optional
For the cream cheese frosting
- 16 ounces cream cheese, at room temperature
- 4 tablespoons (56 g) unsalted butter, at room temperature
- ½ teaspoon kosher salt
- 1 teaspoon pure vanilla extract
- 5 cups (575 g) confectioners’ sugar
Instructions
- Preheat your oven to 350°F. Grease two 9-inch round baking pans, and set them aside. (See Recipe Notes.)
Make the cake batter.
- In a medium-size bowl, place the flour, xanthan gum, cornstarch, salt, baking powder, baking soda and cocoa powder, and whisk to combine well. Set the bowl aside.
- In the bowl of a stand mixer fitted with the paddle attachment (or a large bowl with a handheld mixer), beat the butter on medium-high speed until light and fluffy.
- Add the granulated sugar, followed by the eggs and vanilla, beating to combine well on medium-high speed after each addition.
- Add the vinegar and then about a scant 1/8 teaspoon of the food coloring, if using, and beat to combine very well. The mixture may look a bit curdled, and that’s fine.
- Add the dry ingredients, alternating with the milk, and beginning and ending with the dry ingredients, mixing to combine after each addition. The batter should be smooth and relatively thick.
Bake the cakes.
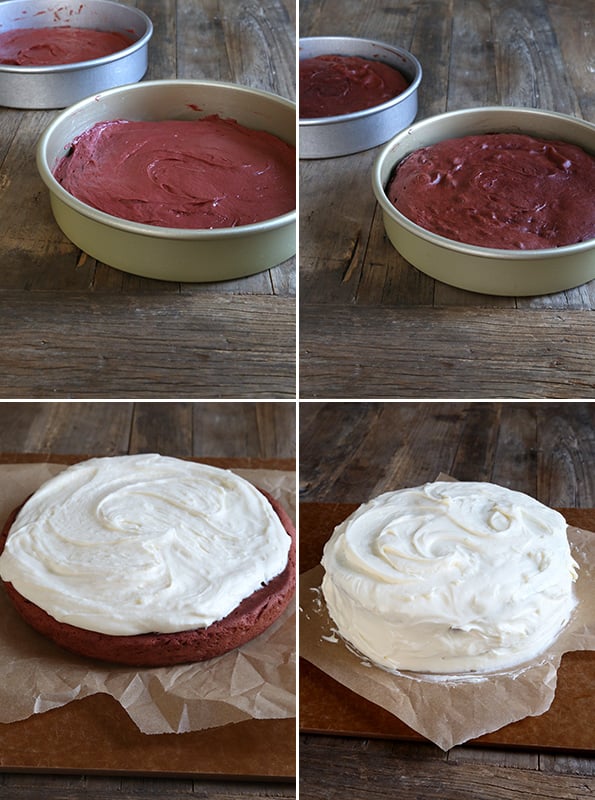
- Divide the cake batter evenly between the two prepared pans, and smooth into an even layer with a wet spatula.
- Place both pans in the center of the preheated oven and bake, rotating once during baking, for 25 minutes, or until a toothpick inserted in the center of each cake comes out mostly clean, or with a few moist crumbs attached.
- Remove from the oven and allow to cool in the pans for 10 minutes before inverting the cakes onto a wire rack to cool completely.
Make the frosting.
- While the cakes are cooling, in the clean bowl of a stand mixer or a clean large bowl with a hand mixer, place the cream cheese and butter. Beat on medium-high speed until light and fluffy.
- Add the vanilla and salt, and beat to combine. Add about half of the confectioners’ sugar, and beat on medium-low speed until the sugar has been absorbed by the butter and cream cheese mixture.
- Add the rest of the confectioners’ sugar about 1 cup at a time, beating on medium speed to combine after each addition.
- Once all the sugar has been absorbed into the mixture, increase the mixer speed to high and beat until light and fluffy. The frosting should hold its shape when scooped, but should not be completely stiff.
Assemble the cake.
- Place one of the cooled cakes upside down on a serving platter. Place about 1 1/4 cups of frosting on top and spread into an even layer. Invert the second cake place on top of the frosting and press gently to adhere.
- For the neatest frosted cake, cover the entire top and sides of the cake in a very thin layer of frosting (this is called the crumb coat), and place in the freezer until very firm (about 15 minutes).
- Remove the cake from the freezer and cover the top and sides with the remaining frosting, spreading into an even layer.
- Swirl the frosting around randomly with a butter knife or offset spatula. Refrigerate the frosted cake for at least 15 minutes before slicing with a sharp knife into generous slices, and serving.
Notes
You can of course use 8-inch round cake pans. You will need to increase the baking time slightly (by a few minutes, likely). You could also use 8-inch or 9-inch square pans, too. If you are baking the cakes in 8-inch round cake pans, you may need to increase the baking time by a few minutes as your cakes are thicker.
Nutrition information is automatically calculated, so should only be used as an approximation.


Hello,
I tried your recipe today. It was good but tasted a little to floury to me. It’s been sooooo long since I had a real red velvet cake that I don’t remember the taste. This one tasted very flour heavy. I use bobs red mill flour and followed the recipe exactly. It also smelled horrible. Thank goodness it tasted better than it smelled. What am I doing wrong? :(
Any suggestions or is that normal?
No, Heather, terrible results that smell and taste bad are definitely not normal for my recipes! Even Bob’s Red Mill 1-to-1 gluten free flour in the blue bag is not one of my specifically recommended blends, as you can see in the all purpose gluten free flour blends page which is linked in the recipe card here. My guess is that you used their bean flour blend, which I expressly recommend against. That is what smells horrible raw and when baking. Even when you do use one of my recommended blends, you also must measure by weight and use all of the ingredients precisely as written for the promised results.
I used this cake recipe to bake my brother’s wedding cake. I made a different frosting though. It was a huge hit!
So glad to hear that, SV. Thank you so much for sharing that this cake was a part of someone’s special day. That’s so lovely to hear!
Could I make cupcakes with this recipe?
No, I recommend you use my recipe for gluten free red velvet cupcakes, Helen.