
This post may contain affiliate links. Please read our disclosure policy.
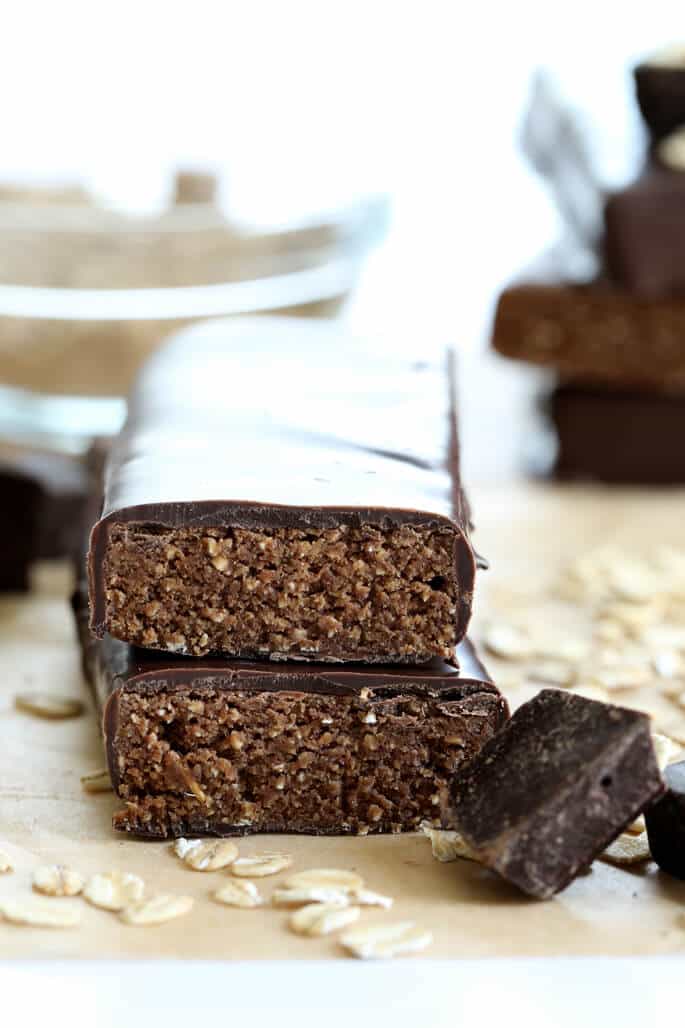
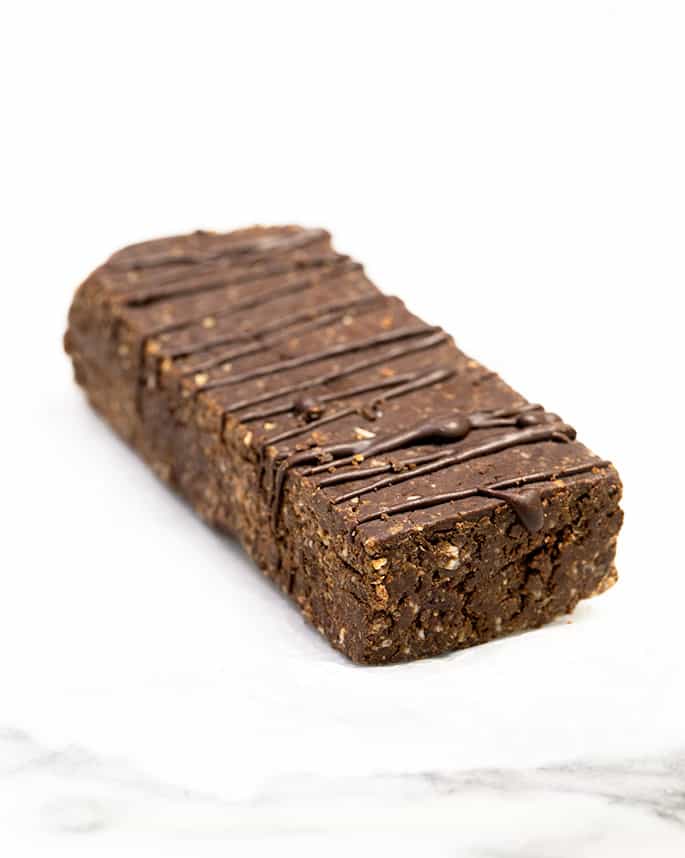
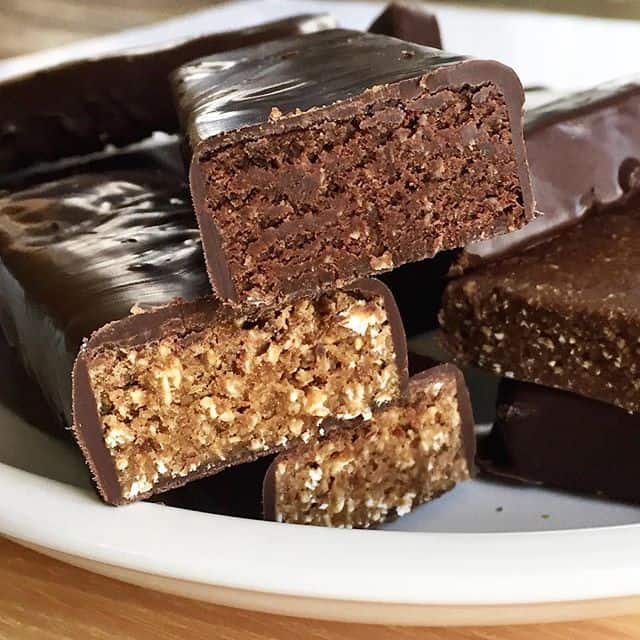
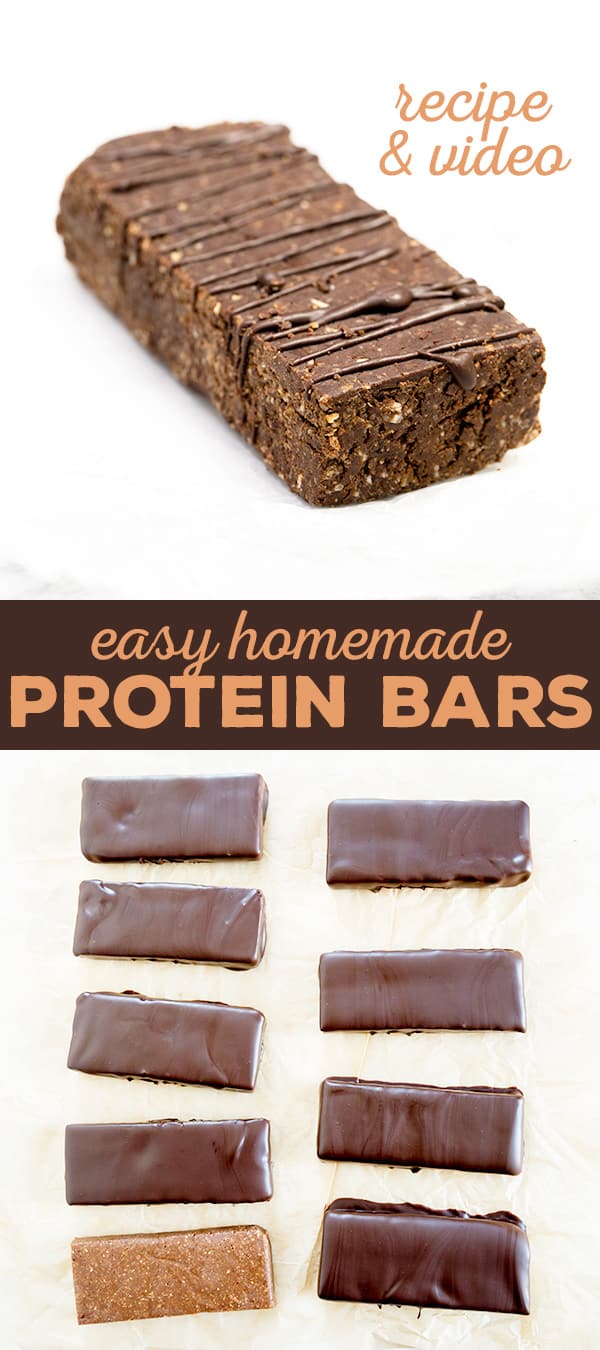
These homemade protein bars are no-bake, high-protein, and totally customizable—made with your favorite protein powder and simple pantry ingredients.
This recipe keeps things simple: no baking, no fuss, and no peanut butter required (unless you want it).
“This has been such a helpful, cost effective and healthy substitute for store bought protein/granola bars. No artificial sweeteners or weird ingredients and way less sugar. Thanks for these!”
my take
Key benefits of this recipe
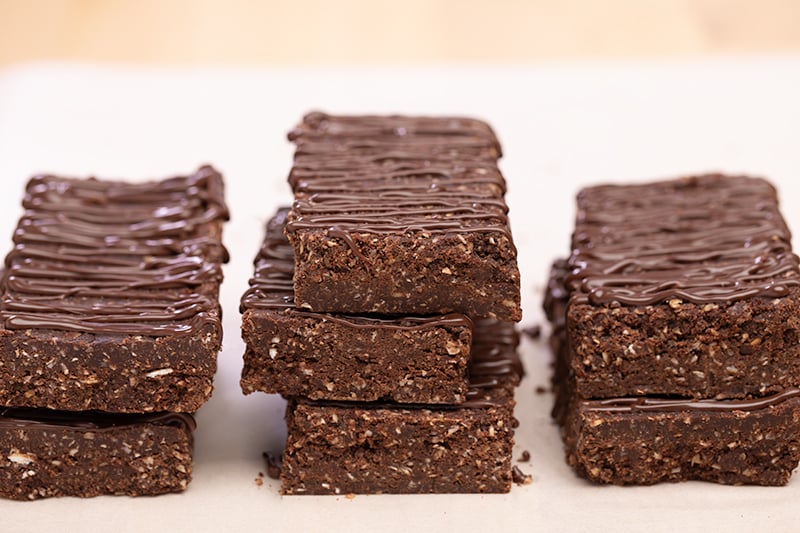
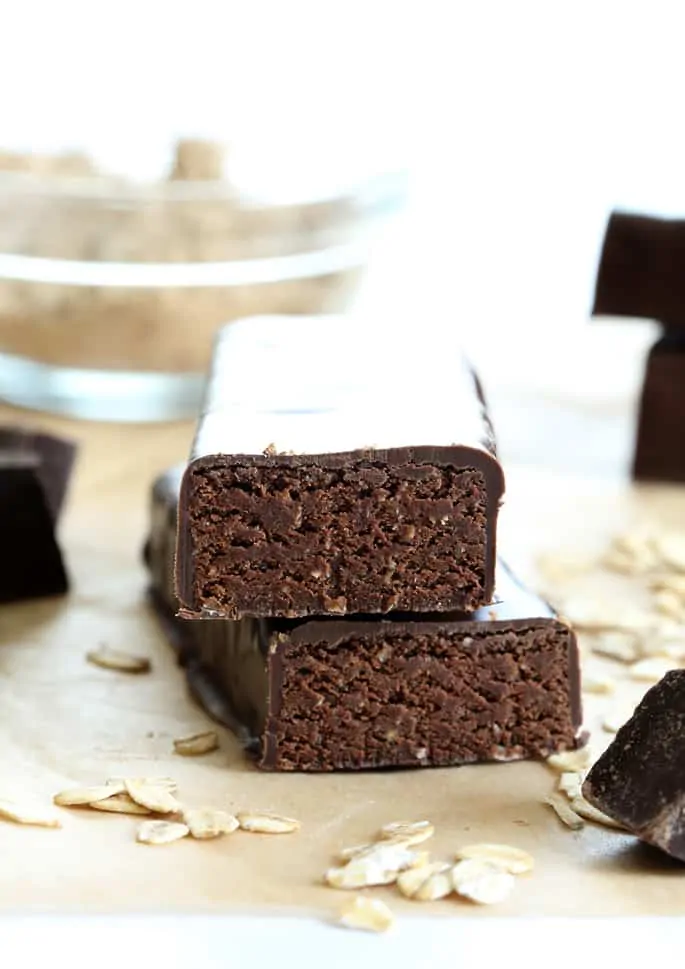
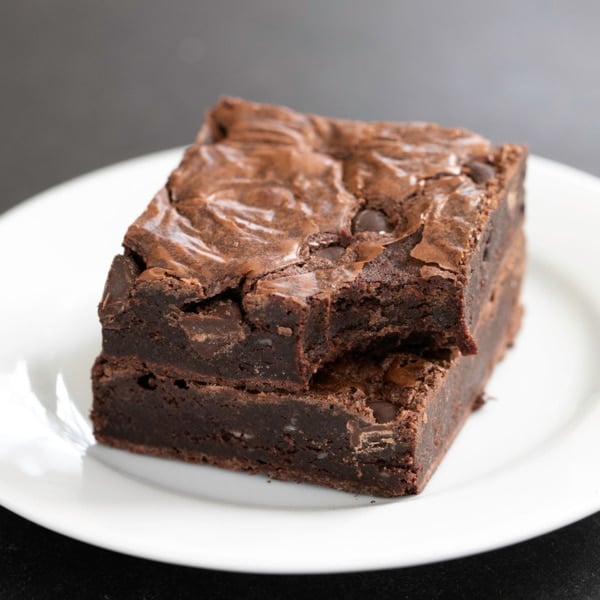
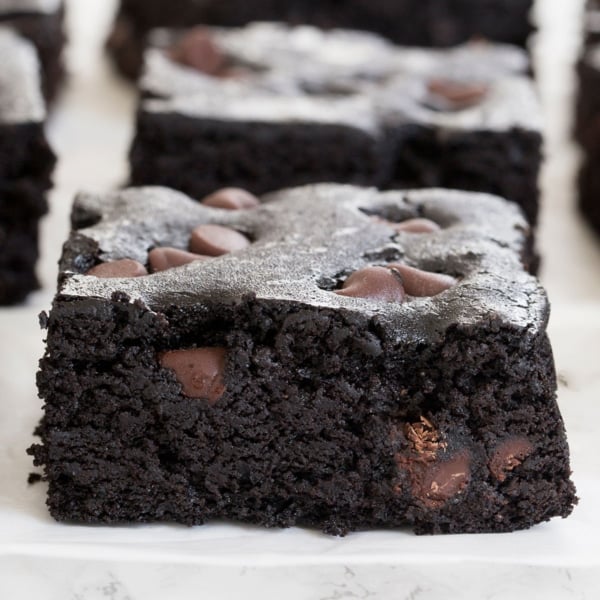
- Rich & soft texture – Like a brownie, but better for you.
- Totally customizable – Use oats or coconut, nut butter or dates, chocolate or fruit.
- Naturally nutritious – 13g protein, whole grains, no refined sugar.
- Easy to make ahead – No baking required; fridge-ready in an hour.
- Saves money – Make a week’s worth of bars for less than a store-bought pack.
Recipe ingredients
This recipe has two base versions: one made with dates (nut-free), and one with peanut butter (no dates). Both share a set of core ingredients, with a few unique to each version.
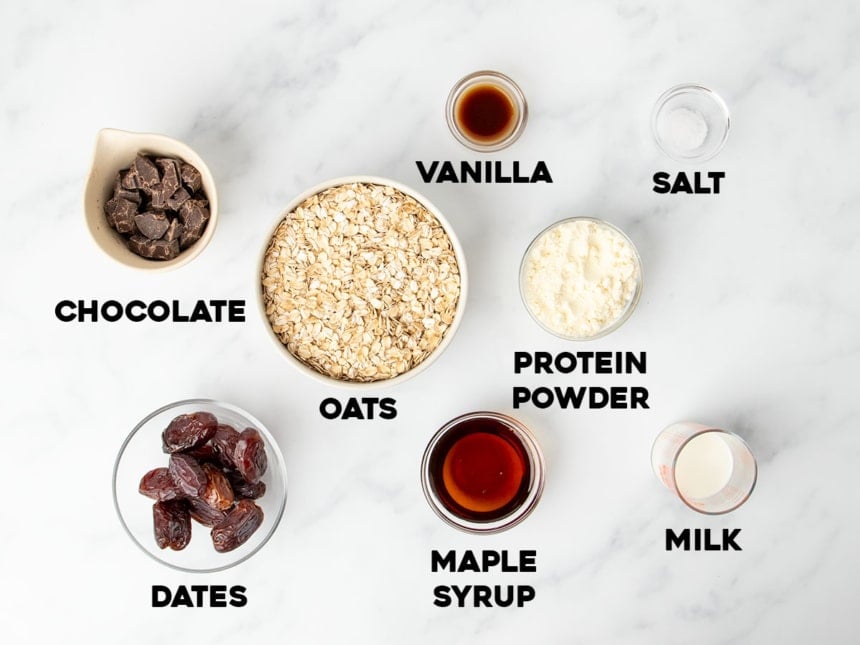
In the dates version only (nut-free)
- Dates: The sticky binder for this version. Medjool dates work best for moisture and rich caramel flavor. If using drier Deglet Noor dates, soak them in hot water for 10 minutes first.
- Vanilla: Adds flavor depth and rounds out the natural sweetness.
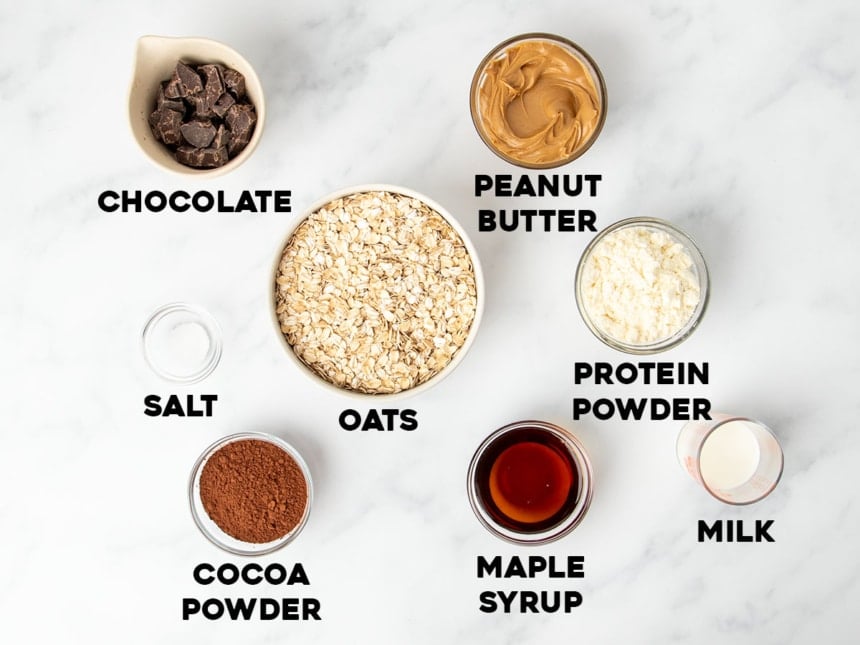
In the peanut butter version only
- Nut butter: Use a no-stir variety like Jif, Skippy, or Barney Butter for structure. Avoid drippy natural nut butters. Wow Butter works for a nut-free option.
- Cocoa powder: Deepens the chocolate flavor and helps thicken the mixture. Dutch-processed is best, but natural works, too.
In both versions
- Oats or oat flour – Ground oats form the base. You can use oat flour instead: 250g = 2 cups + 1 heaping tablespoon.
- Protein powder – Use your favorite; flavored powders add taste, whey protein isolate adds the most protein per scoop.
- Maple syrup – Adds sweetness and helps the bars bind. Honey works too, but you’ll need less.
- Milk – Adds moisture and helps everything come together. Add slowly so the bars stay firm.
- Salt – Balances sweetness and enhances flavor.
- Chocolate – Optional but recommended! Use unsweetened in the base for richness, and sweetened for coating or drizzle, if adding.
How to make homemade protein bars
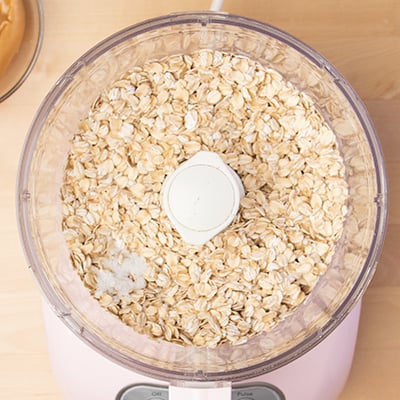
Step 1: Process the base
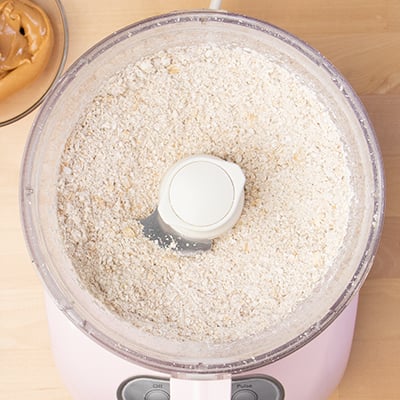
- Grind oats into flour in a food processor (or use oat flour).
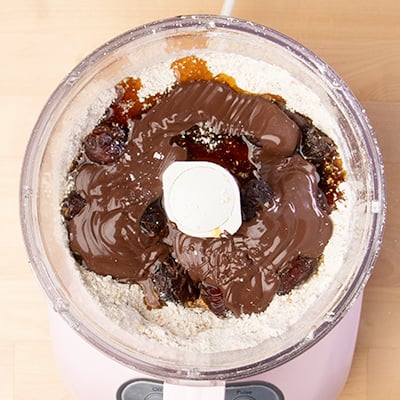
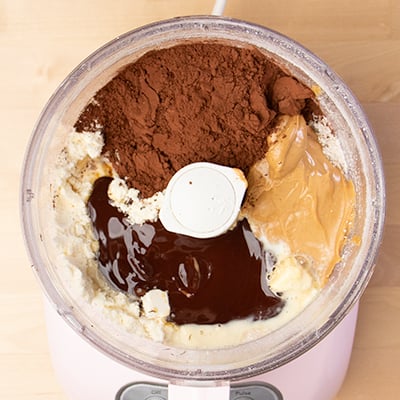
- Add protein powder, maple syrup, melted unsweetened chocolate, and milk.
- Add either:
- pitted Medjool dates (for the date version), or
- cocoa powder and nut butter (for the nut butter version).
Step 2: Blend & adjust
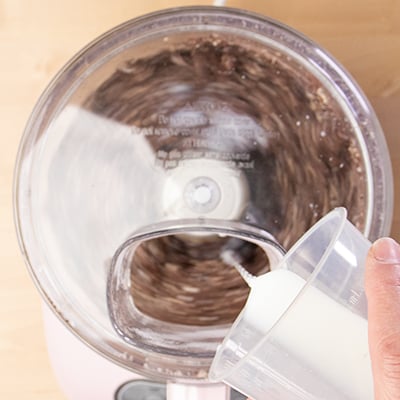
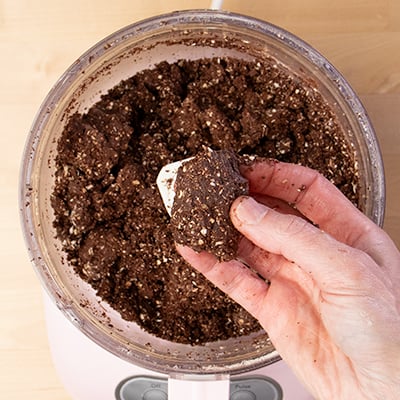
- Process just until the mixture clumps together and holds its shape.
- If it’s too dry, add milk slowly, 1 tsp at a time.
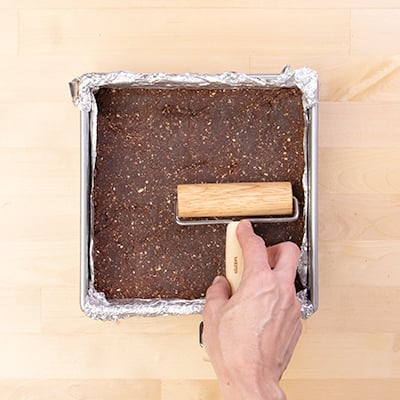
Step 3: Press & chill
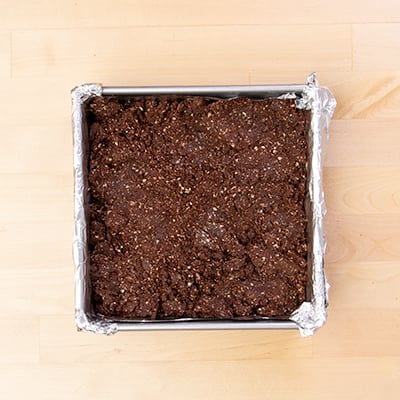
- Press the mixture firmly into a lined pan in an even layer.
- Chill for at least 1 hour in the fridge (or 20 minutes in the freezer).
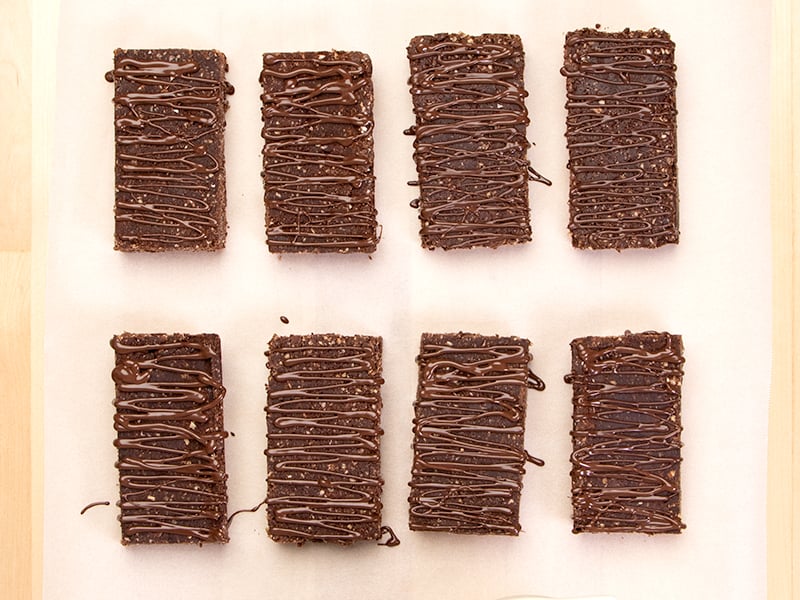
Step 4: Slice & finish
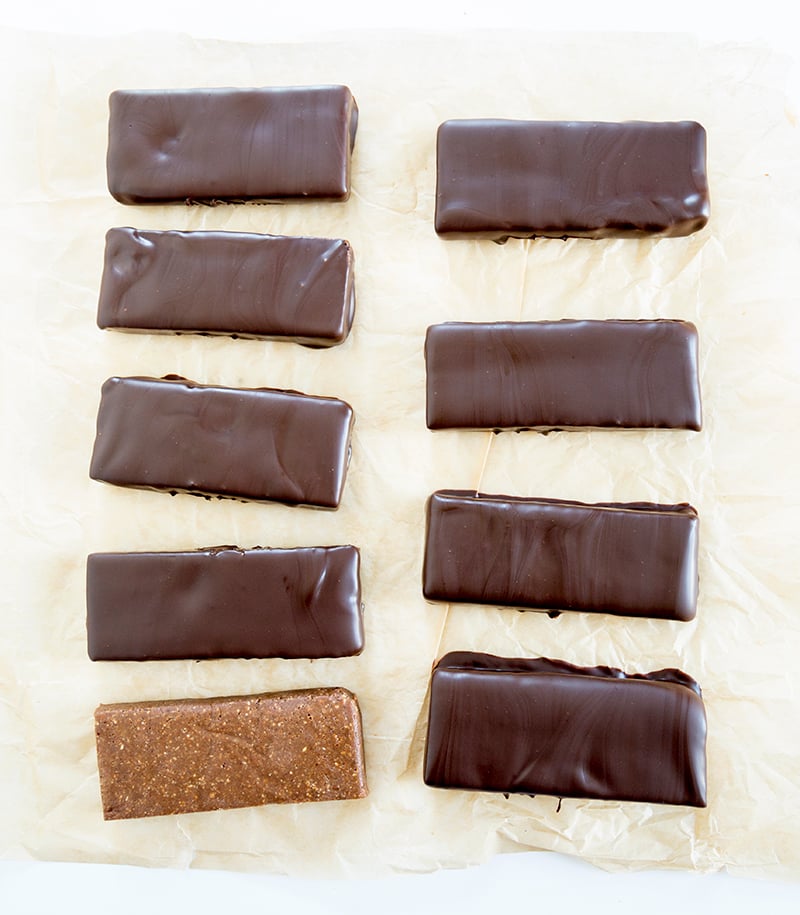
- Cut into bars using a sharp knife.
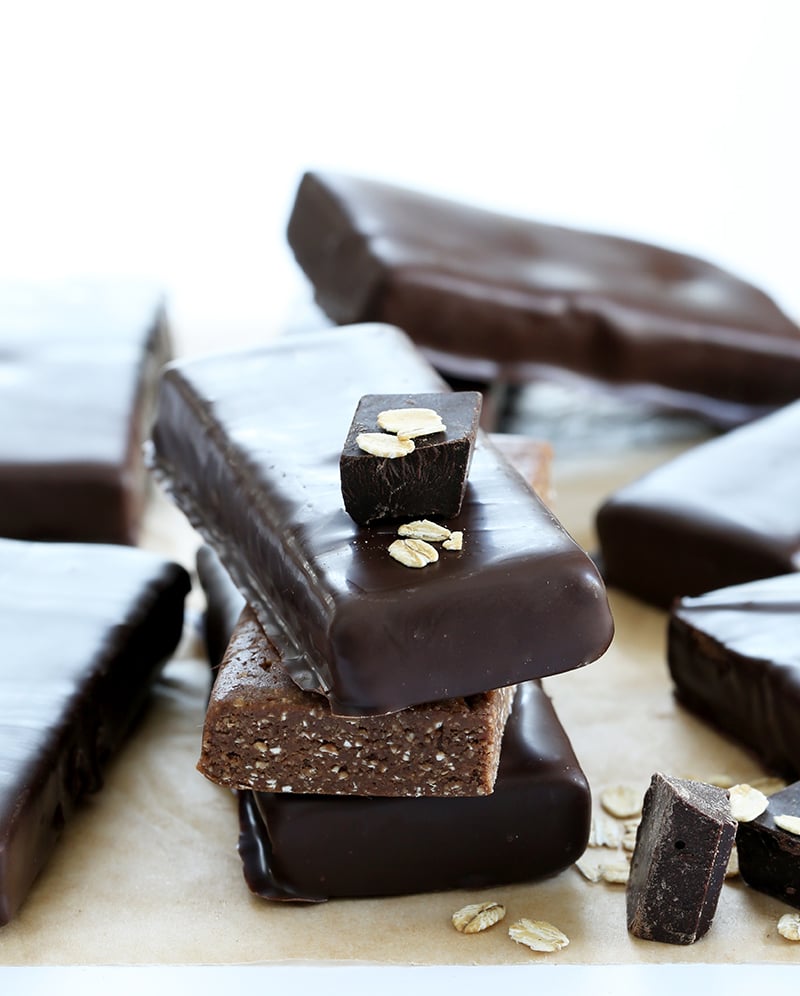
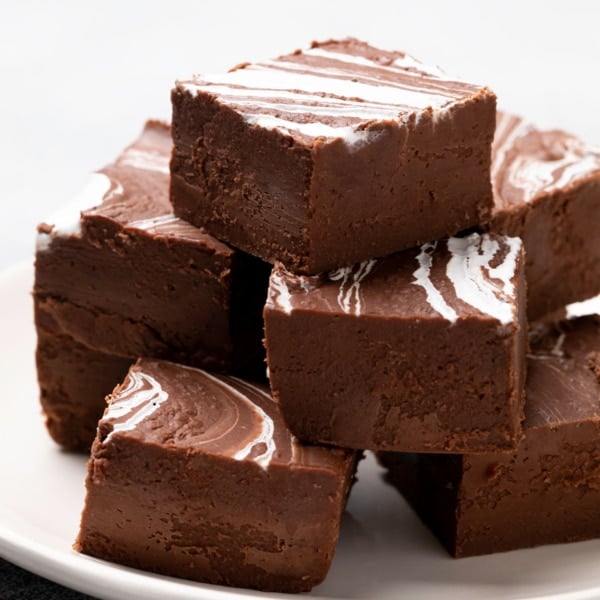
- Optional: drizzle or dip in melted chocolate, then let set at room temperature.
Expert tips
Don’t skip the binder
Every version needs ingredients that bind—like dates, nut butter, or chocolate. Without them, the bars won’t hold together.
No oven, but texture still matters
Since there’s no baking, the mixture needs to feel firm and cohesive before it goes into the pan. Aim for tacky, not sticky or crumbly.
Chill for structure
These bars need at least 1 hour in the fridge to firm up fully. Don’t rush it—warm bars won’t slice cleanly or hold their shape.
Add milk slowly
Too much liquid = soft bars that won’t set. Always add milk a little at a time, just until the mixture clumps together.
Ingredient substitutions
Dairy free
Use dairy free milk, chocolate, and protein powder (like a plant-based option), and you’re all set.
Oat-free
Swap oats with wide coconut chips or buckwheat groats. They fill a similar volume and texture role. Read more about a substitute for oats.
Sugar free
Use a sugar-free maple syrup alternative like Lakanto, but start with a bit less—it’s sweeter than maple syrup. Also check your nut butter for added sugars, and your chocolate coating at the end.
No protein powder
Looking for a softer snack without protein powder? Try my protein balls recipe—no food processor needed, and there’s even a grain-free version.
Ingredient substitutions
Homemade Protein Bars Recipe

Equipment
- Food processor fitted with steel blade
Ingredients
For the date version
- 2.5 cups (250 g) old-fashioned rolled oats, (gluten free if necessary)
- 1 scoop (36 g) protein powder, (gluten free if necessary) I like Vega essentials chocolate flavor protein powder, but you can use whey protein, or your favorite protein powder (vanilla or chocolate)
- 10 (150 g, as pitted) pitted soft Medjool dates
- ¼ cup (84 g) pure maple syrup
- 1 teaspoon pure vanilla extract
- ¼ teaspoon kosher salt
- ¼ cup (2 fluid ounces) milk (any kind), plus more as necessary
- 3 ounces unsweetened chocolate, chopped and melted
- 8 ounces bittersweet chocolate, chopped and melted (optional, for coating)
For the nut butter version
- 2.5 cups (250 g) old-fashioned rolled oats, (gluten free, if necessary)
- 1 ½ scoops (54 g) protein powder, (gluten free, if necessary) I like Vega essentials chocolate flavor protein powder, but you can use whey protein, or your favorite protein powder (vanilla or chocolate)
- ½ cup (40 g) unsweetened cocoa powder, natural or Dutch-processed (can replace with more protein powder)
- ¾ cup (192 g) smooth, no stir nut butter, I have used peanut butter, almond butter and cashew butter—all work well
- ¼ cup (84 g) pure maple syrup
- ¼ teaspoon kosher salt
- ¼ cup (2 fluid ounces) milk (any kind), plus more as necessary
- 3 ounces unsweetened chocolate, chopped and melted (can replace with 2 tablespoons more nut butter + 1 tablespoon pure maple syrup)
- 8 ounces bittersweet chocolate, chopped and melted (optional, for coating)
Instructions
- Line an 8-inch square baking pan or standard 9-inch x 5-inch loaf pan with parchment paper or nonstick aluminum foil, and set it aside.
To make the date version
- Process oats in a food processor until they form a fine flour.
- Add protein powder, dates, maple syrup, vanilla, salt, milk, and (optional) melted unsweetened chocolate.
- Process until the mixture clumps and feels tacky, not sticky. Add milk 1 tsp at a time if needed.
- Press into the prepared pan in an even layer and smooth the top.
- Chill until firm—about 1 hour in the fridge or 20 minutes in the freezer.
- Slice into 10 bars. Dip or drizzle with melted chocolate if using and allow it to set.
- Wrap individually and refrigerate.
To make the nut butter version
- Process oats in a food processor until they form a fine flour.
- Add protein powder, cocoa powder (or more protein powder), nut butter, maple syrup, salt, milk, and melted chocolate (or the maple syrup/nut butter alternative).
- Process until the mixture clumps and feels tacky, not sticky. Add milk 1 tsp at a time if needed.
- Press into the prepared pan in an even layer and smooth the top.
- Chill until firm—about 1 hour in the fridge or 20 minutes in the freezer.
- Slice into 10 bars. Dip or drizzle with melted chocolate if using, and allow it to set.
- Wrap individually and refrigerate.
Video
Notes
Nutrition
Nutrition information is automatically calculated, so should only be used as an approximation.
My Pro Tip
Flavor Variations
More neutral
For a milder flavor, use unflavored or vanilla protein powder and skip the melted chocolate. In the nut butter version, try cashew butter—it lets the chocolate shine without overpowering.
Fruity twist
Swap the cocoa powder for freeze-dried fruit powder (like strawberry or raspberry). You can buy it pre-ground or grind whole freeze-dried fruit in a simple blender or food processor yourself.
Collagen boost
Replace the protein powder with collagen peptides for a nutritional lift without added flavor. I like Perfect Hydrolyzed Collagen Peptides and Vital Proteins Collagen Peptides.
Our favorite
I love the date version with melted unsweetened chocolate in the bars and a drizzle of melted chocolate on top. For even more chocolate, press in 1 to 2 ounces of mini chocolate chips after smoothing the mixture in the pan.
make ahead/leftovers
Storage instructions
Refrigerator:
Store wrapped or in a sealed container for up to 2 weeks. The bars are ready to eat straight from the fridge—no need to let them come to room temperature.
Freezer:
Freeze for up to 3 months. Defrost in the refrigerator or at room temperature before serving.
Your protein bar questions, answered
Just 10 minutes of active time—plus at least 1 hour in the fridge to firm up. The longest part might be cleaning the food processor!
Yes! Use the date-based version in the recipe—no nut butter needed. Or use a peanut-free nut or seed butter like almond, cashew, or WowButter.
You may have added too much liquid. Try processing extra oats into a powder and mixing them in to firm things up.
Yes—just use a 9×13-inch pan instead of an 8-inch square. The bars may need slightly more chilling time to firm up completely.
Absolutely. Whey, plant-based, or collagen powders all work—just keep in mind that flavored powders will change the taste.


how long do these last in the fridge?
Hi, Amber, about 2 weeks in the refrigerator. Please see the “storage instructions” section of the text of the post for details!
These are fantastic. I doubled the recipe and they were all eaten within a week.
Wow, Lisa, that’s a lot of protein bars in a week! Looks like they’re all going to be counting on you from now for a steady supply. :) Thanks for sharing that!
This has been such a helpful cost effective and healthy substitute for store bought protein/granola bars. No artificial sweetners or weird ingredients and way less sugar. Thanks for these!
You’re so welcome, Ashley! I’m really glad it sounds like they’ve filled a need in your family. Thank you for sharing your experience!
These protein bars are incredible! My youngest son is allergic to oats. The author was kind enough to provide oat free options. We used the quinoa flakes (which I’ve never heard of) and they tasted amazing. Our entire family loved them. Thanks for the recipe!!
So glad you loved the protein bars, Cindy, and that the quinoa flakes worked well for you. Since your son is allergic to oats, the post on substitutes for oats should be really useful to you!
Nicole, thank you! Easy to make, great texture, last in my purse a few hours without being too melty, and (thanks to many allergies) way better than my low-protein storebought options!
Question on coconut chip sub (I’m allergic to oats and nuts, so using date version) have you ever experimented with using quinoa flakes or toasted quinoa ground into flour for some or all of the coconut? I have so much coconut in my life and am looking for a different flavor lol – but the recipe is perfect as it is. Thanks for your thoughts!
I hear you, Kathy, it’s a lot of coconut when you use coconut chips instead of oats. You can try using quinoa flakes, millet flakes, or rice flakes in place of oats, too. I’m working on more substitutes for oats in that separate post on the blog. Quinoa flakes are the least hearty, though, so they may not work in this recipe. Definitely not quinoa flour, which doesn’t have any bulk to it. I hope that helps, and I’m so glad you like the bars!
Hi, both recipe versions call for unsweetened, melted chocolate. What can I substitute for this for someone who can’t eat chocolate? Is the only substitute nut butters/Nutella for similar sticky consistency?
Hi, Felicia, that’s a good question, and honestly one I’m not sure how to answer! The melted chocolate solidifies as the bars cool, and helps them hold their shape. The nut butter acts like glue, but doesn’t provide structure like the chocolate does. That’s why one version is with nut butter, and the other with dates. They serve similar functions. You might be able to use candy melts, which don’t usually contain chocolate. Wilton brand is not gluten free, though, but the brand Olive Nation is, if you can find that. I hope that’s helpful!
I have a question about the coconut chip substitution for oatmeal. Do I process the coconut chips down a bit first? Some of them are quite large.
Yes, Donna, you don’t use anything whole in these bars. You’ll be processing the coconut chips like you would oats. Be careful about overprocessing them, though, or you’ll end up with coconut butter!
Makes sense. Thanks.
I have been looking for a protein bar recipe to replace my expensive addiction to the ones I purchase at Costco and I think I’ve found it! I tried the nut butter recipe and it came out perfect the first time. I had to put quite a lot more milk than suggested in the original recipe to get it to the right consistency. I smoothed some melted chocolate on the top of each bar. Came out great. Thank you!
I’m so glad you love these bars, Veronica, and that they’re going to free you from having to buy expensive ones at Costco! That’s the best. There is always variation in the amount of milk you’ll need depending on the exact type of nut butter and protein powder that you use. I’m glad you paid close attention to the consistency and got it right!
Hi! Thanks for the tasty recipe. I have one issue with the consistency. I am using the dates version, it gets too sticky. So sticky it even stick on the parchment paper. Any ideas what I am doing wrong? Thanks
Hi, Va, my guess is that you are adding too much milk and/or overmeasuring the maple syrup. I say this because I have done both of those things, when I was working too quickly and didn’t want to measure the syrup by weight, or got impatient with the food processing, and that’s what happened.
They taste ok but I could not get the mixture to hold together even though I used another loaf pan to press it down while leaning my whole weight on the pan. I made the nut butter recipe. What did I do wrong?
It sounds like you didn’t add enough milk when you processed them, Rosemarie. If you didn’t use as smooth, no-stir nut butter, and instead used one of the separated kinds, that could happen, too.
Thank you. I’ll give that a try.