
This post may contain affiliate links. Please read our disclosure policy.
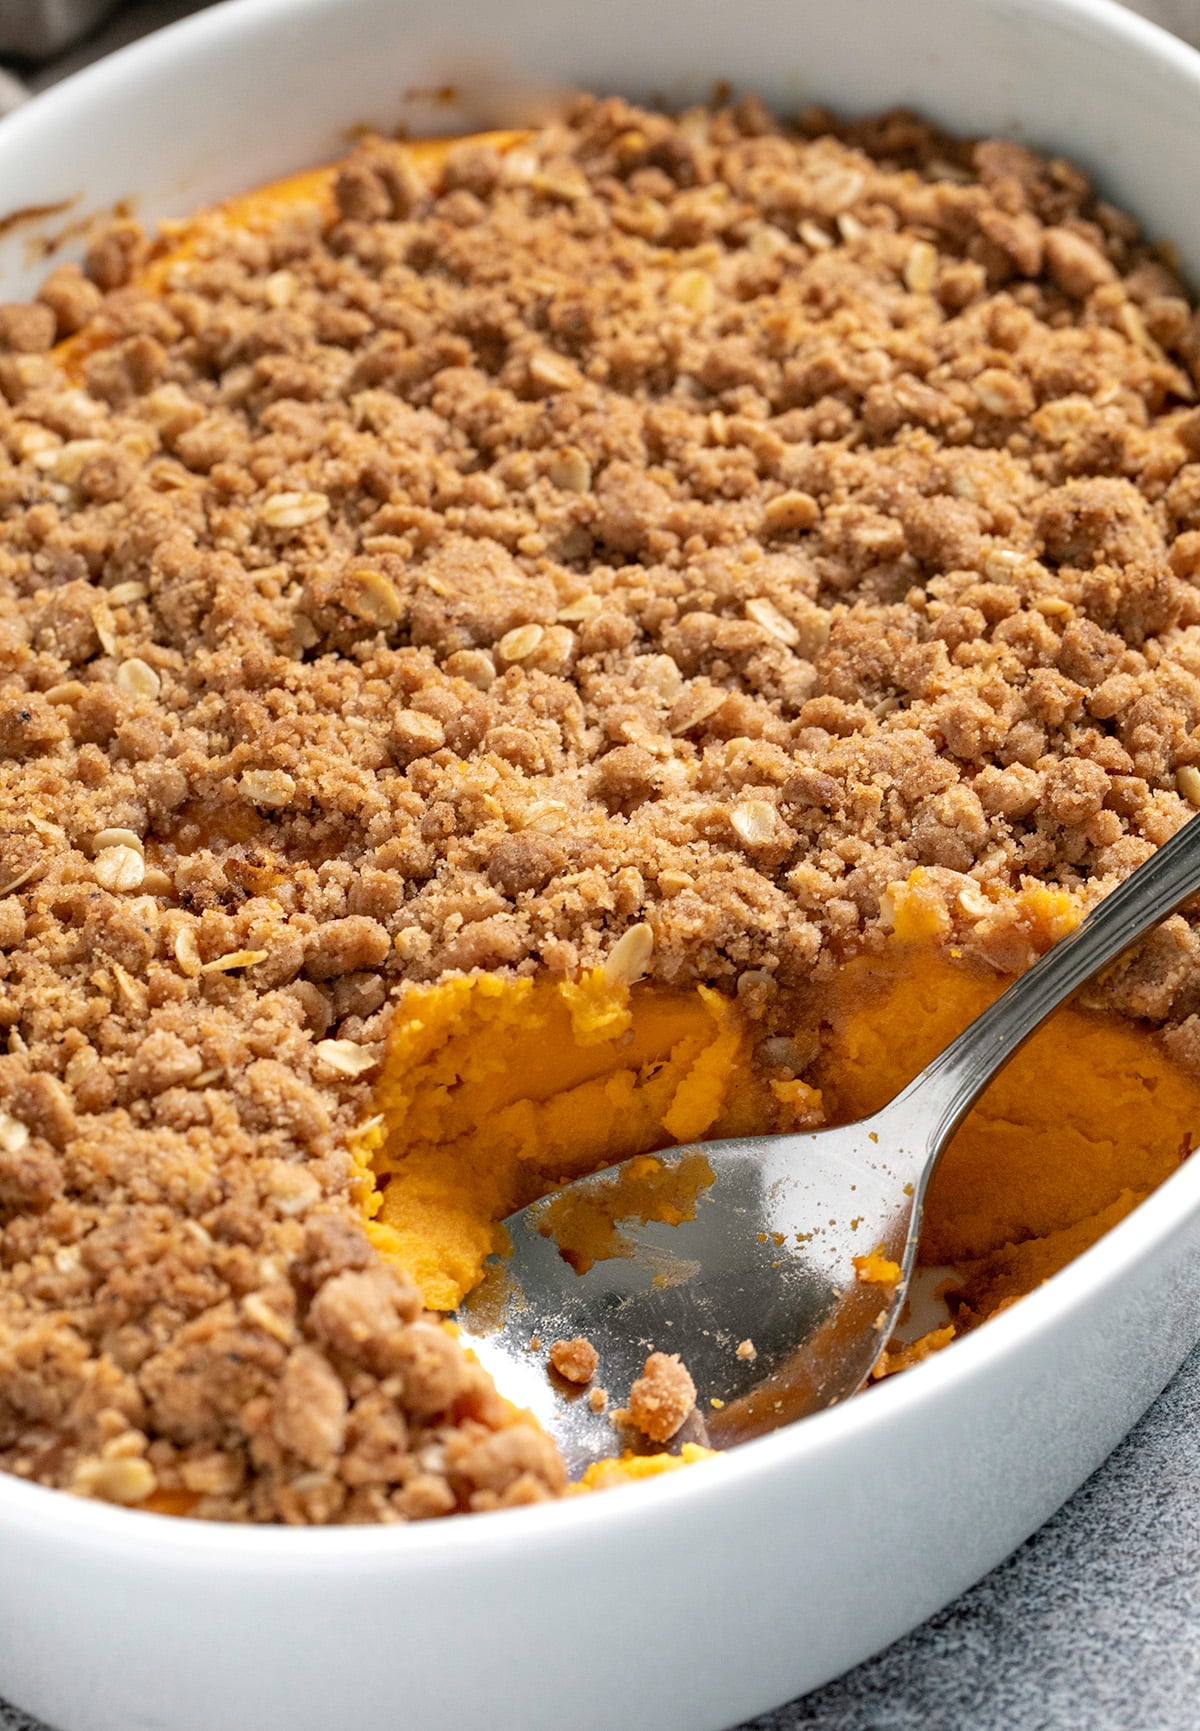
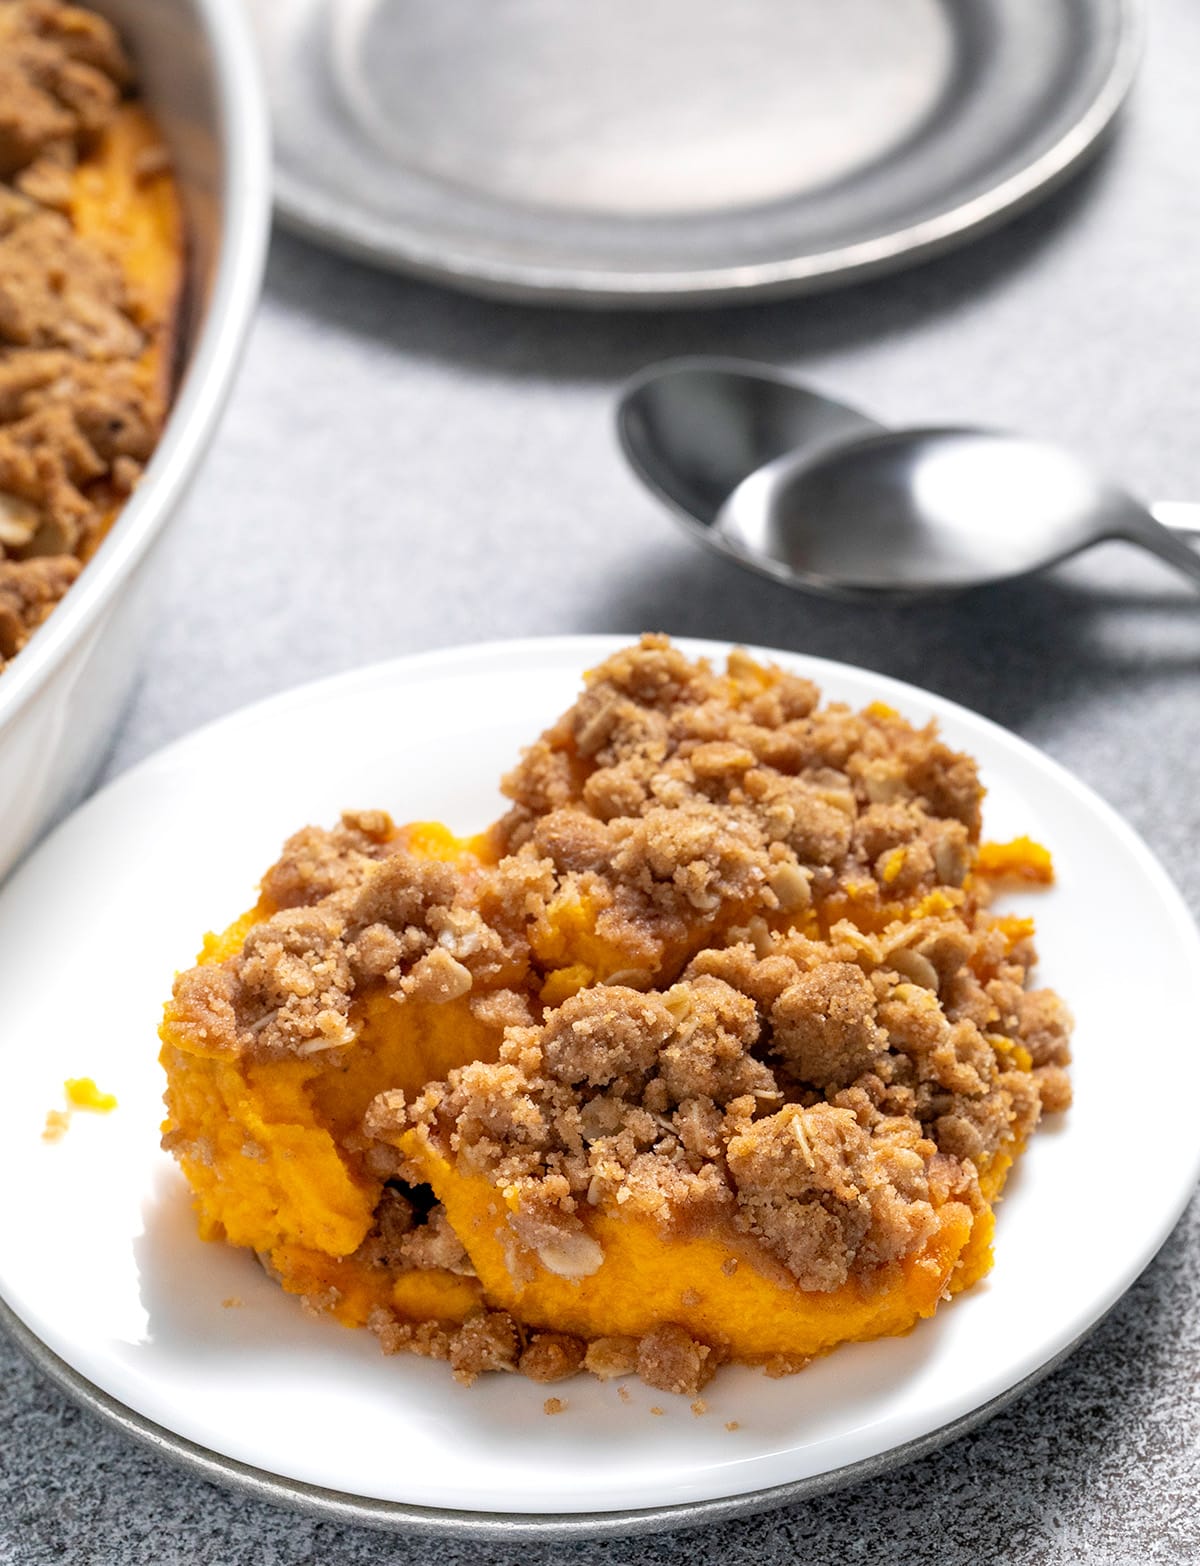
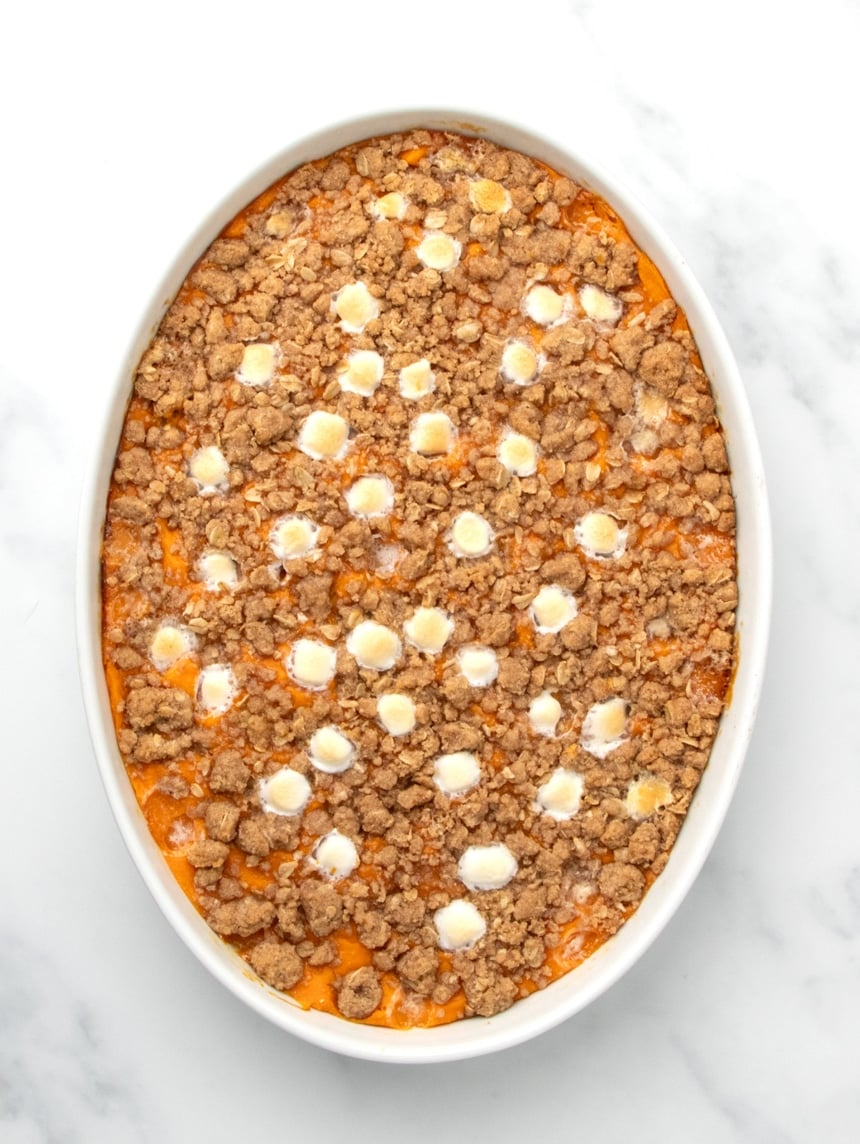
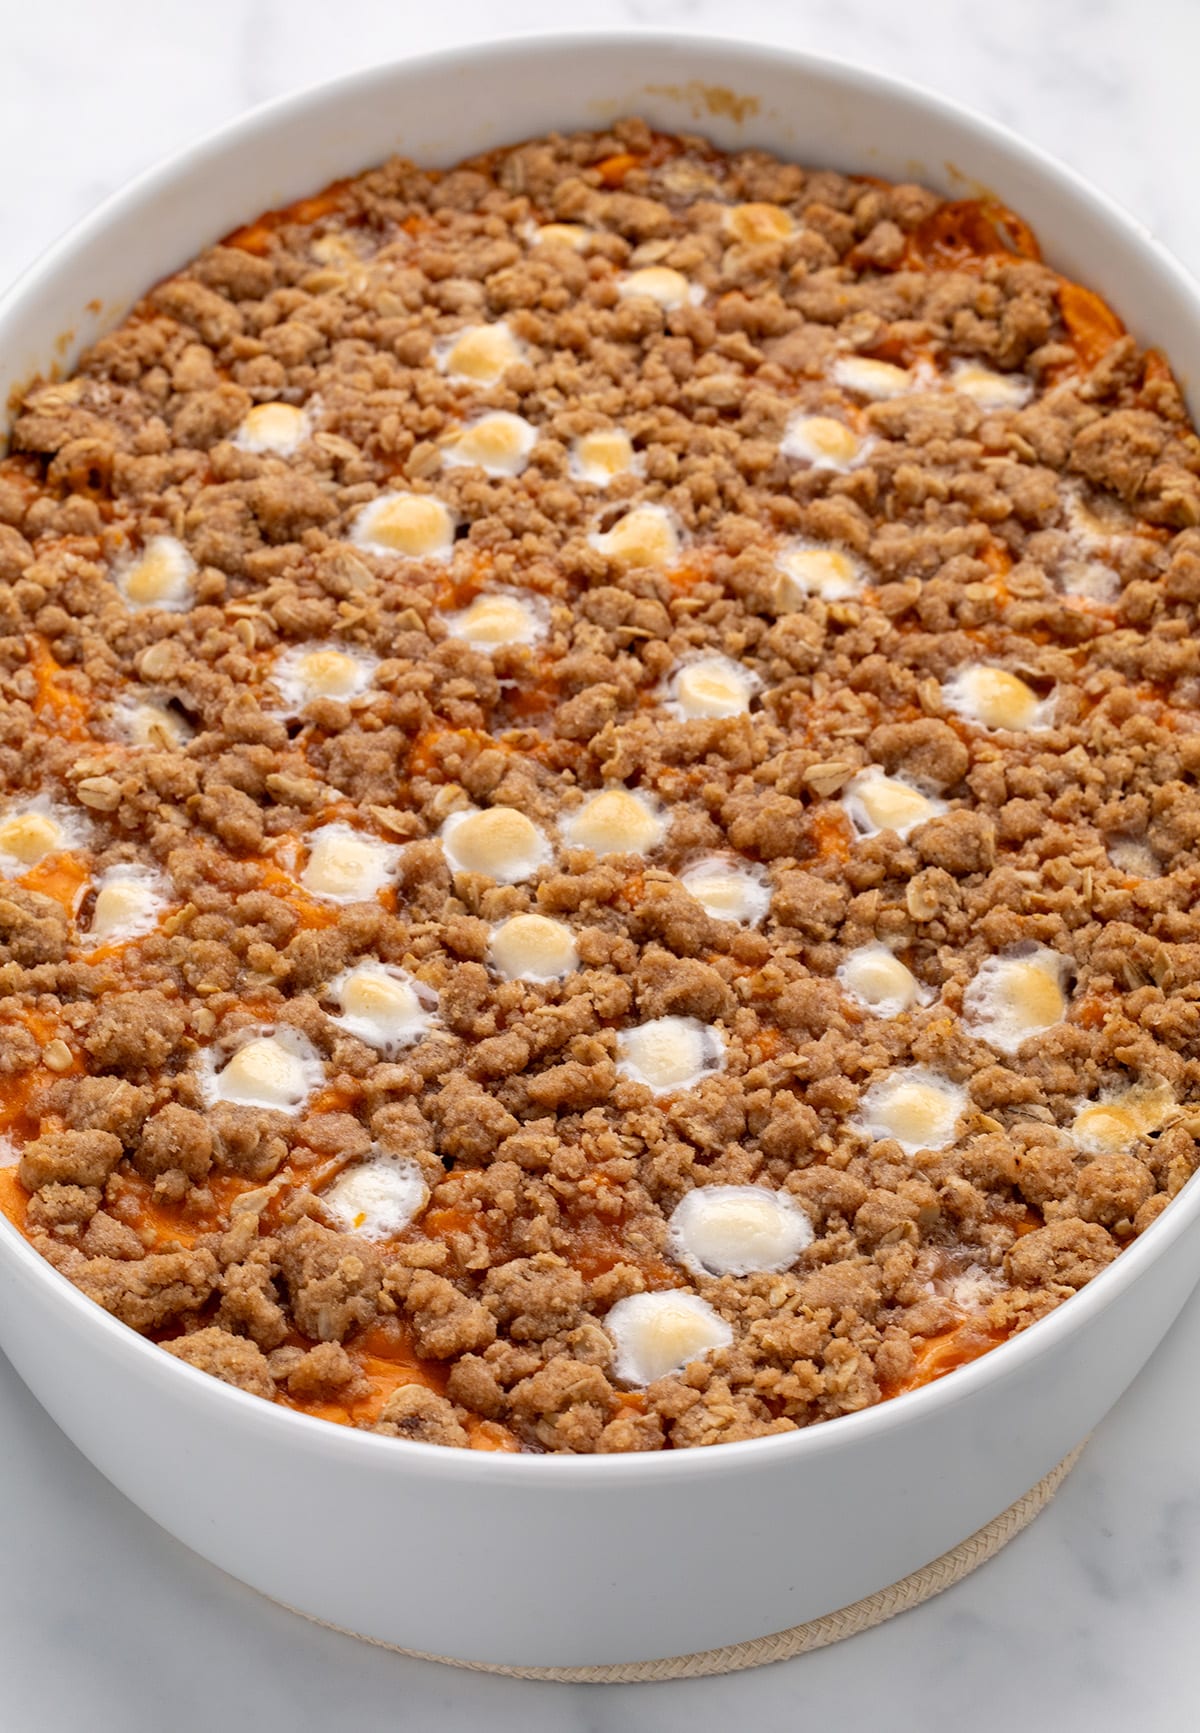
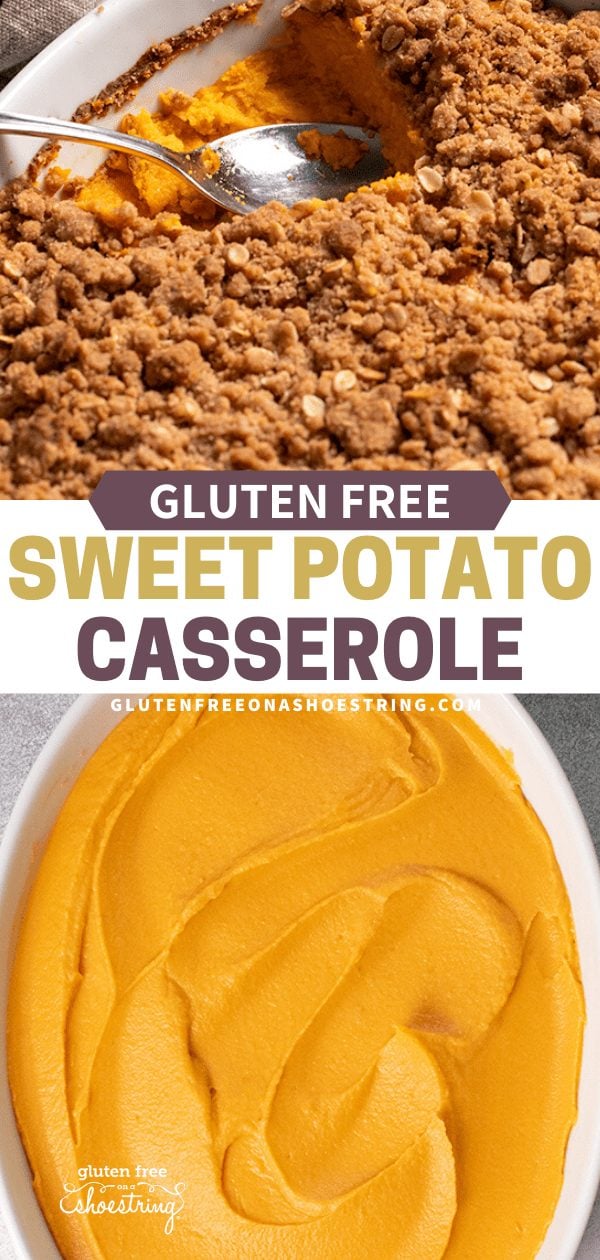
This gluten free sweet potato casserole has the perfect combination of textures: a light, fluffy and smooth filling topped with a sweet, nubby crispy-chewy crumble topping.
With tons of warm, earthy flavor from roasted, not steamed, potatoes and just enough sweetness, this unfussy dish is always the hit of the holiday table!
Why this recipe works
We roast the sweet potatoes to intensify all of their rich natural flavor and sugars, unlike most sweet potato casseroles. That's why the filling is still full of flavor even with little added sugar, and very few taste boosters. Plus, roasting the potatoes means your filling will never be watery.
The toasty, crunchy crumble topping is thinner than on a gluten free coffee cake, with a few (optional) oats for chewiness. It adds just the right texture contrast to the smooth, pillow-soft filling, and adds lots of sweet-cinnamon flavor of its own.
With all the other savory ingredients on your holiday table, like gluten free stuffing covered in gluten free gravy, this casserole a really welcome touch of sweetness.
Key ingredients
The filling (below, left) and the topping (below, right) for this casserole contain many of the same ingredients. Here's an overview of each, including the role each plays in the final dish:
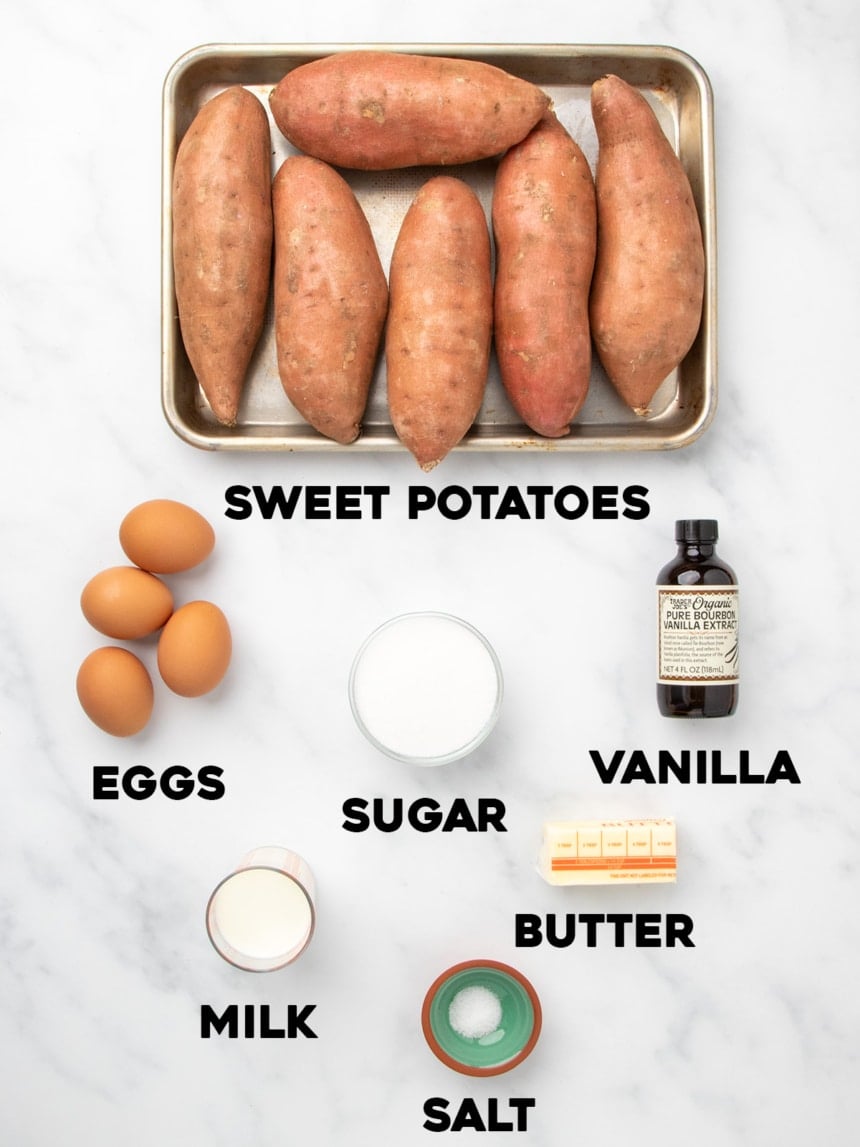
- Sweet potatoes: The main base for this casserole, we roast in foil them rather than boiling them to enhance their natural sweetness and earthy aroma, and to create the perfect creamy texture without adding any unwanted crispness.
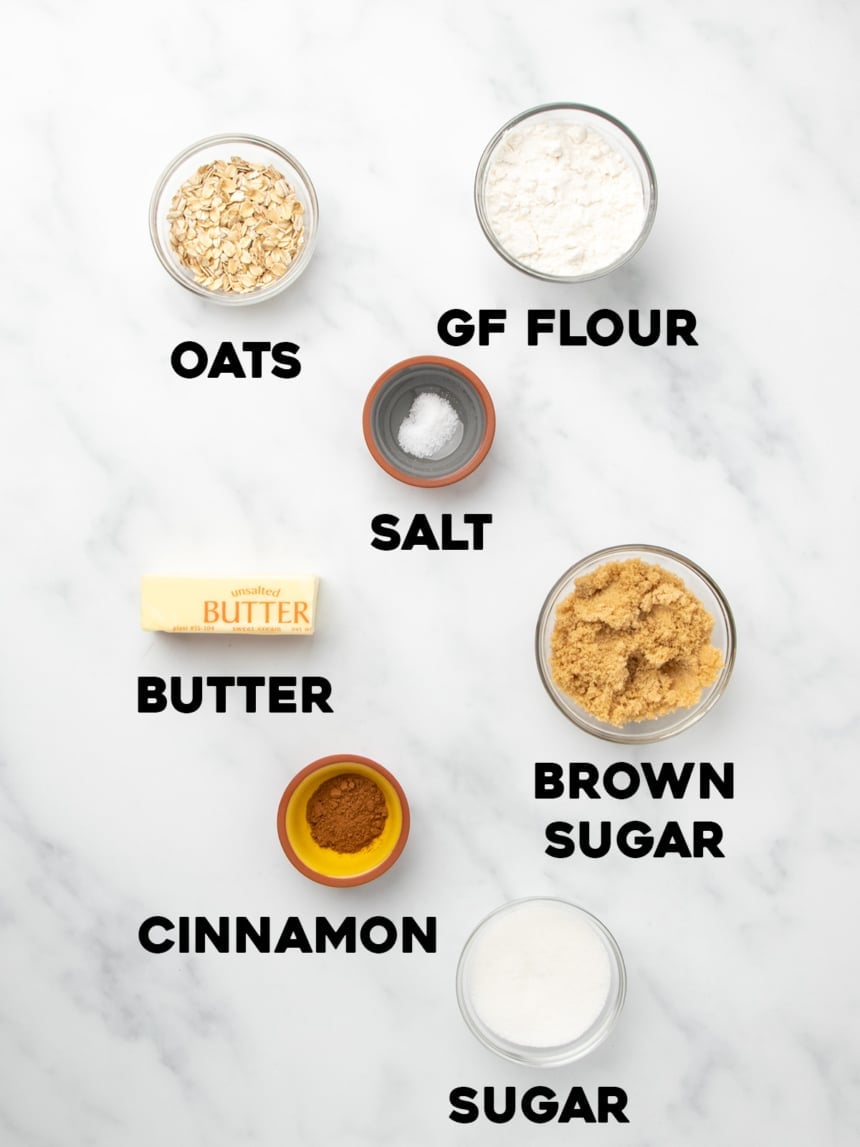
- Sugars: The white sugar in the filling and in topping add some sweetness and help lock in moisture. The brown sugar in the topping adds some chewy tenderness in the center.
- Butter: In the filling, adds buttery flavor and creamy texture. In the topping, it binds the ingredients to create clumps and helps it brown in the oven.
- Milk: Helps smooth out and bring together the sweet potatoes in the filling.
- Eggs: Help bind together the sweet potatoes. The yolks add richness, and the whites help the filling rise a bit in the oven, and hold the rise as the dish cools.
- Gluten free flour: Adds structure to the topping so it doesn't melt in the oven. My favorite blends are Better Batter's classic blend and Nicole's Best multipurpose with added xanthan gum as a binder since they're well-balanced and contain non-gritty rice flour. Bob's Red Mill 1-to-1 should also work, as should Vitacost's Multipurpose gluten free blend.
- Oats: Adds some extra chewy texture to the topping and helps it hold its shape during baking.
- Cinnamon: Adds warm, earthy aroma and flavor to the topping and enhances the sweetness.
- Salt: Balances the sweet taste and enhances all the flavors in the filling and topping.
- Vanilla: Adds depth of flavor to the relatively mild filling.
How to make gluten free sweet potato casserole (with step by step photos)
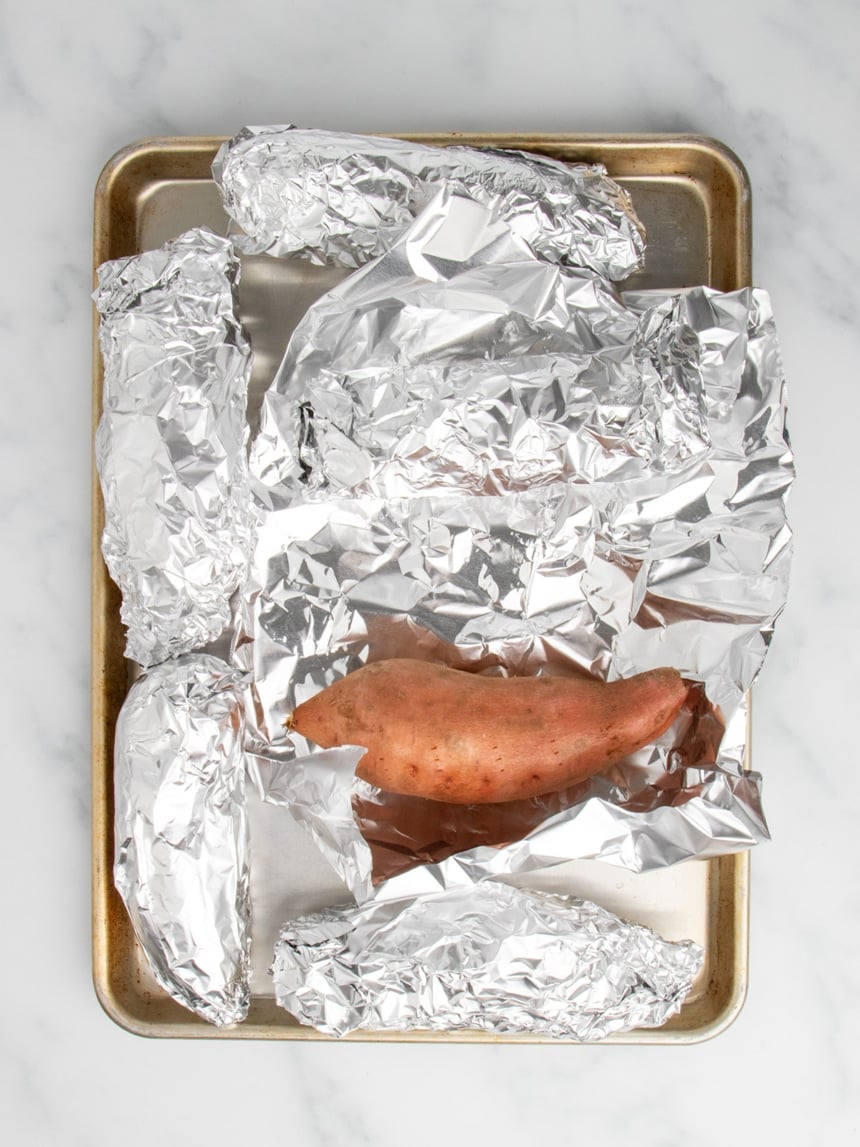
1. Prepare the sweet potatoes
Wash and dry each of the potatoes well, pierce the skin with the tines of a fork to allow steam to escape during baking, and wrap separately in aluminum foil. This allows each potato to cook efficiently without becoming crispy or losing any flavor.
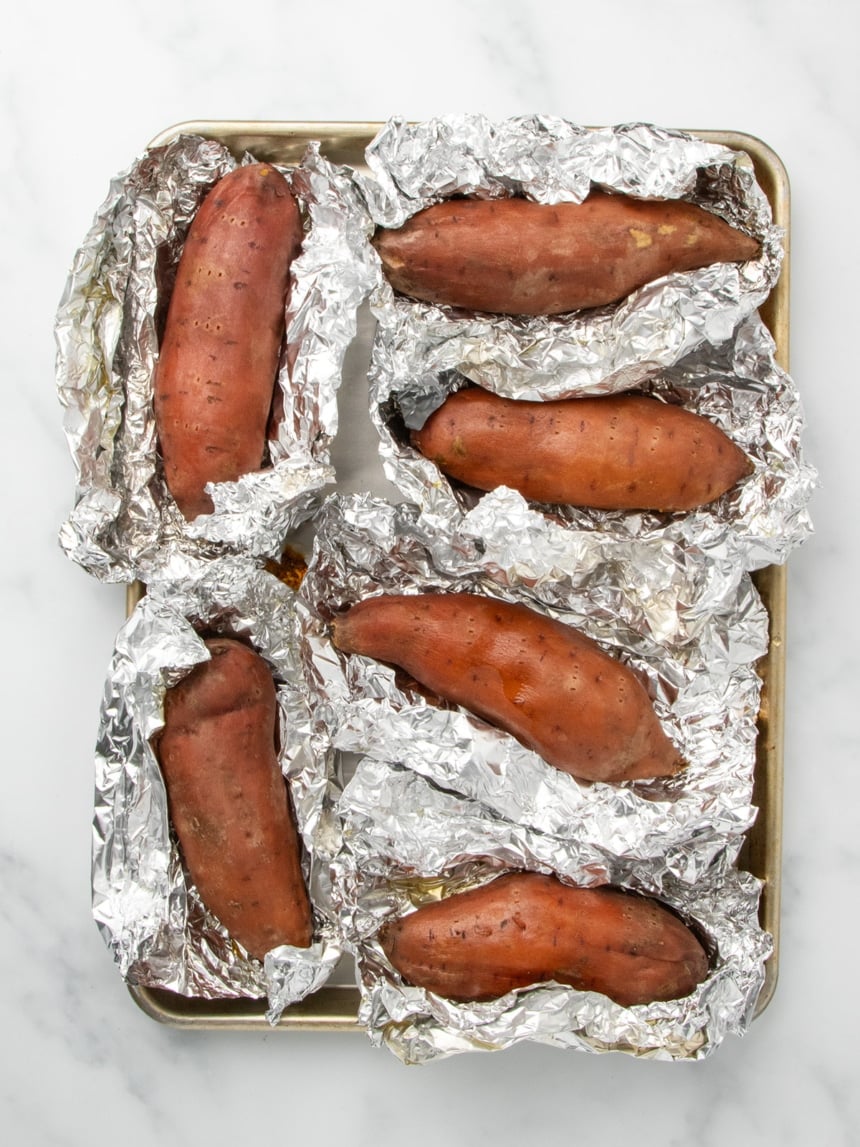
Place them on a rimmed baking sheet and roast in a preheated 375°F oven until a paring knife inserted in the center of the thickest part of each sweet potato doesn't encounter any resistance (45 minutes to 1 hour+, depending upon size).
Remove the potatoes from the oven as they are done, unwrap and allow to cool until you can safely remove the skin without burning yourself.
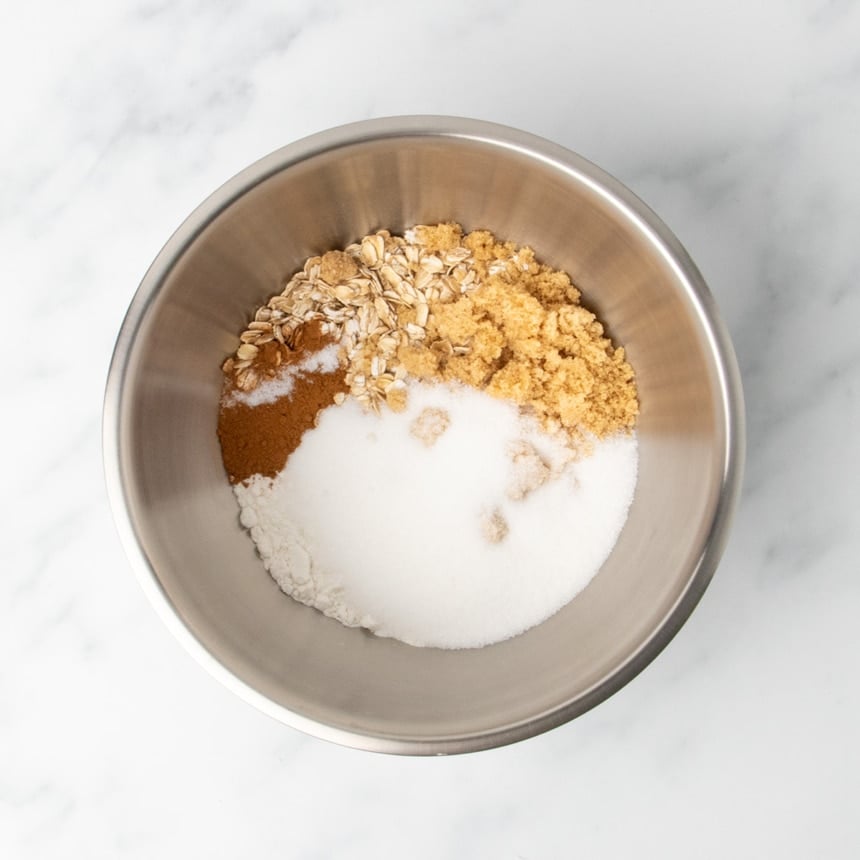
2. Combine the topping ingredients
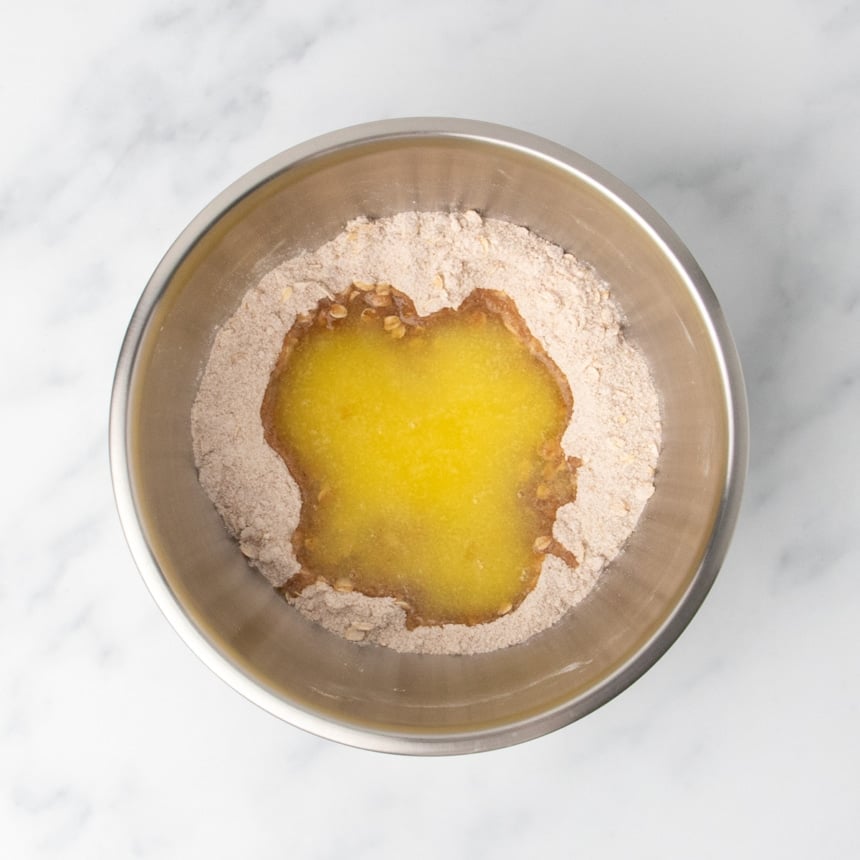
Whisk together the gluten free flour, salt, sugars, cinnamon, and oats until well-combined. Crush any lumps of brown sugar with the back of a mixing spoon.
Create a well in the center of the whisked dry ingredients and pour in the melted butter to begin the combining process just by adding the butter. Mix with the same mixing spoon until all of the dry ingredients are moistened with butter.
3. Chill, then break up, the topping
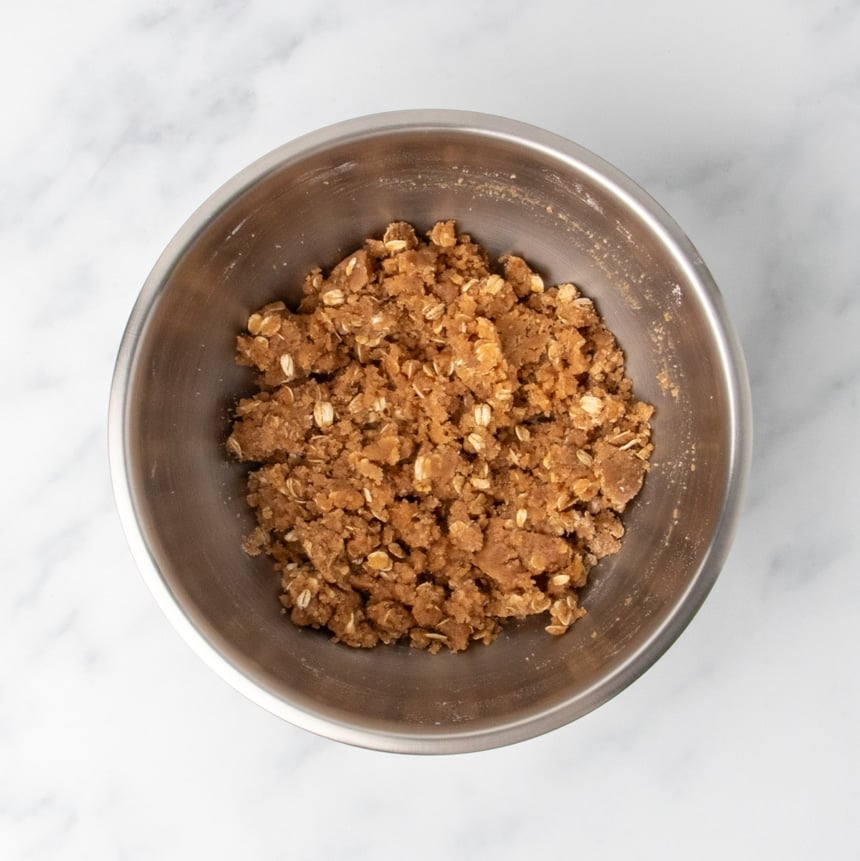
Place the topping mixture in the refrigerator so the melted butter becomes solid again while you make the filling. This is what will keep the topping from melting into the filling during baking.
Once the topping feels very firm, use the tines of a fork to break up the topping into irregular clumps. These randomly sized and shaped pieces will add visual interest to the casserole. Keep the topping cold until it's time to add it.
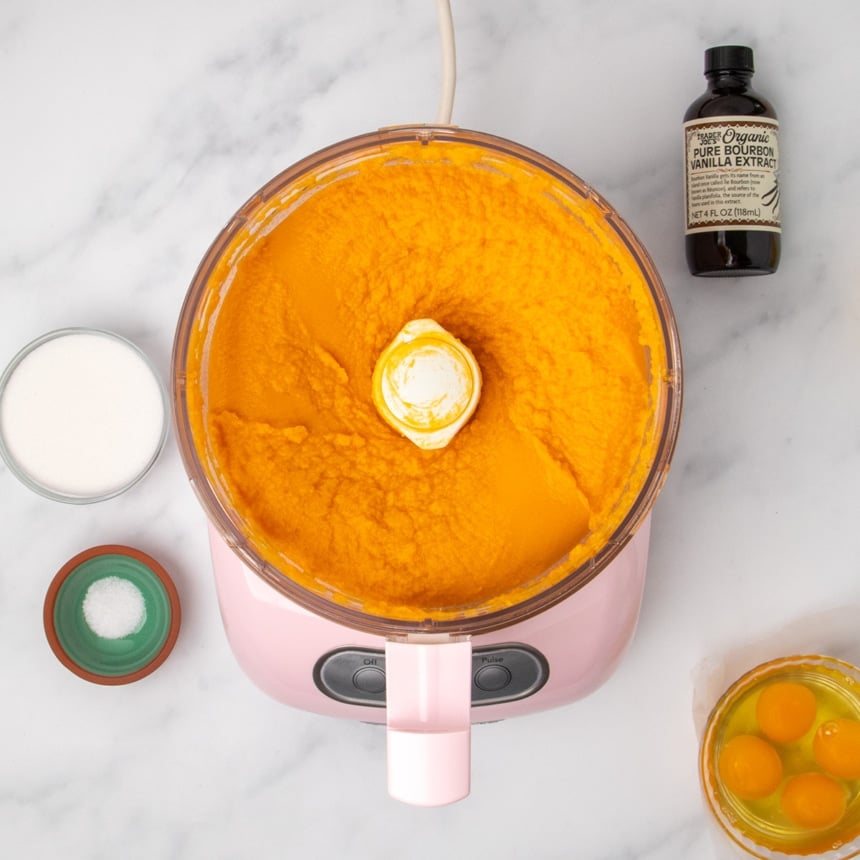
4. Puree the potatoes
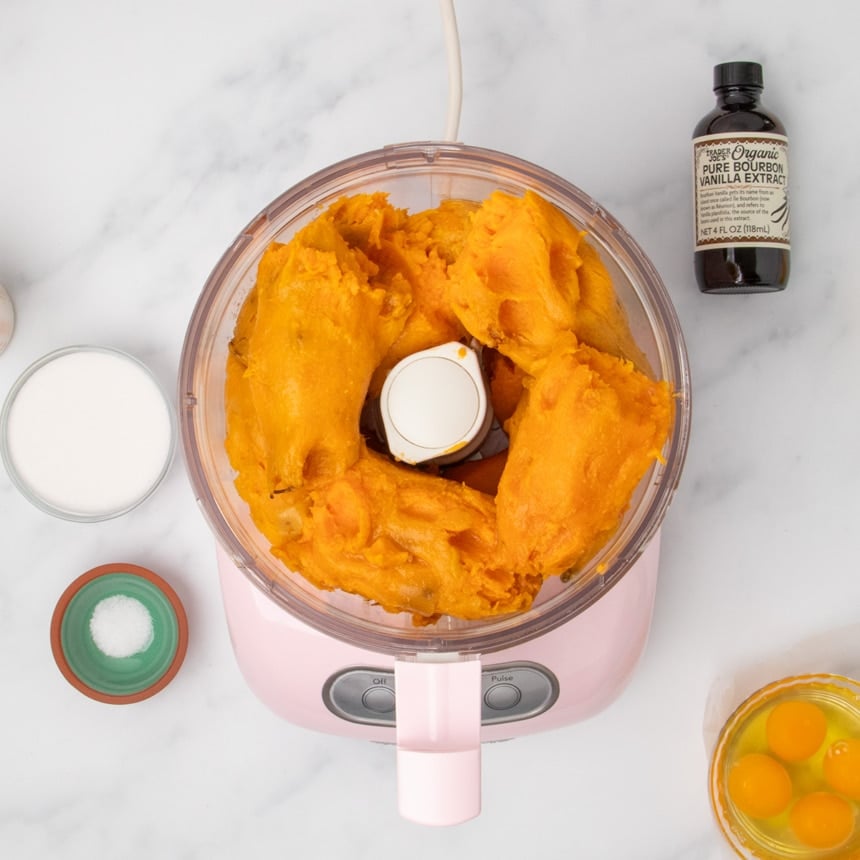
Peel the prepared sweet potatoes and place just the soft flesh inside the bowl of a large food processor fitted with the steel blade. You should have at least 3 1/2 pounds of sweet potato flesh after roasting and peeling the vegetable.
Lock in the machine's cover, turn on the machine, and puree the sweet potatoes for about 2 minutes. It should be enough time to process most of the potatoes toward the top of the machine (since the blades are on the bottom, the machine will work on those contents first).
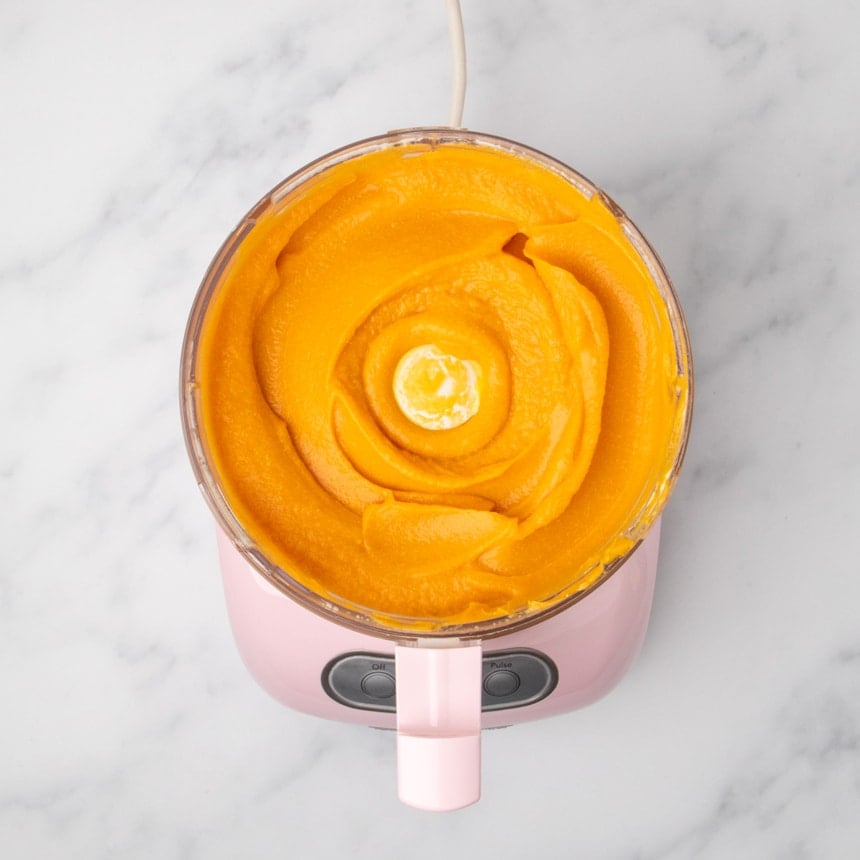
5. Finish preparing the filling
Add the sugar, salt, milk, eggs, butter and vanilla, cover the machine again, and process until very smooth. If any of the ingredients were cold, some of the butter may clump. Just make sure any clumps of butter are evenly mixed throughout the mixture.

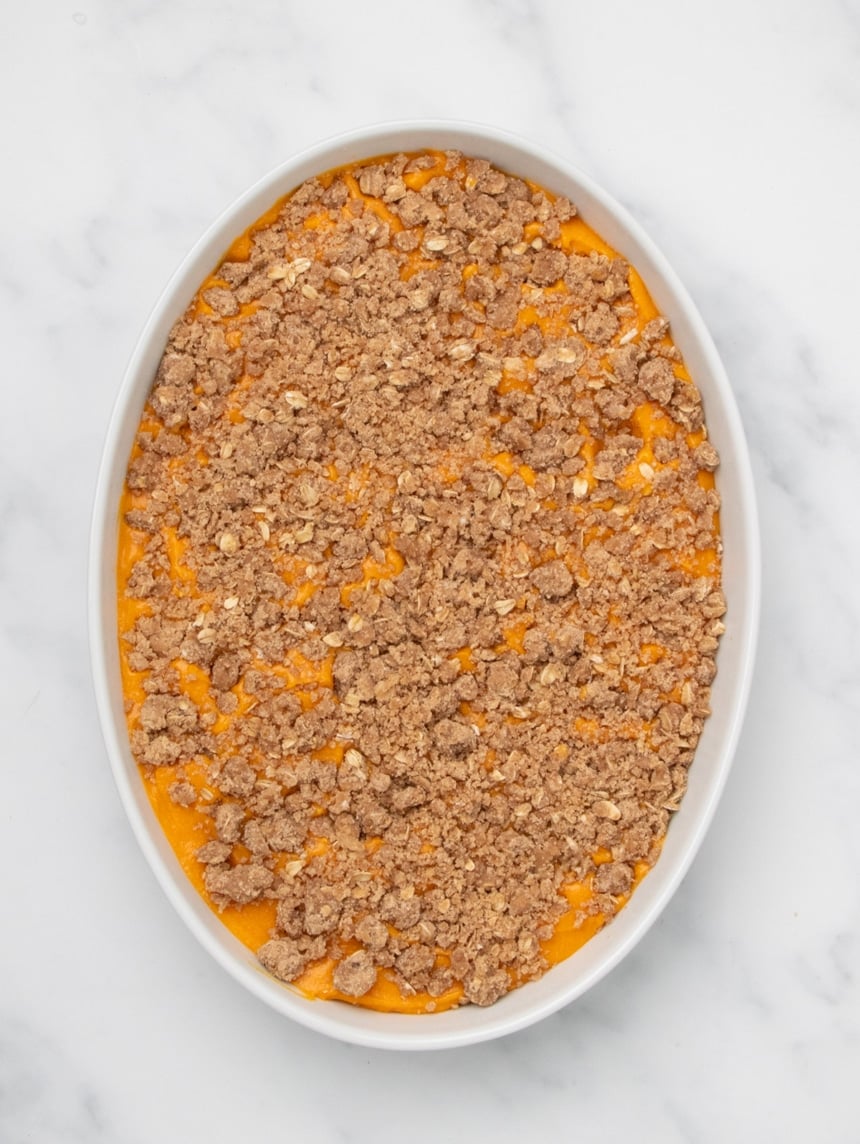
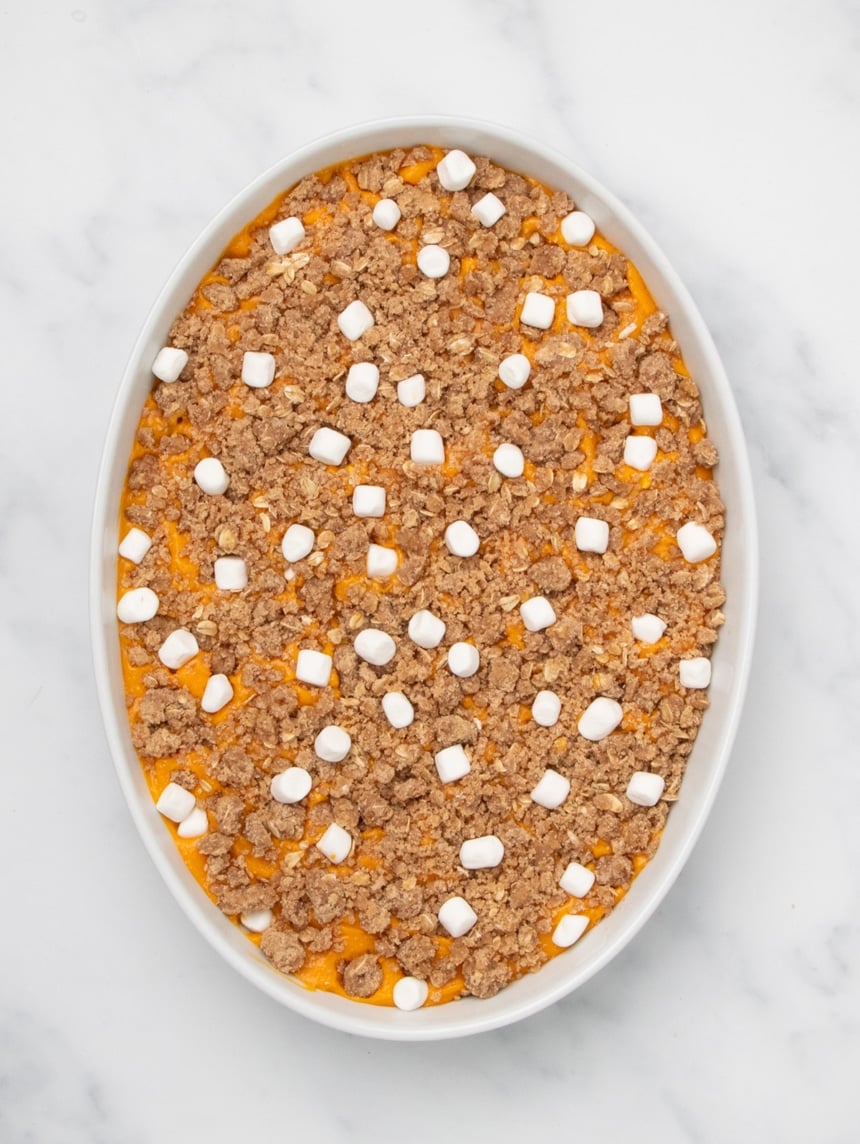
4. Assemble the dish
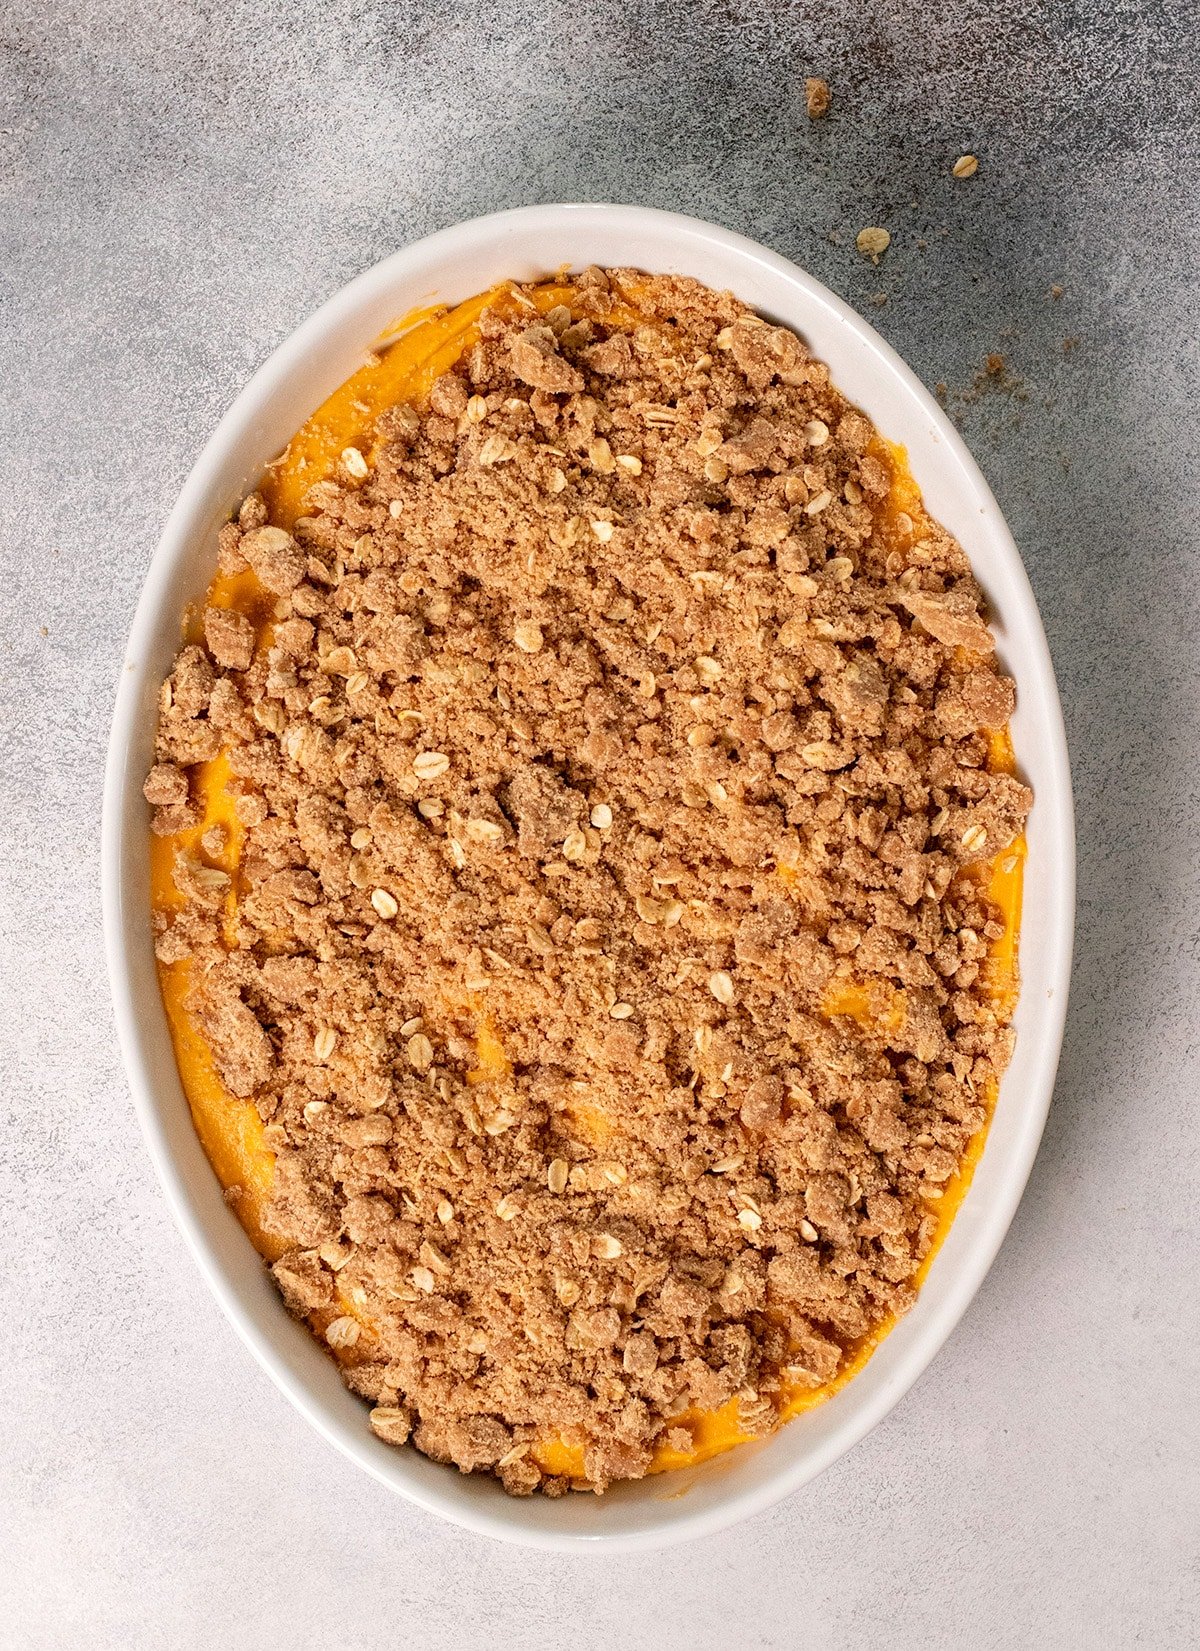
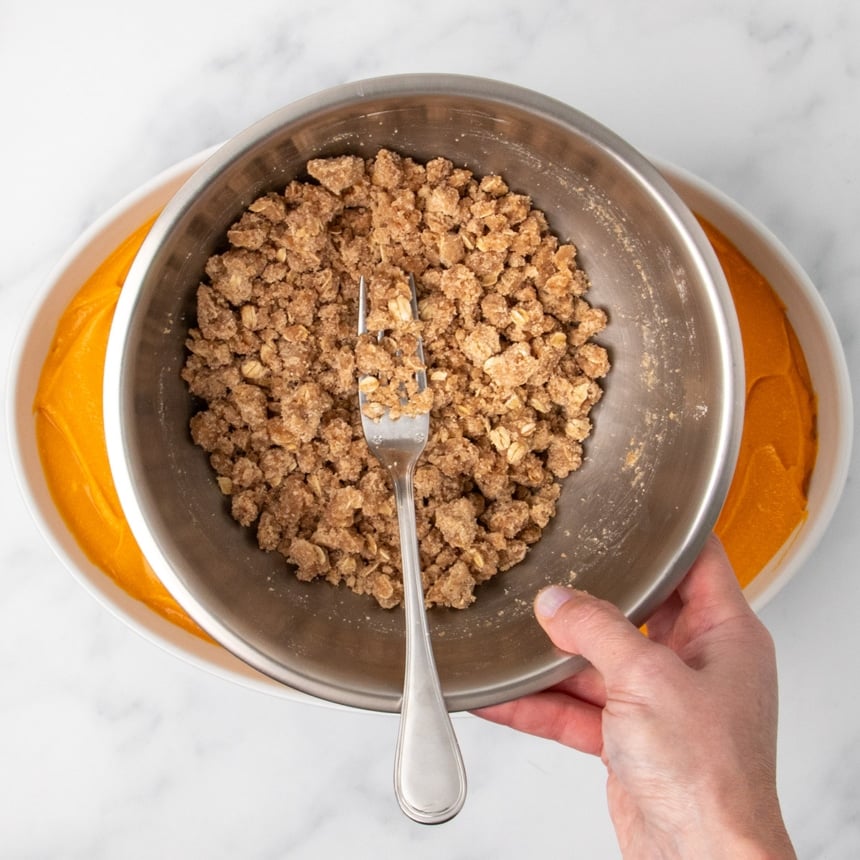
Transfer the filling to a greased 9-inch x 12- or 13-inch casserole dish, and spread it into an even layer. Wipe down any spilled filling to create a clean edge all the way around the dish to avoid burnt filling.
Top the filling with an even layer of cold prepared topping crumbles. If you'd like to add a handful of mini marshmallows, place them evenly across the top in gaps in the crumble. Press the toppings down gently to help them adhere to the filling.
5. Bake
Place in the center of a preheated 350°F oven to allow air to circulate all the way around the dish. Bake until the topping is golden brown and the filling has risen and appears set. It shouldn't jiggle uncontrollably when moved from side to side, but will still sway. Allow it to cool until set before scooping and serving warm.
Expert tips
Roast your sweet potatoes
Always roast your sweet potatoes in the oven to prepare them, which intensifies their natural sweetness and earthy flavor. Most other recipes call for than peeling, chopping, and boiling or steaming the sweet potatoes until fork tender, which boils away nutrients, is much more work, and can often lead to a watery filling.
Prepare the potatoes ahead of time
The most time-consuming portion of this dish is preparing the sweet potatoes. You can easily prepare them up to 1 week ahead of time. After they are roasted and have cooled, refrigerate them in a sealed container either with or without their skins. Just be sure to let them warm to room temperature before using them in the filling.
Make the filling as smooth as possible
There's a lot of filling in this recipe, and it will take all the capacity of a large, 7-cup food processor. If you only have a small food processor, purée the sweet potatoes in batches. Then, use a hand mixer to beat the eggs and remaining filling ingredients together in a large mixing bowl. Then, mix in the pureed sweet potatoes by hand.
I’ve prepared the sweet potatoes with a hand mixer, but it’s just not as smooth. If that's all you have, though, mix the sweet potato flesh separately in its own bowl. Then, follow the instructions just above for combining all the other ingredients, then mixing the two parts together by hand.

Ingredient substitutions
Dairy free
For the butter in the filling and the topping, try Melt or Miyoko's Creamery block-style vegan butter. You could also use Earth Balance buttery sticks in the filling, but not in the crumble topping as it won't hold its shape properly during baking.
Use any unsweetened, unflavored nondairy milk you like in the filling. I recommend something with a similar consistency to cow's milk, like coconut milk in the carton or soy milk.
Egg free
It will be tough to replace all 4 eggs and make something with the same souffle-like consistency. For all 4 eggs, you can try to combine 3/8 cup (6 tablespoons) milk, 3/8 cup (6 tablespoons) Greek yogurt, and 2 1/4 tablespoons (20 grams) cornstarch, and add when you would add the eggs.
Oat-free
The oats in the crumble topping recipe with 1/4 cup (36 g) additional all purpose gluten free flour (for a total of 1 cup (140 g)). You could also replace the oats with an equal amount, by weight, flattened buckwheat or rice flakes. For a complete discussion of substitutions for oats in gluten free baking, please see our substituting oats guide.
Gluten Free Sweet Potato Casserole Recipe

Ingredients
For the crumble topping
- ¾ cup (105 g) all purpose gluten free flour blend, (See Recipe Notes)
- ½ teaspoon xanthan gum, (omit if your blend already contains it)
- ¼ cup (25 g) gluten free old-fashioned rolled oats, (See Recipe Notes)
- ¼ cup (55 g) packed light brown sugar
- ¼ cup (50 g) granulated sugar
- 1 ½ teaspoons ground cinnamon
- ⅛ teaspoon kosher salt
- 6 tablespoons (84 g) unsalted butter, melted and cooled
For the filling
- 4 ½ pounds sweet potatoes, (5 to 6 large sweet potatoes)
- ¼ cup (50 g) granulated sugar
- ¼ teaspoon kosher salt
- ½ cup (4 fluid ounces) milk
- 4 (200 g (weighed out of shell)) eggs, lightly beaten
- 5 tablespoons (70 g) unsalted butter, melted and cooled
- ½ teaspoon vanilla extract
Instructions
Make the crumble topping
- in a medium-sized bowl, place the flour blend, xanthan gum, oats, brown sugar, granulated sugar, cinnamon, and salt, and whisk to combine, working out any lumps in the brown sugar.
- Add the melted butter, and mix to combine well. The mixture will be thick.
- Place the bowl in the refrigerator to chill until firm (at least 10 minutes and up to 3 days).
Roast the sweet potatoes
- Preheat your oven to 375°F. Wash and dry the raw sweet potatoes, then pierce all over with the tines of a fork. Wrap each separately in aluminum foil, place on a rimmed baking sheet.
- Bake until a paring knife inserted in the center of the thickest part of each sweet potato doesn’t encounter any resistance (45 minutes to 1 hour+, depending upon size).
- Remove the sweet potatoes from the oven, unwrap them, and allow them to cool until you’re able to handle them. Once roasted and skinned, your sweet potatoes should weigh at least 3 1/2 pounds.
- Reduce the oven temperature to 350°F. Grease a 9-inch x 12- or 13-inch baking dish and set it aside.
Make the filling
- In the bowl of a food processor fitted with the steel blade, place the sweet potato flesh and process for about 2 minutes. If necessary, add some of the milk to get the machine moving.
- Turn off the machine and add the granulated sugar, salt, milk, eggs, butter, and vanilla. Process again until completely smooth (3 to 4 minutes more).
- Stop the food processor as necessary to scrap down the sides and keep the mixture moving. The filling will be thick but very soft and smooth.
Assemble the dish
- Transfer the filling to the prepared baking dish, and smooth the top into an even layer.
- Remove the crumble topping from the refrigerator, break it up into irregular pieces with the tines of a fork, and sprinkle the pieces evenly over the top of the filling.
Bake
- Place in the center of the preheated oven and bake until the topping is golden brown and the filling appears set (about 45 minutes). Allow the dish to cool completely before serving.
Video
Notes
Instead of oats, you can use an additional 1/4 cup (36 g) all purpose gluten free flour (for a total of 1 cup (140 g)).
Nutrition
Nutrition information is automatically calculated, so should only be used as an approximation.
Make ahead instructions
You can prepare the raw topping up to 1 week ahead of time, and store it in a sealed container in the refrigerator until you're ready to use it.
You can also roast the sweet potatoes up to 1 week ahead, and store them either with or without their skins in a sealed container in the refrigerator.
You can also prepare the filling entirely up to 1 week ahead, then bring the dish to room temperature before topping and baking. This dish can be served warm, or cool, so you can bake it hours before you sit down to eat, to free up the oven.
Storing leftovers
To store leftovers without mixing the topping into the filling, use a large, wide spatula to lift sections of the dish into a storage container. Place a piece of wax or parchment paper on top of the crumble, and layer in more sections until the container is full. Store in the refrigerator for up to 1 week, or in the freezer for up to 2 months.
Defrost in the refrigerator if frozen, then lift out sections by holding the paper lining. Refresh in the toaster oven until the filling is warmed through and the topping is toasty.


I love this casserole. The filling is smooth and creamy and the topping is perfect. It is my favorite Thanksgiving side dish of all time.
That’s so great to hear, Cathy! You described it so well. I really appreciate your sharing your experience!
Thanks so much!!
I forgot to add that I used vegan options to replace the dairy ingredients. I used Miyoko’s butter and Unsweetened Ripple .
Glad to know the Miyoko’s vegan butter worked so well. It and Melt brand vegan butters really are a big improvement over other butter substitutes. And Ripple is great, too (although I wish it weren’t so expensive). Well done, Corrin!