

This post may contain affiliate links. Please read our disclosure policy.
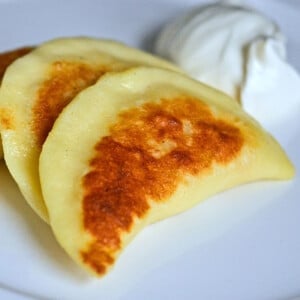
There are many ways to make pierogi, and everyone seems to have their favorite. This is my favorite recipe for gluten free potato pierogi, as the dough is made with both milk and sour cream.
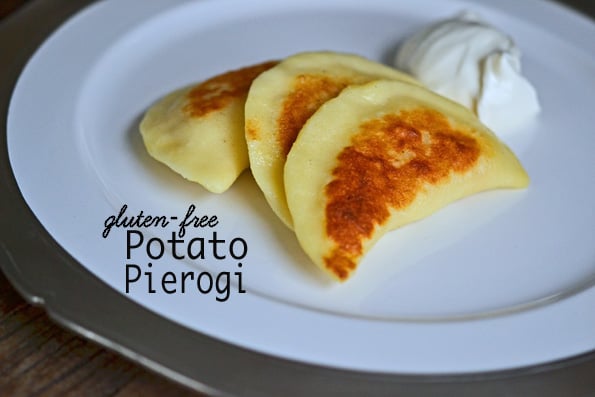
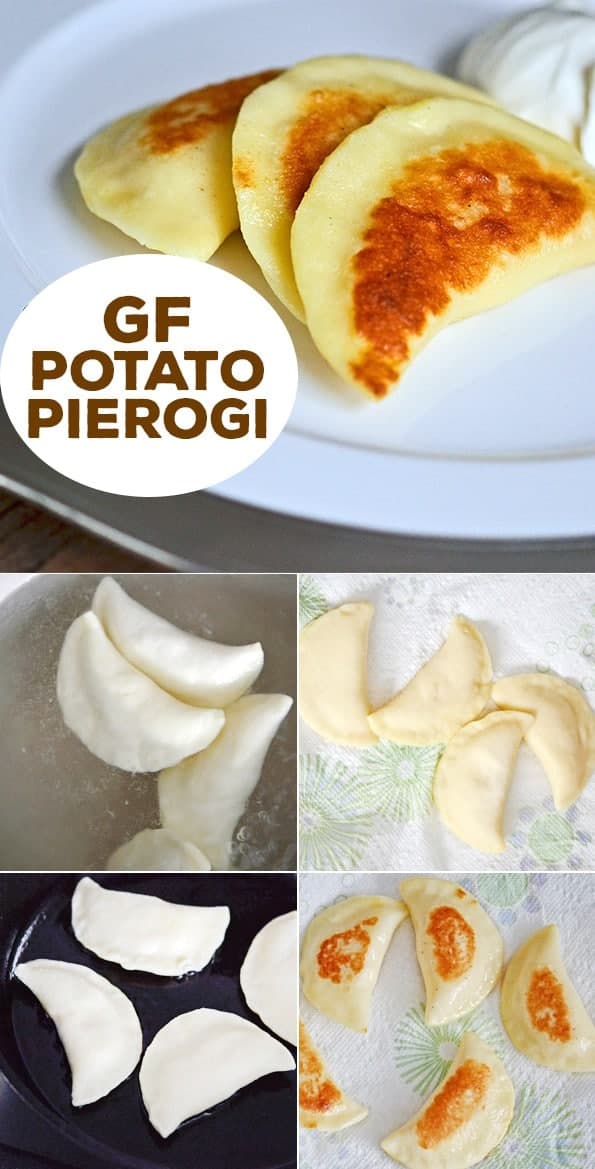
There's no way around it. Pierogi takes some time to prep. I promise that this dough will work – just read the recipe all the way through before you roll up your sleeves and get to work. And let all the step by step pictures mesmerize you for a bit, too.
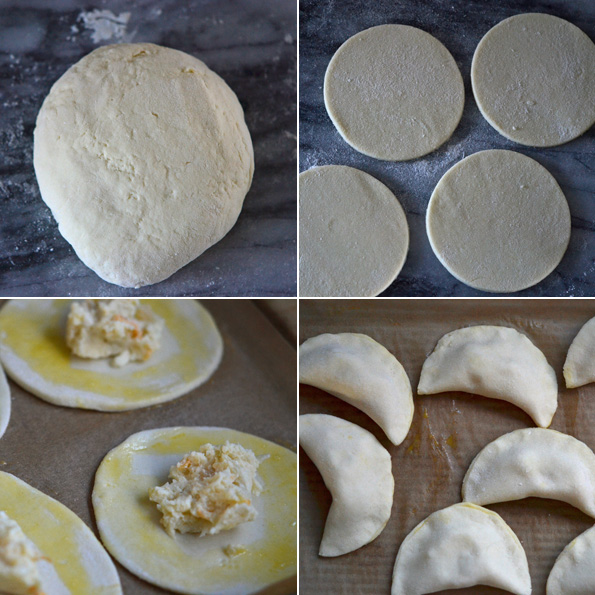
Semi-Pro Tip #1: Rather than struggling to roll out the dough as thin as 1/8 inch before cutting rounds, roll it out 1/4 inch thick. Then, reroll each round into an oval that is closer to 1/8 inch thick.
This way, you're much less likely to have a dough of uneven thickness (which might cause some of them to break during boiling), and an oval shape is easier to form into half-moons.
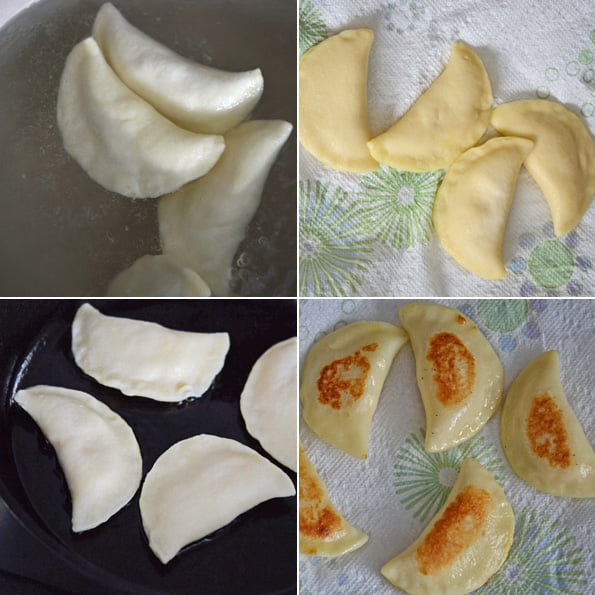
Be careful as you select your gluten-free flour blend for this task, too. Anything that is too high in starch, like Trader Joe's All Purpose Gluten Free Flour, is going to be difficult to roll out smooth as it will absorb too much moisture in the dough.
This is a different dough than, for example, gluten free pie crust, which is flaky as any proper pastry would be that is meant to be baked in a hot oven. Pierogi dough has more chew, and is less fragile by nature.
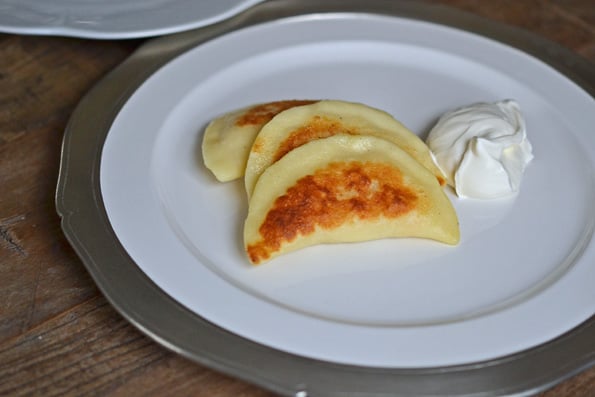
Just be sure to serve these to someone special. Pierogies bring to mind Easter for me, which may or may not be strange. But one thing's for sure – if you're going to make them for a big group, pay special attention to the Make-Ahead Option in the printable recipe below. Now … how do you say “EAT!” in Polish?
How to make homemade gluten free pierogi, step by step
Gluten Free Pierogi Recipe
Ingredients
For the dough
- ½ cup (112 g) sour cream, at room temperature
- ⅔ cup (170 g) milk, at room temperature
- 1 (50 g (weighed out of shell)) egg, at room temperature, beaten
- ⅛ teaspoon kosher salt
- 2 ½ cups (350 g) all purpose gluten free flour blend, (I used my Better Than Cup4Cup Blend; please click through for appropriate flour blends), plus more for kneading
- 1 teaspoon xanthan gum, omit if your blend already contains it
For the filling
- 1 pound potatoes, about 8 small red skin potatoes or 1 large potato
- 1 small onion, peeled and diced
- 2 tablespoons (28 g) clarified butter or ghee, can substitute olive oil
- ½ cup (112 g) sour cream, at room temperature
- ½ cup (2 ounces) shredded semi-hard cheese, (I used a blend of Monterey jack and cheddar)
- Kosher salt and freshly ground black pepper, to taste
For finishing
- 1 egg (any size), beaten
- 2 tablespoons (28 g) ghee or clarified butter, can substitute olive oil
Instructions
Make the dough.
- In a large bowl, place the sour cream, milk, beaten egg and salt, and whisk to combine well. Add the flour and xanthan gum in three parts, mixing well to combine after each addition.
- The dough will come together and be relatively smooth but still a bit sticky. Turn it out onto a lightly floured surface, and, with floured hands, knead the dough until it becomes easier to handle (it will not be completely smooth).
- Cover the dough loosely with plastic wrap and set it aside to rest.
Make the filling.
- Bring a large pot of salted water to a rolling boil, add the potatoes and reduce the boil to a simmer. Boil the potatoes, covered, until they are just fork tender (about 15 minutes).
- Drain the water from the pot of potatoes and cover the pot with a tea towel. Allow the potatoes to steam beneath the towel until the are softened (about another 10 minutes).
- While the potatoes are cooking, place the diced onion and clarified butter in a small skillet and cook, stirring frequently, until the onions are translucent (about 6 minutes).
- Once the potatoes are softened, peel the skin off (it should come off easily) and mash the potatoes in the pot. Add the cooked onions, then the sour cream, shredded cheese and the salt and pepper to taste. Set the filling aside.
Roll out the dough.
- On a lightly floured surface, roll out the dough into a round about 1/4 inch thick, and moving the dough frequently and dusting lightly with flour to prevent sticking as you roll.
- Cut out rounds 4 inches in diameter from the dough. Gather and reroll scraps. Roll each round into an oval that is closer to 1/8 inch thick (the thickness of a nickel).
Assemble the pierogies.
- Paint the edges of each oval with the beaten egg, then place about 1 tablespoon of filling in the center of each.
- Fold the dough over on itself, matching the edges, and pinch the edges together to form a tight seal.
Boil the pierogies (See Recipe Notes).
- In a large pot of salted, boiling water, place the pierogies, about 6 at a time, until they float to the surface of the water (about 3 minutes).
- Place the boiled pierogies on a paper towel to drain, then blot them dry.
Finishing.
- Sauté the towel-dried pierogies in ghee in a large skillet until browned, about 2 minutes per side. Serve immediately.
Notes
Nutrition
Nutrition information is automatically calculated, so should only be used as an approximation.











My son said that these were better than the store bought ones. Only problem for me is now I’ve made a second batch after less than a week. Thanks for this recipe.
Aw, Haley, that’s a great problem to have! Thanks so much for sharing your experience.
they freeze great! i boil from frozen. now i have a big batch for whenever i want them
used what I had on hand: great value All-purpose gluten-free Walmart brand flour.
used 2 eggs instead of one.
everything else was the same.
ymmv
kiddos said they’re the best they’ve had.
thank you for a great recipe
Excellent recipe, worked well. I really went all over the web in three languages to find one that looked great and had positive comments. I won’t look anywhere else after making this one.
I made a gluten free and a wheat flour batch. The taste was slightly different. The gluten free lighter and less chewy. My polish grand-mother used to make a decorative twist around the pierogi and it kind of work with the gluten free dough, but without the elasticity of wheat it was harder I decided not to make the decorative twist. It was easier to differentiate them that way anyway.
I used the your Better Than Cup4Cup Blend. I made an excel chart to put all the ingredients in the right proportions. 11 ingredients for the dough, one needs to stay focus and using a good scale, but I prefer this to a mix because I could not find any recipe with mixes that I can buy where I live. Having a choice with basic ingredient is really good. Please keep doing this for your recipes.
I use an Italian pasta machine like I do for the wheat pierogi. You have to trust the process because the 4 first times I put the dough through it it was a mess. But after that the dough was beautiful. A little bit more tendency at having holes than wheat flour, but really not that hard.
The only issue I had with the recipe was the number of pierogi it makes. Maybe it is because I used the pasta machine and my dough was thinner but I used the third setting from the thinest. But instead of 24 pierogi I had 43.5. Thanks to my excel sheet, next time I’ll make the right amount of dough.
I’m glad you enjoyed the pierogi, S. For others’ benefit, I do not recommend using my recipes and subbing in wheat flour. You generally need different ingredient proportions for gluten free recipes than for wheat flour, and there’s no such thing as a “cup for cup” replacement for wheat flour.
Excited to try this recipe. A bit confused though about the make ahead option. The recipe notes say to boil then freeze but all the comments say to freeze raw.
You can really do it either way, Brigitte!
I used this recipe, and it turned out great. I did do a couple of things differently that most people wouldn’t choose to do, but they worked for me.
I used Bob’s Red Mill 1 to 1, because that is what my husband’s company sells at a discount. I added xanthan gum, because like most people, I haven’t been particularly happy with BRM flour in the past, and hoped the xanthan gum would make up for the lack. I also increased the recipe to 32 pierogis. For the difference in flour, I used Isopure brand unflavored whey protein powder- I thought it was possible that the increase in protein would also assist in the texture and “chew.” All other ingredients remained as recommended, and the process was unchanged – one thing, I DID have to use a little corn starch in addition to flour for rolling, because I was running low on flour and was worried I would run out.
The texture was perfect, they boiled beautifully, and fried nicely. My husband thought the texture was better than the “regular” pierogis that I made for him and his parents. I am looking forward to being able to eat these with my family on Christmas, as has been our tradition my whole life.
Love this recipe! I’ve been searching for a a good gluten free perogie recipe for after being diagnosed with celiac disease several years ago. I was crushed thinking it wasn’t possible, but finally this is the one. Great recipe! The search is over. Thank you!
So glad you enjoyed the pierogi, Karen! Thanks for sharing your experience.
These were great, easy-to-follow recipes.
Can I boil, then freeze them?
Hi, Lynn, I’d really recommend that you freeze them raw and fully shaped and filled, and then cook right from frozen. You’ll get better texture that way, and they do tend to be somewhat slice after boiling.
This is a great recipe; I’ve used King Arthur gf blend and it worked fine. I use a ravioli cutter- it does a good job crimping the edges and I can make half- circles if I want. You reminded me that I have some in my freezer! Thanks for everything you do!
Hi,
I’m so excited to try these for my daughter.
Do you know if Bob’s Red Mill all purpose flour works for these?
Hi, Sylvia, I’m afraid I haven’t tried Bob’s Red Mill in this recipe, but if you give it a shot, I’d expect to add at least another 1/8 teaspoon xanthan gum per cup of flour since it has a very low amount.