

This post may contain affiliate links. Please read our disclosure policy.
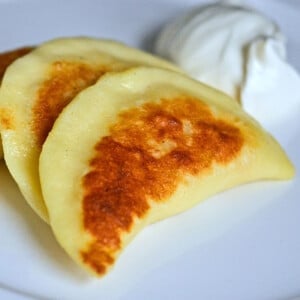
There are many ways to make pierogi, and everyone seems to have their favorite. This is my favorite recipe for gluten free potato pierogi, as the dough is made with both milk and sour cream.
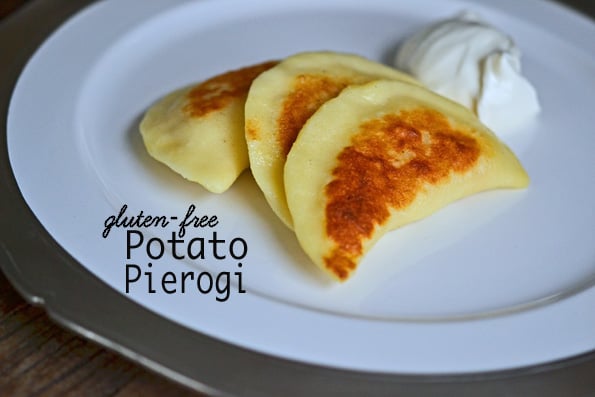
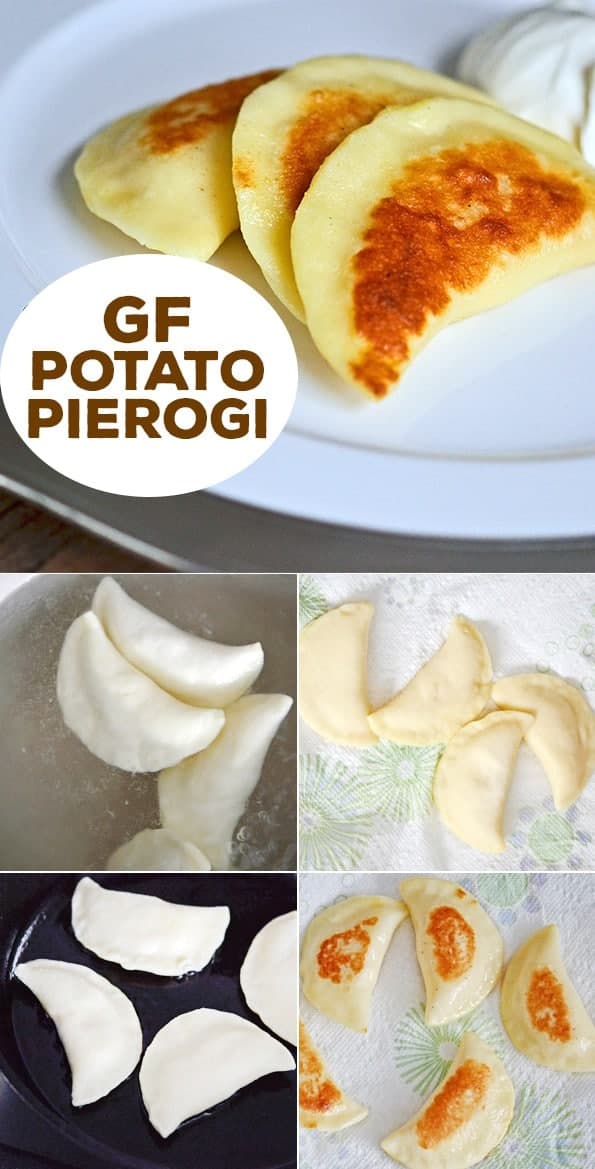
There's no way around it. Pierogi takes some time to prep. I promise that this dough will work – just read the recipe all the way through before you roll up your sleeves and get to work. And let all the step by step pictures mesmerize you for a bit, too.
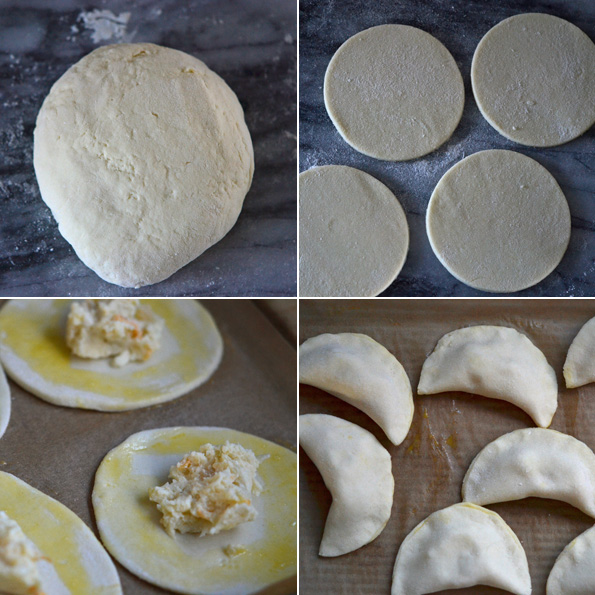
Semi-Pro Tip #1: Rather than struggling to roll out the dough as thin as 1/8 inch before cutting rounds, roll it out 1/4 inch thick. Then, reroll each round into an oval that is closer to 1/8 inch thick.
This way, you're much less likely to have a dough of uneven thickness (which might cause some of them to break during boiling), and an oval shape is easier to form into half-moons.
Be careful as you select your gluten-free flour blend for this task, too. Anything that is too high in starch, like Trader Joe's All Purpose Gluten Free Flour, is going to be difficult to roll out smooth as it will absorb too much moisture in the dough.
This is a different dough than, for example, gluten free pie crust, which is flaky as any proper pastry would be that is meant to be baked in a hot oven. Pierogi dough has more chew, and is less fragile by nature.
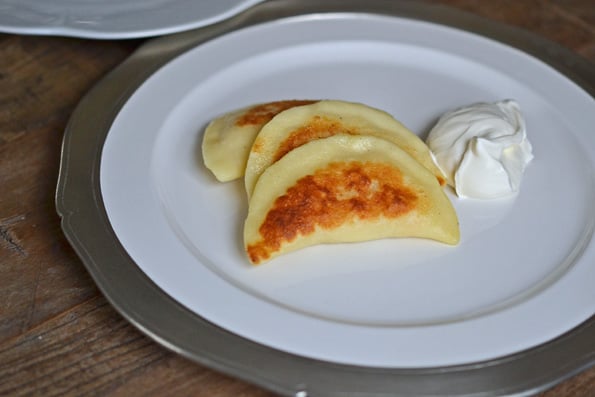
Just be sure to serve these to someone special. Pierogies bring to mind Easter for me, which may or may not be strange. But one thing's for sure – if you're going to make them for a big group, pay special attention to the Make-Ahead Option in the printable recipe below. Now … how do you say “EAT!” in Polish?
How to make homemade gluten free pierogi, step by step
Gluten Free Pierogi Recipe
Ingredients
For the dough
- ½ cup (112 g) sour cream, at room temperature
- ⅔ cup (170 g) milk, at room temperature
- 1 (50 g (weighed out of shell)) egg, at room temperature, beaten
- ⅛ teaspoon kosher salt
- 2 ½ cups (350 g) all purpose gluten free flour blend, (I used my Better Than Cup4Cup Blend; please click through for appropriate flour blends), plus more for kneading
- 1 teaspoon xanthan gum, omit if your blend already contains it
For the filling
- 1 pound potatoes, about 8 small red skin potatoes or 1 large potato
- 1 small onion, peeled and diced
- 2 tablespoons (28 g) clarified butter or ghee, can substitute olive oil
- ½ cup (112 g) sour cream, at room temperature
- ½ cup (2 ounces) shredded semi-hard cheese, (I used a blend of Monterey jack and cheddar)
- Kosher salt and freshly ground black pepper, to taste
For finishing
- 1 egg (any size), beaten
- 2 tablespoons (28 g) ghee or clarified butter, can substitute olive oil
Instructions
Make the dough.
- In a large bowl, place the sour cream, milk, beaten egg and salt, and whisk to combine well. Add the flour and xanthan gum in three parts, mixing well to combine after each addition.
- The dough will come together and be relatively smooth but still a bit sticky. Turn it out onto a lightly floured surface, and, with floured hands, knead the dough until it becomes easier to handle (it will not be completely smooth).
- Cover the dough loosely with plastic wrap and set it aside to rest.
Make the filling.
- Bring a large pot of salted water to a rolling boil, add the potatoes and reduce the boil to a simmer. Boil the potatoes, covered, until they are just fork tender (about 15 minutes).
- Drain the water from the pot of potatoes and cover the pot with a tea towel. Allow the potatoes to steam beneath the towel until the are softened (about another 10 minutes).
- While the potatoes are cooking, place the diced onion and clarified butter in a small skillet and cook, stirring frequently, until the onions are translucent (about 6 minutes).
- Once the potatoes are softened, peel the skin off (it should come off easily) and mash the potatoes in the pot. Add the cooked onions, then the sour cream, shredded cheese and the salt and pepper to taste. Set the filling aside.
Roll out the dough.
- On a lightly floured surface, roll out the dough into a round about 1/4 inch thick, and moving the dough frequently and dusting lightly with flour to prevent sticking as you roll.
- Cut out rounds 4 inches in diameter from the dough. Gather and reroll scraps. Roll each round into an oval that is closer to 1/8 inch thick (the thickness of a nickel).
Assemble the pierogies.
- Paint the edges of each oval with the beaten egg, then place about 1 tablespoon of filling in the center of each.
- Fold the dough over on itself, matching the edges, and pinch the edges together to form a tight seal.
Boil the pierogies (See Recipe Notes).
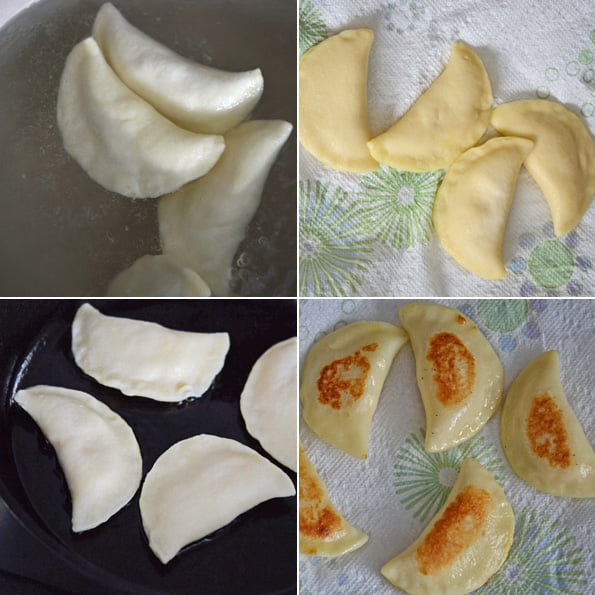
- In a large pot of salted, boiling water, place the pierogies, about 6 at a time, until they float to the surface of the water (about 3 minutes).
- Place the boiled pierogies on a paper towel to drain, then blot them dry.
Finishing.
- Sauté the towel-dried pierogies in ghee in a large skillet until browned, about 2 minutes per side. Serve immediately.
Notes
Nutrition
Nutrition information is automatically calculated, so should only be used as an approximation.











Loved this recipe! Turned out great, although I will say I did have to add quite a bit of extra flour to help with the dough. It was very sticky and hard to work with till I started adding more flour which helped a lot.
Also, don’t skip the egg the wash, that really helped it stick together.
Thank you!!
Hi, Katherine, I’m really glad you enjoyed the pierogi. The experience you’re describing with the dough is usually because of a lesser quality flour blend than the ones I recommend and/or not measuring your ingredients by weight, and instead using volume measurements. I’m glad you were able to get it to work for you, though!
i think your dough recipes are amazing
Thank you so much, Chris!
I have been using this recipe and adding other fillings, sauerkraut, farmers cheese, etc , and serving to some of the pickiest eaters I know. They have all loved these and don’t even care they are gluten free!
This recipe is delicious!! So glad I found it. ?❤️
So glad you love it, Lori! Thanks for sharing your experience.
These were fantastic, as usual. I often come to your site for superb recipes, Nicole. This did not disappoint. I first made these when I was in my early 20s, taught by a gaggle of Polish and Polish American cooks. But then I developed my gluten allergy and my attempts at re-capturing that old magic were dismal. My main problem was sealing the pierogi with a fork dipped in water or egg, but your instructions to coat the edges with egg makes all the difference. And now, FINALLY, I’m back to being a pierogi chef!! Thanks ever so much, Nicole!
You’re so welcome, Mark, and I’m so glad you were able to relive the memory without gluten. I really appreciate your trust in my recipes, so thank you for including that. And thank you for sharing your experience!
Nicole, you have become one of the most reliably beneficial people to grace my browser tabs. Thank you, always.
I had a bit of trouble getting the dumplings to hold together because the dough is not elastic like wheat flour. They had holes where i tired to stretch them. I’m trying to work out if i shuld steam them instead of boil so the filling doesn’t come out in the water.
You can’t stretch them, DLS, you have to roll and cinch as the recipe describes.
Oh my goodness, these came out perfect. They’ve been a big hit. Thank you, Nicole! I often come to your site for excellent recipes.
At first, I was making a foolish mistake in assembling them. You see, I was raised in a Polish-American church and it’s there I learned how to make pierogis from my mom and her friends.
But then I developed my gluten allergy, and I struggled with many recipes. My flour blend – Cup4Cup (and all the others I’ve tried through the years) – promised me that I just needed to substitute it for regular flour to enjoy all my favorite goodies just as before. But that’s not true, is it?
One of the things I kept doing was dipping my fork in either water or egg to then pinch together the pierogi dough. But the dough would inevitably cling to the fork. That includes the first few pierogi I made with your recipe.
So dang it, I figured I was doing something fundamentally wrong. So I re-read your recipe. And yeah, you never told me to dip the fork. Once I started coating the edges with the egg, perfection ensued. And I still used the fork – clean and dry – to pinch the dough together.
I am very, very grateful, Nicole. Thank you and Happy Easter!
At last, great gluten free comfort food.
Your family will make this a regular weeknight request.
So glad you enjoyed the pierogi, Brenda!
Fantastic and easy! We will be making pierogi again and again with this recipe (I even made a huge mistake and they were still fantastic- can’t wait to try it without all the xanthum gum I accidentally dumped in…. lol ) Thank you for a great recipe!
Hahaha, you can only love them more, Liz! Thanks for sharing your experience.
Would you suggest adding xanthum gum to Bob’s Red Mill 1 to 1 Baking Flour? Also, does the recipe work well if you double or triple the recipe? Thanks!
Hi, Rachel, generally, yes, I recommend adding additional xanthan gum to Bob’s Red Mill in the blue bag, but I haven’t tried using it to make this, and since it’s such a simple recipe, I’m not sure that it would work well here. And I generally don’t recommend doubling a recipe since it’s much more likely that the ingredients won’t be mixed fully, so instead recommend making the recipe twice without cleaning the bowl.
Great recipe! I was out of eggs so substituted 3 TBSP of mayo, also subbed greek yogurt for the sour cream and the recipe still turned out perfect! The pierogis were light and crispy after boiling then cooking in butter.