This post may contain affiliate links. Please read our disclosure policy.
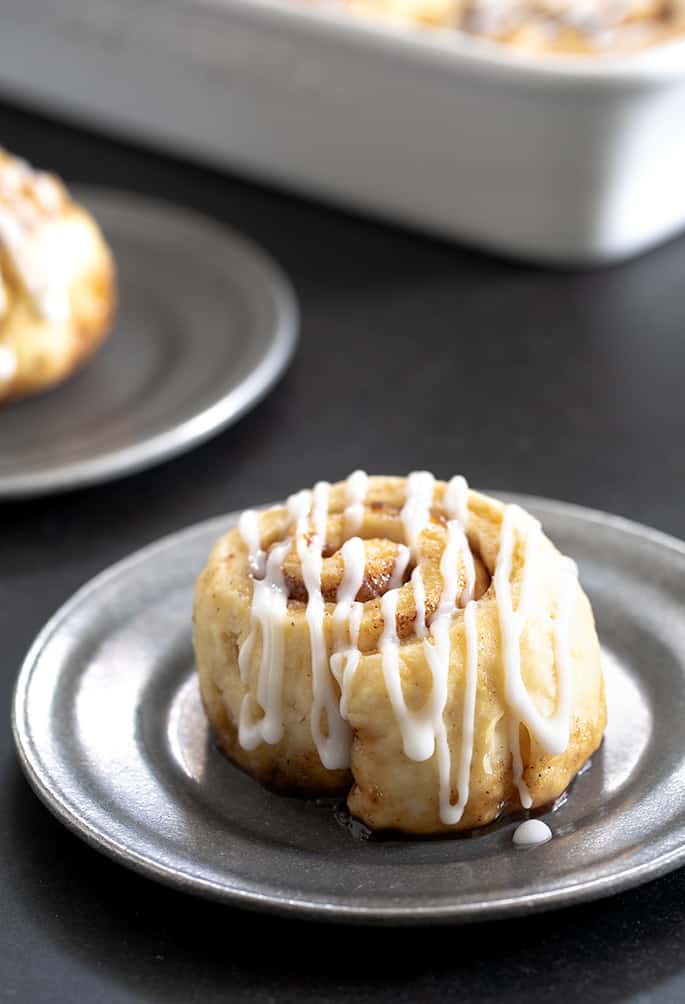
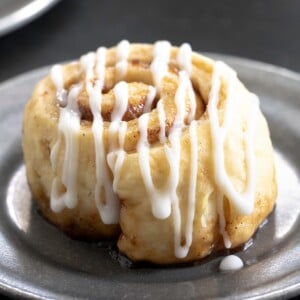
These sweet, tender gluten free cinnamon rolls rise quickly and easily, and make the whole house smell amazing. Make weekend mornings special!
Why I love this recipe
These fluffy rolls are just sweet enough for you to enjoy the delicious icing. The dough is enriched with an egg and butter, making it very tender, and easier to handle and shape. The rolls are so pillowy-soft that your family will never know they're gluten free if you don't tell them.
Warm, fluffy cinnamon rolls just like these were a family staple of mine growing up. They were homemade, but we didn't make them ourselves.
Recipe ingredients
For the rolls
- Gluten free flour blend: Be sure to use one of my recommended gluten free flour mixes, and only add xanthan gum to it if the blend doesn't already contain it. When I use Better Batter, I omit the xanthan gum; when I use Nicole's Best, there is no xanthan gum in the mix so you can add the precise amount of 3 teaspoons (1 tablespoon) xanthan gum here.
- Tapioca starch: This is an additional ingredient, even though all good-quality all purpose gluten free flour blends already contain tapioca starch (also called tapioca flour) as an ingredient. Adding more tapioca starch helps make the dough more elastic, easier to handle raw, and helps the rolls hold their shape during baking.
- Milk powder: Adds richness, helps the rolls brown in the oven, and adds protein. You can also use buttermilk powder, or coconut milk powder in its place.
- Instant yeast: Provides flavor as the rolls rise outside the oven, and lift when they rise in the oven; I like to use instant yeast because it doesn't have to be dissolved in liquid first to be activated. To use active dry yeast instead, just use 25% more by weight (here, just under 8 grams) and dissolve it first in 1/4 cup of the milk.
- Cream of tartar: Helps stabilize the rise. You can use 1/2 teaspoon of lemon juice instead.
- Baking soda: Helps the rolls turn golden brown in the oven. We don't add baking powder, which would be for rise, since the rise comes from the yeast.
- Brown sugar: Adds sweetness, tenderness, and depth of flavor.
- Salt: Balances sweetness, brightens other flavors. I usually use kosher salt because it's easier to measure properly without overmeasuring, but table salt works fine. Just use a tiny bit less.
- Apple cider vinegar: Helps add tenderness and some yeasty flavor. You can use white wine vinegar in its place.
- Butter: Adds flavor and tenderness. Be sure to use butter at room temperature, not melted butter, which is more likely to make the dough greasy during shaping and leak in the oven.
- Egg: One egg adds structure, richness, and helps stabilize the rolls. Eggs can be really useful in gluten free baking, especially of yeast breads, to support the more fragile gluten free dough.
- Milk: Adds moisture, richness, and flavor. You can use a nondairy milk here, but make sure it isn't nonfat since we need the fat for richness.
For the filling
- Butter: Adds richness and helps create a paste with the brown sugar so it stays in place.
- Brown sugar: Adds sweetness and lots of flavor to the center of the rolls, which is the best part!
- Cinnamon: Adds tons of woodsy flavor and combines with brown sugar for the characteristic cinnamon roll aroma.
For the optional glaze and/or frosting
- Confectioners' sugar: Adds sweetness and stability to the icing or the frosting; powdered sugar is only sugar, but confectioners' sugar has added cornstarch which makes the frosting more stable
- Milk: Hydrates the confectioners' sugar in the glaze to create a pourable icing
- Butter: Adds richness and makes the frosting spreadable and full of flavor. It should be at room temperature so it can be beaten, not melted where it will leak out of the frosting
- Heavy cream: Just a few tablespoons thins the frosting enough to make it spreadable, so it melts into the warm cinnamon rolls
How to make gluten free cinnamon rolls
These step by step photos for how to make this recipe are designed to make it easy for you to imagine exactly how to make these cinnamon rolls at home. For full instructions including exact quantities and a full printable recipe, be sure to scroll down to the recipe card.
Whisk dry ingredients, then add wet
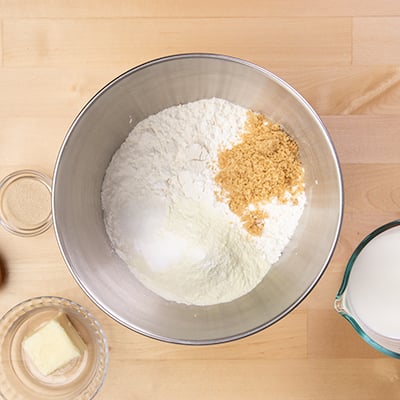
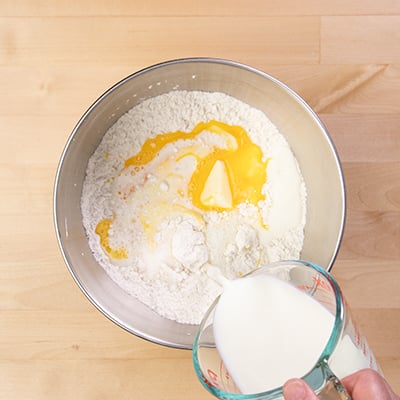
This dough comes together so quickly and easily in a stand mixer with the paddle attachment. Begin by whisking together the dry ingredients (flours, yeast, salt, brown sugar, cream of tartar), and adding the wet ingredients (butter, milk, an egg, a splash of vinegar). The recipe doesn't call for vanilla extract, but you could add 1 teaspoon of it for flavor if you like.
Beat the mixture well
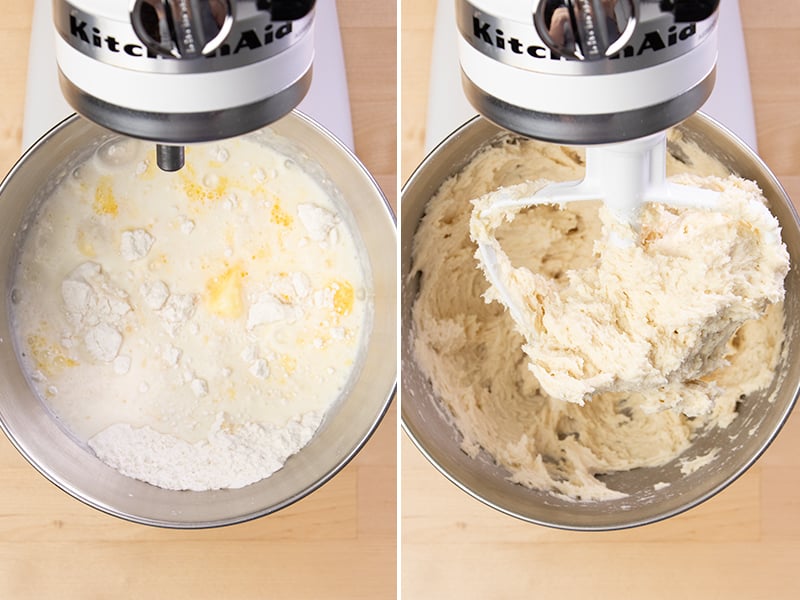
Beat everything together well in your stand mixer. The mixture will clump at first, but just keep on beating until it starts to look a bit whipped and shaggy. To make the dough easier to handle, place it in a sealed container and refrigerate for 20 to 30 minutes.
Roll, fill & shape the dough
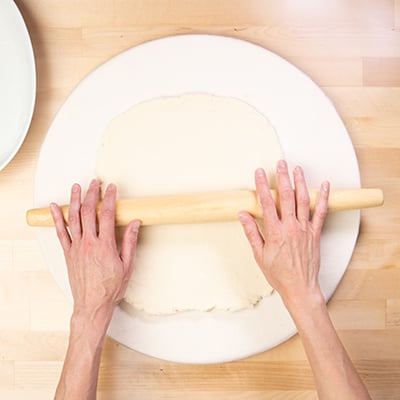
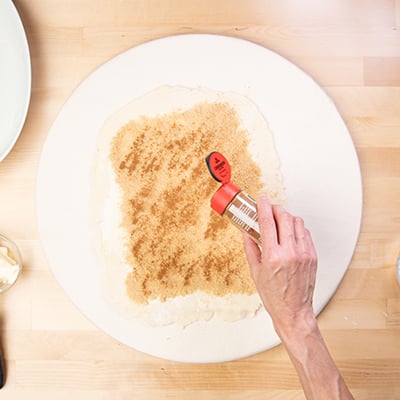
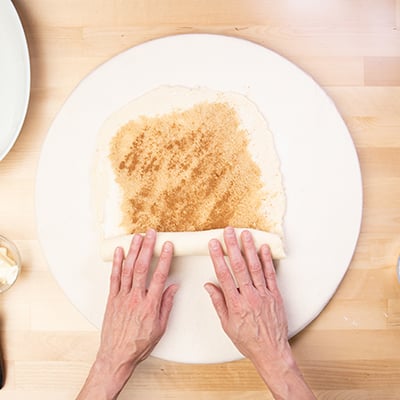
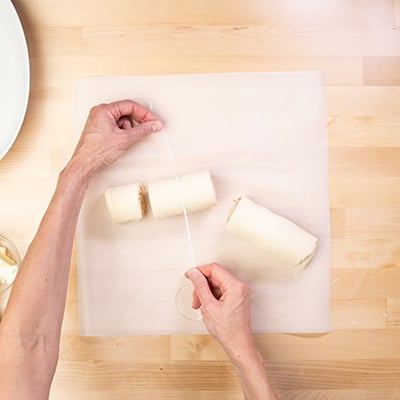
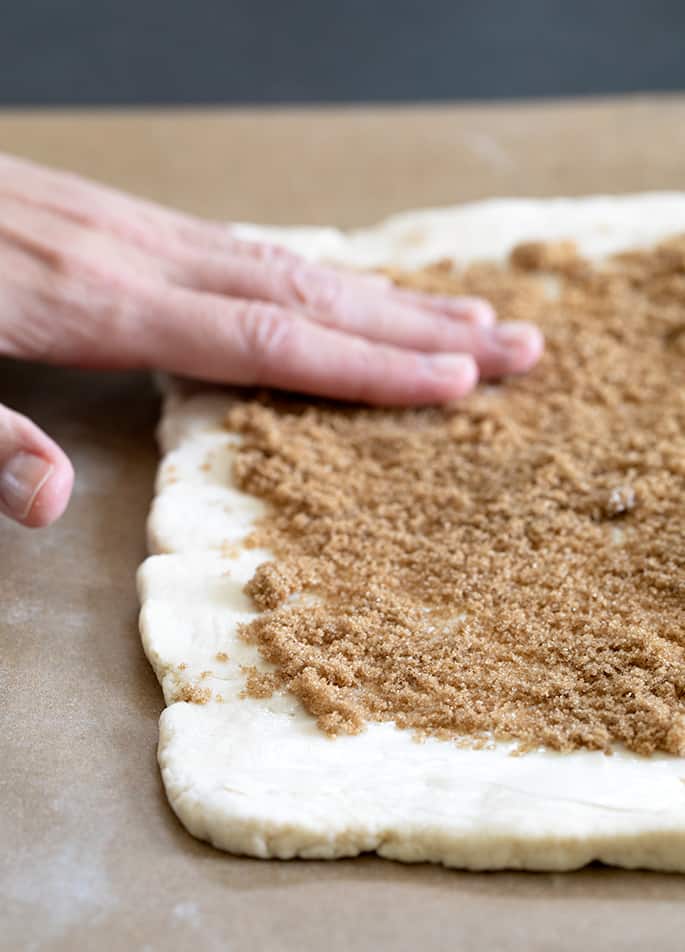
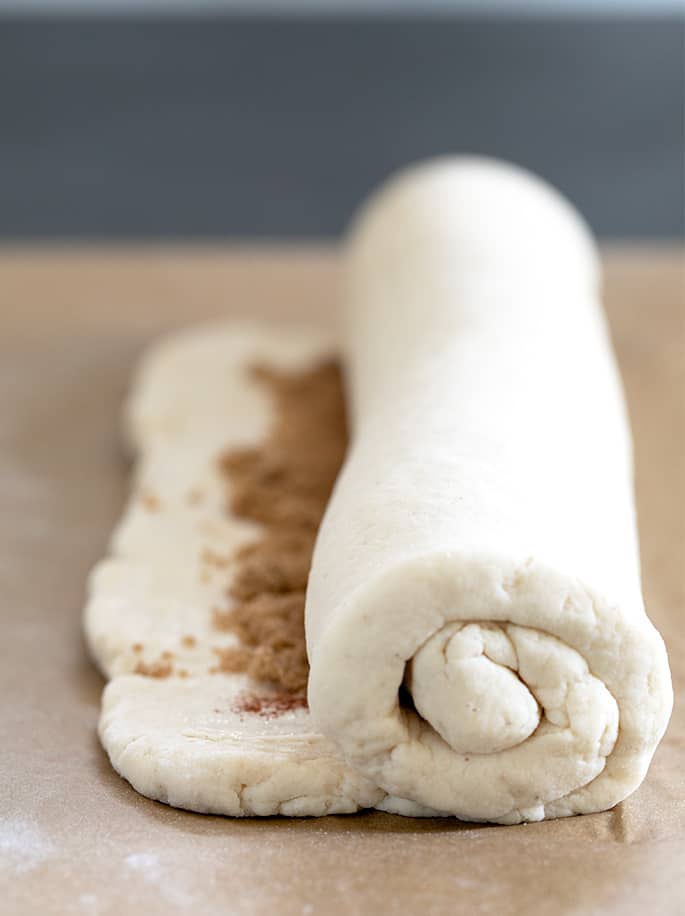
To shape the dough, sprinkle it with a bit of flour to smooth it out, then roll it into a rectangle, sprinkling lightly with flour as needed. Spread some soft butter on top, then sprinkle brown sugar & cinnamon. Roll the dough into a coil, and slice with (of all things) dental floss if you have it.
Let the rolls rise, then bake
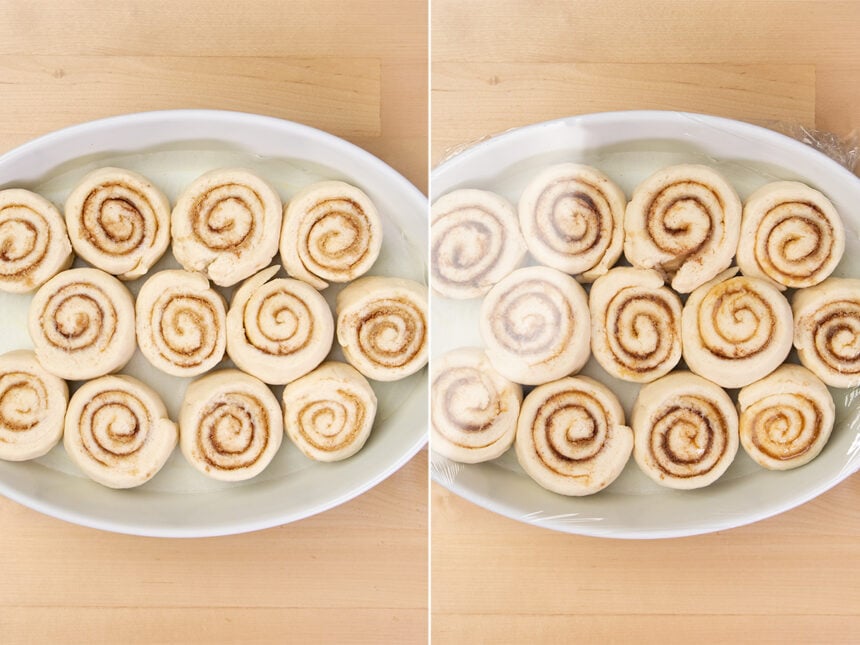
Place the raw rolls in a greased casserole dish, cover it, & let them rise. You only want them to swell to about 50% bigger than they started. You'll know when the rolls are closer together than they were before. Bake at 350°F for about 25 minutes.
Add frosting, and serve warm!
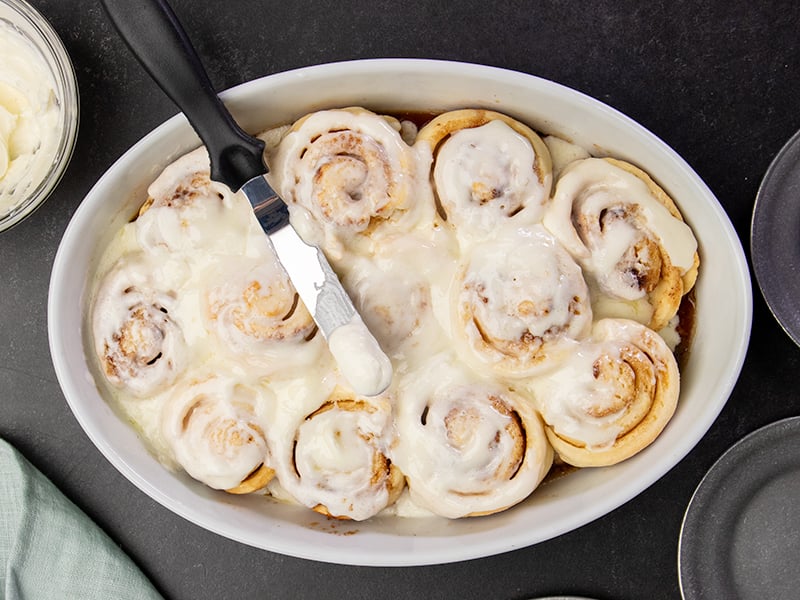
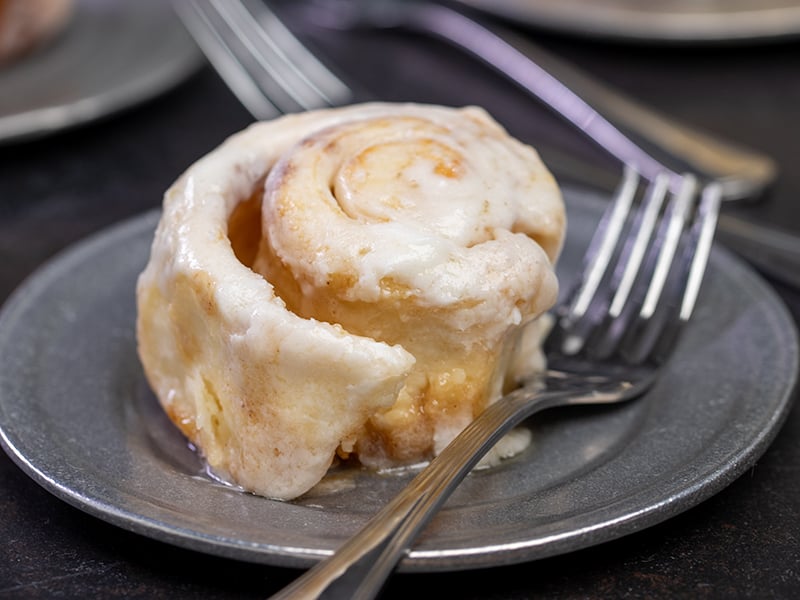
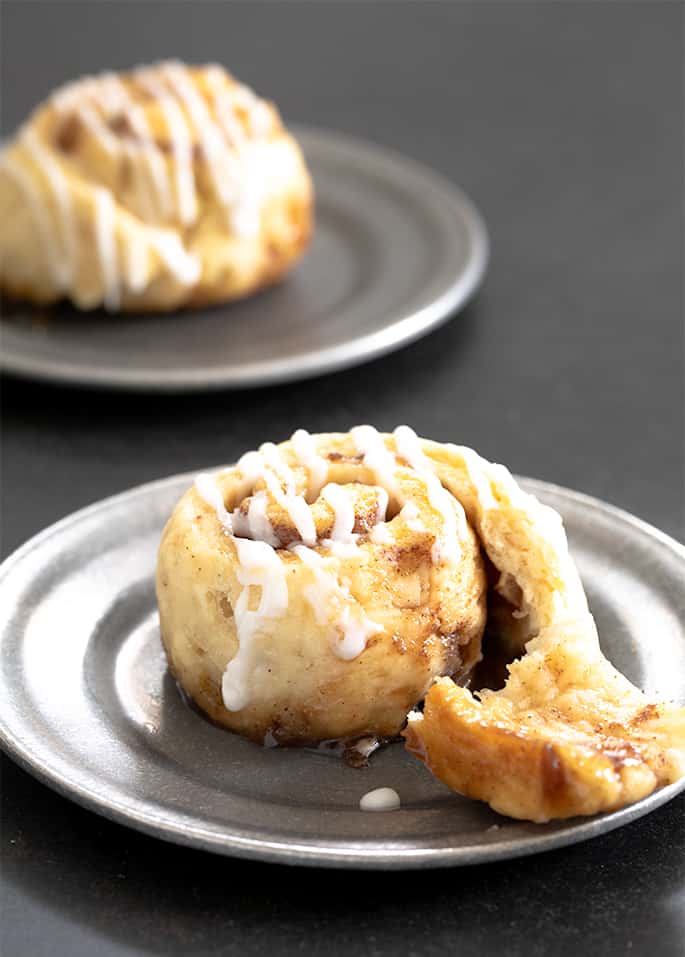
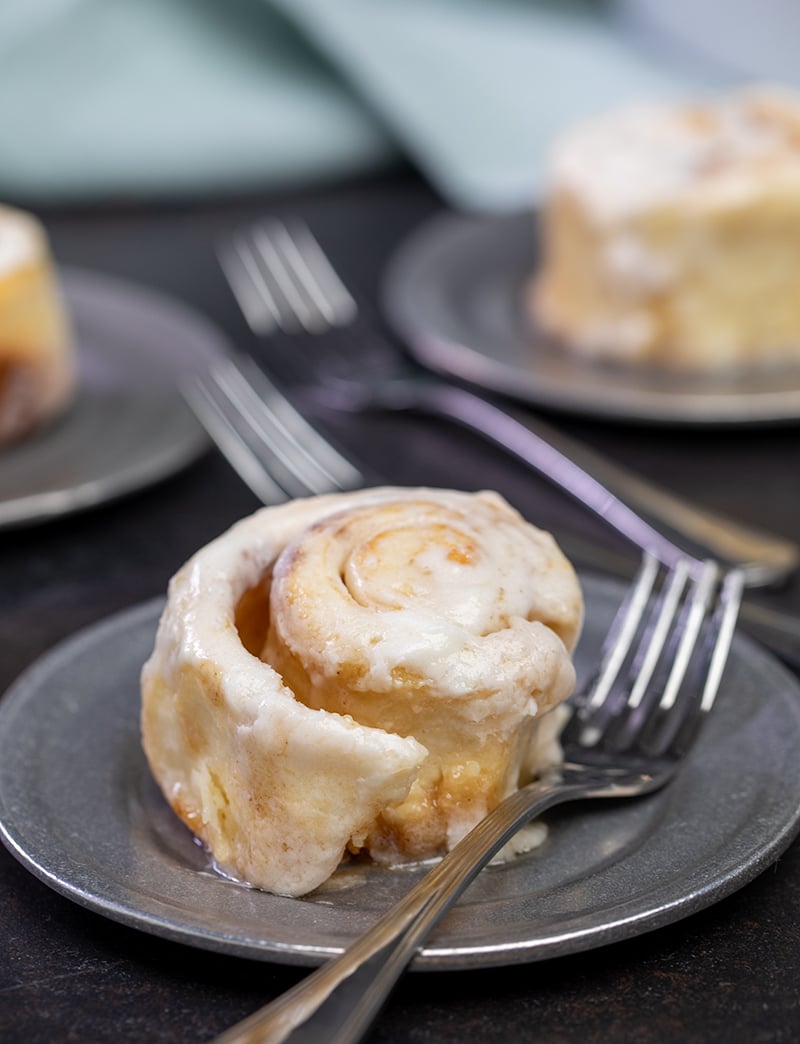
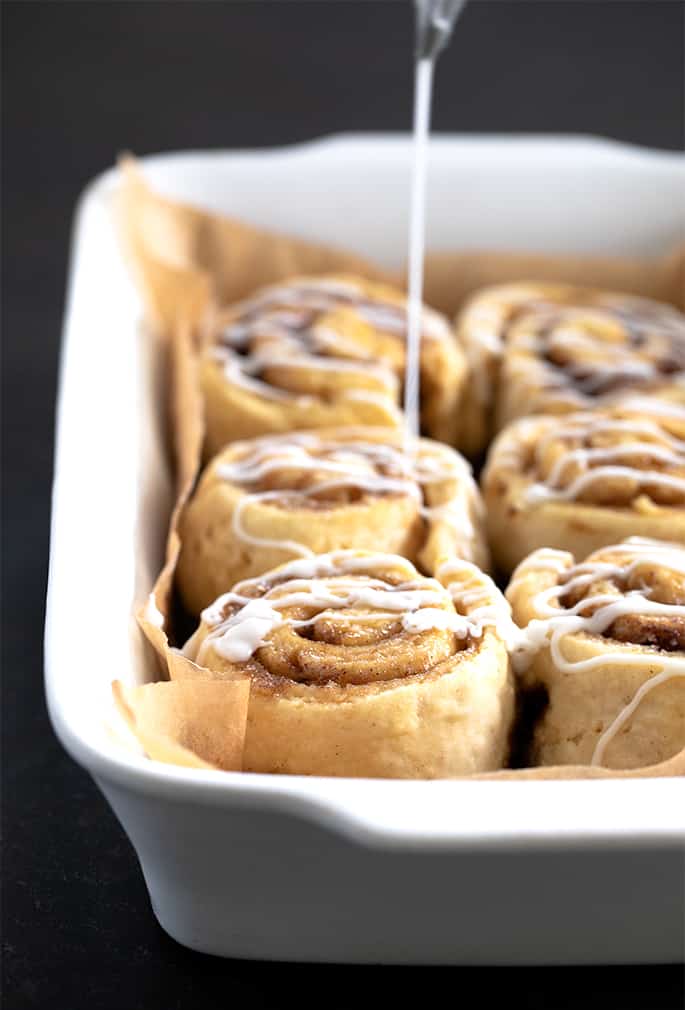
Let the rolls cool out of the oven for only about 10 minutes before adding icing (a simple milk and sugar mixture) or frosting (a thin buttercream icing). A cream cheese frosting is also delicious if, instead of 6 tablespoons of butter, you use 4 ounces of cream cheese and 2 tablespoons of butter. You want the frosting or icing to melt a bit when you spread it on. Let it set briefly, and serve warm.
Recipe tips and tricks
Begin with cold dough
This dough is easiest to work with when it's cold. If you can, place the raw dough in a tightly sealed container (plastic is fine) and refrigerate it for at least 30 minutes before working with it.
When the dough is cold, you'll be much less likely to incorporate a lot of extra flour into it during shaping. If you do add too much flour during shaping, you will lower the hydration ratio of your dough and the yeast won't be able to be active.
Practice patience
If you only take away one piece of advice about baking with yeast, it should be the importance of patience. Of course, you don't want your rolls to overproof (or over-rise), as they'll break apart even before they bake in the oven. But yeast takes time to grow.
Baking with yeast is also very environment-dependent. If the environment in your kitchen is cooler or the air is very dry, the yeast will continue to grow, just more slowly.
Maintain the right temperature
Extremely high temperatures and extremely low temperatures can kill the yeast. Once the dough is about 50% larger than when it started rising, it's considered fully risen.
This type of gluten free yeast dough won't usually double in size during the rising phase. Before it reaches a true doubling, it will start to get pock-marked and overly soft.
The bulk rise, which is the only necessary rise for this dough, should take about 45 minutes. I typically turn on my oven to 300°F and set the covered and shaped dough on top of the range. But if it takes longer than an hour, let it go longer.
Overproofing happens when the dough has proofed too much, not when it's been left to rise for “too long.” There is no “too long” for proofing unless the dough has over-proofed. But if you don't let the dough rise for long enough before baking, it will be dense after baking.

Roll your raw dough 1/2-inch thick
Be sure not to roll your cinnamon roll dough too thin, or the dough will break as you roll the filling inside. Too thick, and you won't be able to fit in enough filling—or get much of a pretty swirl!
Use a dental floss or a very sharp knife for slicing the rolls
To slice the roll cleanly from the coiled log, use a piece of unwaxed, unflavored dental floss. You can also use a a very sharp knife, and saw gently, rather than cutting in one motion, or you'll compress or tear the dough.
Making gluten free cinnamon rolls in advance
My Aunt Bia's used to make her rolls in these round disposable tins and bake them partially. That way, they could be defrosted, finished in the oven and served fresh any time at all.
Here's how you can make them in advance like Bia used to:
- Prepare and shape the raw rolls, let them rise, and then bake them at 300°F until puffed and very very pale golden, about 15 minutes. This is called parbaking them, so the yeast does its rise and they're set.
- Remove the rolls from the oven, and let them cool completely to at room temperature.
- Cover the dish tightly with freezer-safe wrap, and freeze them.
- Defrost the dish at room temperature, and bake them at 350°F for about 10 minutes, or until the filling is bubbling and the rolls are just starting to brown a bit.
- Let them cool for about 10 minutes before icing or frosting the rolls, and serve warm.
Storage & refreshing tips
Storing baked gf cinnamon rolls
Once your rolls are baked, before you add the glaze, you can cool them completely and freeze them in a single layer. Just wrap them first very tightly in freezer-safe wrap, and they warm up perfectly.
Reheating gluten free sweet rolls
If your rolls aren't just out of the oven, we can still make them taste like they are! Try letting them defrost at room temperature until they're no longer frozen in the center, then sprinkle them with some water and refresh them in a 275°F oven or toaster oven.

Ingredients & substitution suggestions
How to replace the dairy
To make these rolls dairy-free, you can try replacing the milk powder with powdered coconut milk. The butter in both the rolls and the filling can be replaced with a vegan butter that softens nicely at room temperature, like Melt brand or Miyoko's Creamery brand. For milk, use your favorite unsweetened nondairy milk, but make sure it has some fat, like almond milk.
How to replace the egg
Since there is only 1 egg in this recipe, I expect that it would work well with a “chia egg” substitute (1 tablespoon ground white chia seeds mixed with 1 tablespoon lukewarm water and allowed to gel).
How to replace apple cider vinegar &/or cream of tartar
In place of apple cider vinegar, you can use 1 teaspoon white wine vinegar. In place of cream of tartar, try 1/2 teaspoon of lemon juice.
Choosing a gluten free flour blend
You really must use one of my recommended gluten free flour blends for this recipe. All of my gluten free recipes are designed to be made with one of my recommended blends, but yeast bread in particular is even more sensitive to flour substitutions.
I highly recommend using Better Batter (or my mock Better Batter) gluten free flour blend in yeast bread applications like this. I have successfully made this recipe with both Cup4Cup and my Better Than Cup4Cup blends, though, and the rolls are fluffier but the recipe still works.
Make sure you're using milk powder or buttermilk powder and not liquid buttermilk for that ingredient, or your dough will be too sticky to handle. You'll also use liquid milk as a separate ingredient.
FAQs
No! Cinnamon rolls that aren't made specifically to be gluten free aren't safe on a gluten free diet. You need to use this recipe, or another one like it, made with reliably gluten free ingredients.
Patience is the #1 virtue in yeast bread baking! Overproofing is a matter of not rising enough, not rising for too long, so don't fear overproofing. Just cover your raw dough properly to avoid its drying out, measure your water by weight so you don't undermeasure it, and wait!
If you didn't make any changes to the recipe as written, used one of my recommended gluten free flour blends, and measured by weight, you likely either added too much additional flour during shaping, or didn't let your rolls rise long enough before baking.
Here are some questions to ask yourself as you troubleshoot:
Did you use Better Batter classic blend GF flour, and measure by weight? Not all gf flour blends are created equal, particularly for yeast applications. Did you use buttermilk or milk powder, and not liquid buttermilk? That is a relatively common error and will lead to overhydrated dough.
Dry cinnamon rolls were maybe overbaked, were dense because you added too much flour during shaping, or absorbed too much moisture because you used a poorly balanced flour blend.
Yes! To use active dry yeast, you'll need 25% more yeast (here, that would be a total of a scant 8 grams of active dry yeast), and dissolve the yeast first in some of the milk before adding it to the mixture.
Gluten Free Cinnamon Rolls Recipe
Equipment
Ingredients
For the rolls
- 3 cups (420 g) all purpose gluten free flour blend, (I highly recommend Better Batter; please click thru for full info on appropriate blends), plus more for sprinkling
- 2 teaspoons xanthan gum, omit if your blend already contains it
- ¼ cup (36) tapioca starch/flour
- ½ cup (43 g) dry milk powder, or buttermilk powder; make sure it's powder, not liquid!
- 2 teaspoons (6 g) instant yeast
- ¼ teaspoon cream of tartar
- ¼ teaspoon baking soda
- 2 tablespoons (26 g) packed light brown sugar
- 1 teaspoon kosher salt
- 1 teaspoon apple cider vinegar
- 4 tablespoons (56 g) unsalted butter, at room temperature
- 1 (50 g (weighed out of shell)) egg, at room temperature, beaten
- 1 ¼ cups (10 ounces) warm milk, about 95°F (plus a bit more, only as necessary)
For the filling
- 4 tablespoons (56 g) unsalted butter, at room temperature
- ¾ cup (164 g) packed light brown sugar
- 1 teaspoon ground cinnamon
For an optional glaze
- 1 cup (115 g) confectioners' sugar, sifted
- 1 tablespoon milk, any kind, plus more by the 1/4 teaspoonful
For an optional frosting
- 6 tablespoons (84 g) unsalted butter, at room temperature
- 2 cups (230 g) confectioners' sugar, sifted
- 3 tablespoons heavy whipping cream, at room temperature, plus more as necessary
Instructions
- Grease a 9-inch x 13-inch casserole dish and set it aside.
Make the dough.
- In the bowl of a stand mixer fitted with the paddle attachment, place the flour, xanthan gum, tapioca starch, milk powder, yeast, cream of tartar, baking soda and sugar in the bowl of your stand mixer. Whisk to combine well with a separate, handheld whisk.
- Add the salt, and whisk with a separate whisk again to combine well.
- Add the cider vinegar, butter, and egg, and milk, and mix to combine well.
- Turn the mixer up to high and let it work for about 3 minutes. If necessary to help the mixture become smooth and cohesive, add more milk by the drop, only as essential to bring the dough together.
- The dough will be moist but continue to mix until the dough starts to pull away from the sides of the bowl in spots.
- To make the dough easier to handle, transfer it to a sealed container and refrigerate it for 30 minutes.
Roll out the dough.
- Turn the chilled dough out onto a flat, lightly floured surface. Sprinkle it with some extra flour and knead it gently until it’s somewhat smoother.
- Divide the dough in half, and place one half under a tea towel to prevent it from drying out.
- Using a rolling pin and sprinkling lightly with flour as necessary to prevent sticking, roll the remaining half of dough into a rectangular shape about 1/2-inch thick, and about 9 inches wide x 12-inches long.
Add the filling and shape the dough, one piece at a time.
- Beginning with the first piece of dough and using an offset spatula or spoon, spread half of the softened butter all around the rectangle, leaving 1-inch border clean all around.
- Sprinkle with half of the brown sugar evenly on top of the butter and pat the brown sugar down lightly with your fingers to help it stick to the butter. Sprinkle the cinnamon evenly on top of the sugar.
- Starting at a short side, roll the dough tightly into a coil. Using a piece of unwaxed dental floss or thread or a very sharp knife, cut rolls in cross-section each about 2-inches wide.
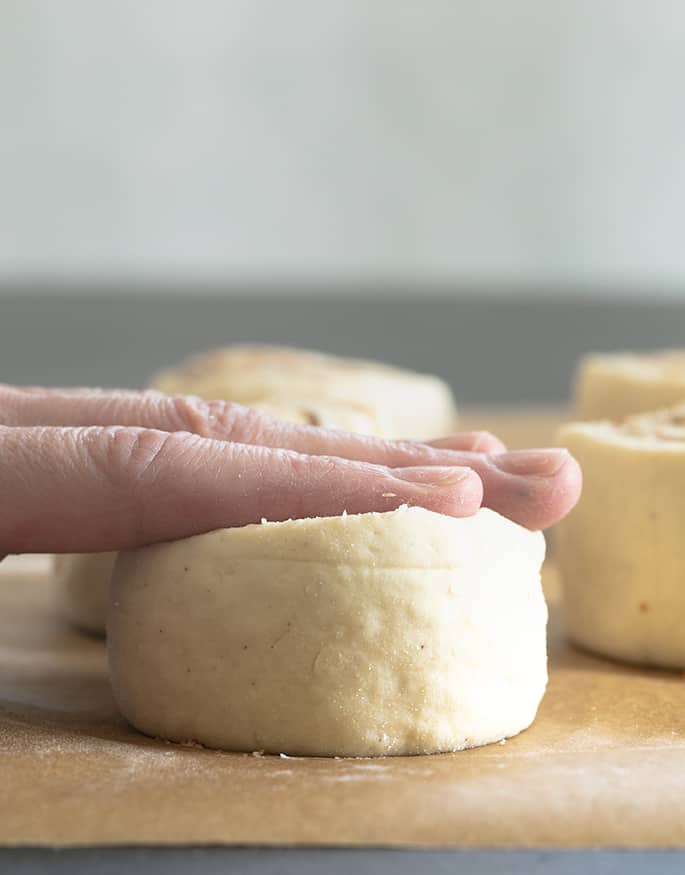
- Place the rolls in the prepared baking pan, about 1-inch apart. Apply even pressure to the top of each roll with your fingers to compress the coil about 1/3 of the way down.
- Repeat the process with the other half of the dough, and the other half of the softened butter and brown sugar.
Let the rolls rise.
- Cover the pan with lightly oiled plastic wrap and set in a warm, draft-free location to rise until about 150% its original size. It should take about 45 minutes, but may take longer in a cold, dry environment.
Bake the rolls.
- When the dough is nearing the end of its rise, preheat your oven to 350°F. Remove the plastic wrap and place the pan in the center of the preheated oven.
- Bake for about 20 minutes or until the cinnamon rolls are risen, just beginning to brown on top and cooked all the way through. Remove from the oven and let the rolls cool for about 10 minutes.
- If you plan to add the glaze (or frosting), make it right when the rolls come out of the oven so you can add it when they're still warm.
Make the (optional) glaze.
- In a small bowl, place the confectioners’ sugar and milk. Mix well, until a thick paste forms.
- Add more milk by the 1/4-teaspoon, mixing to combine well, until the glaze falls off the spoon slowly, in a thick but pourable glaze.
- Drizzle the glaze on top of the warm rolls and allow to set briefly before serving.
Make the (optional) frosting.
- In a medium-size bowl, place the butter and confectioners' sugar, and use a handheld mixer to beat first on low speed until well-combined.
- Increase the mixer speed to medium. The mixture will first clump, and then smooth out.
- With the mixer running, add 2 tablespoons of cream to thin the frosting so it's easily spreadable. Add more cream if you'd like a thinner, more spreadable frosting.
- Spread the frosting generously on top of the warm rolls and allow to set briefly before serving.
Notes
Nutrition
Nutrition information is automatically calculated, so should only be used as an approximation.




More difficult non-dairy challenge.
My wife is allergic to dairy and coconut, so powdered coconut milk won’t work either. (Nor will most nuts)
Do you have any other thoughts about that ingredient.
Understand if you don’t, just curious if you have some thoughts.
I’m afraid I don’t know of a coconut-free nondairy powdered milk substitute that would reliably work in baking, no. There are powdered plant-based milks that are sold today, but those aren’t really comparable to dairy milk. Soy milk powder might be one to try, but soy products tend to create tough (meaning, the opposite of tender) baked goods. Sorry I can’t help more!
Just made these for the first time. Most of the butter and cinnamon came out and is covering the bottom of the pan. What did I do wrong?
I’m afraid I really can’t know what happened. The thing that’s most likely is if you didn’t roll the dough large enough, which led you to pack too much filling into a too-small roll. That, and not rolling it tightly to properly seal the dough, or using butter that was too warm and melty before it even went into the oven. Those are just a few possibilities.
This dough was outrageously sticky. Followed the recipe with neurotic exactness because I was really stoked for this. I can’t tell you what went wrong, but it was non-workable in the state I had it. I even did all the extra things recommended in the text. But yeah. Even with the floured work surface and what not, it was sticking to my fingers, the table, the roller. Simply way too wet. Frustrating. Used the recommended flour and all.
When you say you used the recommended flour, Brady, are you speaking about Better Batter? And did you measure by weight, not volume? I also suspect that some people are using actual liquid buttermilk, instead of buttermilk powder, which would absolutely be too much moisture. It’s common to assume that they’re interchangeable, but they’re definitely not. Happy to try to help troubleshoot more, but I’d need more info!
I attempted this recipe 3 times and today I’ve finally had complete success! The only difference I made is I found more success letting it rise first, then rolling it out. Otherwise this is an amazing recipe and I appreciate your thoroughness in creating this, it helped a ton!
I have a lot of experience baking GF. I Tried it twice with two different flour blends (Cup4cup and King Arthur) first batch was sticky and unusable. Second batch was a little better because I left out about 1/2 cup of the water. And everything was measured by volume including the water-and I always balance my scale before baking. Dough simply stuck to everything even adding probably an extra 1/2 to 1 cup of flour in the kneading process. Rolling out was a laughable process and there’s nowhere near enough dough to get two 9×12 rectangles with 1/2 inch thickness. Holes everywhere when I tried to roll them. I’m sure there’s a great GF cinnamon roll recipe out there. I’m also certain it’s not this one.
That sounds very frustrating, Kelly, but I’m afraid I really can’t tell why or how this recipe didn’t turn out for you. The time that you used King Arthur Flour, that’s one of the brands that I recommend very strongly against, and performs particularly poorly with yeast applications (by their own admission, even, I believe). I also imagine that, since you used that blend at all and particularly in yeast bread, you haven’t clicked through to my all purpose gluten free flour blends page, where I explicitly caution against using that blend.
I haven’t tried this particular recipe with Cup4Cup, which is generally best suited to pastry applications as it’s very high in starch, but I suspect that’s the issue—plus if you didn’t use the buttermilk blend, or made other ingredient substitutions, which you didn’t say (and is very very common). I’ve checked and double-checked all the ingredients, thinking that perhaps I made an error in transferring this to a new recipe format, but it’s correct. This is one of the oldest recipes on the site, and has worked every single time I’ve made it with Better Batter or my mock Better Batter, and it will work when made with that blend. But I will test it with Cup4Cup and report back if there are any modifications that I find useful (or just with my results).
Since you’re certain that this isn’t a good recipe, which of course I disagree with, clearly you aren’t interested in troubleshooting. But the recipe does work when made as written, and I will report back for others’ benefit with my results with Cup4Cup.
No other substitutions, used the buttermilk powder per the recipe. I used KA All Purpose flour, not measure for measure, which I have frequently used VERy successfully in yeasted applications. My go to bread and dinner rolls are made with it and it works amazingly. Lots of other people seem to have the same complaint including that new review, sounds like you aren’t interested in fixing your recipe that many say is bad.
You simply can’t use King Arthur Flour in my recipes at all, Kelly. It won’t work. There’s nothing to “fix” in a recipe when I state clearly and unequivocally that the flour you’re using won’t work. That company even recommends against using that flour in yeast breads. At least now I know what happened. I’ve been checking, double-checking, and triple-checking this recipe, and made it again last week. It’s your flour. The recipe isn’t “bad,” and it has 4.95 stars from 210 votes. I’m not perfect and I make mistakes sometimes. But I’ve vetted this recipe, and read and considered your comments. This isn’t one of those times!
Hi Nicole,
Just curious if you ended up trying this recipe with Cup4Cup? I tried using it the other day and the dough was much too wet and sticky. Would love your feedback on how to adjust the recipe for this particular flour brand.
Thanks!
No, I haven’t tried this recipe with Cup4Cup, but as I explain on the all purpose gluten free flour blend page on the blog, Cup4Cup is best for pastries.
my yeast did not rise. i will not mix with flour again. it needs hot water and sugar to grow then flour
Leslie, that sounds frustrating, but your statement isn’t correct. Instant yeast, which this recipe calls for, does not need to be proofed. If you used active dry yeast, it must be proofed, and you’d need more of it, both of which are explained in the post.
I have a severe allergy to apples in any form, so can you use regular vinegar instead of apple cider vinegar in your baking.
What is the difference?
I discuss how to replace the apple cider vinegar in the Ingredients and Substitutions section of the post, Nancy. Apple cider vinegar adds a nice tangy flavor to baked goods, and helps activate chemical leaveners for additional lift.
Do you have to use butter? Due to allergies Would vegan margarine work
Please see the dairy-free subheading in the ingredients and substitutions section of the blog post, Elma. I always provide information on how to avoid dairy in that section of each post.
Where do I get the gluten free flour?
Please follow the link in the recipe for all purpose gluten free flour for full information, Louise.
Hi Nicole. I am so very excited to try out your recipe! My question is: Under the “Temperature and Time” section, you mention that once the dough is 50% larger, it is considered fully risen. However, in the direction portion of the recipe, you mention that the dough should be left to rise until it is 150% of its original size. My dough is in the rising phase now. I will check on it in an hour, but am confused by the notes.
Lynn, 50% larger is another way of saying 150% of its original size.
What can I substitute the egg with? Or can it be omitted altogether? Both my son and I are allergic to eggs.
Please see the ingredients and substitutions section, Sara, for all the information I have on substitutions!