
This post may contain affiliate links. Please read our disclosure policy.
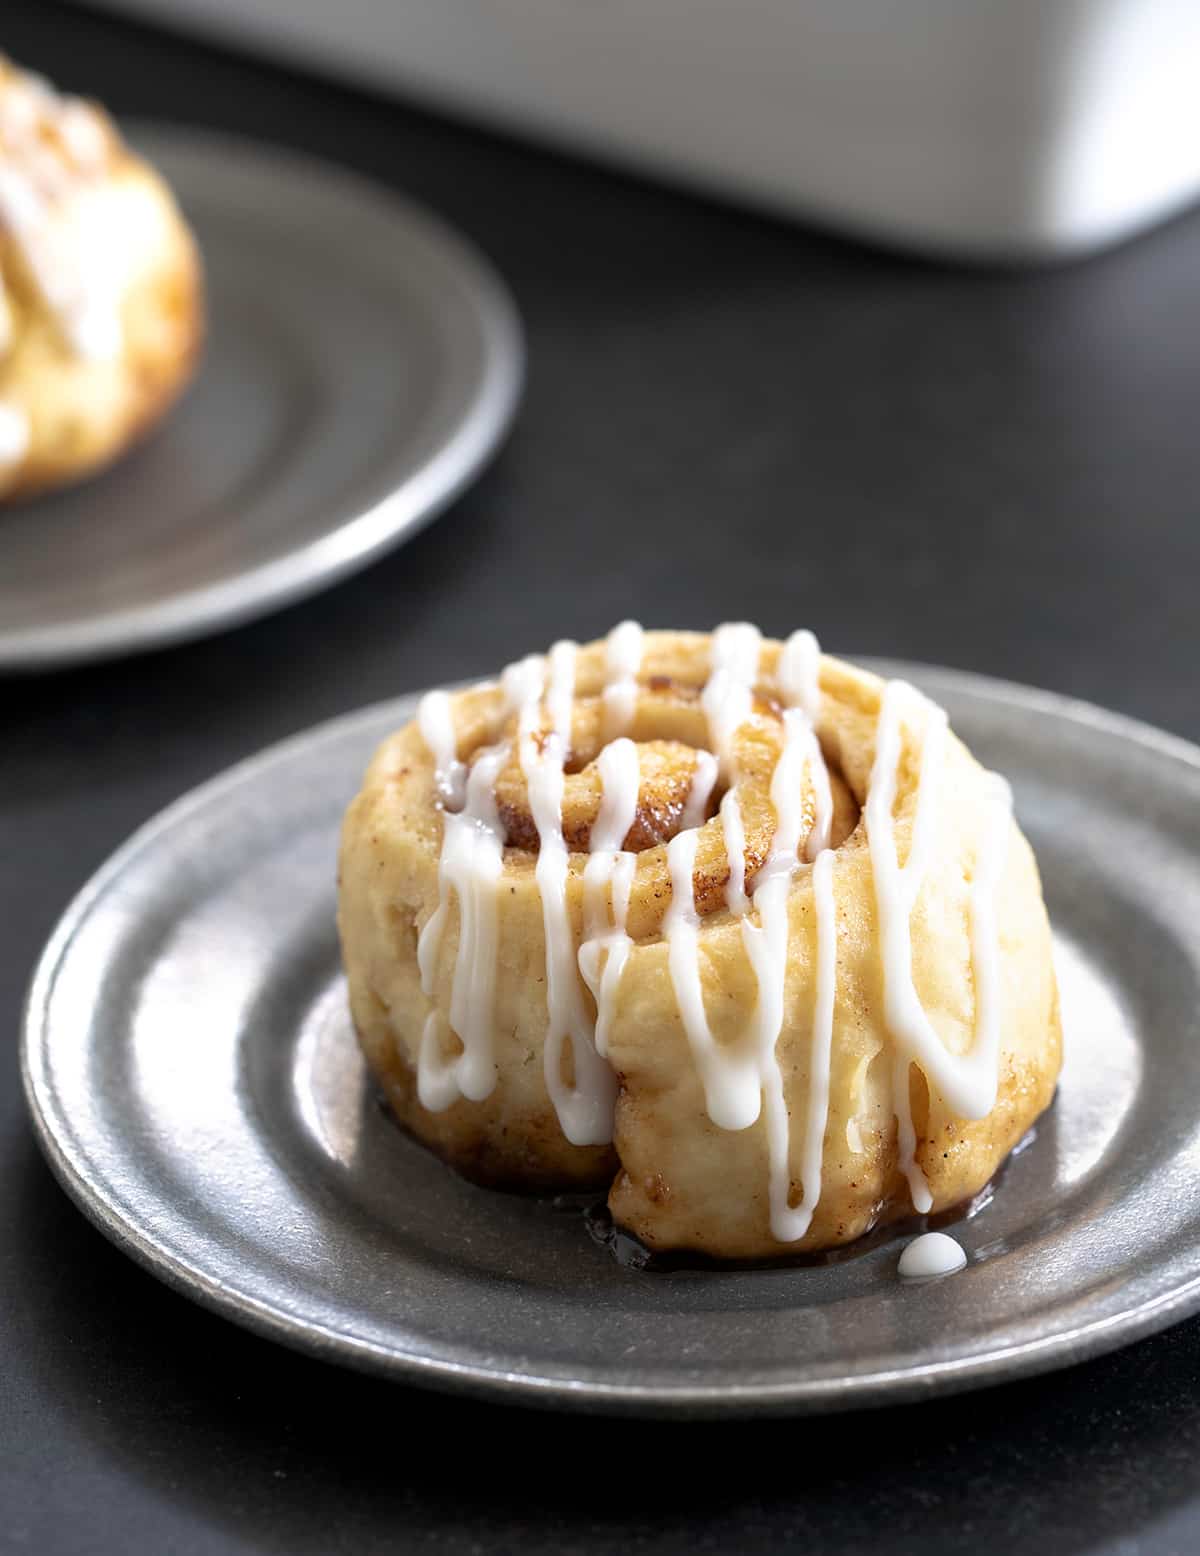
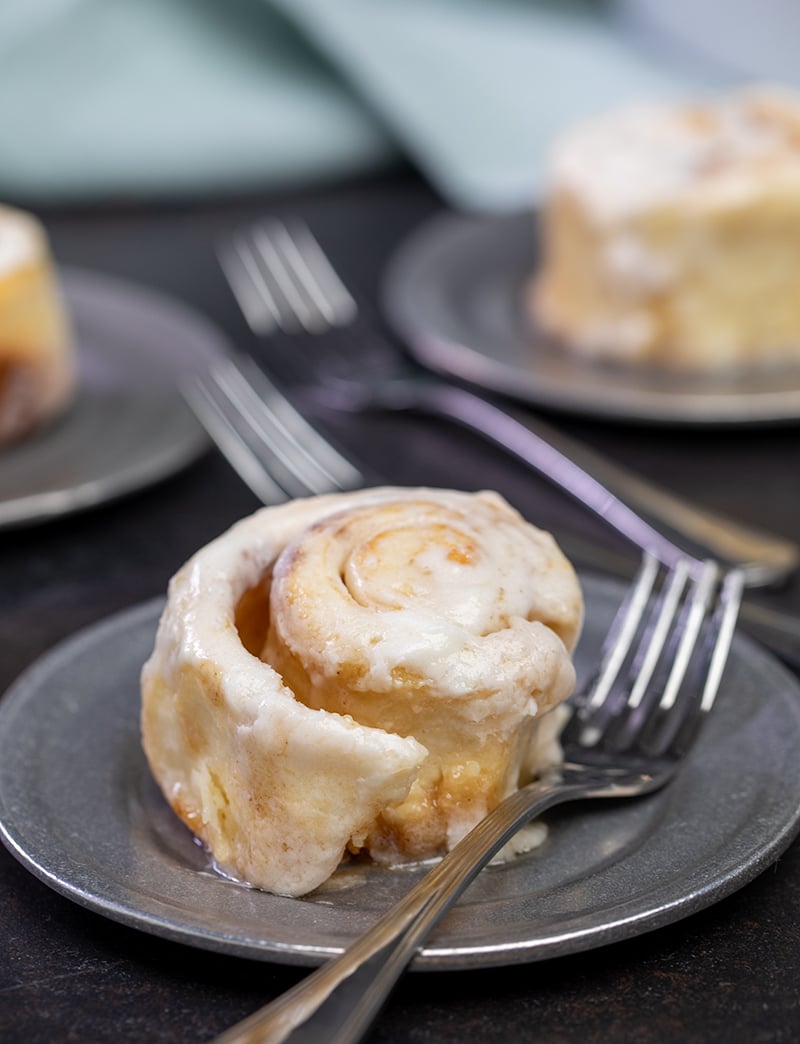
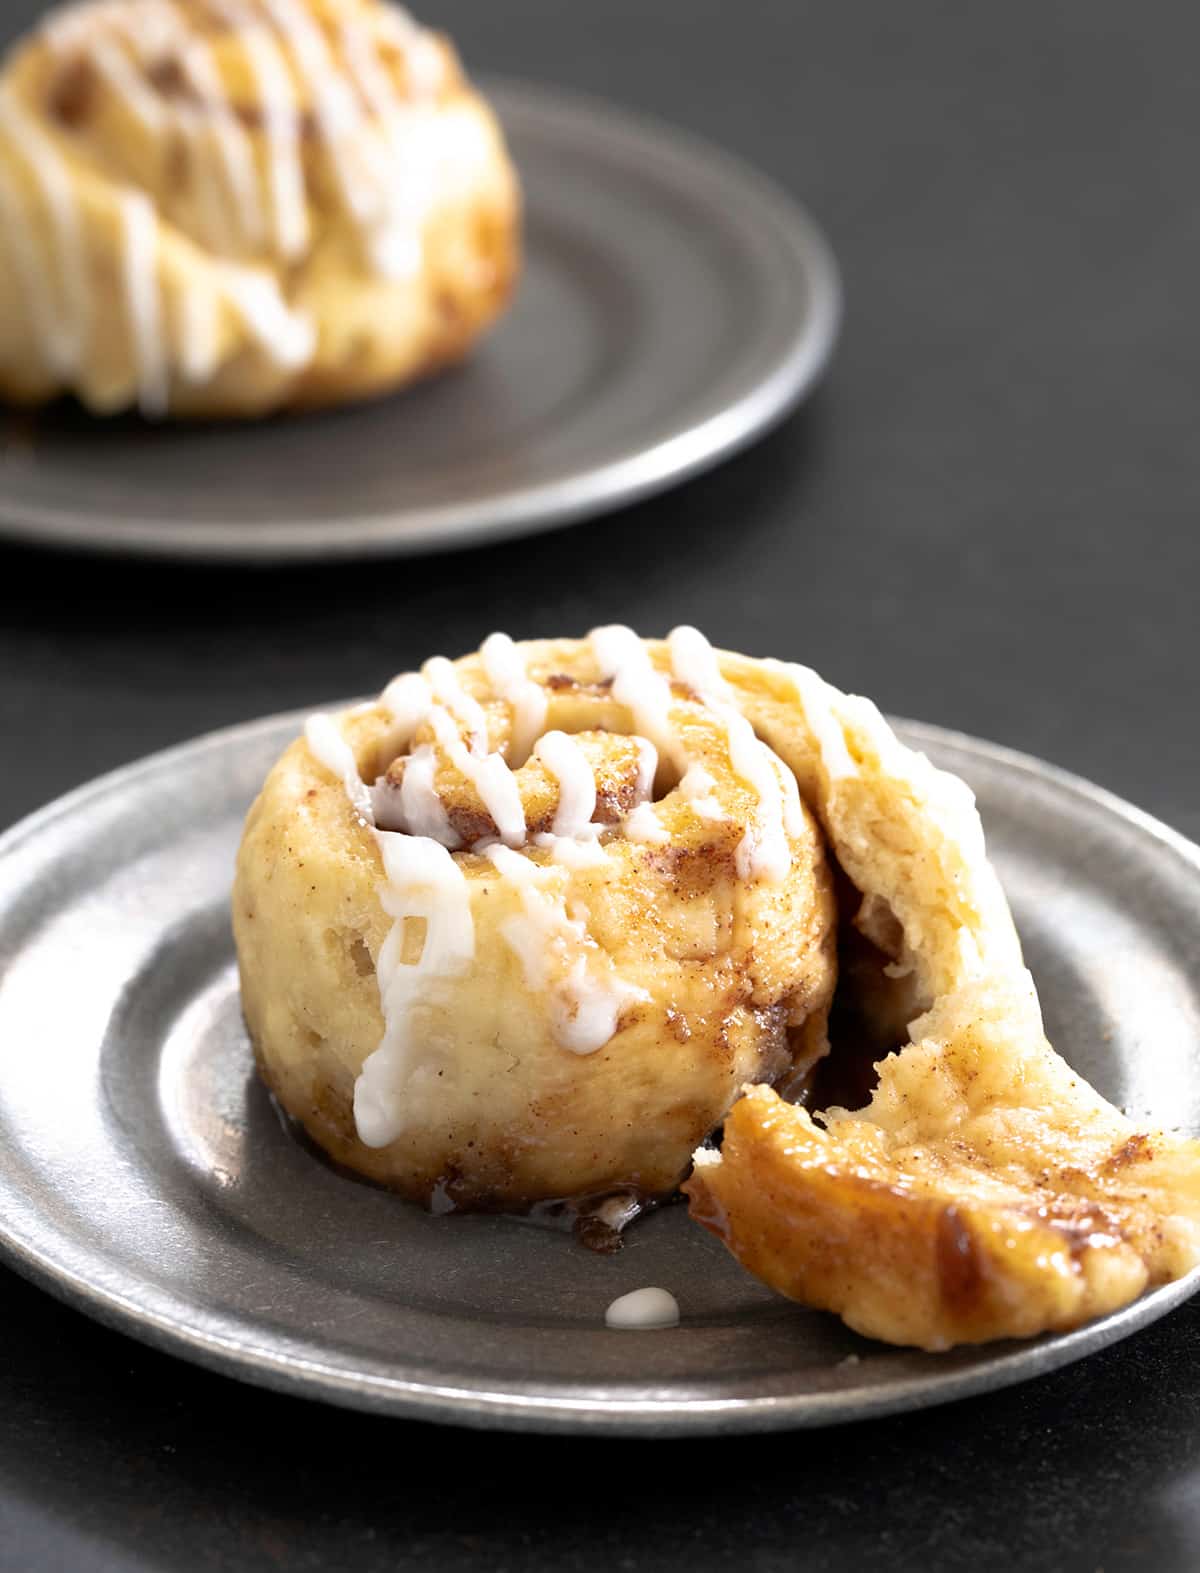
These gluten free cinnamon rolls are soft, gooey, and full of cinnamon-sugar flavor, just like the kind you thought you couldn’t have anymore.
The dough is easy to work with, they rise beautifully, and I've even revised the recipe so you can finally make them ahead of time without the rolls losing their shape!
“OMG! These were incredible. Light, fluffy and the perfect sweet I have been missing. Will definitely make these again.”
Why this recipe works
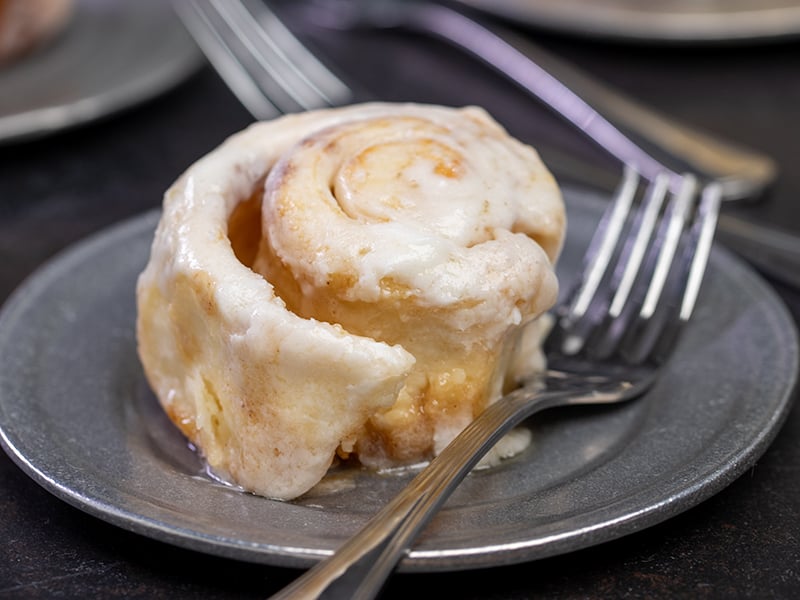
These gluten free cinnamon rolls rise beautifully and have that classic pillowy, tender texture you'd expect from the original. No one will guess they're gluten free.
The dough is easy to make and even easier to shape, especially after a quick chill in the refrigerator. There's just enough balanced sweetness in the rolls to complement the cinnamon, but not so much that you can't enjoy any icing or frosting.
They're also great for making ahead. Parbake and freeze a batch so fresh cinnamon rolls are ready whenever you want them.
Recipe ingredients
Here's what you'll need to make the rolls, the filling, and the topping, plus an explanation of what role each ingredient plays in a successful result:
For the rolls
- Gluten free flour blend: This recipe works well with a high quality blend based on a finely ground and sifted rice flour like Better Batter's original all purpose flour blend, Nicole's Best multipurpose (be sure to add the full 2 teaspoons xanthan gum), or King Arthur Flour's gluten free bread flour (not Measure for Measure or Bob's Red Mill 1-to-1, which aren't meant for yeast bread and won't hold up).
- Tapioca starch: Any well-balanced blend will already have some tapioca, but it's important to add more for extra stretch, resilience and softness.
- Milk powder: Adds richness to the dough and helps with browning in the oven without overbaking and burning.
- Instant yeast: For rise and flavor. Active dry yeast also works if you add about 25% more and proof it first in some of the liquid in the recipe.
- Cream of tartar + baking soda: Work together to help the rolls rise and brown.
- Brown sugar: Adds some depth of flavor and sweetness.
- Salt: Balances and enhances other flavors.
- Apple cider vinegar: Adds a slight tang and helps with lift.
- Butter: Adds buttery flavor, and firms up as you chill the dough for easier shaping.
- Egg: Binds the dough together and gives it some resilience to hold its shape during baking and as the rolls cool.
- Milk: Adds moisture to bring the dough together and some fat for richness. Use full fat cow's milk whenever possible.
For the filling
- Brown sugar + cinnamon: Add the classic flavors and melts for some gooey texture.
- Butter: Softened so it spreads easily, butter helps the cinnamon and sugar adhere to the dough.
For the optional glaze or frosting
- Confectioners’ sugar + milk: The milk hydrates the powdery sugar and added cornstach for a simple pourable glaze that stiffens as it dries.
- Butter + heavy cream: For a thicker, rich frosting. Use at room temp for best texture.
How to make gluten free cinnamon rolls (step by step photos)
Follow along with my directions below to see how to make gluten free cinnamon rolls in your own kitchen, including an explanation of the reason behind each step. For full ingredient amounts, see the recipe card below.
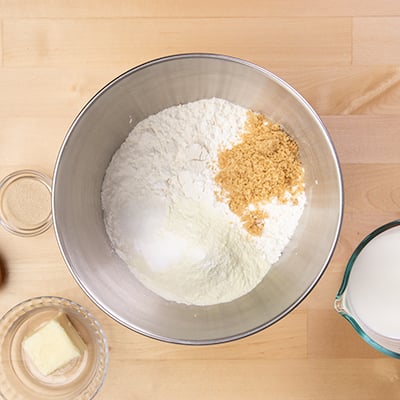
Mix the dry
Use the bowl of a stand mixer but without any attachments at first. Use a handheld whisk to combine all the dry ingredients first except the salt (gluten free flour with xanthan gum, tapioca starch, milk powder, instant yeast, cream of tartar, baking soda, brown sugar). Whisk in the salt alone next to avoid any clumping of the salt with the yeast, since salt inhibits yeast.
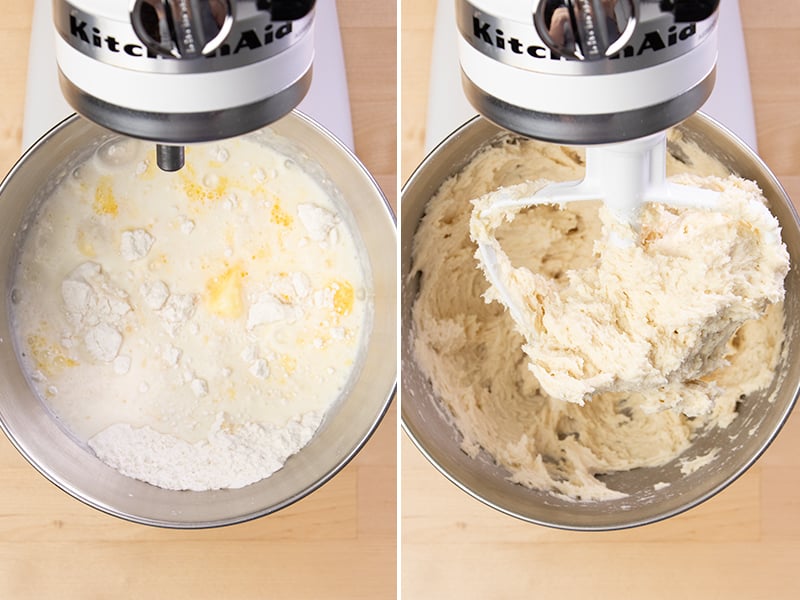
Add wet
Since we're using a stand mixer which will thoroughly blend everything together, add all the wet ingredients (apple cider vinegar, butter, egg, and milk) at once on top.
Beat
Use the paddle attachment to combine everything on low in a stand mixer, then beat on high speed for 3 minutes, or until it appears fluffy and whipped, with air incorporated into it.
Chill the dough
Refrigerate the dough for 30 minutes so it’s easier to handle since the butter will become firm. Make sure the dough is well-covered, though, so it doesn't dry out, which will lower the hydration and the dough's ability to rise.

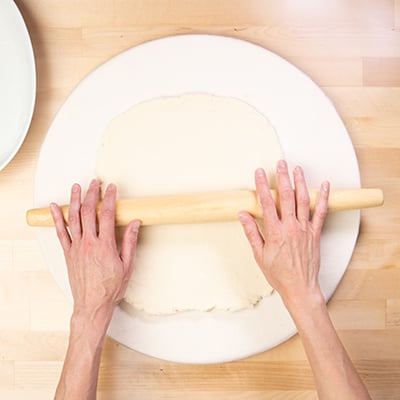
Roll it out
Work with half of the chilled dough at a time to make it less likely to tear. Place the dough on a very lightly floured surface (a canvas-covered board or even a sil-pat will prevent sticking with little to no added flour).
Use a tapered rolling pin to roll each half into a 9×12-inch rectangle about ½-inch thick. If the dough seems very uneven, gather it together again, sprinkle it very lightly with extra flour and roll it again.
Spread with butter
Use a small offset spatula to spread the whole top of the dough with half of the softened butter in a thin, even layer.
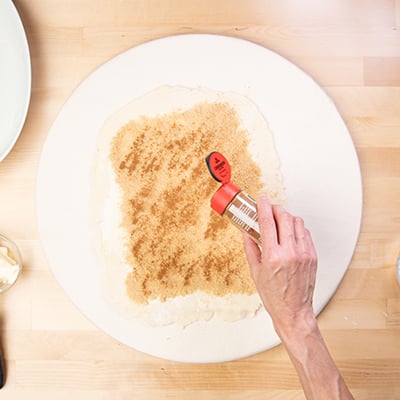
Add the cinnamon-sugar
Add the brown sugar, ground cinnamon and a touch of flour to help the filling thicken and not leak as much. Pat the filling down gently to help it stick.
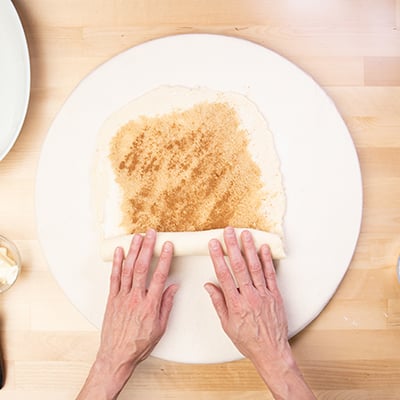
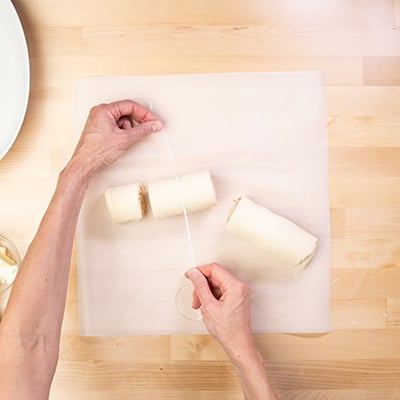
Shape the rolls
Roll the dough tightly from a short side into a coil. Slice into 6 even pieces using dental floss or a saw gently with a serrated knife to avoid tearing the dough, creating uneven edges.
Repeat with the other half.
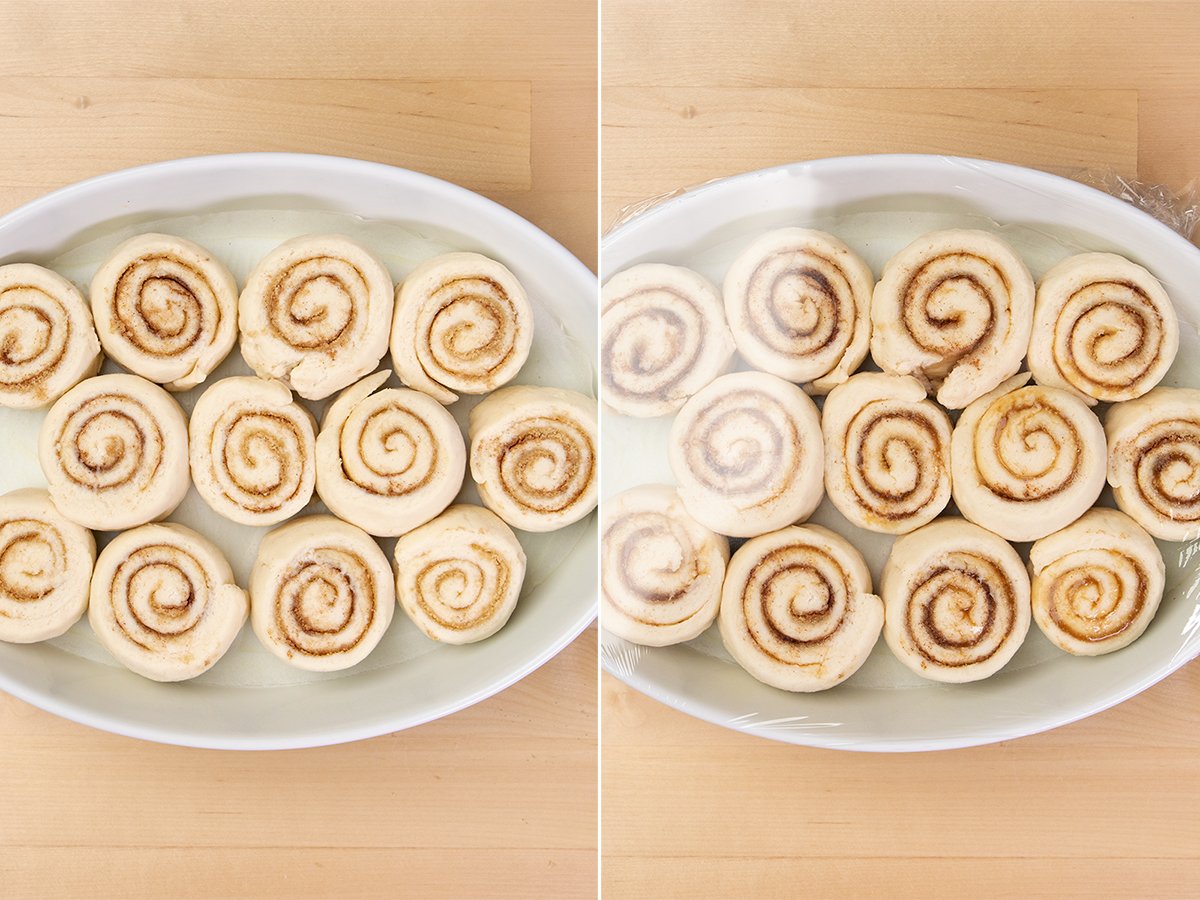
Let them rise
Place the rolls with the end pieces cut side up for a smooth rise, touching, in a greased baking dish, and cover with plastic wrap to avoid moisture evaporation, which would prevent a proper rise.
Let the rolls rise until puffy, about 50% larger, not doubled. Once the dough starts to take on a pockmarked appearance, it's beginning to overproof and should go right into the oven.
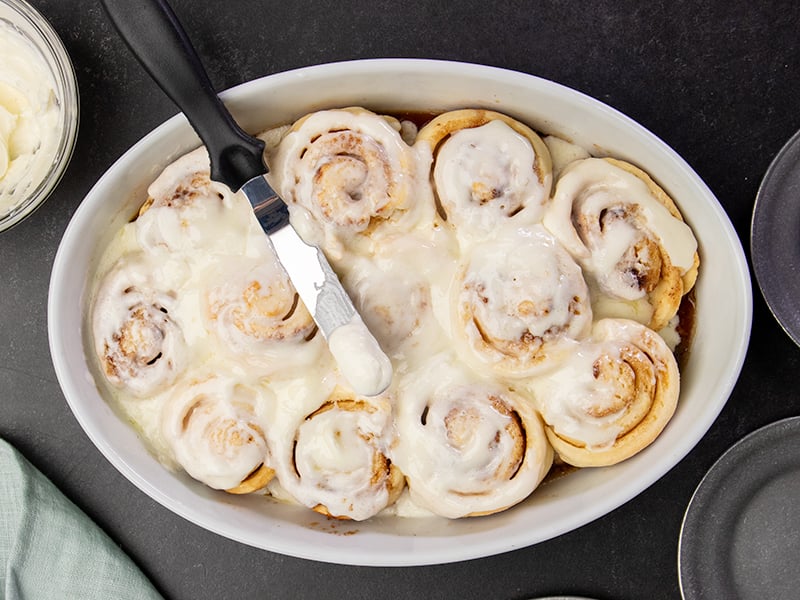
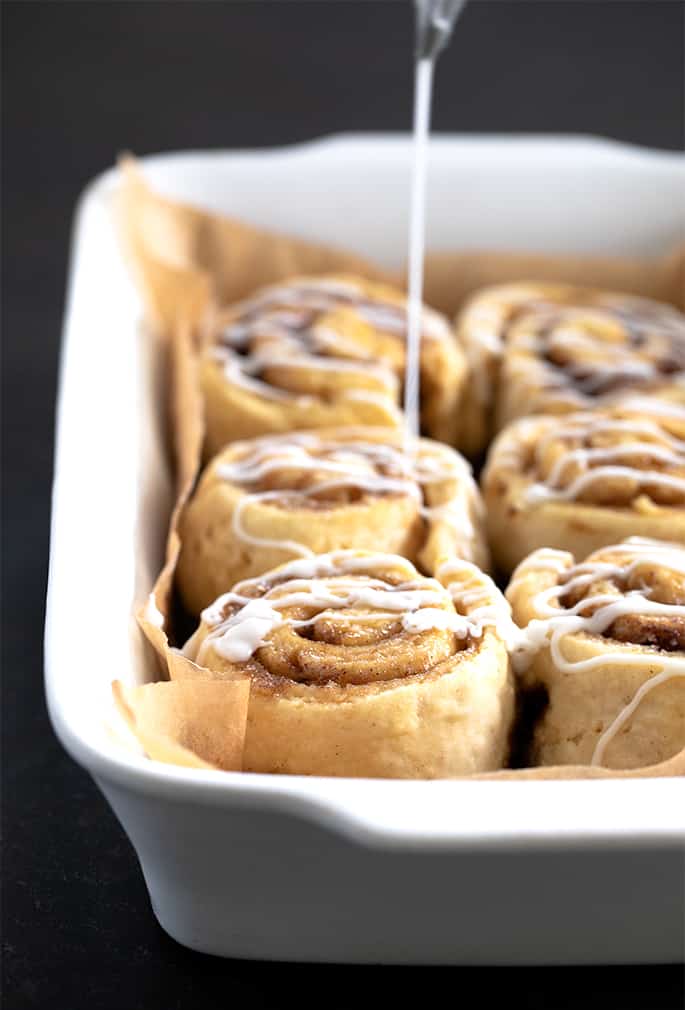
Bake and frost
Bake at 350°F until risen and lightly golden. The rolls should read about 190°F on an instant read thermometer. While still warm, top with glaze or frosting, if using.
Expert tips
Work with cold dough
Cold dough is easier to handle, and you're less likely to add extra flour, lowering the hydration ratio and leading to dense rolls that don't rise fully. The hydration ratio here, or how much water there is compared to how much flour, is at about 58%. That's relatively low for gluten free dough since gluten free flours absorb a lot of moisture, and it's how we keep the rise controlled and stable.
Don't overproof
They should rise to about 50% bigger, not double. Overproofed rolls lose structure and bake up flat. You'll know they're beginning to overproof when the tops start to look cratered. Bake them right away.
Roll evenly
A ½-inch thickness gives the best swirl without tearing the dough or losing too much filling during baking.
Slice cleanly
Try using unwaxed, unflavored dental floss to cut slices without compressing the rolls. If using a knife, use a serrated knife and saw gently back and forth so you exert very little pressure, which can collapse the rolls.
Ingredient substitutions
Dairy free
Use powdered coconut milk in place of milk powder. Substitute vegan butter for dairy butter, and choose a nondairy milk with fat (like almond milk, not fat-free).
Egg free
Replace the egg with a chia egg (1 tablespoon ground white chia seeds + 1 tablespoon lukewarm water, mixed and gelled).
Apple cider vinegar/cream of tartar
Use white wine vinegar instead of apple cider vinegar, and lemon juice (½ teaspoon) in place of cream of tartar.
Instant yeast
You must use commercial yeast in this recipe, but to replace instant yeast with active dry yeast, you need 25% more, by weight, for a total of 8 grams, and to dissolve it first in the warm milk in the recipe.
Parbake and freeze
To make fresh cinnamon rolls in the morning without overproofing, follow these steps:
- Shape the rolls and let them rise as usual.
- Bake at 300°F for 15 minutes—until puffed but very pale.
- Let cool completely, then wrap tightly and freeze.
- When ready to serve, defrost at room temp.
- Bake at 350°F for about 10 minutes, until browned and bubbling.
Gluten Free Cinnamon Roll Recipe
Equipment
- Stand mixer with paddle attachment
Ingredients
For the rolls
- 3 cups (420 g) all purpose gluten free flour blend, (See Recipe Notes), plus more for sprinkling
- 2 teaspoons xanthan gum, omit if your blend already contains it
- ¼ cup (36) tapioca starch/flour
- ½ cup (43 g) dry milk powder, or buttermilk powder; make sure it's powder, not liquid!
- 3 teaspoons (6 g) instant yeast
- ¼ teaspoon cream of tartar
- ¼ teaspoon baking soda
- 2 tablespoons (26 g) packed light brown sugar
- 1 teaspoon kosher salt
- 1 teaspoon apple cider vinegar
- 4 tablespoons (56 g) unsalted butter, at room temperature
- 1 (50 g (weighed out of shell)) egg, at room temperature, beaten
- 1 ¼ cups (10 ounces) warm milk, about 95°F (plus a bit more, only as necessary)
For the filling
- 4 tablespoons (56 g) unsalted butter, at room temperature
- ¾ cup (164 g) packed light brown sugar
- 1 teaspoon ground cinnamon
- 1 teaspoon (3 g) gluten free flour, you can use more all purpose gluten free flour, tapioca starch, superfine rice flour, or arrowroot
For an optional glaze
- 1 cup (115 g) confectioners' sugar, sifted
- 1 tablespoon milk, any kind, plus more by the 1/4 teaspoonful
For an optional frosting
- 6 tablespoons (84 g) unsalted butter, at room temperature
- 2 cups (230 g) confectioners' sugar, sifted
- 3 tablespoons heavy whipping cream, at room temperature, plus more as necessary
Instructions
- Grease a 9-inch x 13-inch casserole dish and set it aside.
Make the dough
- In the bowl of a stand mixer fitted with the paddle, whisk together the flour, xanthan gum, tapioca starch, milk powder, yeast, cream of tartar, baking soda, and sugar. Add the salt and whisk again.
- Add the vinegar, butter, egg, and milk, and mix to combine.
- Increase the mixer speed to high and beat for about 3 minutes, until the dough is fluffy and has a shaggy whipped appearance from air being incorporated into it.
- Transfer the dough to a sealed container, and refrigerate for 30 minutes to make it easier to handle.
Roll out the dough
- Turn the chilled dough onto a lightly floured surface and knead gently to smooth.
- Divide in half, keeping one half covered. Roll the other into a 9×12-inch rectangle about ½ inch thick, dusting with flour as needed.
Add the filling and shape
- Spread half the softened butter over the dough, leaving a 1-inch border.
- In a small bowl, combine brown sugar, cinnamon and flour, and mix to combine without compressing the sugar.
- Sprinkle the dough evenly with half the cinnamon and sugar mixture and pat it down gently to help it adhere.
- Starting from a short side, roll the dough tightly into a coil. Slice into 6 rolls using floss or a sharp knife.
- Place in a greased 9×13-inch pan, 1 inch apart. Press each roll down about ⅓ of the way to flatten slightly.
- Repeat with the second half of the dough and the remaining filling.
Let rise
- Cover the pan with lightly oiled plastic wrap. Let rise in a warm spot until the rolls are about 50% larger (about 45 minutes).
Bake
- Preheat the oven to 350°F.
- Remove the plastic wrap and bake for 20 minutes, until risen, lightly golden, and baked through (about 190°F on an instant read thermometer)
- Let cool for 5 to 10 minutes before icing or frosting, but no longer.
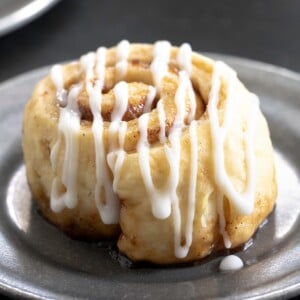
Optional glaze.
- Whisk together confectioners’ sugar and milk until thick but pourable. Add more milk ¼ teaspoon at a time if needed.
- Drizzle over warm rolls.
Optional frosting
- Beat butter and confectioners’ sugar until smooth. Add cream gradually to reach a spreadable consistency.
- Spread generously over warm rolls.
Video
Notes
Nutrition
Nutrition information is automatically calculated, so should only be used as an approximation.
Storage instructions
Let the rolls cool completely before storing. Wrap tightly and freeze in a single layer before adding glaze.
To reheat, defrost at room temp, sprinkle with a bit of water, and warm in a 275°F oven until soft and heated through.
FAQs
Be patient. Gluten free yeast dough takes time to rise and usually won’t double. If they seem stalled, the environment may be too cold.
Most likely causes: too much flour during shaping or not enough proofing time. Make sure to let the dough rise until noticeably puffy.
Check that you used the correct flour blend, measured by weight, and used dry milk powder—not liquid. Sticky dough often means it’s overhydrated.
They may have overbaked, or the flour blend may have absorbed too much moisture. Avoid adding extra flour while shaping.


Hi Nicole can I use your better than cup for cup flour mix for the cinnamon buns
Hi, Shirley, yes, that should work just fine since this recipe calls for an all purpose gluten free flour blend and that’s one of my recommended blends. Just be sure to measure by weight!
Hello Nicole,
I’ve made these and had trouble with the flour most likely. I’m in Australia and blend my own gluten free flours (yes, I know). I bravely tried this with your recipe and used a fine brown rice flour mixed with tapioca flour and xanthum gum. I used the same weights as in your recipe. The mix looked very similar to yours, but after chilling it was still *very* sticky and impossible to form into a ball and no way I was going to be able to roll it out. I ended up patting it out with lots of flour under it and managed to add the toppings and roll it up. Any advice for someone who makes their own flour mixes so they can have some success with this kind of recipe??!
Hi, Helen, glad you enjoyed the rolls, but you unfortunately found out the hard way that just using weights isn’t enough to make a well balanced gluten free flour blend. I developed my mock Better Batter for exactly this reason, so readers outside the U.S. who can’t get the blends I recommend purchasing in the States can bake the same way. Please see the all purpose gluten free flour blends page for full information.
Thank you – I didn’t realise that was a recipe!
Great!
Could I refrigerate the cinnamon rolls overnight and then bake in the morning for fresh rolls or would they over proof in the fridge? Excited to try these for Christmas morning! I haven’t had a cinnamon roll in years!
I’m afraid I don’t recommend that, no, Alicia, since they will overproof and then fall as they cool.
Hi Nicole. Would you have any tips for baking gluten free with the Ankarsrum assistant?
Your input will be greatly appreciated.
I have been a fan of your recipes for years. Thank you for all of them!
Hi, Ruthe, I had never heard of that mixer (I had to google it to see what it even was!), so I honestly don’t know. If it has a paddle attachment that looks and behaves like the KitchenAid stand mixer, then it should work. Thank you for the kind words!
I love my Ankarsrum mixer and use the dough hook as regular. I have been GF since 2006
Can I make this without the egg?
Please see the text of the post under “Ingredient substitutions,” “Egg-free” for my suggestions, Emma.
I made your cinnamon rolls, and they were awesome! The best GF ones of any that I’ve attempted, so THANK YOU for your expertise and recipe. My question today is if you have ever tried the recipe using Authentic Foods gluten free “Steve’s Bread Flour” for these? I happen to have a couple bags of this flour on hand, and have heard it is very finely ground and good quality. My celiac hubby is asking for another batch of your cinnamon rolls, and I’d like to use up my bread flour on hand, if possible. Thanks so much for any advice or input. And thanks again for all of your gluten free labor of love (and food!) Grandma
Hi, there, Grandma to 4, you’re very welcome! I’m so glad you enjoyed the cinnamon rolls so much! I’m afraid that I’ve never tried that blend. I have heard good things about it, but I would stick to a recipe created to be used with that blend in particular to use it up, since I wouldn’t want you to waste ingredients.
Can I add apple pie filling to these?
Hi, Traci, I don’t recommend that, no, since I have to imagine something that’s that substantial would leak out during baking. You could instead make these mini apple pie pockets.
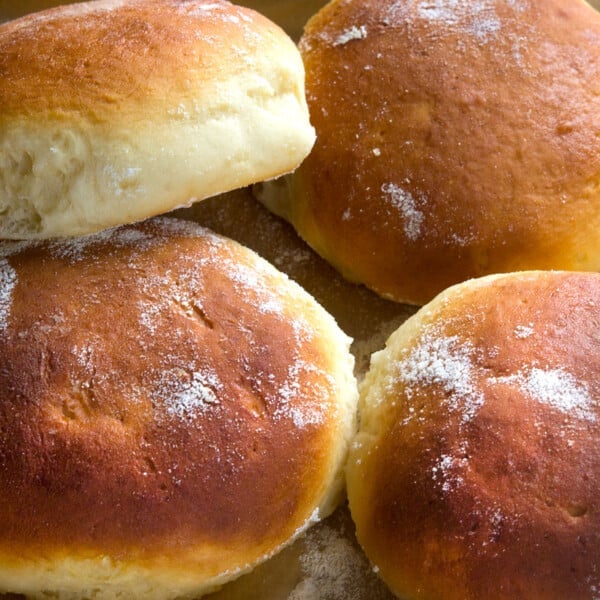
This is a lovely dough to work with. I made crescent rolls just now and they are amazing. So soft & fluffy & delicious. They smell and taste exactly like a Pillsbury Crescent Roll. I make my own flour blend of 44 grams brown rice flour, 44 grams white rice flour, 23 grams potato starch, 23 grams of tapioca flour. I adapted the Mock Better Batter recipe on this site. Yes I know the pectin & potato starch & xanthum gum isn’t in my blend but I don’t keep potato flour & pectin. I’ve used my blend for everything. It makes such a wonderful light fluffy white cake & chocolate cake, cookies. I use my blend for everything & I do a lot of baking. I’ve had no issues with my blend & I can make 3lbs for $15.
Looking forward to trying this recipe! Have you tested Walmarts Great Value brand gluten free ap flour? Would you recommend it for this recipe?
Hi, Mandi, I’m afraid I haven’t tried that blend, no, so I can’t say whether or not it will work. Yeast bread is the trickiest type of recipe, and shaped yeast bread even trickier, so I’d hesitate to try this recipe with a flour blend that may not be up to the task.