
This post may contain affiliate links. Please read our disclosure policy.
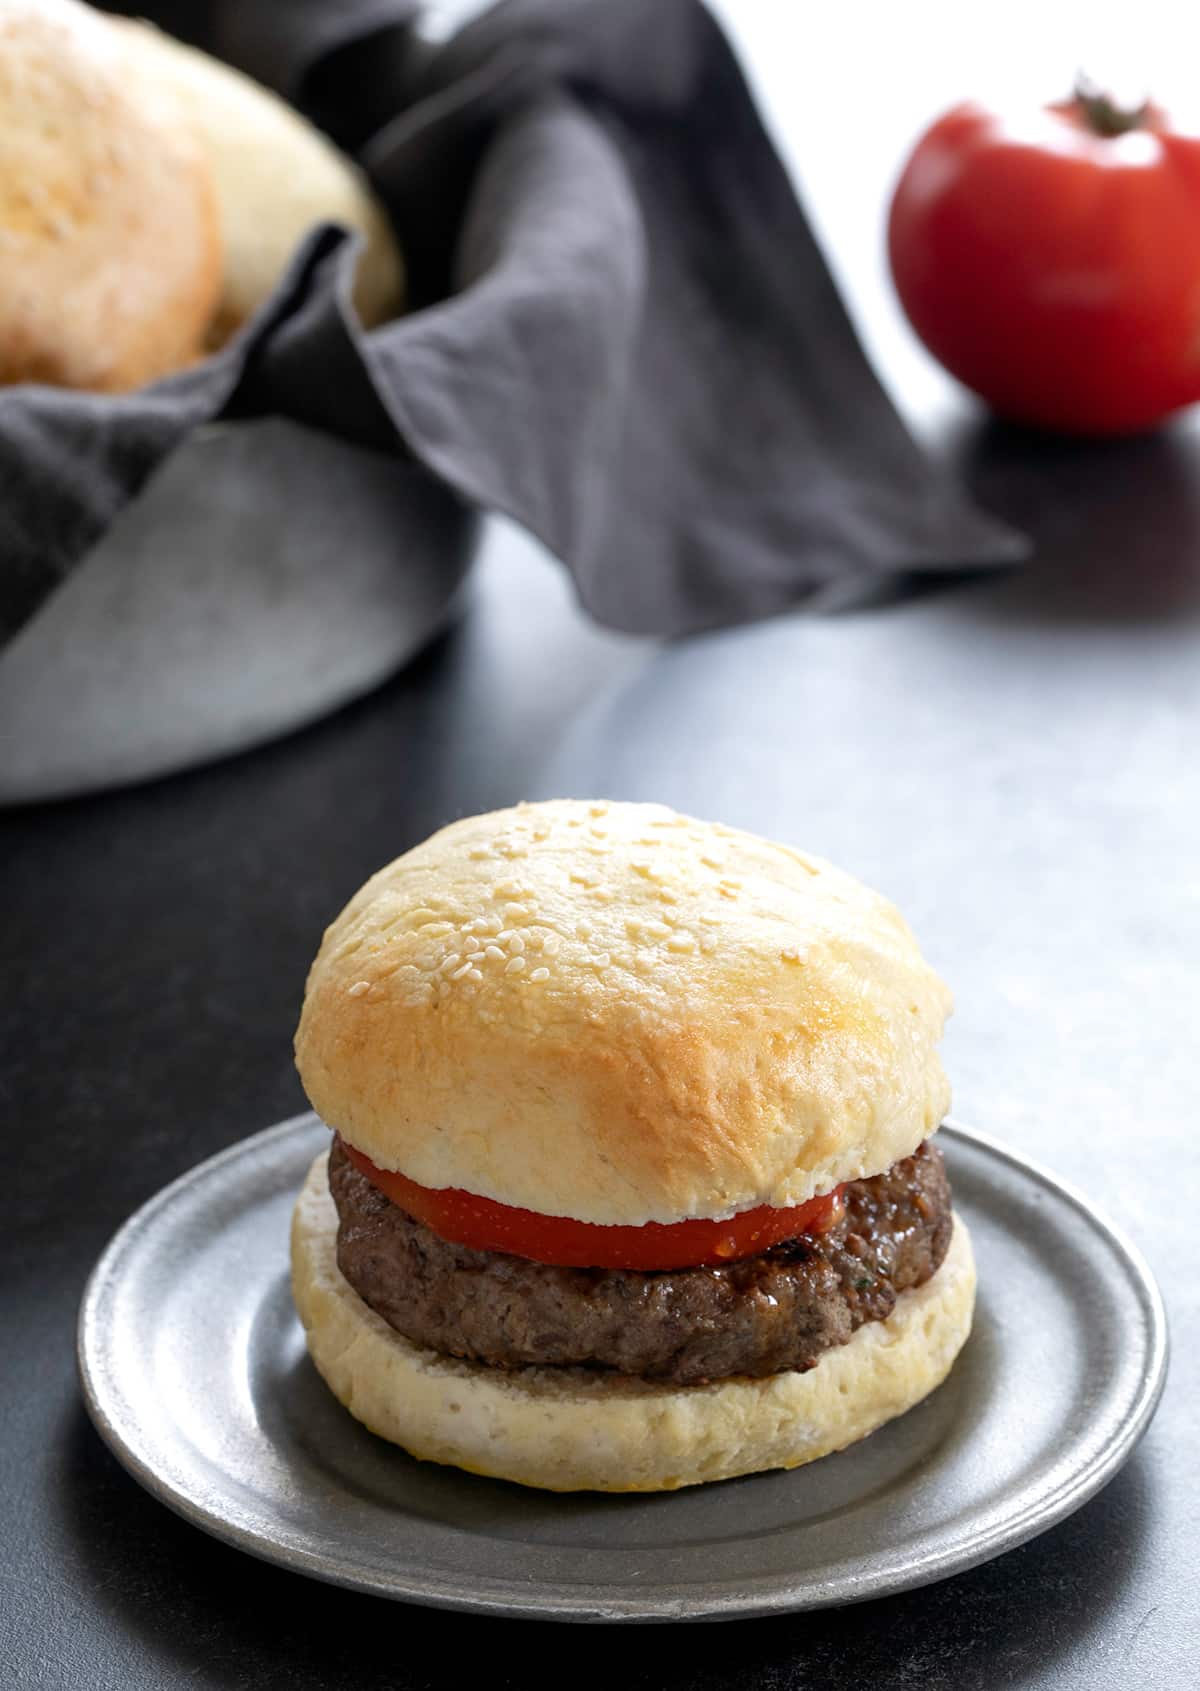
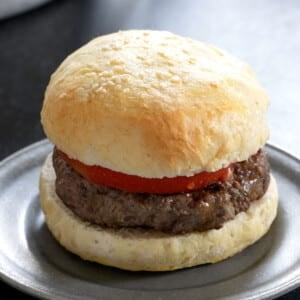
This recipe for gluten free buns is for everyone who has ever eaten a burger on a lettuce wrap and pretended it was “fine.” I love lettuce as much as the next person, but it's not a hamburger bun.
Why you'll love these burger buns
This gluten free bun recipe is very simple, and accommodates other dietary restrictions quite easily. The dough can be made up to 3 days ahead of time, and the baked rolls freeze really well.
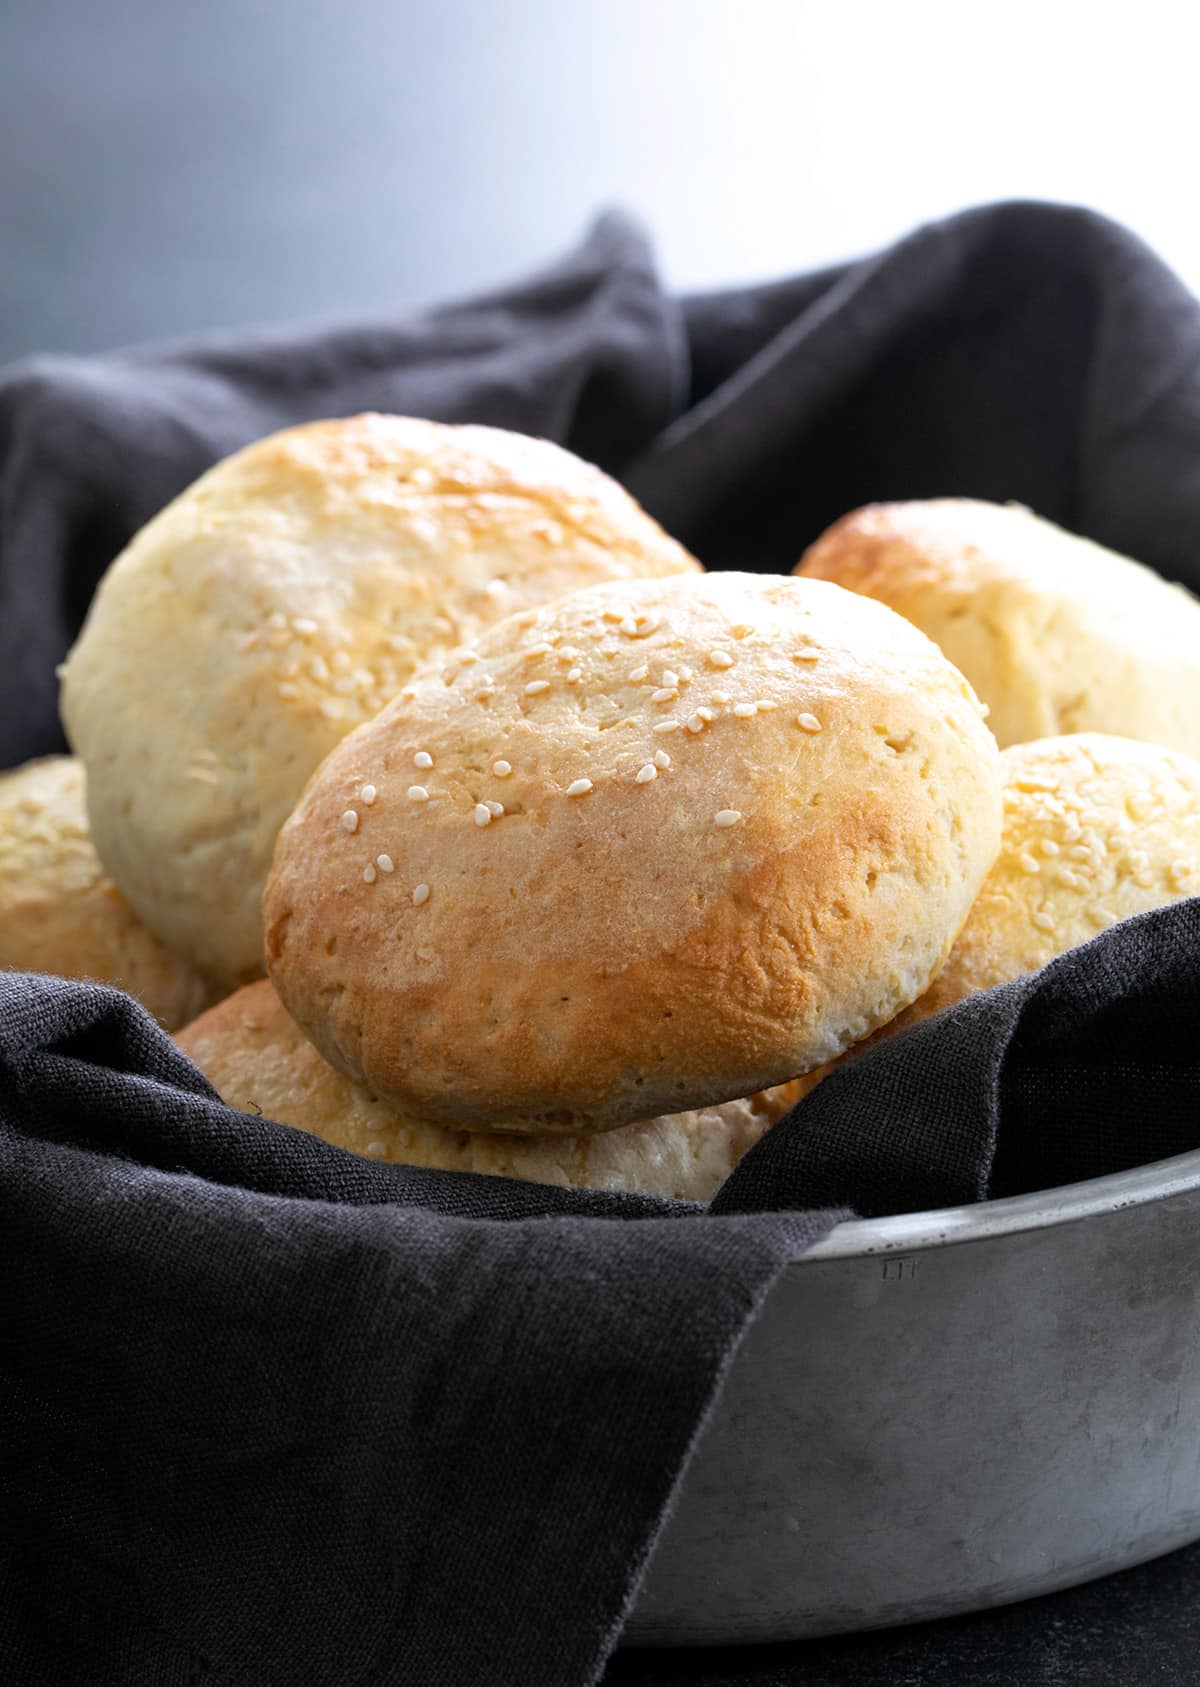
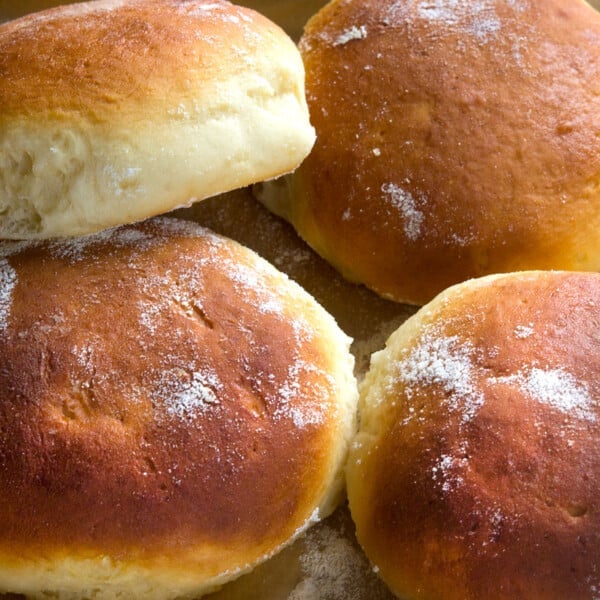
And when I say that these are the best gluten free hamburger buns, I mean it! But not just for hamburgers. Depending on how you shape the dough, you can make smaller sliders, fatter rolls, or flatter sandwich buns.
When it comes to taste and texture, this isn't a fragile, crumbly roll that's going to fall apart when you bite into a big, juicy gluten free hamburger or pile it high with lunch meat, lettuce, and all the fixings.
These rolls are so soft and squishy, they're everything you've ever wanted in a hamburger bun, gluten free or not.
Ingredient notes
- All purpose gluten free flour blend – I recommend Better Batter's original blend here, which you can also combine an all purpose blend + Expandex (see recipe notes for more info). You can also use King Arthur Flour's gluten free bread flour blend, but add an additional 2 tablespoons water since that blend absorbs a ton of moisture.
- Buttermilk blend powder – Adds tenderness and flavor without additional unwanted moisture.
- Instant yeast – Also called breadmaker or rapid-rise yeast, it doesn't need to be proofed first and gives these buns their rise
- Apple cider vinegar – Tenderizes the bread dough, aids the rise, and adds subtle flavor
- Cream of tartar and baking soda – Neutralize the acidic ingredients and aid in rise.
- Light brown sugar – Feeds the yeast and adds some depth of flavor
- Salt – Salt adds flavor to your bread
- Butter – Adds flavor and tenderness.
- Eggs – An egg white helps bind the bread; a whole egg is used to make an egg wash that helps the outside of the bread brown in the oven.
- Warm water – Brings the dough together and adds moisture.
- Sesame seeds – For adding some texture and flavor on top.
Expert tips
Similar to our gluten free bread recipe for sandwiches , the dough for these buns is made mostly by dumping all of the ingredients (first dry, then wet) in a large bowl, and then mixing until fluffy.
Here are some keys to the success of this recipe:
Bring your ingredients to room temp
Keeping your ingredients at room temperature makes them combine properly with one another, and helps the dough rise.
Begin with a wet dough
If you want any yeasted dough to rise, you must have enough moisture or the yeast are not able to reproduce. That's why a stiff or hard dough won't rise, which can happen if you don't measure your ingredients properly, use a flour blend that absorbs too much moisture, or use too much flour in shaping.
Shape with a light touch
Handle the dough with a light touch, and even a bit of extra flour won't incorporate into the center of the dough where it will stifle the yeast.
Be patient but don't let it rise too much
If your dough hasn't risen enough after shaping, your kitchen might be rather dry or a bit on the chilly side. As long as your ingredients are in the right proportions, the dough will rise, sometimes just more slowly.
Ingredient substitutions
Dairy free
In place of nonfat dry milk or buttermilk powder, you can use powdered coconut milk by weight (about 40 grams). In place of butter, Melt or Miyoko's Kitchen vegan butter should work great.
Egg free
Try replacing the egg white with aquafaba (the brine from a can of chickpeas). The egg wash on top of the rolls can be replaced with melted butter or even some olive oil.
Vegan
You can make this easy gluten free hamburger bun recipe vegan by following my suggestions above for replacing the dairy and eggs. Just be sure your brown sugar is made without bone char.
Apple cider vinegar & cream of tartar
Both apple cider vinegar and cream of tartar help add lightness and lift to these rolls. If you'd like to try eliminating one or both, you can try lemon juice in their place.
Instant yeast
There's no substitute for yeast, but you can use active dry yeast instead of instant yeast, but you'll need to use 25% more yeast, by weight (here, that would mean just over 11 grams active dry yeast). Be sure to dissolve the active dry yeast in some of the water in the recipe first.
Gluten Free Hamburger Buns Recipe
Equipment
- Stand mixer with paddle attachment
Ingredients
- 3 ¼ cups (455 g) all purpose gluten free flour blend, plus more for sprinkling (See Recipe Notes)
- 1 ½ teaspoons xanthan gum, omit if your brand already contains it
- ½ cup (43 g) cultured buttermilk blend powder, (or 1/2 cup + 2 tablespoons (40 g) milk powder)
- 1 tablespoon (9 g) instant yeast, (or 1 1/4 tablespoons active dry yeast) (See Recipe Notes)
- ¼ teaspoon cream of tartar
- ¼ teaspoon baking soda
- 1 tablespoon (13 g) packed light brown sugar
- 1 teaspoon (6 g) kosher salt
- 1 teaspoon apple cider vinegar
- 2 tablespoons (28 g) unsalted butter, at room temperature
- 1 (25 g) egg white, at room temperature
- 1 ½ cups (12 fluid ounces) warm water, (about 95°F) (See Recipe Notes)
- Egg wash:, 1 egg of any size at room temperature, beaten with 1 tablespoon milk or water
- Sesame seeds for sprinkling, optional
Instructions
Make the bread dough.
- In the bowl of your stand mixer fitted with the paddle attachment, place the flour, xanthan gum, buttermilk powder, yeast, cream of tartar, baking soda, and brown sugar and whisk to combine well with a separate, handheld whisk. Add the salt, and whisk again.
- Add the cider vinegar, butter, egg white, and warm water, and mix on medium speed in your stand mixer until the dough begins to come together.
- Turn the mixer to high speed and beat until the dough is no longer a ball but has begun to appear whipped.
- Transfer the dough to an oiled container with a tight-fitting lid or a greased bowl, spray lightly with cooking oil spray, and cover tightly.
- Place in a warm, draft-free area to rise until it’s about 150% of its original volume (about an hour), or refrigerate the dough for up to 3 days.
Shape the buns.
- When you’re ready to make the rolls, line rimmed baking sheets with unbleached parchment paper.
- If you’ve refrigerated the dough, work with it straight from the refrigerator. If you haven’t, place the tightly sealed dough in the refrigerator to chill for at least 15 minutes before working with it, as the dough is easiest to handle when it’s chilled.
- Turn the dough out onto a flat, lightly floured surface, and sprinkle the top with additional flour. Work the dough, squeezing and kneading it, turning it over frequently, until it has begun to appear smoother.
- Using a bench scraper or large knife, divide the dough in two parts and set one half aside (cover to prevent its drying out). Working with the second half of dough, divide it again into 4 equal portions.
- Working with one piece of dough at a time, sprinkle it with more flour, form it into a ball by pinching the ends underneath, then rolling it with the side of your palm pressed against the surface and guiding it with your fingertips into a round.
- Sprinkle the dough with more flour and press it into a disk about 3/4-inch thick with your fingers and palm. Place the disk on one of the prepared baking sheets.
- Repeat with the remaining pieces of dough, and then eventually the other half. You’ll have 8 disks of dough.
Let the shaped buns rise.
- Cover the baking sheets with oiled plastic wrap and place in a warm, draft-free location until each piece of shaped dough is at least 150% of its original volume (about an hour).
- After about 45 minutes, preheat your oven to 400°F. Don’t allow the dough to rise any longer once the tops of the dough begin to take on a pock-marked appearance.
Bake the buns.
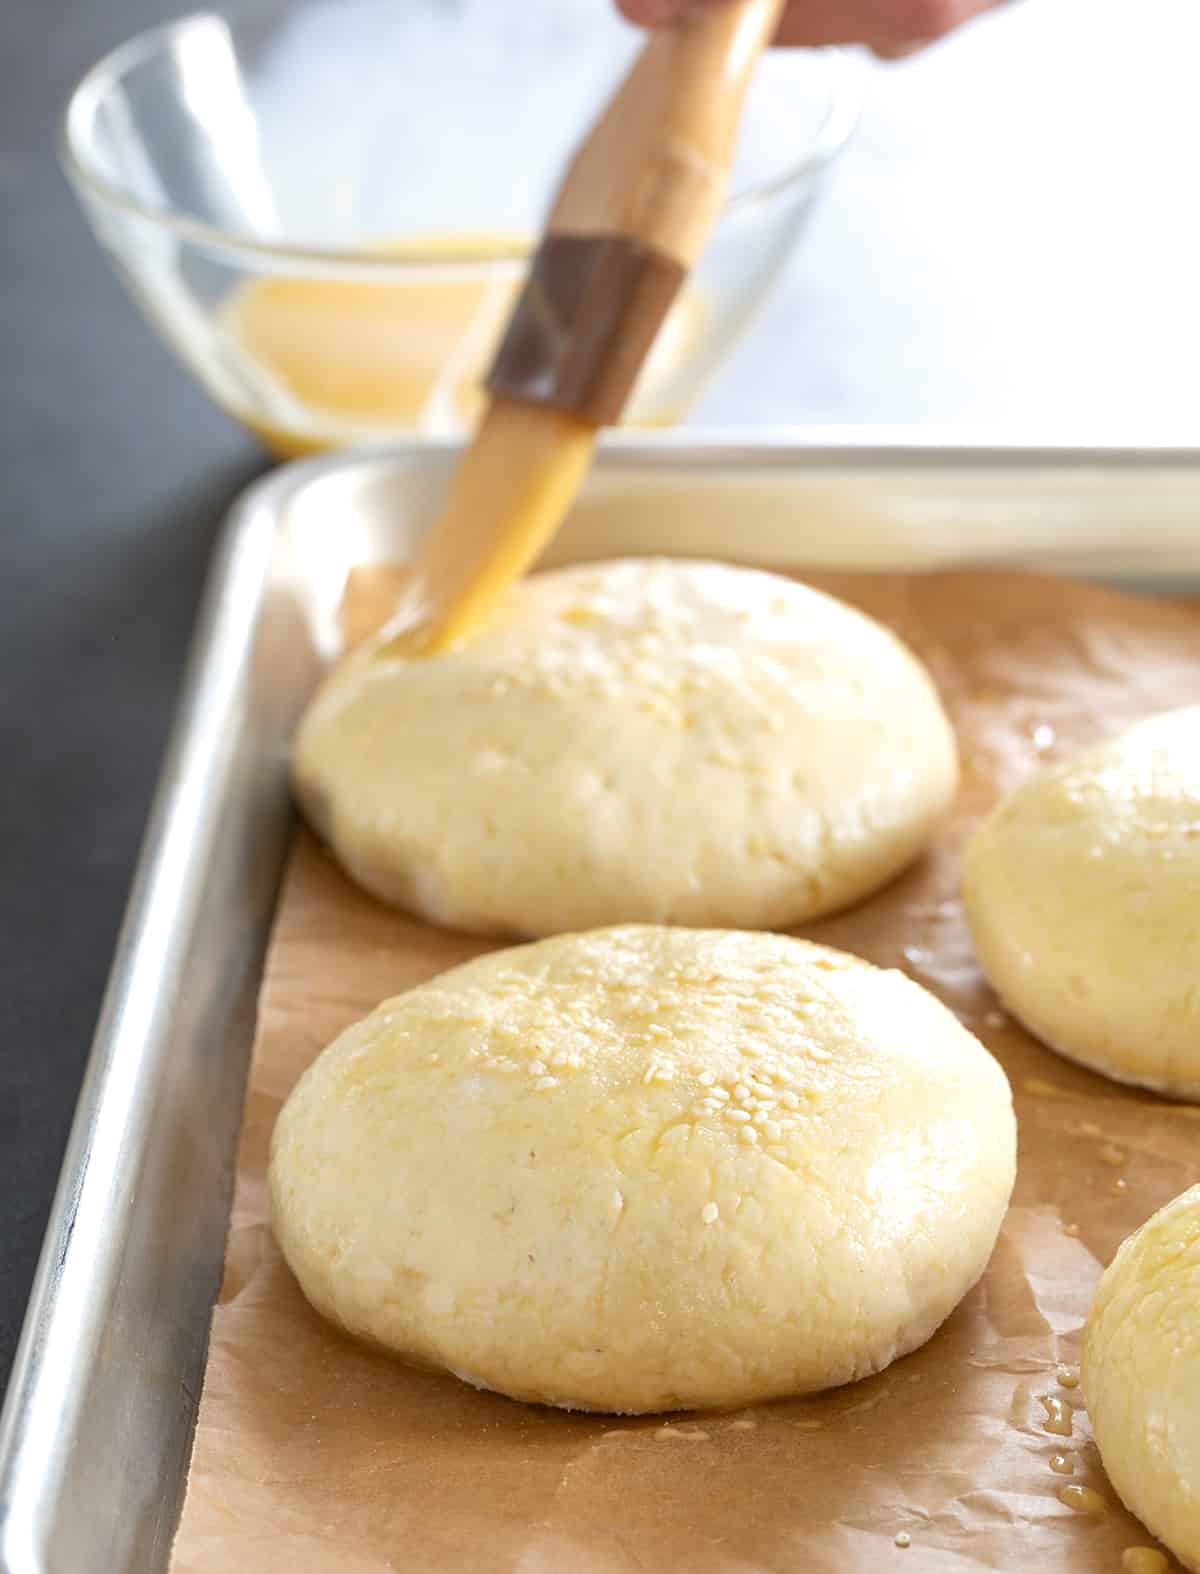
- Brush the tops and sides of the risen buns generously with the egg wash, and sprinkle with the optional sesame seeds.
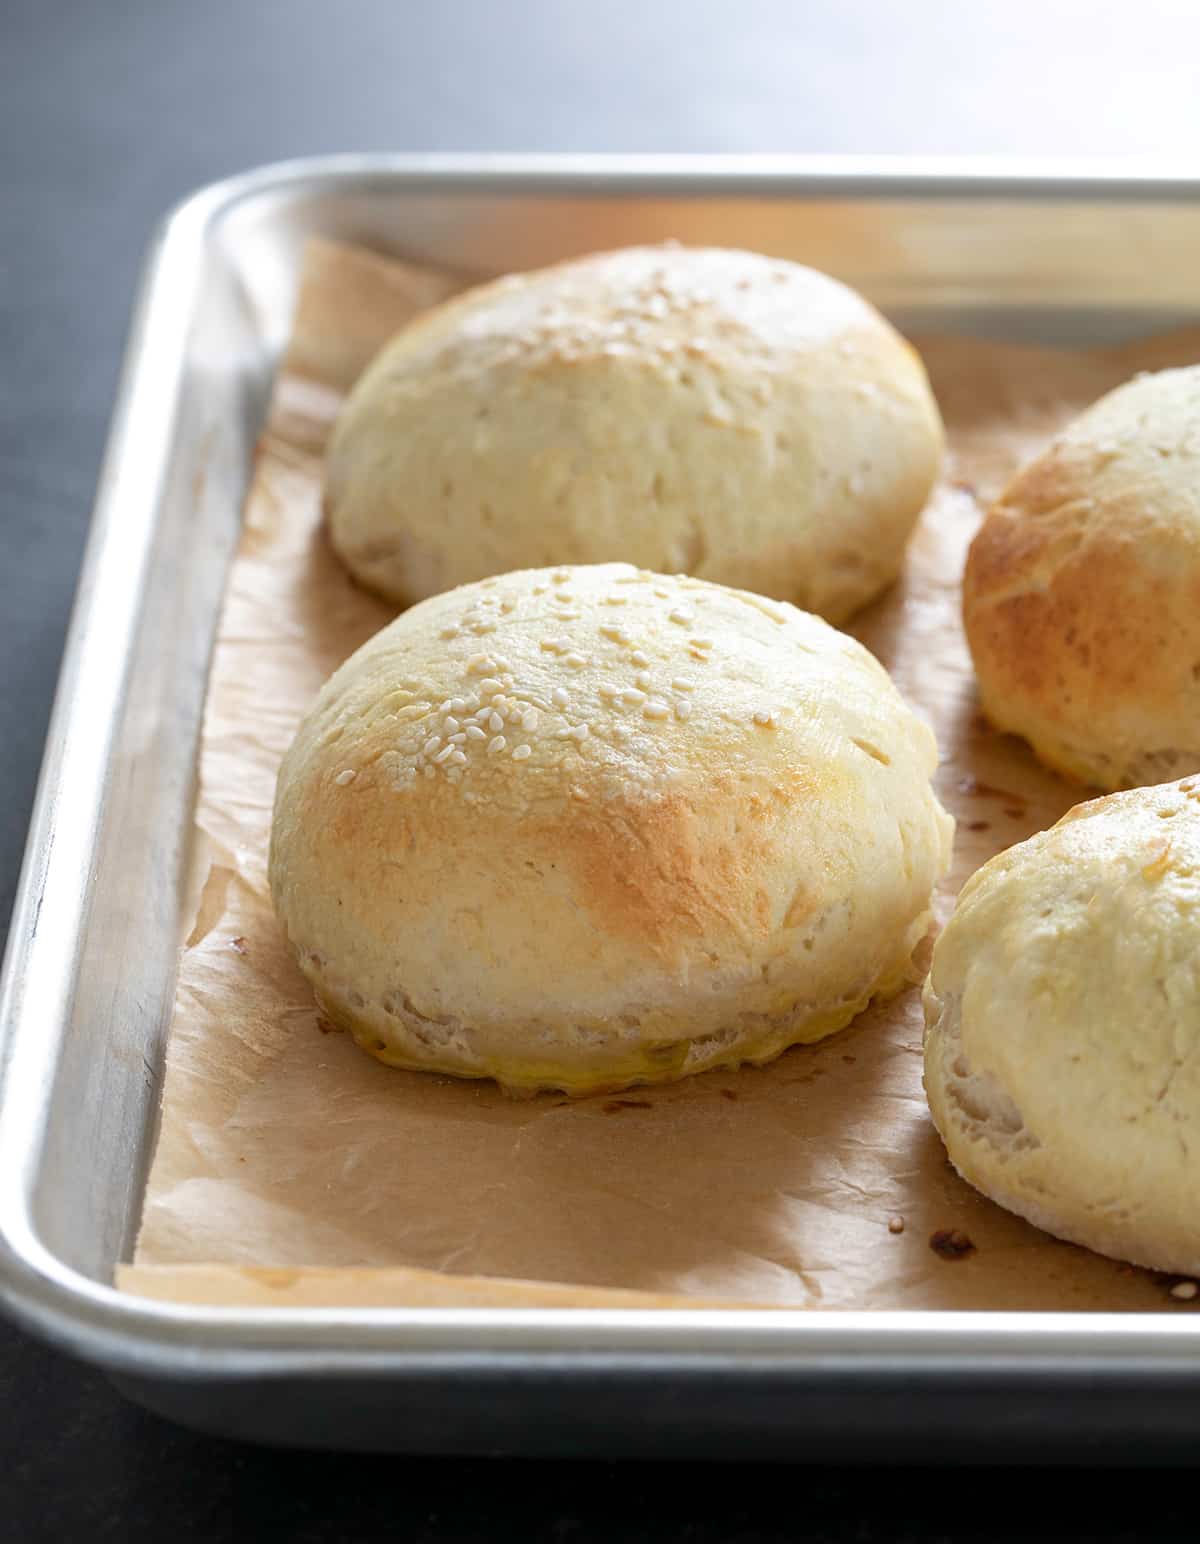
- Place in the center of the preheated oven and bake until the rolls are puffed and the tops are very pale golden brown (about 18 minutes). The center of each roll should be about 190°F when tested with an instant-read thermometer.
- Remove the rolls from the oven and allow to cool on the baking sheet until no longer hot to the touch before slicing and serving.
- Any leftover rolls can be sliced, cooled completely, then wrapped tightly in a freezer-safe bag (remove as much air from the bag as possible).
- Freeze for up to 2 months. Defrost in a toaster set to light toasting.
Video
Notes
For best results, use a high-quality all purpose gluten free flour like:
• Better Batter (original blend)
• Nicole’s Best multipurpose (with 3 1/4 teaspoons xanthan gum)
• King Arthur Gluten Free Bread Flour (try adding 2 tablespoons more water)
• Caputo Fioreglut (add liquids to the bowl first to avoid sticking) Avoid:
• King Arthur Measure for Measure
• Cup4Cup
• Bob’s Red Mill 1-to-1 (may work with 1½ tsp added xanthan gum) For DIY blends, see the All Purpose Gluten Free Flour Blends page. Always measure by weight, not volume, for accuracy. Optional gf flour and water variation: Instead of 3 1/4 cups (455 g) all purpose gluten free flour, use 3 cups (420 g) all purpose gluten free flour and add 1/4 cup (36 g) Expandex modified tapioca starch and increase the water by 2 tablespoons (1 ounce) to 13 ounces (1 1/2 cups + 2 tablespoons) water. About using active dry yeast. If you use active dry yeast in place of instant yeast, you will need to soak it in some liquid from the recipe to activate it. Then, add it with the remaining liquid ingredients and proceed with the recipe otherwise as written.
Nutrition
Nutrition information is automatically calculated, so should only be used as an approximation.

Storage instructions
They will stay fresh in an airtight container at room temperature on the kitchen counter for about three days.
For longer storage, wrap each cooled bun individually, and then store in a zip-top bag. They will keep in the freezer this way for about 2 months. To defrost, microwave briefly, sprinkle lightly with water, and toast.
FAQs
If you buy gf burger buns at the store, they may or may not be wheat free. For example, gluten free bread made with Caputo Fioreglut gluten free flour is not wheat free, since that flour uses wheat starch as an ingredient.
Alternately, make your own wheat free bread when you follow my homemade gluten free hamburger buns recipe. Better Batter gluten free flour, the classic blend all purpose gluten free flour I recommend, is free of the top 8 allergens, including wheat.
No, this gluten free burger bun recipe won't work if you just grab a random gluten free flour from your pantry.
Making these buns with almond flour or coconut flour, for example, just won't produce the right taste or consistency — unless you're a fan of dense, crumbly, and oddly flavored hamburger buns?
When yeast bread dough doesn't rise, there are many possible causes. Did you use one of my recommended gluten free flour blends? Did you measure by weight, not volume? If not, you probably overmeasured your flour which will make the dough dry. Dry dough won't rise. Did you incorporate too much flour into the buns during shaping? That will also dry out the dough.
You could shape this recipe's dough into a hot dog bun, but I've got a better recipe you can try instead. My gluten free hot dog buns recipe produces a more pliable dough that's better for the unique shape of hot dogs and sausages.
Shaping a homemade gluten free hamburger bun by hand is really simple: Just roll a piece of dough in your hand until it's round, and then flatten it into a disk by pressing it against a floured surface.
If you want to make gluten free sandwich buns, just flatten the disk a little more so that the dough is flatter. For gluten free slider buns, use less dough to make bite-sized buns.


I made these once and omitted an ingredient by mistake… so I’ll be trying again…Question? Would the Japanese milk bread recipe work as a bun? Thanks!
I’m afraid I really don’t know if that recipe would work as a bun, Arlene, but typically I develop bun recipes to rise less, like this recipe, so they don’t lose their shape as they rise. I’d stick with this recipe, and make sure you use a proper all purpose gluten free flour blend (ideally, Better Batter here or my mock blend), measure by weight, and not make any substitutions.
My question is what should the initial consistency of the dough be before refrigeration?
Please post a picture or describe the consistence of the dough before rising.
I’ve described the consistency in the recipe by explaining that you are meant to beat it with the paddle attachment of a stand mixer until it begins to appear whipped in consistency, and there’s a video showing me making the dough, transferring it to the proofing bucket, and then removing it from the bucket and shaping it, Angeline. If you’re not seeing the video, you’re using an ad blocker and it’s only available to those who are willing to be served ads in exchange for the free recipes and other content.
Just to make sure I’m reading this correctly: if I want to refrigerate the dough, I never have to do a proper rise? Just mix, bowl, and refrigerate, with no rise in-between?
Correct, Alyssa. The first rise is a cold one. Then shape, rise, bake. Just as it’s written!
Hi,
I tried this recipe for the first time today. Following the instructions, and using your recipe for bread flour with Ultratex 3 the dough came together more like pancake batter rather than bread dough. It never formed a ball as referenced in step 3. I added enough extra flour to make it manageable, but rather than rise they spread out with only about 1/2 of the rise I would have expected. The resulting buns were tasty, although heavy and thinner than I had hoped. I did not want to add the extra flour, but it was unmanageable and I did not want to waste it. My question is what should the initial consistency of the dough be before refrigeration? And any ideas on were I may have gone wrong? I have made many recipes from your site and all are really good. This is the first problem i have had.
Thanks for all you do,
Scott
Scott, you can’t make this recipe with my gluten free bread flour blend. That blend is only appropriate when the recipe specifically calls for it. This isn’t that recipe, which calls for an all purpose gluten free flour blend, ideally Better Batter. You can add a bit of Expandex in place of a bit of the Better Batter if you follow the other instructions in the recipe notes, but in no case can you use my gf bread flour blend. Please reread the recipe, and the accompanying text, both of which discuss this.
Just fyi, your “Shape the buns” section says to preheat the oven in step 1 but I think that step is later on. Thanks for all your recipes! I’m trying these today. ❤️
Yes, you’re absolutely right, Jaimie! I’ve omitted that first reference to preheating the oven. Thank you for letting me know!
Well, it took me 24 hours to finally source potato flour from a UK supplier that is gluten free and doesn’t cost the earth. I’ve learned that most suppliers in the UK use the term potato flour, or potato starch, to describe potato starch ONLY. Some major sources would have you believe yellow potato flour doesn’t even exist. Of course, I needed the ‘yellow’ flour. So, for other UK readers who want to buy ‘yellow’ potato flour to build the Mock Better Batter Blend (and, subsequently, the Bread Flour Blend) then I found it on thespiceworks.co.uk.
After all that searching, PHEW! I can finally get down and dirty with these divine looking hamburger buns. When my ingredients arrive, of course.
Thanks Nicole! I’m looking forward to baking bread that isn’t the density of a breeze block! :-)
That’s great information, Wendy! Thank you for sharing it with everyone. The whole potato flour question does become something of an issue when you’re outside the U.S. and trying to build the mock Better Batter blend.
What can I replace the expandex tapioca flour ?
What can I replace the whey isolate powder?
Hi, Ruth,
Please see the discussion of Expandex in the post. There is no whey protein isolate in this recipe.
Do you have any recommendations for a stand mixer? I’ve always wanted one but there are so many to choose from and look complicated ?
Hi, Julie,
That’s a great question. I’ve only ever owned a KitchenAid stand mixer. If I didn’t use it professionally, I would be completely fine with the classic tilt-head 4.5 quart bowl KitchenAid stand mixer (which I had and used happily for many years). They generally cost over $300, but you can find them on sale from time to time if you shop around. Right now and for about another week, I see that mixer is on sale on macys.com for about $200. If you have other questions, just ask!
Your Burger Bun sounds great, but we are recently dairy free, and while I have a butter im a little stuck here…
any idea what would be a suitable substitute for the buttermilk powder?
Please see the ingredients and substitutions section, Dee.
Can you use buttermilk instead of the water & butter milk powder ?
thanks
Ironically, I actually don’t find that buttermilk powder + water and actual buttermilk are good substitutes for one another, Frank. If you can’t find buttermilk powder, I’d recommend using dry milk powder.