This post may contain affiliate links. Please read our disclosure policy.
Today I'm bringing you a bagel recipe that's about to change your breakfast game forever. If there's one thing I've learned on my gluten-free journey, it's that great bread is possible. It's not only possible but also absolutely critical to enjoying our meals—and our lives—without feeling like we're missing out.
As a born and raised New Yorker, chewy, crusty authentic New York-style bagels have always been very important to me. Now I bring them to you, gluten free!
Bagels and I go way back. From the local bagel store of my childhood in New York, to the bigger, puffier bagels at the famed spots like Ess-a-Bagel and H&H Bagels when I lived in New York City, bagels have always been more than just bread to me. They're a connection to my past, a comfort food, a versatile snack or meal—and a baking challenge I was more than ready to tackle.
After many trials and a few too many ‘interesting' outcomes, I can confidently say I've cracked the code on baking gluten-free bagels that are not only as good as their gluten-filled counterparts but may even be better.
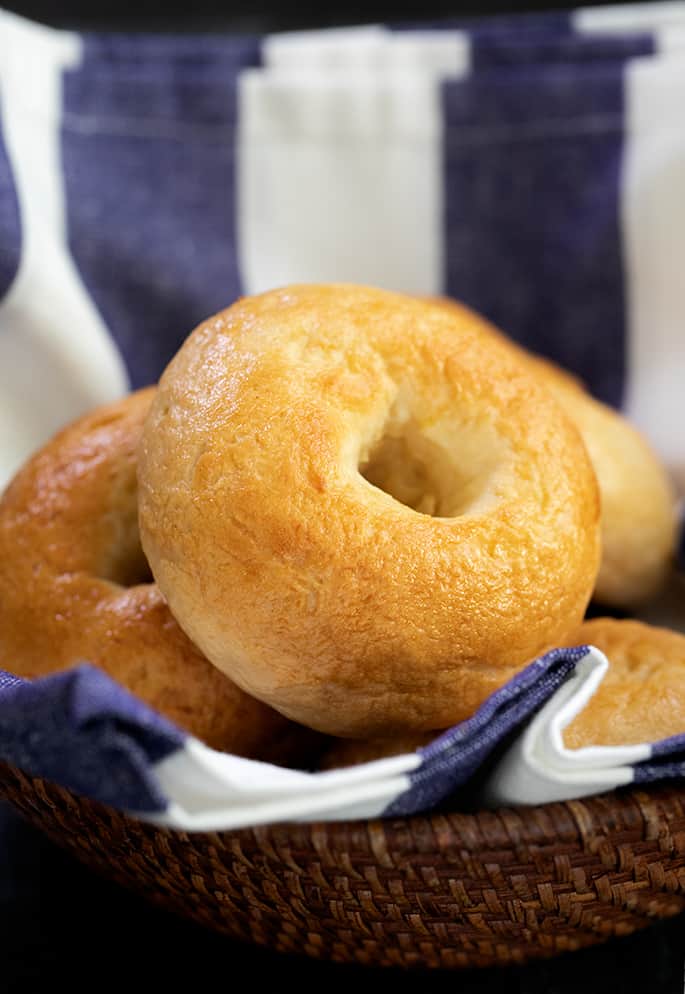
Why you'll love this recipe
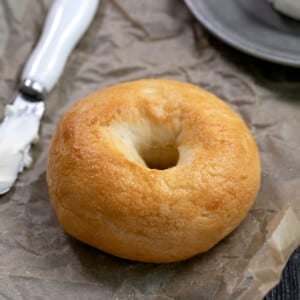
First off, the texture is simply unmatched. These bagels are crisp on the outside, satisfyingly chewy on the inside, just like real, boiled bagels are meant to be.
It’s not just about the texture. It’s also about the bready, yeasty taste that’s perfect whether you toast them or not. The process of making these bagels is genuinely enjoyable and almost therapeutic, with each stage of preparation becoming a part of the joy in creating something delicious from scratch.
And who doesn't love a recipe that's forgiving, right? You don't need to be a professional baker to pull off these bagels. It's all about simple ingredients and techniques.
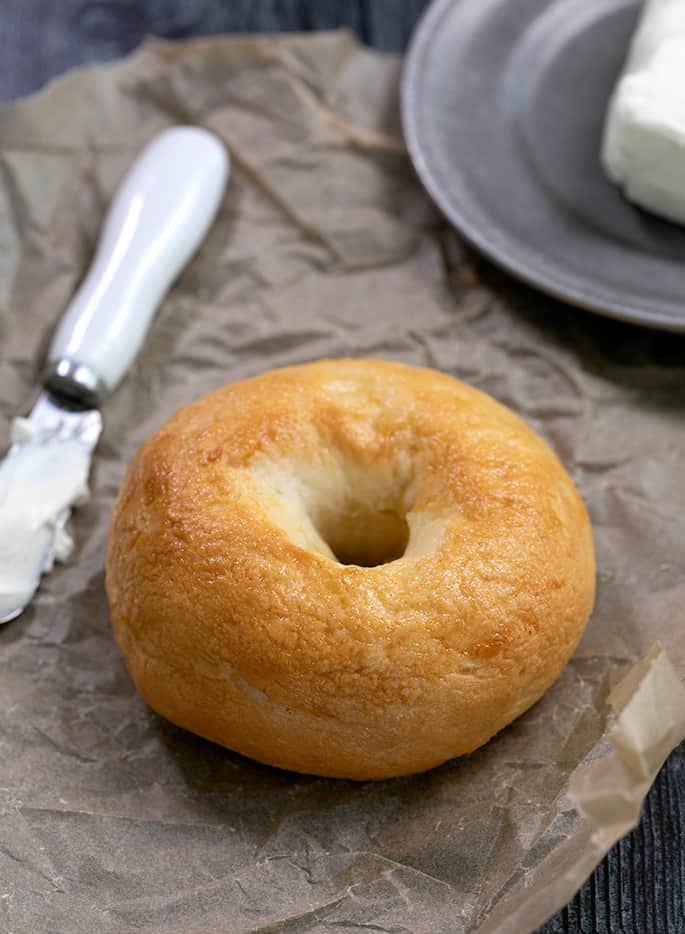
Plus, the versatility these bagels bring to your kitchen is unique. You can enjoy them plain, toasted with a bit of cream cheese, or use them as the foundation for the perfect sandwich.
A New York gluten free bagel, of a kind
When I first started developing recipes for bagels, I was inclined to make a true New York bagel: one that has a relatively tight crumb, and is intensely chewy.
That's the kind of bagel I grew up in NY eating from the local bagel store in town. The kind where teens worked after school. The kind that is required at a proper gluten free breakfast or brunch.
When I lived in New York City, I ate at places like Ess-a-Bagel and H&H Bagels. They had bigger, puffier bagels.
They were still chewy, but they also had a much more airy crumb. To me, they tasted fluffy. But they're not truly fluffy. These gluten free plain bagels are like those bagels of my young adulthood.
They're not the roll with a hole that you get from somewhere like Dunkin Donuts (bless their hearts). No one aspires to that sort of bagel, not even Dunkin Donuts.
Same goes for all the packaged gluten free bagels you can buy—at least all the ones I've tried. They are bagel-shaped bread.
These bagels are amazing fresh out of the oven. Pile a chunky chicken salad on one, and try to conceal your pleasure before you even take a single bite.
They're also awesome toasted. First, why would anyone do that with a true fresh bagel?
But if you're planning to toast your bagel, you may as well make a big batch, let them cool completely, slice them through the middle, and freeze them. Defrost at room temperature, and toast to perfection.
How to make gluten free bagels
Making these gluten-free bagels is truly an enjoyable process, and while it might look a bit lengthy, it's not overly complex. Let’s break it down.
We begin by combining our gluten-free ingredients to create a soft, workable dough. There's no need for high-end, hard-to-find ingredients, just regular pantry-style gluten-free ingredients are all it takes.
Once the ingredients are combined, we beat them in a stand mixer fitted with the paddle attachment until the dough takes on a whipped appearance. Then, we chill it for a bit, which makes it easier to shape later and gives the yeast a chance to develop some flavor.
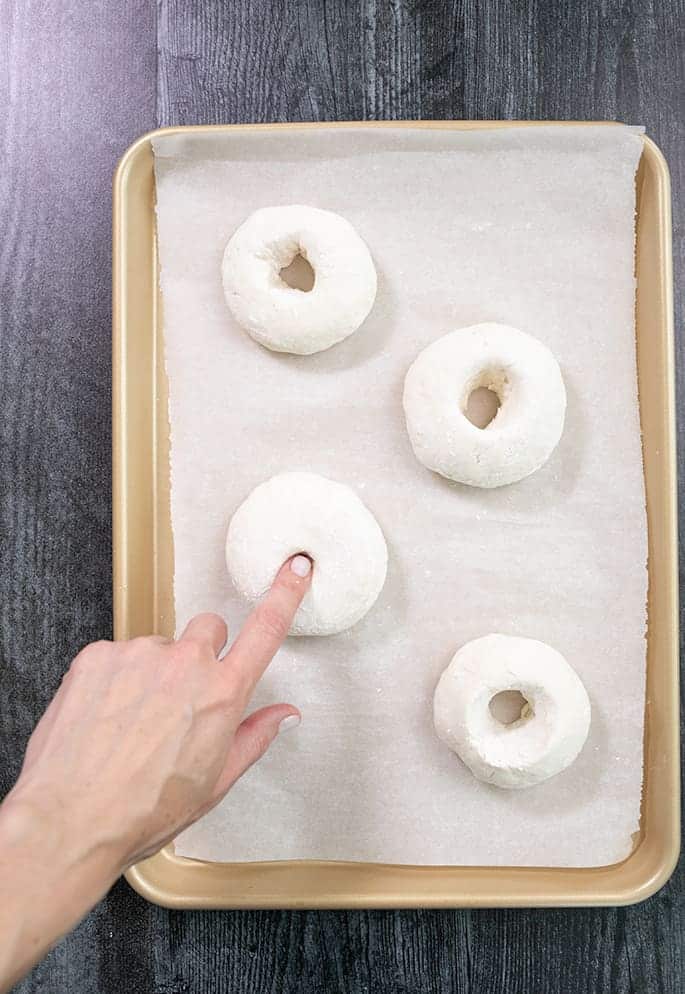
Speaking of shaping, that's our next step. We portion out our dough into individual pieces and start forming our bagels. But there's no complicated rolling and joining here. We just shape the dough into a round and then make a hole in the middle.
Once our bagels have been shaped, we give them some time to rise. They puff up to about 1.5 times their original size, creating a nice, light texture. They won’t double in size, so don’t let them overproof waiting for them to get even bigger.
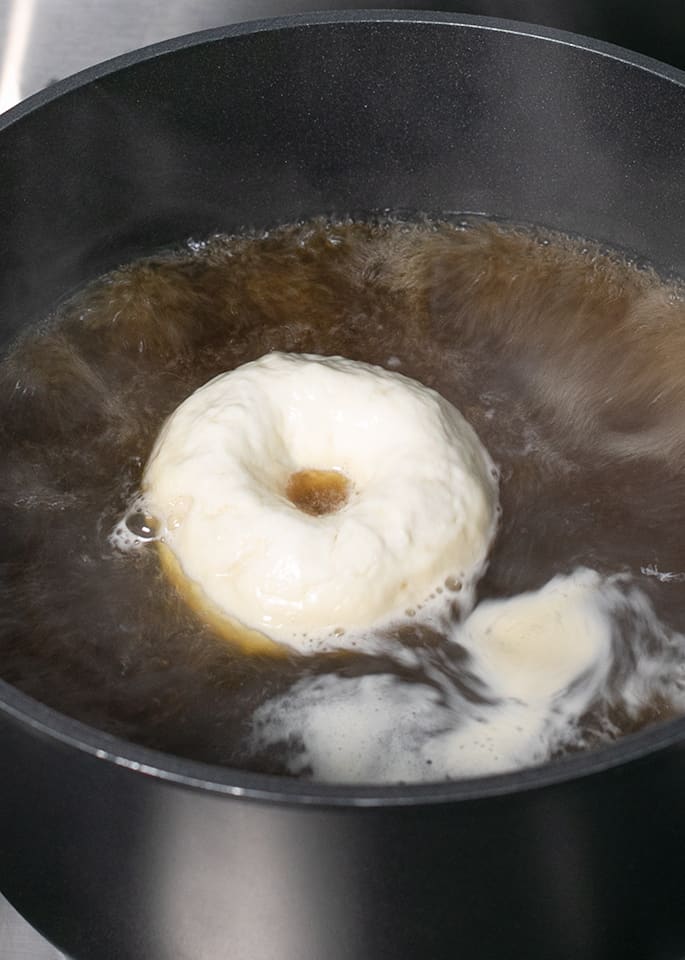
Then comes the part that gives our bagels their authentic taste and texture – boiling them in a molasses bath! This step restricts the oven rise a bit and ensures that chewy, classic bagel texture we're after.
After a quick boil, the bagels are brushed with egg wash to give them a lovely golden color in the oven. Then, into the oven they go until they've reached a beautiful golden brown and the aroma fills your kitchen.
So, you see, while there are a few stages in the process, each one is straightforward and adds to the final result: chewy, tasty, authentic gluten-free bagels!
How to shape gluten free bagels the easy way
Bagels are sometimes shaped by rolling out a cylinder of dough, about 1 1/2-inches thick and then joining the ends together to create a round. That is not the way I shape or recommend shaping bagels.
If you shape your bagel like that, the edges may separate during boiling or even during baking. Plus, a bagel tastes no different if it's shaped that way. Maybe it's just for showing off? We do not need that.
I prefer to shape my bagels the easy way. Create a round of your portioned piece of dough as you would any other round of dough.
A smooth round piece of bread dough is shaped by cupping your hand around the dough, with the pinky edge of your hand resting on the surface and your hand in a C shape (or a backwards C if you're right handed like I am). Move your hand around in a circle, maintaining contact with the surface on the side of your hand at all times.
Then, poke a floured finger into the center and rotate the dough around that finger in concentric circles. If you're a visual learner and are sighted, watch the how-to video. You'll get the hang of it.
Why these gluten free bagels must be boiled and then baked
After the shaped pieces of dough rise just enough (you only want it to rise to be about 1 1/2 times its original size), you're going to boil them in a molasses bath. That's just 6 cups water with 1 teaspoon kosher salt and 1 tablespoon unsulphured molasses brought to a rolling boil.
If you have a cakey bread dough, no amount of boiling is going to give you a chewy dough. But if you have the right recipe with the proper balance of regular pantry-style gluten free ingredients like this recipe, boiling your shaped and risen bagels will keep them from rising too much in the oven and make them chewy.
When the bagels' oven rise is just a bit restricted, you are rewarded with a chewy bagel. Be sure not to let them rise too much once they're shaped, or your bagel dough will soak up water like a sponge and disintegrate during boiling.
Substitutions for gluten free bagel ingredients
I'd be careful with changing any of the ingredients here. This recipe works because of the right ingredients in the right quantities. But, if you do want to try, here are my best guesses. But no promises!
Gluten free dairy free bagels
The dairy in this recipe comes from butter and milk powder. The milk powder you use can be nonfat dry milk or whole milk powder. Whole milk powder makes a slightly richer result.
To replace the milk powder with a dairy-free alternative, coconut milk powder should work. I like Native Forest brand, but there are many others available now, including Anthony's brand.
In place of butter, vegan butter should work. I like Miyoko's Kitchen or Melt brand vegan butters best.
Gluten free egg free bagels
If you can’t have egg whites, you can try replacing the egg white with an equal amount, by weight, of aquafaba, which is the brine from a can of chickpeas. Try beating the aquafaba until foamy with a whisk before adding it to the dough.
In place of the egg wash on the outside of the bagels, try using melted butter or cream!
Do you have to use extra tapioca starch/flour, even if your all purpose GF blend contains it?
Yes! You must use tapioca starch as a separate ingredient.
All proper all purpose gluten free flour blends have tapioca starch in the blend. Here you need a touch more.
There is no other starch that I can recommend as a perfect substitute for tapioca starch/flour. It provides structure, stretch and a smoothness to the dough that I've really come to rely upon in many bread recipes.

Easy Gluten Free Bagels
Equipment
Ingredients
- 2 ¾ cups (385 g) all purpose gluten free flour blend , (I used Better Batter; click through for full info on appropriate blends)
- 2 ¾ teaspoons xanthan gum, omit if your blend already contains it
- ½ cup (72 g) tapioca starch/flour, plus more for sprinkling
- ¼ cup (40 g) milk powder
- 1 tablespoon (9 g) instant yeast , (See Recipe Notes)
- 2 tablespoons (24 g) granulated sugar
- 1 teaspoon kosher salt
- 1 (25 g) egg white, at room temperature
- 6 tablespoons (84 g) unsalted butter, at room temperature
- 1 ⅜ cups (11 ounces) warm water, (about 95°F)
- Molasses bath, 6 cups water + 1 teaspoon kosher salt + 1 tablespoon unsulphured molasses
- Egg wash, 1 egg + 1 tablespoon lukewarm water, beaten
Instructions
To make the bagel dough.
- In the bowl of a stand mixer, place the flour, xanthan gum, tapioca starch/flour, milk powder, instant yeast, and granulated sugar, and whisk to combine well. Add the salt, and whisk again to combine.
- Create a well in the center of the dry ingredients and add the egg white, butter, and warm water, and mix to combine well.
- Place the bowl in the stand mixer fitted with the paddle attachment and beat on medium speed. The dough will clump at first.
- Once it begins to smooth out, increase the speed to medium-high and continue to beat until the dough takes on a whipped appearance.
- Transfer the dough to a container with a lid, cover, and chill for about 30 minutes (and up to 2 days) to make the dough easier to work with.
Shape the bagels.
- When you’re ready to shape the bagels, line a rimmed baking sheet with parchment paper, spray it lightly with cooking oil spray, and set it aside.
- Sprinkle a surface lightly with tapioca starch, and turn out the chilled dough onto it. Sprinkle again lightly with more tapioca starch, and turn the dough over a few times to smooth the surface.
- Using a sharp knife or bench scraper, divide the dough in half, then each half into 4 equal pieces to make 8 pieces total.
- Working with one piece at a time, sprinkling very lightly with additional tapioca starch to prevent sticking, press the dough into a roughly shaped round, pinching together any cracks.
- Shape the dough into a round by placing it flat on the shaping surface and moving a cupped hand around in a circular motion to coax it into a round. Sprinkle the top liberally with more tapioca starch and poke a floured finger into the center.
- Move that finger in a circular motion to create a hole about 1 1/2-inches in diameter. Place the shaped dough on the prepared baking sheet. Repeat with the remaining dough.
Let the bagels rise.
- Cover the baking sheet with lightly oiled plastic wrap, and set aside to rise until the bagels are about 150% of their original size.
- Rising could take as little as about 40 minutes, or it could take much longer. It depends upon the environment in your kitchen. If you see the surface of the bagels begin to become very uneven, with craters forming, stop proofing immediately.
- Preheat your oven to 375°F.
Boil the risen raw bagels.
- As the bagels are nearing the end of their rise, place the ingredients for the molasses bath in a heavy-bottom saucepan and bring to a rolling boil over medium heat.
- Place as many of the bagels in the bath as you can fit without crowding them at all, and boil for about 45 seconds total, turning the dough over for even boiling.
- Remove the bagels from the bath with a slotted spoon or strainer, and return them to the baking sheet. Brush the bagels generously with the egg wash.
Bake the bagels.
- Place the baking sheet in the center of the preheated oven and bake for 15 minutes.
- Rotate the baking sheet in the oven and continue to bake for another 10 to 15 minutes or until golden brown all over and a thermometer inserted into a bagel reads 180°F.
- For a thicker crust, increase the oven temperature to 400°F and bake for another 7 or 8 minutes. Remove the baking sheet from the oven and allow the bagels to cool until they’re no longer too hot to handle before serving.
Video
Notes
If you don’t have instant yeast, you can use active dry yeast in a larger quantity. The conversion is to multiply the weight of the instant yeast (here, 9 grams) by 125% (9 grams x 1.25 = 11.25 grams; just use a tiny bit more than 11 grams). All purpose gluten free flour
Please follow the link in the recipe for a full discussion of the all purpose gluten free flour blends will and will not work in my recipes. This is particularly important in bread recipes. I always get a lot of comments and emails from readers who have used a gluten free flour blend like Bob’s Red Mill, King Arthur Flour, or Namaste, complaining that the recipe doesn’t work as written. You cannot use these blends in my recipes and expect consistent, if any good, results. Nutrition information. Nutrition information is an estimate only from online calculators, provided as a courtesy, and should not be relied on under any circumstances. In this particular case, it excludes any effect of the molasses bath and egg wash.
Nutrition
Nutrition information is automatically calculated, so should only be used as an approximation.




I absolutely love this recipe! I have used it for over a year now and it never disappoints. I have gotten better as I have went and I do bake for a bit longer. I always ferment my dough in the fridge over night and set out the next day for about an hour before shaping. They rise SO much
I’m so glad you’ve enjoyed these bagels for over a year, Addison! I love it when someone incorporates a recipe into their regular routine. Even more so when I get to hear about after so much time! Thank you for sharing that.
Is there a substitute for the milk powder. I can’t have dairy and don’t want to fail the recipe if it doesn’t work without the milk powder.
Yup, Anitra. Please see the text of the post under the heading “Gluten free dairy free bagels” for my specific suggestions.
Hi Nicole and thank you for your wonderful work! I’ve carefully followed your recipe (I only replaced molasses with honey in the boiling bath), but the bagel, which had risen nicely, flattened out a bit in the water and completely in the oven. Here in Germany I have to use local GF flour mixes, so is the mix responsible for the failure? Is it some ingredient or the balance among them? Maybe if I had baked the bagels without dipping them in the water they might have turned out edible at least! Thank you!
I’m afraid that it is mostly likely due to your flour blend, Marcy. I can’t recommend anything other than the brands I do on the flour blends page, but I also have recipes there to DIY your own “mock” versions of my recommended blends especially for readers outside the U.S.
I made these, and they turned out pretty good. I prefer Bob’s redmill 1 to 1 gf flour, taste the best compared to flours recommended here.
I’m afraid that Bob’s Red Mill’s flour blends are not appropriate for my recipes, particularly for shaped yeast breads.