
This post may contain affiliate links. Please read our disclosure policy.
This easy gluten free mug cake bakes up tender and rich in just 1 minute—right in your microwave. It's perfect when you're craving something chocolatey but don’t want to heat up the kitchen or make a mess.
After lots of testing (and a few rubbery fails), I landed on the perfect mix of ingredients for a moist, egg-free cake that works in any microwave. I'll show you how to make it just right—whether you're at home or at work!

Why this recipe works
This gluten free mug cake recipe skips the eggs (which can turn rubbery in the microwave) and relies on the right blend of flour, cocoa, fat, and baking powder for a tender, fluffy texture and a rich chocolate cake.
A touch of chocolate in the center helps lock in moisture as the cake cooks, while tested timing and wattage guidance ensures it bakes just right—no matter your microwave.
The result? A single-serve chocolate cake with rich flavor and a soft bite, ready in about 1 minute.

Recipe ingredients

There are only a few ingredients in this single-serving chocolate dessert. Here's some background on the purpose of each:
- Gluten free flour – A gum-free blend like Nicole’s Best, my 3-ingredient blend or Bob's Red Mill 1-to-1 gives just enough structure without going gummy or dense.
- Cocoa powder – Adds rich chocolate flavor. Dutch-processed or Hershey's Special Dark will give the deepest flavor, but natural cocoa powder works, too.
- Baking powder – Provides all the rise without eggs, so check the date to make sure yours is fresh.
- Salt – Brightens the flavor and balances sweetness.
- Granulated sugar – Keeps the cake tender and sweet. You can adjust the amount to taste.
- Neutral oil or melted butter – Adds richness. Use oil to make it dairy-free and super easy, or butter for extra flavor.
- Milk – Adds moisture to bring the batter together, and some flavor.
- Chopped chocolate, wafers or chips – Melt into the center for added moisture and fudginess.
How to make a gluten free mug cake
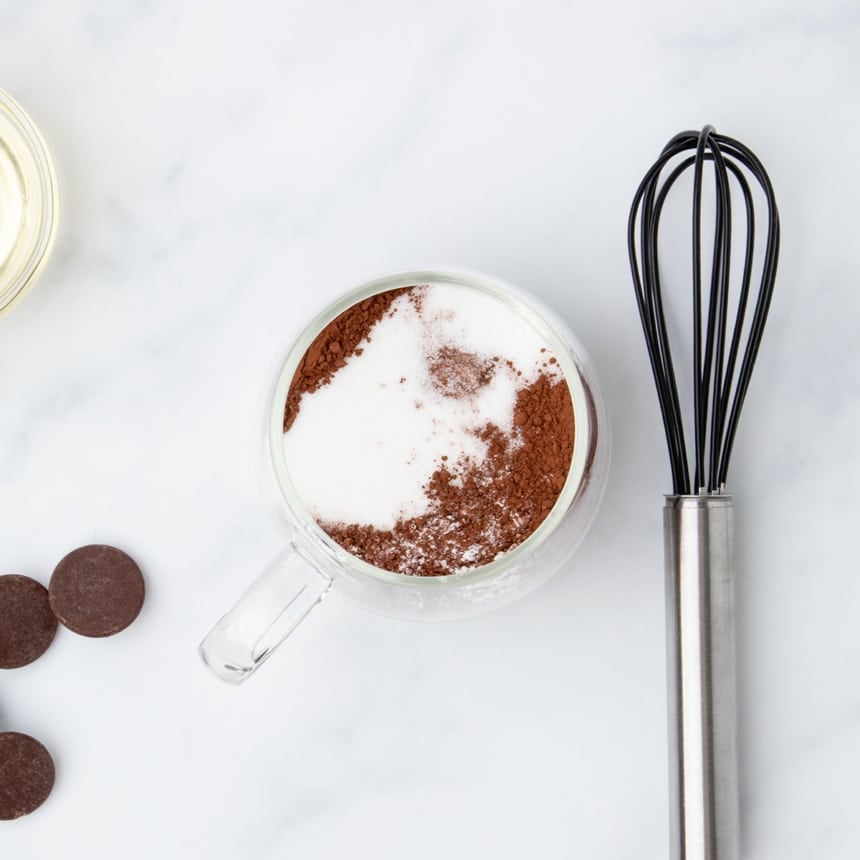
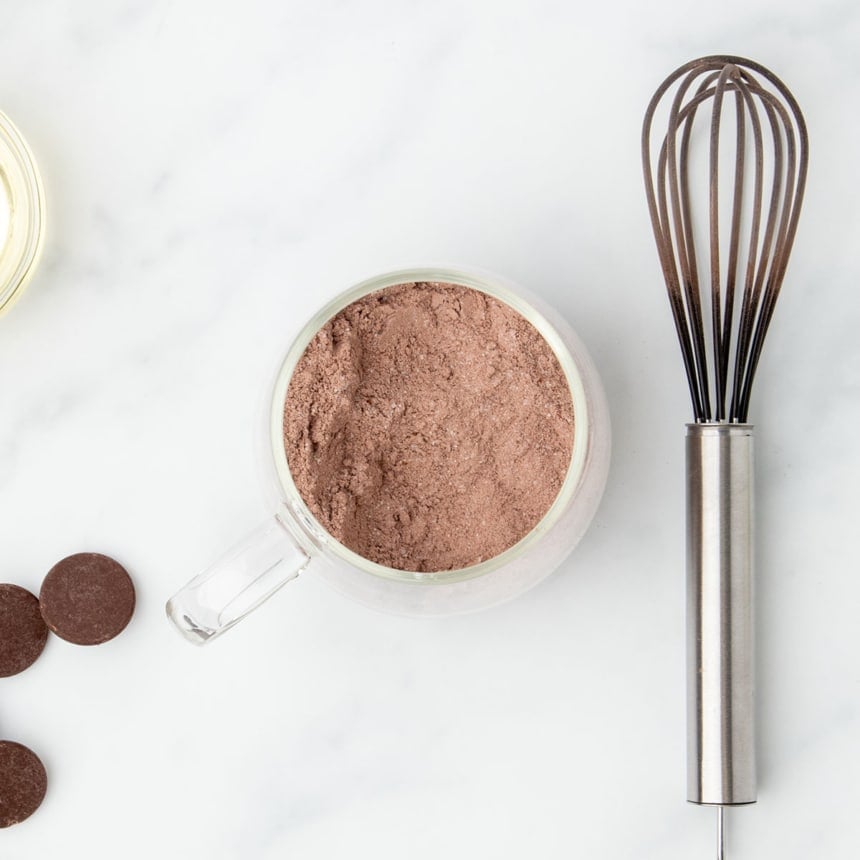
1. Mix the dry ingredients
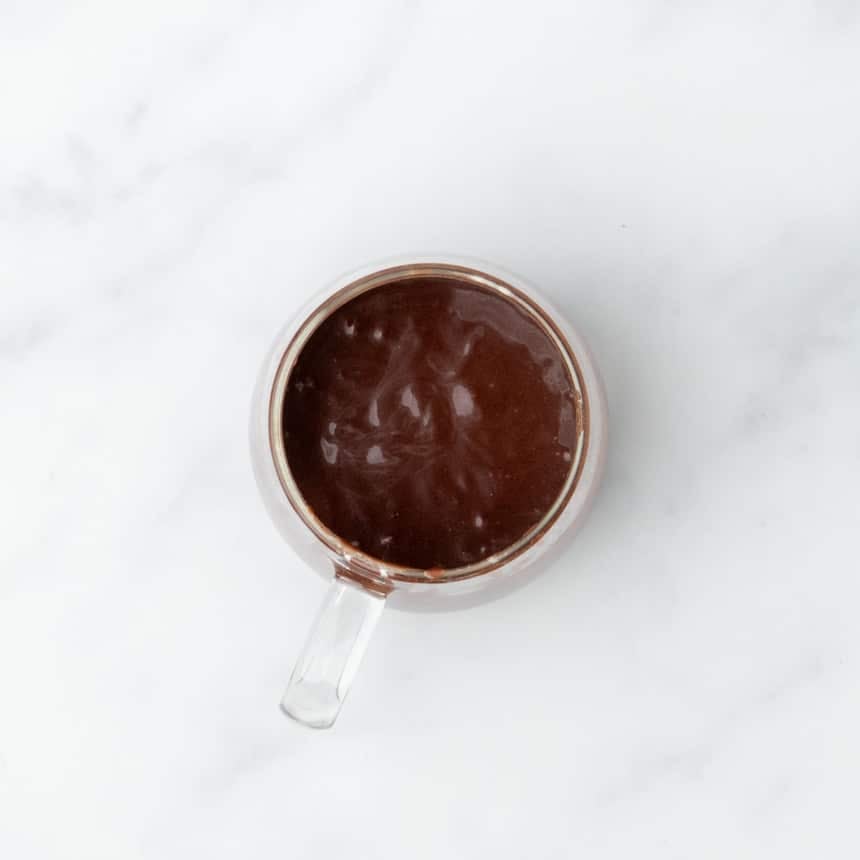
In a microwave-safe mug (at least 10 ounces), whisk together the flour blend, cocoa powder, baking powder, salt, and sugar. I used a silicone coated whisk to avoid scratching the surface. Whisk well to avoid any clumping, especially of the leavener.
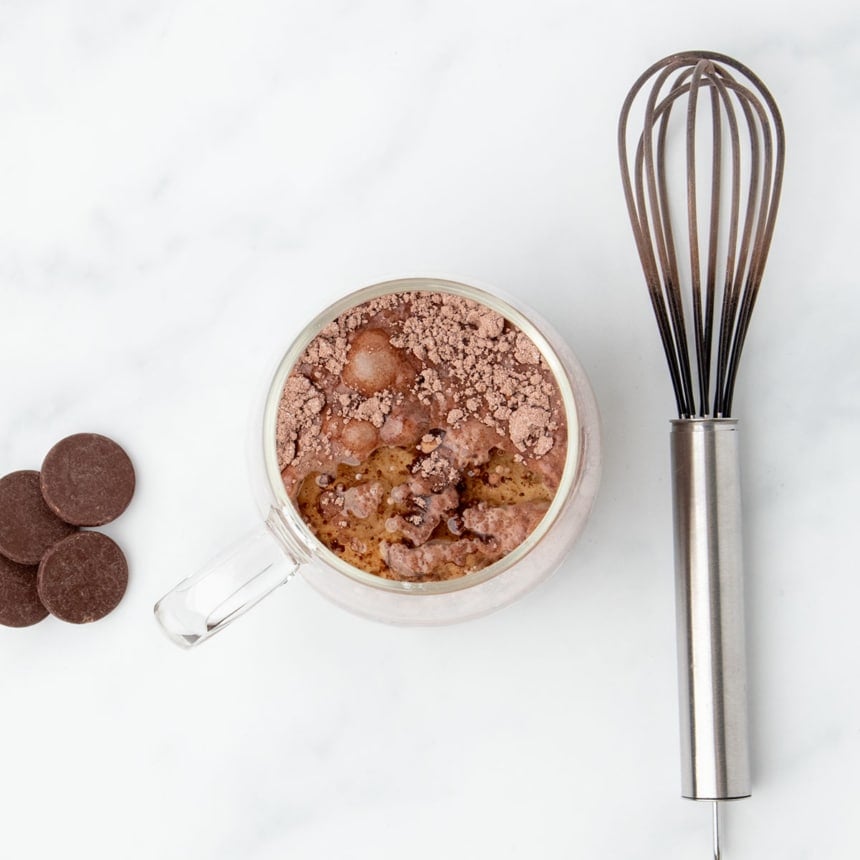
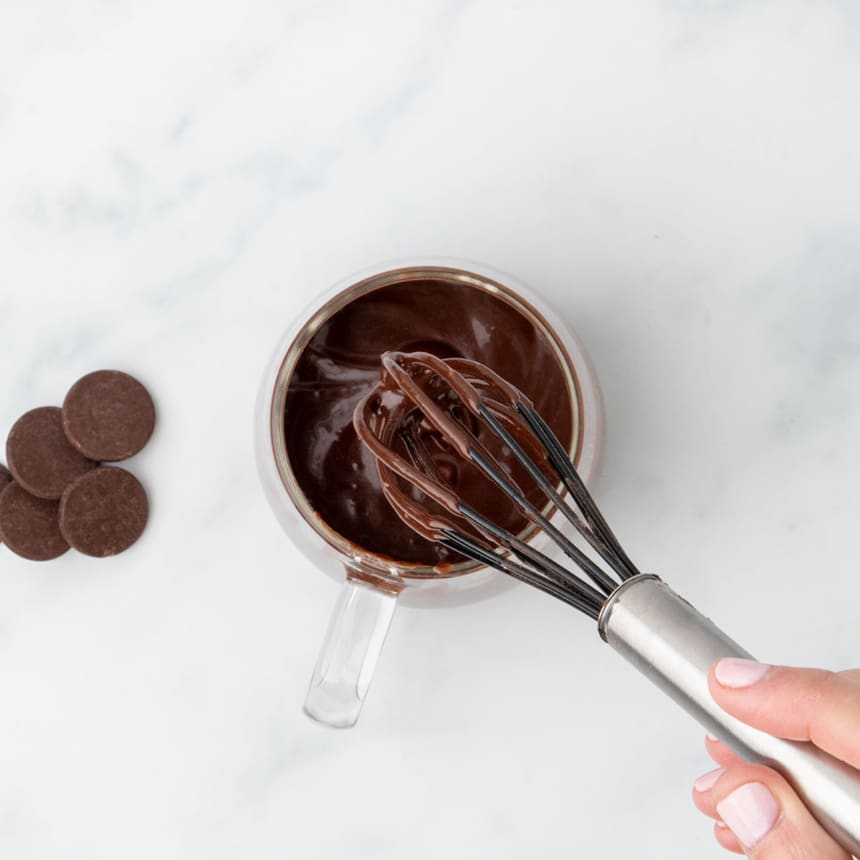
2. Add the wet ingredients
Stir in the oil or melted butter and milk until smooth and well combined, making sure there are no dry pockets left behind.
3. Add chocolate (optional but recommended!)
Press a few chocolate chips or chopped chocolate into the center of the batter for extra richness and moisture.
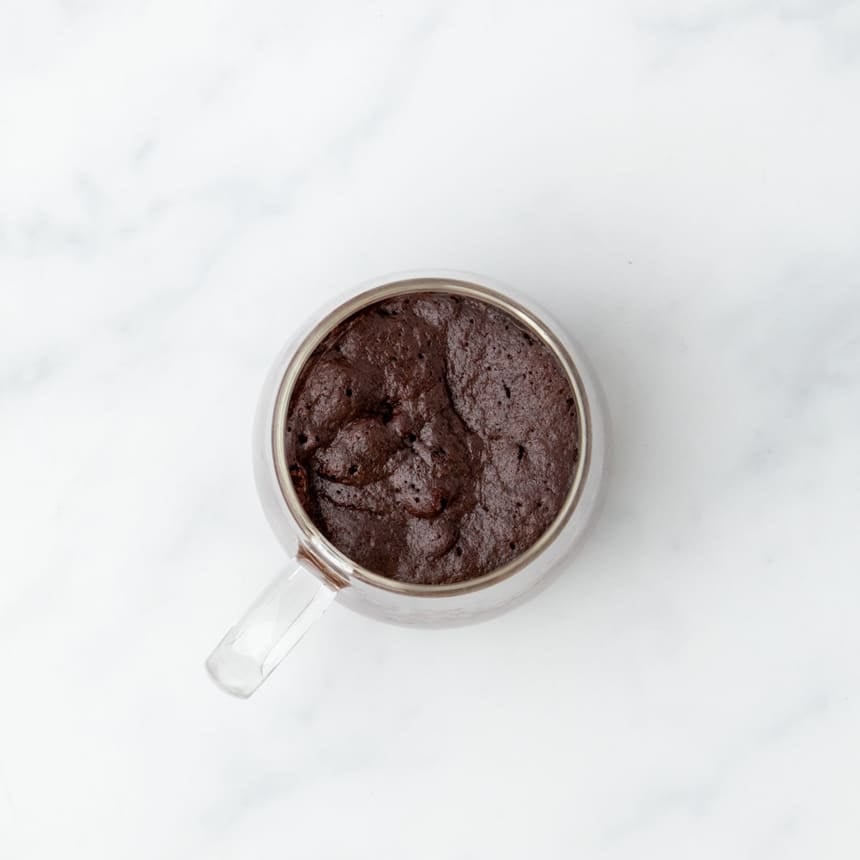
4. Microwave
Cook for about 1 minute at 1000 watts (adjust for your microwave's wattage if needed). Check with a toothpick—if it isn’t mostly clean, microwave for another 10–20 seconds.
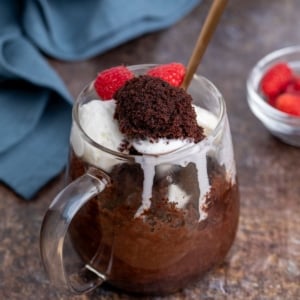
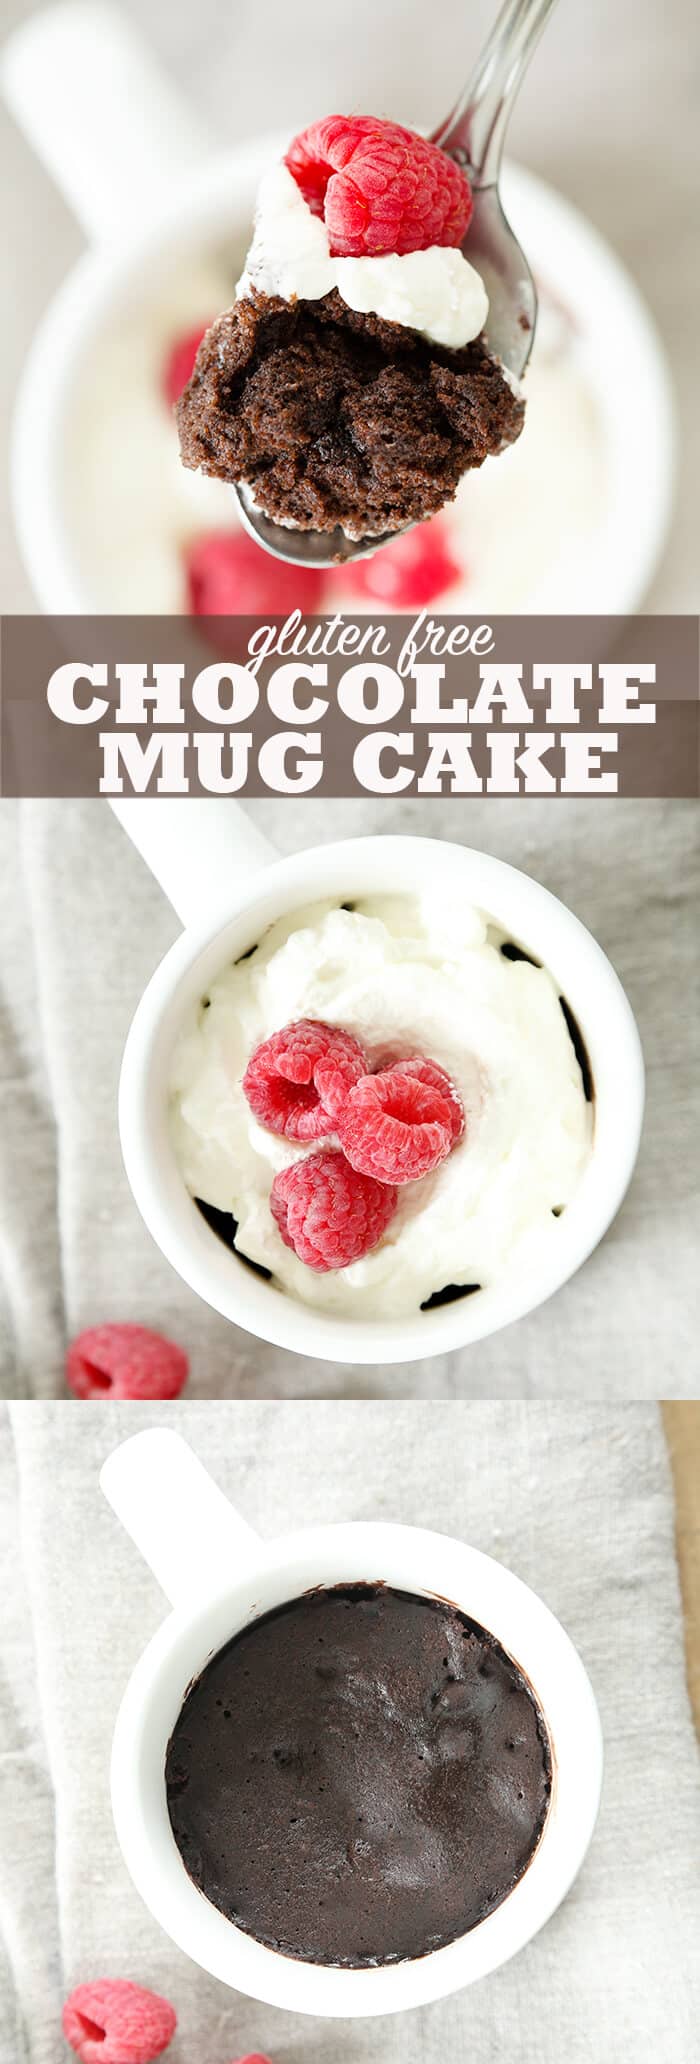
5. Cool and enjoy
Don't overcook or the cake can turn out dry or dense. Let it sit briefly before adding some more chips, ice cream, whipped cream or berries on top and enjoying.
Expert tips
Make the most of your single-serve cake with these simple but essential tips:
Don't skip the chocolate center
Press a few chocolate chips or chunks into the middle of the batter before cooking. They melt just enough to keep the texture moist as the cake cools.
Stick to a 10 ounce mug—or bigger
The batter rises a lot while cooking. Using too small a mug means overflow, mess, and uneven cooking. If you're not sure, place a small plate under the mug just in case.
Adjust your microwave's power
Adjust the power of your microwave to approximate 1000 watts by microwaving at a reduced power level if necessary. Keep in mind that underbaked is better than overbaked.
Wattage is usually listed on the inside of the oven door, on a label on the back, or in the owner's manual. You can also test it to estimate the wattage. Mine is 1200 watts, so I either microwave the cake for up to 1 minute 20 seconds at 80% power, or closer to 1 minute at 90% power.
Let it cool before diving in
It’s piping hot out of the microwave. Use oven mitts, and give it a minute to sit, especially if you’re adding toppings like whipped cream or ice cream.

Ingredient substitutions
This recipe is already naturally egg-free. Here’s how to adjust for other dietary needs:
Dairy free
Use a neutral oil or melted vegan butter in place of regular butter. Swap the milk with any unsweetened dairy-free option (almond milk works great). Be sure to use dairy-free chocolate, too.
Vegan
Follow the dairy free swaps above, and check that your sugar wasn’t processed with bone char (some brands aren’t vegan-friendly).
Gluten Free Mug Cake Recipe
Equipment
- Microwave oven
- Microwave-safe mug at least 8 ounce capacity
Ingredients
- ¼ cup (35 g) gum free gluten free flour blend, (See Recipe Notes)
- 2 tablespoons (10 g) unsweetened cocoa powder, natural or Dutch-processed
- ¼ teaspoon baking powder
- ⅛ teaspoon kosher salt
- 2 tablespoons (24 g) granulated sugar, (reduce to 1 1/2 tablespoons (18 g) or increase to 3 tablespoons (27 g))
- 2 tablespoons (28 g) neutral oil (canola, vegetable, grapeseed, peanut, etc.), or unsalted butter, melted (See Recipe Notes)
- 3 tablespoons (1.5 fluid ounces) milk, any kind, at room temperature
- ½ ounce (14 g) chocolate, chopped, or chips or wafers (optional)
Instructions
- Grease a microwave-safe mug or mason jar with at least an 8-ounce capacity.
- In the mug, place the flour blend, cocoa powder, baking powder, salt and sugar, and whisk to combine well.
- Add the oil or melted butter and milk, and whisk until well-combined and smooth.
- Add the optional chocolate and press it down into about the middle of the batter.
- Place the mug in your microwave oven and cook at about 1000 watts for 1 minute. (See Recipe Notes about microwave wattage.)
- Test with a toothpick to see if it comes out mostly clean. If not, cook for up to another 20 seconds at about 1000 watts.
- Allow to cool briefly before serving.
Notes
Use a gum-free gluten free flour blend like Nicole’s Best or my 3-ingredient gum-free blend (23 g superfine white rice flour, 8 g potato starch, 4 g tapioca starch). Bob’s Red Mill 1-to-1 also works here since it’s low in xanthan gum. Oil or butter:
Use any neutral oil (like canola or grapeseed), or melted unsalted butter for added flavor. Both work well—just avoid strongly flavored oils like olive oil. Make-ahead mix option:
To prep a just-add-milk version, cut 2 tablespoons of Crisco or Spectrum brand shortening into the dry ingredients with a fork and store in a small container or jar. When ready, just add 3 tablespoons of milk and microwave. Microwave power:
Microwave the cake at about 1000 watts. If your microwave is stronger (e.g., 1200 watts), reduce the power to 80–90%. Start with 1 minute, check doneness with a toothpick, and add 10–20 seconds only if needed.
Nutrition
Nutrition information is automatically calculated, so should only be used as an approximation.
Storage instructions
Leftovers:
If you can’t finish it all at once, cover the mug and refrigerate for up to 1 day. Before serving, sprinkle the top with a little water and reheat in the microwave for 15–20 seconds at 50% power to revive the soft texture.
Make-ahead dry mix:
Whisk together the dry ingredients (flour blend, cocoa powder, baking powder, salt) and store in a sealed container in a cool, dry pantry for up to 3 months. To use, measure out 75 g of the mix, add the oil or butter, milk, and optional chocolate, and microwave.
Just-add-milk option:
To prep a mix that only needs milk so you can make it away from home, cut 2 tablespoons of shortening into the dry mix, seal, and store in a cool, dry pantry for up to 2 months. The shortening will make it shelf-stable. You can place some chocolate wafers on top.
When ready to make, remove the chocolate wafers, stir in 3 tablespoons of milk, press the chocolate into the center, and microwave as directed.
If you enjoyed this recipe, try my gluten free cookie dough for another treat to enjoy without turning on the oven.
FAQs
Dutch-processed cocoa gives the richest flavor. Rodelle and Hershey’s Special Dark are great options, but natural cocoa powder works fine, too.
No, this cake is only designed to make in a microwave. Instead, try our flourless chocolate cake for 1 in the oven.
A 10 to 12-ounce mug gives the cake space to rise safely. If you only have a smaller mug, set it on a plate in case the batter spills over.
No, the recipe relies on the cocoa powder for structure and texture. For a vanilla version, try my separate recipe for gluten free vanilla mug cake.
This usually means one of the following:
• Your baking powder wasn’t fresh
• You mismeasured dry or wet ingredients
• The batter wasn’t whisked thoroughly
• It was microwaved too long or at too high a power
No, doubling in one mug can lead to uneven cooking and overflow. It’s best to make two single cakes in separate mugs. You could make 1 1/2 times the recipe in an especially large mug. Just increase all the ingredients and cook for a bit longer.
See the storage instructions above, but generally 1 day in the fridge is fine. Reheat gently with a splash of water.


This is actually delightful! Only ever had mug cakes as a gluten eating muggle 12 plus years ago and they were always rubbery and horrible. This however, is brilliant!
So glad you enjoyed it, Emma! Thanks for sharing your experience.
We make these in soup bowls with an added dash of cinnamon and nutmeg. Then top with some vegan vanilla ice cream. Yummy. Something about having more cook surface, somehow makes them fluffier.
So interesting, Elizabeth! I love hearing that feedback, and your additions sound wonderful. Thank you for taking the time to share your experience here on the blog. :)
Quick and tasty and my gluten eating husband loved it!
That’s great, Ali! The gluten eaters are our secret audience. :)