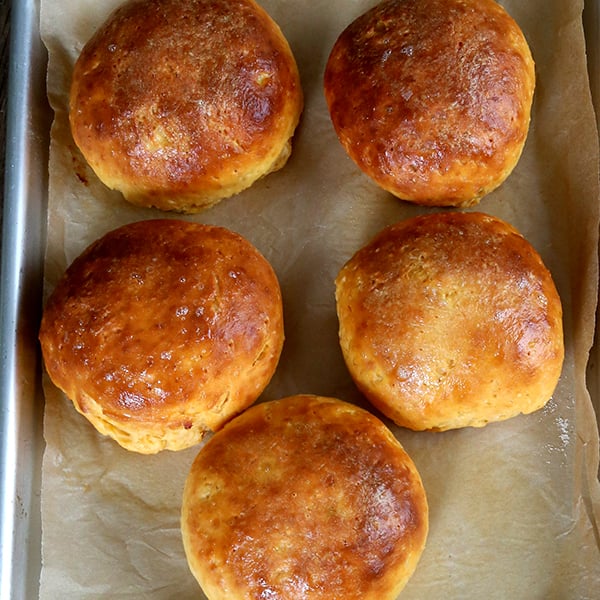

Gluten free sweet potato browned butter rolls are soft, tender and packed with flavor. Use up your extra roasted potatoes.
WANT TO SAVE THIS RECIPE?
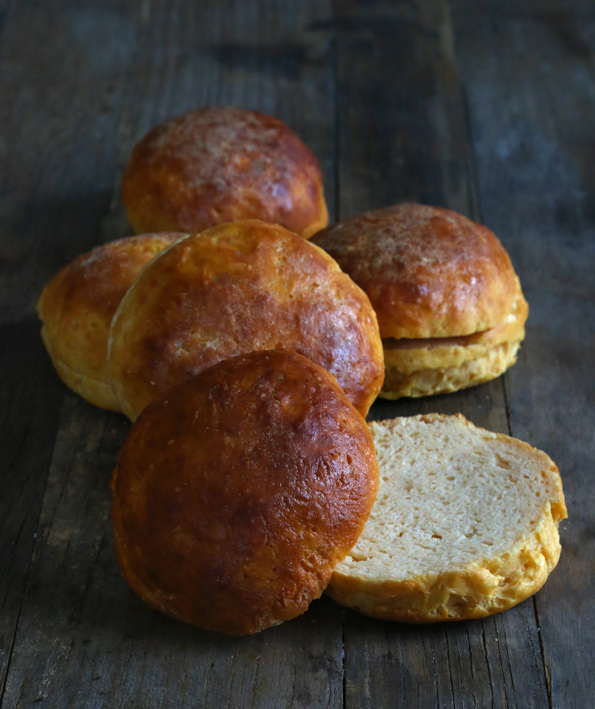
These are pretty special rolls, these super soft gluten free sweet potato brown butter rolls. They're made with browned butter, which takes butter from one of my favorite things (what can I say?) straight to my favorite.
Plus, they're made with sweet potatoes. I truly love sweet potatoes, but I always know that if I talk about them at all, I run the risk of getting one of those eye-rolling lectures from someone about the difference between sweet potatoes and yams and how grocery stores the world over name them all wrong. I don't know the difference, and if you try to tell it to me, I'm gonna class it up and stick my fingers in my ears (or in my eyes, if you write it out here on the Internet).
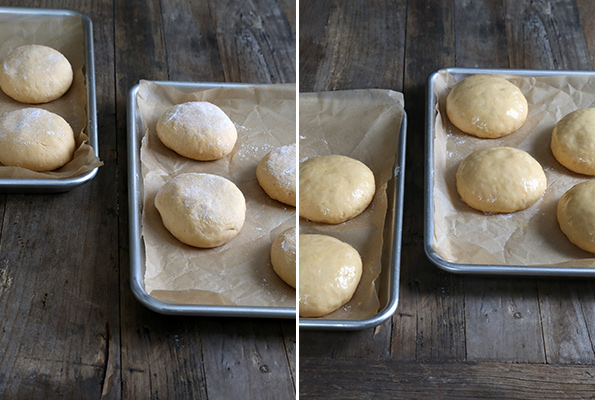
Oh, and guess what? The bread dough is so dreamy and easy to work with that there is absolutely no need for any sort of long, slow refrigerator rise. You will want to chill the dough a bit, though, after it rises since it's just much easier to work with cold dough and that's a fact.
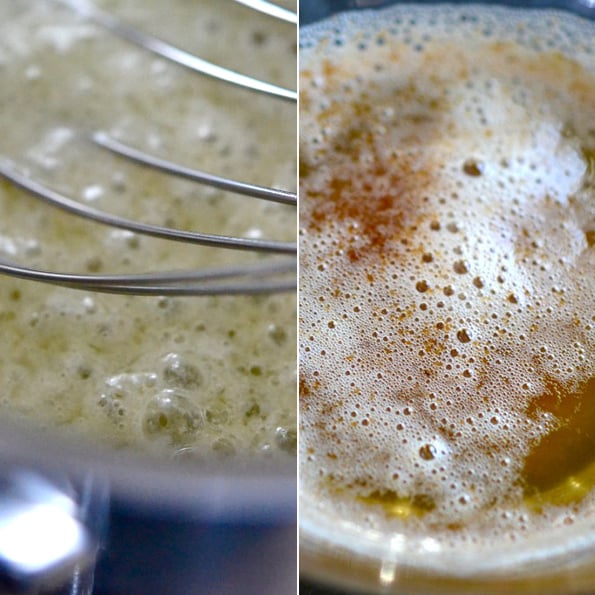
If you're afraid of browning butter, I promise It's super easy—just take it slow.
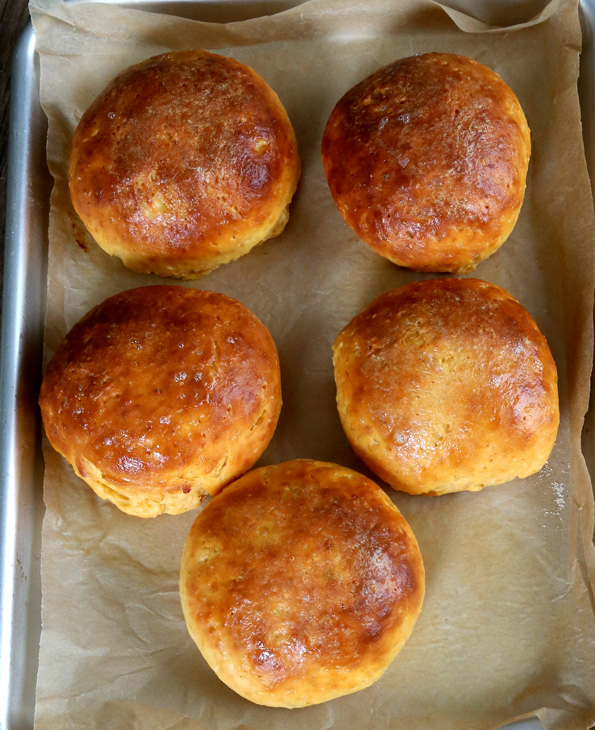
I most like these super flavorful rolls made full-size, because they make amazing hamburger buns and I just don't see the point of making “sliders” at home since, well, double the work for exactly the same enjoyment. But if you'd prefer sliders, go ahead and divide the rolls into as many pieces as you like before baking (say, 12?).
Gluten Free Sweet Potato Browned Butter Rolls
Equipment
- Stand mixer fitted with dough hook attachment
Ingredients
- 6 tablespoons (84 g) unsalted butter chopped
- 3 ½ cups (490 g) Gluten Free Bread Flour plus more for sprinkling (click thru for details; you must use this blend)
- 1 ⅔ teaspoons (5 g) instant yeast
- 2 teaspoons (12 g) kosher salt
- ¾ cup (5 ¼ ounces) roasted mashed sweet potatoes from about 3 small sweet potatoes (See Recipe Notes)
- 1 tablespoon (21 g) honey
- 1 ⅛ cups (9 fluid ounces) milk at room temperature
- Egg wash (1 egg + 1 tablespoon water, beaten), for brushing
- Unsalted butter for brushing the tops
Instructions
Brown the butter.
- Place the butter in a small, heavy-bottomed saucepan, and cook over medium heat, stirring constantly. First, the butter will melt, and then it will boil and foam. Continue to stir, and watch carefully. The protein solids will separate and drop to the bottom of the pan.
- As soon as you begin to smell a nutty smell and begin to see a golden brown color start forming around the edges of the saucepan, remove the pan from the heat and continue to stir. Once the bubbles clear, you will be able to see whether the protein has begun to brown. If not, return to the heat briefly, stirring constantly, and remove once the butter has begun to brown.
- Continue to stir, as it will continue to brown off the heat. Pour the brown butter into a small, heat-safe bowl and set it aside to cool until no longer hot to the touch.
Make the dough.
- Place the bread flour and yeast in the bowl of a stand mixer, and use a handheld whisk to combine well. Add the salt, and whisk to combine. Add the cooled browned butter, sweet potatoes, honey and milk, then attach the dough hook to the stand mixer, and mix on low speed until combined. Raise the mixer speed to medium and mix for about 5 minutes. The dough should be smooth and stretchy.
- Spray a silicone spatula lightly with cooking oil spray, and scrape down the sides of the bowl. Transfer the dough to a lightly oiled bowl or proofing bucket large enough for the dough to rise to double its size, and cover with an oiled piece of plastic wrap (or the oiled top of your proofing bucket).
- Set the dough in a warm, draft-free environment to allow it to rise to double its size (about 1 1/2 hours).
- Once it has doubled, place it in the refrigerator for at least 15 minutes or until it is chilled. This will make it much easier to handle.
Begin to shape the dough.
- Line a rimmed baking sheet with unbleached parchment paper and set it aside.
- Remove the dough from the refrigerator and turn it out onto a lightly floured surface and, using the scrape and fold kneading method and a very light touch, sprinkle the dough with more flour and knead it lightly, sprinkling with flour when necessary to prevent it from sticking, scraping the dough off the floured surface with a floured bench scraper, then folding it over on itself. Repeat scraping and folding until the dough has become smoother. Do not overwork the dough or you will incorporate too much flour and it will not rise properly.
Shape the buns + the final rise.
- With a floured bench scraper, divide the dough into eight pieces of equal size. Shape each piece into a round, and place the rounds on the prepared baking sheet, about 3-inches apart from one another.
- Sprinkle the tops of the rounds lightly with flour. Cover the baking sheet with lightly oiled plastic wrap, and place in a warm, draft-free location until nearly doubled in size (about 1 1/2 hours).
Bake the buns.
- About 25 minutes before the buns have finished rising, preheat your oven to 375°F, then remove the plastic wrap and brush the rolls generously with the egg wash.
- Allow to finish rising, and then place the baking sheet in the preheated oven and bake for about 10 minutes.
- Reduce the heat to 350°F, remove the buns from the oven, and brush the tops with the melted butter.
- Return the baking sheet to the oven and bake until the internal temperature of the buns reaches about 185° and they are golden brown all over (about another 8 minutes).
- Remove from the oven and cover with a tea towel as they cool before slicing and serving.
Notes
WANT TO SAVE THIS RECIPE?

Thanks for stopping by!
Hi, I’m Nicole. I create gluten free recipes that really work and taste as good as you remember. No more making separate meals when someone is GF, or buying packaged foods that aren’t good enough to justify the price. At Gluten Free on a Shoestring, “good, for gluten free” just isn’t good enough! Come visit my bio!

anna says
I made these halfway last night, and i have to say that the batter was gorgeous! I was, however, a bit confused about the rise times: 90 minute warm rise, short sit in the fridge, shaping, and then another 90 minute warm rise? I did the first 90 minute warm rise, but, instead of a short stint in the fridge, theyll be sitting in there until I shape them tonight (a full day). Do you think thatll impact their flavor or texture? Maybe a bit more yeasty tasting? Thanks!
Nicole Hunn says
You should be fine, Anna! Like you said, a bit more yeasty in flavor, and the only other to watch out for is that they don’t overproof in their second rise. That’s all. :)
anna says
Thank you, Nicole! Im going to assume that the finger poke test will work the same with gluten free bread to check for over/under/perfect “proofed-ness”?
anna says
I didnt get home til after 9pm last night so I ended up smoothing the dough and then just cutting these into pieces instead of shaping them. They only needed a 60ish minute warm rise, and ended up rising and baking more biscuit-shaped, but oh man were they delicious! Next time i definitely need to schedule better and shape them, but theyre still amazing done the lazy woman’s way. Thank you for this recipe!