This post may contain affiliate links. Please read our disclosure policy.
No more buying gluten free ice cream cones when you can make them yourself with a simple batter and a pan. No special equipment needed!

What makes these gluten free ice cream cones special?
They're sugar cones! Most of the gluten free cones I've bought are cake cones, and they're super fun. They're relatively expensive, but not that hard to find any more.
One of my children just loves cones, and I like to keep the cake cones on hand for when the mood strikes her. If you ask me, they taste like styrofoam, but she doesn't seem to care.
These are sugar cones, though. They have a deep caramel-like taste and a delightfully snappy texture—all without the help of a special pizzelle or waffle cone maker.

Why make gluten free ice cream cones instead of buying them?
Even I, a lover of an impossible recipe development project, wouldn't attempt to make gluten free cake cones at home. They, like gluten free rice krispies, require lots of special equipment.
I'm too far out of my depth on that one. And I would never want to share a recipe you couldn't make without buying heavy machinery.
But gluten free sugar cones are harder to find than cake cones. And in my experience, they're much more expensive and tend to go stale quickly.
Few things irritate me more than spending a ton of money on a packaged gluten free product only to have it go bad before I can serve it. Plus, these cones are as easy to make as gluten free pancakes.

No special equipment needed to shape cone
When I first developed this recipe back in 2011, I used metal cream horns to shape the cones. They're too small, though, and kind of slippery, so I don't recommend that.
In the video above, you see me using a wooden cone with a handle to shape the pancakes into cones. It's a pizzelle roller by O'Creme brand (affiliate link), costing less than $10.
The cone holder rack is a “cupcake cones baking rack” from Wilton, and it's designed for baking cupcake batter into sugar cones. There are plenty of inexpensive acrylic cone stands, too, if you'd like to be fancy.
The stands serve to hold the cones as they cool completely so they don't lose their shape. They're nice to have, but I don't believe they're necessary at all.

Tips for getting the cones just right
The batter for these cones comes together in a snap, and uses regular gluten free pantry items. The key is in the technique.
- The cones need to be shaped when they're still warm, or they will stiffen and break. If you haven't reached the shape you like before a pancake stiffens, try placing it in the microwave for 10 seconds to soften and shape again. It's better to overcook rather than undercook the pancake. An undercooked cone will never become crisp, and may even become overly chewy after the first day.
- Ratio-wise, there's a lot of sugar in the batter, which may blacken around the edges if you overcook them a bit. Luckily, though, they won't taste burnt.
- And, of course, the perfect vanilla ice cream in a crispy sugar cone is what dreams are made of. May I recommend our recipe for no-churn 3 ingredient vanilla ice cream?

Ingredient substitution suggestions
Dairy substitute
The dairy in this recipe comes in two forms: melted butter and milk. Vegan butter (Miyoko's Kitchen or Melt brand) should work well for the melted butter. The milk can be any unsweetened nondairy milk you prefer.
Egg white substitute
I haven't tried making this recipe with an egg white substitute like aquafaba, which is the liquid in a can of chickpeas. I'm afraid I can't say whether it would work or not, but if you try, please let us know how it goes.
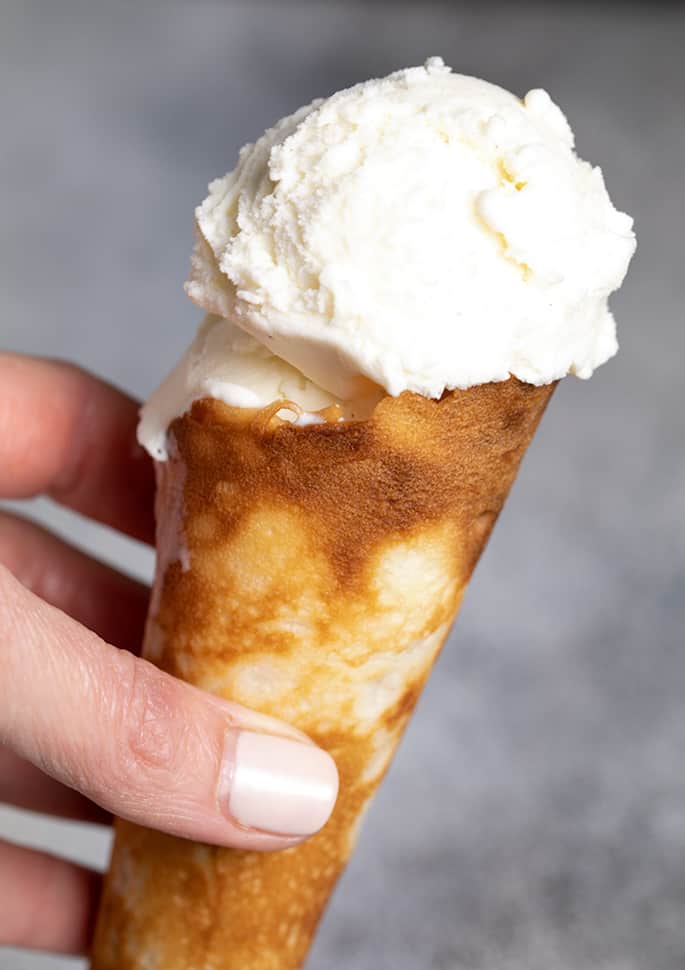
Gluten Free Ice Cream Cones Recipe

Ingredients
- ½ cup (70 g) gum free gluten free flour, See Recipe Notes
- ⅛ teaspoon xanthan gum, optional (See Recipe Notes)
- ⅛ teaspoon kosher salt
- ⅜ cup (75 g) granulated sugar
- 2 tablespoons (28 g) unsalted butter, melted and cooled
- 1 (25 g) egg white, at room temperature
- 1 teaspoon vanilla extract, or 1/2 teaspoon almond extract
- 2 to 4 tablespoons milk, (plus more by the drop, as necessary)
- Coconut oil or butter for greasing the pan
Instructions
- In a large measuring cup or bowl with a pour spout, place the flour blend, xanthan gum, salt and granulated sugar. Whisk to combine well.
- Add the melted butter, vanilla extract, egg white, and 2 tablespoons of milk. Whisk until very smooth. Add more milk by the teaspoonful, whisking well in between additions, until the batter is pourable but not too thin.
- It should be about the consistency of a classic pancake batter. If you’ve used an all purpose gluten free flour with xanthan gum already in it as your flour blend, you’ll need to add a few more milk drops before each cone.
- Brush a 10-inch nonstick pan lightly with coconut oil or butter, and place over medium-low heat. Once the pan is hot and the oil is shimmering, pour or ladle in about 3 tablespoons of batter.
- Gently shake the pan so that the batter is evenly distributed in a circle, about 5 inches in diameter. I also like to use a small offset spatula to create a round with uniform thickness. Be careful not to spread the batter so thin that the edges will instantly crisp.
- Cook on one side until just set and beginning to brown, about 2 minutes. Flip the pancake and press evenly on the cooked side with a flat spatula so that the underside browns evenly.
- Cook, while pressing, for another minute, and flip. Repeat the procedure on the other side, pressing to brown evenly.
- Once the pancake is a deep golden brown on at least one side, remove it from the pan, and roll it into a cone shape immediately. If you’re doing it free form, simply roll the round pancake with one hand around the fingers of the other, concentrating on the tip.
- Cinch together the bottom of the cone while it is still warm, and gently hold it closed until the seams stick together. Place on a wire rack to cool.
- Repeat with the remaining batter and cones.
- Place a mini marshmallow or two in the bottom of each cone to help catch drips as the ice cream melts. In a non humid environment, they will stay crisp at room temperature for a couple of days, or in 3 days in a sealed glass jar at room temperature.
Video
Notes
The best flour blend for this recipe is my xanthan gum-free gluten free flour blend, made of 3 ingredients. Here, you'd use 46 g superfine white rice flour + 15 g potato starch + 9 g tapioca starch. If you add 1/8 teaspoon xanthan gum, which is less than you'll find in Better Batter, the batter is perfect. Without the xanthan gum, you'll simply have a runnier batter that is more likely to develop tiny holes in the cones. If you prefer to use one of our all purpose gluten free flour blends, like (mock) Better Batter, you'll need more milk to create the proper batter consistency. And the cones may not be as crispy.
Nutrition information is automatically calculated, so should only be used as an approximation.




Hi, is it possible to freeze the cones please?
I’m afraid these don’t freeze well, no, Emma.
Aquafaba works for egg replacement!!
That’s so great to know, Patricia. Thanks for sharing that!
That wooden shaper you have in the photo looks remarkably similar to the pestle in a cone-shaped food mill/colander (don’t really know the name, but it’s used for separating seeds and skins from fruit for jam making).
Yes! It absolutely does, Chantal. You’re referring to a conical strainer or chinois, and, indeed, a pestle! I have a set of those, and I hadn’t even considered just using that pestle, but I should have.
I have made ice cream cones for 30 years because I was gifted with a Nordicware krumkaka electric iron years ago. Prior to that we used a stovetop flip iron. I would rather have the electric iron than getting the Wilton cone holder. Cooking time is a little bit less per unit with using the iron instead of stovetop frying. I ended up baking the cones rather than frying in oil. I also vary the liquid. I like thicker cones which are sturdier. I tend to use about a teaspoon of dough, and prefer to drop the dough rather than pour the thinner, more fragile batter which your recipe will produce. I also use the wooden cone with a handle to shape the cones. With thicker cones, I insert 4 cones one inside the other for storage in a Tupperware pan (and fill the pan) and I can freeze the cookies (or cones) with ease. Overall, the recipe is still a time consuming work of art.
It sounds like you’re using your own recipe, Margaret. I’m glad you found something that works for you. This is just how I make them, and it’s not time-consuming at all.
Thank you so much!! I have bought a cone maker for my husband as a surprise. I no have the GF recipe I need for it! I have all of your books but one. I ‘ll be buying that book once e are out of lockdon. I have recommended your books to so many people!!
Hi Natalie, I hope you enjoy the cones! I’m not 100% sure what a cone maker does, but I hope you love it. Thank you so much for the kind words and support. They mean so much!
Every so often Whole Foods does a gluten-free tour of their stores. I went to one when I was living in Colorado & it was very helpful & informative. We also got a lot of free samples to take home! It is too expensive to shop there on a regular basis but once in a while I would treat myself. Now that I have found your blog, Nicole, and your cookbook, I haven’t been back…I can bake my own gf goodies!
Hi, Peggy,
How wonderful, that you find yourself liberated from the need to buy. It is nice to have the option to buy, but it’s even nicer when it is just that — an option, not a necessity. Happy baking!
xoxo Nicole
Thank you so much for this recipe! I’m going to have to make sure I whip up a batch of cones when my parents come to visit at the beginning of next month. They absolutely LOVE to hear when I bake something that I haven’t been able to eat for so long, but they’re halfway across the country now and don’t really get to enjoy them (though my husband ‘taste tests’ everything and USUALLY prefers the GF foods. Bread has been his only regular wheat fall-back). I’d already planned on making them homemade ice cream, so why not include this extra little touch? :)
Also, thank you so much for working through all of this for those of us who A) don’t have the time, B) are flubs in the kitchen, and/or C) are ridiculously intimidated by the scope of making food for themselves. I have friends and family that fall into both, but me? I have tons of free time with all my auto-immune diseases – celiac actually having stemmed from a failing liver my senior year in high school. (Well, the celiac started that year, I was diagnosed with the liver problem when I was twelve. :P) So finding websites like yours, that are around to help us all feel normal and not bat-poo crazy, are a delight. :) I appreciate everything you do, and have done, for all of us.
YUS! Finally, a gluten-free ice cream cone! Woo-hoo! Love the idea of putting the marshmallow in the bottom of the cone too, genius.
Yeah, I’ve been to a few gluten-free expos here in New Zealand, I don’t know how they compare with ones in the USA, but I treat it like a race for free food and taste tests! It’s so much fun! :)
Hi Nicole,
Thanks for another wonderful recipe and blog post – I love reading them! I have an ice cream cone maker that my husband bought a few months ago (impulse buy) and think I’ll finally get around to trying it out with your recipe!
Take Care,
Tammie