This post may contain affiliate links. Please read our disclosure policy.

Why I love this recipe for gluten free Japanese cheesecake
Unless you've had perfect, cotton-soft Japanese cheesecake before in your life, this gluten free Japanese Cheesecake is going to be the softest, lightest cheesecake you've ever had. No contest.
I like to think of it as the perfect cross between a traditional gluten free cheesecake and a gluten free sponge cake—with all the taste of the cheesecake (love) and the texture of the sponge cake (so light!).

The method has a couple extra steps to it, but I take you through it in painstaking detail so you've nothing to worry about at all. And you'll be rewarded. Richly.
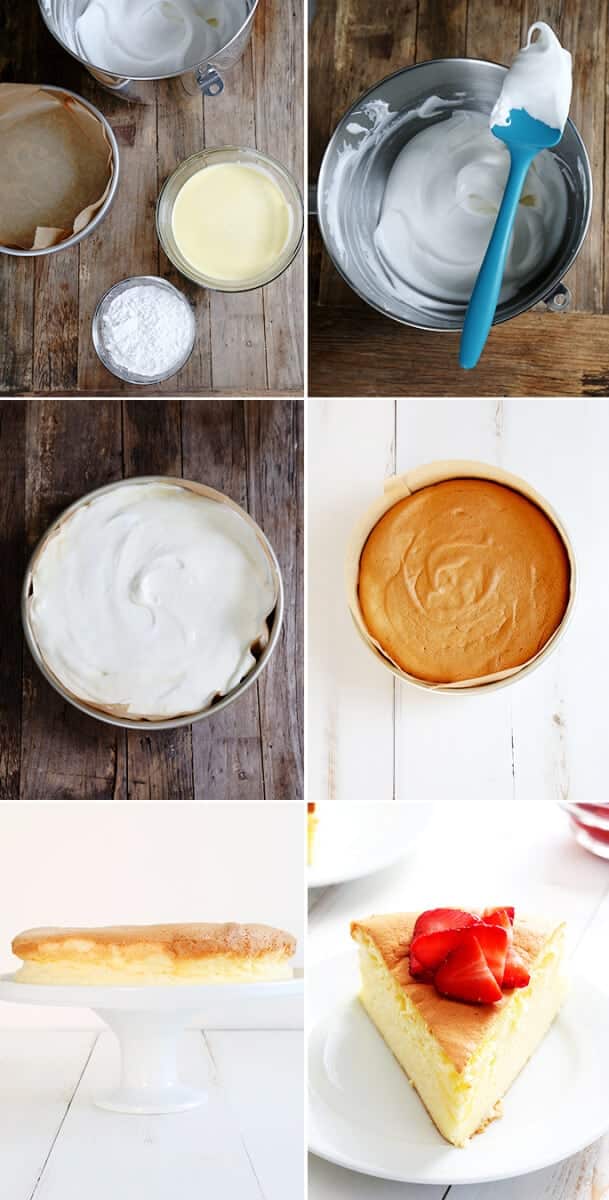
This recipe has four components:
1. Prep, where we preheat the oven, set up the pans, sift together the dry ingredients, and boil some water for the water bath in which we'll bake the cake.
2. Make the cream cheese batter, where we'll heat and combine the milk, butter and cream cheese with the egg yolks, without scrambling the yolks, and then combine with the dry ingredients.
3. Make the meringue and combine, where we'll beat the egg whites with sugar until soft peaks from before folding it into the cream cheese batter before, finally, we
4. Bake and chill the cake. All of the ingredients are basic pantry-style ingredients. We are just combining them in different ways to achieve a particularly extraordinary result.
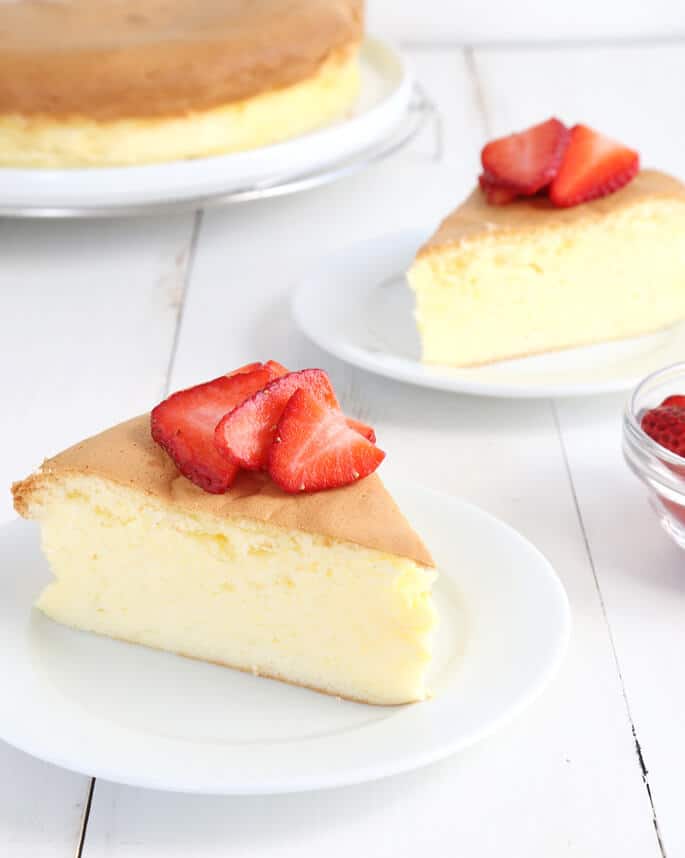
Read through the recipe directions fully before you begin. Gather your ingredients at the proper temperatures and then relax. It's going to be spectacular!
A few ingredient notes:
- I have tested this recipe using an all purpose gluten free flour blend, like Better Batter, and it simply did not hold its rise as the cream cheese batter was too gummy to fully incorporate the meringue.
- The 1/8 teaspoon of xanthan gum I recommend adding helps the cake hold its shape and rise.
- You simply can't make this recipe without eggs. So sorry!
- I haven't tested this recipe with light cream cheese, and I'm afraid it would yield a dense result. But feel free to experiment, as always!
- You can replace cream of tartar with 1 teaspoon of freshly squeezed lemon juice. Its purpose is to help the meringue hold its shape.
- I think any sort of milk would work, as long as it's not nonfat! I also think that a nondairy butter replacement would work fine, but I'm not sure about the cream cheese alternative!
Gluten Free Japanese Cheesecake

Equipment
- Springform pan
Ingredients
- ⅜ cup (54 g) basic gum-free gluten free flour blend, (36 grams superfine white rice flour + 12 grams potato starch + 6 grams tapioca starch/flour)
- ⅛ teaspoon xanthan gum, (recommended, but optional)
- ¼ cup (36 g) cornstarch
- 5 (125 g) egg yolks, at room temperature
- 7 tablespoons (100 ml) (100 ml) milk
- 3 ½ tablespoons (50 g) (50 g) unsalted butter, chopped
- ¼ teaspoon kosher salt
- 8 ounces cream cheese, at room temperature
- 1 tablespoon freshly squeezed lemon juice
- 6 (150 g) egg whites (150 g), at room temperature
- ⅛ teaspoon cream of tartar
- ¾ cup (150) (150 g) granulated sugar
Instructions
- Preheat your oven to 325°F. Place a large roasting pan near the stove, and set about 8 cups of water to boil.
- Once the water has boiled, keep it covered but turn off the heat. Into a small bowl, sift the flour blend, optional xanthan gum, and cornstarch to combine and eliminate any clumps. Set the bowl aside.
- Grease a standard 9-inch round cake pan, and place a round of unbleached parchment paper on the bottom of the pan. Create a “collar” of parchment paper around the sides of the pan, reaching about 2 inches above the lip of the pan.
- Alternatively, place a large rectangle of parchment paper into the greased pan and up the sides, slicing the sides of the paper periodically to help the sides lay flat against the pan. Set the pan aside.
Make the cream cheese and egg yolk batter.
- Place the egg yolks in a medium-size heat-safe bowl, and set them next to the stovetop.
- Set a large mixing bowl right next to that. In a medium-size saucepan, place the milk, butter and salt. Bring to a light simmer on the stovetop over medium heat, then add the cream cheese and lemon juice.
- Turn off the heat and whisk until the cream cheese is melted and the mixture is smooth.
- Add about half of the warm cream cheese and milk mixture to the bowl of egg yolks very, very slowly, whisking the egg yolks constantly. This will temper the egg yolks with the hot liquid so that they don’t scramble.
- Pour the egg yolk mixture back into the saucepan with the remaining cream cheese mixture and whisk to combine.
- Pass the cream cheese and egg yolk mixture through a strainer and into the large mixing bowl.
- Add the dry ingredients and mix to combine well. The mixture will be thick but smooth and soft.
Make the meringue.
- In the bowl of a stand mixer fitted with the whisk attachment or a large bowl with a handheld mixer, place the egg whites and beat on medium speed until frothy.
- With the mixer still on medium speed, add the cream of tartar and continue to beat until the egg whites have nearly doubled in volume.
- Add the granulated sugar in a slow but steady stream, and increase the mixer speed to medium-high.
- Continue to beat until the mixture forms soft and glossy peaks (about 5 minutes of beating total). Soft peaks are peaks that form, and then slowly fold over on themselves.
Combine the batter with the meringue.
- Fold the meringue carefully into the cream cheese batter in three parts, taking care not to deflate the meringue. Pour the mixture into the center of the prepared pan and spread into an even layer with a silicone spatula.
Bake the cake.
- Place the cake pan in the center of the roasting pan from Step 1, and place on the bottom rack of the preheated oven.
- Pour the hot water into the roasting pan until it reaches about 2/3 of the way up the sides of the baking pan.
- Close the oven door and bake the cake, undisturbed, until the top is lightly golden brown and a toothpick inserted into the center of the cake comes out with no more than a few moist crumbs attached (about 1 hour 20 minutes).
- Turn off the oven and, with the cake still in it, leave the oven door open about 3 inches.
- Allow the cake to sit in the oven for 20 minutes or until the oven temperature has fallen below 200°F.
- The cake will fall a bit as it cools.
Chill the cake.
- Remove the pan from the oven, pour off the water and dry the bottom of the cake pan.
- Place the cake in the refrigerator to chill for about an hour.
- Invert the cake onto parchment-lined plate.
- Remove the parchment paper from the bottom and sides of the cake, and re-invert the cake onto a serving platter.
- Remove the final piece of parchment paper.
- Slice in only one direction (i.e., do not saw back and forth) and serve chilled.
Nutrition information is automatically calculated, so should only be used as an approximation.



My daughter, who hasCeliac, loves this and requests for her birthday ❤️
Aw, Deb, happy birthday to her! She has good taste. :) Thanks for sharing that!
Muy buenas recetas! Gracias por compartir.
¡Por supuesto, Liliana!
this looks amazing nicole! i’m going to make this for my birthday this April. i’ll let you know how it turns out. :) -mena
This would be fabulous for a bridal shower I am hosting. Do you think it would work well in mini muffin or regular muffin size? How would one go about that?
Thanks!
can arrowroot be substituted for the cornstarch?