This post may contain affiliate links. Please read our disclosure policy.
A gluten free Dutch Baby pancake is the best way to get a warm and comforting gluten free breakfast on the table in about 20 minutes. It feels light but is still filling—and it only looks like it was hard to do!

What makes this gluten free Dutch baby recipe special
Maybe you've never had a Dutch baby/German pancake, gluten free or otherwise. If not, you're in for a treat. If you have had a Dutch baby, I bet you've been missing this lovely cross between a pancake and a popover.
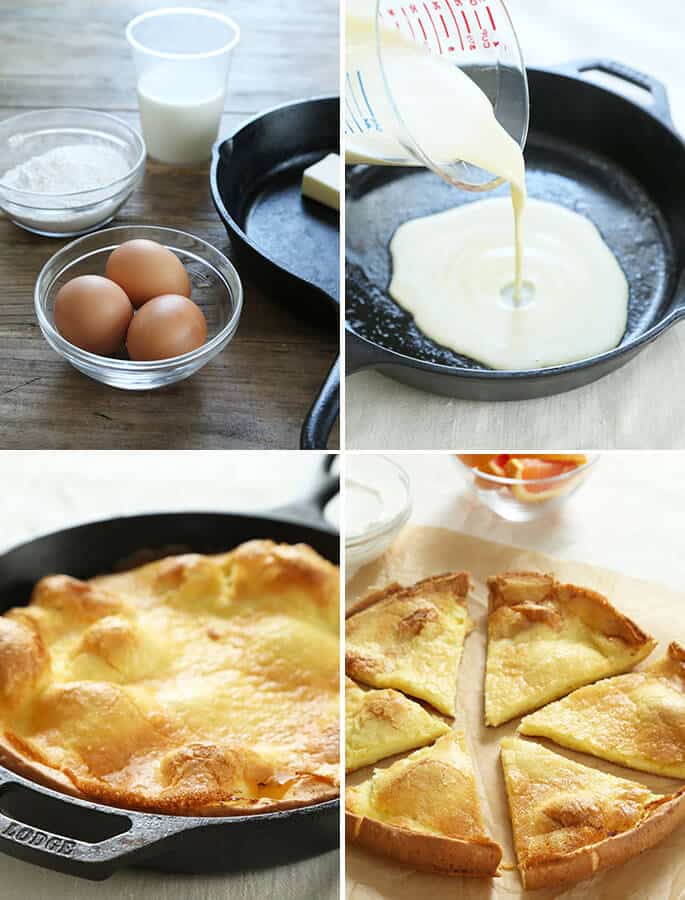
The batter is made simply with basic pantry ingredients like eggs, butter, milk, and our simplest gluten free flour blend. We don't use any xanthan gum at all, since we want a completely smooth, thin, flowing batter.
We combine the milk, eggs, flour blend and salt in a blender to create a simple, pale yellow, smooth and pourable room temperature batter. Then, pour the batter into a very hot, buttered cast iron (or other oven safe) pan that's about 9-inches in diameter. In the oven, the batter will puff and brown beautifully.
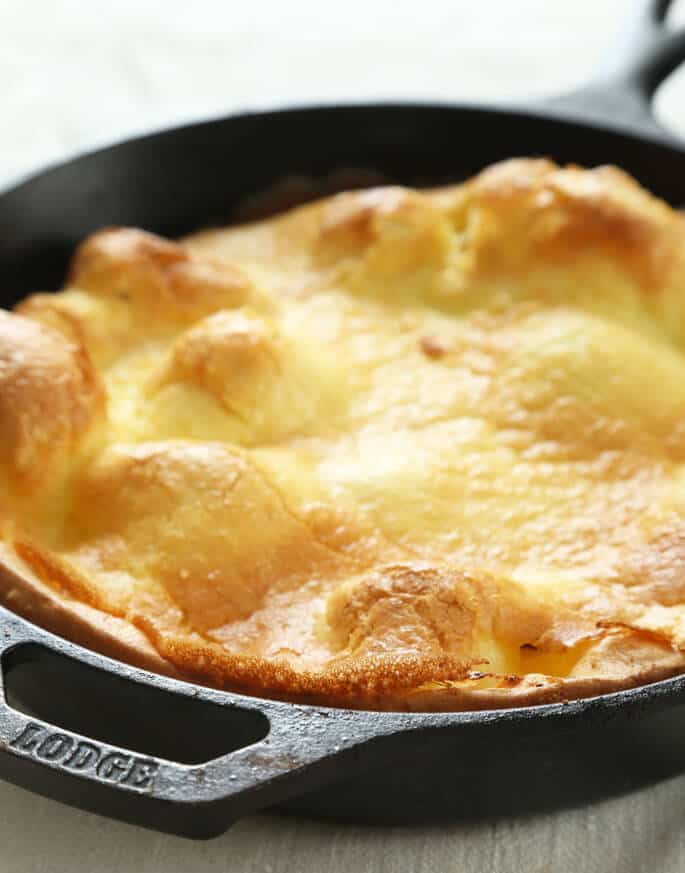
The underside and edges, and any big bubbles will brown beautifully in the oven, creating a lovely contrast with the custard-like thicker portions of the pancake. The center of the gluten free Dutch baby will fall as it cools, which is exactly what it's meant to do to create all those varied textures.
Tips for making the perfect gluten free Dutch baby
As is especially the case with a super simple recipe like this one, there are a few tricks of the trade.
Select your gluten free flour blend carefully
You must select and prepare the few necessary ingredients carefully. Not just any flour blend will do. You need my three-ingredient gum-free blend, which doesn't contain xanthan gum and is made with superfine white rice flour so your Dutch baby is completely without any grit or unwanted rough texture.
Begin with room temperature ingredients
Whenever you are combining eggs and milk together like we are here, the ingredients must be at room temperature for them to be smooth when combined. If your eggs are at room temperature but your milk is cold, the eggs will clump when the milk lowers their temperature.
Make sure your pan is really hot
And your pan must be hot from the oven when you pour in the batter. Pouring room temperature batter into a very hot pan gives rise to that gorgeous, puffy pancake and the even browning.
You don't have to use a cast iron pan, as long as whatever pan you're using is oven safe, of course. I prefer a cast iron pan because it holds heat so well.
As with many things, there's something special about baking it in a cast iron skillet, as it holds heat so well and heats so evenly. But I have made this gluten free Dutch baby successfully in a 9-inch cake pan.
If you can, try to avoid making it in a Pyrex pan, as glass bakes very hot, and the pancake is much more likely to burn before it browns.
Don't use a pan that's too big or too small
If your pan is too small, you will overfill it with batter and your pancake won't puff up enough. If your pan is too big, the batter will spread too thin, and there won't be enough batter to puff before it begins to burn.
FAQs
Was your pan hot enough? Did you heat the pan before pouring in the batter?
Were any of your ingredients cold when you combined them? If your eggs or milk are cold, they will probably clump rather than combining into a smooth, creamy batter.
Did you use an all purpose gluten free flour blend that already contains xanthan gum? You really can't make this recipe with xanthan gum, as the gum makes the batter too dense, as xanthan gum absorbs tons of moisture and makes food viscous. Sometimes, like when we're making gluten free bread, we want that. Other times, like in crepes, pancakes, and a Dutch baby, we don't. If you don't want to build your own gum-free gluten free flour blend, you can always use my own gluten free multipurpose blend, Nicole's Best, which is perfectly balanced for any recipe and doesn't already contain xanthan gum.
Yes! You can double the recipe and bake it in two separate pans. Just heat the pans with butter as instructed, and then divide the batter evenly between them. If you do make the doubled recipe in a 9-inch x 13-inch rectangular pan, it will cook and taste good, but it won't puff in the same way that it does when it's baked in smaller pans.
A Dutch baby has its intended taste, texture, and flavor when it's fresh out of the oven. However, leftover wedges can be stored at room temperature for about 4 hours, or even wrapped tightly and stored in the refrigerator for at least 1 day. You can make the batter ahead of time and store it in the refrigerator for up to 3 days, and then let it come fully to room temperature before baking it in a hot pan. Be sure that none of the flour has settled out of the batter before you use the mixture, though, and if you're at all unsure, blend it quickly once more before baking it.
Gluten free German pancake
Wondering why some people call it a Dutch Baby and others a German Pancake? Well, as the story goes, the young daughter of a German restaurateur in Seattle couldn't pronounce the word “Deutsche” and instead said “Dutch.”
And so this classic German pancake became known as a Dutch baby. Fact or fiction? Who knows. All I know is that it's ridiculously easy and delicious, and it works like magic. Every. Single. Time.
Gluten free Dutch baby pancake recipe
Gluten Free Dutch Baby Recipe
Equipment
- Blender
Ingredients
- 1 ½ tablespoons (21 g) unsalted butter
- ¾ cup (6 fluid ounces) milk, at room temperature
- 3 (150 g (weighed out of shell)) eggs, 150 g, weighed out of shell at room temperature
- ¾ cup (105 g) basic gum-free gluten free flour blend, (69 g superfine white rice flour + 23 g potato starch + 13 g tapioca starch/flour)
- ¼ teaspoon kosher salt
Instructions
- Preheat your oven to 375°F. Place the butter in a 9-inch cast iron skillet or heavy-bottom 9-inch cake pan.
- Place the pan with the butter in the preheated oven just until the butter is melted, while you make the batter.
- In a blender, place the milk, eggs, flour blend, and salt, and blend just until smooth. You do not need a high-speed blender for this task. The batter will be thin.
- Remove the hot pan with the melted butter from the oven, and pour off excess butter, leaving just a coating on the pan.
- Working quickly, pour the batter into the hot pan and return to the oven. Bake for 12 minutes.
- Rotate the pan 180° and continue to bake until the pancake is puffed and golden brown all over (about another 5 minutes). Remove from the oven.
- The pancake should lift easily from the pan. If it seems stuck on any sides, loosen it with a knife and slide it from the pan onto a wire rack. This will ensure that the bottom of the pancake doesn’t become soggy as it cools.
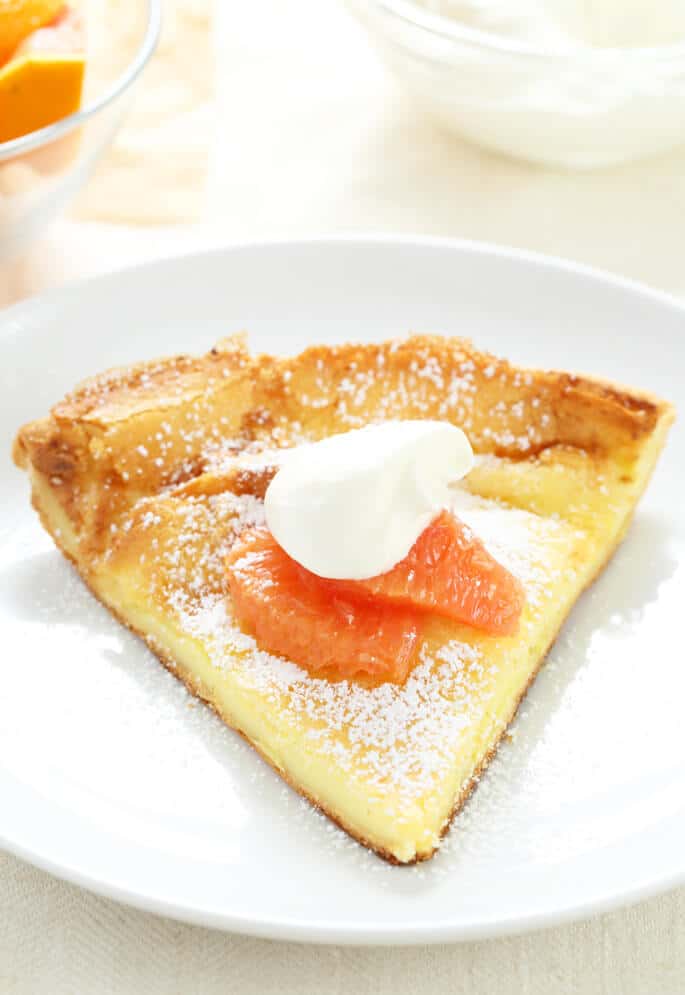
- Allow to cool briefly before slicing into 6 wedges and serving warm, garnished with fruit (in the winter, I like to serve it with citrus; in the summer, with berries), a light dusting of confectioners’ sugar, and maybe a dollop of whipped cream.
- Any leftover wedges can be stored at room temperature for about 4 hours, or even wrapped tightly and stored in the refrigerator for at least 1 day.
- Reheat gently in the microwave before serving. This recipe can be doubled easily, and baked in two batches.
Nutrition
Nutrition information is automatically calculated, so should only be used as an approximation.





Can salted butter be used in your recipes, leaving out the added salt?
Hi, Marilyn, I really recommend using unsalted butter since the difference is not only salt, but the moisture content, with salted butter having a higher moisture content. Sometimes it matters more than others, and some salted butters have more moisture (and more salt) than others. I use unsalted butter to control for the amount of salt and the amount of moisture, so we are all using the same ingredients, which leads to their performing the same way in baking. I hope that’s helpful!
This is the one! If anyone is in doubt, let me reassure you that a gum-free flour blend is the way to go. I made two batches to compare, one with the recipe’s recommended blend, and one batch with off the shelf gf flour (Bob’s). No shade to Bob’s – I love that flour for so many things – but the gum free blend was so smooth and puffed up better, had a better overall flavor and texture. I didn’t have potato starch on hand so I used an equal weight of tapioca. Weighing the dry ingredients is key!
Thank you for this wonderful recipe! It’s going into regular rotation here (when eggs are plentiful 😁)
You’re so welcome, Selina! I agree that the gum-free blend is the way to go. It makes a huge difference. I’m mindful that it’s an extra step to not be able to use an all purpose blend, but sometimes (particularly in pancakes of all kinds) it just doesn’t work. And yes, when eggs are plentiful, there should be Dutch pancakes often!
I’m about to make this, but I’ve been making dutch babies for decades, using an old recipe from my German family. What? .. “pour off excess butter” — sacrilege! ;)
Only for sourdough, right, Erica? We would never ever waste precious gf batter. ;)
Hi, I make this for my family very often – the gluten option that is. I would love to join them. I am milk diary intolerant. Think I can use non-diary milk and butter alternatives? Thank you you for any input.
I didn’t realize how much I missed these until I saw your recipe! This has to be the easiest recipe I’ve made from you so far. I made them for breakfast and since I didn’t have any milk, I used yogurt. Worked great for me and even my sick toddler, who was refusing food, hobbled them up. Thanks, Nicole!
Oh yay, Sarah! That’s so great. And really good to know that the recipe worked with yogurt. Hope your little one is feeling better soon. :)
Is there a difference between white rice flour and super fine white rice flour?
Also, if your eggs don’t weigh quite enough, what do you do? I’ve read that you can add egg whites from a carton, but was wondering what you personally use.
Thanks
Hi, Michelle,
Yes, there is a big difference between white rice flour and superfine white rice flour! Most rice flours sold are not superfine and lead to a gritty taste in the baked goods. Authentic Foods brand is the only brand that I am sure makes a truly superfine rice flour. Vitacost makes it own brand that it also calls superfine rice flour, but I haven’t tried it.
If your eggs don’t weigh enough, if a recipe calls for whole eggs, just beat another egg and add just enough of the beaten egg to make up the remaining weight.
Good questions, Michelle!