

This post may contain affiliate links. Please read our disclosure policy.
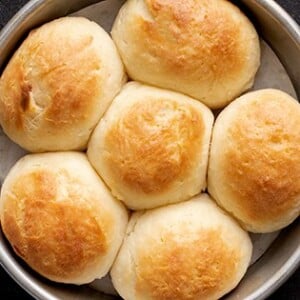
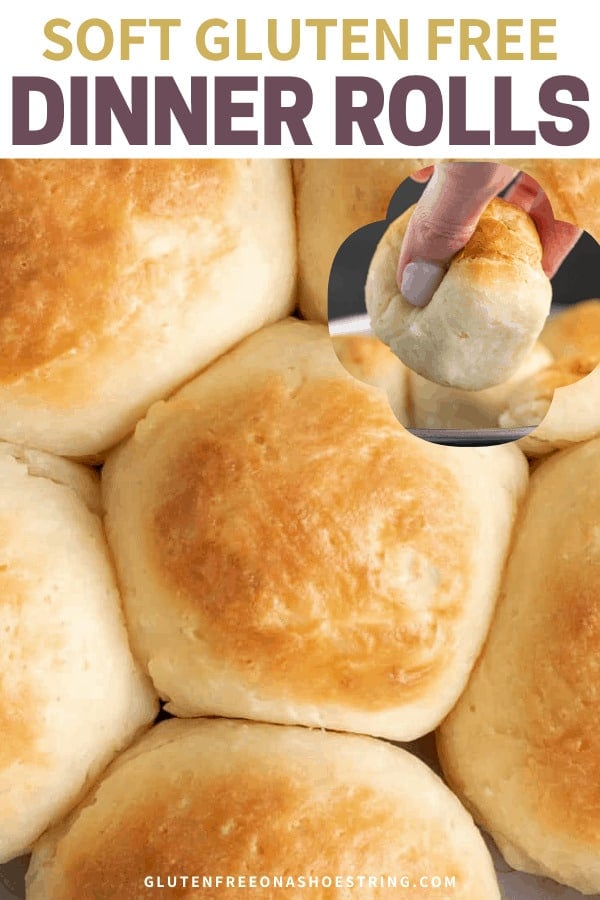
These soft, homemade gluten free dinner rolls are easy enough for a weeknight, and special enough for any holiday table. They bake up golden, tender, and fluffy every time.

Why this recipe works
These dinner rolls bake up soft and fluffy inside with a beautiful golden brown crust outside that’s still squishy, never tough. The dough comes together with just about 20 minutes of hands-on time and a fast rise, so you can have fresh rolls on the table quickly.
The dough itself is easy to handle and shape, making the process smooth from start to finish. Even if you’re new to baking bread, you’ll find this straight-forward recipe do-able, especially with our step by step photos below.
You can also parbake, or partially bake, them, and freeze, so you defrost and finish baking them right when you’re ready. And if you’re avoiding dairy, simple ingredient swaps make it easy to keep these rolls completely dairy-free without losing their soft texture or buttery flavor.
Recipe ingredients

These few ingredients come together to make the softest, most tender gluten free rolls you’ve ever had:
- Gluten free flour: Use a high-quality all purpose gluten free flour blend made with finely ground rice flour. It should be designed for yeast baking. My favorite blends are Better Batter’s original blend which already contains xanthan gum, and Nicole’s Best with added xanthan gum. King Arthur Flour gluten free bread flour should also work (try adding 1 to 2 tablespoons extra milk), but avoid their multipurpose blends, which KAF itself says are not designed for yeast breads.
- Tapioca starch: Even though your blend almost certainly already includes this flour, this extra tapioca starch gives the dough stretch and flexibility.
- Instant yeast: Gives the rolls their rise. Also called rapid-rise or breadmaker yeast. Be sure yours is fresh.
- Sugar: Feeds the yeast and adds a subtle sweetness.
- Milk: Warm milk activates the yeast, moistens the dough, and adds richness.
- Butter: Adds moisture and flavor, keeping the rolls soft and tender.
- Egg whites: Provide structure, help bind the dough together, and help the rolls keep their shape as they cool.

How to make gluten free dinner rolls (step by step photos)
This visual overview should help you envision making these rolls at home, with an explanation of the role of each step as support for my reasoning. For the precise ingredient amounts, see the recipe card below.
Step 1: Mix the dry ingredients
In the bowl of a stand mixer, if possible, whisk together the gluten free flour, xanthan gum (if needed), tapioca starch, yeast, and sugar until well combined. Whisk in salt next. This is how we keep the salt from clumping with the yeast and creating an uneven rise.
Step 2: Add wet ingredients and beat the dough
Pour in the warm milk, melted butter, and egg whites. Using the paddle attachment, beat the mixture until it comes together and begins to look whipped (about 6 minutes total) to introduce air into the dough and help create fluffy rolls.
Step 3: First rise/chill
Transfer the dough to a lightly oiled container with a tight-fitting lid. Let the unshaped dough rest at room temperature for about 2 hours, then refrigerate it for 30 minutes, or refrigerate it for up to 2 days. Either resting period will help the dough develop some yeasty flavor and allow it to absorb some of the liquid.
Chilling the dough for about 30 minutes will make it easier to handle. If you’ve chilled the unshaped dough for longer than 1 hour, let the dough warm up a bit at room temperature before shaping or the cold butter in the dough may make it hard to shape without visible seams.


Step 4: Divide and shape
Turn the dough onto a very lightly floured surface and divide it in half, then each half into 8 equal pieces. Gently roll each piece into a ball by cupping your hand around the dough and moving it in a circular motion. This is the way to gently shape the dough into a round without compressing it and making the rolls dense.
Step 5: Arrange and rise again
Place the rolls into a greased and lined baking pan. You can crowd them slightly for pull-apart rolls or leave space for individual ones. Cover with plastic wrap and let them rise in a warm, draft-free spot until at least 150% of their original size (they won’t double).


Step 6: Bake
Once risen, brush the tops with melted butter. Bake at 375°F until the rolls are golden and an instant-read thermometer reads around 190°F in the center—about 20 minutes. If the rolls are touching, reduce the oven temp to 350°F after 18 minutes and bake a bit longer, since keeping them close together means there’s less room for the warm oven air to circulate.
Step 7: Serve warm
Brush the hot rolls with more melted butter for extra flavor, and serve while warm and soft.


Expert tips
Use a stand mixer if you can
A stand mixer with the paddle attachment creates the smooth, whipped dough that gives these rolls their signature texture. If needed, a food processor with a plastic blade can work—just pulse carefully and don’t overmix. Avoid hand mixing.
Create a warm, steady rise
Place your dough in a draft-free spot with gentle warmth—like on top of a warm oven, never inside. If the environment is too hot, you risk killing the yeast. Too cool, and the dough will rise very, very slowly. Too dry, and it won’t rise.
Adjust for dry climates
If you live in a dry environment and your dough isn’t rising well, try adding 1 extra tablespoon of warm milk or water. But don’t overdo it—too much liquid can cause overproofing and gummy rolls.
Shape gently
Don’t press or knead the dough aggressively. On a lightly floured surface, cup your hand around the dough ball and gently move it in a tight circle on a very lightly floured surface to create a smooth round shape.
Want to make them ahead? Try parbaking
To prep rolls in advance, bake the shaped rolls at 300°F for 15 minutes to 20 minutes—just until puffed and set but not browned. Cool completely, then freeze. They may sink a bit as they cool. When ready to serve, defrost at room temp, then finish baking at 375°F until golden and fully cooked (190°F inside). This method gives you fresh-baked rolls in less time.

Ingredient substitutions
Dairy free
Replace the melted butter with a block-style dairy-free butter alternative. Melt and Miyoko’s Kitchen brands both work well. For the milk, use an unsweetened nondairy variety with some fat and a texture that mimics cow’s milk Avoid fat-free options, since richness matters here, and anything with unwanted texture, like oat milk.
Egg free
You should be able to replace the 2 egg whites with 50 grams of aquafaba (the liquid from a can of unsalted chickpeas).
Yeast
You can’t make these rolls without yeast, but you can swap instant yeast for active dry yeast. Use 15 grams of active dry yeast and be sure to proof it first in some of the warm milk.
Tapioca starch
Even though most good gluten free flour blends already include tapioca starch, this recipe needs extra. If you don’t have it, try replacing it with an equal amount of superfine glutinous rice flour or sweet white rice flour.

Storing & freezing the rolls
Best when fresh
Like all yeast rolls, these are at their best the day they’re baked. But you can still store and reheat them with great results.
Room temperature
Store leftover rolls in a sealed container at room temperature for up to 2 days. To refresh before serving, sprinkle lightly with lukewarm water and warm in a 300°F toaster oven for about 5 minutes.
Freezer storage
Once cooled, place baked and cooled rolls in a freezer-safe zip-top bag and press out as much air as possible. Freeze for up to 3 months. Defrost at room temperature and reheat as above. For parbaking instructions, see the Expert Tips section above.
Gluten Free Dinner Rolls Recipe
Tell Google you trust GFOAS!
Ingredients
- 3 ¼ cups (455 g) all purpose gluten free flour blend, (See Recipe Notes)
- 3 ¼ teaspoons xanthan gum, omit if your blend already contains it
- ⅞ cup (105 g) tapioca starch/flour, plus more for sprinkling
- 4 teaspoons (12 g) instant yeast, See Recipe Notes
- ¼ cup (50 g) granulated sugar
- 1 teaspoon kosher salt
- 1 ⅝ cup (13 fluid ounces) warm milk (about 90°F)
- 8 tablespoons (112 g) unsalted butter, melted and cooled (plus more for brushing)
- 2 (50 g) egg whites, at room temperature
Instructions
Make the dough
- In the bowl of a stand mixer (See Recipe Notes), place the flour, xanthan gum, tapioca starch/flour, instant yeast, and granulated sugar, and whisk to combine well. Add the salt, and whisk again to combine.
- Add the milk, melted butter, and egg whites. Using the paddle attachment, beat vigorously. The mixture will come together in a clump and clear the sides of the bowl. Keep beating until it begins to look whipped, and sticks to the side of the mixing bowl again (about 6 minutes total).
- Transfer the mixture to a lightly oiled bucket or bowl with a very tight-fitting lid. The container should be large enough for the dough to nearly double (although it won’t double fully).
Let the dough rest/chill it
- At this point, you can let the unshaped dough rest in the bucket at room temperature for 2 hours, and then refrigerate it for 30 minutes, or refrigerate it for up to 2 days. Do not let the dough rest/rise for much longer than that, or your rolls will rise much more irregularly after shaping.
- If your dough has been refrigerated for more than 1 hour, allow it to sit at room temperature until no longer very cold to the touch before working with it.
Shape the rolls
- Grease a quarter sheet pan or 2 8-inch round cake pans for baking, and set them aside. You will later decide if you’d like to crowd the rolls, and have them rise then bake touching, or have them separate.
- Flour a clean, dry work surface very lightly with tapioca starch. Divide the dough in half, then each half into 8 equal portions, for 16 pieces, each about 2 1/2 ounces in weight.
- Working with one piece of dough at a time, cup your fingers around the dough, keep the side of your palm on the surface, and move your hand in tight circles to coax the dough into a round.
- Place the shaped rounds of dough in your chosen baking pan(s) either touching (they will rise mostly up), or a bit more than 1-inch apart, taking care not to crowd them (the will rise up and out).
Let rise
- Cover the pan(s) with lightly greased plastic wrap, place in a warm, draft-free location, and allow to rise until about 150% of their original size (they won't quite double).
- This rise can take anywhere from 45 minutes to hours, depending upon the ambient temperature in your kitchen. Overproofing is not very likely, and can be detected when the surface of the rolls begins to look pockmarked.
- When the rolls are nearing the end of their rise, preheat your oven to 375°F. Once the rolls are properly risen, remove the plastic wrap from the pan(s), and brush generously on all exposed sides with melted butter.
Bake
- Bake until an instant read thermometer inserted into the center of each roll reads about 190°F.
- If there is any space between the rolls after they’ve risen, they will take around 20 minutes until fully baked.
- If the rolls are touching one another, lower the oven temperature to about 350°F at 18 minutes and continue to bake for about another 5 minutes or until the center reaches 190°F.
- Remove the pan from the oven, and with the rolls still in the hot pan, brush again with melted butter and serve warm.
Video
Notes
I recommend Better Batter’s original blend or my Nicole’s Best multipurpose blend (with 3 teaspoons added xanthan gum). King Arthur’s gluten free bread flour can work but makes denser rolls, so consider adding 2 tablespoons more milk. To make your own blend using one of my “mock” recipes, please see the all purpose gluten free flour blends page. No stand mixer?
A food processor with the plastic blade works in a pinch. Don’t use a hand mixer or mix by hand; the dough needs vigorous mixing to whip up properly and create a smooth shaped roll.
Nutrition
Nutrition information is automatically calculated, so should only be used as an approximation.
FAQs
No, you still need the additional tapioca starch listed in the recipe. All gluten free blends include some tapioca, but this recipe relies on a larger amount to give the dough its flexibility and the rolls their soft, stretchy texture.
No, this dough won’t hold its shape that long after shaping. It’s best to refrigerate the dough before shaping, then bring it to room temperature and shape right before the second rise.
Not recommended. It’s best to bake and freeze the rolls, or use the parbake method above.
Yes, but they won’t have the same pull-apart quality. Bake time may be slightly shorter.
Yes, just cut all ingredients in half. I do this all the time! Rise and bake times stay the same.










I have an allergy to dairy milk. Would it be better to use almond milk in this recipe or just water?
Definitely not water, Raylee. For information on how to make these rolls dairy free, please see the text of the post under the heading “Gluten free, dairy free dinner rolls”
My daughter is allergic to tapioca. What would you recommend as a replacement? Thankyou!
I’m afraid that tapioca is in all of the gluten free flour blends that I recommend, as well as the extra added tapioca starch that is in this recipe, Heather, and it doesn’t have a replacement that is always reliable. You can try using superfine sweet white rice flour, also known as glutinous rice flour, but I can’t promise it will always work.
I used cup for cup gf flour. The flour suggested is not available to me and was a crazy price on Amazon. I definitely could not form the rolls in my hand as the dough was too sticky. I put the dough on a light floured surface using the tapioca flour and used a spatula to shape it into rolls. This worked really well. The rolls turned out great. I used a round pan but next time I would put eight rolls in the pan to get a higher rise. They were so delicious fresh out of the oven. My granddaughter who is celiac was in heaven but we also enjoyed them. I had a bit of an issue with the lid popping of the bowl when I was rising them. The lid was a snap on lid but it kept popping off. Could the bowl just be loosely covered with Saran Wrap instead?
Hi there! Currently trying this recipe, I was wondering if you think these would work in a greased muffin pan or not? I cut the recipe to make 10 rolls, but if I make the rolls a little smaller do you think they would turn out ok in a muffin pan? If so, should I change the oven temp and cook time?
Thanks!
I’ve never tried this, but I imagine it should work okay. It would require trial and error, though, so I’m afraid I can’t give you time and temperature, though!
I made these for my mom at Christmas and they came out great! It makes a lot though, thinking of making a half recipe next time.
So glad you enjoyed the rolls, Stephanie! Thank you so much for sharing your experience. Half the recipe is easy to do and works great. I do that myself sometimes. :)
Thank you for the recipe. This was my first time trying a yeast rolll myself. I have a couple questions:
mine turned out very yeasty tasting and I know I went 3-4g over the yeast amount bc I mistakenly followed the tablespoon measurement opposed to my scale. Would that make a huge difference on taste? I almost felt like they tasted like beer as weird as that sounds. ?
Also, my rolls didn’t have that amazing tan bread like look you have pictured. They were just white. Do you have any ideas what I may have done wrong? I did take them out at proper temp.
Hi, Angela, yes, overmeasuring your yeast by that much, which is at least an extra teaspoon, can definitely affect taste. Did you use one of my recommended flour blends? And did you brush the rolls with butter? Was your oven temperature reliable? In addition, using that much extra yeast would cause the rolls to rise more quickly, which could result in less time in the oven, and no chance to brown.
Nicole,
Thanks for responding! Yes, I ordered better batter especially for this recipe. I also buttered the rolls as stated and adjusted the temp as my rolls were touching as stated. I’m not sure how to verify my oven temp but it appears correct. I actually put them back in the oven after the allotted time because although the internal temp was correct they still seemed a bit off and white. I’ll have to give it a try again and see if the yeast measurement makes all the difference. I was super psyched to try out a homemade gf roll because the ones at the store leave much to be desired, but I am very inexperienced when it comes to baking yeast goods.
You do sound like you’re off to a great start though, Angela. Yeast bread baking is a bit art along with science and takes some practice, but I have no doubt you’ll get there. Definitely measure instant yeast by weight and I think you’ll really prefer the results.
I bought the recommended flour and the tapioca flour, followed all the directions and used my kitchen scale as suggested. I didn’t add the xanthan gum because the recipe said not to if the flour had it which Better Batter does. I mixed it for 6 minutes with my mixer and placed it in a lightly oiled bowl with a sealed lid. It never rose at all. What did I do wrong? I have tried so many recipes and wasted so much money on gluten free ingredients. I had high hopes for this recipe after reading all the comments. Is my house not warm enough?? Could that be it?
That sounds very frustrating, Stephanie. Did you add additional tapioca starch as a separate ingredient, in addition to the all purpose gluten free flour blend? Did you make any ingredient substitutions? Was your yeast fresh? Did you instant yeast? If you used active dry yeast, you needed to add more, as explained in the text of the post. If it rose before shaping and not after, you likely incorporated too much flour into the dough during shaping, which lowers the hydration ratio and makes it impossible for the rolls to rise. If none of those questions helps, you may simply just have not waited long enough for a rise. I hope that is helpful!
My experience was the same. I was extremely careful about the ingredients and their amounts; only using the recommended flour brand and used the mock better batter recipe. I visually checked my liquid measuring cup and set my scale to fluid ounces to be sure I was on the mark. I used all the recommended equipment as well. The dough was extremely stiff and really gave my stand mixer a workout. It would be helpful to see what the dough should look like after the first rise. I’ve added a full 1/4 cup of warm milk with 1/2 tsp yeast and put it all back in the mixer. I’m still not sure that was enough liquid but I’m hoping it will be sufficient to get some rise. It “felt” a lot better but it’s too soon to tell.
Attempt 2 underway. I cut the recipe in half. The dough behaved as described in the recipe, and it was sticking to the sides after a vigorous beating with the stand mixer. The dough easily formed into a ball when putting in the container for the first rise. It holds it’s shape, is very stiff with a few seams showing, and does not settle at all. I am nervous. Is that how it’s supposed to be?
I’m afraid I really can’t know for sure, without being there with you, Christopher. Generally, you can see from the photos and video that it is a relatively stiff dough, which is why you really don’t need to incorporate much flour into the dough during shaping and if you do, it won’t rise since you’ll be lowering the hydration ratio. If the dough seems to be behaving very differently from last time, you should take note of what you did differently.
I had problems with yeast. Two different packets, with expiration dates not until Dec 2025 but still both bad. Threw them all out and bought and used regular active dry yeast and hydrated it prior to adding to dough so I could see it was lively. Still having a hydration problem with the dough but I am guessing it’s the tapioca flour. I’m using Bob’s Red Mill. I was very careful about using Authentic Foods brand for the rice flours but thought I could get away with other brands for minor ingredients. However, the amount of Tapioca flour is quite large in this recipe and I’m guessing substitutions are unwise. I’ll take a second mortgage out on the house so I can buy MORE ingredients and try again.
I’m afraid that Bob’s Red Mill blends are just not going to work reliably, particularly in yeast bread recipes. I try to be as explicit about that as possible to avoid anyone wasting ingredients. I’m sorry that there’s no inexpensive alternative. I wish there were.
Hi Nicole. I am hoping that your brand of GF flour will help my GF baking adventure. After baking bread almost all my life, after my breast cancer treatment , I suddenly got a gluten allergy that comes out on my skin. I tried blending my own flour as you suggested, but almost always came out dense or gooey. I will let you know how it goes. Also Because I wasted so much I reduce the recipe in half now, so if it comes out bad I am not wasting gf flour. Thanks so much for all your work.
Sorry, I meant ‘popped it in the oven’!
Thanks so much for this fabulous recipe Nicole! I wasn’t sure it would turn out just like you described as there are always so many factors involved in this kind of baking, especially the first time around. I made the dough yesterday afternoon and put it in the fridge overnight. After an hour or so out the fridge and another hour proofing in the tin I popped it in the tin. And the results were spectacular! A nice crusty exterior and just the right amount of squidgy, yeasty on the inside. I’ll definitely be making these again soon!
So glad you enjoyed the rolls, Mike! Thank you so much for sharing your experience!