This post may contain affiliate links. Please read our disclosure policy.
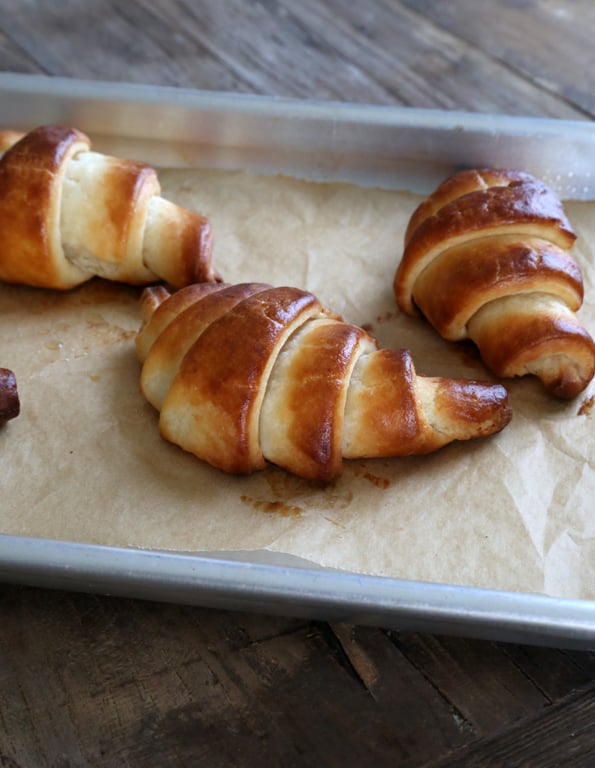
If you have ever wondered if you could make a gluten free croissant at home—whether you could really do it—this recipe is the proof that you can do it. You should do it. Here's how, step by step.

Table of Contents
- The best gluten free croissant you'll ever make
- The secret to making a perfect gluten free croissant
- Gluten free croissant ingredients
- Equipment you need
- Gluten free croissants vs. gluten free crescent rolls
- Tips for making gluten free croissants
- How to store gluten free croissants so they stay fresh
- Gluten free croissants: ingredients and substitution suggestions
- FAQs
- Gluten Free Croissant Recipe | Buttery, Flaky, and Simple!
The best gluten free croissant you'll ever make
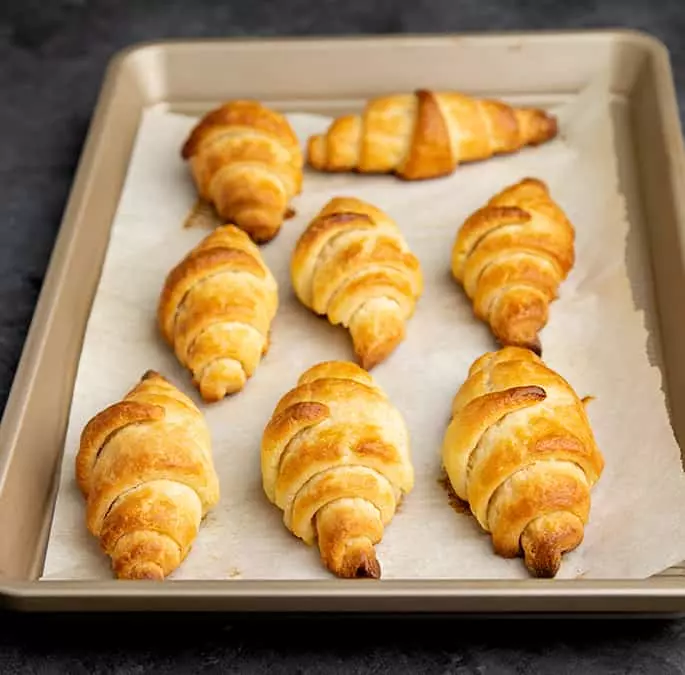
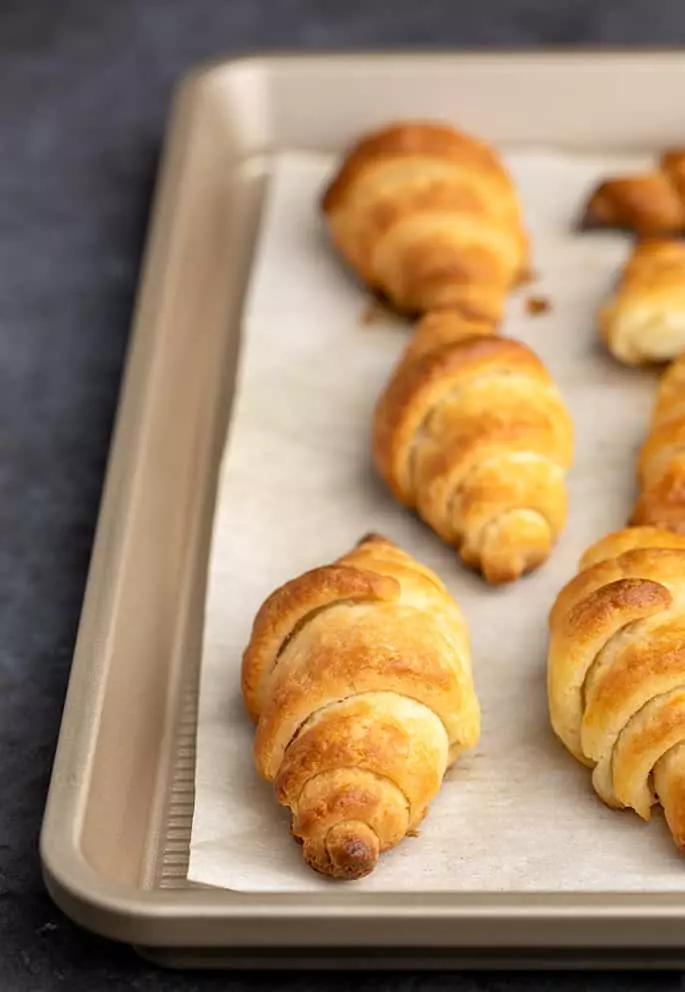
These croissants have that melt-in-your-mouth flakiness that seems intimidating, but they’re actually quite simple to make. The amount of information in the recipe card and the step-by-step photos here is not because it’s hard to make these beautiful pastries happen. It’s because it can be hard to imagine what it's like to make them, but once you see it done and the concept clicks, they're really simple to make (although they do take some time).
Believe it or not, traditional gluten free croissants are one of the most common recipes requests I have received over all the years of writing this blog. It’s not like it’s every day that I’m positively buried with requests from readers simply dying to make their own croissants, though.
It’s more like a steady drip-drip-drip of requests over the years. Over time I’ve mostly pointed readers in the direction of an old custard-filled danish recipe from years ago, since danishes are made from yeasted puff pastry, which is really what croissant dough is.
I’ve also suggested to readers that they just use my recipe for gluten free puff pastry (no yeast involved), and call it a day. After all, that's a delicious recipe that makes really flaky gf pastries.

The secret to making a perfect gluten free croissant
Traditional croissants are, indeed, made with what is essentially a yeasted puff pastry dough, making these the most delicate and flaky of pastries as they get lift both from yeast and from “laminated” dough (lamination is simply the process by which you encase layer after layer of cold butter in layer after layer of pastry dough). That’s the only time you’ll hear any “fancy” terms, though, in this whole business. Period full stop.
Read through the instructions below, stare at the step-by-step photos, and watch the video. Follow the temperature instructions to the letter (sometimes ingredients and doughs are room temperature, sometimes (usually) they’re cold), and remember that pastry dough is much less a matter of chemistry than it is a matter of architecture.
Layers and layers of butter surrounded by layers and layers of gluten free flour. The yeast gives these an extra lift over puff pastry, but really the general puff pastry architecture is what does the heavy-lifting of creating the flakiness we crave.
Think of it like this: unlike flour, butter expands as it warms. When the butter layers (created in the “turns” described below) are properly chilled, they hit the heat of the oven and puff up, forcing the flour layers up and out.

Gluten free croissant ingredients
- Gluten free pastry flour – For this easy gluten free croissant recipe, you need a pastry flour, which you can easily make yourself by combining Better Batter all purpose flour, cornstarch, and dry milk.
- Instant yeast – Yeast is what distinguishes gluten free croissant dough from pastry dough. During a proofing period, it causes your croissants to puff up, revealing all those amazing layers. Here, we use instant yeast, since it doesn't have to be hydrated in liquid first, but can be whisked right into the dry ingredients. If you only have active dry yeast, you'll need 25% more of it, by weight, and to let it proof first in some of the milk.
- Sugar – There's only a little sugar in this gluten free croissant recipe to “feed” the yeast.
- Salt – Salt is a must to complement the intense buttery flavor, and to control the yeast.
- Butter – This is the star of the show. It's what gives you that incredible flavor and mouthfeel, but as the gf croissants bakes, it's also what releases steam for maximum flakiness.
- Milk – This is the liquid that brings the gluten free croissant dough together.
- Eggs – We only need one egg for this gf croissant recipe, to brush on before baking, so you can achieve a rich, golden brown crust.
Equipment you need
- Large mixing bowl
- Rolling pin
- Parchment paper
- Plastic wrap
- Pastry cutter or pizza cutter
- Baking sheets
- Basting brush
Gluten free croissants vs. gluten free crescent rolls
Be honest: Have you been using the words croissant and crescent roll interchangeably? It's okay if you have, as many people do in the gluten free baking world (and the world at large).
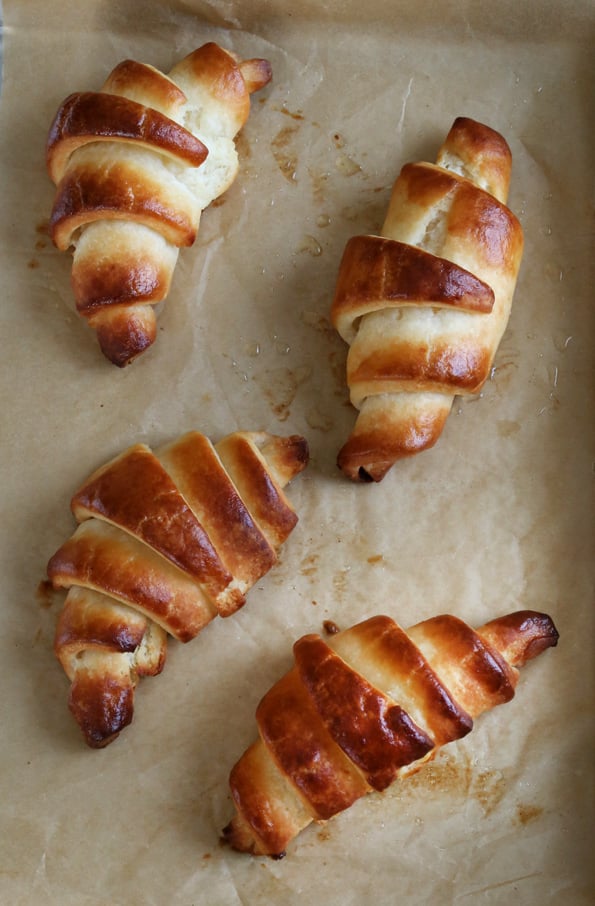
The baked goods do look similar, both being shaped into a crescent after having been rolled. But there's a huge difference when it comes to preparation and ultimately taste and texture.
Gluten free crescent rolls are made using a gluten free bread flour blend that you roll out and shape. Compared to making croissants, a gluten free crescent roll recipe is a very quick and simple affair.
GF croissants take more time and effort because you laminate the dough, or fold in a butter packet with multiple folds to create flaky layers. You also use a pastry flour blend that contains dry milk.

Tips for making gluten free croissants
Don't try to rush the process
Look, I will just come right out and say that making gf croissants isn't the kind of task that you take up on a busy Friday night when you're in a rush to get dinner on the table. It's not even the kind of thing that you do on a slow Wednesday afternoon when you have an hour to burn.
It's takes time to make gluten free croissants, and if you try to rush the process — say, by skipping the several refrigeration steps or reducing the number of turns — you're not going to end up with the same buttery, flaky goodness you see in all these pictures.
The first time you decide to make gluten free croissant rolls, set aside a weekend. Give yourself plenty of time to get familiar with the preparation steps and practice, practice, practice. It's the only way you'll build the confidence and skill to do these right.
Splurge on the butter packet
I would argue that the butter packet is the star of this show. And because you don't need a ton of it (despite the fact that it adds the most flavor), it's the perfect place to splurge when buying ingredients.
If you can swing it, I highly suggest trying a European-style butter. Overseas, butter is made with more fat, so it's so incredibly rich and flavorful.
Shaping gluten free croissants
These gluten free croissants look really fancy, but I promise that getting them into that shape isn't nearly as hard as it looks.
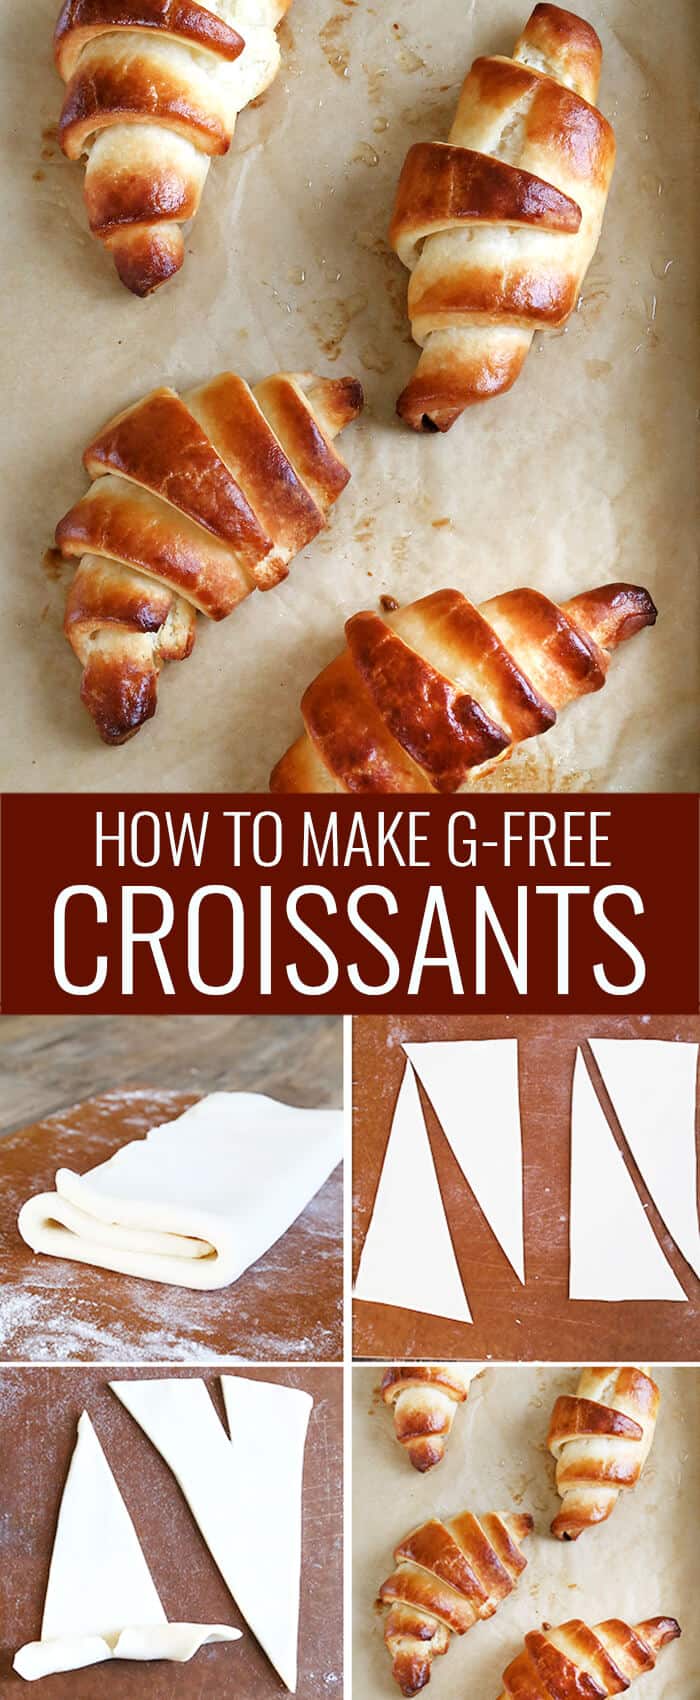
Once you've rolled out your dough a final time, you cut out equally sized rectangles. Then you slice those rectangles diagonally to create long triangles.
I suggest using a pastry wheel for this step, but a pizza cutter or sharp knife will work too. You need a sharp tool as crisp lines help maintain definition.
All that's left to do now is put a small slit at the widest part of the triangle, and then roll the croissants up from the base, just slightly turning the edges away from each other as you go.
Don't hesitate to use the refrigerator
Butter is the star of the show, and although we begin working with it while it's cold, we have to work with solid at room temperature, using our hands. The heat from the room and the heat of our hands does tend to warm the butter and cause it to begin to melt. That's why the process calls for handling the butter and the dough, and then refrigerating it until it's solid again before proceeding.
There may be times when you notice signs that the butter is melting. The dough may become sticky or difficult to handle. Even if the recipe doesn't call for refrigeration at any particular time, don't hesitate to refrigerate the dough whenever you need and just pick up where you left off once it's chilled.
To keep the dough from drying out if you leave it in the refrigerator for more than a few minutes, just wrap it with plastic wrap. It doesn't need to be wrapped tightly, though, unless you are leaving it for an extended period of time.
How to store gluten free croissants so they stay fresh
Baked gluten free croissants can sit at room temperature in an airtight container, and they'll stay fresh for two to three days.
Note that the longer they sit, the more they'll harden and go stale. If you get to that point, you can quickly refresh a gluten free croissant to restore softness by popping it into the microwave for 10 to 15 seconds.
Can I freeze baked gluten free croissants?
Absolutely! If you've made too many or are simply meal planning, you can freeze extra croissants to enjoy another time.
First, make sure that they are completely cool. Place them on a baking sheet, and pop the whole thing into the freezer. When the croissants are mostly frozen, you can transfer them to a freezer safe, ziptop bag. They'll stay good for a couple of months.
When you're ready to defrost, you can leave the croissants on the counter or in the fridge, and then bake them for a few minutes at 350°F until they're heated through.
Gluten free croissants: ingredients and substitution suggestions
Gluten free, dairy free croissants
There's quite a bit of dairy in this gluten free croissants recipe. There's the dry milk in the gluten free pastry flour blend, the liquid milk for combining the dough, and of course, the butter.
In place of dry milk, you can try using a substitute like coconut milk powder or soy milk powder. Soy milk tends to toughen baked goods, though, so I'd be more inclined to try the coconut milk powder.
You can use a dairy free milk of your choice in place of the liquid milk. Almond milk or coconut milk will probably work fine.
For the butter, you can likely substitute your favorite vegan butter. My favorite brand is Melt, and when I can't find that, I go with Earth Balance.
Gluten free, egg free croissants
We only use egg as a wash prior to baking these gluten free croissants. It helps create a gorgeous golden-brown crust, but if you can't have eggs, you can easily use melted butter or melted vegan butter in its place.
Gluten free, vegan croissants
For gluten free, vegan croissants, you'll want to follow all of my suggestions above for replacing the dairy and eggs.
Gluten free croissant variations
There aren't a lot of variation options when it comes to traditional gluten free croissants, but there is one you'll likely be interested to know about.
And that would be gluten free pain au chocolat — gluten free chocolate croissants. A gluten free chocolate croissant recipe is exactly the same as the traditional croissants recipe, except before you roll your triangles, you drop a few small pieces of chocolate onto the dough.
Bake as instructed, and you'll enjoy crispy, flaky croissants with a center of rich, melted chocolate.

FAQs
No, traditional croissants are not gluten free. That's because they're made using a wheat based flour. All those croissant options you see at the store? Unless they're specifically marked gluten free (and there won't be many), they're off limits.
For my gluten free croissant recipe, I use a homemade gluten free pastry flour. This gluten free flour blend combines 80% by weight of Better Batter all purpose gluten free flour, 10% by weight corn starch, and 10% by weight powdered milk to create the perfect consistency for pastry.
If you want to go the prepared route, you can also use Cup4Cup gluten free flour, which is a good all purpose gluten free flour blend, but actually works most perfectly like a pastry flour.
The biggest difference between gluten free croissant dough and puff pastry is that the first uses yeast and the second doesn't.
Preparation of the two is very similar with the butter packets and the laminating, but adding yeast gives croissants a puffier, flaky consistency.
No, croissants are the not same as crescent rolls. Although a gluten free croissant and a crescent roll may look similar and both contain yeast, they are distinct baked goods. Croissants require a lamination process that creates alternating layers of flour and cold butter that create flaky pastry layers during baking. Crescent rolls are shaped enriched yeast bread, made with warm ingredients.
Laminating may sound technical, but it just describes the process of folding a butter packet into dough. It's not a hard process at all, but the method is specific and essential if you want all the flaky layers for which croissants are known.
Yes, you can double this gf croissant recipe, but I don't recommend it if you're making them for the first time. There's a bit of an art of making the best gluten free croissants, and it's much easier if you aren't working with double the amount of dough. Begin by reading the recipe all the way through to the end, gathering your ingredients, and following the recipe exactly as written.
Gluten Free Croissant Recipe | Buttery, Flaky, and Simple!

Equipment
- Rolling Pin
- Pizza wheel or pastry wheel, for slicing/shaping
Ingredients
For the dough
- 2 ¼ cups (315 g) gluten free pastry flour, or Cup4Cup gluten free flour, plus more for sprinkling (See Recipe Notes)
- 2 teaspoons (6 g) instant yeast
- 2 tablespoons (24 g) granulated sugar
- 1 teaspoon (6 g) kosher salt
- 3 tablespoons (42 g) unsalted butter, melted and cooled
- ¾ cup (6 fluid ounces) whole milk, at room temperature
For the butter packet
- 16 tablespoons (224 g) unsalted butter, chilled
- ¼ cup (36 g) gluten free pastry flour, or Cup4Cup gluten free flour (the “real” thing, or my mock Cup4Cup)
- Egg wash, (1 egg + 1 tablespoon water, beaten well), for brushing
Instructions
Make the dough.
- In a large bowl, place the flour, yeast and sugar, and whisk to combine well. Add the salt, and whisk again to combine.
- Create a well in the center of the dry ingredients, add the butter and milk, and mix until the dough comes together.
- Add more flour by the half-teaspoonful if necessary to bring the dough together.
- Turn out the dough onto a lightly floured surface, sprinkle the top very lightly with more flour, and roll into a 9-inch round.
- Wrap tightly in plastic wrap and place in the refrigerator to chill while you prepare the butter packet.
Prepare the butter packet.
- Sprinkle a piece of unbleached parchment paper with 1/8 cup (2 tablespoons) of the flour, and place all 16 tablespoons (preferably in 2 whole sticks) of butter on top and press together.
- Sprinkle with the remaining 2 tablespoons of flour, and cover with another piece of unbleached parchment paper.
- Pound the butter with a rolling pin until it flattens and melds together.
- Uncover and fold the flattened butter in half, cover again with the parchment and pound again until you have a 5-inch square butter packet.
- Cover the butter packet completely with parchment, and place in the refrigerator to chill for 5 minutes or until firm.
Wrap the dough around the butter packet.
- Remove the 9-inch round dough from the refrigerator, unwrap it, and place it on a lightly floured surface.
- Place the chilled butter packet directly in the center of the dough and score the sides of the dough lightly to represent the exact size of the butter. Remove the butter and set it aside.
- Using a rolling pin and sprinkling the dough lightly with flour as necessary to prevent it from sticking, begin at the site of each of the four scorings and roll the edges of the dough away from the center to create 4 flaps, leaving the center of the dough intact.
- Return the butter packet to the intact center of the dough, and wrap the flaps of the dough around the butter packet like you would a present.
Roll out the dough with the butter and complete the first “turn.”
- Sprinkle the dough-and-butter-packet lightly with more flour, and roll out into a 1/2-inch thick rectangle.
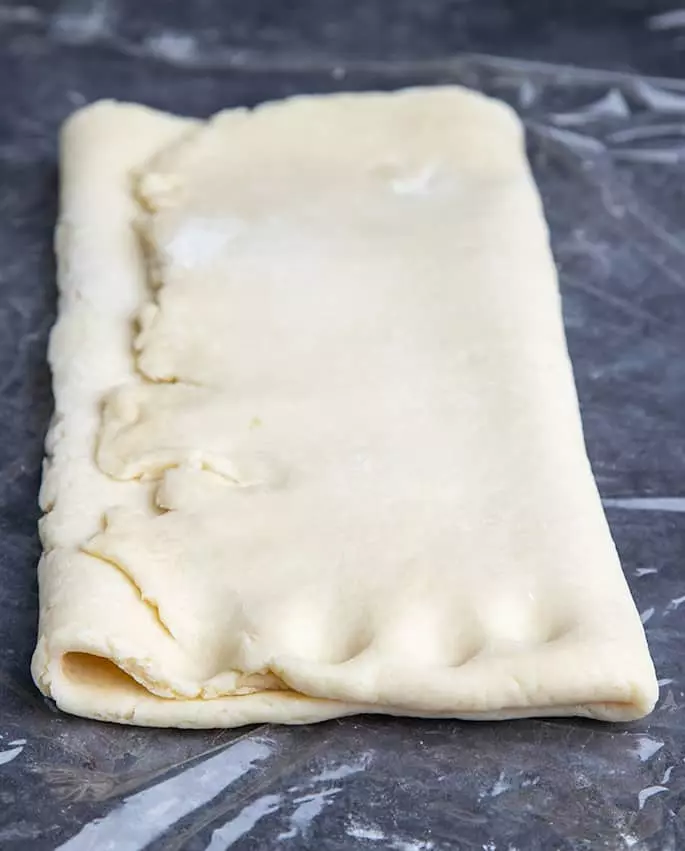
- Fold the rectangle over on itself in thirds, as you would a business letter. Sprinkle the dough again lightly with flour.
- With the length of the 3-layer rectangle of dough running parallel to your body, roll the dough away from you into a rectangle that is again about 1/2-inch thick.
- Turn the left and right sides of the 1/2-inch thick rectangle over on themselves again, as you would a business letter.
- You have just completed the first “turn.” Wrap the folded dough tightly in plastic wrap and place in the refrigerator to chill for at least 4 hours or up to overnight.
Complete the remaining 4 to 5 “turns.”
- Once the dough has finished chilling after its first turn, repeat the process of rolling the 3-layer dough out into a 1/2-inch thick rectangle, then refolding the dough like a business letter, at least 4 more times, (for good measure, 5 more times). After each turn, keep track by pressing a notch in the dough with one knuckle to represent the number turn you're on (e.g., after 4 turns, make 4 notches).
- Be sure to wrap and chill the 3-layer rectangle of dough in the refrigerator for at least 30 minutes (or the freezer for 10 minutes) in between turns. If you let the dough chill for too long, it may become difficult to roll out smoothly. Just let it sit at room temperature for a few minutes before rolling it back out.
Shape the croissants.
- Line rimmed baking sheets with unbleached parchment paper and set them aside.
- Roll out the prepared 3-layer croissant dough into a 1/4-inch thick rectangle.
- Using a pastry wheel or pizza wheel (or very sharp knife—well-defined edges are essential here), square the edges, then cut out as many 4-inch x 6-inch rectangles as you can.
- Slice each rectangle diagonally into two triangles and separate the shapes from one another.
- Sprinkling lightly with flour as necessary to prevent sticking, roll each triangle out to elongate it to about 8-inches from base to tip.
- Slice a notch into the base of each triangle about 1/2-inch deep, and roll each triangle into a coil from base to tip, turning the edges slightly away from each other as you roll.
- Place on the prepared baking sheets, seam side down, about 2-inches apart from one another.
Proof the croissants.
- Cover lightly with oiled plastic wrap and place in a warm, draft-free location until nearly doubled in size. You will see the individual layers in each fold begin to separate slightly from one another once the croissants are fully proofed.
- Uncover the baking sheets and brush the tops and sides of the croissants with the egg wash.
- To avoid gluing the coiled layers of each croissant together, brush with the egg wash by beginning in the center of each pastry and brushing out to the sides in one motion on each side, with the “grain” of each coil, not against.
Chill the proofed croissants.
- Place the shaped and proofed croissants in the refrigerator to chill for at least 10 minutes or until mostly firm.
Bake the croissants.
- While the shaped croissants are chilling, preheat your oven to 400°F.
- Place the chilled and proofed croissants in the center of the preheated oven, one baking sheet at a time, and bake for about 20 minutes, or until deep golden brown all over and firm to the touch.
- Allow to cool briefly before serving.
Video
Notes
- 80% all purpose gluten free flour blend (with xanthan gum), by weight (in one cup or 140 grams, 80% is 112 grams)
- 10% cornstarch, by weight (in cup or 140 grams, 10% is 14 grams)
- 10% milk powder, by weight (in cup or 140 grams, 10% is 14 grams)
- 280 grams all purpose gluten free flour blend (with xanthan gum*)
- 28 grams cornstarch
- 28 grams milk powder
Nutrition information is automatically calculated, so should only be used as an approximation.




Have so many recipes I used to make with croissants dough . My whole family is going to be thrilled.
Back when I made your flour recipes I labeled one “Better then Cup4Cup”. Is that the same one I need for this recipe? Thanks for providing this one. if I nail this, I can once again hit the back corner at the big box store and not be sad that I can’t enjoy crossaints anymore.
Hi, Lori, here is the page with all of my flour blends. Cup4Cup is not the same as my Better Than Cup4Cup blend. And I know exactly what you mean about that corner of the big box store! Fear it no longer! :)
Nicole, this recipe is a Godsend!! Have you tried freezing them? I know when I used to make regular Crossiants I would bake them and then freeze and reheat in a warm oven.. I know that you can freeze them unbaked as well. It would be nice to make a big batch and pop them out during the Holidays.. Thanks so much for posting!
Hi, Carrie, I really don’t recommend freezing them unbaked as I strongly recommend against freezing unbaked yeast dough. It can be temperamental, and sometimes the yeast survives and sometimes it doesn’t. You can definitely try freezing them once they are baked and cooled, then defrosting in the refrigerator and warming in a low oven.
Can you provide a few pointers for those of us who don’t have a huge chunk of time to devote to making these? Are there do-ahead points, where I can put in fridge and come back later, even the next day?
Rhonda, there is a recipe for Quick Puff Pastry in my second book, Quick and Easy. I would go for that recipe. There really isn’t any way to rush traditional croissants, though, I’m afraid. Each active step doesn’t take much time at all.
I am so happy that you have just posted this! I keep really craving croissants but the shop bought versions don’t look at all appetizing. I am definitely trying these tomorrow :)
These are sooo beautiful!!!
Nicole, this recipe looks fantastic. Do you think it would work with your Dairy-free Pastry Flour Hack for those of us who are dairy-free?
I think the Dairy-Free Pastry Flour hack would work, Anne, but you’ll still have the matter of the butter…
I’m thinking of replacing the butter with Earth Balance buttery spread. I use it in place of butter for baking pretty frequently and it always turns out fine.
Anne, pastry baking, especially puff pastry and Danish pastry like this, is an entirely different animal. Earth Balance has a very significant amount of water, and it would leak right out of pastry, leaving you with flat, unflaky pastry. I think Donia’s plans to use butter-flavored Spectrum nonhydrogenated vegetable shortening (below) are worth a shot, though.
A work of art! Thank you Nicole for posting all the turns!
I’m still fretting over GMO’s and have to find organic butter, these lovely’s will be on the top of the list of must bake recipes. :)
OK, I’m going to be that person. I’m sorry in advance. I’m thinking these could be made dairy-free (wait, wait, please hear me out…) because most mass-produced versions use shortening, not real butter. Yes, I fully admit, they would likely not be as good. But it would still be better than no croissant at all for us poor dairy-free-ers, right? I’m thinking Spectrum’s butter flavored palm shortening might be the best dairy-free contender. I notice it gets harder in my cabinet as the weather gets colder, so it *might* even semi-behave like butter during the turning. I suspect the results wouldn’t be so puffy, because shortening has no water content. But the yeast will assist. So that’s my hypothesis…
What would you use to replace the dry milk in the flour?
I think you found your answer based upon your question above, Anne!
I think this will work too Donia. go for it!
Oh, Nicole! I have been waiting for these! I never asked for them, because I know what a hassle they are — my mom used to make them and it is a big project to take on. You have made my day. Since Hilma is coming to visit soon, we will take these on together! I love you, and all your genius, I really, really do!! :)
HILMA!!! tell her I say “HI”. what a wonderful lady!!!
Definitely time to get the gang back together. We’ll be arriving there soon, Anneke. Get ready! ;)
Thanks, guys! It would be great to see you both (and Nicole, too!). I’ll tell Hilma you said hi!
Oh this is the absolute perfect project to delve into with your mom, Anneke! I only wish I could reprise our day of gluten free baking in Minnesota from last winter and make them with you! Please give her my very best. :)
There are many days when I wish I could bake with you again, Nicole! Good wishes to my mom will be passed along, and she will have a great time helping me make these! She has so much more patience for the steps than I do.