
This post may contain affiliate links. Please read our disclosure policy.
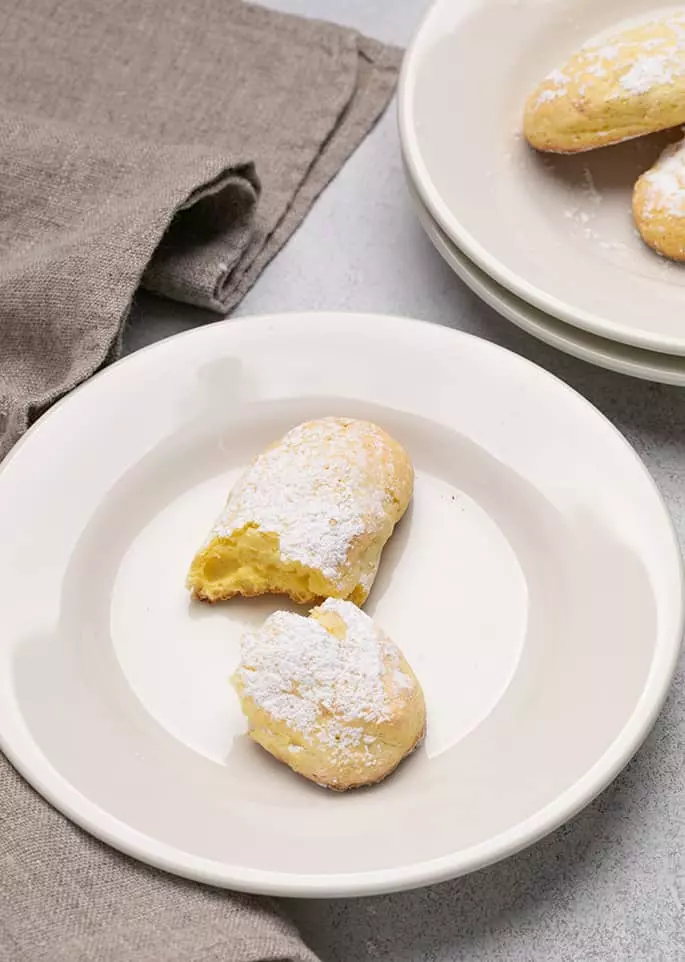
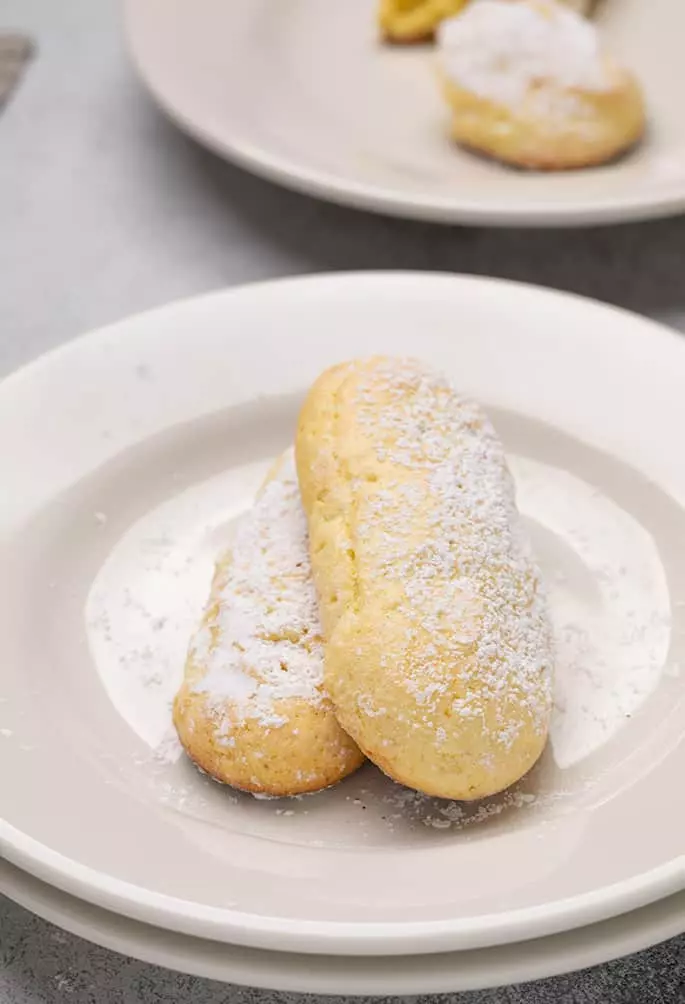
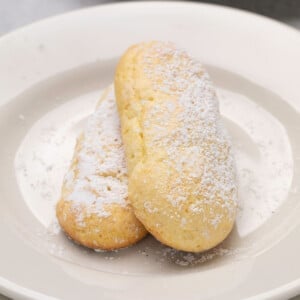
Gluten free ladyfingers are made with the simplest gluten free ingredients, and when they're combined in just the right way, that's when the magic happens! Light as air, crisp outside and tender inside like the perfect sponge cake.
They're delicious on their own, but of course they're just right for making gluten free tiramisu, all manner of sweet trifles and delicate charlottes, or as a crust for your favorite cheesecake.
What makes this recipe for gluten free ladyfingers the best?
Any recipe for gluten free ladyfingers cookies will have a similar list of ingredients. Sure, you need to have the right ingredients in the right balance, and this recipe has that for sure.
But where this recipe really shines is in the specific technique it uses to incorporate a lot of air into the raw mixture as possible, without weighing down the batter. That way, it's smooth enough to pipe, yet holds its shape during baking.
The right technique for making perfect gf ladyfinger cookies every time
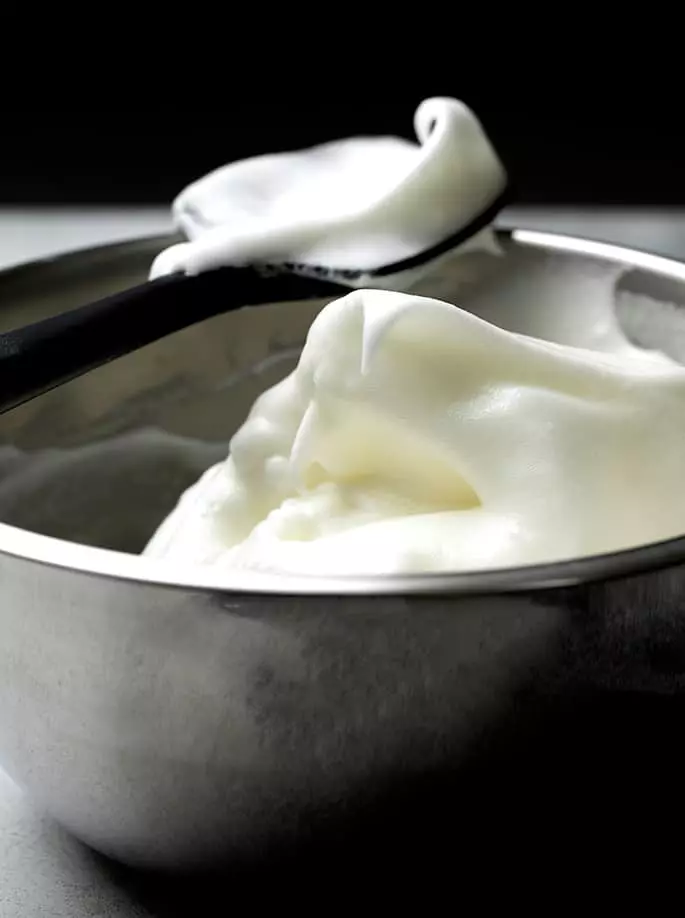
First, we whip the 4 egg whites with a bit of cream of tartar to help stabilize them.
Adding a bit of the confectioners' sugar to the egg whites also helps make them more stable. You'll find that they are glossy when they're stiff, and are less likely to become dry and almost crumbly, like over-whipped egg whites can be.
Then, we whip the egg yolks with most of the sugar for a full 8 minutes or until the mixture triples in volume. That allows this part of the mixture to absorb the gluten free flour blend.
But you must add the sifted (yes, you have to sift!) gf flour blend in batches. If you dump all the flour in at once, sometimes it will combine well enough, and others your mixture will turn into crumbs.
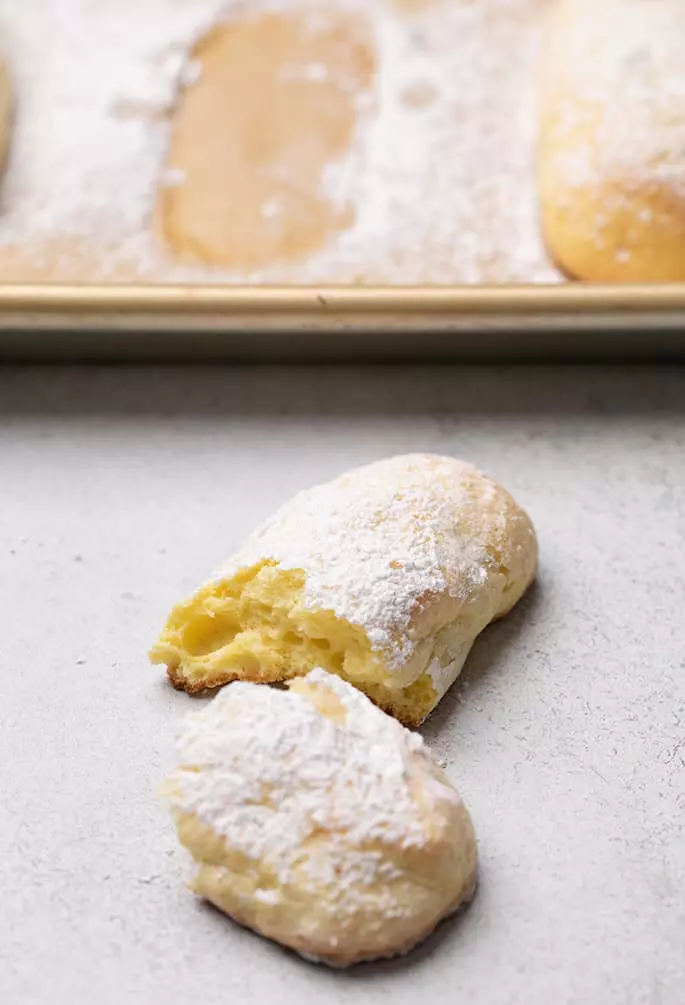
Then, fold in the whipped egg whites, pipe it into fingers, and you're ready to bake. The gf ladyfingers will come out puffy, very pale, and ready to make some beautiful desserts—or be enjoyed immediately!
Are ladyfingers gluten free, naturally?
No! Ladyfingers are like little sponge cakes made in the shape of fingers. But they're made with an all purpose flour base, so to make gluten free ladyfingers, you must use a gluten free recipe.
What can I use ladyfinger cookies for, besides tiramisu?
When most of us think of ladyfinger cookies, we think of tiramisu. But we already knew about tiramisu. Did you know how many other ways you can use ladyfinger cookies?
The beauty of ladyfinger cookies is that they're really mild in flavor, and only lightly sweet. And, especially when they sit for a bit, they can absorb all sorts of amazing flavors.
Here are a few ideas:
- Line the edge of a classic gluten free cheesecake with gf ladyfingers, standing upright (vertically). Skip the bottom cookie crust, or use it for the underside only.
- Use them in place of pound cake in our gluten free fruit trifle (or use half pound cake, half ladyfingers)
- Try lining the edge of a no bake chocolate pudding pie with ladyfingers, instead of in the cheesecake above.
- Make a Charlotte, by soaking your ladyfingers in the sweet liquid, lining the bottom and sides of a springform pan or similar round cake mold with them, and then filling them with chocolate mousse, no bake strawberry cheesecake, or even just layers of gluten free pudding or custard, preserves, and whipped cream.
Popular substitution suggestions
Can you make eggless gf ladyfingers?
I'm afraid I don't think so! To make vegan gluten free ladyfingers, you'd need a recipe that was developed to be made without eggs.
Most likely, it would be made with whipped aquafaba, or the brine from a can of chickpeas, in place of egg whites. But the egg yolks are much harder to replace.
Can you make sugar-free gluten free ladyfingers?
I bet you can! There really isn't a lot of sugar in this recipe, as it's written. I think you could replace the 3/4 cup (86 grams) confectioners' sugar with an alternative confectioners' or powdered sugar.
Swerve brand confectioners' sweetener would probably work. Keep in mind that, although it's called “confectioners'” sweetener, it's really an alternative powdered sugar.
Powdered sugar is finely ground white sugar; confectioners' sugar is finely ground white sugar with added starch. To replace that added starch, try adding 1 tablespoon of cornstarch to the gluten free flour blend.
Recipe tips and tricks
This recipe is foolproof because of the the technique it describes. But ladyfingers, like any sponge cake, have no chemical leavener like baking powder or baking soda.
All they have is whipped egg whites, and whipped egg yolks for rise. Let's talk about some of the most important steps in this recipe, and how they lead directly to your success!
Don't skip separating the egg yolks and whites
You really do need to separate the eggs into yolks and whites, use one more white, as listed in the recipe, and whip them each separately. That's where all the rise comes from, like in a gluten free sponge cake.
Whip the egg whites just right
Be sure you don't have any yolk at all in your whites. If there's any fat in the mixture, they won't whip into peaks. Break each egg separately into a small bowl before adding the white to the larger bowl. That way, if any yolk sneaks in, you've only wasted one egg, not all that came before.
When you whip egg whites, whether you're doing it with a stand mixer or a hand mixer, they will go from viscous to foamy to opaque white. A stiff peak will hold its curl when you lift the beater.
Beat the yolks until truly tripled in volume
Beating the yolks with the confectioners' sugar is a crucial step in this process. It will take the full 8 minutes to triple in volume. That will support the ladyfingers rise in the oven, and make it possible for you to incorporate every bit of flour into the mixture without impossible clumping.
How to store gf ladyfinger cookies
These gf cookies won't maintain their perfect crisp-outside, tender-inside texture for more than about a day or so. If you're making them to enjoy plain, don't make them until you're ready to eat them, and store them briefly in a sealed glass container.
If you're making them for a tiramisu, charlotte, or somewhere else you need them to absorb a delicious liquid, they will get stale but they will be refreshed properly by the liquid you're using.
Can I freeze ladyfingers?
You can, but they won't retain their fresh texture. Only freeze your ladyfingers if you're going to use them as part of another dessert where they are meant to absorb liquid.
FAQs
Can I use coconut flour to make ladyfingers?
No! Coconut flour is a really specific gluten free flour that behaves unlike any other. It absorbs many times its weight in moisture, and would only work in a recipe designed specifically for it.
Can I substitute sugar with granulated erythritol in this recipe?
I don't like baking with erythritol, since it alone doesn't really mimic sugar in the oven. Scroll up for full information on how to try making this recipe sugar-free using Swerve confectioners' sweetener alternative.
Why are my ladyfingers flat?
You may have over-mixed the batter. If you didn't whip first the egg whites until they form stiff peaks, and then the egg yolks and sugar until the mixture triples in volume, your ladyfinger cookies won't have the proper lift.
Why is my batter stiff and/or not smooth?
Did you whip the egg yolk mixture for a full 8 minutes until it tripled in volume? This incorporates a lot of air into the egg yolk mixture and allows it to absorb the flour evenly, leaving the mixture soft enough to fold in the egg whites.
You can also try first folding in some of the whipped egg white mixture after you add the first bit of flour to loosen it a bit if you feel like the mixture is becoming too thick. Then, continue adding the flour and follow up with the rest of the egg white mixture.
Are ladyfingers supposed to be soft?
Ladyfingers are miniature sponge cakes, so they're slightly crisp on the outside and are tender, but almost stiff (but not dry) inside. If you put them in a container before they've cooled completely, they can become soggy.

Gluten Free Ladyfingers Recipe
Equipment
- Stand or handheld mixer
Ingredients
- 3 (150 g (weighed out of shell)) eggs, weighed out of shell, separated into yolks and whites
- 1 (25 g) egg white
- ⅛ teaspoon cream of tartar
- ¾ cup (86 g) confectioners’ sugar, plus more for sprinkling
- 2 teaspoons pure vanilla extract
- ½ teaspoon kosher salt
- ⅞ cup (123 g) all purpose gluten free flour blend, sifted
- ½ teaspoon xanthan gum, omit if your blend already contains it
Instructions
- Preheat your oven to 400°F. Line two baking sheets with unbleached parchment paper and set them aside.
- In the bowl of your stand mixer fitted with the whisk attachment or a large bowl with a handheld mixer, place the 4 egg whites and cream of tartar.
- Beat on medium-high speed until soft peaks form (about 3 minutes in a stand mixer). Add about 1/4 cup of the confectioners’ sugar, and beat again until shiny, stiff peaks form (about another 2 minutes).
- Gently scrape the beaten egg whites out of the mixing bowl into another medium-size bowl. Set the whites aside.
- In the original mixing bowl, place the egg yolks and the remaining confectioners’ sugar. Turn the mixer on medium-high speed and beat until the sugar is absorbed into the yolks (about 1 minute).
- Turn the mixer speed up to high and continue to beat for 8 to 10 minutes on medium speed, or until the mixture is pale yellow, thick, and nearly tripled in volume. Don’t skip or cut short this step! This is what will allow this mixture to absorb the flour without clumping much.
- In a separate bowl, whisk together the gluten free flour blend and the xanthan gum, if your blend didn't already contain it.
- Into the yolk mixture, add the vanilla and salt, and then about 1/4 of the gluten free flour blend fold, and fold in the flour blend until fully incorporated.
- Add the rest of the gf flour blend in 2 or 3 more batches, folding in carefully until smooth. and whisk to combine.
- The mixture will get a bit stiffer with each addition of flour, but be sure to scrape all dry bits from the bottom and sides of the bowl. If you are concerned that the mixture is getting too thick, stop adding the flour blend and add some of the whipped egg whites to loosen it. Then continue with the remaining flour blend.
- Add the whipped egg white mixture to the batter in 2 or 3 portions, folding it in carefully until smooth after each addition.
- Fill a pastry bag fitted with a 1/2-inch plain piping tip (or a zip top plastic bag with a hole cut in the corner) with the raw ladyfinger dough.
- Pipe “fingers” onto the prepared baking sheet that are 3- to 4-inches long, about 2 inches apart from one another, on the prepared baking sheet.
- If you'd like a slightly sweeter cookie, dust the tops of the raw cookies with confectioners' sugar. It's entirely optional.
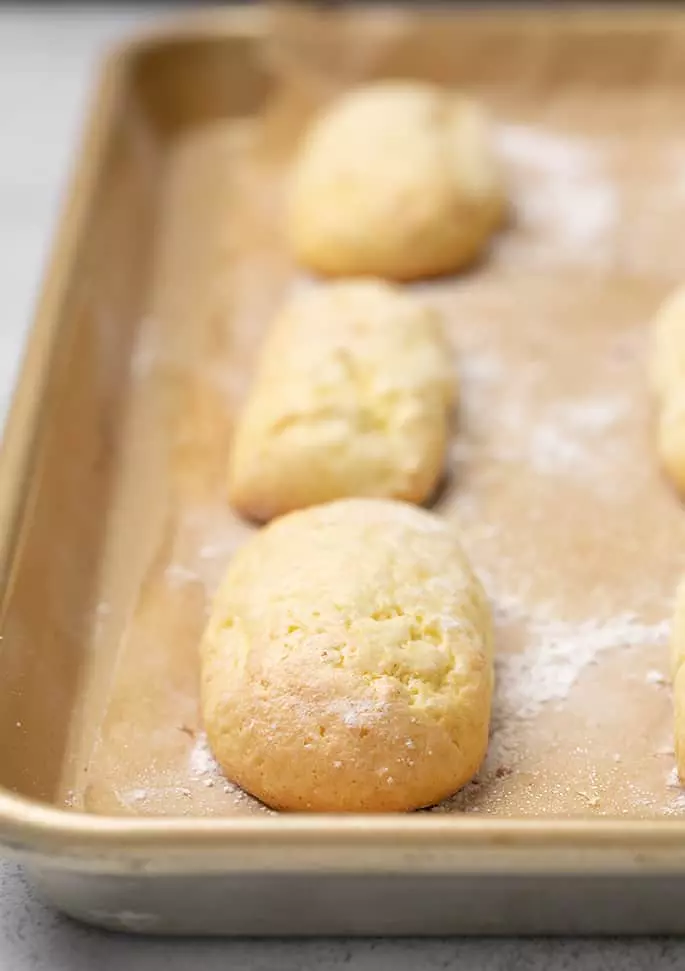
- Place the baking sheet in the preheated oven and bake for about 12 minutes or until the cookies are puffed and pale golden.
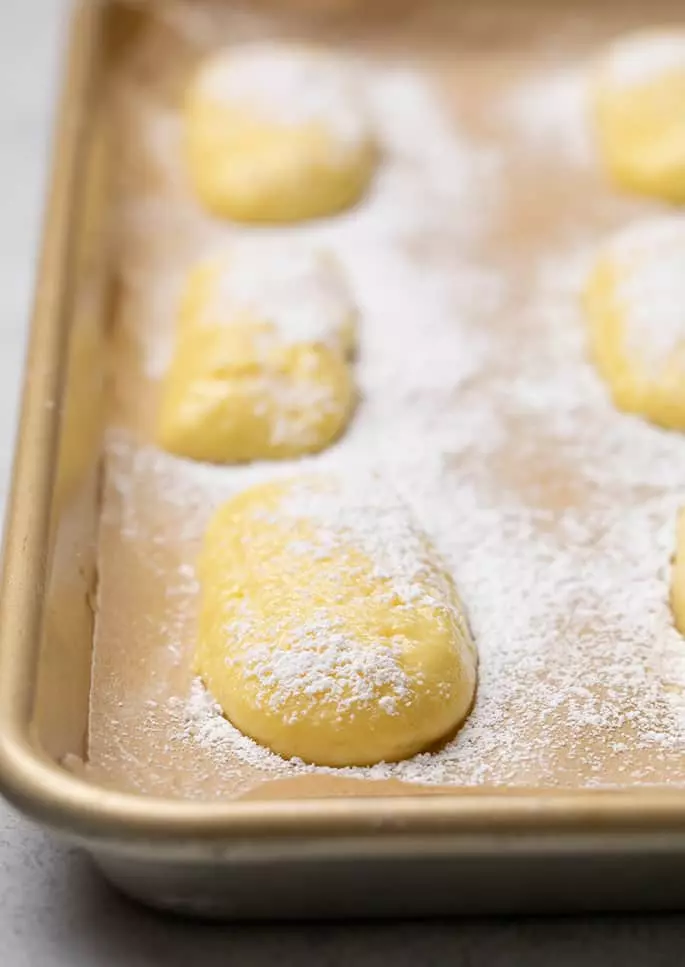
- Remove the baking sheet from the oven and allow the ladyfingers to cool until no longer hot to the touch on the baking sheet (about 10 minutes).
- Dust the fingers evenly with more confectioners’ sugar and allow to finish cooling until firm on the baking sheet.
- To maintain texture for a day or so, store in a sealed glass container at room temperature. They will not maintain their texture when frozen.
Video
Nutrition
Nutrition information is automatically calculated, so should only be used as an approximation.


Thank you for sharing this fantastic gluten free ladyfingers recipe! I really appreciate how detailed the instructions are, especially the explanations about whipping the egg whites and yolks properly. The step-by-step guidance makes this recipe feel approachable even for beginner bakers. I also loved the creative serving ideas beyond tiramisu — the charlotte and cheesecake suggestions sound absolutely delicious!
Sounds like a great recipe. What are the nutrition facts mainly interested in carbs as we are also diabetic.
I’ve added approximate nutritional information, Carol, but please don’t rely on it as it’s only an estimate.
TY for share this “well done” recipe, i did tiramisu with ladyfingers and was delicious
You’re very welcome, Rebecca! Thanks for sharing your experience.
Instead of piping it into lady fingers, Can you just pour into a cake pan to make a sponge?
I’m afraid I don’t think that would work, no, Deanna. The dough needs to have much more exposure to the heat of the oven than that would allow.
Great recipe. I did use it as a guide in combination with my GF sponge recipe. Which uses 4 yolks and 2 parts GF Flour mix and one part corn starch. And half a tsp cream of tartar. My GF Flour mix already has gum in it so didn’t have to add that. Otherwise I would add it to the flour when sifting it.
Thanks again and hopefully the addition of and extra egg yolks will help those that are struggling with a dry yolk and Flour mix…