This post may contain affiliate links. Please read our disclosure policy.
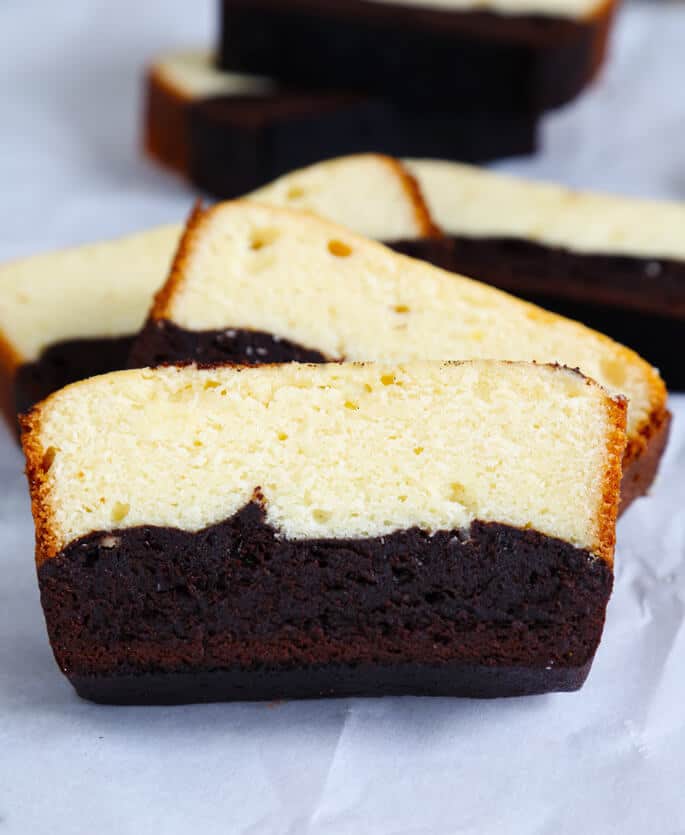
Table of Contents
When I started this blog way back in early 2009, it was all about great gluten free recipes that don't cost an arm and a leg to make. And it still is. But since by now we're all pretty convinced that great gluten free recipes are yours for the taking, we're moving on to Phase 2 of Gluten Free World Domination: “If they can make it with gluten, we can make it without.” If you had it before, you can still have it.
Somebody else made something delicious, but with gluten. Let's make it without. Like this gluten free brownie butter cake. There's a deep, rich fudgy brownie on the bottom that's similar in flavor to our classic chewy gluten free brownies, but more cake-like. Then, we bake a soft and tender butter cake on the top.
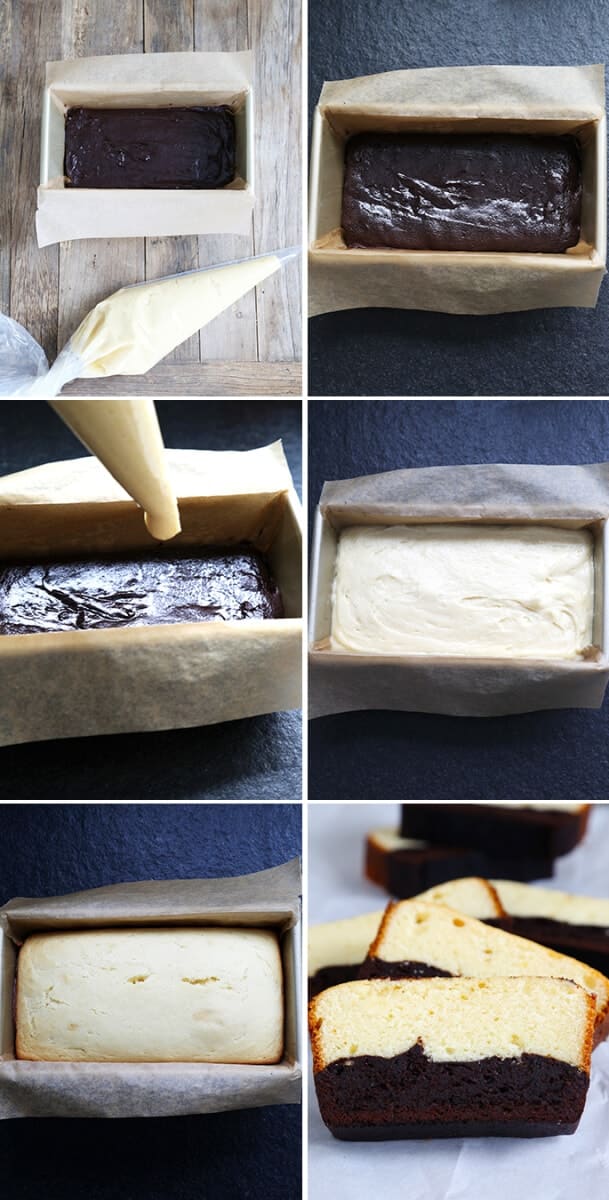
The instructions on Rasa Malaysia's site are, frankly, a little hard to follow so I've spelled them out here explicitly to ensure your success. And if you're tempted, like I was over and over and over, to skip the step of baking the brownie layer alone first I have one word for you: DON'T! I thought it would overcook the brownie to bake it, essentially, twice. Not to mention that I really didn't want to fuss with the extra step.
But somehow, blind-baking the brownie layer does something magical: it speeds up the baking of the butter cake layer, without ever overbaking the brownie layer. I speak to you as someone who made this cake 6 separate times before posting it here. I'm thorough, but blog recipes don't typically get tested 6 times before posting. Learn from my mistakes!
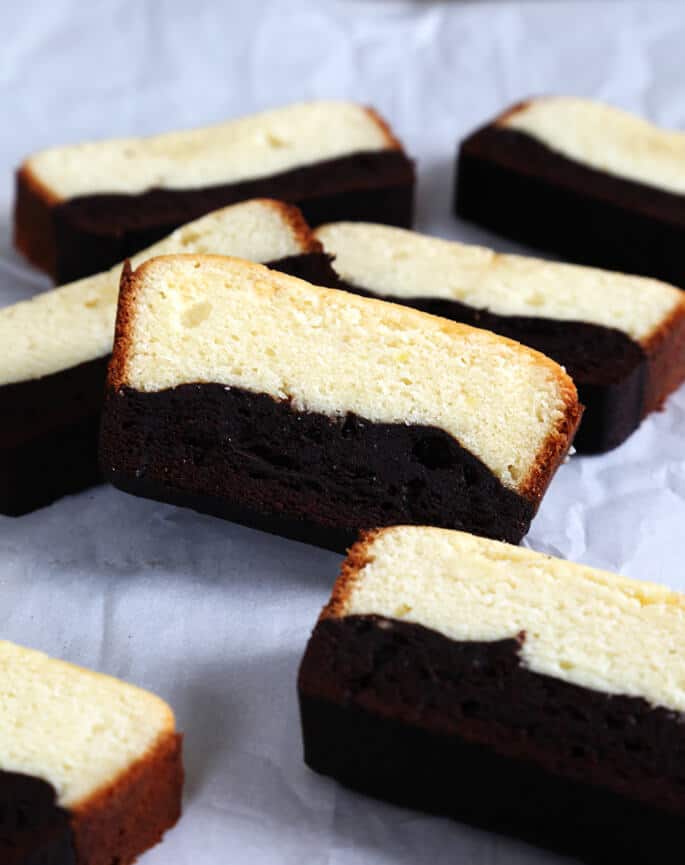
You will be rewarded with a show-stopper of a cake. If you can, slice into it right in front of your dinner guests (even if they're just your hungry family!). The tender, blonde butter cake layer is such a gorgeous yellow inside. The more dramatic the reveal, the better!
Gluten Free Brownie Cake
Ingredients
For the Brownie Layer
- 6 tablespoons (30 g) unsweetened cocoa powder, (Dutch-processsed works best; if you are using natural, add 1/8 teaspoon baking soda)
- ¼ cup (35 g) all purpose gluten free flour blend, (I used Better Batter; please click thru for full info on appropriate blends)
- ⅛ teaspoon xanthan gum, (omit if your blend already contains it)
- ⅛ teaspoon kosher salt
- 3 ounces dark chocolate, chopped
- 5 tablespoons (70 g) unsalted butter, chopped
- ¼ cup (55 g) packed light brown sugar
- 2 (100 g (weighed out of shell)) eggs, at room temperature, beaten
- ½ teaspoon pure vanilla extract
For the Butter Cake Layer
- ⅞ cup (122 g) all purpose gluten free flour blend, (I used Better Batter; please click thru for full info on appropriate blends)
- ½ teaspoon xanthan gum, (omit if your blend already contains it)
- ¼ teaspoon baking powder
- ¼ teaspoon kosher salt
- 8 tablespoons (112 g) unsalted butter, at room temperature
- ½ cup (100 g) granulated sugar
- 2 (100 g (weighed out of shell)) eggs, at room temperature, beaten
- 1 teaspoon pure vanilla extract
- 3 tablespoons milk, at room temperature
Instructions
- Preheat your oven to 325°F. Grease and then line with unbleached parchment paper a standard 9-inch x 5-inch loaf pan. Set it aside.
Make and bake the brownie layer.
- In a small bowl, place the cocoa powder, flour, xanthan gum and salt, and whisk to combine. In a separate, large heat-safe bowl, place the chocolate and butter, and melt either in a double boiler on the stovetop or in the microwave in 30-second bursts at 60% power, stirring in between.
- Add the brown sugar to the melted chocolate mixture, and mix to combine. If the mixture is hot to the touch, allow it to cool until it is, at most, warm or it will cook the eggs.
- Add the beaten eggs and vanilla, and mix to combine well. Add the dry ingredients and mix until just combined.
- Pour the brownie mixture into the prepared pan, and shake into an even layer. Place in the center of the preheated oven and bake for 15 minutes.
Make the butter cake batter.
- In a small bowl, place the flour, xanthan gum, baking powder and salt and whisk to combine well. In a separate, large bowl, place the butter and beat until light and fluffy.
- Add the sugar, eggs and vanilla, and beat until well-combined.
- Add half of the dry ingredients and mix until just combined, then the milk and mix until just combined, followed by the remaining dry ingredients, mixing once again until just combined. The batter should be fluffy.
- Transfer the butter cake batter to a large piping bag or large zip-top bag. Cut off the tip of the piping bag (or corner of the zip-top bag).
Add the butter cake layer.
- Once the brownie layer is finished baking, remove it from the oven and, working quickly, pipe the butter cake batter evenly over the top of the hot brownie layer.
- Shake and spread gently into an even layer and return the pan to the center of the hot oven.
- Continue to bake for about another 25 minutes, or until a toothpick inserted into the center comes out with a few moist crumbs attached and the top of the cake feels relatively firm to the touch.
- Allow to cool in the pan for 10 minutes before turning the cake out onto a wire rack to cool completely. Slice thickly and serve.
Nutrition information is automatically calculated, so should only be used as an approximation.



Thank you Leslie.
Is it really necessary to pipe the butter cake batter? Is it okay to spread it over the brownie layer?
Hi Terry,
I made this without piping the butter cake batter but I spread the batter out VERY quickly using a silicone spatula (sprayed lightly with oil). Just be sure that you have everything ready the moment that you take the brownie layer out of the oven. The cake that I made turned out just as nicely this way.
I just got in from working outside and first thing I see is this beautiful cake…Yum.
I could sure use a slice with some chai tea about now :)
I have all these ingredients already! Thinking I will make this tomorrow with my daughters.
Yum is all I can think of!
I think baking your recipes at home is still a worthwhile cost saving. I recently bought a roll cake at a store and it was expensive as well as tasting terrible. The “cream” was sweet cheap tasting sugar frosting! My guests and I choked it down. I could have made any recipe myself that would taste better.
Ditto