
This post may contain affiliate links. Please read our disclosure policy.
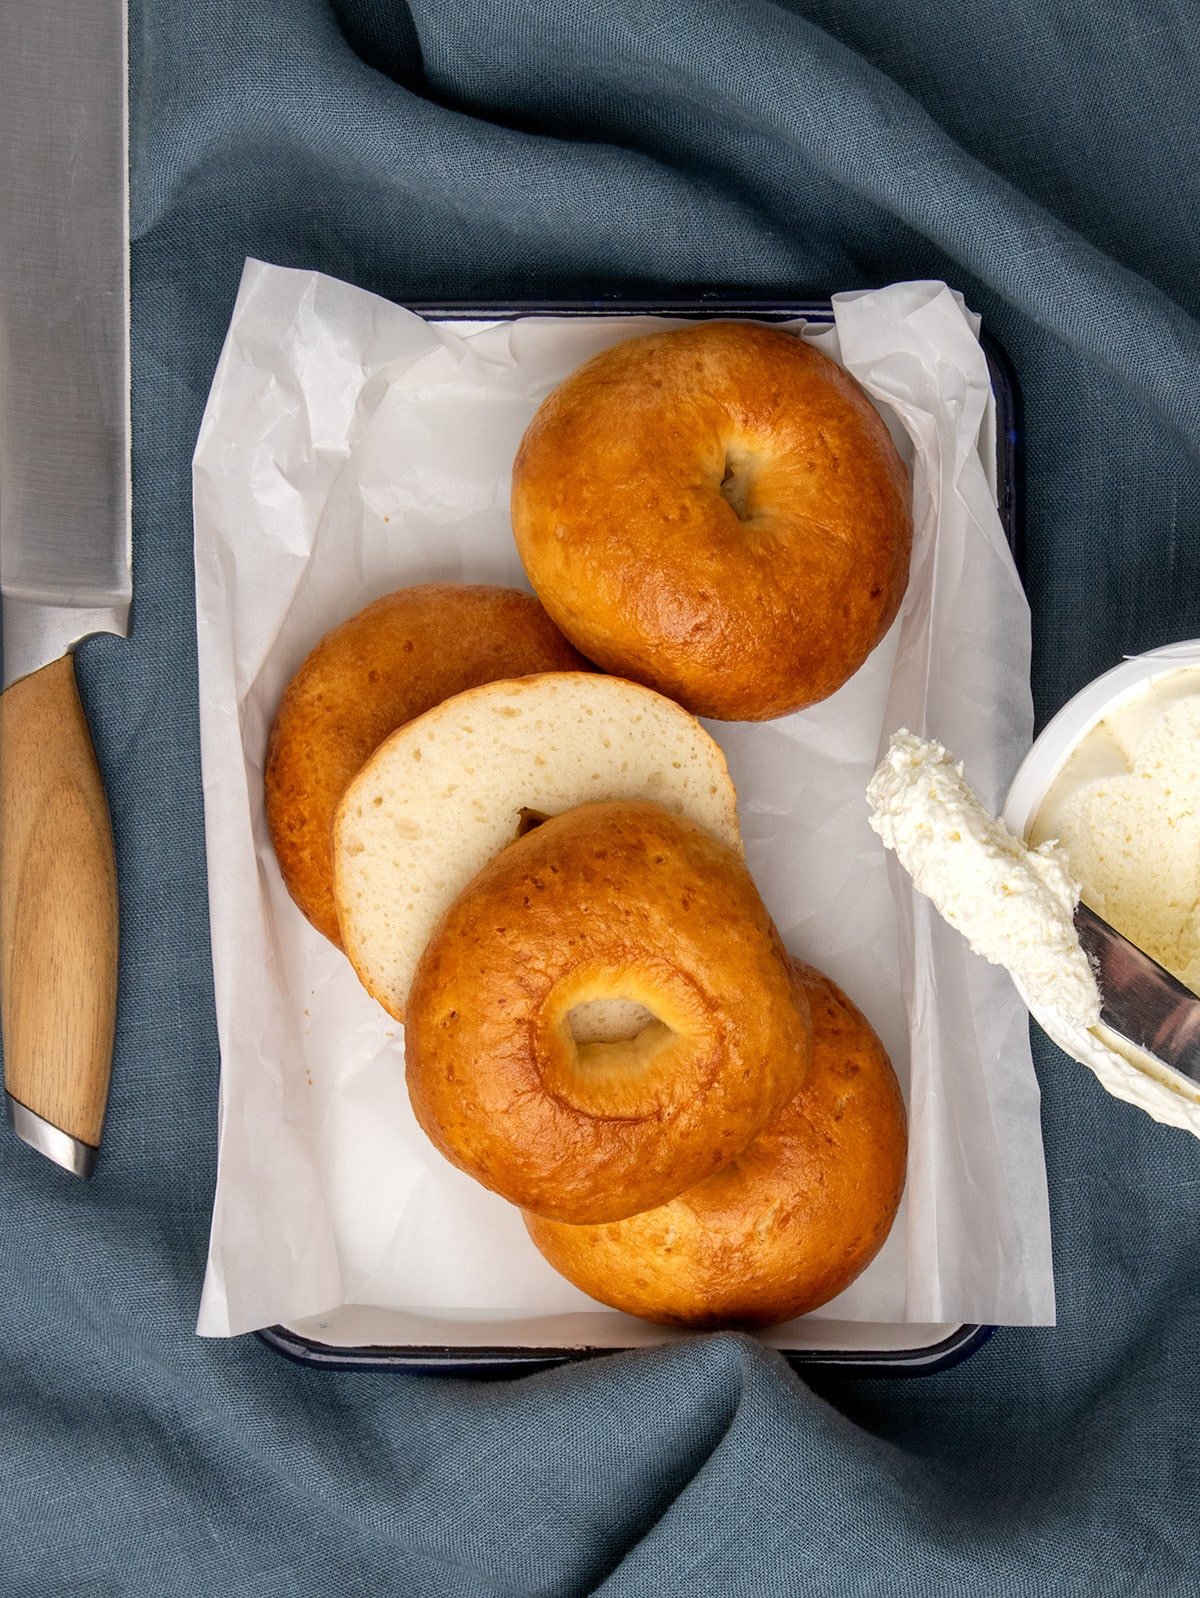
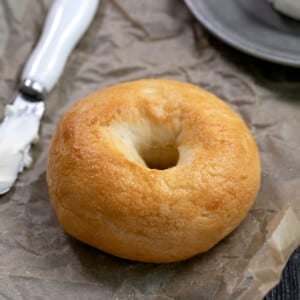
This recipe makes truly authentic gluten free bagels that you may have thought you'd never have again. The secret to an easy to handle dough is the cold rise before shaping, and the secret to the chewy crust is boiling them in a molasses bath before baking to perfection.
As a born and raised New Yorker, chewy, crusty New York-style bagels have always been very important to me. Now I bring them to you, gluten free!

Why you'll love this recipe
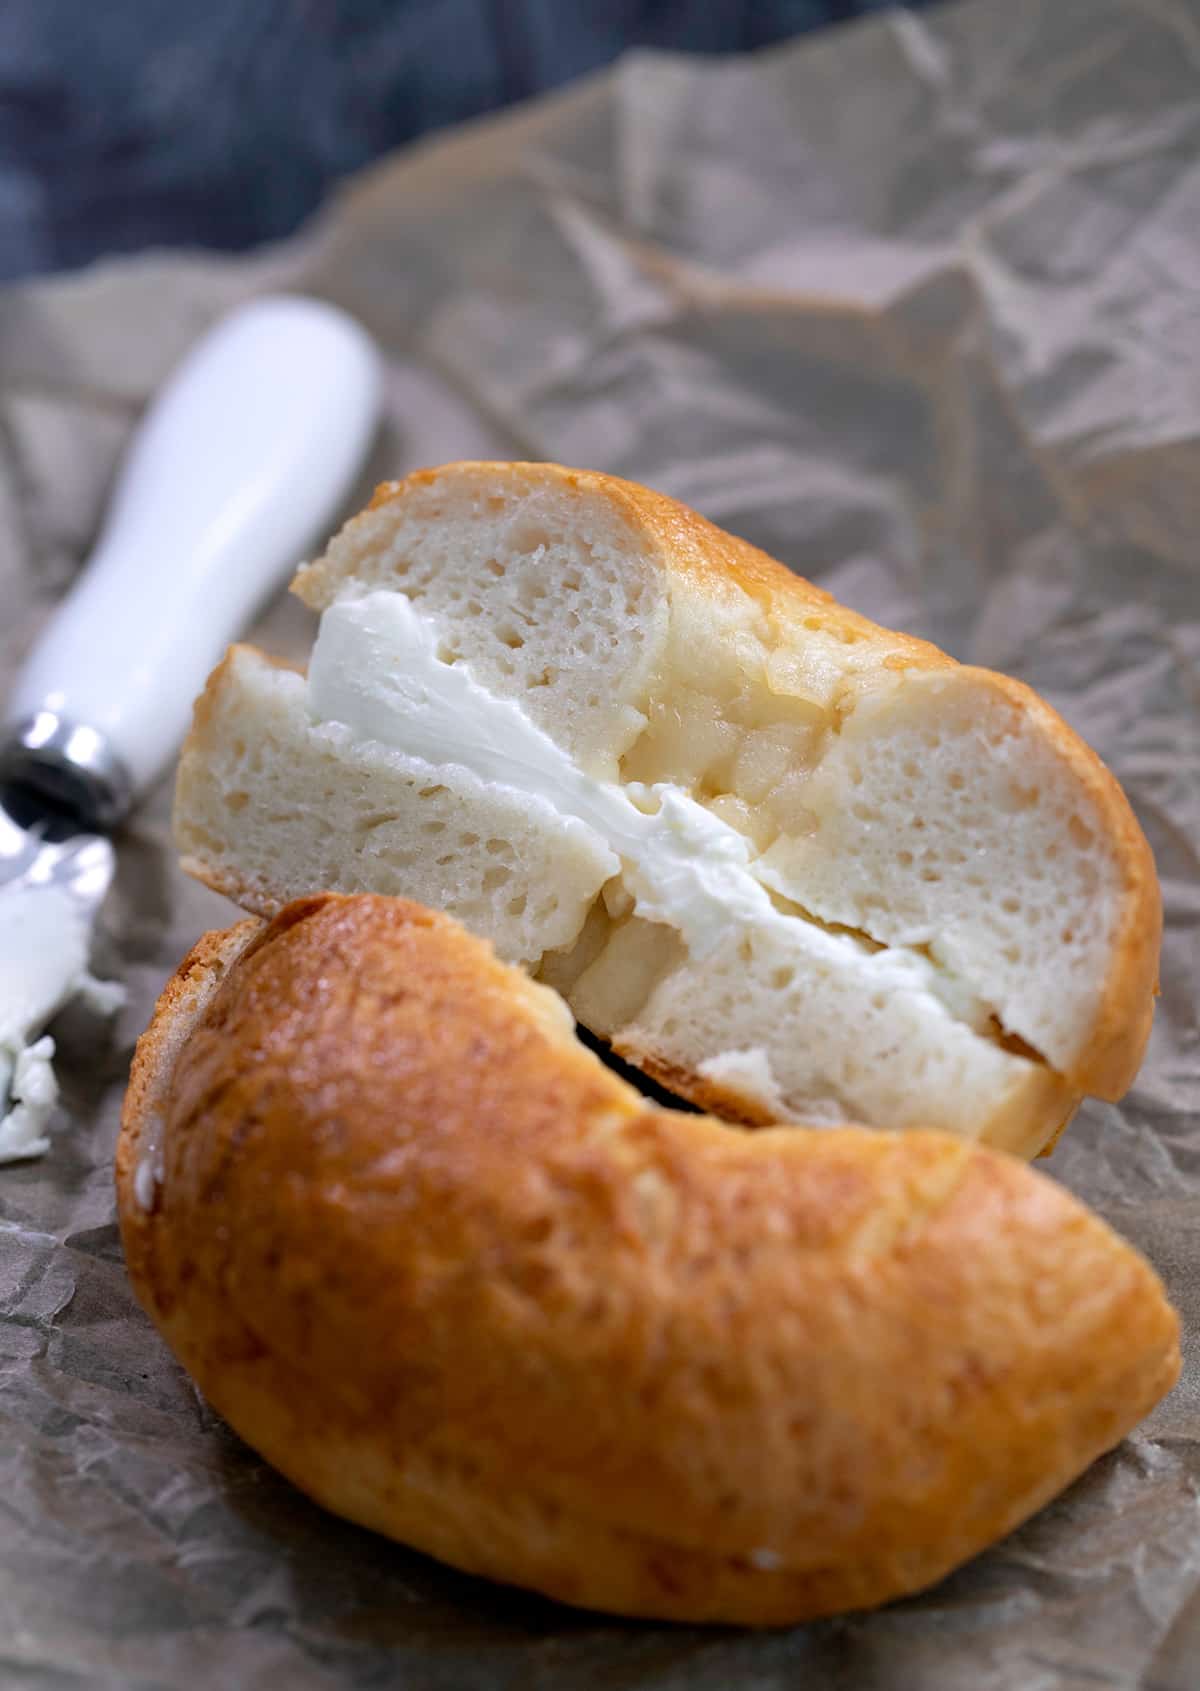
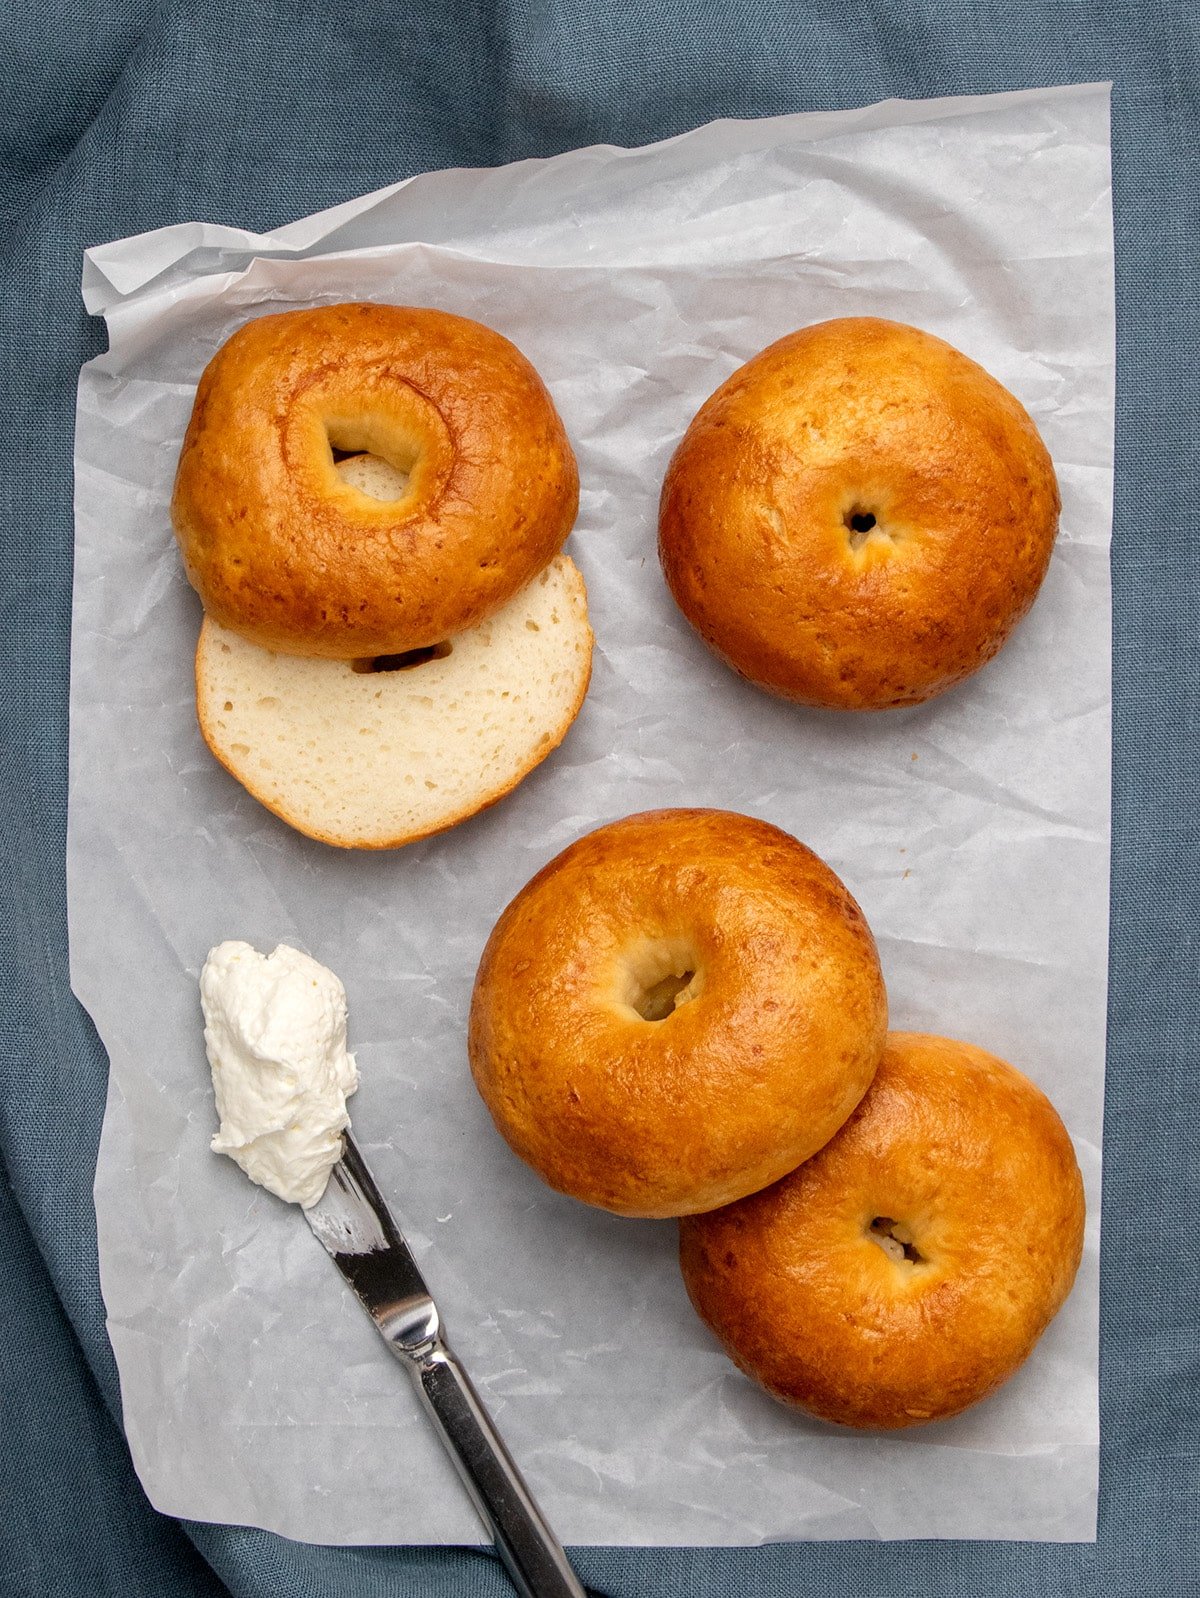
These bagels are crisp and fully browned on the outside and satisfyingly chewy inside, just like real New York bagels. You can sprinkle them with sesame or poppy seeds, everything seasoning, even top with cinnamon-sugar after brushing with an egg wash.
The recipe has lots of ingredients that aid in browning in the oven, an egg white to help them hold their shape as they cool, and extra tapioca starch to make the bagels super chewy.
Enjoy them plain, toasted and with butter or cream cheese, or use them as the foundation for the perfect sandwich.
Recipe ingredients
Here are the ingredients you'll need to make this recipe, plus a bit about the role each plays in a perfectly round, chewy, browned bagel:
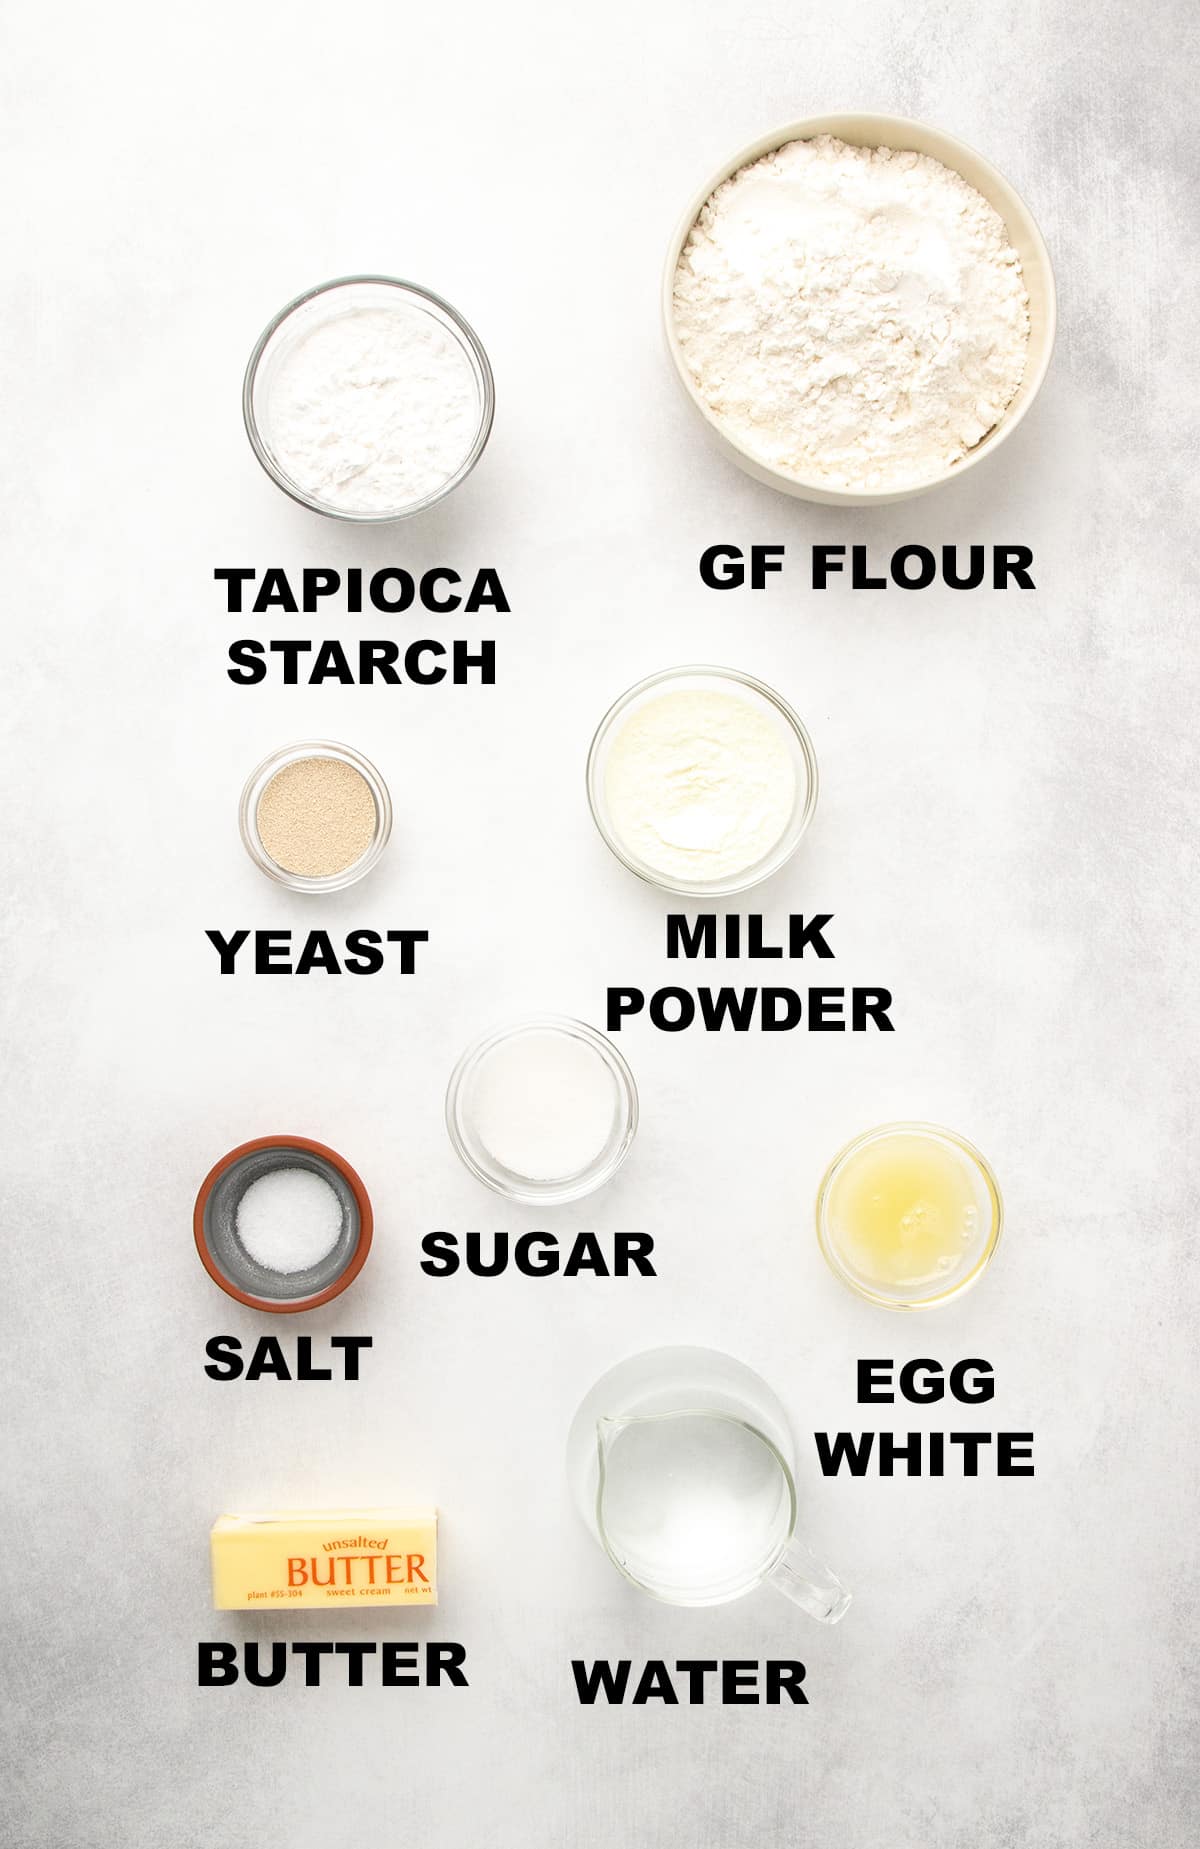
- Gluten free flour: Select your all purpose gluten free flour blend carefully, an important choice for any recipe, but especially important in a shaped yeast bread recipe like this. I highly recommend Nicole's Best multipurpose gluten free flour blend or Vitacost's Multi-Blend Gluten Free Flour with added xanthan gum, or Better Batter's original all purpose blend without additional xanthan gum. I recommend against Bob's Red Mill 1 to 1 in the blue bag here, since it just doesn't have enough structure. King Arthur Flour's gluten free bread flour or pizza flour may work, though.
- Tapioca starch: Adding extra tapioca starch to this recipe, beyond what is already contained in your all purpose gluten free flour blend, adds extensibility and stretch to the dough. Sprinkling the dough lightly with more tapioca during shaping also helps the bagels crisp in the oven.
- Milk powder: Adds richness to the bagels and helps them brown. Use even if your all purpose blend already contains milk powder.
- Instant Yeast (aka rapid rise or breadmaker yeast): Gives these bagels their rise. To use active dry yeast, add 2 grams more for a total of 11 grams yeast, and proof it in some of the recipe's water first. Active dry yeast has a thicker inactive coating that you must dissolve before adding it to the dough or it won't activate.
- Sugar: Helps feed the yeast, adds a very gentle sweetness and helps the bagels brown.
- Salt: Adds flavor, and helps control the rise of the yeast.
- Butter: Adds richness, buttery flavor and helps with browning.
- Egg white: Provides structure to help the bagels hold their rise as they cool after baking. The egg wash (egg + water) brushed on the outside of the boiled bagels helps them turn out evenly brown and shiny.
- Water: Brings the dough together and creates a wet enough environment for the yeast to thrive. Warm water helps the yeast activate quickly. Make sure yours isn't too hot, or it could kill the yeast.
- Molasses bath: Bagels are traditionally boiled in a water bath with barley malt added. Since we can't use that gluten-containing ingredient, we use unsulphured molasses in a boiling water bath instead to add some dark brown color to the bagels.
How to make gluten free bagels
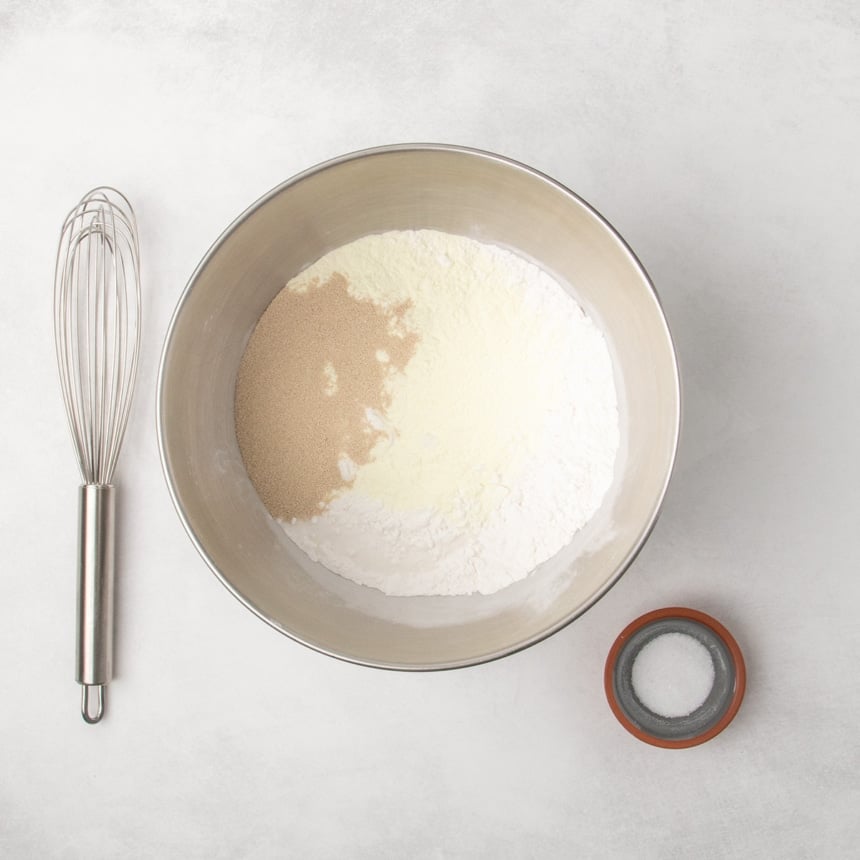
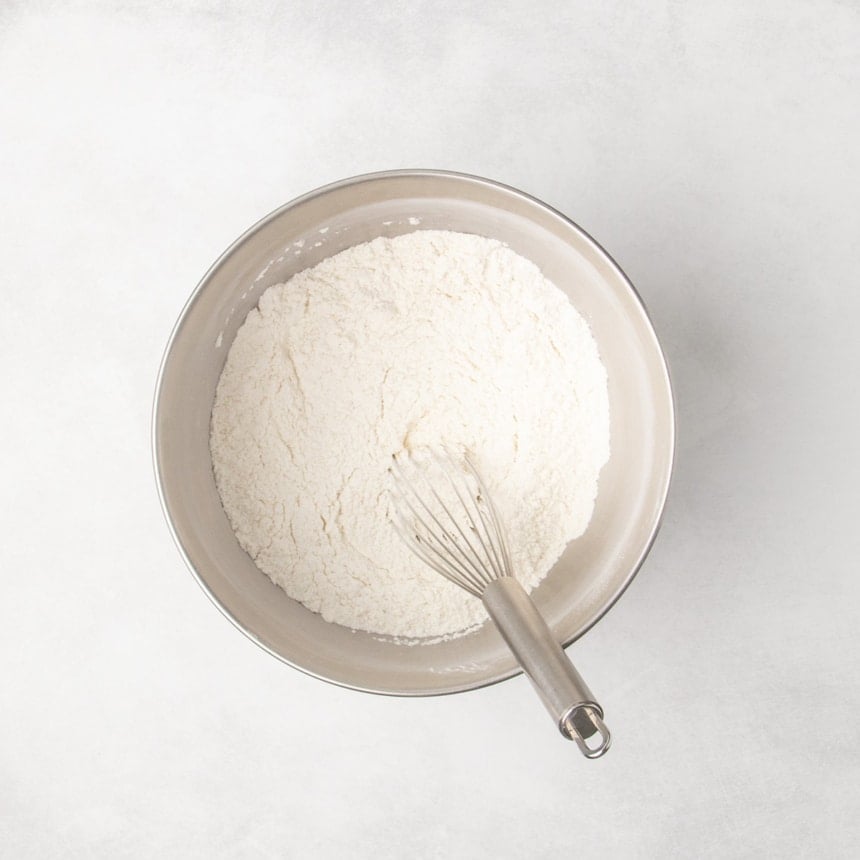
Whisk the dry ingredients
In the bowl of a stand mixer, whisk together all the dry ingredients except the salt (gluten free flour blend with xanthan gum, tapioca starch, milk powder, yeast and sugar) before whisking in the salt.
This evenly distributes all the dry ingredients and ensures that the unmixed salt and yeast don't come into direct contact, as salt inhibits yeast.
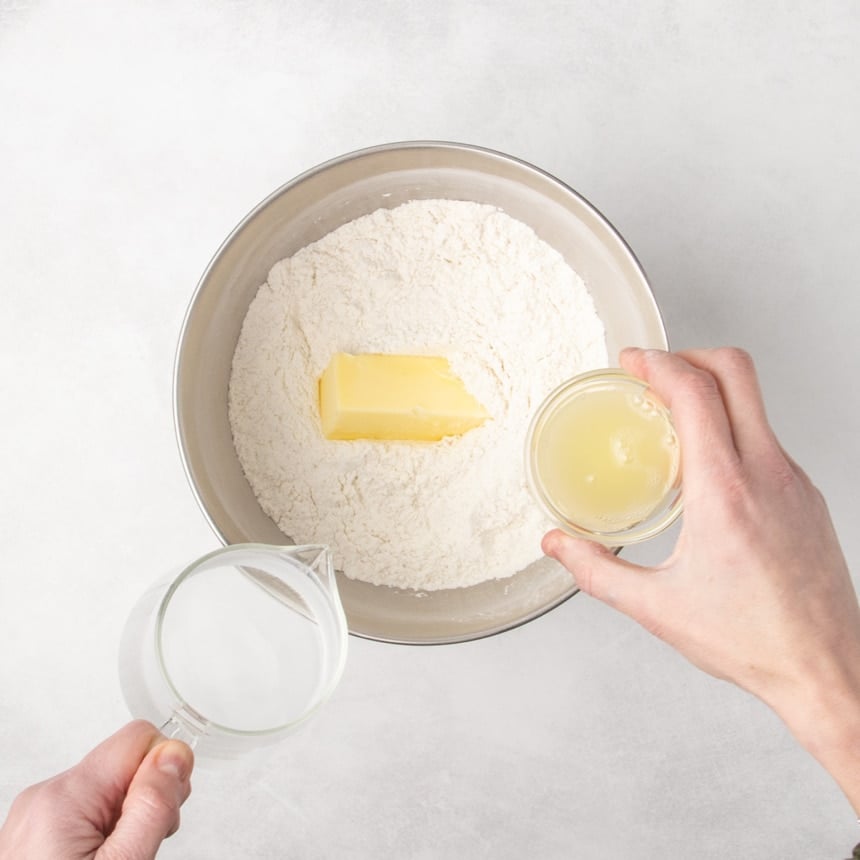
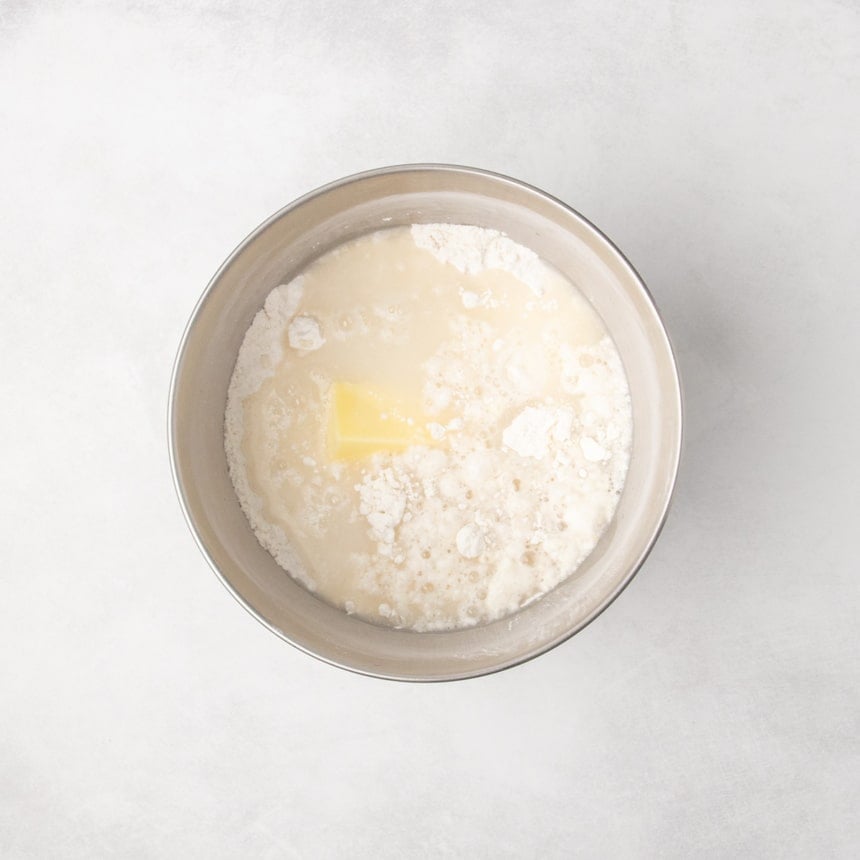
Add the wet ingredients
Add softened butter, a room temperature egg white, and warm water to the whisked dry ingredients. If your mixing bowl is especially large, turn things over a few times with a spatula to begin combining wet and dry ingredients.
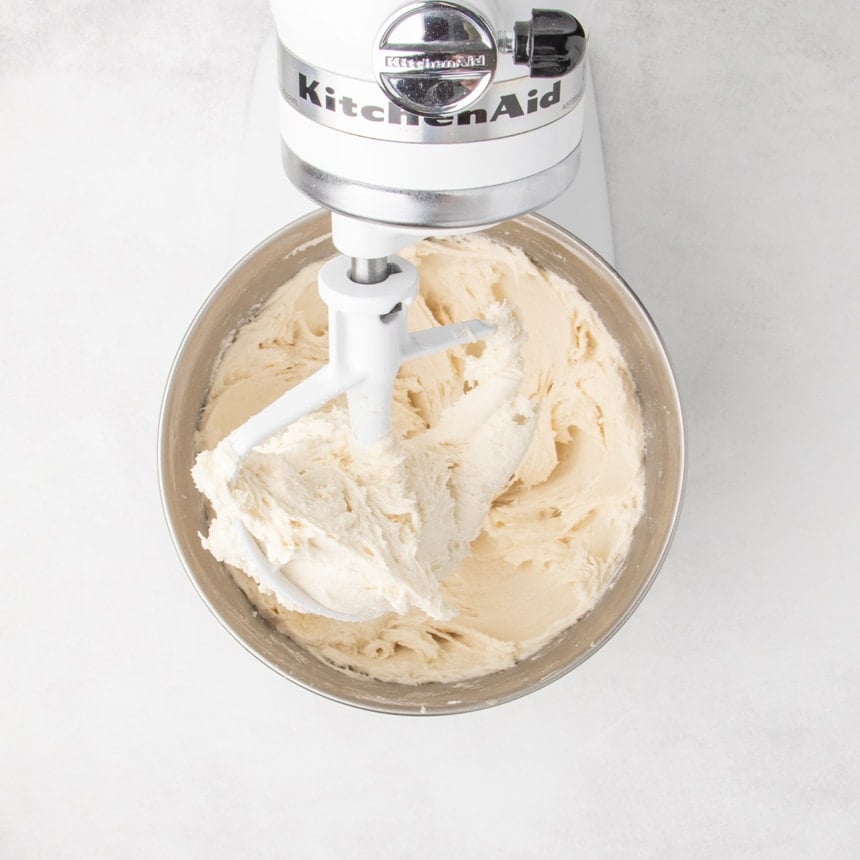
Mix well
Place the mixing bowl in the stand mixer and attach the paddle. Mix on medium-low speed for a minute until the flours are moistened. The dough will clump around the paddle. Mix on medium-high speed for about 4 minutes or until the dough sticks to the sides of the bowl and takes on an airy, whipped appearance.
Chill the unshaped dough
Transfer the prepared raw dough to a container or bowl and cover tightly. Place in the refrigerator for at least a 30 minute (and up to 2 day) cold rise. This allows the dough to develop yeasty flavor. It also gives the flours time to absorb moisture and the butter to stiffen, making the dough easier to shape.

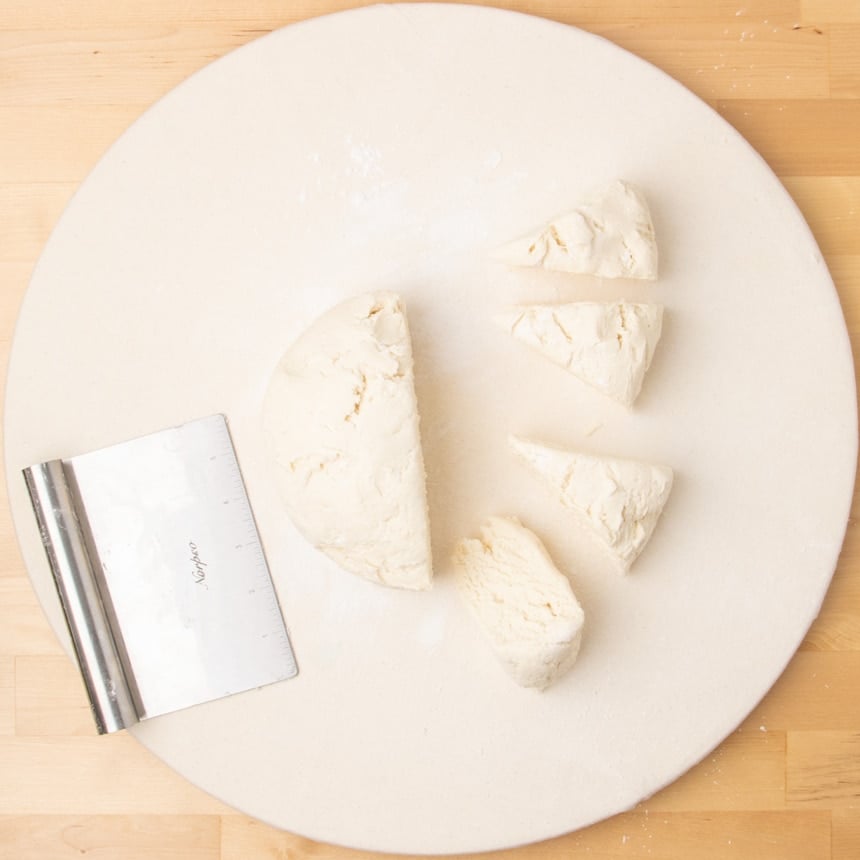
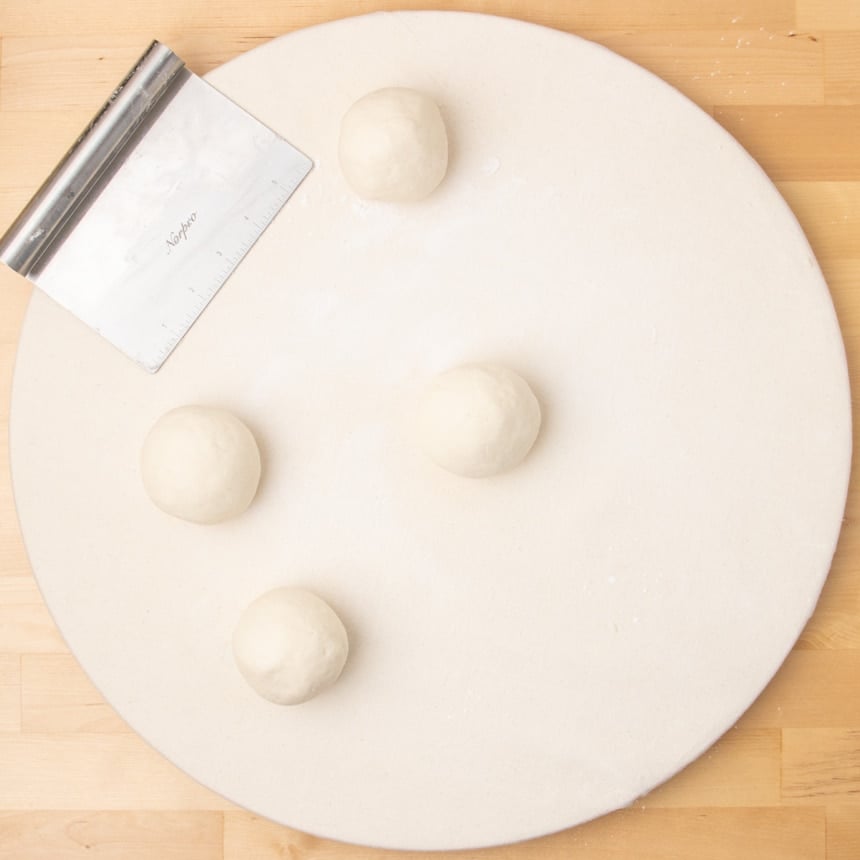
Divide the dough
Place the dough on flat surface lightly dusted with extra tapioca starch and sprinkle it lightly with more tapioca. Use a bench scraper or sharp knife to divide it half, then each half into 4 equal portions, each weighing a bit more than 4 ounces. Evenly divided dough will rise and bake evenly together.
Shape into rounds
Work with one piece of dough at a time to shape into a round. Cupping your hand around the dough, resting the pinky edge of your hand on the surface and your hand in a C shape (or a backwards C if you're right handed like I am). Move your hand around in a circle, maintaining contact with the surface on the side of your hand at all times. Only sprinkle with more tapioca as essential to prevent sticking or the dough can dry out, preventing a proper rise.
Create bagel holes
Use your palm to press each round gently into a disk. Poke a floured finger into the center from both sides of the dough. Rotate the dough around that finger in concentric circles to widen the hole. Bagels are sometimes shaped by rolling out a cylinder of dough, about 1 1/2-inches thick and then joining the ends together to create a round. If you shape your bagel like that, the edges may separate during boiling or even during baking.

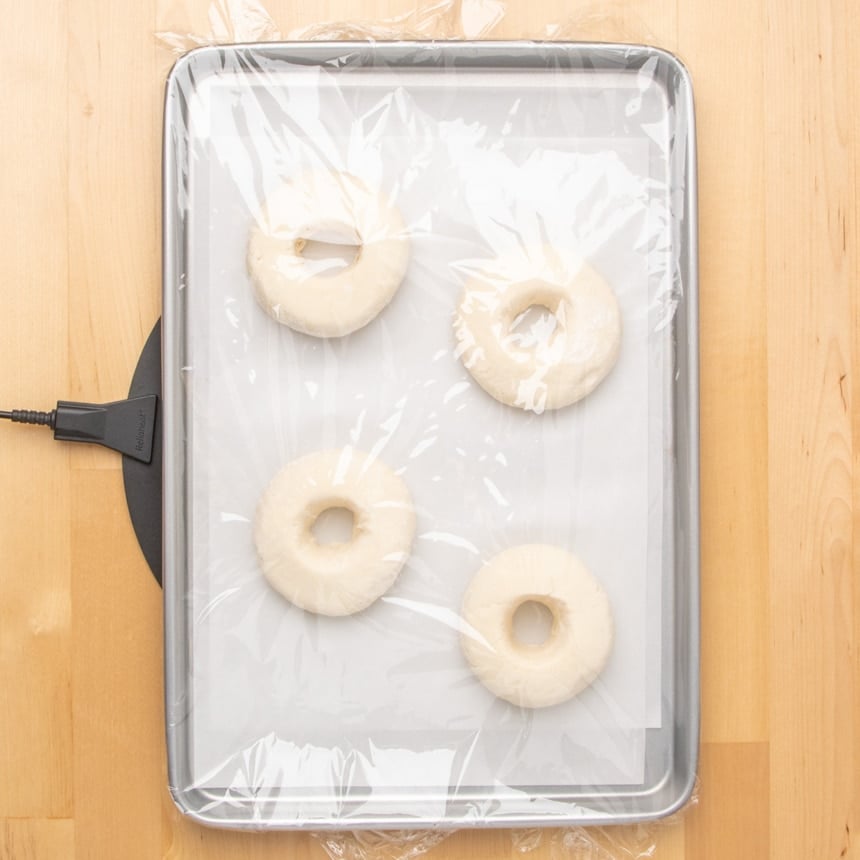
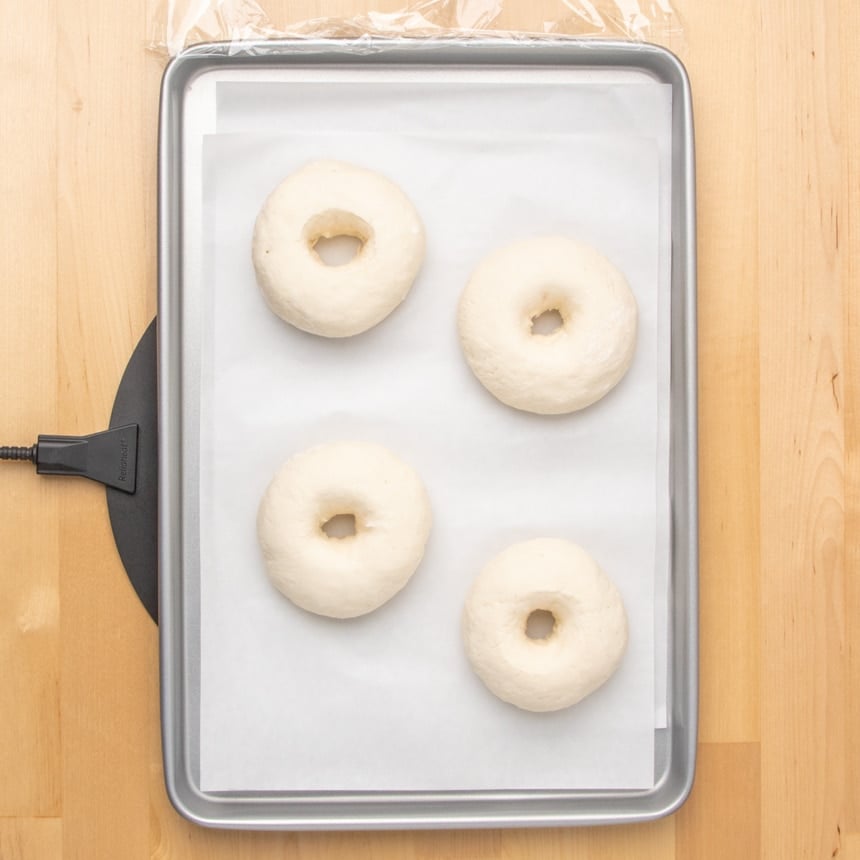
Let the shaped dough rise
Place the raw shaped bagels about 2 inches apart on lined baking sheets, cover lightly with plastic wrap, and let rise until about 50% larger than they started. This is very temperature and humidity-dependent, so be patient. The dough isn't strong enough to double in size while still holding its shape, but you don't need it to.
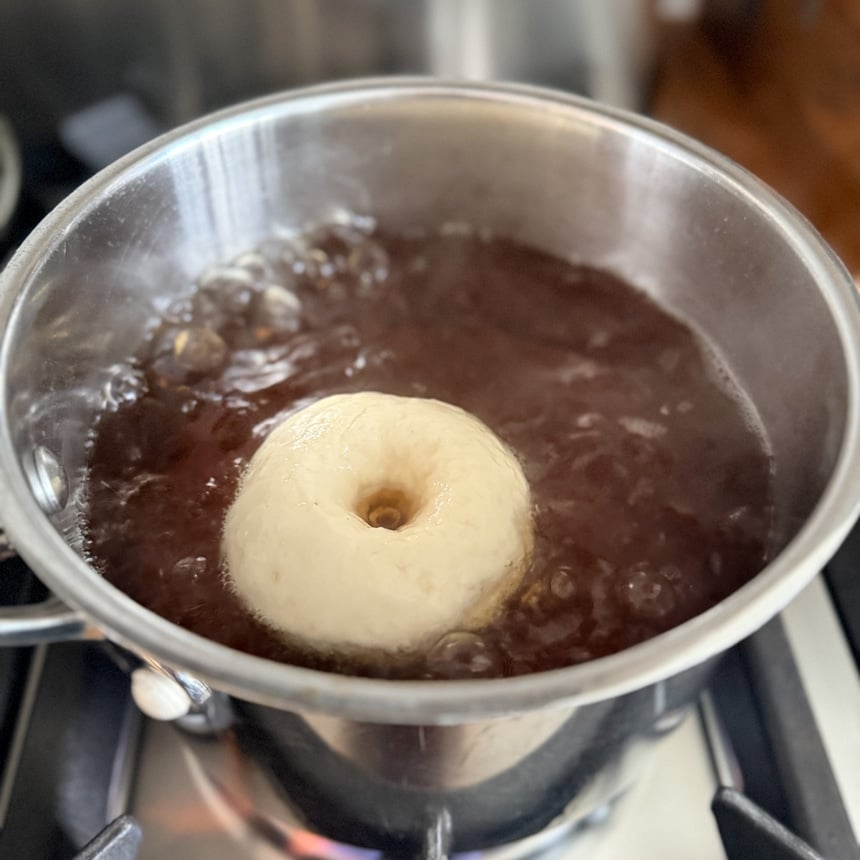
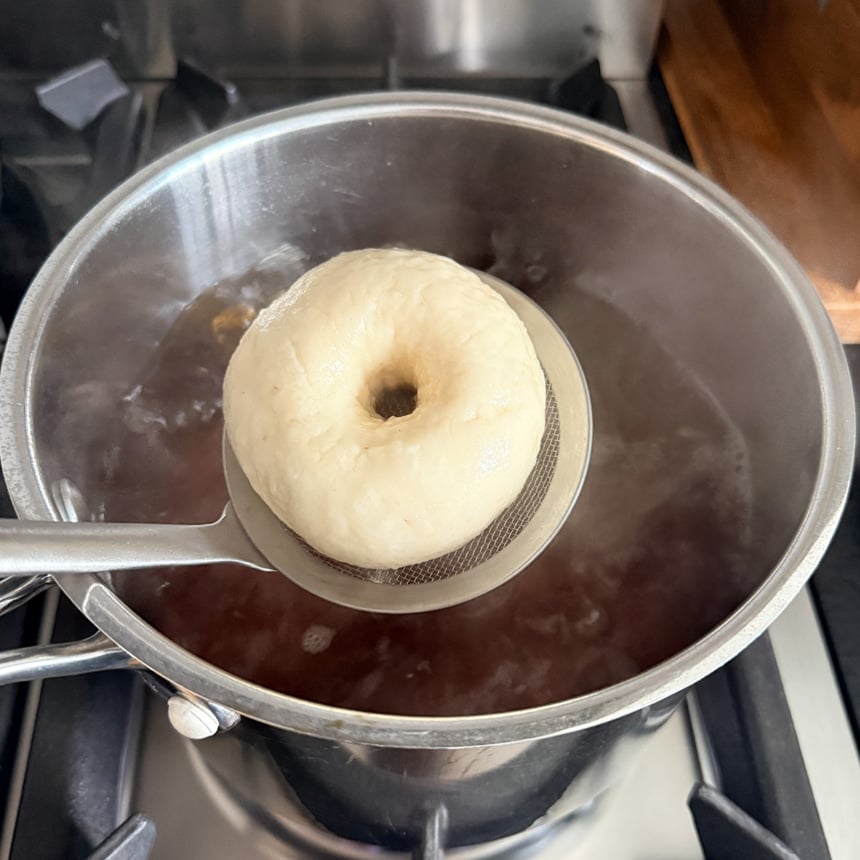
Boil the risen bagels
Add unsulphured molasses to water and bring it to a rolling boil. This is the molasses bath that restricts the oven rise a bit and ensures that chewy, classic bagel texture and appearance. Boil each risen bagel for less than 1 minute total, flipping over gently to boil both sides. Return to the baking sheet.
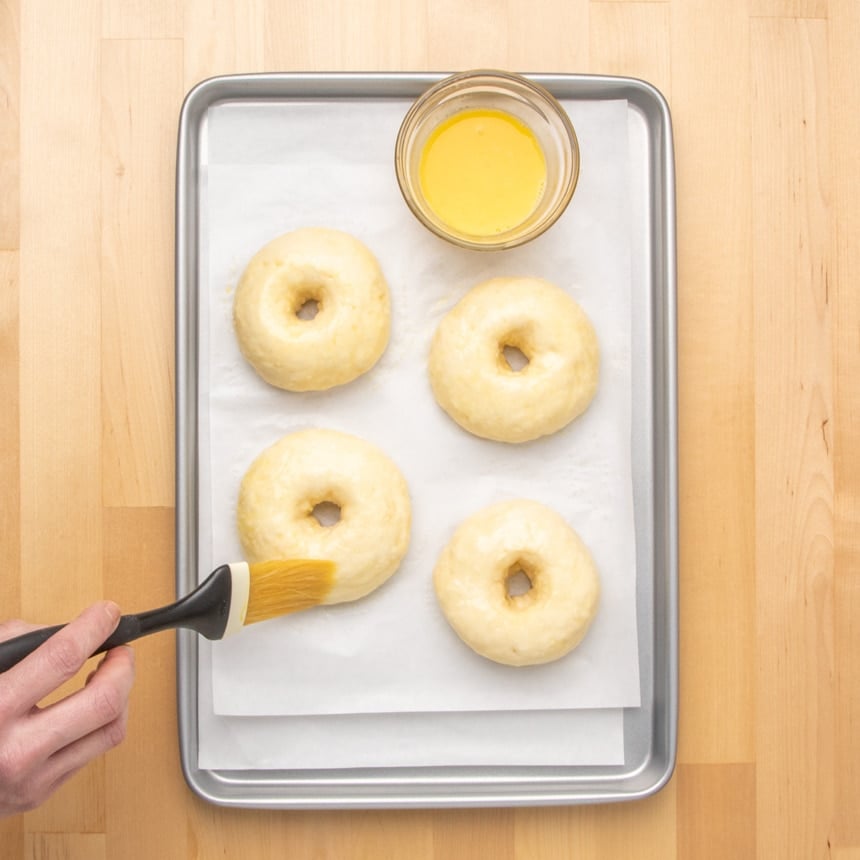
Brush with an egg wash
Brush the boiled bagels with an egg wash to help them brown well and come out shiny.
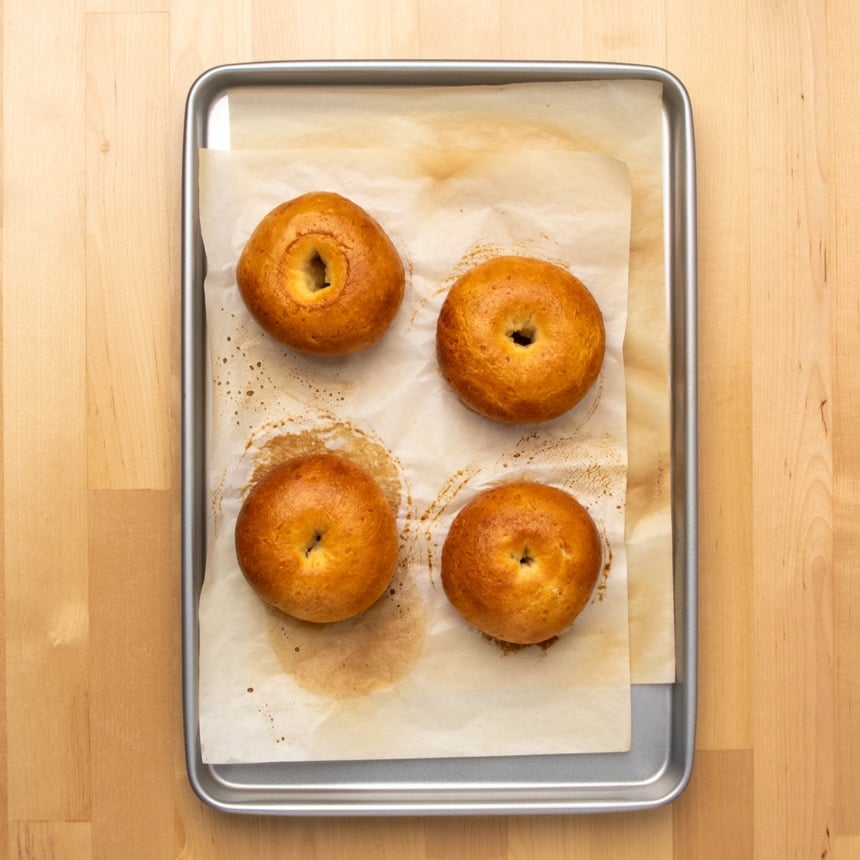
Bake until golden
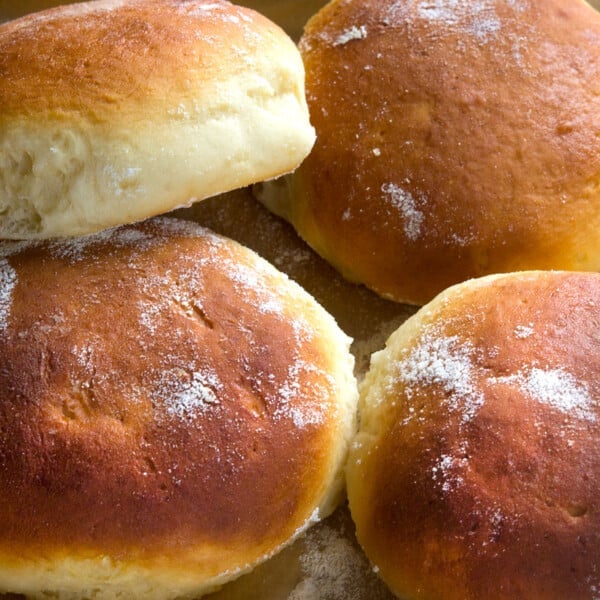
Bake at 375°F for about 25 minutes, rotating once after 15 minutes, or until they've reached a beautiful golden brown and measure about 180°F on an instant read thermometer.
When they're done, the bagels will spring back when pressed gently and will feel relatively light for their size. The molasses bath may cause them to blacken a bit on the bottoms, but it won't affect the taste.
Expert tips
Be sure to add extra tapioca starch
Most well balanced all purpose gluten free flour blends have some tapioca starch in the blend. Here the recipe calls for extra tapioca starch as a separate ingredient, and it's essential. It provides structure, stretch and a smoothness to the dough.
If you don't have a stand mixer
You can't make a cohesive raw dough that rises smoothly both raw and during baking without some sort of mechanical mixing. A stand mixer with the paddle attachment is ideal for over-areating the dough a bit, which a handheld mixer would do.
If you don't have a stand mixer, you can try using a large food processor with the plastic dough blade (the metal blade is too aggressive). Pulse the dough a couple times quickly, scrape it down to redistribute the ingredients, then pulse again and repeat until you have a relatively smooth dough. Be careful not to overprocess.
Avoid overproofing the shaped dough
The raw, shaped dough will not double in size, and instead will become about 50% larger than how it began. If the dough begins to take on a dimpled look, it's started to overproof. Over-risen dough will soak up water like a sponge and disintegrate during boiling.
Boil before you bake
Boiling bagels after their shaped rise sets the starches on the outside, keeping them from rising too much in the oven. It's what creates the characteristic chewy crumb that a roll-with-a-hole that just looks like a bagel can't have.

Ingredient substitutions
Dairy free
To replace the milk powder with a dairy-free alternative, coconut milk powder should work. In place of butter, vegan butter should work. I like Miyoko's, Melt, or Trader Joe's brand vegan butters best.
Egg free
If you can’t have egg whites, try replacing the egg white with an equal amount, by weight, of aquafaba, which is the brine from a can of chickpeas. Try beating it until foamy with a whisk before adding it to the dough. In place of the egg wash on the outside of the bagels, try using melted butter or cream.
Easy Gluten Free Bagels Recipe
Equipment
- Stand mixer with paddle attachment
Ingredients
- 2 ¾ cups (385 g) all purpose gluten free flour blend, (See Recipe Notes)
- 2 ¾ teaspoons xanthan gum, omit if your blend already contains it
- ⅗ cup (72 g) tapioca starch/flour, plus more for sprinkling
- ¼ cup (40 g) milk powder
- 1 tablespoon (9 g) instant yeast , (See Recipe Notes)
- 2 tablespoons (24 g) granulated sugar
- 1 teaspoon kosher salt
- 1 (25 g) egg white, at room temperature
- 6 tablespoons (84 g) unsalted butter, at room temperature
- 1 ⅜ cups (11 ounces) warm water, (about 95°F)
- Molasses bath, 6 cups water + 1 teaspoon kosher salt + 1 tablespoon unsulphured molasses
- Egg wash, 1 egg + 1 tablespoon lukewarm water, beaten
Instructions
Make the raw dough
- In the bowl of a stand mixer, place the flour, xanthan gum, tapioca starch/flour, milk powder, instant yeast, and granulated sugar, and whisk to combine well. Add the salt, and whisk again to combine.
- Create a well in the center of the dry ingredients and add the egg white, butter, and warm water.
- Place the bowl in the stand mixer fitted with the paddle attachment and beat on medium-low speed. The dough will clump around the paddle at first.
- Once it begins to smooth out, increase the speed to medium-high and continue to beat until the dough sticks to the sides of the bowl and takes on a whipped appearance (3 to 5 minutes).
Chill the unshaped dough
- Transfer the dough to a container with a tight-fitting lid, cover, and chill for about 30 minutes (and up to 2 days) to make the dough easier to work with and help it develop yeasty flavor.
Shape the bagels
- Line a rimmed baking sheet with parchment paper and set it aside.
- Sprinkle a clean, flat surface lightly with tapioca starch, and turn out the chilled dough onto it. Sprinkle again lightly with more tapioca starch, and turn the dough over a few times to smooth the surface.
- Using a sharp knife or bench scraper, divide the dough in half, then each half into 4 equal pieces to make 8 pieces total (each a bit more than 4 ounces).
- Working with one piece at a time, sprinkling very lightly with additional tapioca starch to prevent sticking, press the dough into a roughly shaped round, pinching together any cracks.
- Shape the dough into a round by placing it flat on the shaping surface and moving a cupped hand around in a circular motion to coax it into a round. Use your palm to press the top of the dough gently into a disk.
- Sprinkle the top of the dough and your index finger with more tapioca starch. Poke your finger into the center of the dough. Turn the dough over, poke through the same hole all the way through. Move your index finger quickly in a circular motion to increase the size of the hole to about 1 1/2-inches in diameter.
- Repeat with the remaining dough, placing the shaped raw bagels about 2 inches apart.
Let the shaped bagels rise
- Cover the baking sheet with lightly oiled plastic wrap, and set aside to rise until the bagels are about 150% of their original size. They won't fully double, (which would be 200%).
- Rising could take as little as about 40 minutes, or it could take much longer. It depends upon the temperature and humidity in your kitchen. If you see the surface of the bagels begin to become very uneven, with craters forming, stop proofing immediately.
Boil the risen raw bagels
- Toward the end of the rise, preheat your oven to 375°F.
- Place the ingredients for the molasses bath in a heavy-bottom saucepan and bring to a rolling boil over medium heat.
- Place as many of the bagels in the bath as you can fit without crowding them at all, and boil for about 45 seconds to 1 minute total, turning the dough over for even boiling. It's fine if the bagels swell unevenly.
- Remove the bagels from the bath with a slotted spoon or strainer, removing as much excess water as possible. Return them to the baking sheet.
- Brush the tops and sides of the boiled bagels generously with the egg wash. Repeat with any remaining bagels.
Bake the bagels
- Place the baking sheet in the center of the preheated oven and bake for 15 minutes.
- Rotate the baking sheet in the oven and continue to bake for about another 10 minutes or until golden brown all over, a thermometer inserted into a bagel reads 180°F, and the tops of the bagels spring back when pressed gently with your finger. When they're fully baked, they should seem relatively light for their size.
- Allow the bagels to cool for at least 10 minutes and until they’re no longer too hot to handle before slicing and serving.
Video
Notes
Nutrition
Nutrition information is automatically calculated, so should only be used as an approximation.

Storage instructions
Boiled and baked bagels will stay fresh for only about a day. If you wrap them very tightly in high-quality plastic wrap, they will still be good toasted the next day or two.
For longer storage, once cool, they freeze exceptionally well. Just slice them in half horizontally, place them in a well-sealed zip-top container with all the air squeezed out, and freeze for up to 3 months. Defrost at room temperature or briefly in the microwave, and toast to perfection.


Other modifications, got it!! Thank you!!
I love bagels, but somehow they go all wrong in the boiling water stage… do you have any tips?
Thank you Nicole! I forgot to ask do I also have to increase the liquid by 150% as stated in the book for this recipe as well? Thanks again!! :)
I was just going to comment on the whey powder as well:) In Nicole’s Gluten Free Bakes Bread she offers a substitute for dairy free, a NOW Foods pea protein isolate, and Growing Naturals rice protein isolate. I was also wondering if I could use either of these substitutes in this bagel recipe?
Definitely, Anne, with the other modifications in the book. :)
Hi, I am unable to have whey powder (or anything dairy) as well as soy. What do you recommend to replace the whey powder in the GF bread flour?
Thanks!!
In place of whey protein isolate, Bean, you can use rice protein isolate or pea protein isolate, but you will have to increase the water to 150% of what is in the recipe as written, and you will have a much more moist dough. I go into the process in more detail in my bread book!
I make a double batch of your wild sourdough bagels every week, and my children (teens) help because we LOOOOOVE bagels! Everything is our favorite, but we’ve mixed a little cinnamon and raisins into the dough and they were apparently mind-blowing as well (I didn’t get any of those). Now I can share this recipe with those who wanted one because I didn’t feel right copying the recipe from my all-time favorite book of yours. :)
Thank you, Melanie! I really appreciate the sourdough love (it’s some work, but it’s SO worth it!), and the fact that you weren’t willing to copy the recipe from the book. That means a lot to me.
I’ve never made bagels before, GF or otherwise. Is it possible to simply add flavor variations to this recipe (onion, sesame seeds, etc)? Does that work?
Definitely, Louise! You can sprinkle dried onion flakes on top, and whatever other seeds you like.
Can you use store bought GF Flour?
Nothing “straight off the shelf” no.
Like John said, Todd, there is no viable option for a pre-mixed gluten free bread flour. Please follow the link in the recipe for more information on how to take Better Batter gluten free flour and add two ingredients to it to make my bread flour blend.
Tried as I might, I could not master the grain free bagel. It was okay, but not something I want to rush to make. So, I have decided that I am going to start having cheat days from this grain free thing. Sunday is my cheat day. Once in that day, I will have some grains. I am now ordering Better Batter and making bread flour. First up, these bagels! Yeah baby! :) :)
Aw, Mare, good for you! I’ll be honest—I haven’t tried to make a grain-free bagel. Have you tried Otto’s Cassava Flour? A friend gave me some to work with since she found out she’s allergic, suddenly, and so far I’m very, very intrigued.
Never heard of it. Will have to check it out. Oh, my husband and daughter will be ecstatic on Sunday when they see the bagels. (I have some bread flour left that I can use on them this Sunday!)
I’m afraid it’s not cheap, Mare, but it’s available on Amazon if you want to try it (Otto’s Naturals Cassava Flour (aff link))
None of the flours are cheap. I have bulk almond and coconut in my freezer. No room for bulk cassava though. Maybe someday a larger freezer.
Same as tapioca, no?
tapioca starch is just the starch from the cassava root, i believe Joy and cassava flour is the whole root ground up.
I am SO excited to try these quickies! Our local bagel shop has been posting hilariously awesome photos of their new rainbow bagels, and I’ve been craving one ever since! Thanks, Nicole!
No way, Allison! If you make these into rainbow bagels, please please snap a photo and share it here??
Goodness! Rainbow Bagels! And I DO have time this weekend for baking…..
;-)
If you use Better Batter flour, do you still need the whey protein isolate, expandex, etc.
Yepper. Says as much in the directions above.
But it also says or Better Batter itself – I am presuming that is if you you the mock better batter
Read it again closely.
I am new to this blog and need to understand what is the difference between mock better batter and better batter itself. Do you add the other items when using the mock better batter?
Ok. See if this helps:
One cup of Gluten Free Bread Flour (which is what you need to use for this recipe and is discussed more fully on pages 8 to 10 of GFOAS Bakes Bread) contains 100 grams Mock Better Batter (There’s a hyperlink up there in the post by the way that you can click on and it will take you to the page with the recipe for Mock Better Batter). If you do not wish to make your own “Mock Better Batter” you can just use Better Batter itself.
In addition to either the one cup (140 grams) of “mock better batter” or just plain old off the shelf Better Batter you’ll need to add 25 grams whey protein isolate and 15 grams Expandex modified tapioca starch.
Those three things. The Better Batter (homemade or off the shelf) plus the whey protein isolate, plus the Expandex make up the Gluten Free Bread Flour.
Thank you very much. You answered my questions. Have a great day.
I didn’t even scroll down to see that you had already responded to Joy. you did a much better job than i did! :)
Nicole developed mock better batter for those who don’t have excess to the real thing or for some reason don’t want to buy it from the Better Batter company. it can be used for a 1:1 replacement for when Better Batter is called for in Nicole’s recipes.
I posted a pic of them above. You have to try it :)
Made ’em! Learned a lot – should have tinted my colors more vibrant, should have kneaded less after I combined the colors to keep more of a separation of color…but still, fun, fun, fun! These are halves from two different bagels because not all of them had all five colors after my over-mixing. Just ate one toasted with butter. Delicious! Thanks, Nicole! You’re the best!
Wow!
Thanks! They were fun to do! And SO much tastier than any gluten-free bagel I’ve ever purchased!
Okay. This is a thing I must make/do! So fantastic!!