
This post may contain affiliate links. Please read our disclosure policy.
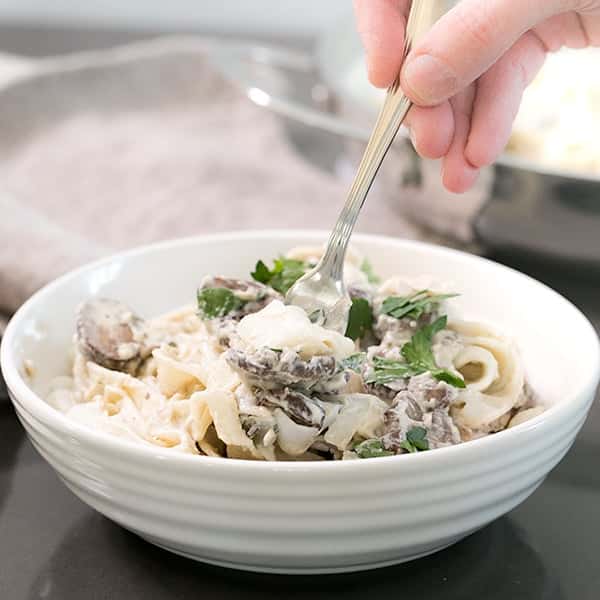
Make the ultimate creamy, rich, and cheesy dairy free mac and cheese quickly and easily on the stovetop.
I spent years cooking vegetables and soaking cashews to make a creamy dairy free cheese sauce. But now that I've found the best vegan dairy products on the market, vegan mac and cheese is a snap!

NICOLE'S NOTES
My take on this recipe
- Quick & easy: No need to soak cashews for creamy texture or steam and puree carrots for color and taste. And the whole dish is made on the stovetop in minutes.
- The best dairy free products: Luckily, vegan milk, cheese, and butter have come a very long way lately. I tried them all so I can tell you what to buy, what to avoid, and how to use them to make the best tasting dairy free cheese sauce.
- Perfect texture: We start with a dairy free roux of vegan butter and flour to thicken the sauce, and finish by melting the best dairy free cheddar and Parmesan cheeses. The result is a rich, creamy dish that even has that cheesy pull!
- Customizable taste: For a more intense umami flavor, add nutritional yeast, mellow white miso pasta and/or mustard powder to finish.

substitutions
Ingredient selection & substitutions
Dairy-free butter
For baking, I recommend with Melt or Miyoko's Creamery vegan butter because they have less moisture than Earth Balance buttery sticks. But for this cooking recipe, whether the product has more or less moisture doesn't really matter. Use what you like the taste of, even if it comes in a tub, rather than in a stick.
Flour
Since this is a gluten free food blog, I use a gluten free flour. I usually use finely ground glutinous white rice flour (also known as sweet white rice flour), which is made from short grain white rice. It makes a great roux. But you can use tapioca starch, cornstarch (not my favorite, since it can leak a bit of liquid as the sauce cools), or all purpose wheat flour if you're not gluten free, only dairy free.
Dairy-free milk
Be sure you are using vegan milk that has a neutral flavor (no added flavorings like vanilla in this savory dish), unsweetened, is creamy, has some fat (nonfat milk is really like water), and a similar consistency to dairy milk. I don't like cooking with oat milk (it tastes gritty and chalky to me).
Here are my favorite types and brands:
- Ripple brand plain unsweetened unflavored nondairy milk (pictured; made from pea protein) is my favorite for cooking
- Almond milk is my second choice. Be sure it’s unsweetened and unflavored
- Cashew milk: thick and creamy, with a neutral flavor
- Coconut milk in the carton (not in the can, since it's too thick)
Dairy-free cheddar-style cheese
There are so many amazing types of vegan cheddar-style cheese available on the market these days. Here are the ones I can recommend:
- Daiya brand cheddar style shreds melt well and taste better than ever. They're also easy to find in a lot of stores.
- Violife brand Just Like Cheddar shreds taste best, but you'll need a little extra heat on the stovetop to finish melting them.
- Follow Your Heart brand cheddar style dairy free cheese tastes great and melts best.
- So Delicious brand cheddar style shreds also taste great and melt very well, but can be difficult to find and more expensive
- 365 brand from Whole Foods are less expensive and taste good, melt okay.
Dairy-free Parmesan-style cheese
This ingredient adds a lot of depth of flavor to this dish. If you can't find it or don't want to use it, you can use about 1/2 cup nutritional yeast (or more, or less, to taste) in its place.
Here are my favorite brands of vegan Parmesan:
- Follow Your Heart brand vegan Parmesan comes grated and shredded. It tastes amazing and melts so well. It's available in many markets, and convenient.
- Violife brand vegan Parmesan comes in a block. It tastes great, but is harder to find and doesn't melt as easily.

If you enjoyed making this recipe, try my gluten free baked ziti as well.
Dairy Free Mac and Cheese Recipe

Equipment
- Flat whisk or small balloon whisk or small spatula for mixing
- Silicone spatula for folding the pasta into the cheese
Ingredients
- 10 ounces dried elbow macaroni pasta, (gluten free, if necessary; I use Rummo gluten free brand)
- 1 tablespoon olive oil, or any other oil you prefer
- 4 tablespoons (56 g) vegan butter, (See Recipe Notes for brand recommendations)
- ¼ cup (36 g) superfine white rice flour, (tapioca starch, glutinous white rice flour, cornstarch, or wheat flour all work, too)
- ¾ teaspoon smoked Spanish paprika
- 1 ½ cups (12 fluid ounces) unsweetened unflavored nondairy (and not nonfat) milk, at room temperature (See Recipe Notes for recommendations of types/brands of milk), plus more as necessary
- 8 ounces dairy free cheddar-style shreds, at room temperature (See Recipe Notes for brand recommendations) (7 ounces is fine, too)
- 3 ounces dairy free Parmesan-style cheese, grated or shredded (See Recipe Notes for brand recommendations)
- Salt, to taste
- Freshly ground black pepper, to taste
- Coarse toasted breadcrumbs, for sprinkling (optional; gluten free bread crumbs if necessary)
Instructions
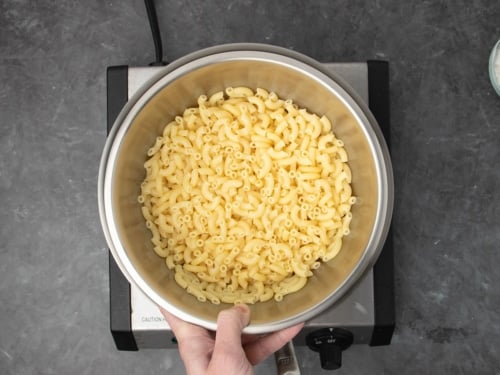
- Boil the elbow pasta according to the package directions. Drain and toss with olive oil, then cover and set aside.

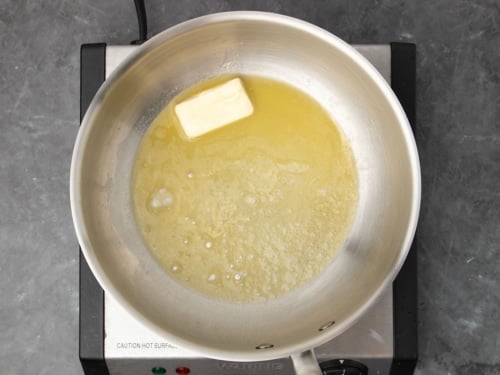
- In a medium-size, heavy-bottom saucepan, melt the vegan butter over medium-low heat. Vegan butter burns more easily, so go slow.
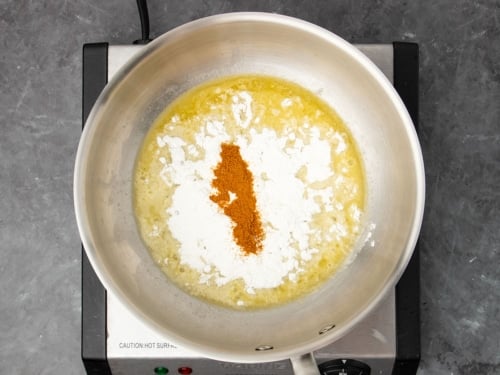
- Add the flour and paprika.
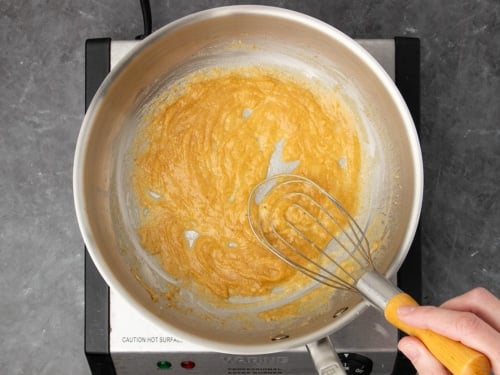
- Using a flat whisk or spatula, whisk or mix until smooth. Cook the roux, whisking frequently, over low heat until the mixture begins to smell slightly nutty but hasn’t yet begun to brown (about 2 minutes).
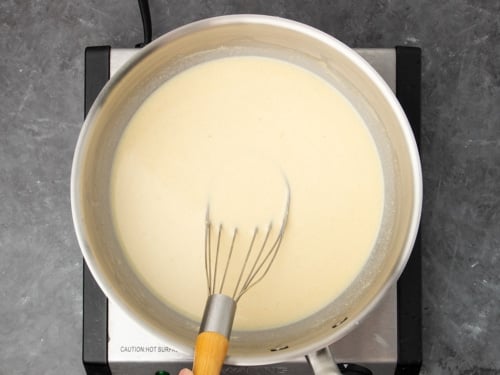
- Add 1 1/2 cups of nondairy milk, and whisk or mix to combine.
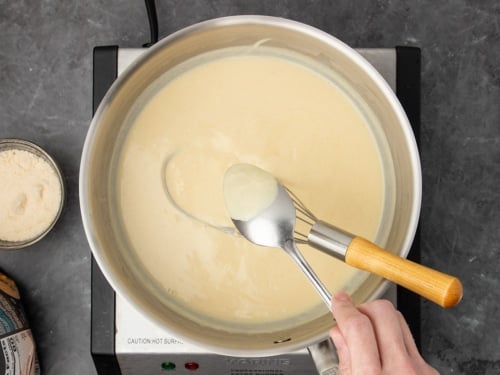
- Cook over medium heat, whisking or mixing frequently, until the mixture thickens enough to coat the back of a spoon without running off. It will thicken as it stands, so don’t cook for too long.
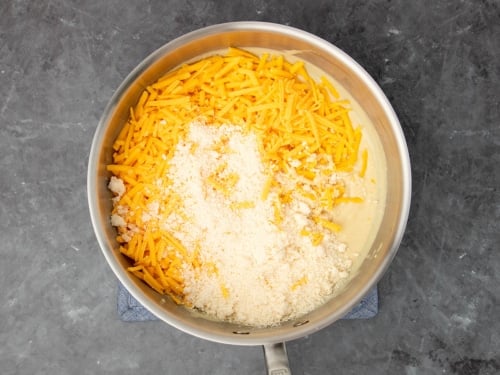
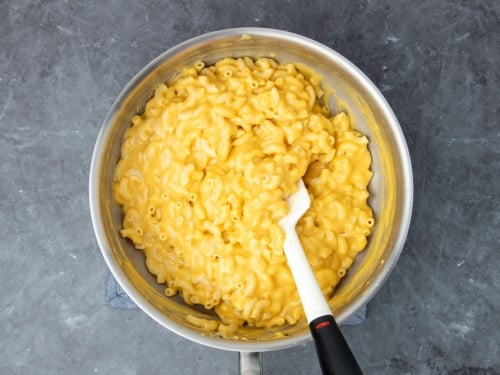
- Remove the pot from the heat, add the cheddar-style shreds and grated Parmesan-style cheese.
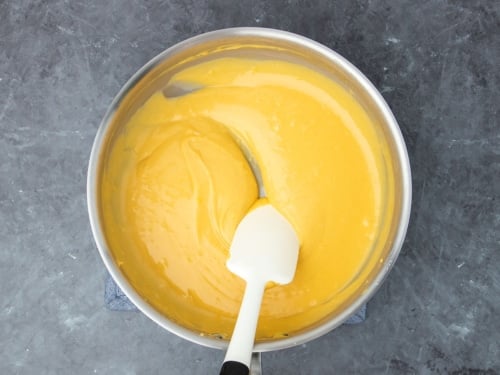
- Using a wide spatula, mix continuously until all of the dairy free cheese is melted and the cheese sauce is smooth. If necessary to melt all of the cheese shreds (some brands melt better than others), place the pan back on the stove over low heat and mix continuously until melted and smooth.
- Add more milk by the tablespoonful as necessary to thin the sauce to your desired consistency.
- Sample the cheese sauce, and salt and pepper to taste. You can also add freshly ground black pepper at the end, but you may not need any salt since the dairy free cheese is relatively salty.
- Add the pasta to the saucepan with the cheese sauce, and stir very gently with a silicone spatula or large wide spoon until all of the pasta is coated.
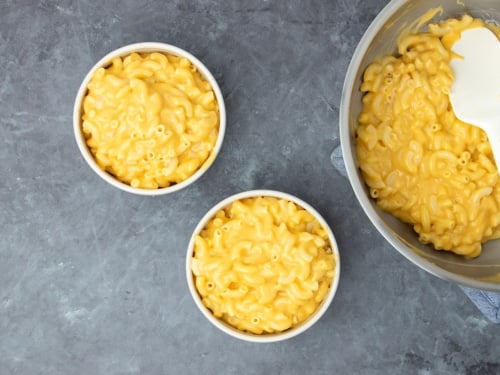
- Transfer the mac and cheese to serving dishes, and sprinkle with the optional coarse toasted breadcrumbs. Serve immediately.
Notes
- Ripple brand plain unsweetened unflavored nondairy milk (made from pea protein) is my favorite for cooking
- Almond milk is my second choice. Be sure it’s unsweetened and unflavored
- Cashew milk: thick and creamy, with a neutral flavor
- Daiya brand cheddar style shreds
- Violife brand Just Like Cheddar shreds
- Follow Your Heart brand cheddar style dairy free cheese
- So Delicious brand cheddar style shreds
- 365 brand from Whole Foods
- Follow Your Heart brand vegan Parmesan
- Violife brand vegan Parmesan
Nutrition
Nutrition information is automatically calculated, so should only be used as an approximation.

Recipe variations
Cooking recipes, unlike baking, are a great time to experiment with different flavors. You'll know right away if your changes are going to affect the final result, and you can usually correct anything that alters the texture or taste in a way you don't like.
Here are some of my favorite ways to alter this recipe:
Increase the flavor
To increase the umami flavor of the cheese sauce, add 2 tablespoons nutritional yeast, 1 tablespoon mellow white miso paste (I like Miso Master brand) and/or 1 to 2 teaspoons (to taste) mustard powder.
Mix in a small amount of one flavor at a time after you finish the cheese sauce and before you add the pasta, and taste as you go.
Different pasta shapes
The classic shape that we use in our gluten free mac and cheese is elbow macaroni. It holds the cheese sauce so well. But you can try experimenting with any other short pasta shape, like fusilli, rigatoni, bow tie pasta, or penne.
Make the top crunchy
After the dish is done, transfer the mixture to an 8-inch or 9-inch casserole dish, sprinkle the top with coarse breadcrumbs and drizzle with 2 tablespoons more melted vegan butter. Bake in a 375°F oven for 10 minutes or until the top is starting to brown, or place under your oven's broiler for about 5 minutes or until lightly golden brown on top.
FAQs
I recommend reheating the dish on the stovetop, unless you've baked it after preparing to make the top crunchy. Then, pour some more nondairy milk into the dish carefully along the edges, cover with foil, and reheat in a 300°F oven or toaster oven until warm.
Yes! I've also made this dish with Follow Your Heart brand vegan mozzarella-style cheese, and the flavor was more mild, but the dish still worked really well. I added another 3/4 teaspoon smoked paprika for color and some flavor, and more umami flavor with 1/4 cup nutritional yeast flakes. It was delicious!
Yes! As long as it melts well, you can make dairy free mac and cheese with dairy free cheese prepared any way you like. I think you could use Follow Your Heart dairy free gouda slices or Kraft “Not Cheese” cheddar-style slices. To learn more about Kraft's whole line of dairy free cheese products, please see the Kraft plant-based products website, NotCo.
make ahead/leftovers
Storage instructions
You can store the completed dish, once cooled to room temperature, in a sealed container in the refrigerator for about 2 days. Reheated pasta (especially gluten free pasta) tends to get a little rubbery in the microwave, so it's best to heat it gently in a saucepan over medium-low heat. Stir in more vegan milk slowly to loosen the cheese sauce as necessary.
Make ahead
If you know that you aren't going to serve the whole dish at once, or you want to make part of it ahead, I recommend not completing the final dish. Instead, make the cheese sauce alone, place it in a sealed container and refrigerate it for up to 5 days.
Before serving, make the pasta and place the cold cheese sauce in a heavy-bottom saucepan. Add more nondairy milk as necessary to thin it, whisking constantly as you reheat it over medium-low heat.
Freezing
You can even freeze the sauce alone or the finished dish for longer storage. Place it in a well-sealed container, and then defrost in the refrigerator. Then, reheat as described above.


When you suggest coconut milk in the carton, not the can, are you really talking about coconut beverage? There is a difference between the milk and beverage, and the beverage is much thinner.
Hi, Meg, I don’t mean coconut beverage. I’m talking about coconut milk in the carton, which yes, is thinner than even light coconut milk in a can, but although enriched with certain vitamins usually, doesn’t have sweeteners and added flavorings.