This post may contain affiliate links. Please read our disclosure policy.
The perfect gluten free pizza crust, stuffed full of spinach, pepperoni and, of course, plenty of cheese. This pizza dough handles so beautifully and tastes so authentic, you won't believe it's gluten free!
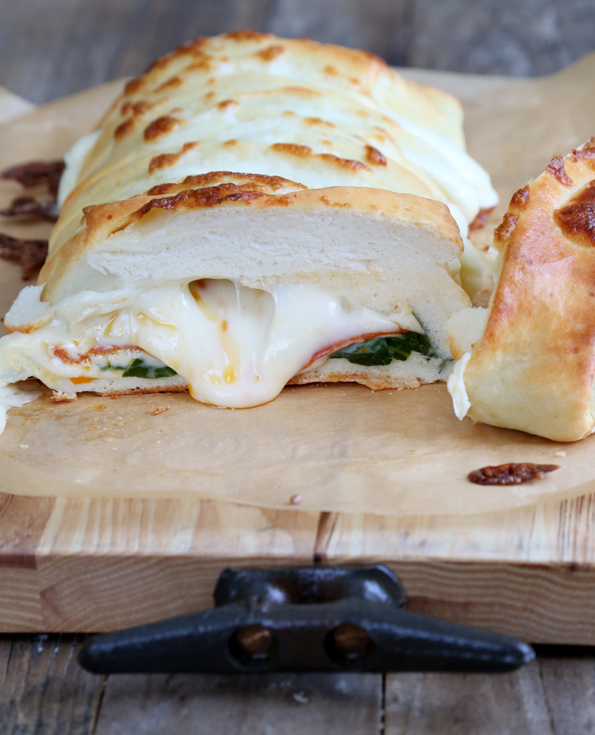
Table of Contents
When I make pizza, I usually just roll the pizza into rounds, scatter some sauce and cheese, and serve it with a big salad. But lately, I've been stuffing and braiding that gluten free pizza dough.
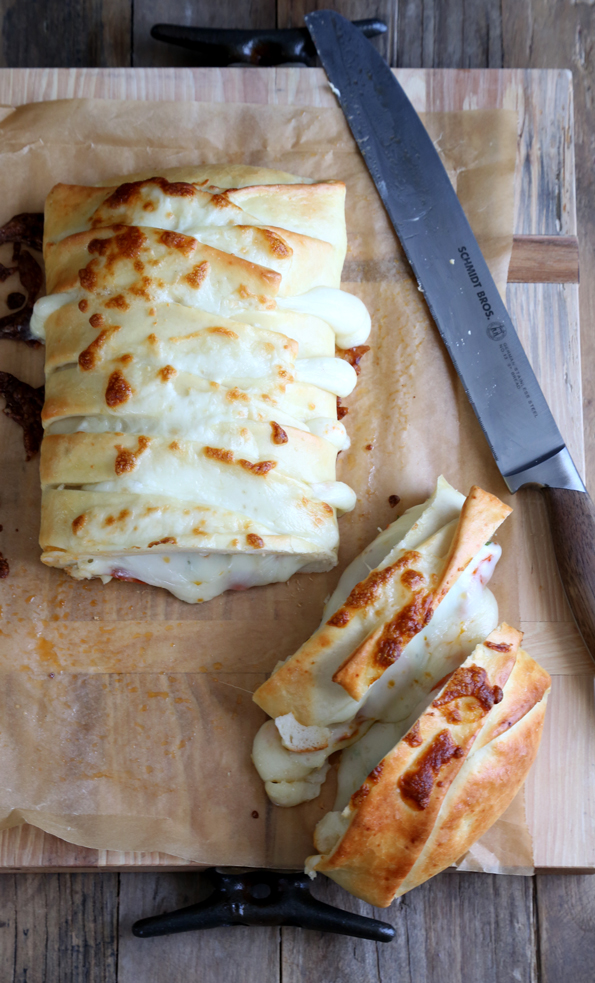
The first few times I made this braided and stuffed pizza, I made it with ground beef, broccoli and cheese (always lots and lots of cheese). And I made it into individual braids, one for each family member. I'll be honest, though. Even though there was no complaining from the peanut gallery (hello! pizza doesn't get complaints), I wasn't thrilled with how dough-y the small braids had to be. I much prefer the single braid. The balance of dough to cheese to other fillings is much easier to strike.
In case you've never seen it, above is my Charlie Chaplin impression of silently shaping the pizza dough from the book. Oh, and you can absolutely still use the gluten free pizza dough from the blog; it just won't be as easy to handle, but there are plenty of shaping instructions in that blog recipe so you'll be fine. Now for the comprehensive step-by-step shaping instructions…
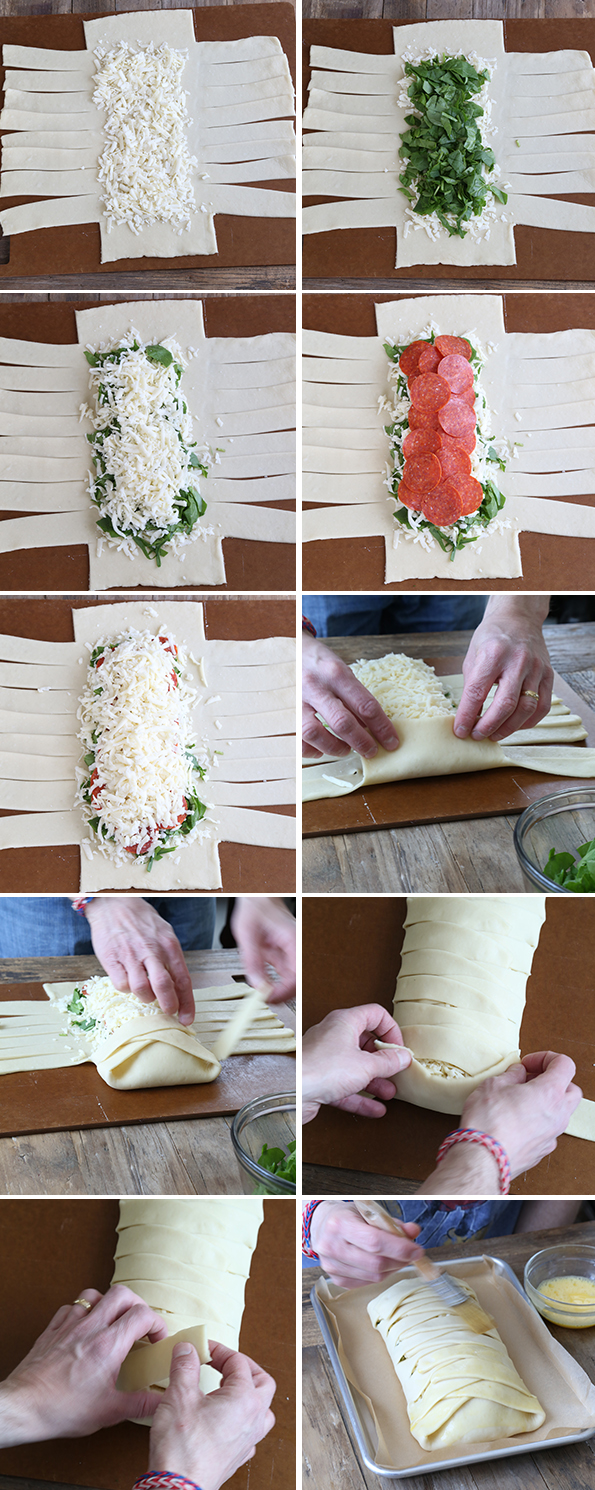
That's my husband, Brian. The hand model. He was extremely proud of how he did, and you'll be happy to know that he received very, very little instruction. And he still totally nailed it! Don't you think?!

Please know that this really is the easiest thing to pull together. Its ease just doesn't translate that well into words. It's much more intuitive in pictures, and unfortunately a bit wordy, well, in words. So stare at the lovely hand model in the pictures for a bit before you read through the recipe. And don't skimp on the cheese!
Gluten Free Stuffed Pizza Braid
Equipment
- Stand mixer fitted with the paddle attachment to make the pizza dough
Ingredients
- 1 recipe gluten free pizza dough
- 3 ounces Asiago cheese, grated (or another semi-hard cheese)
- 10 ounces mozzarella cheese, grated (plus more for sprinkling)
- 5 ounces fresh spinach, chopped
- 3 ounces pepperoni, thinly sliced
- Egg wash, (1 egg beaten with 1 tablespoon water)
Instructions
- Prepare the gluten free pizza dough according to the recipe instructions. Preheat your oven to 400°F. Line a rimmed baking sheet with unbleached parchment paper, and set it aside.
Prepare the dough.
- Prepare the pizza dough according to the recipe instructions.
- Follow those instructions in that recipe for shaping, but do not divide the dough.
- Instead, roll it into a 12-inch by 14-inch rectangle.
- Cover the rolled out dough loosely with a moist tea towel and allow it to rise slightly while you assemble and prepare the filling ingredients in the form indicated in the ingredients list.
Assemble the braid.
- Once the filling ingredients are prepared, uncover the dough.
- Using a sharp knife, pizza wheel or pastry wheel, cut a 3 1/2-inch x 1 1/2-inch rectangle out of each of the 4 corners of the dough rectangle. This will allow you to wrap the ends of the braid securely around the fillings.
- Position the dough rectangle so that one 12-inch side is facing your body as you work. Beginning about 1-inch from the top of each flap on the left and right-hand sides of the rectangle, cut 8 approximately 1-inch strips in those flaps.
- The fillings will all be placed in the center third of the rectangle, from the top to the bottom of the dough.
- Scatter all of the grated Asiago cheese in an even layer down the center panel of the dough.
- Cover with an even layer of all the chopped spinach, then 1/3 of the grated mozzarella cheese, followed by an even layer of the sliced pepperoni, and finally the remaining 2/3 of the grated mozzarella cheese. Pack down the fillings tightly by pressing down firmly.
- Starting at one end, pull the flap taught over the filling. Only the flaps on the ends will be pulled taut. The rest of the braid should be much looser, allowing room for expansion in the oven.
- Alternating sides, braid the 8 strips on each side of the rectangle over the filling, angling the strips slightly. Do not pull the strips taut.
- Stop braiding when you have reached the bottom two strips (one on each side) and the bottom flap. Pull the bottom flap taut up and over the bottom of the filling, and cover gently with the remaining two strips.
- Transfer the braid carefully to the prepared baking sheet.
- Brush the entire surface of the braid generously with the egg wash.
- Scatter the additional shredded mozzarella cheese on the top of the braid.
Bake.
- Place in the center of the preheated oven and bake until golden brown all over (about 15 minutes). Remove from the oven, slice and serve immediately.
Nutrition information is automatically calculated, so should only be used as an approximation.




I used the link to the free gf pizza dough recipe and mine was a disaster. It didn’t rise at all and is super yeasty tasting (I followed directions to a T and make bread all the time). When I went to roll it out, it was a mess and fell apart all over the place…so you can imagine what happened when I tried to do the braid. *sigh* I have never had luck yet with gf dough. We’ll see how it tastes, but I don’t have high hopes.
JLo I understand how frustrating it can be when a recipe does not turn out, but I made that recipe for years and years and it will work when made as written. I recommend that you be sure you are measuring all of the ingredients by weight, not by volume, including your water (see Bread FAQ# 21 for instructions on how to weigh water—the other Bread FAQs only apply to my new bread recipes, but the water weighing instructions are universal). My guess is that your water measurements were inaccurate, and/or that there was an issue with the flour blend you used.
Since I don’t have the book yet (on my wish list!) can I just double up the crust that is linked to as a “thick crust” pizza? Does your recipe from the book differ that much for the thick crust one?
Yes, the recipe from the book differs significantly from the old pizza recipe, Liz. It’s not a matter of how much dough there is. It’s how it behaves. Sorry!
you are my favorite
You’re not so bad yourself, Briana. ;)
This is completely up my alley. Can I do a stuffed crust pizza with this dough? Like pizza hut?
Jennifer I have been working on a proper stuffed crust Pizza Hut-style pizza for what seems like a year and a day, and I still haven’t quite nailed it. I am still perfecting and have made it my mission to get it just right. It sounds so simple, I know, but the cheese just leaks right out more often than not. Still working on it. Promise!!
Yahoo! :) I know you can do it!!!
I actually used this pizza dough to make lahmacun (Turkish lamb pizzas) for Easter and my husband was beyond appreciative! My beloved Turkish mother-in-law was equally impressed (via skype). I just have a few questions: 1) I didn’t know if the recipe would work to double it so I made two batches. Could I have easily just doubled it and still work? 2) My dough was very hard when it came out of the fridge and never got as pliable as your youtube video. It still tasted great but wasn’t as stretchy as I thought. Any suggestions??? Thanks, Heather
Hi, Heather, that sounds amazing! Yes, you can double the recipes in the bread book. Double away! If your dough was hard, my first guess is that it dried out in the refrigerator. Try using a sealed proofing bucket for rising. I use a 2-quart Cambro bucket that I have bought all over, from kitchen supply stores to amazon. That, and please see Bread FAQ#21 for instructions on how to measure water by weight. Your water measurements may have been off.
Heather —
I double this recipe all the time, with great success! I would suggest getting the 4-qt Cambro if you plan to double, though, as the rise can blow the top off the smaller one. Ask me how I know that . . . I use the 2-qts for everything else.
The hard way, Anneke! Is there another way to learn things that I’m not aware of? ;)
I’m a regular 2qt top blower (that doesn’t sound good does it?) when I’m messing with recipes…. first it scares the pants off me (loud – fridge shakes) and second it is horrid to clean up.
The never ending links for the GF pizza dough recipe is very fustrating to find…Do I have to buy the book just make this recipe? 8•° …hence a “shoestring budget” applies for me.
Is it possible to post the actual recipe here? It would be much appreciated. :)
RJ, I do not plan to post either recipe for pizza dough in the body of this post. As I explain in the recipe ingredients, you can use either the Thick-Crust Pizza Dough recipe from GFOAS Bakes Bread, or the linked gluten free pizza dough recipe here on the blog. I made certain that you did not have to buy the book to make this recipe. You just have to follow the link to the free recipe for gluten free pizza here on the blog.