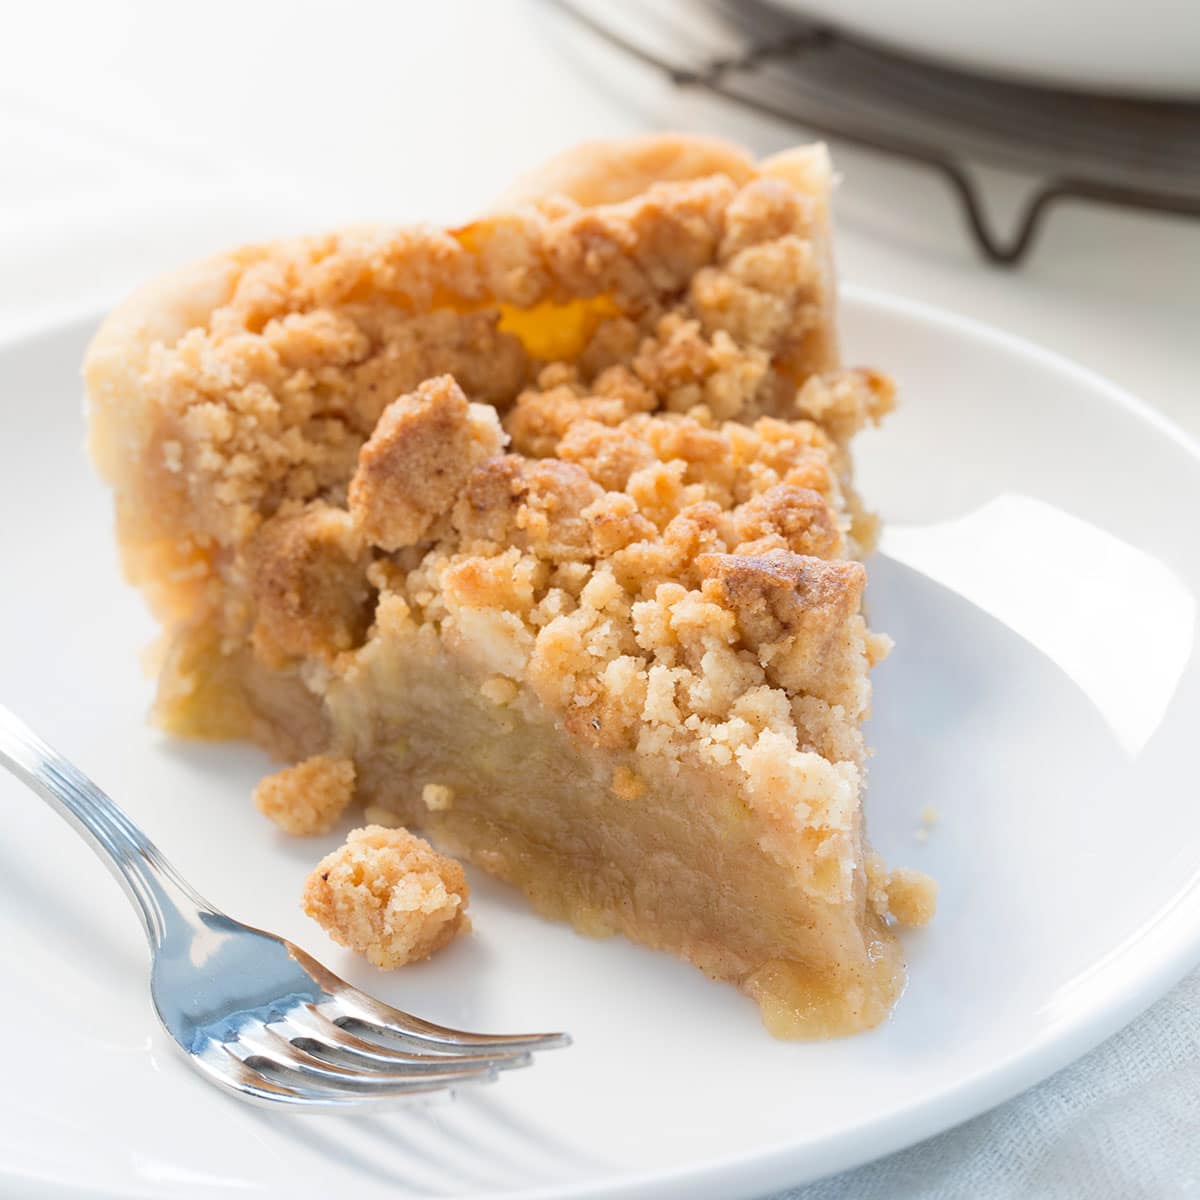

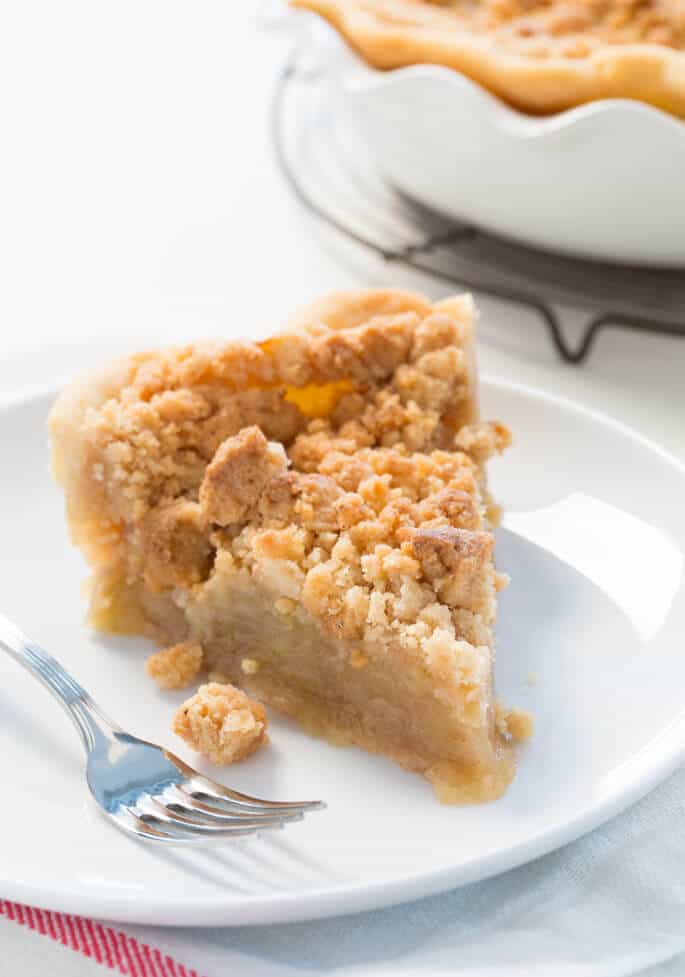
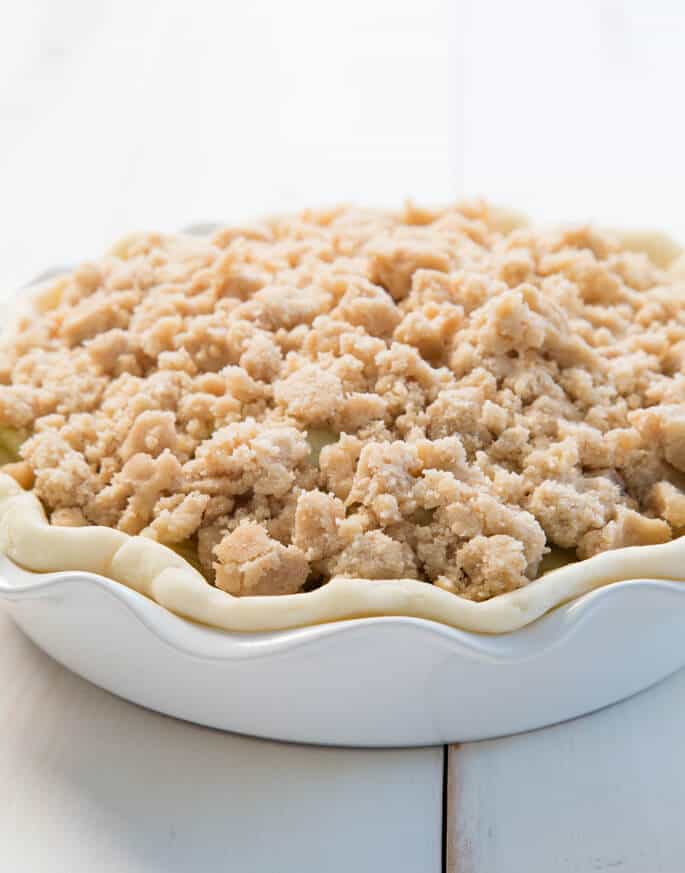
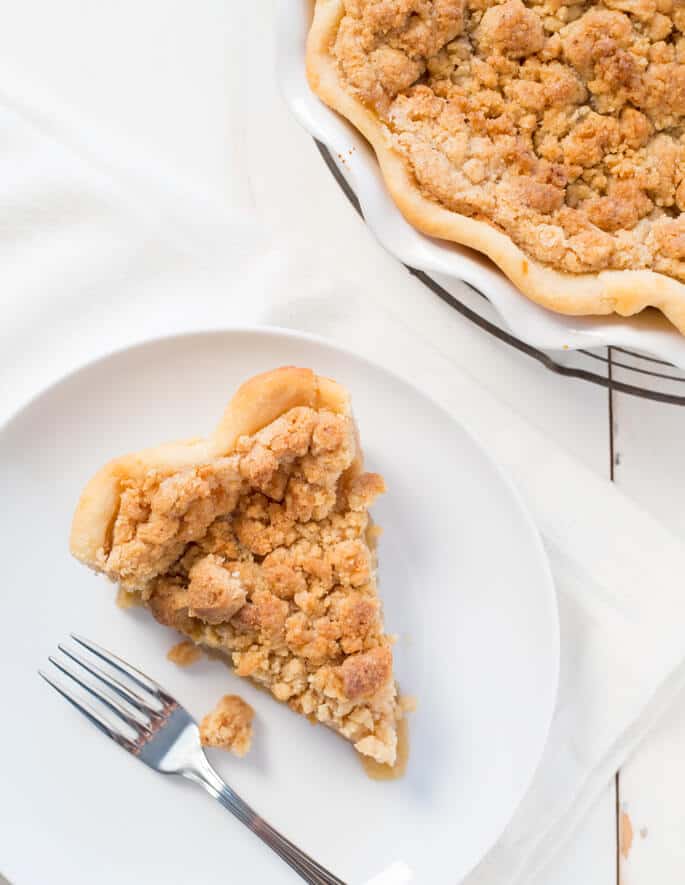
This gluten free apple pie is made with a simple pie crust on the bottom, filled with over 2 pounds of thinly-sliced, tart apples and topped with a warm brown sugar crumble topping.
WANT TO SAVE THIS RECIPE?
Why this is the best gluten free apple pie recipe
A gluten free Dutch apple pie is made simply with a traditional pastry crust on the bottom, packed with thinly sliced apples, and covered with a gorgeous, thick crumble topping. Like business on the bottom, party on top.
Cinnamon, sugar, and nutmeg are all present, along with a flaky bottom crust that won’t let you forget for one moment that it’s pie season.
Homemade gluten free apple pie made easy
In the past, I had made this pie with a much more complicated custard-style apple filling. It called for eggs and sour cream, plus a bit of flour in the filling. Thank goodness I’ve recovered from that. Frankly, it wasn’t worth the trouble.
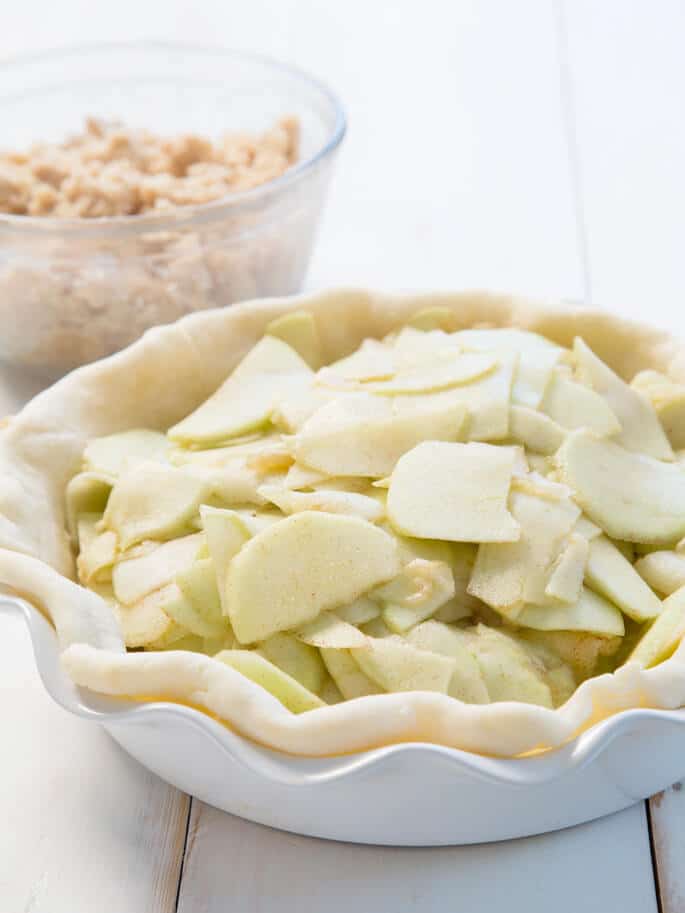
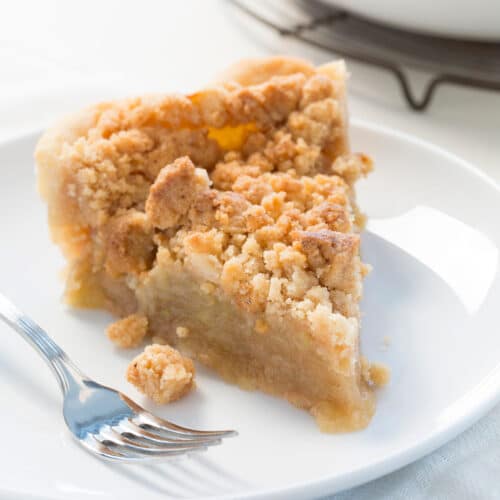
The simplified filling of nothing more than apples, cinnamon, and sugar holds together beautifully. The apples are sliced thin and allowed to sit for a few minutes before being piled into the crust. That way, they release a fair amount of their juices but retain just enough texture.
So many ways to enjoy gluten free apple pie
A double crust pie is a classic, and I don't mean to suggest that it doesn’t deserve a place on your fall holiday table. That pie is all about the crust and the apples—and they both shine so bright.
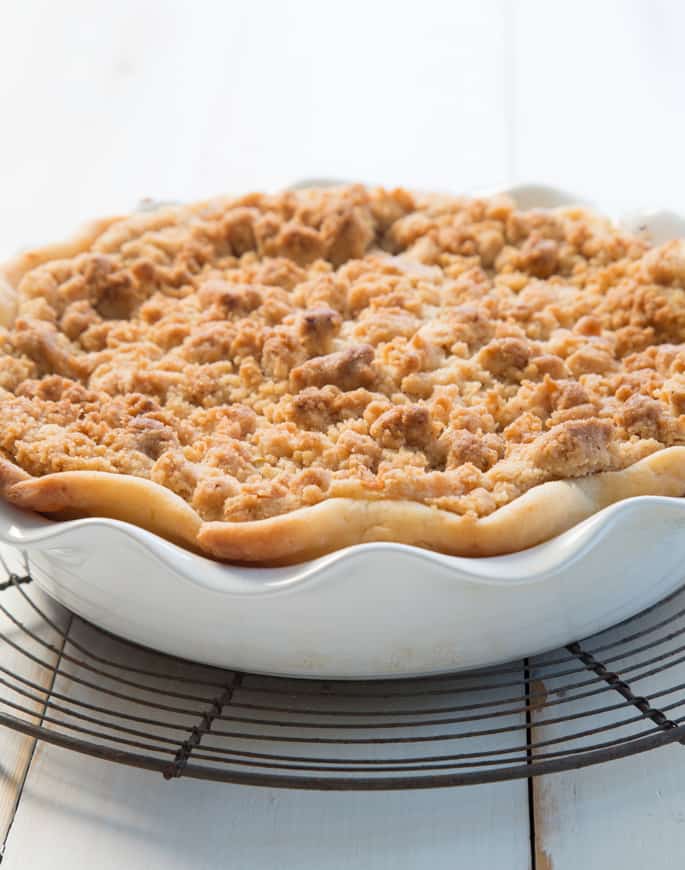
But this gluten free apple pie has only a bottom crust and a crumble topping, with lots of apples in between. This assembly allows the apples to bake to perfect fork-tenderness while the crumble topping, like the best part of a coffee cake, browns and bakes.
Try a warm slice with a scoop of rich vanilla ice cream, dusted lightly with ground cinnamon. Or just have it plain, and allow the gluten free streusel topping to have its moment.
Gluten free apple pie ingredients
- Gluten free pie crust – prepare the simple raw crust ahead of time, and keep it in the refrigerator for up to 5 days, wrapped tightly. Let it sit at room temperature for a bit so it doesn't crack, roll it out, place it in the pie pan and parbake it.
- Apples – the star of the show! I recommend Granny Smith as they offer the perfect balance between tart and sweet.
- Granulated sugar – Sugar helps balance the flavors in this gluten free apple pie recipe.
- Cinnamon – We'll use cinnamon in both the apple pie filling and the crumb topping.
- Nutmeg – We also add nutmeg to the sweet crumb topping for more warmth. If you don't like the flavor, you can just omit it, but if you do be sure to grate it fresh as ground nutmeg tends to be flavorless
- Salt – Just a pinch in the Dutch apple topping and filling to steady the flavors.
- Gluten free flour blend – This is one of two main ingredients for the gluten free pie crumble topping, and of course a main ingredient in the bottom gf pie crust
- Light brown sugar – Of course, brown sugar is an essential component in both the sweetness and the aroma of the crumble topping.
- Unsalted butter – The butter holds together the flour and sugar, caramelizing as it bakes.
Tips for making a gluten free apple pie
Choosing apples for your gluten free apple pie filling
For my gluten free apple pie filling, I like to use Granny Smith apples. They're tart and firm, so they impart incredible flavor without breaking down too much.
Gala, Empire, and Cortland apples are also good alternatives. They're sweeter but they're also quite firm and never mealy, so they'll bake to perfect consistency.
Try to avoid really sweet apples, extra juicy apples like Fuji or Red Delicious, as they'll break down very quickly and essentially turn to mush by the end of the baking process.
Slice your apples evenly for even baking
Another thing that can lead to problems with texture is not slicing your apples evenly. If you slice some big and chunky and others into tiny cubes, they'll soften at different rates as they cook. When you bite into your pie, you'll have harder chunks mixed with mush.
Give your gf apple pie plenty of time to cool
After you remove your pie from the oven, resist the urge to slice it up. Instead, give it a solid 1 hour (or longer) to cool.
During the baking process, your apples will release quite a bit of moisture. By allowing the pie to cool completely, you'll give it ample time to reabsorb that moisture and set up beautifully.
How to store leftover apple pie
Storing leftover pie is easy. So long as you keep it in an airtight container in the fridge, it will stay good for breakfast or a snack for up to three days.
When you're ready for a bite, you can enjoy your gluten free apple pie cold, straight from the fridge, and maybe with a scoop of ice cream, or you can pop it into the microwave for just a few seconds to warm it up.
If you have a lot of pie left (or even an entire pie) and want to reheat all of it, put it back into the oven instead. It will warm more evenly and your gluten free pie topping won't get soggy.
Can I freeze this pie after it's baked?
It's really not a good idea to freeze this gf Dutch apple pie—the texture just isn't the same after it's been frozen. For best results, always bake fresh!
Gluten free apple pie: substitution suggestions
Gluten free, dairy free apple pie
If you're avoiding dairy, you'll need to replace the butter in the bottom crust and the crumb topping.
In both cases, I recommend that you try Spectrum nonhydrogenated vegetable shortening or Miyoko’s Kitchen brand vegan butter. Both should work wonderfully.
Gluten free, egg free apple pie
The purpose of the egg white in this recipe is to seal the crust so that it doesn't get soggy when you fill it with the apple pie filling. If you'd rather not use egg, you can try using melted butter or a flavorless oil. Just brush on a thin coat and return the crust to the oven for a few minutes to brown up.
Pie crust options
You've got lots of options when it comes to a gluten free pie crust for this delicious apple pie.
I highly recommend that you follow my recipe for a homemade gf pie crust. It only takes about 15 minutes of active prep time to make a pie crust from scratch. If you can have dairy and want the flakiest crust, try our recipe for gluten free extra flaky pie crust.
If you don't have the time or desire to make your own crust, you can turn to a store-bought variety. Remember that you can't use a regular pie crust because it's likely made with wheat. Instead, you'll need to find a pie crust that's specifically labeled gluten free.
Don't like the idea of a gluten free crumble topping for pie? Prefer a double crust pie? Check out my classic gluten free apple pie for the perfect recipe.
Prefer to skip the crust altogether? Instead of this recipe, I recommend using our recipe for gf apple crisp, which is much like a Dutch apple pie (think delicious crumble topping!) but without a bottom crust.
FAQs
Classic apple pie recipes are not gluten free. That's because they use wheat flour to make the crust and sometimes to thicken the apple pie filling.
A Dutch apple pie, also known as an apple crumble pie, is instantly recognizable by its crumb topping. A traditional apple pie is a double crust pie, meaning that there are two crusts: the bottom crust and the top crust. All types of apple pie are fruit-forward pies, unlike a custard-based pie like gluten free pumpkin pie. They're all welcome at my gluten free Thanksgiving table, though!
Yes, you definitely want to peel your apples before using them in your gluten free apple pie.
Apple skins just don't break down the same way the flesh does. So if you leave the skins on, you can expect to bite into pieces with a tough texture.
I recommend a 9-inch-deep pie plate. It's the perfect size for filling with lots of delicious apples and finishing with a sweet crumb topping.
If you're short on time, you can absolutely buy a gluten free pie crust from the store rather than make your own. It may not be easy to find a gluten free crust that's ready to go, and it's likely pretty expensive, but it might be worth it if it means you'll have an apple pie!
Yes! Prepare the pie crust according to the recipe instructions through step 5, chilling the unshaped wrapped crust, and keep it in the refrigerator for up to 5 days. Let it sit at room temperature for a bit before you shape it, though, or it will crack.
Yes! After parbaking the crust, filling it with apples and topping it with the crumble topping, the unbaked, assembled pie in the parbaked pie crust can be covered securely and frozen until ready to use. Just bake from frozen according to the rest of the recipe directions. You may need to add a few minutes to the final baking time.
If you don't have pie weights, head to the pantry in search of some dried beans. You can use black beans, kidney beans, or lentils instead. Note that you won't be able to use the beans for cooking after they've been in the oven, so keep them in a jar so they can serve as pie weights again in the future.
Yes, blind baking the crust is the best way to ensure you don't end up with a soggy crust.
Gluten Free Apple Pie | Sweet Crumb Topping
Equipment
- Pie weights optional
Ingredients
For the crumble topping
- 1 cup (140 g) all purpose gluten free flour blend (I used Better Batter; please click thru for appropriate blend info)
- ½ teaspoon xanthan gum (omit if your blend already contains it)
- ⅓ cup (73 g) packed light brown sugar
- ¼ cup (50 g) granulated sugar
- 2 teaspoons ground cinnamon
- ½ teaspoon freshly grated nutmeg optional
- ¼ teaspoon kosher salt
- 8 tablespoons (112 g) unsalted butter melted and cooled
For the crust
- 1 recipe gluten free pie crust chilled
- Egg white for brushing
For the filling
- 2 ½ pounds Granny Smith apples (or other tart and firm apple) (from about 5 large apples) peeled, cored and sliced thin
- ½ cup (100 g) granulated sugar
- 2 teaspoons ground cinnamon
- ¼ teaspoon kosher salt
Instructions
- Grease lightly a 9-inch deep dish pie plate and set it aside.
Make the crumble topping.
- In a medium-sized bowl, place the flour, xanthan gum, brown sugar, granulated sugar, cinnamon, nutmeg and salt, and whisk to combine, working out any lumps in the brown sugar.
- Add the butter, and mix to combine well.
- Place the bowl in the refrigerator to chill for about 10 minutes or until firm (or the freezer for about 5 minutes).
Make & shape the crust
- Prepare the pie crust according to the recipe instructions through step 5, chilling the unshaped dough for 30 minutes.
- Preheat your oven to 375°F. Remove the pie dough from the refrigerator.
- Place the dough on a lightly floured piece of unbleached parchment paper, dust lightly with flour, and roll into a 12-inch round, about 3/8-inch thick.
- Roll the pie crust loosely on the rolling pin and then unroll it over the prepared pie plate.
- Press the pie crust gently into the bottom and up the sides of the pie plate and, with kitchen shears, trim the crust so that only 1/4-inch of excess is overhanging the plate.
- Tuck the 1/4-inch of excess under itself, and crimp the edge gently all the way around the crust. Pierce the bottom of the pie crust with the tines of a fork and place the pie plate in the freezer to chill for 10 minutes.
Par-bake the pie shell.
- Remove the pie plate from the freezer and place a large piece of unbleached parchment paper in the center of the crust. Place enough pie weights or dried beans to fill the pie crust, on top of the paper.
- Place the pie plate with the weights in the center of the preheated oven and bake for 10 minutes.
- Remove the pie plate from the oven, and remove and set aside the paper and pie weights. Brush the bottom and sides of the crust with the egg white, and return the pan to the oven.
- Bake for another 3 minutes, and remove from the oven. Reduce the oven temperature to 350°F.
Make the filling
- In a large bowl, place the prepared apple slices and toss with the sugar, cinnamon and salt. Allow to sit while the pie crust is par-baking.
- When the pie crust has finished baking, transfer the sliced apple filling to the pie crust, leaving behind any rendered liquid from the apples.
- Remove the crumble topping from the refrigerator and break up into large chunks with a fork. Scatter the topping all over the top of the pie in an even layer. Press gently on the crumble topping to ensure that it adheres to the filling.
Make-Ahead Option
- At this point, the unbaked, assembled pie in the parbaked pie crust can be covered securely and frozen until ready to use.
- Just bake from frozen according to the rest of the recipe directions. You may need to add a few minutes to the final baking time.
Bake the pie
- Place the pie in the center of the preheated oven and bake for 45 minutes, or until the crumble topping is evenly golden brown and the apple filling is bubbling around the edges.
- If necessary to prevent the edges from burning, cover the crust with foil during the final 15 minutes of baking.
- Remove the pie from the oven and allow to cool completely before slicing and serving.
Notes
Nutrition
WANT TO SAVE THIS RECIPE?

Thanks for stopping by!
Hi, I’m Nicole. I create gluten free recipes that really work and taste as good as you remember. No more making separate meals when someone is GF, or buying packaged foods that aren’t good enough to justify the price. At Gluten Free on a Shoestring, “good, for gluten free” just isn’t good enough! Come visit my bio!

Lynne says
I never bake GF because I am always baking for everybody but me. This Thanksgiving, it was just my DH and I and we decided to make a pie that we could eat together. This recipe was golden! I haven’t been able to eat gluten for almost 20 years, so it was a gift to me… but even my DH, who eats gluten every day, loved it and said that if he hadn’t known that it was GF, he might not have even questioned it! A real win! Thank you!
Nicole Hunn says
That’s so great to hear, Lynne! Always baking for everyone but you sounds like a mom to me… I always knew that if I had been the one who was GF first, not my son, I probably would have just done without. But it shouldn’t be that way. I’m so glad you made something that everyone could enjoy, including you!