This post may contain affiliate links. Please read our disclosure policy.
Highly portable, on-the-healthy-side no bake gluten free granola bars. Perfect for stashing away for snacking emergencies!
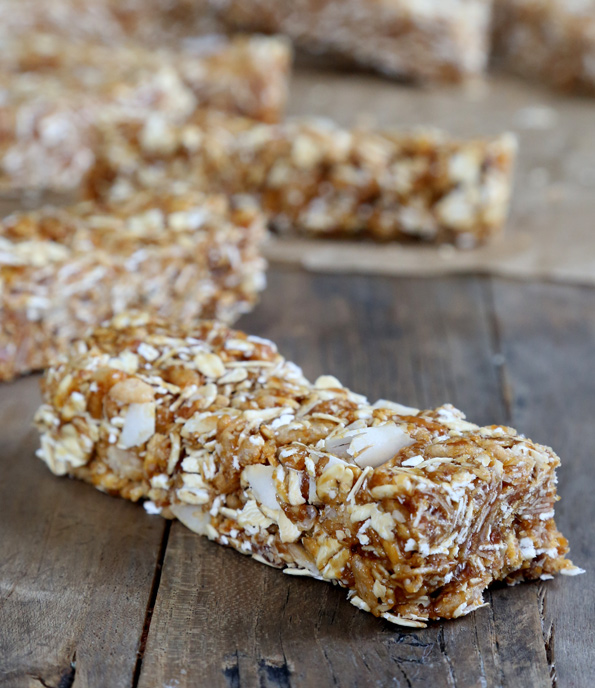
Table of Contents
It can be kind of difficult to get too excited about a granola bar recipe. So you'll forgive me if I trot out the old saw: these are different! And anyway you can trust me when I say that because it's not like everything we make around here is meant to be “different.”
Once you see how incredibly easy these bars are to make, you'll be sure to always keep a stash on hand for those crazy busy school mornings when grab-and-go breakfast is all anyone can manage.
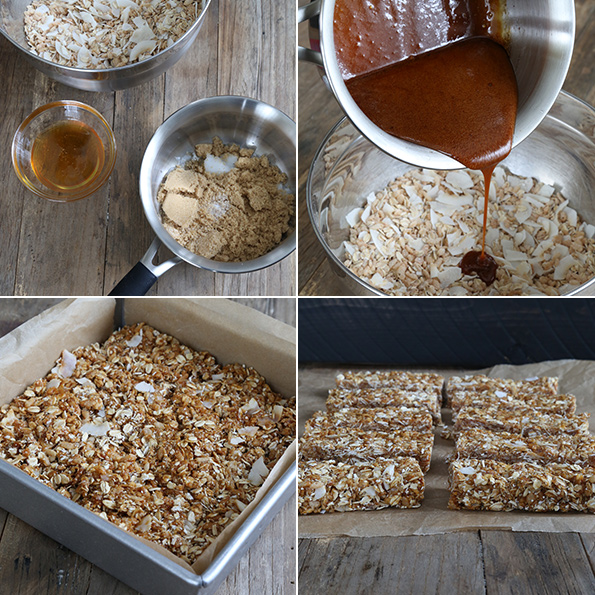
These granola bars (other than being no bake, which is a nice bonus in the summertime and really any time) are different in a few more ways:
(1) They have no nuts—unless you want to add some chopped nuts in place of, say, some of the coconut chips. So if you're tired of super-nutty granola or just can't have nuts, these are the granola bars for you. Not to mention that nuts are expensive.
(2) They are ready so fast you can't even believe it. Cooking the brown sugar for about a minute, just until it liquefies and simmers slightly, ensures that everything sticks together super well, and super fast. And anyway speaking of sugar:
(3) I have made these bars so many times, in so many slightly different ways and I can proudly report … that you can replace the brown sugar in the recipe with an equal amount, by weight, of coconut palm sugar, a much more nutrient-dense, unrefined sugar.
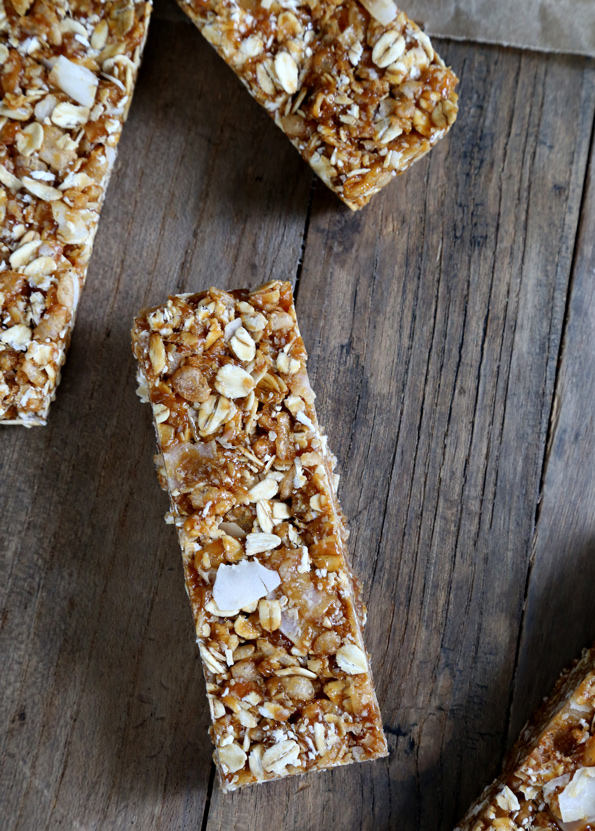
These are the granola bars that I stashed in my purse when we went to pick up my kids from a few weeks of sleepaway camp last week. And I have to choose carefully when I bring them food from home at a time like that.
My kids eat a lot of processed food at camp, something they are not used to for obvious reasons (I'm no supermom, I just cook and bake for a living—you understand). They do not like it. As my husband says, when they first come home, they're pretty “food angry.”
I'm happy to report that these highly portable, nearly nonperishable, on-the-healthy-side no bake granola bars went over very well with all 3 of my children. High fives all around!
No Bake Gluten Free Granola Bars

Ingredients
- 2 cups (200 g) old fashioned rolled oats, gluten free if necessary
- ½ cup (60 g) oat flour, gluten free if necessary
- 2 cups (60 g) crisp rice cereal, gluten free if necessary
- ½ cup (40 g) unsweetened coconut chips
- 4 tablespoons (56 g) virgin coconut oil
- 1 cup (218 g) packed light brown sugar
- ½ teaspoon kosher salt
- ½ cup (168 g) honey
- 1 teaspoon pure vanilla extract
Instructions
- Line an 8-inch square baking dish with crisscrossed sheets of unbleached parchment paper, with the paper overhanging all 4 sides of the dish, and set it aside.
- In a large bowl, place the rolled oats, oat flour, rice cereal and coconut chips, and mix to combine well. Set the bowl aside.
- In a medium-size heavy-bottom saucepan, place the coconut oil, brown sugar (or coconut palm sugar) and salt, and cook over medium heat, stirring occasionally, until the mixture liquefies and comes to a simmer.
- Cook, undisturbed, for 45 seconds more, and then remove from the heat. Add the honey and vanilla, stirring constantly until the mixture stops bubbling. Allow the mixture to cool slightly, until no longer hot to the touch.
- Create a well in the center of the dry ingredients in the large bowl, pour in the warm sugar mixture and mix throughly, working quickly to prevent the warm sugar from sticking to the bottom of the bowl.
- Continue to mix until all of the dry ingredients have been absorbed into the mixture.
- Transfer to the prepared baking dish and press very firmly into an even layer.
- Allow to sit at room temperature until cool and set before lifting out the bars by the overhung pieces of parchment paper.
- To speed the cooling and setting process, you can place the baking dish in the refrigerator.
- Place the bars on a cutting board and, using a large, sharp knife, cut into 12 rectangles.
- Wrap each bar separately and store at room temperature until ready to serve.
Nutrition information is automatically calculated, so should only be used as an approximation.



Those look scrumptious! I make granola bars nearly every two weeks and my recipe is similar except that I do bake them. Also, mine has nearly 1 cup more oil than yours (I use half butter/half coconut oil) but also only 1/3 cup of brown sugar to your 1 full cup. Now I’m curious what difference more sugar vs more butter would make. Any thoughts?
1 cup more oil is a lot of oil, Kristina! Feel free to experiment, but that sounds like it would yield greasy bars.
You’re right! LOL! Sorry, I posted early in the morning and I wasn’t fully awake – I meant 1/2 cup more oil. My recipe: 3/4 cup butter, 1/2 cup honey, 1/3 cup brown sugar, 1 tsp vanilla, 1 cup flour, 4 cups oatmeal, 1 tsp baking soda, and 1 cup of add-ins. Plus it’s baked in a 9 x 13 pan, so they’re flatter than yours. I will try out your recipe for the next batch!!
I dislike the texture of raw coconut, is there something I could add? You made mention that I could sub nuts, but how much?
Have you ever tried coconut flakes, Jennifer? I dislike to texture of bagged shredded coconut. In fact, I dislike it a whole lot. I’ll leave it at that in deference to any reader who love it! But coconut chips are nothing like shredded coconut. If you’d like to try those, they’re wide, flat pieces of coconut (as you can see in the step by step photos above) and taste nothing like the shredded kind. If you’d like to sub in something else, feel free to experiment with the same amount of nuts by weight. I haven’t tried that, though, so I can’t promise it will turn out.
These look so good and quick and NO NUTS! Thank you for sharing this recipe. I will be trying these very soon!
Any suggestion for replacing oats?
I would recommend googling a Paleo granola recipe, Kat. Rolled oats are the foundation of and most plentiful ingredient in these bars. Sorry!
My daughters boyfriend is allergic to nuts, and is looking for a nut free protein bar. Do you think it would work to add in some protein powder to this recipe?
I haven’t tried this with any more additions, but a protein powder is going to change the moisture balance. Feel free to experiment, Janell!
These are exactly what i was looking for! Simple. Does the coconut oil leave much scent/flavor? I have a jar but i cant bring myself to use it on stuff because i dont like how it smells. Im not sure what, if anything, would be a good replacement for it in these.
Hi, anna, I don’t find that it imparts much coconut flavor at all, but if you are at all concerned and really don’t like it, you can definitely use Spectrum nonhydrogenated vegetable shortening 1:1.
anna, use expeller pressed coconut oil. It doesn’t smell or taste like coconut oil. I think you must have cold pressed which does taste and smell coconutty
Can I use maple syrup instead of honey
Maple syrup is thinner than honey, Lady, so I wouldn’t recommend that. You could try reducing the maple syrup to the same viscosity as honey and then using it.
Perfect timing on this one–yet again! Going away this weekend and want easy food to take for breakfast and snacks. I have to add nuts though…pecans most likely…because I love them! I am going to try it with dates in place of the brown sugar. I’ll let you know how they turn out.
I don’t know about dates in place of brown sugar here, Mare. That’s quite a change. I’d really recommend trying coconut palm sugar if you want something unrefined in place of brown sugar.
We are taking the girls camping in 4 days, was gonna make granola bars… of course you knew that!
Teddy Nanny Cam strikes again :)
Oh these are absolutely perfect for camping, Lucy! Make a bunch. :)
These look amazing. Do you think I could put them in the dehydrator or are they not really sticky at all? thanks
You could give it a shot, Rene. I don’t have a dehydrator so I haven’t tested that but they’re not really overly sticky.