This post may contain affiliate links. Please read our disclosure policy.
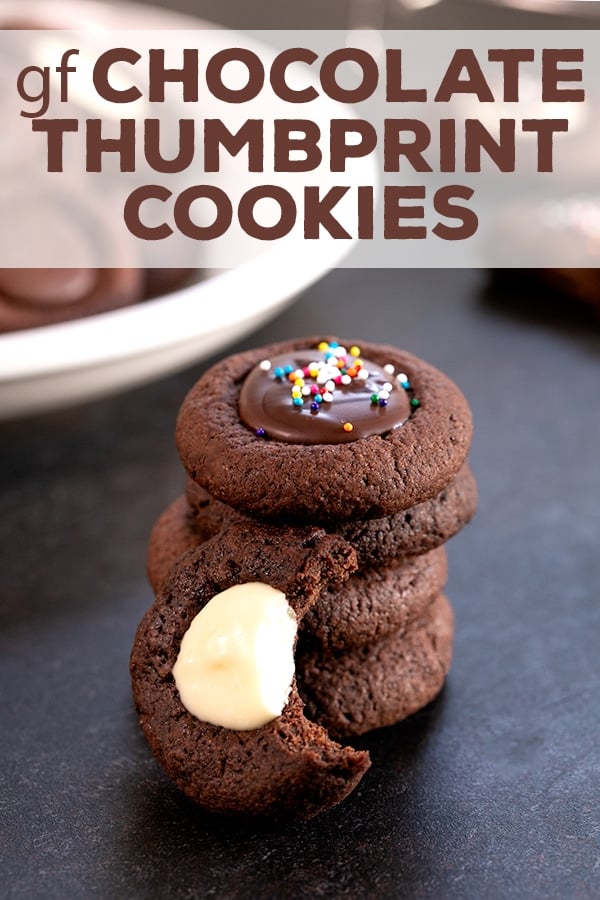
These gluten free chocolate thumbprint cookies have a soft, brownie-like texture and rich chocolate flavor. Perfect for any cookie plate!
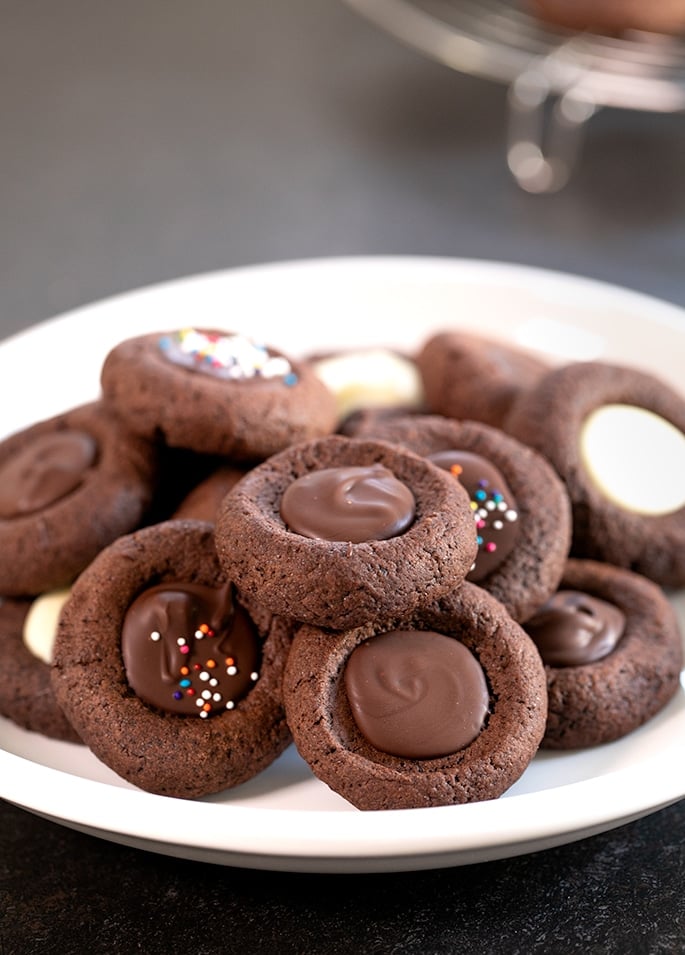
What makes these gluten free chocolate thumbprint cookies special?
Other than taste and texture, the most important part of a thumbprint cookie is, well, that it has a thumbprint-sized indentation in the center. If you've ever made thumbprint cookies, you may have noticed that they have a tendency to crack—and that the indentation has a tendency to heal up.
Over the years, I've tried all kinds of tricks to get them to keep their shape. I even placed a few round ceramic pie weights in the center of each cookie as it baked. That was truly ridiculous of me—even though it worked.

I've made so many thumbprint cookies that I feel confident I've made all the mistakes in the world. I'm back from the edge, and I've got guidelines. If you want a cookie that is still soft and tender but keeps its shape, here are the rules to follow.
First, mind the temperature. Make sure all of your ingredients are at room temperature when making the dough, then shape the dough completely while it's soft. After the dough is shaped, chill it briefly before baking.
Second, use a 1/2-teaspoon measuring spoon to make the impression—not your thumb. I'm sure you have lovely thumbs, but the tips are attached to the rest of your thumb. And they're not quite round.

Third, press the bowl of the measuring spoon back into the center immediately after the cookies come out of the oven. It won't disturb the shape of the rest of the cookie, and it will ensure that you have a proper indentation for your filling.
Since these are chocolate, you'll have to judge whether they're done or not by their texture, not a slight browning around the edges or anything. They go from glossy (raw) to matte (baked).

What's in that filling?
Chocolate thumbprint cookies are some of the most versatile cookies you can make (we have a recipe for vanilla gluten free thumbprints with jam, too) since you can fill them with whatever you like. Melted chocolate, softened caramel, seedless jam, or even frosting are all legitimate fillings.
When I first made these cookies, I made them super fancy with a homemade soft caramel filling, chopped nuts, and a chocolate drizzle. They were quite beautiful and classed up my holiday cookie boxes. ??But that was a little extra (apologies to my children, who don't bother to read this blog anyway).

Caramel filling
The recipe for caramel filling that I included in the original recipe is still included below. It really does make quite a lovely fancy chocolate thumbprint. You can also make a soft caramel filling in the microwave, which is much easier.
White chocolate filling
I'm much more likely to fill these simple cookies with a simple filling. I love using melted white chocolate chips. You don't have to add a thing and they won't harden completely even after they set. Sprinkle them with some nonpareils before they dry for a festive touch.
Chocolate filling
To make a lovely chocolate filling, just place 4 ounces of chopped chocolate (or chocolate chips) and 2 tablespoons (28 g) virgin coconut oil in a small, heat-safe bowl. Place the bowl over a small pot of simmering water, taking care to ensure that the bowl does not touch the water.
Heat, stirring occasionally until the mixture is melted and smooth. Remove the chocolate mixture from the heat and allow it to cool for about 5 minutes or until it just begins to thicken. Pour the filling into the wells of the cooled cookies and allow to sit at room temperature until set (about 45 minutes).
Ingredients and substitutions
Dairy-free: I would try using a mix of half melted and cooled shortening/half room temperature Earth Balance buttery sticks in place of the butter, and full-fat coconut milk for the cream in the caramel filling.
Egg-free: Since it's only one egg, I would recommend using one “chia egg” (1 tablespoon chia flour + 1 tablespoon lukewarm water, mixed and allowed to gel) as that is the most neutral-flavored egg replacement that actually adds structure instead of just moisture (applesauce only adds moisture, and eggs provide much more than moisture).
Nut-free: Easy! Just sprinkle with something other than nuts.
Gluten Free Chocolate Thumbprint Cookies

Ingredients
For the cookies
- 1 cup (140 g) all-purpose gluten free flour blend, (I used Better Batter; please click thru for full info on appropriate blends)
- ½ teaspoon xanthan gum, (omit if your blend already contains it)
- 3 tablespoons (27 g) cornstarch, replace with more Cup4Cup if that is your all purpose gluten free flour blend
- 7 tablespoons (35 g) Dutch-processed cocoa powder
- ¼ teaspoon kosher salt
- ½ cup (109 g) packed light brown sugar
- 8 tablespoons (112 g) unsalted butter, at room temperature
- 1 (50 g (weighed out of shell)) egg, at room temperature, beaten
- 1 teaspoon pure vanilla extract
For the caramel filling
- ½ cup (100 g) granulated sugar
- ⅛ teaspoon cream of tartar
- 2 tablespoons (1 fluid ounce) water
- 3 tablespoons (1 ½ fluid ounces) heavy whipping cream, at room temperature
- 2 tablespoons (28 g) unsalted butter, chopped
- ½ teaspoon kosher salt
- Chopped raw pecans, for sprinkling
- Melted chocolate, for drizzling (optional)
For chocolate filling
- 6 ounces chopped chocolate
- 3 tablespoons (42 g) virgin coconut oil
Instructions
- Preheat your oven to 325°F. Line a large rimmed baking sheet with unbleached parchment paper and set it aside.
- In a large bowl, place the flour, xanthan gum, cornstarch, cocoa powder and salt, and whisk to combine well.
- Add the brown sugar, and mix to combine and work out any lumps.
- Create a well in the center of the dry ingredients, and add the butter, egg and vanilla, and mix and press the dough until it comes together. It will be thick but soft.
- Scoop the dough into heaping tablespoons with a #50 cookie scoop or two spoons and place about 1 1/2-inches apart on the prepared baking sheet.
- Roll each piece of dough into a round between the slightly moistened palms of your hands.
- Press the moistened bowl of a 1/2 teaspoon (or your thumb, moistened) into the center of each disk, about 3/4 of the way to the bottom of the dough. If the dough begins to stick to the teaspoon or your thumb, moisten it in between each cookie. If the edges split, press the back together gently.
- Place the baking sheet in the refrigerator for about 15 minutes or the freezer for 5 minutes or until mostly firm to the touch. This will help the cookies keep their shape during baking.
- Place the cookies in the center of the preheated oven and bake for 10 minutes, or until the cookies are puffed and set (they will not glisten when they’re baked like they do when they’re raw).
- Remove the cookies from the oven, and press the thumbprint depressions again with the bowl of a 1/2 teaspoon if any have puffed up too much during baking.
- Allow to cool for about 5 minutes on the baking sheet, and transfer to a wire rack to cool completely.
Make the (optional) caramel filling.
- In a small, heavy-bottom saucepan, place the granulated sugar, cream of tartar and water, and mix to combine well.
- Place the saucepan over medium-low heat, and cook until the mixture is beginning to turn amber in color (to ensure that you do not burn the sugar, clip a candy thermometer to the side of the saucepan and remove it from the heat when the sugar mixture reaches 300°F).
- Remove the pan from the heat and, whisking constantly, slowly add the cream. The mixture will bubble fiercely. Keep stirring until the mixture stops bubbling and is smooth.
- Add the butter and salt, and whisk to combine well. Pour the caramel into a separate heat-safe bowl or jar, and allow to cool while you make the cookies. It will thicken as it cools.
Make the (optional) chocolate filling.
- Place the chopped chocolate and 2 tablespoons virgin coconut oil in a small, heat-safe bowl. Place the bowl over a small pot of simmering water, taking care to ensure that the bowl does not touch the water.
- Heat, stirring occasionally until the mixture is melted and smooth. Remove the chocolate mixture from the heat and allow it to cool for about 5 minutes or until it just begins to thicken.
Fill the cookies.
- Once the cookies are cool, fill the thumbprint depressions with the cooled caramel or the warm chocolate filling, sprinkle immediately with chopped pecans and drizzle with the (optional) melted chocolate.
- Allow the cookies to sit at room temperature until set (about 45 minutes—less if you refrigerate them).
Video
Nutrition information is automatically calculated, so should only be used as an approximation.






Nicole,
Thank you so much!! ❤
Christine
Hello and thank you, Nicole.
Could you share a work around for the coconut oil? My daughter has gluten sensitivity, but is also having full blown allergic reactions to kiwi and apparently coconut. – they’re cutting into our options.
We are in our first holiday season of baking GF. All help with trial & error is a blessing. Thanks again & Happy Thanksgiving
Hi, Christine,
I assume you’re talking about the coconut oil I suggest for a chocolate filling? That’s super easy to replace. You can use Spectrum brand nonhydrogenated vegetable shortening. It works perfectly! Happy Thanksgiving to you and yours as well!
Making these for Christmas for my granddaughter!
Oh my goodness these were amazing!!! My new favorite cookie…until your next cookie recipe, that is. :) My family devoured them and even my extremely picky eater ate one (without pecans, of course) and said “Yum! My favorite part is the caramel in the middle.” That’s huge for him. So I have to give you props!! I was told I’m the best mom ever but since it’s your recipe I’ll take second place. I’m good with that. :) Thanks for all your awesome recipes and all you do to make gluten free baking a joy. You rock!!
Yummo! Thanks for the substitution suggestions :) can’t wait to try these!
Pleasure, Jen! :)
Mmm! I love turtle..anything! Can’t wait to try these! Thanks!!
Turtle flavors are magic, Laura!