This post may contain affiliate links. Please read our disclosure policy.

Table of Contents
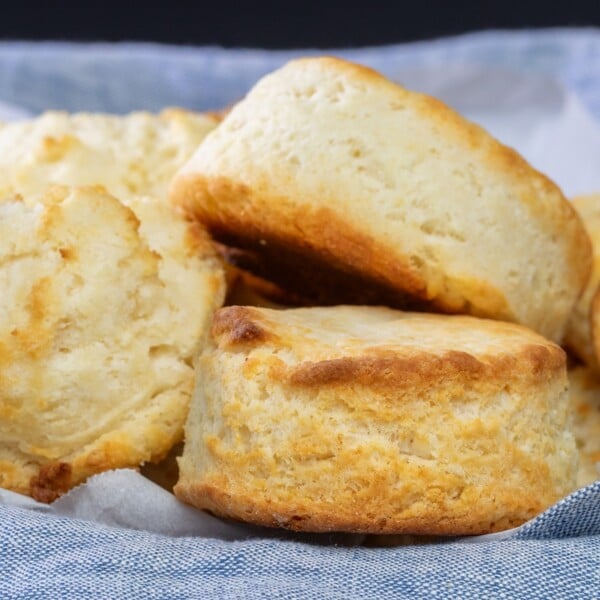
This gluten free strawberry Danish braid is a truly beautiful thing, and one that I know you can master. If you've made light and flaky gluten free biscuits, then you can make gluten free Danish dough. If you haven't made gluten free biscuits, then we really should talk. Mastering the simple principles(yes, simple!) of pastry-making may seem overwhelming if working with pastry is unfamiliar, but I'm here and we're going to do it together. Like we've done everything else since the very beginning. When I started out baking gluten free 100 years ago (okay, 10 years ago but still), there were bean flour blends (ew) and pretty much nothing else was familiar. And look how far we've come.

If you've made the braided and stuffed gluten free pizza, the shape and method are almost the same. But, as always when working with pastry, the ingredients must be kept cold. Danish dough is a bit of a contradiction, though, as it's yeasted. Yeast needs warmth to rise fully, but we keep everything cold cold cold until 30 minutes before baking when we cover the Danish and allow it to proof. It will swell, but not double, and then will continue its flaking and puffing and general awesomeness in the oven.

The rewards for this labor of love are many, as you can see for yourself. If you've been missing real, honest-to-goodness flaky Danish, then this is the recipe for you. If they can make it with gluten, we can make it without. The promise lives!
Gluten Free Strawberry Danish Braid

Ingredients
- 1 recipe Gluten Free Croissant Dough, with more flour for sprinkling as directed in the croissant recipe
For the Filling
- 1 package (8 ounces) cream cheese, at room temperature
- 1 (50 g (weighed out of shell)) egg, at room temperature, beaten
- ¼ cup (50 g) granulated sugar
- ⅛ teaspoon kosher salt
- 1 teaspoon pure vanilla extract
- ¼ cup seedless strawberry jam
- ½ pound fresh strawberries, hulled and sliced 1/8-inch thick
- Egg wash, (1 egg + 1 tablespoon water, beaten)
- Coarse sugar, for sprinkling (optional)
For the Glaze
- 1 cup (115 g) confectioners’ sugar
- 1 tablespoon milk (any kind), plus more by the 1/4 teaspoonful if necessary
Instructions
- Preheat your oven to 400°F. Line a large rimmed baking sheet with unbleached parchment paper, and set it aside. Prepare the gluten free Croissant dough through Step 5 (before shaping).
- Cover the dough and place it in the refrigerator to chill while you prepare the filling. The dough may be made up to 3 days ahead of time and kept wrapped tightly in the refrigerator until ready to use. I do not recommend freezing yeasted dough.
Make the filling.
- In the bowl of your stand mixer fitted with the paddle attachment or a large bowl with a hand mixer, place the cream cheese and beat on medium-high speed until light and fluffy (about 2 minutes).
- Add the egg, granulated sugar, salt and vanilla, and beat again on medium-high speed until smooth (about another 2 minutes). Set the filling aside.
Prepare the Danish dough.
- Remove the dough from the refrigerator, unwrap it and place it on a piece of unbleached parchment sprinkled lightly with flour. Sprinkle the top lightly with more flour and roll the dough into a rectangle about 13-inches x 17-inches, and trim it down to a neat 12-inch x 16-inch rectangle.
- Transfer the dough to the parchment-lined baking sheet (remove the parchment from the baking sheet if it makes it easier to maneuver). Using a sharp knife, pizza wheel or pastry wheel, cut a 3 1/2-inch x 1 1/2-inch rectangle out of each of the 4 corners of the dough rectangle. This will allow you to wrap the ends of the braid securely around the filling.
- Position the dough rectangle so that one 12-inch side is facing your body as you work. Beginning about 1-inch from the top of each flap on the left and right-hand sides of the rectangle, cut 8 approximately 1-inch strips in those flaps.
- The filling will be placed in the center third of the rectangle, from the top to the bottom of the dough, as shown in the step-by-step photos above. If you have removed the parchment paper from the baking sheet to work on it, return it to the baking sheet now.
Assemble and proof the braid.
- First, spread the cream cheese filling in an even layer down the center panel of the dough using a small offset spatula or butter knife. Cover with the strawberry jam, similarly spread in an even layer.
- Cover the layer of jam with the sliced strawberries in an interlocking pattern to minimize the spaces in between the slices. To braid the Danish, start at the end closest to you. Pull the flap taught over the filling. (Only the flaps on the ends will be pulled taut. The rest of the braid should be much looser, allowing room for expansion in the oven.)
- Alternating sides, braid the 8 strips on each side of the rectangle over the filling, angling the strips slightly. Do not pull the strips taut. Stop braiding when you have reached the top two strips (one on each side) and the top flap. Pull the top flap taut up and over the end of the filling, and cover gently with the remaining two strips.
- Brush the entire surface of the Danish generously with the egg wash. Scatter the optional coarse sugar on the top of the braid and cover loosely with oiled plastic wrap. Place in a warm, draft-free location for 30 minutes. The dough will swell, but we are not looking for doubling.
Bake.
- Uncover the Danish and place it in the center of the preheated oven. Bake until golden brown all over (about 15 minutes). Remove from the oven and allow to cool for 10 minutes.
Make the glaze.
- In a small bowl, place the confectioners’ sugar and 1 tablespoon of milk. Mix well, until a thick paste forms. Add more milk by the 1/4-teaspoon, mixing to combine well, until the glaze falls off the spoon slowly, in a thick but pourable glaze.
- Add milk very slowly, as it is much easier to thin, than to thicken, the glaze. If you do thin the glaze too much, add more confectioners’ sugar a teaspoon at a time to thicken it. Drizzle the glaze in zigzag patterns all over the top of the cooled Danish. Slice and serve.
Nutrition information is automatically calculated, so should only be used as an approximation.


Oh Nicole!! I JUST lost six pounds and now THIS! Sigh…..
OMG! Seriously? That looks like heaven! No, I have not made the biscuits yet but then, I did just get GFOAS Bakes Bread somewhat recently. I have made so many epic failures with GF baking in the last 7 months that I’m losing the enthusiasm to bake. (NONE of the failures have been a result of using your recipes BTW). However, the desire to have my spicy sausage gravy is a great motivator to try the biscuits and then perhaps this awesome looking danish.
We’ll get that enthusiasm going again, Laura! For sure.
Wow! That looks lovely! Can we sub other fruits for the strawberry? Like apple butter n apple slices or cherry pie filling? I just got your Snacks cookbook on Friday. I am so excited to make the kitkat cookie part… I miss those silly pink sugar cookies in the cellophane sleeve. I figured I can make the cookies and use your oreo filling and live without them being pink. Thank you for doing all the research, so I can just bake!
Oh, I love those wafer cookies, too. What a good idea! Here, there are made by Mothers and are tan, pink and brown, or there are some in a bag from Trader Joe’s. I love the old Biscos sugar wafers too. (last I saw, they have changed the recipe) I love the Piroline cookies, too.
I’m actually working on a recipe for the Pirouline cookies, Michelle! I didn’t get to it before the cookbook was done, but it’s going to be a blog recipe for sure. That wafer is thinner and crispier, but definitely similar.
Oh my gosh, Rhonda. I know exactly the cookies you mean! Those are the same tort wafers that are in Kit Kats, and you can definitely make those by just layering in another filling with the same wafers. Just don’t cover in chocolate! Perfect. Great idea!!
Yum! Will this keep okay a day or two on the counter? Or do you recommend baking and eating? Normally this isn’t an issue for me, forcing myself to let your recipes cool a bit after coming out of the oven is a difficult thing :) but I have people visiting in a couple weekends and I don’t think we will have time for baking, however i know that they would love this.
Yes, I do, anna. I wouldn’t glaze it until the day you plan to serve it, though. Just take it out of the oven when it’s just baked, keep it covered on the counter once it’s cool, and then refresh it in a warm (say, 350°F) oven for a few minutes.
WOAH. Serious mouth watering taking place over here! Oh how I’ve missed REAL flaky Danish pastries like this!! I will be making this for our do-over Easter breakfast (everyone was sick yesterday :( ) Thank you Nicole! You are the BEST!!!
Aw, hope everyone is well now, Kellan!
Funny story, I totally made this with your biscuit recipe and blueberries, because I can see the future. Lol. It was really good and worked out perfectly, for those who aren’t totally sure they have mastered yeast baking. Or for those who can’t have yeast.
Very funny, Kristy! Maybe you’ll be willing to try them soon with the yeasted Danish dough?
I’ve never eaten a Danish pastry before, but this post, with the strawberries and all… makes me want to make it and eat it! Looks so yummy!
You won’t be disappointed, Linda. :)
Jumping up and down with sheer joy!! I just love you to pieces!
So glad, Mare!
when my little brother and sister saw this recipe their jaws hit the floor. they say that any pastry that has strawberries AND glaze is a must have.:) they made me promise to make it as soon as the strawberry patch gets going. thank you for another great recipe Nicole!
I can’t even begin to imagine how amazing this would be with truly fresh strawberries!
Wow! Absolutely stunning! I have yet to make pastry, looks like pastry is in the near future :)
Well then it’s a must, Lucy!