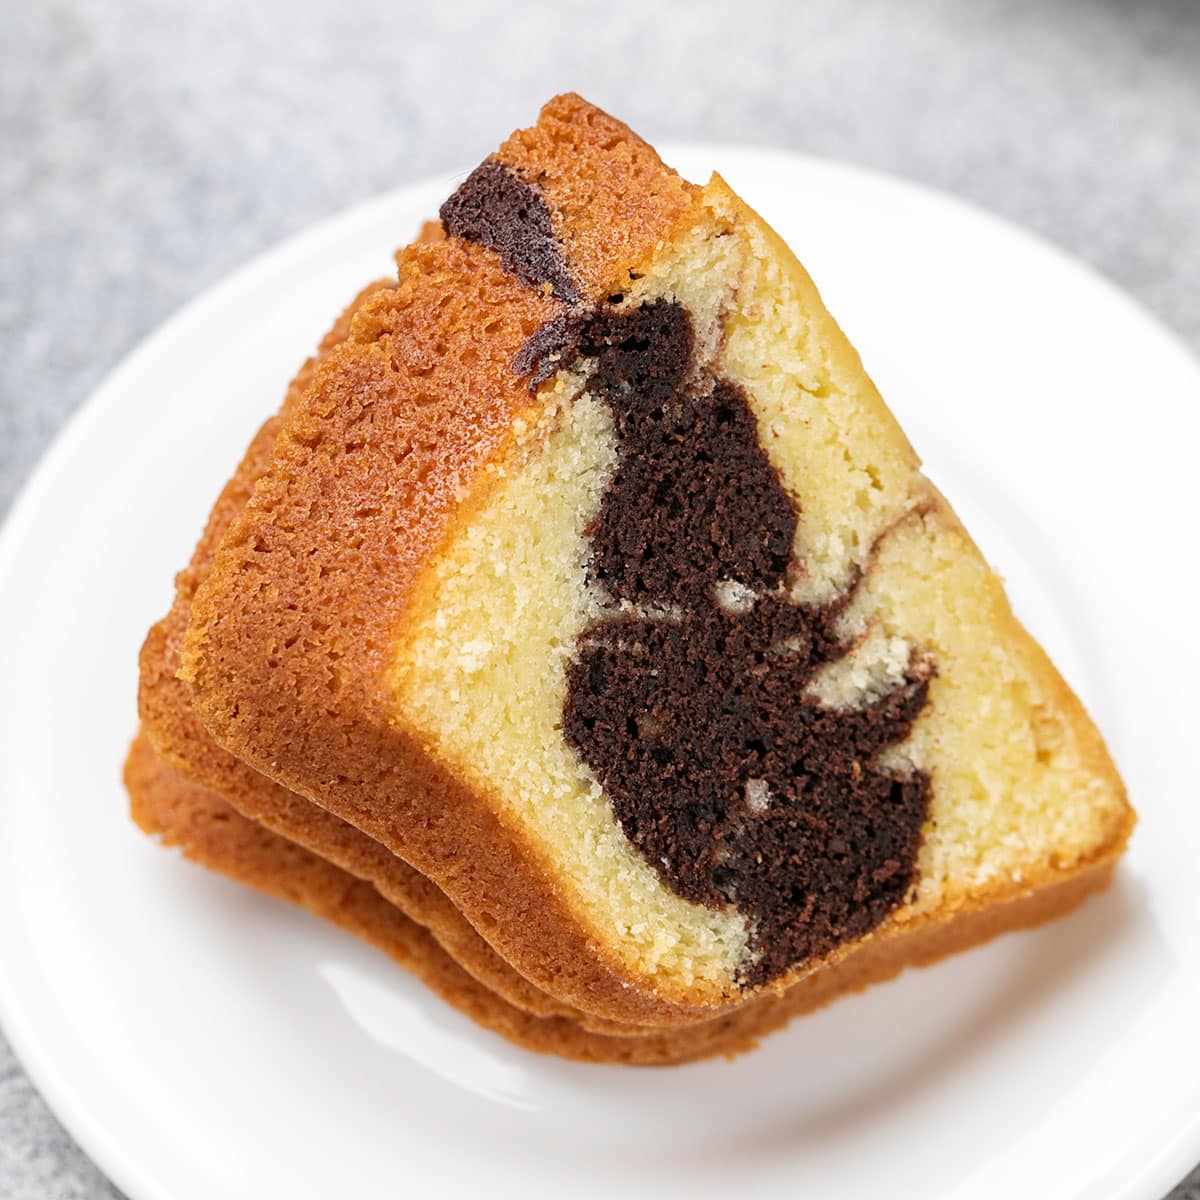

Don't miss this gluten free bundt cake recipe for an effortlessly fancy, rich, vanilla and chocolate gluten free cake that no one will forget. This simple but elegant gluten free bundt cake needs no decoration for it to impress your family and friends!

WANT TO SAVE THIS RECIPE?
What makes this gluten free bundt cake special
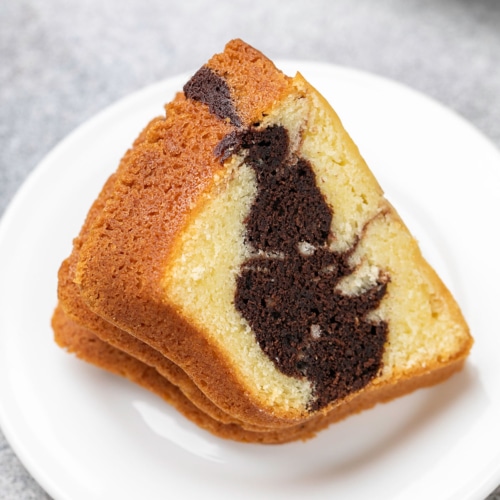
This gluten free bundt cake has a fine, but incredibly tender crumb, and has all the best tastes of chocolate and vanilla in every single bite. It's not just a simple gf vanilla-and-chocolate cake in a bundt pan, though.Oh no no no. This is so much better than any “regular” cake.
The texture of this gluten free marble cake is like a cross between the dense, smooth crumb of a gluten free pound cake, and the open and airy crumb of a gluten free vanilla cake. It's not exactly a marbled pound cake recipe, though.
This cake is best made in a bundt pan, with all those beautiful edges and crevices—but you can make it as a regular gluten free cake, too. You'll have to make more batter for 2 layers, or less batter for one, but it's not hard to do.
If you have a good bundt pan, I hope you'll consider using it. With a good pan, and the right gluten free recipe like this one, you'll absolutely go crazy over this cake.
Choosing the best gluten free flour blend for your marble cake recipe
As written, this cake is made with a combination of 2 cups (280 grams) of (mock) Better Batter original gluten free flour blend and 1/2 cup (72 grams) cornstarch. When used together in that proportion, they basically make a gluten free cake flour that's light enough but sturdy enough for this cake.
If you're using an all purpose gluten free flour blend that's higher in starch to start, like Cup4Cup, you don't want to add extra cornstarch to the recipe. Instead, you'll use 2 1/2 cups (350 grams) of just Cup4Cup.
If you were to use a blend like Jules gluten free flour blend, it's way too strong and your batter will be too tight. You won't be able to swirl the batter at all, and the cake will have a tight, dry crumb.
Selecting the right bundt pan
Baking cakes in a bundt pan can seem intimidating. You've probably had one break when you tried to release it from the pan—or at least heard about cake wrecks like that.
But if you prepare the pan properly, and have a pan with a clean nonstick surface that hasn't been scratched up, your cake should come out cleanly. And you can't beat the beauty of a bundt cake without need for any decorating at all.
What kind of pan to use for this gluten free bundt cake recipe
A standard-size bundt pan is a 10-cup pan, which holds 10 cups of cake batter, by volume. The amount of cake batter that fits into that pan is about 1½ times the amount of batter in a standard single-layer 8-inch or 9-inch cake.
The material that I like best for a bundt pan is aluminum, which bakes evenly, usually without any hotspots. It doesn't hold or transfer too much heat, which can cause hot spots where the cake will burn.
There are many shapes of bundt pans. The shape that I used here is called a “brilliance” bundt pan, and I used the 10-cup Nordic Ware heavy gauge aluminum pan.
The dimensions of that pan are 10 x 10 x 3-inches. It's smaller in person than it tends to look in photos.
What pan to use for this cake if you don't have a bundt pan
If you don't have a bundt pan, you can bake this cake batter similarly in a round or square cake pan. You'll need to multiply or reduce the cake recipe ingredients to fit in a smaller pan, or to be divided among 2 pans, though.
To make a single layer 8-inch or 9-inch cake, reduce each ingredient in the recipe by 50%. You'll still layer and marble the ingredients as instructed, and the single layer should be done by about 30 minutes (a bit more for an 8-inch pan, a bit less for 9-inch pan).
Since the cake calls for 3 eggs, and you'll need 1½ eggs, just break two eggs into a bowl and beat them fully. Then measure out 75 grams of the mixture.
To make a double layer 8-inch or 9-inch cake, increase the recipe by 50%. Then, divide the vanilla mixture into 4 parts, and the chocolate into 2, and make 2 smaller versions of the bundt cake.
Achieving the perfect marbled swirl in your bundt cake
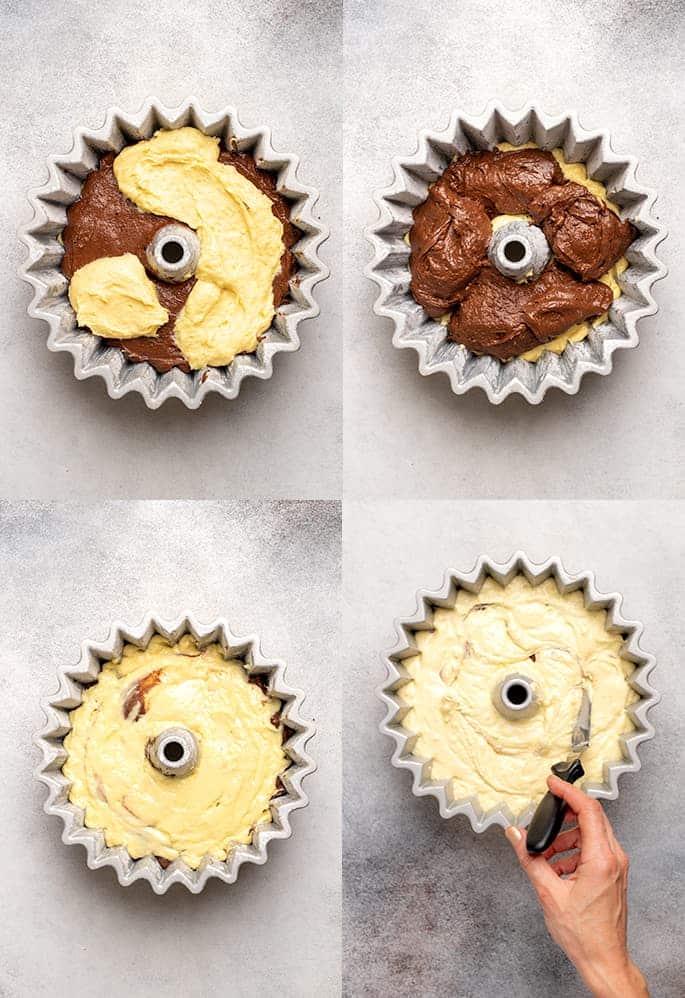
The best advice for achieving a properly marbled gluten free marble cake is not too marble very aggressively. You want to use a greased butter knife, small offset spatula, or even a chopstick and insert it into the layered cake batter.
Move the knife or spatula in a large zig-zag pattern around the center hole in an irregular pattern. I recommend going around the batter no more than 2 times fully.
Part of the marbling comes from the way we layer the batter, too. The middle, chocolate layer isn't spread evenly.
Instead, the chocolate batter in the center is just scattered on top of the bottom layer. Then, we shake the pan back and forth to help even it out a bit—but not too much.
More tips for making the best gluten free bundt cake
Testing your cake for doneness
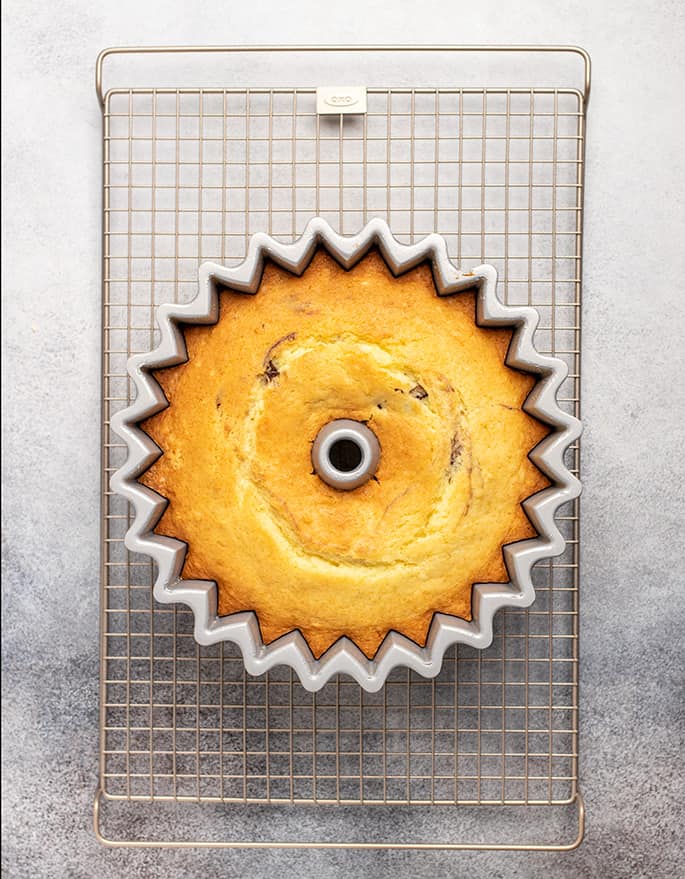
This cake bakes evenly at the relatively low temperature of 325°F/163°C. If you avoid baking it in a dark pan or a glass pan, it will brown without ever burning on the bottom or the edges at all.
Rotate the pan once 180° halfway through baking to ensure even baking. It's done when a cake tester comes out clean, about 1 hour.
Most ovens run hot (mine included), so I always use an inexpensive hanging analog oven thermometer to gauge the baking temperature. I never trust my oven itself to stay in calibration.
How to get your cake out of the pan
A properly baked bundt cake in the right pan, prepared well, should come out of the pan easily. Let it cool in the pan on a wire rack for at least 10 minutes.
Then, with clean fingers, pry the edges of the cake away from the pan along the perimeter. Using a nonstick spatula or other small nonstick, no-scratch tool, pry the cake away from the center, too.
Place an inverted wire rack on top of the pan. Working quickly with one hand in a pot holder on the rack and another pot holdered hand under the pan, invert the cake and wire rack.
Tap the outside of the pan a few times and try to twist the pan a bit. If the cake is free from the sides of the pan, it will twist.
Slowly lift the bundt pan off the top of the cake, and set it aside. Let the cake cool more fully before slicing and serving it.
How to store your gluten free bundt cake
A bundt cake makes such a beautiful presentation, that it should be served whole before being sliced, at least at first. It can be cooled completely, wrapped tightly in freezer-safe wrap, and frozen for at least 3 months. Defrost at room temperature before slicing and serving.
If you're storing leftover pieces of this cake, wrap each piece tightly in freezer-safe wrap. Defrost in the microwave for 10 to 15 seconds, or at room temperature before serving.
Gluten free marble cake ingredients and substitutions
Dairy free gluten free marble cake
To make this cake without dairy, you'll need to replace the butter and the milk. To replace the butter, I recommend vegan butter (Miyoko's Kitchen and Melt brands are best).
For the milk, your favorite unsweetened nondairy milk is fine. I recommend unsweetened almond milk, since it has some fat.
Be sure that the chocolate in the chocolate batter that you melt and mix into it is dairy-free, too.
Egg free gluten free marble cake
There are 3 eggs in this gluten free marble cake. You can try replacing all 3 of them with a chia egg each, but I'm not sure if it will work as described.
To make one chia egg, mix 1 tablespoon ground white chia seeds and 1 tablespoon lukewarm water in a small bowl. Allow it to sit until it gels.
Vegan gluten free marble cake
To make this cake vegan, follow the instructions for replacing both the dairy and the eggs.
More gluten free bundt cake recipes
All the instructions about making a bundt cake here apply whether you're using this cake recipe to make a gluten free marble cake, or you'd like to make another gluten free cake in a bundt pan.
Our vegan gluten free chocolate cake, called a “crazy cake,” is already a gluten free chocolate bundt cake. We also have a recipe for vegan gluten free vanilla crazy cake made in a bundt pan, too.
You can also make any gluten free cake recipe in a bundt pan, too. They won't all hold their shape exactly as well, especially if they have a more open crumb. But you can multiply the ingredients in a recipe for a single layer round cake by 1.5 and have enough batter for a gluten free bundt cake.

FAQs
If your bundt pan has scratches, your batter is much more like to stick. So avoid a scratched-up pan. Grease the pan really well, without letting the grease pool in the crevices of the pan. And if you're worried about release, sift gluten free flour on top of the greased pan, tap it around so it reaches all parts, and then tap out any excess gf flour.
This gluten free bundt cake has a somewhat denser crumb than other cakes, so you won't find moist crumbs attached to your cake tester when it's done. The cake tester should come out quite clean when the cake is done.
Yes! You can freeze this cake in slices, wrapped separately, or as a whole cake. Freezing it as a whole cake to serve later means your guests will see how beautiful your bundt cake is!
Yes! Just leave out the cocoa powder, hot water, and melted chocolate. Add all of the cake batter to the pan at once, smooth it into an even layer, and bake as directed.

Gluten Free Bundt Cake Recipe
Equipment
- Stand mixer or handheld mixer
Ingredients
- 16 tablespoons (224 g) unsalted butter at room temperature
- 2 cups (400 g) granulated sugar
- 1 tablespoon pure vanilla extract
- 3 (150 g (weighed out of shell)) eggs at room temperature
- 2 cups (280 g) all purpose gluten free flour blend (I used Better Batter)
- 1 teaspoon xanthan gum omit if your blend already contains it
- ½ cup (72 g) cornstarch
- 2 ½ teaspoons baking powder
- ½ teaspoon kosher salt
- 1 cup (8 fluid ounces) milk at room temperature
- 6 tablespoons (30 g) unsweetened cocoa powder natural or Dutch-processed
- ⅓ cup (2 ⅔ ounces) hot water
- 1 ounce dark or semi-sweet chocolate melted
Instructions
- Preheat your oven to 325°F. Grease well a standard 10-cup bundt pan (See Recipe Notes), and set it aside.
- In the bowl of a stand mixer fitted with the paddle attachment (or a large bowl with a handheld mixer), beat the butter, sugar, and vanilla until light and fluffy (about 5 minutes).
- Add the eggs, and mix until well-combined. The mixture should be smooth and silky.
- In a separate medium-size bowl or large measuring cup, whisk together the flour blend, xanthan gum, cornstarch, baking powder, and salt.
- Add the flour mixture in 3 parts to the butter mixture, alternating with the milk, and mixing until just combined after each addition until all the flour mixture and milk have been added. The batter should be light and smooth.
- Scrape about 1/3 of the batter into a separate, medium-size bowl and set it aside.
- In a small, heat safe bowl, place the cocoa powder. Pour the hot water over the cocoa powder, and whisk until very smooth.
- Scrape the cocoa mixture into the mixing bowl and mix with the remaining third of the vanilla batter until smooth. Add the melted chocolate, and whisk again until smooth.
- Scrape half of the vanilla batter into the prepared bundt pan and spread into an even layer on the bottom of the pan. Be sure to spread the batter into all the corners of your pan.
- Scatter the chocolate batter across the top of the vanilla batter. Don’t spread the chocolate batter out with a spatula. Instead, shake the pan back and forth to distribute the chocolate batter somewhat evenly.
- Top with the remaining vanilla batter in the same manner, shake the pan back and forth. Then spread the batter a bit so all the batter has an even top layer.
- To marble the 3 layers, spray a small offset spatula or butter knife with cooking oil spray, and insert it vertically into the cake batter. Keeping the spatula or knife vertical, move it around the batter in a zig-zag fashion, going around the pan no more than 2 times.
- Place the pan in the center of the preheated oven and bake until a toothpick inserted in the center comes out clean, rotating once halfway through baking (about 1 hour).
- Remove from the oven and allow the cake, still in the pan, to cool on a wire rack for at least 20 minutes.
- With clean hands, pull the edges away from the side of the bundt pan. Slide a silicone, nylon, or wooden spatula or knife along the center hole to help release it from the cake.
- Place a wire rack on top of the pan, and invert the pan and wire rack so the rack is on the countertop. Tap the outside of the pan a few times with a wooden spoon.
- Remove the pan to reveal the bundt. Allow the cake to continue to cool before slicing and serving.
Notes
If your bundt pan is new, and you’re not very concerned about its ability to release the cake, you can simply grease the inside fully with cooking oil spray. If you’re concerned about the cooking oil spray damaging the pan, use a pastry brush to brush melted butter or a neutral oil all over the inside of the pan. Try to avoid having any oil or melted butter pool in the bottom of the pan. If you’re concerned about your pan releasing the cake at all, after greasing the pan, sift some gluten free flour (a blend, or a single flour or starch like superfine rice flour or cornstarch works well; don’t use any flour that isn’t in the all purpose blend you’re baking with) all over the inside surface of the pan, on top of the oil or melted butter. Turn the pan around on all sides, tapping it with your free hand as you go, to distribute the flour evenly and remove any excess. Nutritional information. Nutrition information is an estimate, per slice assuming your cake is cut into 12 equal slices, made using an online nutrition calculator. It is not to be relied upon.
Nutrition
WANT TO SAVE THIS RECIPE?
Thanks for stopping by!
Hi, I’m Nicole. I create gluten free recipes that really work and taste as good as you remember. No more making separate meals when someone is GF, or buying packaged foods that aren’t good enough to justify the price. At Gluten Free on a Shoestring, “good, for gluten free” just isn’t good enough! Come visit my bio!


Sadaf Choudhry says
This is really nice. Thanks for the recipe. I reduced the sugar to 250g and added some dedicated coconut, and it was just right for us.
Cyon K. says
I have a corn intolerance, is there a substitute for it? Tapioca starch, perhaps? Also, I usually use–depending on the recipe–Bob’s Mill All-Purpose or 1-4-1 Flour. Which one would be better to use for the GF Flour (I live in Canada; not sure the brands mentioned are readily available.)
I love Marble Cake and haven’t had it in so long, so I’m really eager to try this!
Nicole Hunn says
You can’t make any of my recipes with Bob’s Red Mill blends at all, Cyon. They’re not properly balanced and they use very gritty rice flour. Please click through to the all purpose gluten free flour blends page linked in the recipe card for more information. If you can’t have cornstarch, you can try using arrowroot.
Lucinda S Holmes says
I made this the first time with great success! Can this cake be made with up to half Swerve and half sugar? I make your biscotti up to half Swerve and it’s still really, really good, and helps with my husbands’ lower sugar goals.
Nicole Hunn says
I’m afraid I don’t know, Lucinda, as I haven’t tried that. Swerve is a good sugar alternative, but sugar alternatives tend to be drying. That wouldn’t be as much of an issue with something crunchy, like biscotti, as it would be with cake. You’ll have to experiment, but you’re doing it the right way, by making it as written first, so you’ll know what to look for!
Laura says
Made it twice in the last week, once for a birthday, once for Christmas. Going to make it again tonight because now we can’t live without it!
Nicole Hunn says
Wow, Laura, that’s devotion! I hope you find some time to put your feet up while you enjoy a big slice. :)
Gladys Romero says
Thank you so much for this wonderful recipe. It’s my daughter’s childhood favorite. I made it with other gluten free flours but the last time I made your mock mix. Outstanding!! Thanks again.
Nicole Hunn says
I’m so glad, Gladys! It’s wonderful to hear that you were able to give your daughter back her childhood favorite. That’s what this is all about! Thank you for letting me know.
Laura says
Super tasty and not difficult to make at all. Even the non-gluten-free family members were happy!
Nicole Hunn says
That’s great to hear, Laura! So glad you all enjoyed the cake.
Jennifer says
Seriously – use the Better Batter (or Nicole’s mock recipe)! Makes a huge difference. I’m giving away all other varieties of ‘all purpose’. Cup4Cup, Better Batter, and (for now) the AKT blend get to stay on the shelf. Nicole – you taught me to be a baker!! I’m so proud of myself :)
Nicole Hunn says
That’s so great to hear, Jennifer! You absolutely should be proud of yourself. You’re set up for total success, and it should feel this good—and only get better. :)
Becky baxter says
Can Pillsbury GF flour be used and if so should cornstarch be used?
Nicole Hunn says
The only flour blends I can recommend are explained in detail on the all purpose gluten free flour blend page, that’s linked in every recipe that calls for an all purpose gluten free flour blend, Becky. Pillsbury is not properly balanced and has gritty rice flour, so it won’t work, no. Here’s a link to that page for your convenience: https://glutenfreeonashoestring.com/all-purpose-gluten-free-flour-recipes/
Bev Power says
Could I use Bobs Red Mill One to One gluten free flour? Would you add cornstarch to this?
Nicole Hunn says
No, you cannot use that flour blend successfully in my recipes, Bev. Please see the all purpose gluten free flour blend page, linked every time a recipe calls for it. Here’s another link for your reference: https://glutenfreeonashoestring.com/all-purpose-gluten-free-flour-recipes/
Brett says
We used Bob’s Red Mill and it worked quite well. Couldn’t find all the ingredients to do Nicole’s where I shop.
Nicole Hunn says
I’m glad you had a good experience, Brett! I do want to mention for your future reference, and for others’ benefit, that Bob’s Red Mill’s products are of extremely inconsistent quality. What worked once may not work again, even to the extent that it did for you this time. Since their products are so widely available, I sincerely wish this weren’t true, and would love to be able to recommend them, but can’t!