
This post may contain affiliate links. Please read our disclosure policy.
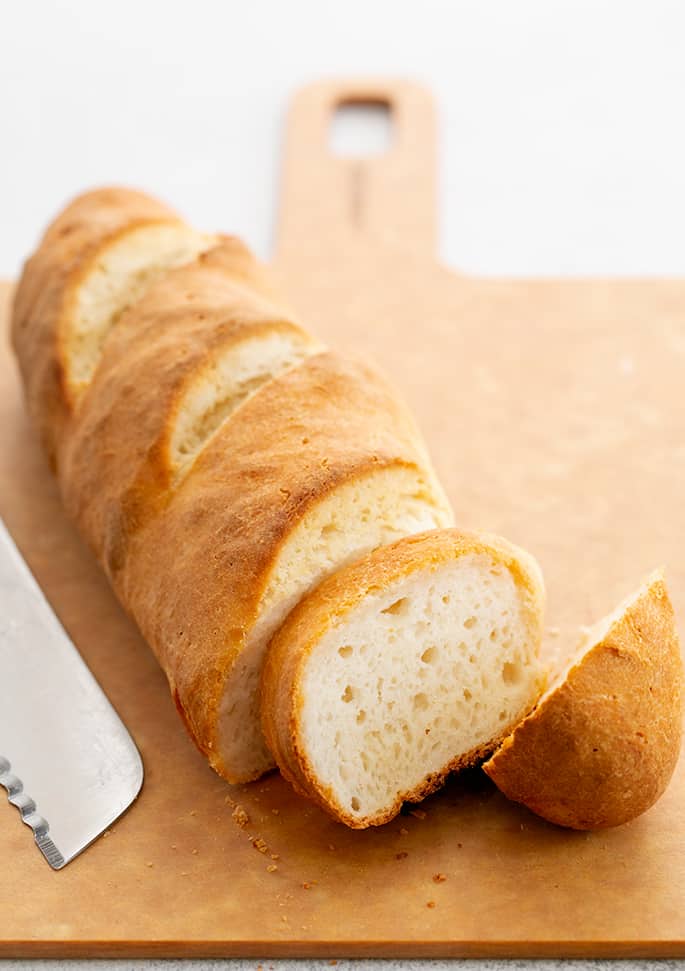
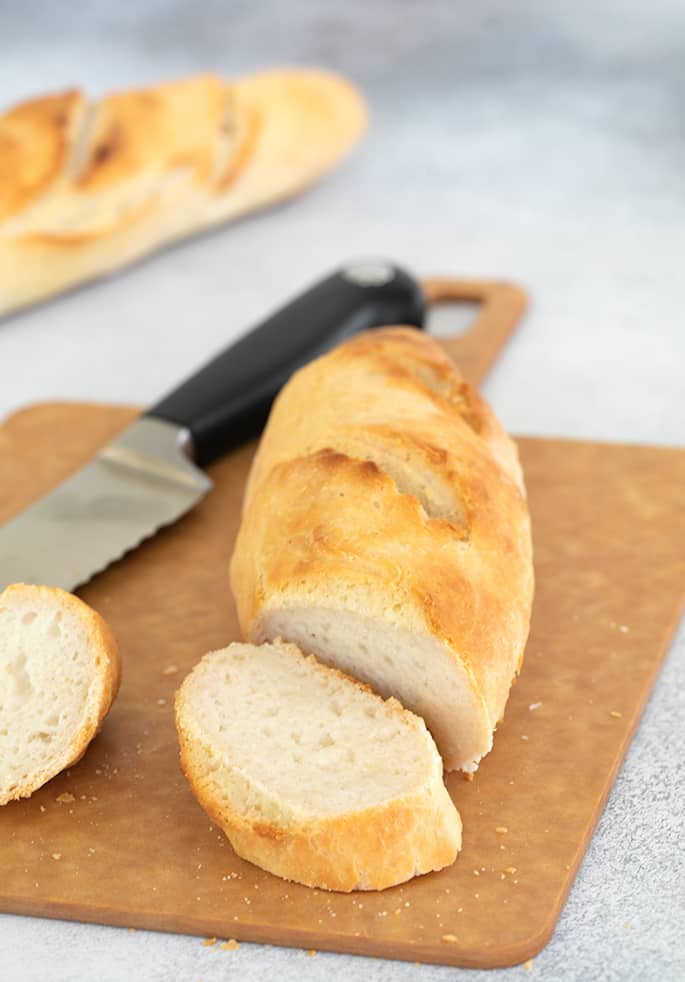
This recipe for gluten free French bread rises fast and bakes even faster. It makes the perfect gluten free baguette for sandwiches, garlic bread, and bruschetta.
What makes this gluten free French bread recipe special
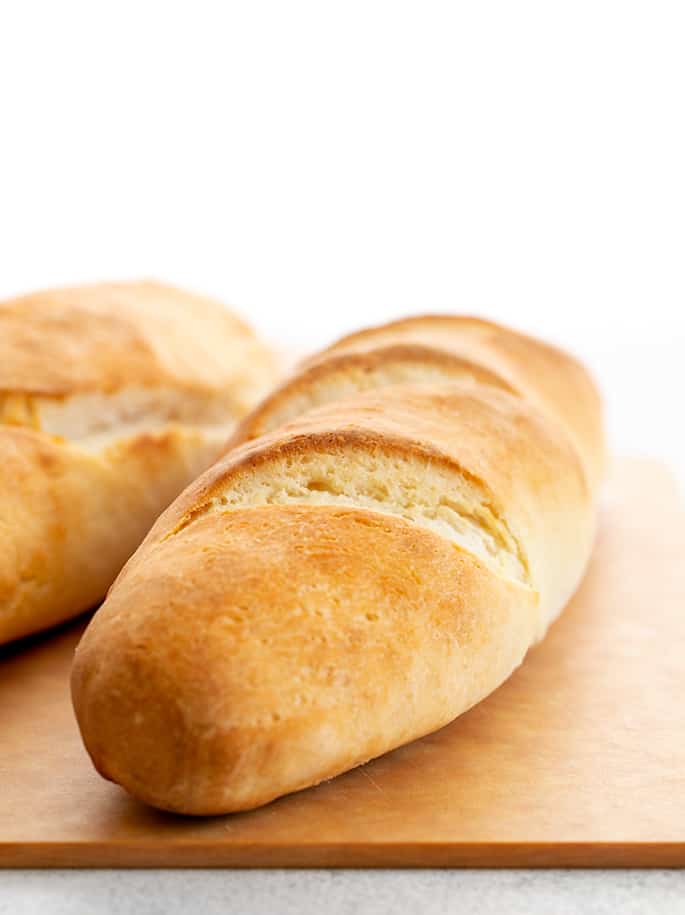
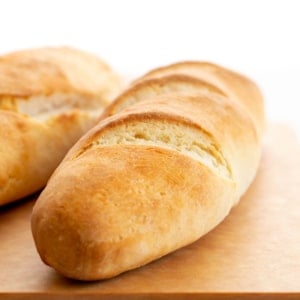
These gluten free baguettes have a thin, crisp outside crust and a soft, almost squishy inside. They're as quick and easy to make as they are versatile.
The dough should be chilled for at least 30 minutes in a sealed container in the refrigerator before shaping, but it doesn't need a long first rise or rest. The recipe makes 2 10-inch rolls, but you can also make one roll that's double the length. You can even double the recipe, since it makes a small batch as it is.
The recipe calls for using a stand mixer, since the dough really does need to be beaten vigorously until it takes on a “whipped” appearance, almost like thick mashed potatoes. That is what helps create that tender crumb. If you don't have a stand mixer, try using a food processor fitted with the steel blade.
Tips for shaping and baking gluten free baguettes
When I use my gluten free bread flour blend to make baguettes, I shape them a bit differently, much like I do our Olive Garden style soft breadsticks. That involved patting and rolling the dough into a rectangle, folding both of the long sides toward the center, then doubling the rectangle on itself. That's a classic way to create a baguette shape.
This recipe is made using one of my preferred all purpose gluten free flour blends (preferably, Better Batter), rather than bread flour. It isn't as similar to conventional gluten-containing bread dough, like our gluten free bread recipe for sandwiches, and it doesn't rise quite as readily. I find that when I use that other shaping method, there are more likely to be gaps in the bread after baking.
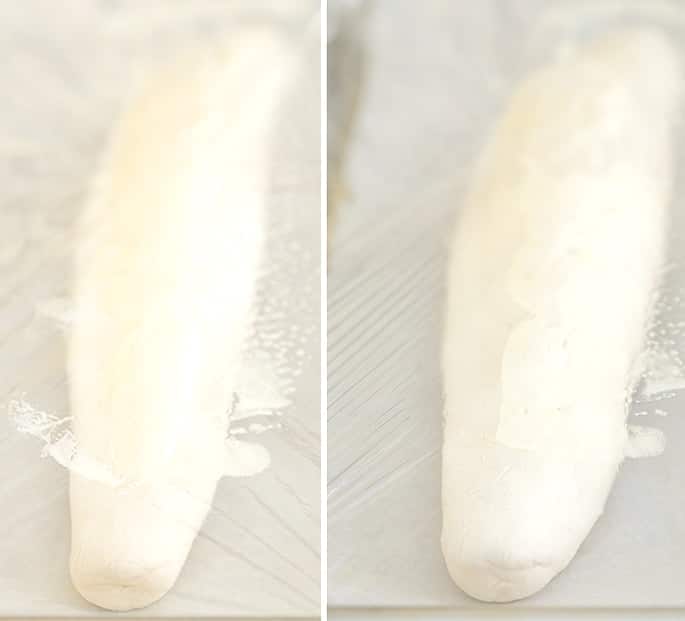
Here, I like to shape the dough by creating a cohesive piece of raw bread dough by pinching together any and all gaps in the dough, so they don't separate during rising and baking. Then, roll out the dough with the palms of your hands, so the dough is thicker in the center, and tapered toward the ends.
The best way to explain the shaping method is to watch the how-to video that is included in this post. But in case you aren't able to see that, I'd explain it in the following way:
Position the palms of both hands right next to one another on the top of the cylinder of dough. Roll the dough first away from your body and then back toward it as you move your hands in a half moon motion away from one another, toward the edges of the dough.
Baking gluten free baguettes
Have you ever seen those baguette pans, which look like side-by-side slings made of metal, with a million little perforations? You don't need one of those.
I actually used to have a baguette pan, but I can't find it. That means that I must have given it away because it always drove me crazy when I tried to store it in a cabinet in my non-industrial-sized kitchen. I'm not sorry it's gone.
Those pans are, indeed, useful because they allow circulation of air all around the bread as it bakes. That's part of what creates a thin but extra-crispy crust even on the bottom of the bread—and helps shape the bread properly. I've found that it's just not necessary with this recipe, though.
For the crispiest crust, it does help to create some steam in the oven at the very start of the baking process. It's easy to do by adding some ice cubes to the oven floor at the very start of baking, then quickly closing the door.
If you don't feel comfortable adding ice cubes to the floor of your oven, try spraying the baguettes liberally with cool water in a clean spray bottle. Do the spritz either the moment right before or right after you place the pan in the oven.

Getting this gluten free baguette dough to rise
When I originally started developing this recipe, I thought I'd have to use a very wet dough. That's typical of gluten free bread made with anything other than my gluten free bread flour blend.
But when I made it with a very high hydration ratio (that's something we talked about in detail in our recipe for NY-style gluten free pizza crust), the dough barely browned, wouldn't crisp well on the outside, and was super squishy almost no matter how much I baked it.
That's good news, though, since a less-wet dough is much easier to shape. It does take a little bit longer to rise, and requires a bit more yeast. But neither of those is much of a problem.
The consistency of this dough is best explained by describing what it's not. It's not stiff, but it's not fragile. You can and should shape it without adding much additional flour, and be sure to shape it with additional tapioca starch, not all purpose flour.
Rising gluten free yeast dough
As with all yeasted dough, rising is variable with the ambient environment in your kitchen (not outside, unless you're setting the dough to rise outside). In warmth and humidity, rising time is shorter. If the air is cool and dry, it will take longer.
Be sure the dough is covered with oiled plastic wrap securely, but not tightly. You want it to have space to rise, but not be fully exposed at all.
And don't expect a doubling of the dough with this old-school gluten free bread dough. Instead, it will rise to about 150% of its original size. It's considered overproofed when the rise begins to break through the surface of the dough.
It will begin to look pockmarked, like it has craters on the outside, and it will become quite fragile. Stop before it gets to that stage, or at least the minute you observe it. This is a relatively quick-rising dough, so be watchful.
Ingredients and substitutions for these gluten free baguettes
Gluten free dairy free gluten free French bread
The only dairy in this recipe is the single tablespoon of butter. It can easily be replaced with Earth Balance buttery sticks, or (my favorite) vegan butters from either Melt or Miyoko’s Kitchen brand.
Gluten free egg free French bread
There is only one egg white in this recipe, and it helps provide structure. If you can’t have egg whites, you can try replacing the egg whites with an equal amount, by weight, of aquafaba, which is the brine from a can of chickpeas. Try beating the aquafaba until foamy with a whisk before adding it to the dough.
Can you make this gluten free French bread recipe without yeast?
No. You must use yeast in this recipe. There is no replacement, so if you can't have yeast, use the search function on the blog to search for “yeast free” bread recipes. They're completely different.
Instant yeast versus active dry yeast
Instant yeast is also called bread maker or rapid-rise yeast. If you only have active dry yeast, multiply the amount of instant yeast called for in the recipe (here, 6 grams) by 125%, and proof the yeast in about 1/4 cup of the water called for in the recipe before adding it to the dough.
Here, that would mean using about 7 1/2 grams grams of active dry yeast. Since most scales (mine included) aren't sensitive enough to measure 1/2 gram, just keep adding more yeast slowly after it reads 7 grams and stop approximately halfway to 8. Just do the best you can!
Gluten free Baguette FAQs
Yes! A baguette is a long, crusty loaf of bread that is French in origin. The terms gluten free French bread and gluten free baguette are used interchangeably!
Did you measure one of my recommended all purpose gluten free flour blends by weight? Did you make any ingredient substitutions? Did you add more than a small amount of gluten free flour to the dough during shaping? All of these could lead to a lack of a rise. Sometimes, though, your bread only needs a bit more time to rise.
Yes! These loaves of bread freeze really well. Let the loaves cool completely, slice them horizontally about 3/4 of the way through from side to the other (so the loaf stays together), and wrap them tightly in freezer safe plastic wrap. Freeze for up to 3 months. Defrost at room temperature.
Yes! If it's only a tiny bit stale, sprinkle it with lukewarm water all over. If it's very stale, run it under the tap. Then place the wet loaf on a parchment lined baking sheet and warm it in a 300°F oven for about 10 minutes. The excess moisture that isn't absorbed by the bread will bake off, leaving you with fresh-tasting, toasty gluten free baguettes!
Gluten Free French Bread Baguettes Recipe
Equipment
- Stand mixer with paddle attachment
Ingredients
- 1 ¾ cups (245 g) all purpose gluten free flour blend, (I used Better Batter; please click thru for full info on appropriate blends)
- ¾ teaspoon xanthan gum, omit if your blend already contains it
- ¼ cup (36 g) tapioca starch/flour, plus more for sprinkling
- 2 teaspoons (6 g) instant yeast
- ½ teaspoon kosher salt
- ¾ cup (6 ounces) warm water, (about 95°F)
- 1 (25 g (weighed out of shell)) egg white, at room temperature
- 1 tablespoon (21 g) honey
- 1 teaspoon apple cider vinegar
- 1 tablespoon (14 g) unsalted butter, at room temperature
- Cooking oil spray
Instructions
- In the bowl of a stand mixer fitted with the paddle attachment, place the flour, xanthan gum, tapioca starch/flour, and yeast, and whisk to combine well. Add the salt, and whisk again to combine.
- Create a well in the center of the dry ingredients and add the water, egg white, honey, vinegar, and butter, and mix to combine.
- Beat the mixture with the paddle attachment with the stand mixer on medium speed for about a minute. The dough will clump.
- Increase the speed to medium-high and continue to beat until the dough begins to stick to the sides of the mixing bowl and looks “whipped” in texture. Transfer the dough to a container with a lid that seals tightly, cover, and refrigerate for at least 30 minutes and up to 3 days.
- When you’re ready to shape the dough, turn the chilled dough out onto a flat surface lightly sprinkled with tapioca starch. Dust the top of the dough lightly with more tapioca starch, and turn it over a few times and knead it gently to smooth the dough.
- Using a large knife or bench scraper, divide the dough into 2 equal portions.
- Working with one piece of dough at a time, dusting very lightly with more flour as necessary to prevent sticking, shape the bread into a cylinder, pinching together any breaks in the dough to seal them.
- Position the palms of both hands right next to one another on the top of the cylinder of dough. Roll the dough first away from your body and then back toward it as you move your hands in a half moon motion away from one another, toward the edges of the dough.
- The shape should be thicker in the center, tapered toward the ends. See the video for a visual of shaping the dough.
- Place the shaped rolls a couple inches apart on a parchment lined baking sheet. Cover with lightly greased plastic wrap and place in a warm, draft-free environment and allow to rise until risen to about 150% of its original size.
- Rising will take longer in a dry, cool environment, and less time in a warm, humid environment. Do not place it in a heated oven, to any temperature, to rise, or you risk killing the yeast.
- As the bread dough is nearing the end of its rise, preheat your oven to 475°F and position the top rack a bit higher than the center of the oven. When the rise is complete, uncover the baking sheet.
- Using a small, sharp knife or a lame held at a 45° angle to the dough, slash each roll on top 3 times at evenly spaced spots on the dough about 1/4-inch deep. Spray the tops and sides of each roll liberally with cooking oil spray.
- Place the baking sheet on the top oven rack, toss a few ice cubes on the floor of the oven, and quickly close the oven door.
- Bake for 18 minutes, and rotate the baking sheet one half turn. Continue to bake for about another 5 minutes or until lightly golden brown all over and an instant read thermometer inserted into the thickest part of the roll read about 190°F.
- For a softer crust, wrap the hot rolls in a tea towel as they cool. Allow to cool for at least 10 minutes before serving.
Video
Nutrition information is automatically calculated, so should only be used as an approximation.


Made this the other day. Used better batter . Weighed everything. 200 deg in center.Seemed a little gumy. Rose about 30 min. Not quite sure where I went wrong
You didn’t let it rise long enough, Clay! 30 minutes is just not long enough, no matter what the ambient temperature.
Nicole, I tried to reply, but don’t see it here. Just wanted to say thank you for trying to help me. My Artisan bread didn’t rise yesterday either. I’ll figure it out. Just probably a small thing I’m doing or not doing. But thank you for your help!!
Shirley
Thank you, Nicole!
I actually got your Better Batter to use. I’m trying the Artisan again and see if it rises. Will keep trying. I’m sure it will become very clear to me one day as I’m cooking!! Thank you for your reply. I appreciate it.
Shirley
Hi Nicole
Do you have a recipe for all purpose flour I would like to try making my own. You bread looks amazing
I am hoping to make some tomorrow.
Kind Regards
Bev
Please click the link in the recipe to the all purpose gluten free flour blends page. All the information is there. There’s always a link, and there’s a few links at the very bottom of the blog as well.
Hi, Nicole, I tried this French bread recipe yesterday and I bought a scale to measure in grams and bought fresh tapioca flour and other ingredients and followed your recipe exactly. I am doing something wrong. My artisan bread and this bread will not rise very much. I let French bread rise for 4 hours waiting for it to get 25% rise. I make regular bread weekly and it rises unbelievably. My GF recipe came out heavy and not big enough for a hoagie sandwich.
So I know I’m doing something wrong for sure. What could it be? Any thoughts? Thanks for your help!
Shirley
Hi, Shirley, I’m afraid I don’t really know, as I’m not there with you. It’s common for readers to say that they’ve followed everything exactly but later realize that there’s something they do regularly that they don’t think is important but it’s sabotaging their efforts. I’m afraid I can’t know what that is for you. Yeast bread will not rise if it’s not properly hydrated. If you are over-measuring flour at all, and/or undermeasuring liquid, it won’t rise. If you set it to rise in a cold location and it’s not covered properly, the dough may dry out and it won’t rise. And you mentioned tapioca starch, but not the all purpose gluten free flour blend you are using. You must use one of my recommended blends, and not your personal favorite, which is something many people do without thinking it matters. For a full discussion of flour blends, please click on that link in the recipe. The only other suggestion I have is to wait longer. Yeast bread sometimes takes much longer to rise. Overproofing is a matter of too much rise, not a matter of too much time. I’m afraid that’s really all I can offer.
Amazing! These turned out perfect although not as pretty as yours. I will be making them again for sure, they are easy to make and taste sooo good. Thank you so much xx
Hi, Angie, so glad you liked the bread! And no reason it needs to be beautiful (unless you’re taking photos of it like I am. :)
These. Are. Amazing.
I might have pulled them out of the oven a little early, but they are still amazing. Thank you!
That’s great to hear, Joanie! Thanks for letting me know.
Hi Nicole. I definitely want to try this one. I have all required ingredients. I made the baguettes from the book over the weekend and while they were visually golden and lovely, they did not have a crispness to the crust at all. Wondering what I can do to improve. A few notes, I used Better Batter/Expandex recipe. My husband was desperate for a baguette so it only had one day in the fridge. Flavor a little flat due to that. I have a hearthkit in my oven so I did a long pre-heat of the stone with thermometer to ensure temp. I also used my metal perforated baguette pan with parchment. Had a pan below and threw in ice cubes. I just posted a pic on instagram @wanderingfeast. Thanks!
Hello, I am loving your recipes, my granddaughter is gluten and dairy intolerant. How do I substitute powdered milk in the all-purpose flour mix? I have white bean flour and buckwheat flour, do you know them? Thank you very much.
You cannot use those flours in any of my all purpose gluten free flour blends, Eva. If you can’t have powdered milk, I recommend using the mock Better Batter recipe instead.
Hi, this recipe looks great. Can you please provide a picture of what the dough looks like when it has taken on a whipped appearance? Having trouble getting what that should look like and I don’t want to overwork the dough. Thank you!
Please watch the video, Fred. You can see the dough change character before it’s done in the stand mixer. I don’t have any images beyond the 5 or so in the post, and the video which contains multitudes.