This post may contain affiliate links. Please read our disclosure policy.
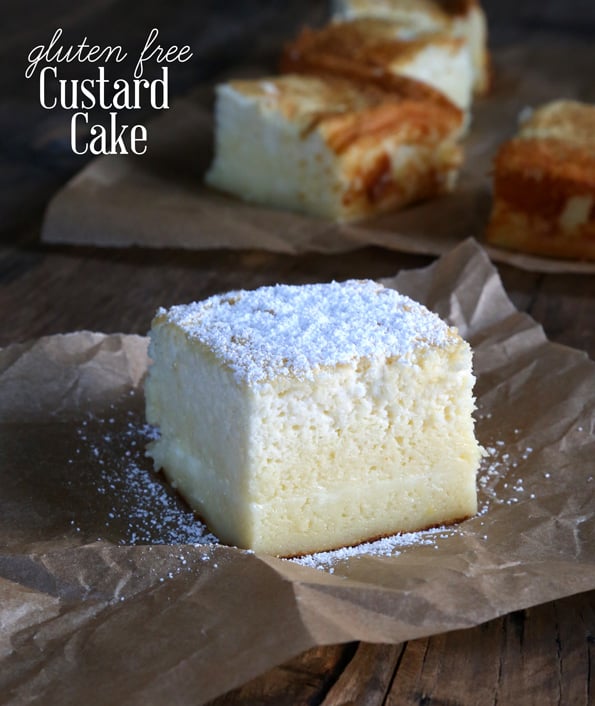
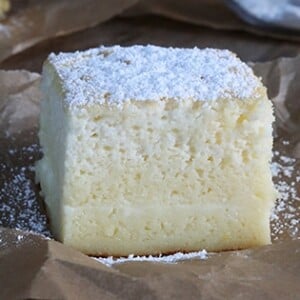
This magic gluten free custard cake creates 3 layers all by itself. The simplest ingredients make the most amazing, light and fluffy cake with a magical custard base!
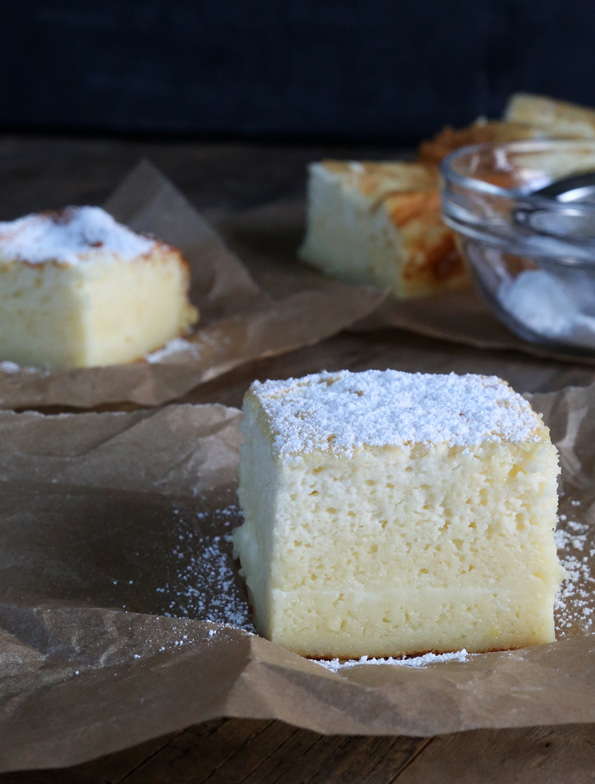
Table of Contents
- What is a gluten free magic cake?
- Why this is the best gluten free magic custard cake recipe
- GF custard cake ingredients
- Tips for making this cake perfect every time
- How to store your custard cake
- Custard cake ingredients and substitution suggestions
- FAQs
- Magic Gluten Free Custard Cake Recipe | Vanilla Sponge with Creamy Custard
What is a gluten free magic cake?
When I first saw this spongelike custard cake, I figured it was some kind of fancy pants cake that had 3 distinct layers, each baked separately and then assembled or something. (It's not like I'm one to shy away from some fancy pants recipes, like classic yeasted gluten free croissants.)
Imagine my relief (and now I hope yours!) to see that it has the simplest, most basic ingredient list ever (butter, sugar, eggs, vanilla, flour, salt). Don't you love it when that happens?
By the way, if it looks like the most tender and moist vanilla cake you've ever tasted, buckle up. That's exactly what this magic tastes-like-custard-cake is: like our gf sponge cake, but with the richness of added butter and milk, and a creaminess you never imagined.
Why this is the best gluten free magic custard cake recipe
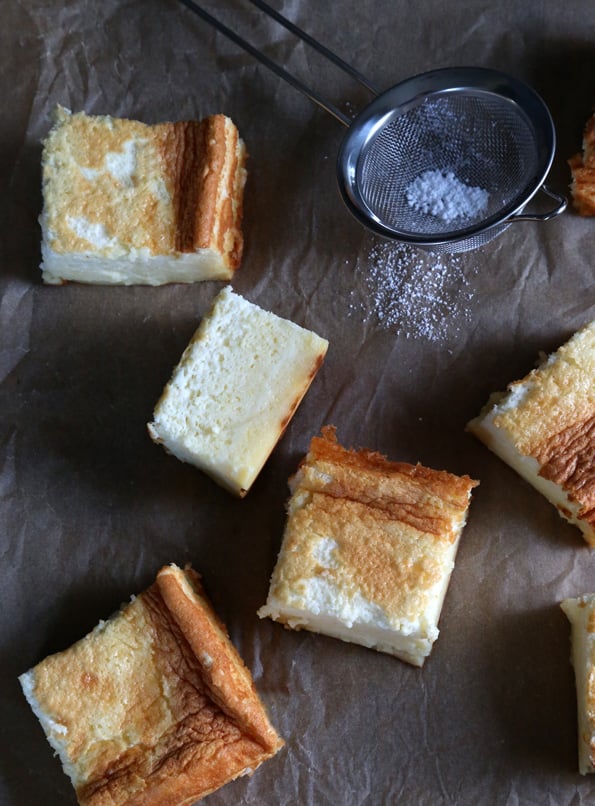
The magic of this custard cake is that it “separates” itself in the oven into 3 creamy, soft layers of cake. The bottom layer of the cake is the densest, most custardy layer. The middle is a fluffier style of custard. The top is the lightest, fluffiest cake, most similar to a sponge cake.
Every single layer of this rich, but light, vanilla cake melts in your mouth. It's an elegant-looking dessert that will impress your guests, your family, or just yourself!
GF custard cake ingredients
- Gluten free flour – I use Better Batter's classic gluten free flour blend here, and get consistently good results. It already contains xanthan gum, so be sure not to add more or your cake will be tough.
- Cornstarch – Adding some cornstarch to the flour blend gives a lighter, softer result. If you use a high starch gluten free flour blend, like Cup4Cup, just use more of that blend to replace the cornstarch.
- Eggs – There are 4 whole eggs in this recipe, and they must be carefully separated into yolks and whites. If you have any yolks at all in your whites, they won't whip into the peaks that you need to help this cake develop its unique baked texture.
- Lemon juice – The lemon juice acts as a stabilizing agent that helps the egg whites to hold their shape when they're beaten. In its place, you can use 1/2 teaspoon of cream of tartar, but I really prefer the bright flavor of the lemon juice.
- Sugar – Sugar is both a tenderizer and a sweetener. Don't reduce the amount in this lightly sweet cake!
- Pure vanilla extract – Vanilla is added for some depth of flavor since this is technically a “vanilla” cake.
- Butter – Unlike our gluten free sponge cake, which is very similar, this cake has butter that's been melted and cooled before being added to the batter. It adds a richness that sponge cake doesn't have, and helps the cake to form that dense, creamy bottom custard layer.
- Milk – Use something with plenty of fat here, like whole milk, to add richness, tenderness, and moisture.
Tips for making this cake perfect every time
Whipping those egg whites right
I don’t mean to brag, but I happen to know the most important details when it comes to beating egg whites until they’re them light and fluffy but still stable enough to handle some manhandling as you incorporate them into a cake batter.
First, you must beat the whites until they’re stiff (but not ever dry, where they start to look a bit curdled when handled) on medium-high speed—not high! Egg whites are a lot like whipping heavy cream in that way: whip them too quickly, and you have an unstable mixture.
Second, you always want to add some sort of stabilizer to the whites as you beat them (here, I used lemon juice, but sometimes I use cream of tartar or a tiny touch of mild vinegar).
Finally, if your recipes calls for sugar, beat some sugar into the whites. It creates a glossy, stiff and more stable peak.
Choosing the right baking pan
I recommend baking this cake in an 8-inch square baking pan, one that's ideally made from cast aluminum or stainless steel since a cake that's light in color and sturdy bakes evenly and never too quickly. I don't like baking this cake in a round cake pan since the flat sides help the cake rise steadily and evenly.
Give your custard cake the space to rise
This super special cake actually smells and tastes like you’re eating custard by the forkful. To get it right, other than beating the whites just right, there’s another secret to success. You need to know what to expect as it bakes.
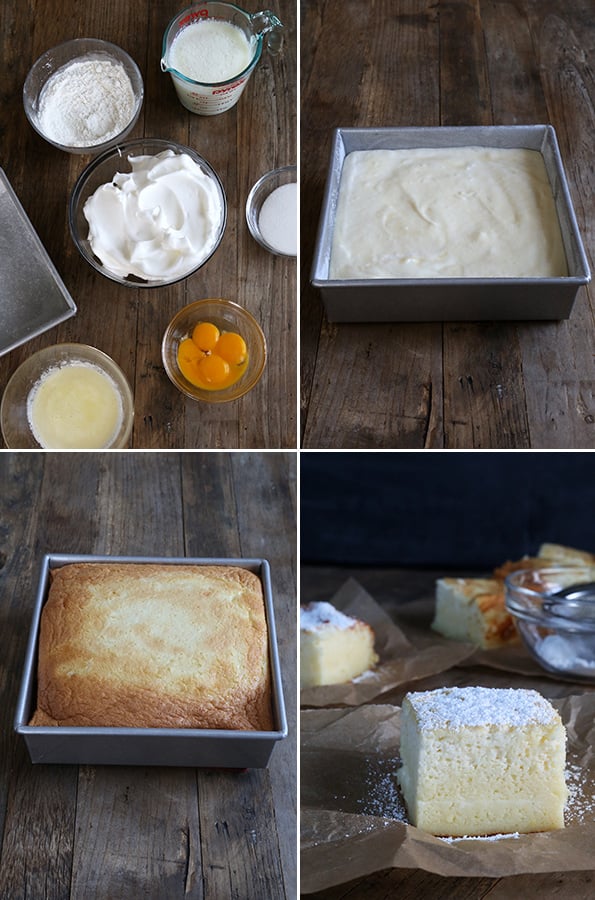
The cake bakes up pretty tall at a relatively low (325°F) oven temperature (it’s ready when the top is lightly golden brown and the center springs back when pressed gently), and then shrinks as it cools. That’s how you get that custard-like center.
It’s like you made a soufflé, and you intended that it would collapse a bit. Hey, I wonder if that is how this magically delicious vanilla cake got its start?!
Don't rush to slice the magic custard cake
Be sure to let the cake cool completely before slicing into it, or you may artificially deflate the cake. Plus, slice it into squares while it's still in the pan, rather than removing the whole, baked cake to a wire rack to cool. It's meant to cool in a contained environment, so it compresses a bit.
How to store your custard cake
Can I make magic custard cake in advance?
This cake is really best the day that it's made. Otherwise, you'll need to store it in the refrigerator and that can be drying.
Can I freeze leftover gf custard cake?
Yes, you can freeze this cake after it's made. Just let it cool completely, slice it into squares with a sharp knife, then lift each piece out and wrap it tightly in freezer-safe wrap. The pieces may shrink a bit in the freezer, and won't taste as fresh when you defrost them.
Custard cake ingredients and substitution suggestions
Dairy free custard cake
The dairy in this cake is in the form of melted butter and warm milk. In place of melted butter, I think you could use vegan butter (the best brands are Miyoko's Kitchen and Melt). In place of milk, try using an unsweetened plant-based milk like unsweetened Ripple brand (it tastes so good, and has tons of protein and good fat!) or almond milk. Avoid anything that's fat free.
Egg free custard cake?
This cake has 4 whole eggs, separated into yolks and whites. The yolks are emulsified with the other wet ingredients and provide richness; the whites are whipped into peaks that are folded into the batter and help create the fluffier layers. It would be quite difficult to replace the yolks, but the whites may be replaceable with whipped aquafaba (the brine from a can of chickpeas).
Custard cake variations
This is a really simple cake and there's a lot of fancy chemistry going on in the oven, but we can still change its flavor profile gently but effectively without ruining anything. Here are some suggestions:
- Almond gluten free custard cake: replace the vanilla extract with almond extract and sprinkle with very top of the cake lightly with some shaved, raw almonds;
- Coconut gluten free custard cake: replace the vanilla extract with coconut extract, and sprinkle with very top of the cake lightly with some dried coconut flakes;
- Lemon custard cake recipe: again use lemon extract in place of vanilla, use 1 tablespoon more freshly-squeezed lemon juice in place of 1 tablespoon of the milk, and add some finely grated lemon zest to the raw batter.
FAQs
Yes, most custard is naturally gluten free, as it's made simply with grain-free ingredients like milk, sugar, and eggs. If your custard is flavored, read the ingredients list carefully, as it may have added gluten. However, this is a custard cake, and that contains flour, which is only gluten free if you're using a gluten free recipe.
This is called a magic cake since it separates itself into relatively distinct layers, each with a unique texture and density, in the oven all by itself—like magic!
No! The batter for this simple gluten free custard cake is made in a few steps, preparing the recipe in multiple parts, but it goes into the oven in a single layer—and then separates itself!
The raw custard cake batter is very light and fluffy, and pours easily into the pan. It isn't a thin liquid, but it also isn't a thick batter that has to be painstakingly spread out in the pan either.
Your custard cake is done when it is lightly golden brown on top, springs back when pressed gently in the center with your finger, and jiggles in a controlled way when moved gently from side to side (like cheesecake). If it seems to move more loosely toward the center, it's not done yet.
You can store this cake in the pan, with the top of the pan covered, for up to one day at room temperature. After that, individual pieces should be wrapped and refrigerated or even frozen.
No, coconut flour is a truly unique flour that absorbs massive amounts of moisture during baking and can only be used in recipes that are developed with it as an ingredient, specifically. It cannot be used as an all purpose gluten free flour, which is what this recipe calls for.

Magic Gluten Free Custard Cake Recipe | Vanilla Sponge with Creamy Custard
Ingredients
- ¾ cup (105 g) all purpose gluten free flour blend, (I used Better Batter; click thru for appropriate blends)
- ¼ teaspoon xanthan gum, omit if your blend already contains it
- 2 tablespoons (18 g) cornstarch, (or try potato starch or arrowroot in its place)
- 4 (200 g (weighed out of shell)) eggs, at room temperature, separated
- 1 tablespoon freshly squeezed lemon juice
- ¾ cup (150 g) granulated sugar
- 1 tablespoon pure vanilla extract
- 9 tablespoons (126 g) unsalted butter, melted and cooled
- 2 cups (16 fluid ounces) warm milk, (about 95°F)
- Confectioners’ sugar, for dusting
Instructions
- Preheat your oven to 325°F. Grease well the bottom and sides of an 8-inch square baking dish, and set it aside. In a small bowl, place the flour, xanthan gum and cornstarch, whisk to combine well and set the bowl aside.
- In the bowl of a stand mixer fitted with the whisk attachment, or a large bowl with a handheld mixer, beat the egg whites and lemon juice on medium-high speed until frothy.
- Add about half of the granulated sugar, and continue to beat on medium-high speed until stiff, glossy (but not dry) peaks form (about 2 minutes).
If using a stand mixer.
- Transfer the egg white mixture to another bowl, set the egg whites aside and place the egg yolks, remaining sugar and vanilla in the mixer bowl.
- Beat the yolks, sugar and vanilla on medium-high speed with the paddle attachment until well-combined and pale.
If using a hand mixer.
- Set the bowl of egg whites aside. Place the egg yolks, remaining sugar and vanilla in a separate, large bowl and beat on medium-high speed until well-combined and pale.
Assemble the rest of the batter.
- No matter what mixer you're using, to the egg yolk mixture, add the melted butter, and beat to combine well.
- Add the flour mixture and the warm milk to the bowl in three parts each, beginning and ending with the flour and beating until just combined after each addition. The mixture will be thin.
- Add the beaten egg whites to the batter in three parts, whisking gently to combine after each addition until no obvious white streaks remain. The final cake batter should be light and fluffy.
- Pour the batter into the prepared pan. Place the pan in the center of the preheated oven.
- Bake until the top of the cake is lightly golden brown and springs back when pressed gently in the center (about 50 minutes). The cake will expand quite a lot in size, but will still be a bit jiggly when shaken gently back and forth.
- Remove the cake from the oven and allow to cool for at least 15 minutes in the pan before slicing into squares with a sharp knife, while the cake is still in the pan.
- The cake will shrink on all sides as it cools. Dust lightly with confectioners’ sugar before serving.
Notes
Nutrition information is automatically calculated, so should only be used as an approximation.



Devine… heavenly…my favorite ♥️
I own two of your cook books. They have helped when overwhelmed with Celiac cooking and diet.
I’m so glad to hear that, Linda. Thank you for the kind words and for sharing your experience. I’m so glad my work has been able to help when you’ve felt overwhelmed.
Really good! Not too sweet