This post may contain affiliate links. Please read our disclosure policy.
These gluten free calzones, packed with all your favorite fillings and flavors, are the ultimate comfort food. They even reheat beautifully.
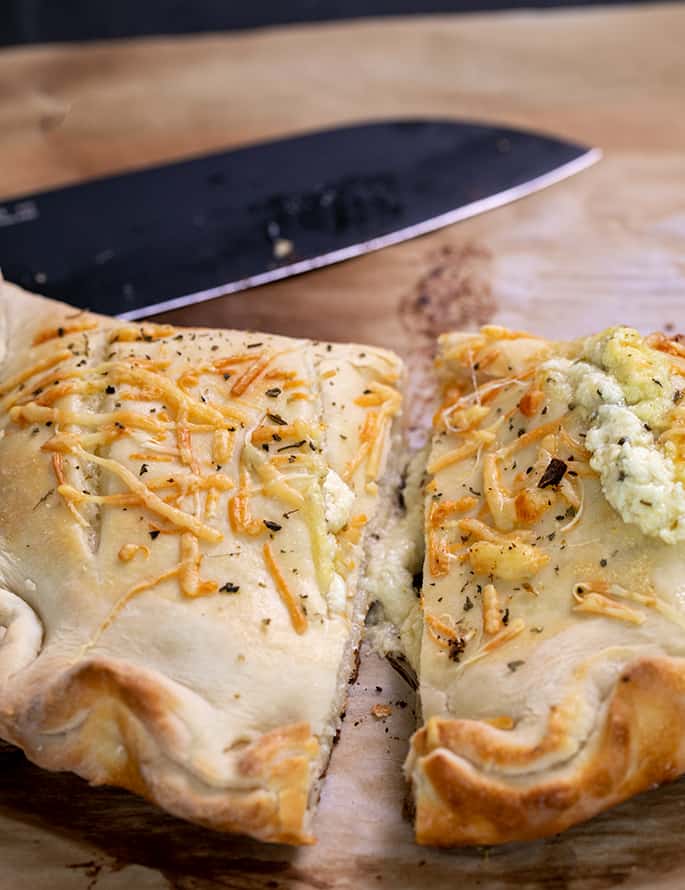
Table of Contents
- What makes this gluten free calzones recipe special?
- The gluten free pizza crust that works best
- Adding tapioca starch/flour and sweet white rice flour to the gf pizza crust
- Gluten free calzone ingredients and substitutions
- How to make the best gluten free calzones, step by step
- Authentic Gluten Free Calzones Recipe
What makes this gluten free calzones recipe special?
Once you have a reliable recipe for gluten free pizza dough, there's an argument to be made that you don't need a separate recipe for calzones.
But if you've ever seen most of the glutenfree calzones recipes out there, you'll notice that they're too pale, and the dough is just too thick.
I make calzones for my family with a just-right crust, in the just-right way. It browns deeply, and the filling shines.
When the crust is too thick, the filling gets overwhelmed. That's just not the way I remember calzones from the pizza place.
This is the way I remember calzones were. The way they should be…
The gluten free pizza crust that works best
If you're interested in the science of gluten free baking, read this section. Otherwise, keep scrolling for the recipe.
Like any bread-based recipe, using a pizza crust recipe with the right hydration ratio is super important. The hydration ratio is the ratio of water to flour weight in bread.
(Remember that 1 fluid ounce (volume) of water is equal to 1 ounce (weight) of water. And 1 ounce = 28 grams.)
The higher the hydration number, the more water is in the dough, and (typically) the softer it will be. Gluten free baking typically calls for higher hydration values overall, since our flours soak up more water in general. But there's still a range.
Our recipe for basic gluten free pizza crust would work, of course, but it would make a crust that is slightly thicker than perfect—and still drier. That recipe has a hydration ratio of about 60%.
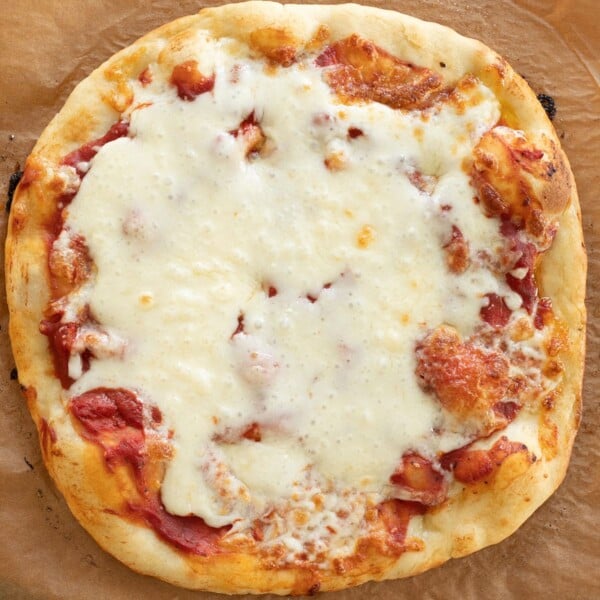
Remember that we're making a pizza pocket. Calzones are like a whole pizza, folded in half, so the crust is doubled in every bite. You don't want just a mouthful of dough.
Our recipe for NY style pizza crust is lovely, but it's way (way) too soft to shape into a calzone. Its hydration ratio is 84%. That's high.
The pizza recipe here is in the middle, at 70%. It's just right. We can shape it, and it rises beautifully in the oven—but it isn't doughy.

Adding tapioca starch/flour and sweet white rice flour to the gf pizza crust
I've always loved baking with tapioca starch/flour. Its only flaw is that it is sometimes referred to as tapioca starch, other times tapioca flour, indiscriminately.
But tapioca starch is unique among starches, as it gives gluten free baked goods stretch and bite. It also helps them crisp in the oven.
Plus, it's inexplicably Paleo, so it makes all my Paleo recipes better. By the way, yes that seems ridiculous, but I don't make the rules.
What is sweet white rice flour?
Sweet white rice flour is also known as glutinous rice flour, but as long as it's milled properly and not contaminated, is gluten free. It's made from short grain white rice.
Traditional white rice flour is milled from long grain white rice. It's the basis of all of our all purpose gluten free flour blends.
When you ask if you can eliminate it in my recipes, the answer is always no. Removing rice is like removing gluten. It turns everything completely upside down.
But sweet white rice flour, since it's made from short grain white rice, behaves a bit like tapioca starch. I've been making homemade rice noodles, and tapioca starch and sweet white rice flour seemed nearly interchangeable in that application.
Cheers to a sometime substitute for tapioca starch. Tapioca starch, I still love you very much.

Gluten free calzone ingredients and substitutions
Yeast
You cannot make this pizza dough without yeast. Try using our recipe for yeast free gluten free pizza dough in its place.
If you'd like to replace the instant yeast with active dry yeast, you'll need to use 25% more yeast (multiply the amount of instant yeast by 1.25) and hydrate the yeast separately. Then, add it to the rest of the dough ingredients.
GF Flour/tapioca starch
Be careful, as always, when selecting your all purpose gluten free flour blend. Please click the link in the ingredients list and familiarize yourself with what works and what doesn't.
I highly recommend using Better Batter (or my mock blend) in this recipe. But my other all purpose blends should work.
I've tested this recipe with superfine sweet white rice flour, gram for gram, as a replacement for tapioca starch/flour. I'm happy to report that it works quite well. Please see the full discussion above.
Gluten free, dairy free calzones
There is quite a lot of dairy in the filling, but none in the pizza crust. You can try using dairy-free versions of all the ingredients, if you have access to them.
I really like Violife dairy free cheeses, especially since they have so many available varieties. Their smoky cheeses actually taste quite similar to their conventional counterparts.
Gluten free, egg free calzones
I include an egg in the filling because it really helps hold the ricotta cheese together in the oven. Otherwise, the cheese is more likely to leak out.
If you can't have eggs, try using much less ricotta, and less filling over all. Eliminate the egg. For the egg wash, just use cream.
[mv_video doNotAutoplayNorOptimizePlacement=”false” doNotOptimizePlacement=”false” jsonLd=”true” key=”rqhcvdedianfgwyfktvb” ratio=”16:9″ thumbnail=”https://mediavine-res.cloudinary.com/v1612358437/xkue4qe4rablrd3qshbu.jpg” title=”Gluten Free Calzones” volume=”10″]
How to make the best gluten free calzones, step by step
Authentic Gluten Free Calzones
Equipment
- Stand mixer with paddle attachment
Ingredients
For the pizza crust
- 2 cups (280 g) all purpose gluten free flour blend, (Better Batter highly recommended)
- 1 teaspoon xanthan gum, omit if your blend already contains it
- ¼ cup (36 g) tapioca starch/flour, plus more for sprinkling (See Recipe Notes)
- 2 teaspoons (6 g) instant yeast, (See Recipe Notes)
- 1 ½ teaspoons (6 g) granulated sugar
- 1 teaspoon kosher salt
- 1 cup (8 ounces) warm water, (about 95°F)
- 2 tablespoons (28 g) extra virgin olive oil
For the filling
- 1 cup (248 g) ricotta cheese
- 1 (50 g (weighed out of shell)) egg, beaten
- 1 ounce grated Parmesan Cheese
- 6 ounces part skim mozzarella cheese, freshly grated
- ½ teaspoon ground dried oregano
- ⅛ teaspoon freshly ground black pepper
- Egg wash, 1 egg + 1 tablespoon water, beaten
Instructions
To make the pizza crust.
- In the bowl of your stand mixer fitted with the paddle attachment or your food processor fitted with the metal blade, place the flour, xanthan gum, tapioca starch, yeast, and sugar. Whisk to combine with a separate, handheld whisk. Add the salt, and whisk again to combine well.
- Add the water and olive oil, and mix on medium speed in your stand mixer or pulse in your food processor until the dough begins to come together. Turn the mixer to high speed or your food processor on and process for about 2 minutes.
- Transfer the dough to an oiled container with a tight-fitting lid or a greased bowl and cover tightly. Refrigerate the dough for at least an hour and up to 3 days.
To make the calzones.
- When you’re ready to make the pizza, place a pizza stone or overturned rimmed baking sheet in the oven and preheat it to 425°F.
- In a medium-size bowl, reserving a generous pinch of the grated Parmesan cheese and of the dried oregano, place the filling ingredients and mix well. Set the filling and the reserved ingredients aside.
- Remove the dough from the refrigerator, uncover it, and divide it into two equal portions. Work with one at a time, and place the other back in the container and back in the refrigerator.
- Sprinkle the dough lightly with tapioca starch, and knead it a bit until it’s smoother. Place the dough on a piece of parchment paper.
- Sprinkling with more tapioca starch as necessary to prevent sticking, roll the dough into a round about 10-inches in diameter. Keep the dough moving frequently, sprinkling lightly as necessary to prevent sticking. Dust the parchment free of any excess flour.
- Place half of the filling ingredients on one half of the 10-inch round of dough in a half-moon shape, leaving a 1-inch clean border along the edge.
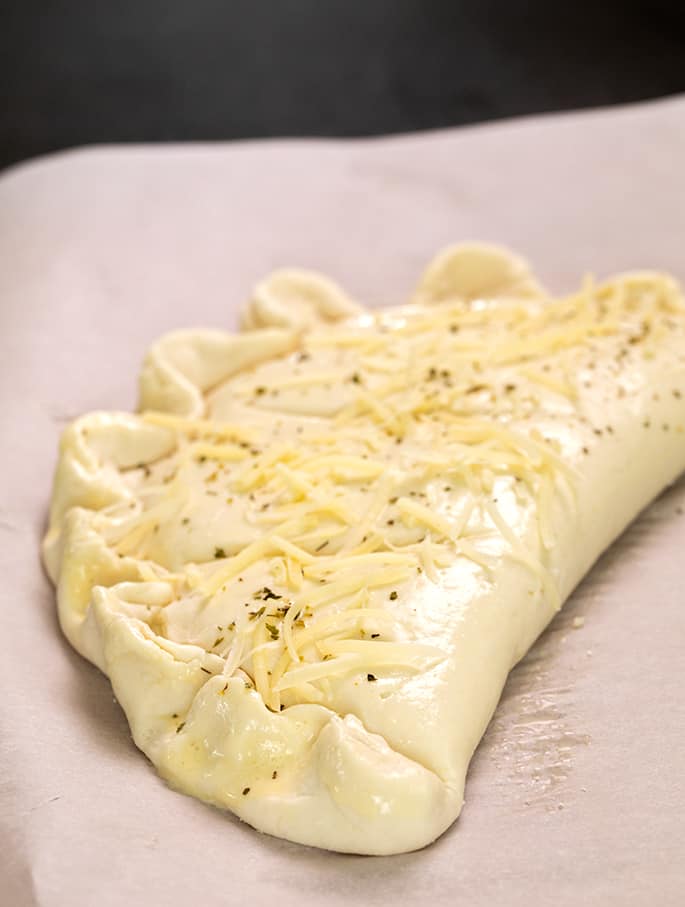
- Lift the clean half of the dough from the edge and carefully place on top of the filling. Pinch the edges to seal, pressing out any air trapped in the pocket. If you’re fancy, crimp or twist the edges like a pie.
- Using a pizza cutter or sharp knife, slice three vents in the top of the calzone. Using a pastry brush, coat the top and sides of the shaped calzone liberally with the egg wash. Sprinkle evenly with half of the reserved grated cheese and herbs.
- Repeat with the other half of the dough, remaining filling ingredients, egg wash, etc. Using a pizza peel or other large, flat surface, transfer the two calzones to the hot oven (on top of the hot pizza peel or overturned baking sheet).
- Bake for about 25 minutes, or until puffed and lightly golden brown all over. Remove from the oven, allow to set for a few minutes, then serve hot.
Make-ahead instructions
- You can cool the baked calzones completely, wrap very tightly in freezer-safe wrap, and freeze for about a month.
- Defrost mostly at room temperature, unwrap and sprinkle lightly with water, and warm in a 300°F oven before serving. Do not freeze the unbaked yeast dough, as freezing may kill the yeast.
Video
Notes
I’ve tested this recipe with superfine sweet white rice flour (also known as glutinous rice flour), gram for gram, in place of tapioca starch/flour. It works quite well. For the instant yeast.
If you only have active dry yeast, you’ll need 25% more yeast. Just multiply the grams of instant yeast called for in the recipe x 1.25 You’ll have to hydrate the active dry yeast in some of the water in the recipe first. Then, add it to the remaining water and proceed with the recipe as written.
Nutrition information is automatically calculated, so should only be used as an approximation.




Hi,
I am very new to GF baking and haven’t tried this recipe yet. But it sounds fun and a great one to make with my kids. Question… why doesn’t the dough have to be left in a warm location outside of the fridge to rise? Thank you
Hi, Sarah, the rise for gluten free calzones and pizza dough in general is for flavor development, not for bulk. Letting the dough rise in the refrigerator allows the yeast flavor to develop and the dough to absorb moisture so the dough is easier to handle. The rise is what is called “oven spring” in the very hot oven when you bake it.
Hi, Nicole, This is my next try. Could you please clarify your response to Ginger’s question re: paddle? In this recipe you use a paddle but in your book you use a dough hook. Are these interchangeable, or specific to the source of the recipe; I.e., you use the dough hook for recipes in the book because you are using a slightly different flour blend from what is found here? I do use your recommended flours and weigh all my dry ingredients. I may start weighing wet ingredients also.
Thanks for the great advice on gluten free baking. I go to your site before I try anything else.
No, they’re not interchangeable at all, Elizabeth. My comment on this recipe is only about this recipe, which doesn’t use my gluten free bread flour blend. All of the recipes in my bread book use the bread flour, which is more than slightly different. It behaves completely different, and you can’t use that blend where it isn’t called for (or vice versa). I hope that helps! If you want to know more about the bread flour blend and you own the bread book, I’d read the introductory chapters where I discuss the important differences. The recipes on the blog are almost exclusively using an all purpose gluten free flour blend since I’ve learned over the years that most blog readers aren’t willing to invest the time and money in sourcing the more complicated ingredients. If you buy the bread book, my hope is that you’re willing to dive in! I really hope that’s helpful and clarifies some of the differences.
Thanks, Nicole.
I don’t have a pizza stone so I just want to clearly that I am going to put the unbaked calzone on a preheated upside down baking sheet? Wondering why upside down? Thanks
Placing the baking sheet upside down allows air to circulate more easily as it elevates the pizza above the oven rack.
These are amazing! People talk about gluten- free recipe as being “as good as ‘regular’ “; I can honestly say these are far better! There was just enough dough and it was tender and easy to manipulate. This was my time using “cup for cup” and I’m glad I tried it; it will remain a pantry staple now that I know how good it is. I added chopped spinach – thawed from frozen and squeezed dry , mashed roasted garlic, increased the seasoning , and doubled the amount of grated parm. My first attempt wasn’t as pretty as yours but the taste was amazing. We dipped them in warm marina sauce with some extra pesto and I’m looking forward to my left-over portion for lunch today. I’m wondering if there’s any reason I couldn’t double the dough recipe? Thanks !
Hi, Meredith, I’m so glad you enjoyed the calzones! It’s definitely worth getting the right flour blends, although I wish there were more good ones and that they were more available. I would only recommend doubling the recipe if you have a large stand mixer that can handle that much dough and combine it completely and uniformly. Otherwise, just make two batches consecutively, without cleaning the mixer.
This recipe looks amazing but I don’t have a paddle mixer. Can I whisk the ingredients together and knead the dough the same way I used to (before celiac) when I would bake conventional yeast bread?
Thank you! Your GF recipes have been a lifesaver!
Hi, Ginger, I’m afraid you can’t “knead” gluten free bread dough with your hands the way you used to with conventional dough. A paddle attachment on a stand mixer is unfortunately the only way I’ve found to create the smooth texture on yeast bread dough that is necessary to shape and get a proper rise out of a cohesive dough. The recipes in my yeast bread cookbooks, Bakes Bread, use a dough hook attachment and you can make those using a handheld mixer with dough hooks attached, but that requires special ingredients, and you to buy the cookbook. I have tried so many other methods for this style of dough using these more common ingredients, but I’m afraid a stand mixer is the only way I’ve had success!
Wow I haven’t had a calzone in ten years! These were super and so easy. I added some turkey pepperoni. They came out perfectly. Thank you so much. Joann
P S I have two of your books and you are my go to source for gluten free recipes.
You’re so welcome, Joann. Thank you so much for the kind words, and for your trust and loyalty. That means so much to me.
Freezing doesn’t kill yeast. I keep my yeast in the freezer and put it directly in my recipes without bringing to room temperature. It works beautifully every time! If you notice, you can buy frozen bread dough in stores and they thaw/bake perfectly without any problems.
Yes, Wanda, it generally doesn’t, but if your freezer takes a dip in temperature, it might. I have run into problems freezing raw yeast dough, so when anyone asks my opinion, I give it to them, based on my experience.
Absolutely delicious!! I haven’t had a proper calzone since being diagnosed with Celiac. This dough is PERFECT (and easy!). We don’t have a stand mixer, so we used a ninja blender dough blade and it worked seamlessly! Thank you so much for all your recipes– we try a new one each week and they’re all perfection
That’s interesting about the ninja blender having a dough blade, Heidi! I don’t think ours does, but I’ll have to check that out. So glad you enjoyed the calzones, and thank you for the kind note!
Made the calzone dough last weekend, I didn’t have any of the fillings needed (and couldn’t go to the grocery store). Sorry I went rogue, but they came out so well. I’m in awe of your ability to develop the perfect dough 👏🏻
I promise I’m not the baking police! Food bloggers routinely get blamed for recipes that don’t work when the recipe isn’t made as written. So glad it all turned out well, and that you enjoyed the dough!
Amazing! I repurposed gf pizza dough to make calzones in the past but I ended up wishing I had just made more pizza instead. I’m glad there are professionals out there who solve the problems us hobbyists are sometimes too lazy to tackle! I used violife smoked provolone and ricotta made from crumbled pressed tofu, cashew cream, lemon juice, and a little tapioca starch to keep it together and add a bit of stretch.
That’s exactly what I’m here for, Mimi! I’m so glad you enjoyed your calzones. Thanks for sharing your dairy free fillings!