This post may contain affiliate links. Please read our disclosure policy.
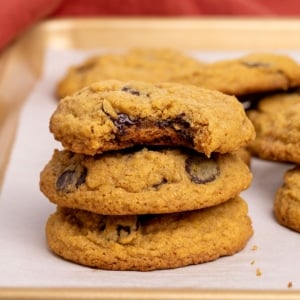
These gluten free pumpkin chocolate chip cookies are packed with pumpkin flavor from concentrated pumpkin puree and pumpkin pie spice. Thick, chewy, with lacy edges and rich, buttery centers.

Why this recipe works
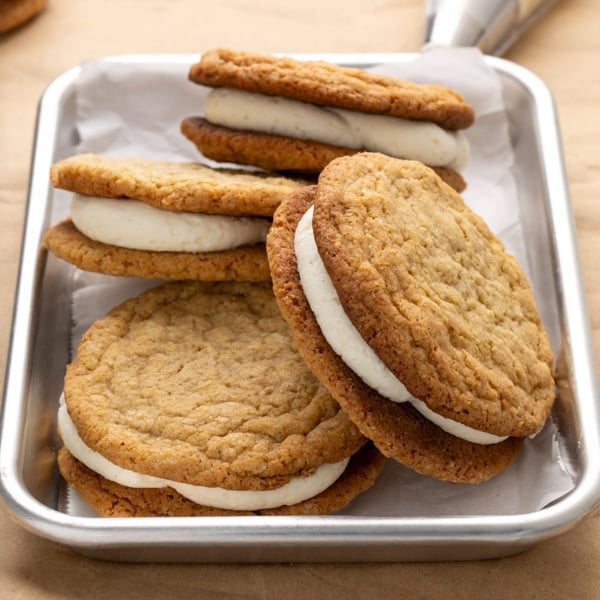
Baking with pumpkin usually means some tender, cakey recipes that we all love, like our gluten free pumpkin roll and gluten free pumpkin pie. And every year, I still make our pillow-soft classic gluten free pumpkin cookies with the thin layer of white icing.
But I've worked hard over the years to perfect this recipe for pumpkin chocolate chip cookies to give them the crisp edges and chewy centers of a classic gluten free chocolate chip cookie. I added more butter, reduced the flour, and blotted much of the moisture from classic Libby's canned pumpkin puree.
The result is a crispy-edged, chewy cookie with a buttery flavor that melts in your mouth, and still has tons of pumpkin flavor. They may look much like regular cookies, but the taste and aroma is unmistakably pumpkin.

Ingredients explained
All the ingredients in these cookies have a specific purpose. Here's what each of them contributes to cookies with the perfect taste and texture:
- Butter: Adds flavor, moisture, crisp edges, and when beaten with the sugars, lightens the texture of the middle of the cookie.
- Brown sugar: Adds depth of flavor, sweetness and tenderness. Also adds moisture for chewy cookies.
- White sugar: Adds tenderness, sweetness, and that lacy texture on the edges as white sugar melts more quickly in the oven.
- Pumpkin spice: These is a blend of the warm spices that smell and taste like pumpkin to us. Try making your own by combining 1 teaspoon ground cinnamon, 1/2 teaspoon ground ginger, 1/4 teaspoon ground allspice, 1/4 teaspoon ground cloves, and 1/8 teaspoon ground nutmeg.
- Pumpkin puree: We remove the excess moisture from the canned pumpkin puree to add pumpkin flavor without making the cookies cakey, like our classic iced gluten free pumpkin cookies.
- Egg yolks: Using just egg yolks adds richness and some structure without the extra moisture in the whites that would make the cookies puffy.
- Gluten free flour: There is almost as much butter in this recipe as there is gluten free flour, but it's still important to choose a high-quality blend. Use Better Batter's classic blend, Nicole's Best multipurpose (and add xanthan gum), or Bob's Red Mill 1-to-1 gluten free flour (just add another 1/8 teaspoon xanthan gum).
- Baking soda: Helps with browning in the oven.
- Salt: Balances sweetness and brightens all flavors.
- Chocolate chips: I only add 4 ounces of chips for just a touch of chocolate flavor that doesn't overpower the buttery pumpkin flavors. You can add up to 6 ounces if you prefer.

How to make gluten free pumpkin chocolate chip cookies
1. Prepare the dry ingredients and pumpkin puree
Place the gluten free flour blend (including xanthan gum), baking soda, salt, and pumpkin pie spice) in a small bowl, and whisk to combine.
Spread pumpkin puree on a plate in a thin, even layer.
Place regular kitchen paper towels on top of the puree on the plate and apply even, relatively gentle pressure. The towels will absorb excess moisture from the puree. Once they're saturated, discard them.
Repeat the process, layering the towels two at a time at the start, until the puree is reduced to about 2 ounces from 4 ounces. The puree should seem crumbly, rather than fluffy and puffy.


2. Make the cookie dough
Cream butter, brown sugar and white sugar until light and fluffy to create some air pockets and help the sugar dissolve a bit. Beat in the egg yolks, blotted pumpkin puree, and vanilla extract.
Mix in the whisked dry ingredients by hand, with a large mixing spoon. The wet mixture may seem like it won't moisten all of the dry ingredients, but keep pressing down with the back of the spoon until you form a thick cookie dough. You can use the mixer for this step, but the cookie dough is so thick that it can be difficult. Mix in the chocolate chips.


3. Scoop the cookie dough and bake at 350°F
Don't chill the cookie dough, since you want the cookies to spread quickly and evenly in the oven.
Scoop the cookie dough into mounds of 1 1/2 to 2 tablespoons of dough onto lined baking sheets about 1 1/2 to 2 inches apart.
Don't flatten the cookie dough at all. It will melt in the oven into rounds.
Bake at 350°F for 15 minutes, or until the edges and undersides are lightly golden brown and the cookies are set in the center.
Let them cool on the baking sheets. They will wrinkle and flatten a bit as they cool, but will stay thick.


My Pro Tip
Expert tips
Use butter at cool room temperature
When you're using a mixer to cream butter with sugars, use butter that is at “cool room temperature,” which means about 65°F/18°C. If your butter is greasy to the touch when you begin, your cookies will spread more than you intend. To raise the temperature of refrigerated butter more quickly, chop it, scatter it on the wrapper, and let it sit at room temperature for 15 to 20 minutes.
Weigh your drained pumpkin puree
Libby's brand pumpkin puree has the most consistently rich puree without too much moisture, but there is still variation. You should be able to start off with 4 ounces of pumpkin puree, blot it with paper towels to reduce it down to 2 ounces. But if your puree seems very wet, start with more puree, blot it, and measure out 2 drained ounces to add to the cookie dough.
Don't chill the cookie dough
To make thick and chewy cookies with lacy edges, begin with cookie dough at room temperature so the mounds of raw dough begin to melt in the oven right away during baking. To make the cookie dough ahead of time, refrigerate it after shaping or even freeze it, but let it come to cool room temperature before baking.

substitutions
Ingredient substitutions
Dairy free
If you can't have dairy, you can replace the unsalted butter in this recipe with vegan butter. Miyoko's Creamy and Melt brands are my favorite. Violife vegan butter in block form is also very good. The cookies may spread a bit more, but they should still be delicious.
Avoid Earth Balance buttery sticks, which have too much moisture, or any other butter substitute that comes in a tub. Be sure to use dairy free chocolate chips.
Egg free
There are two egg yolks in this recipe, and I generally don't have success replacing egg yolks with a common egg replacer like chia eggs or flax eggs. Since egg yolks mostly add richness, you can try replacing the two yolks with 2 more tablespoons of butter.

Gluten Free Pumpkin Chocolate Chip Cookies Recipe
Equipment
- Handheld mixer Stand mixer fitted with paddle attachment
Ingredients
- 1 ½ cups (210 g) all purpose gluten free flour blend, (See Recipe Notes)
- ⅜ teaspoon xanthan gum, omit if your blend already contains it
- ½ teaspoon baking soda
- ¼ teaspoon kosher salt
- 2 teaspoons pumpkin pie spice blend, See Recipe Notes
- 4 ounces pure pumpkin puree
- ¾ cup (150 g) granulated sugar
- ½ cup (109 g) packed light brown sugar
- 12 tablespoons (168 g) unsalted butter, at cool room temperature
- 2 (50 g) egg yolks, at room temperature
- 1 teaspoon pure vanilla extract
- 4 ounces semi-sweet chocolate chips
Instructions
- Preheat your oven to 350°F. Line rimmed baking sheets with unbleached parchment paper and set them aside.
- In a small bowl, place the flour, xanthan gum, baking soda, salt, and pumpkin pie spice, and whisk to combine well. Set the bowl aside.
- Place the pumpkin puree on a small, flat plate and spread it into a thin, even layer. Using paper towels, blot the puree to absorb all excess moisture, pressing down gently and evenly. You will use and discard about 8 layers of paper towel, two layers at a time.
- Keep blotting until the volume of the puree has reduced by nearly half (it should ultimately weigh about 2 ounces). There will still be more moisture if you continue to press with a paper towel, but the puree should darken in color and its texture should go from fluffy to almost crumbly.
- Place the granulated sugar, brown sugar and butter in a large mixing bowl, and beat with a handheld mixer (or in the bowl of a stand mixer fitted with the paddle attachment) for about 5 minutes or until light and fluffy.
- To the butter and sugars mixture, add the dried pumpkin puree, egg yolks, and vanilla, and beat until fully combined.
- Add the dry ingredients and mix by hand with a spoon. Press the mixture with the back of the bowl of the spoon to get all of the dry ingredients moistened by the wet ingredients. The dough may seem too dry at first to absorb all the dry ingredients, but keep pressing and it will come together.
- Add the chocolate chips. Mix until they’re evenly distributed throughout the cookie dough.
- Using a medium-size ice cream scoop or two spoons, place rounded portions of the dough (each about 2 tablespoonsful) on the prepared baking sheet, about 1 1/2-inches apart.
- Place the baking sheet in the center of the preheated oven and bake until the cookies are lightly golden brown around the edges and set in the center, about 15 minutes.
- Remove from the oven and allow to cool on the baking sheet until firm, about 10 minutes.
Video
Notes
Nutrition
Nutrition information is automatically calculated, so should only be used as an approximation.
Storage instructions
These cookies will maintain their lacy edges and chewy center texture at room temperature for at least 3 days. Even if I don't remember to seal them in a container with a lid carefully, they still taste great.
Freezing
For longer storage, you can always freeze the baked cookies. Place them in a sealed, freezer safe container, and remove as much air as possible since that leads to freezer burn. They'll stay fresh for up to 3 months.
You can also freeze the raw cookie dough. Shape it into mounds of dough, and freeze them in a single layer on a baking sheet or other flat surface. Once they're frozen, pile them into a freezer safe bag, seal out air, and freeze raw for up to 2 months.
Refreshing instructions
For frozen baked cookies, defrost them at room temperature or in the microwave for 15 seconds (no longer to preserve texture).
For frozen raw cookie dough, place them on a lined baking sheet 1 1/2 inches apart as instructed in the recipe card, and let them defrost to cool room temperature while the oven preheats. If they're too cold during baking, they'll spread a lot less.
FAQs
If you don't blot out the moisture from the pumpkin puree, your cookies will still be delicious, but their texture will be puffy and very uniform. You should flatten the mounds of raw dough into disks, because they won't spread much, otherwise.
Yes! You can even leave out the chocolate chips entirely, and just make thick and chewy pumpkin cookies. You can also replace them with a different type of dry mix-in, like chopped pecans, walnuts, or almonds for a crunchier cookie.
No! Our classic gluten free pumpkin cookies with a thin layer of white icing are the kind of cakey cookies that you sink your teeth into. These are thick and chewy, with slightly crisp edges and a satisfying chewy texture all the way to the center.
Yes! You can cover the bowl of prepared cookie tightly with plastic wrap and store the cookie dough in the refrigerator for up to 3 days. When you're nearly ready to bake, let the dough sit at room temperature, still covered so it doesn't dry out, until the dough reaches cool room temperature. Then, shape and bake as directed.
You can try using Lankato brand monkfruit alternative sugars for the brown sugar and white sugar. They do tend to be drying, though, so you may need to add some water to the cookie dough, or leave a bit more moisture in the pumpkin puree to account for it.
The best way to remove moisture from the pumpkin puree without its sticking to anything is to blot it with disposable paper towels to absorb the moisture one or two layers of towel at a time. It usually takes about 8 layers of paper towels, which sounds like a lot but only takes about 5 minutes total.
You can try using coconut sugar instead of brown sugar, by weight. It has less moisture than brown sugar, and it's very grainy. I recommend processing the coconut sugar lightly in a food processor or blender to soften it, and watching the texture to see if you need to moisten it with a bit of water to match the texture of brown sugar.
Most likely, you didn't remove enough moisture from the pumpkin puree before adding it to the cookie dough. It can be tricky because your paper towel will never come up dry after you blot, but the puree will take on a crumbly, rather than fluffy, texture when it's done.
You can try roasting sweet potatoes or butternut squash until very soft, removing the skins, and making a puree. It will have more moisture than canned Libby's pumpkin puree, so measure the weight of the puree after blotting and make sure you get about 2 ounces.



How did they change the cup4cup blend? Did they remove the milk powder? I have noticed that it is not in the ingredient list any more but afraid to try it as I am allergic to dairy.
Yes, they changed the blend by removing the milk powder, but also just by changing the formula entirely. I’m afraid I can’t recommend it any longer. If you’re allergic to dairy, I’d go with Better Batter’s original blend.
Can the recipe be doubled?
Sure, Carissa. You can make 32 cookies instead of 16. Just double the yield in the recipe card.