
This post may contain affiliate links. Please read our disclosure policy.
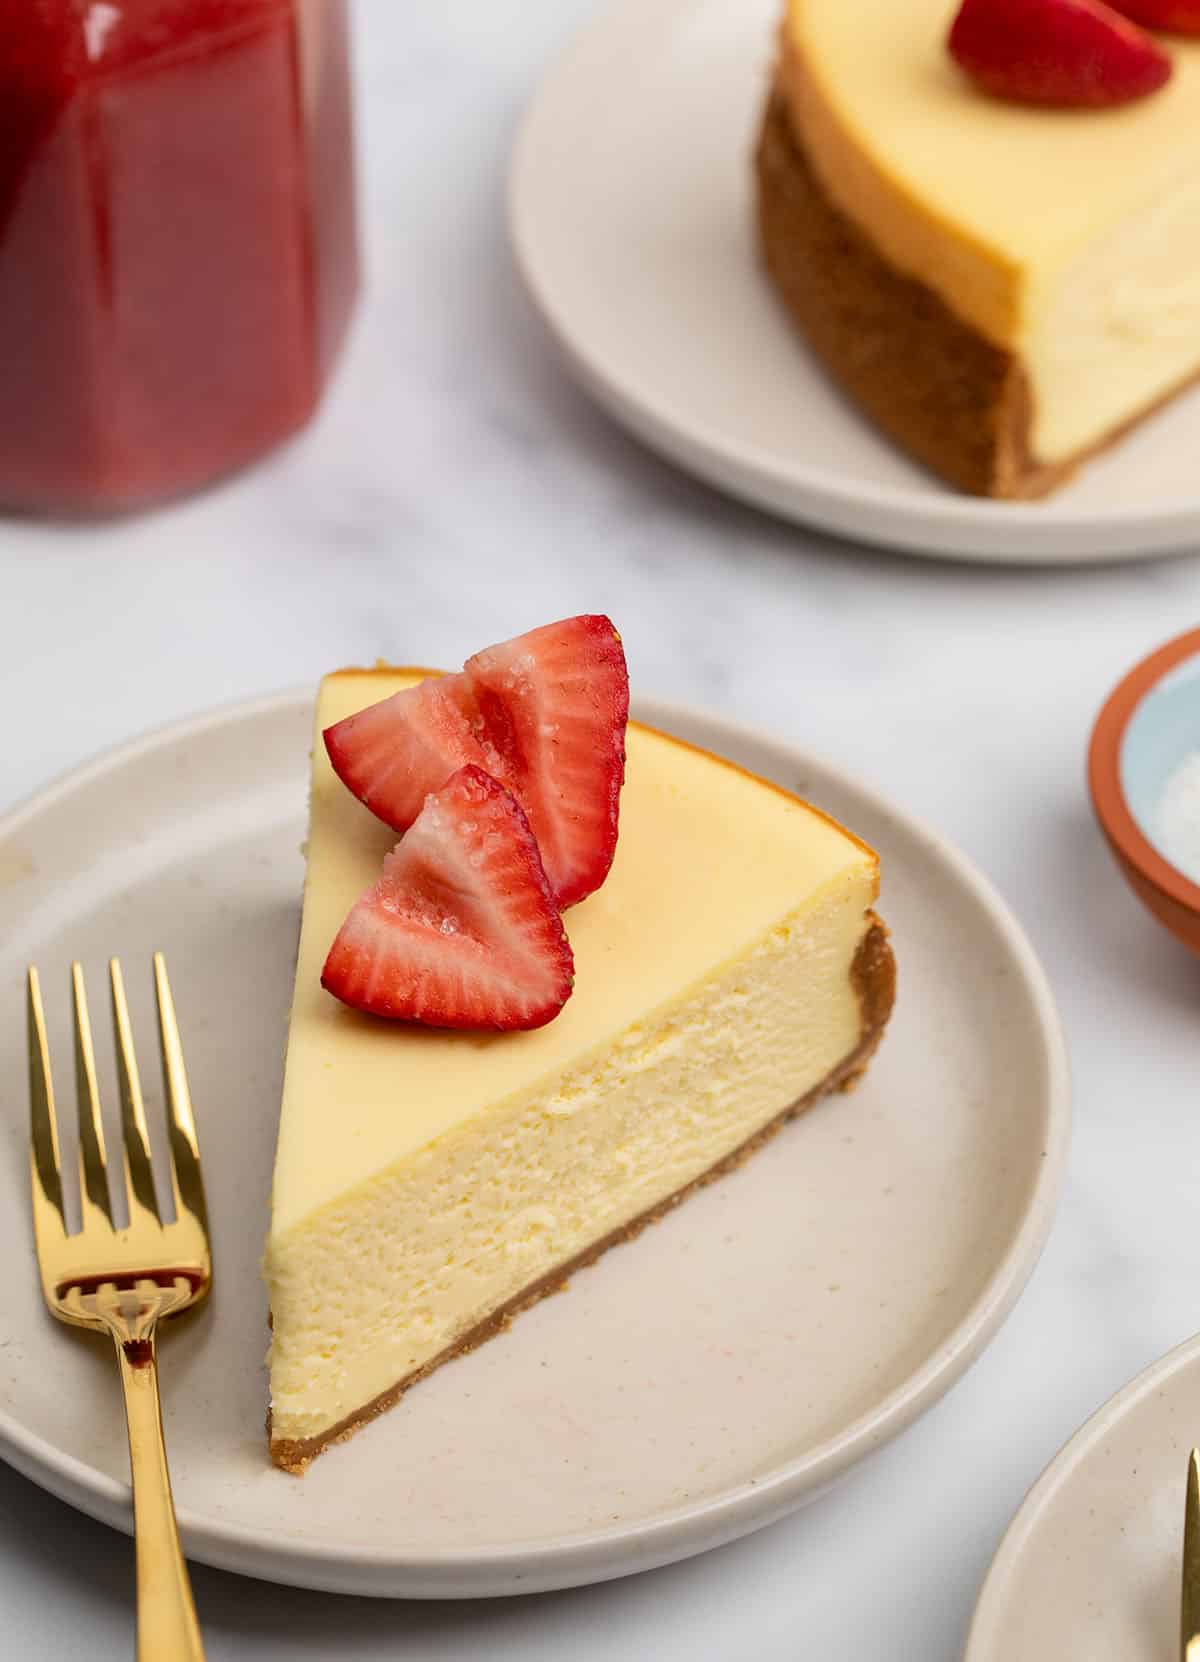
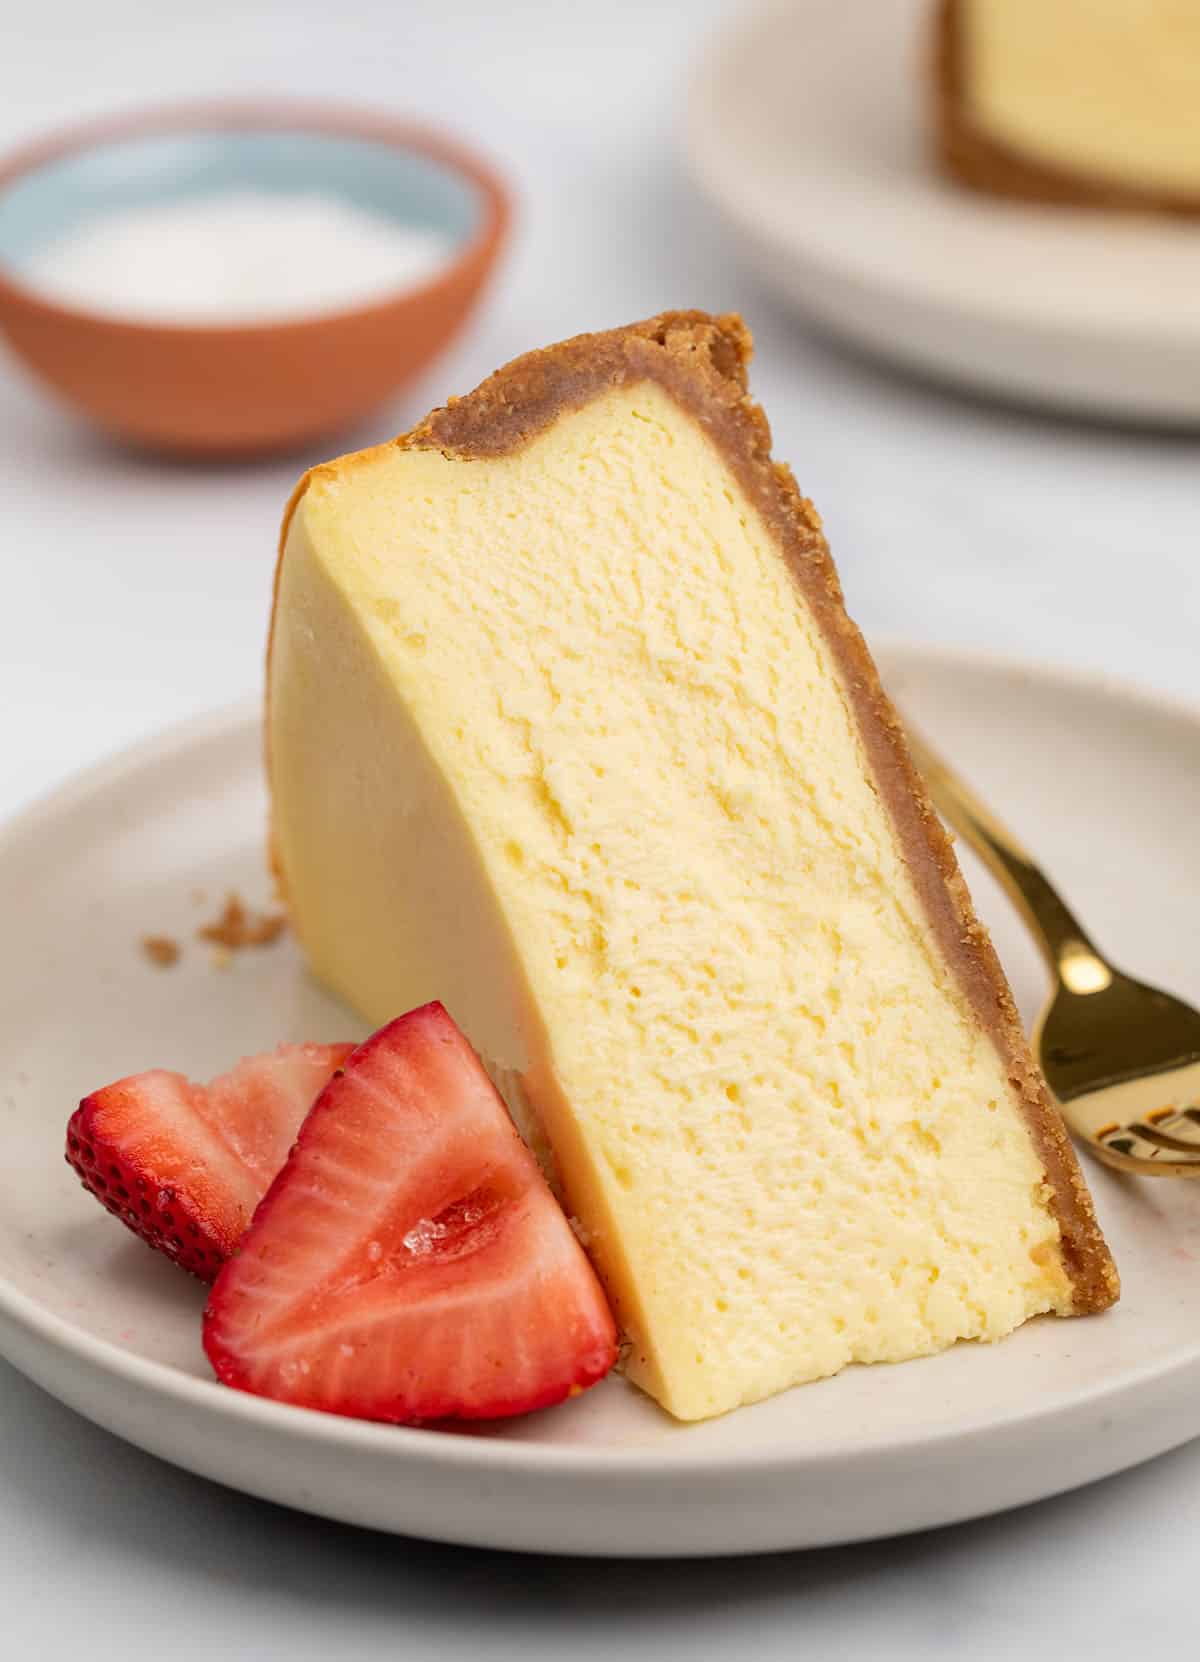
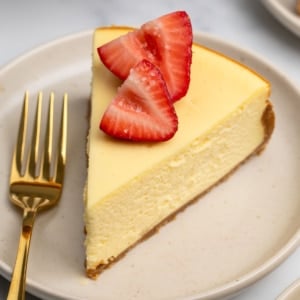
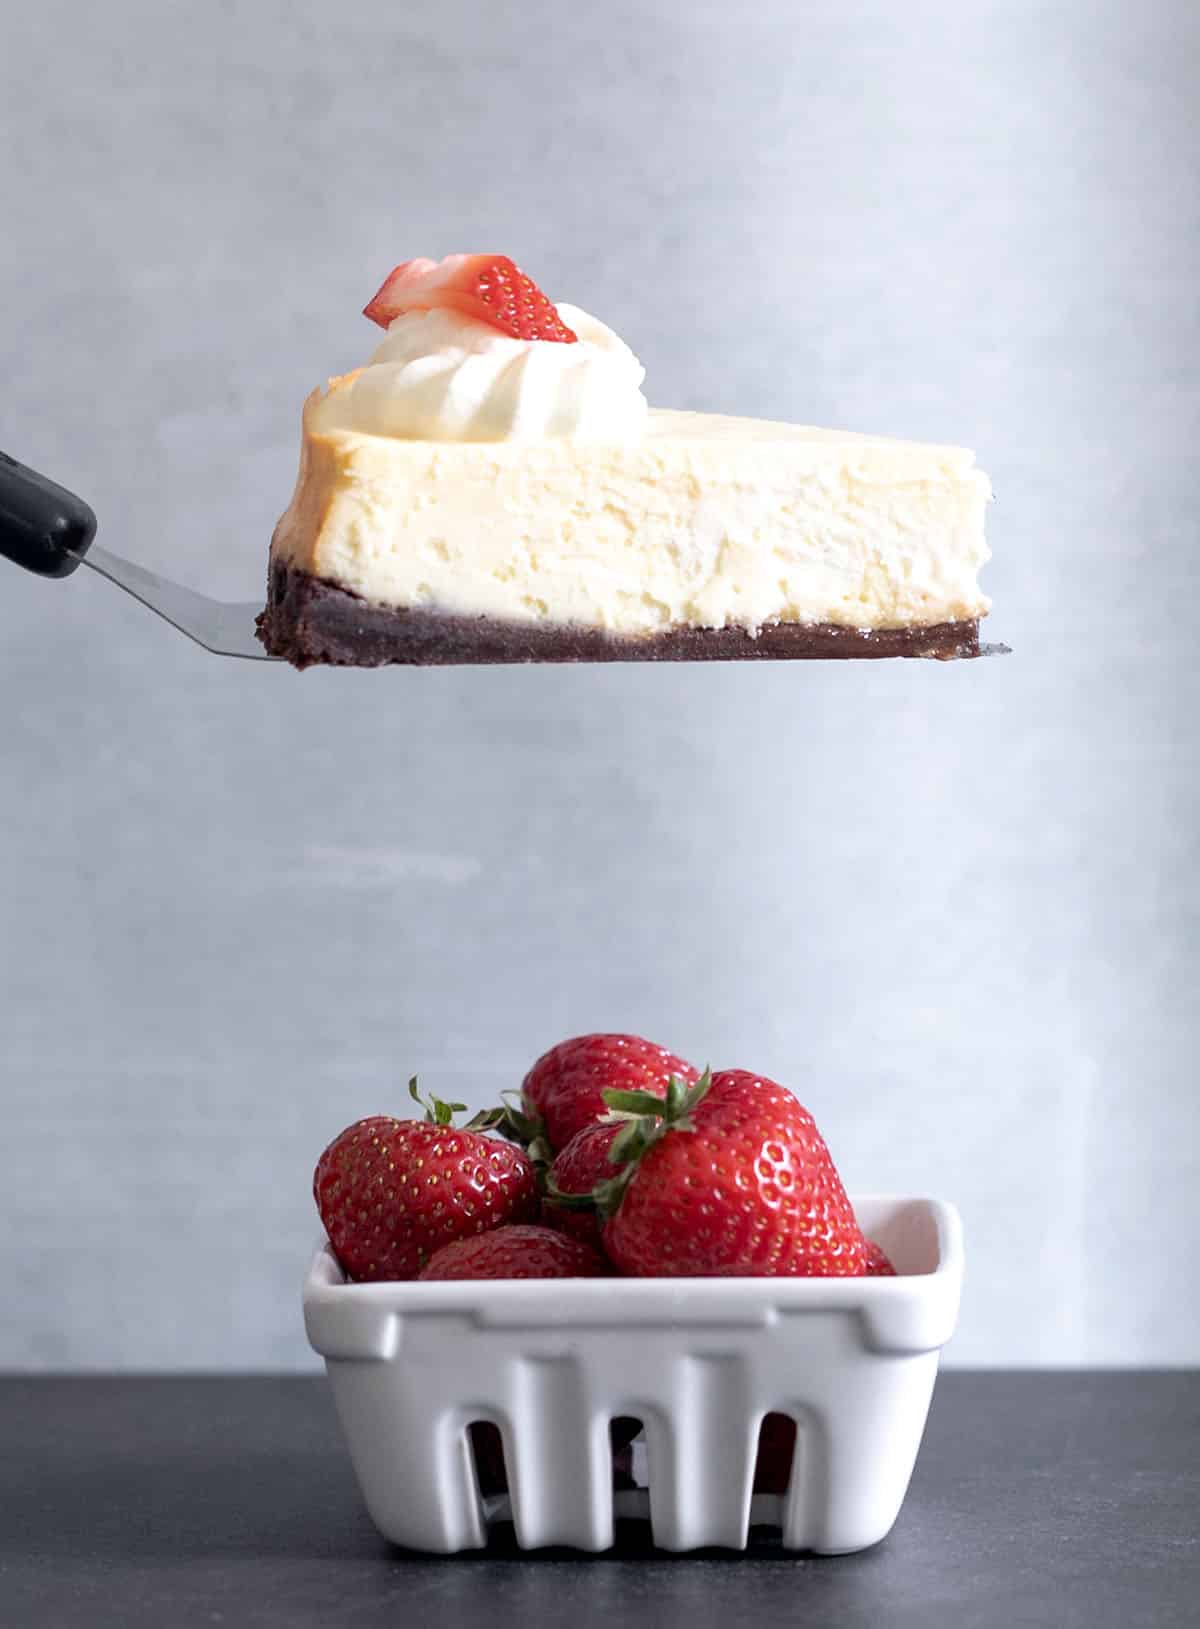
This easy, classic gluten free cheesecake uses just cream cheese, sugar, and eggs. You can make it with a buttery graham cracker crust—or skip the crust altogether. Plus, it works great in the oven or Instant Pot!
If you’ve ever been nervous about making cheesecake because it seems complicated, don’t worry. I’ll show you how to skip the fancy water bath and still get a smooth, crack-free cheesecake every time!
Why this recipe works
This cheesecake is creamy, smooth, and packed with classic flavor—all without any complicated steps or a water bath.
It uses just six simple ingredients and a quick 2-ingredient gluten-free graham cracker crust, making it an easy, reliable dessert for any occasion.
A touch of cornstarch helps the filling set perfectly without being too heavy, so it’s a crowd-pleaser every time.
“First time making a gluten free cheesecake and it was amazing!! I used gluten free crust as well and added a fruit topping. Chefs kiss thanks for the recipe!!”
Recipe ingredients
Making a classic cheesecake filling is simple—and gluten free when you use gluten-free cookie crumbs for the crust. Here’s what each ingredient does:
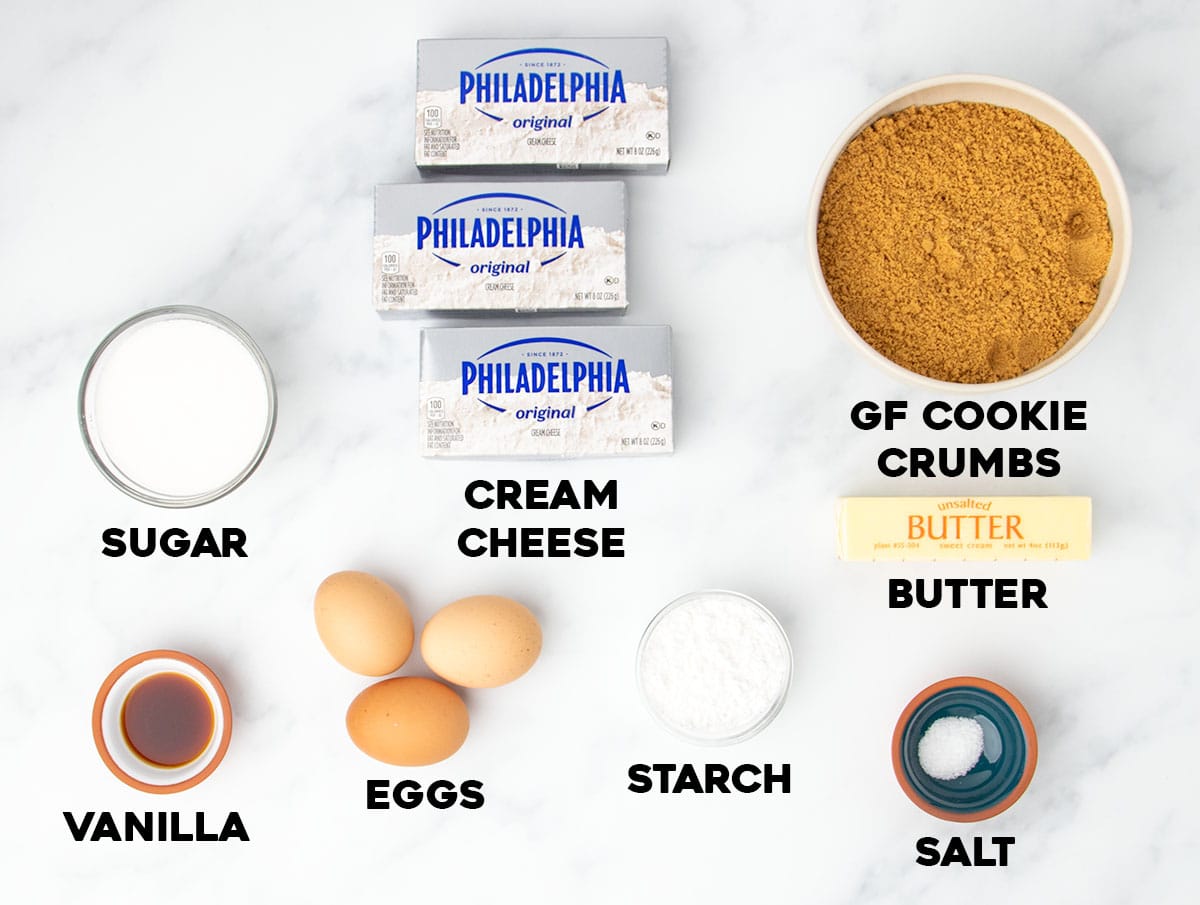
- Cream cheese: Use full-fat for the best flavor. Let it soften at room temperature so it blends smoothly.
- Granulated sugar: Adds the perfect touch of sweetness to balance the tangy cream cheese.
- Cornstarch: Just a bit to help the filling firm up and set perfectly.
- Salt: A small pinch boosts all the other flavors.
- Vanilla extract: Gives that rich, classic cheesecake flavor.
- Eggs: Act as a thickener to create the dense, creamy texture you want.
- Butter: Binds the cookie crumbs and adds a rich, buttery taste to the crust.
- Gluten-free cookie crumbs: Crushed gluten free graham crackers make a crispy, flavorful crust base.
How to make gluten free cheesecake (step by step photos)
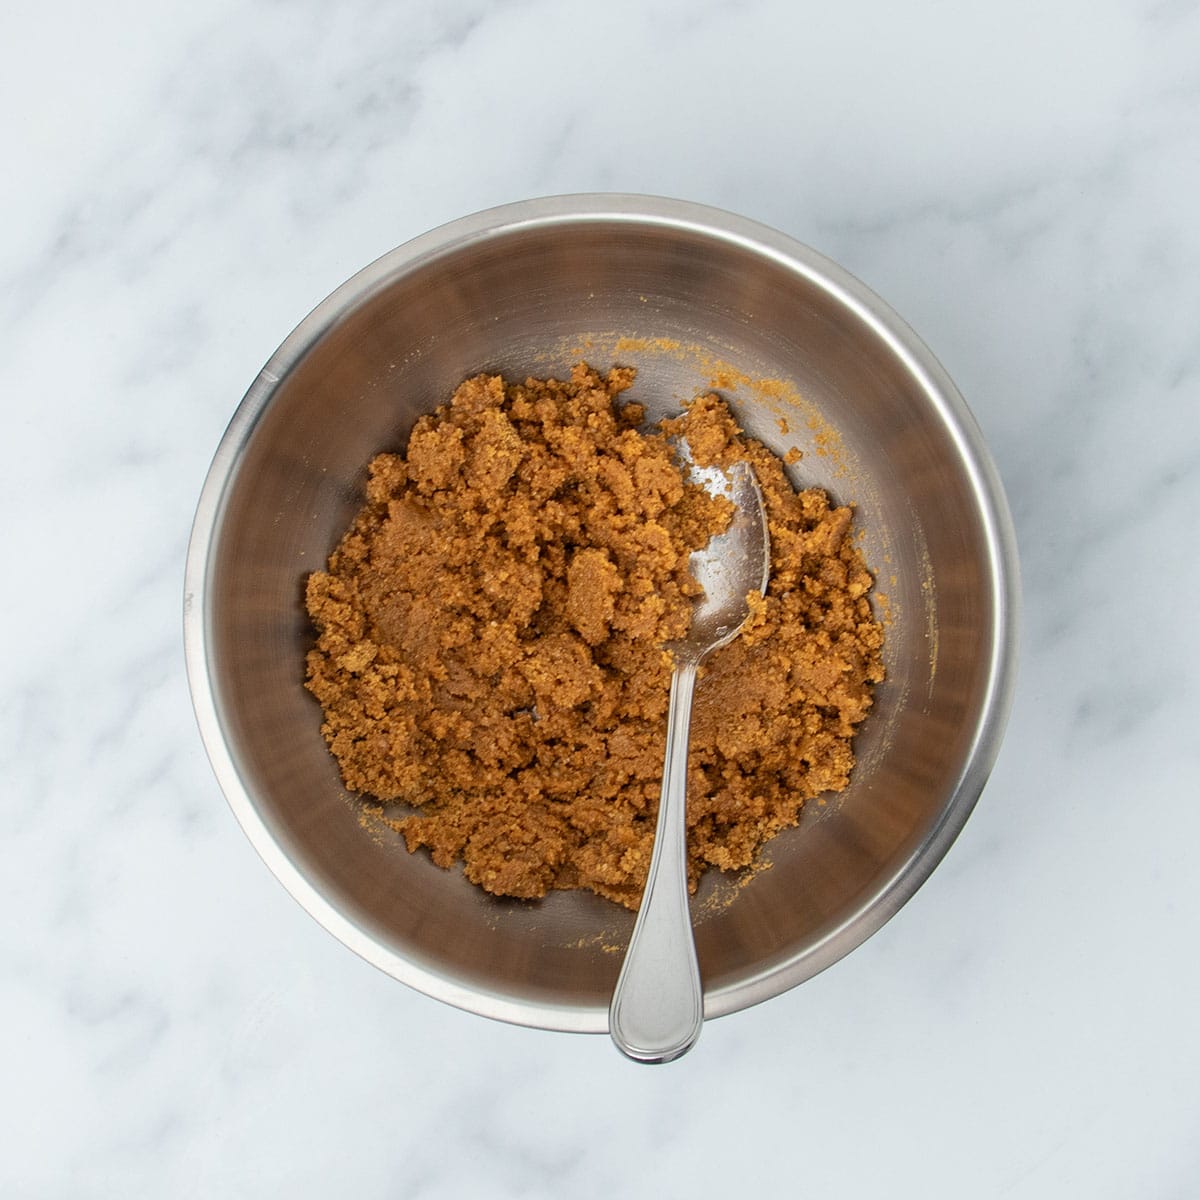
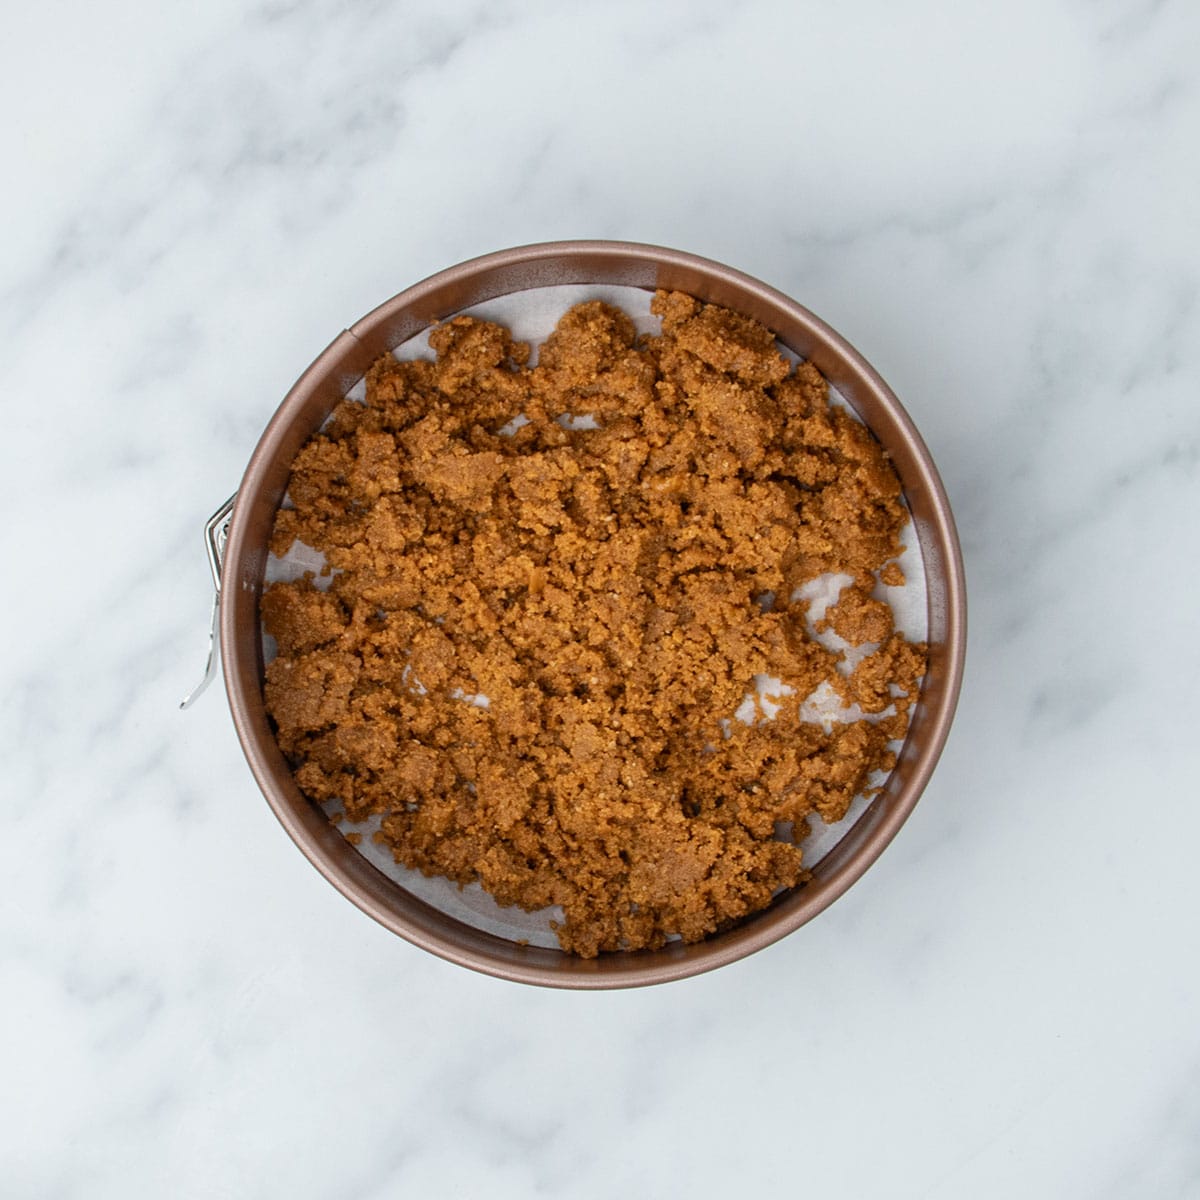
Make the crust
To make a gluten free cheesecake, start by crushing about 10 rectangles of homemade gluten-free graham crackers (or one package of store-bought) into fine crumbs. Mix with melted butter, then press the mixture firmly into the bottom and halfway up the sides of a lined 8- or 9-inch springform pan.


Make the filling
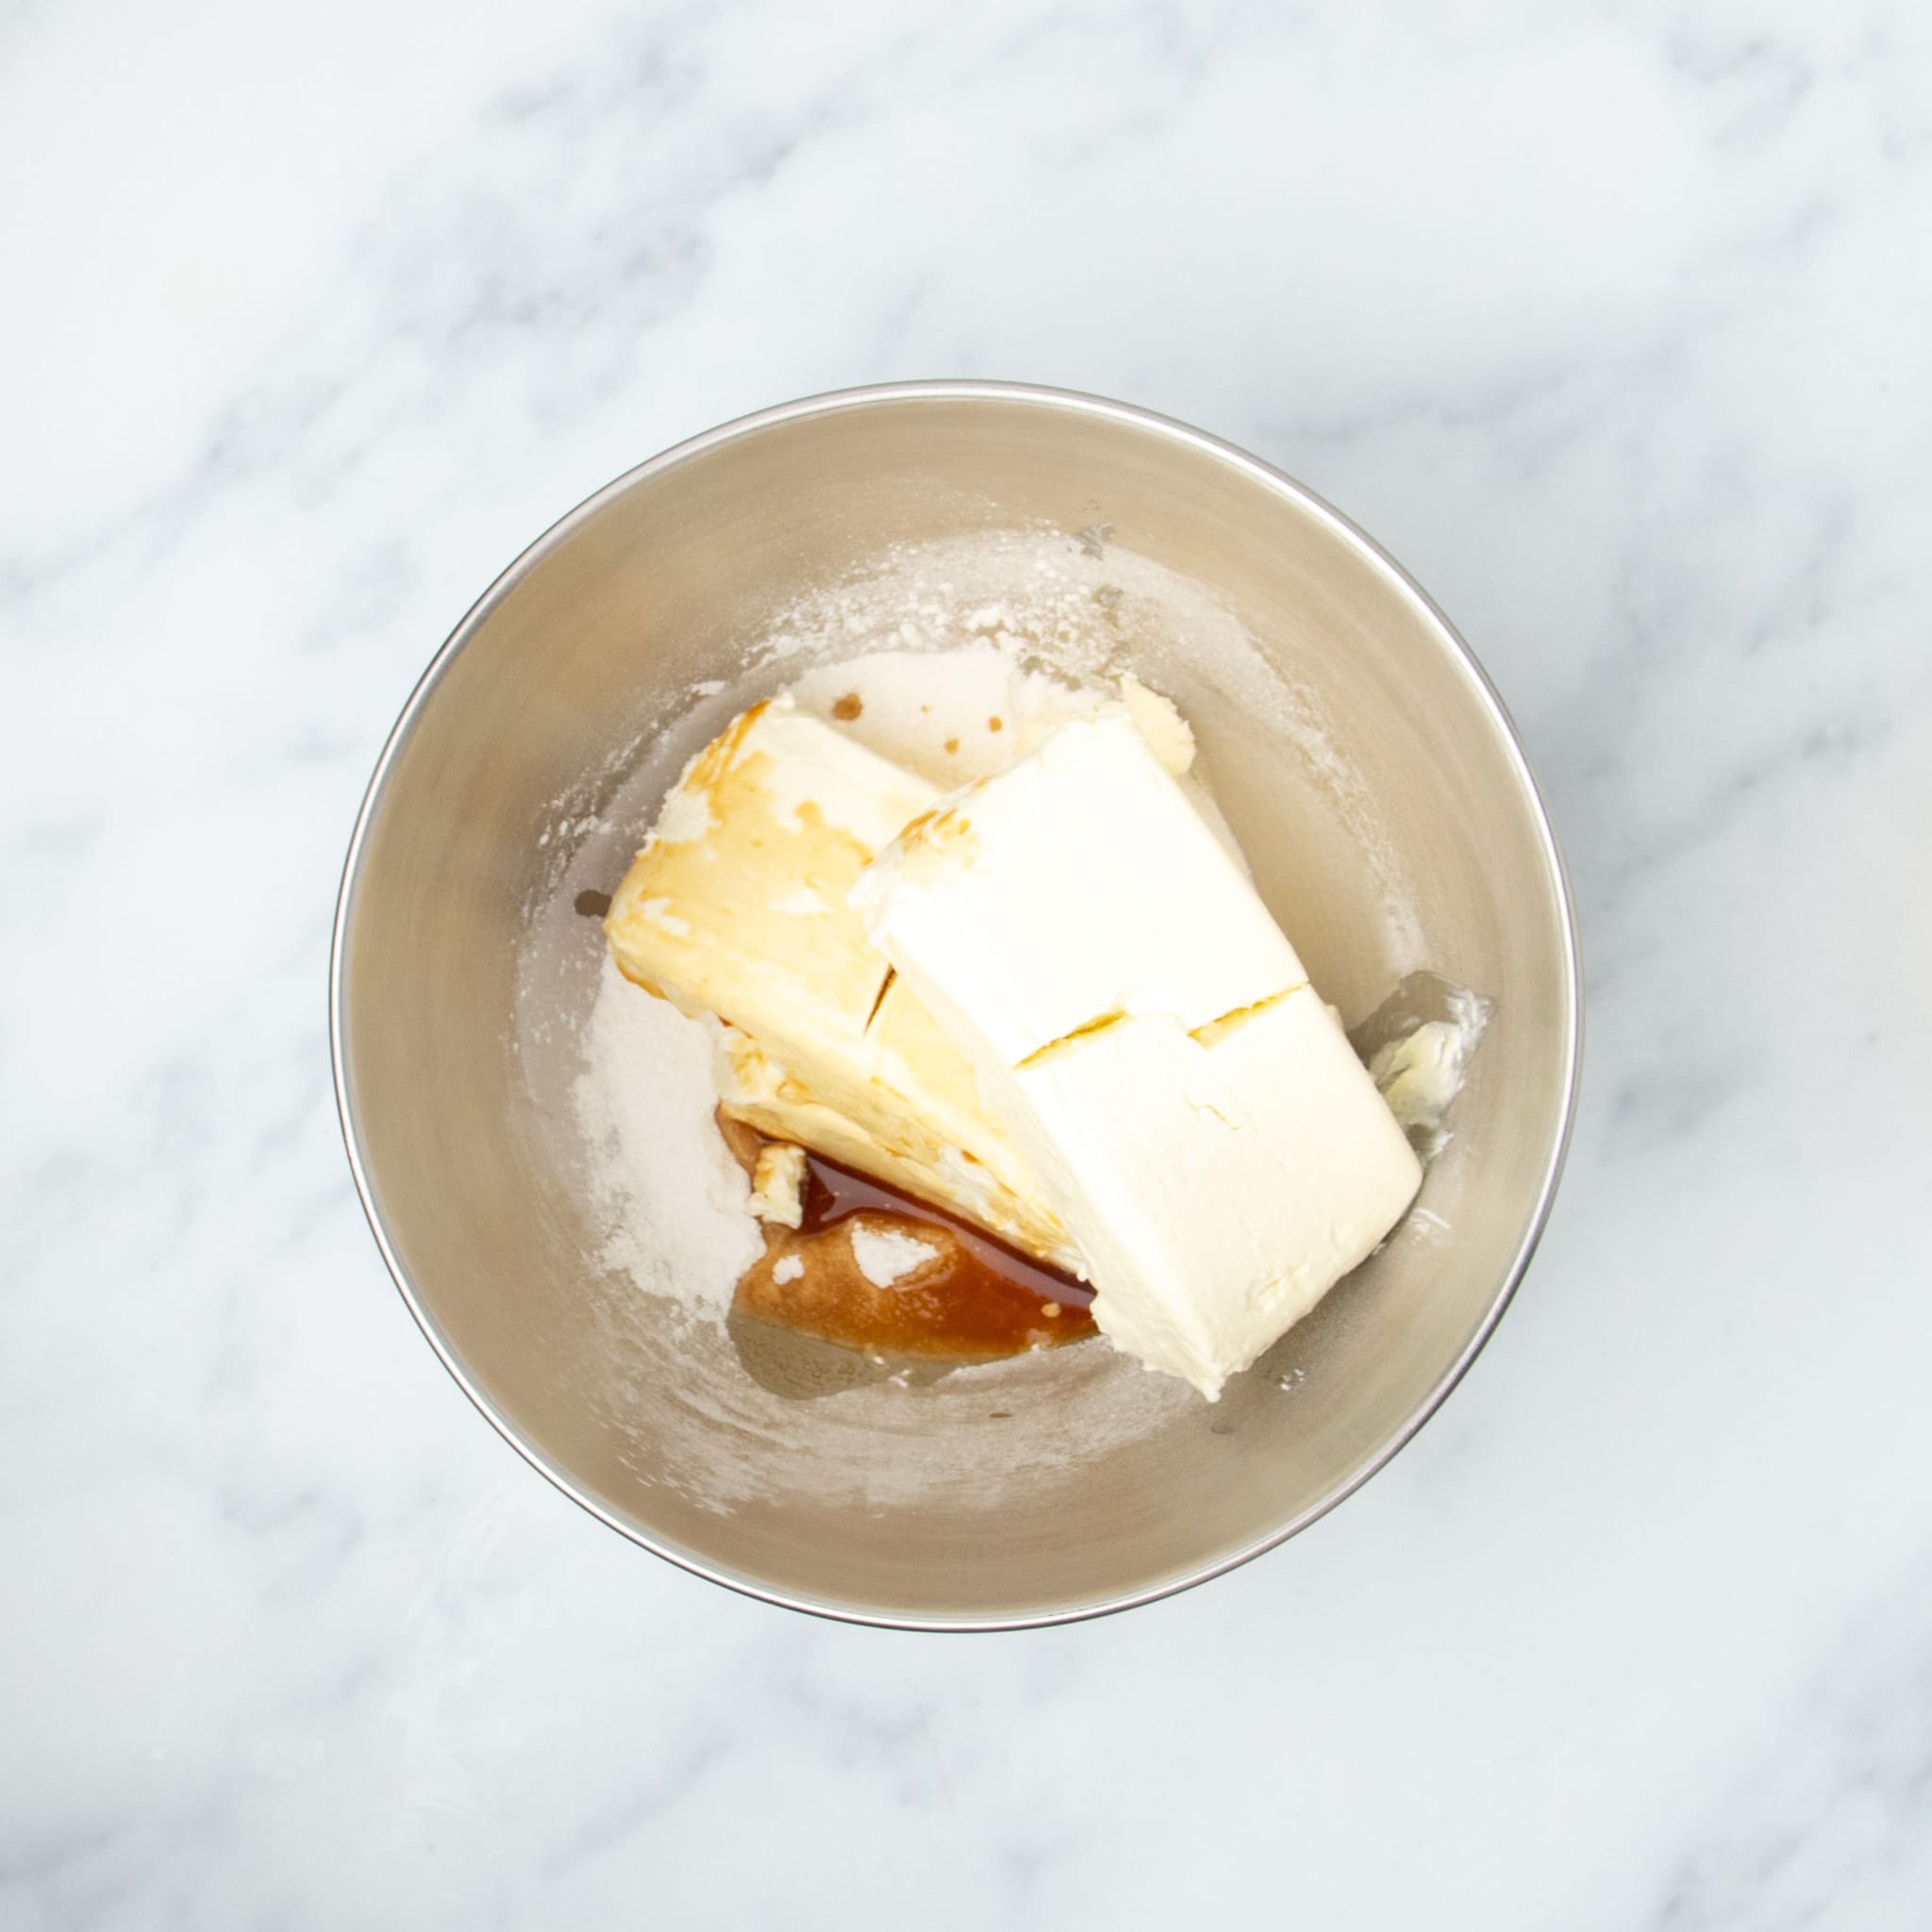
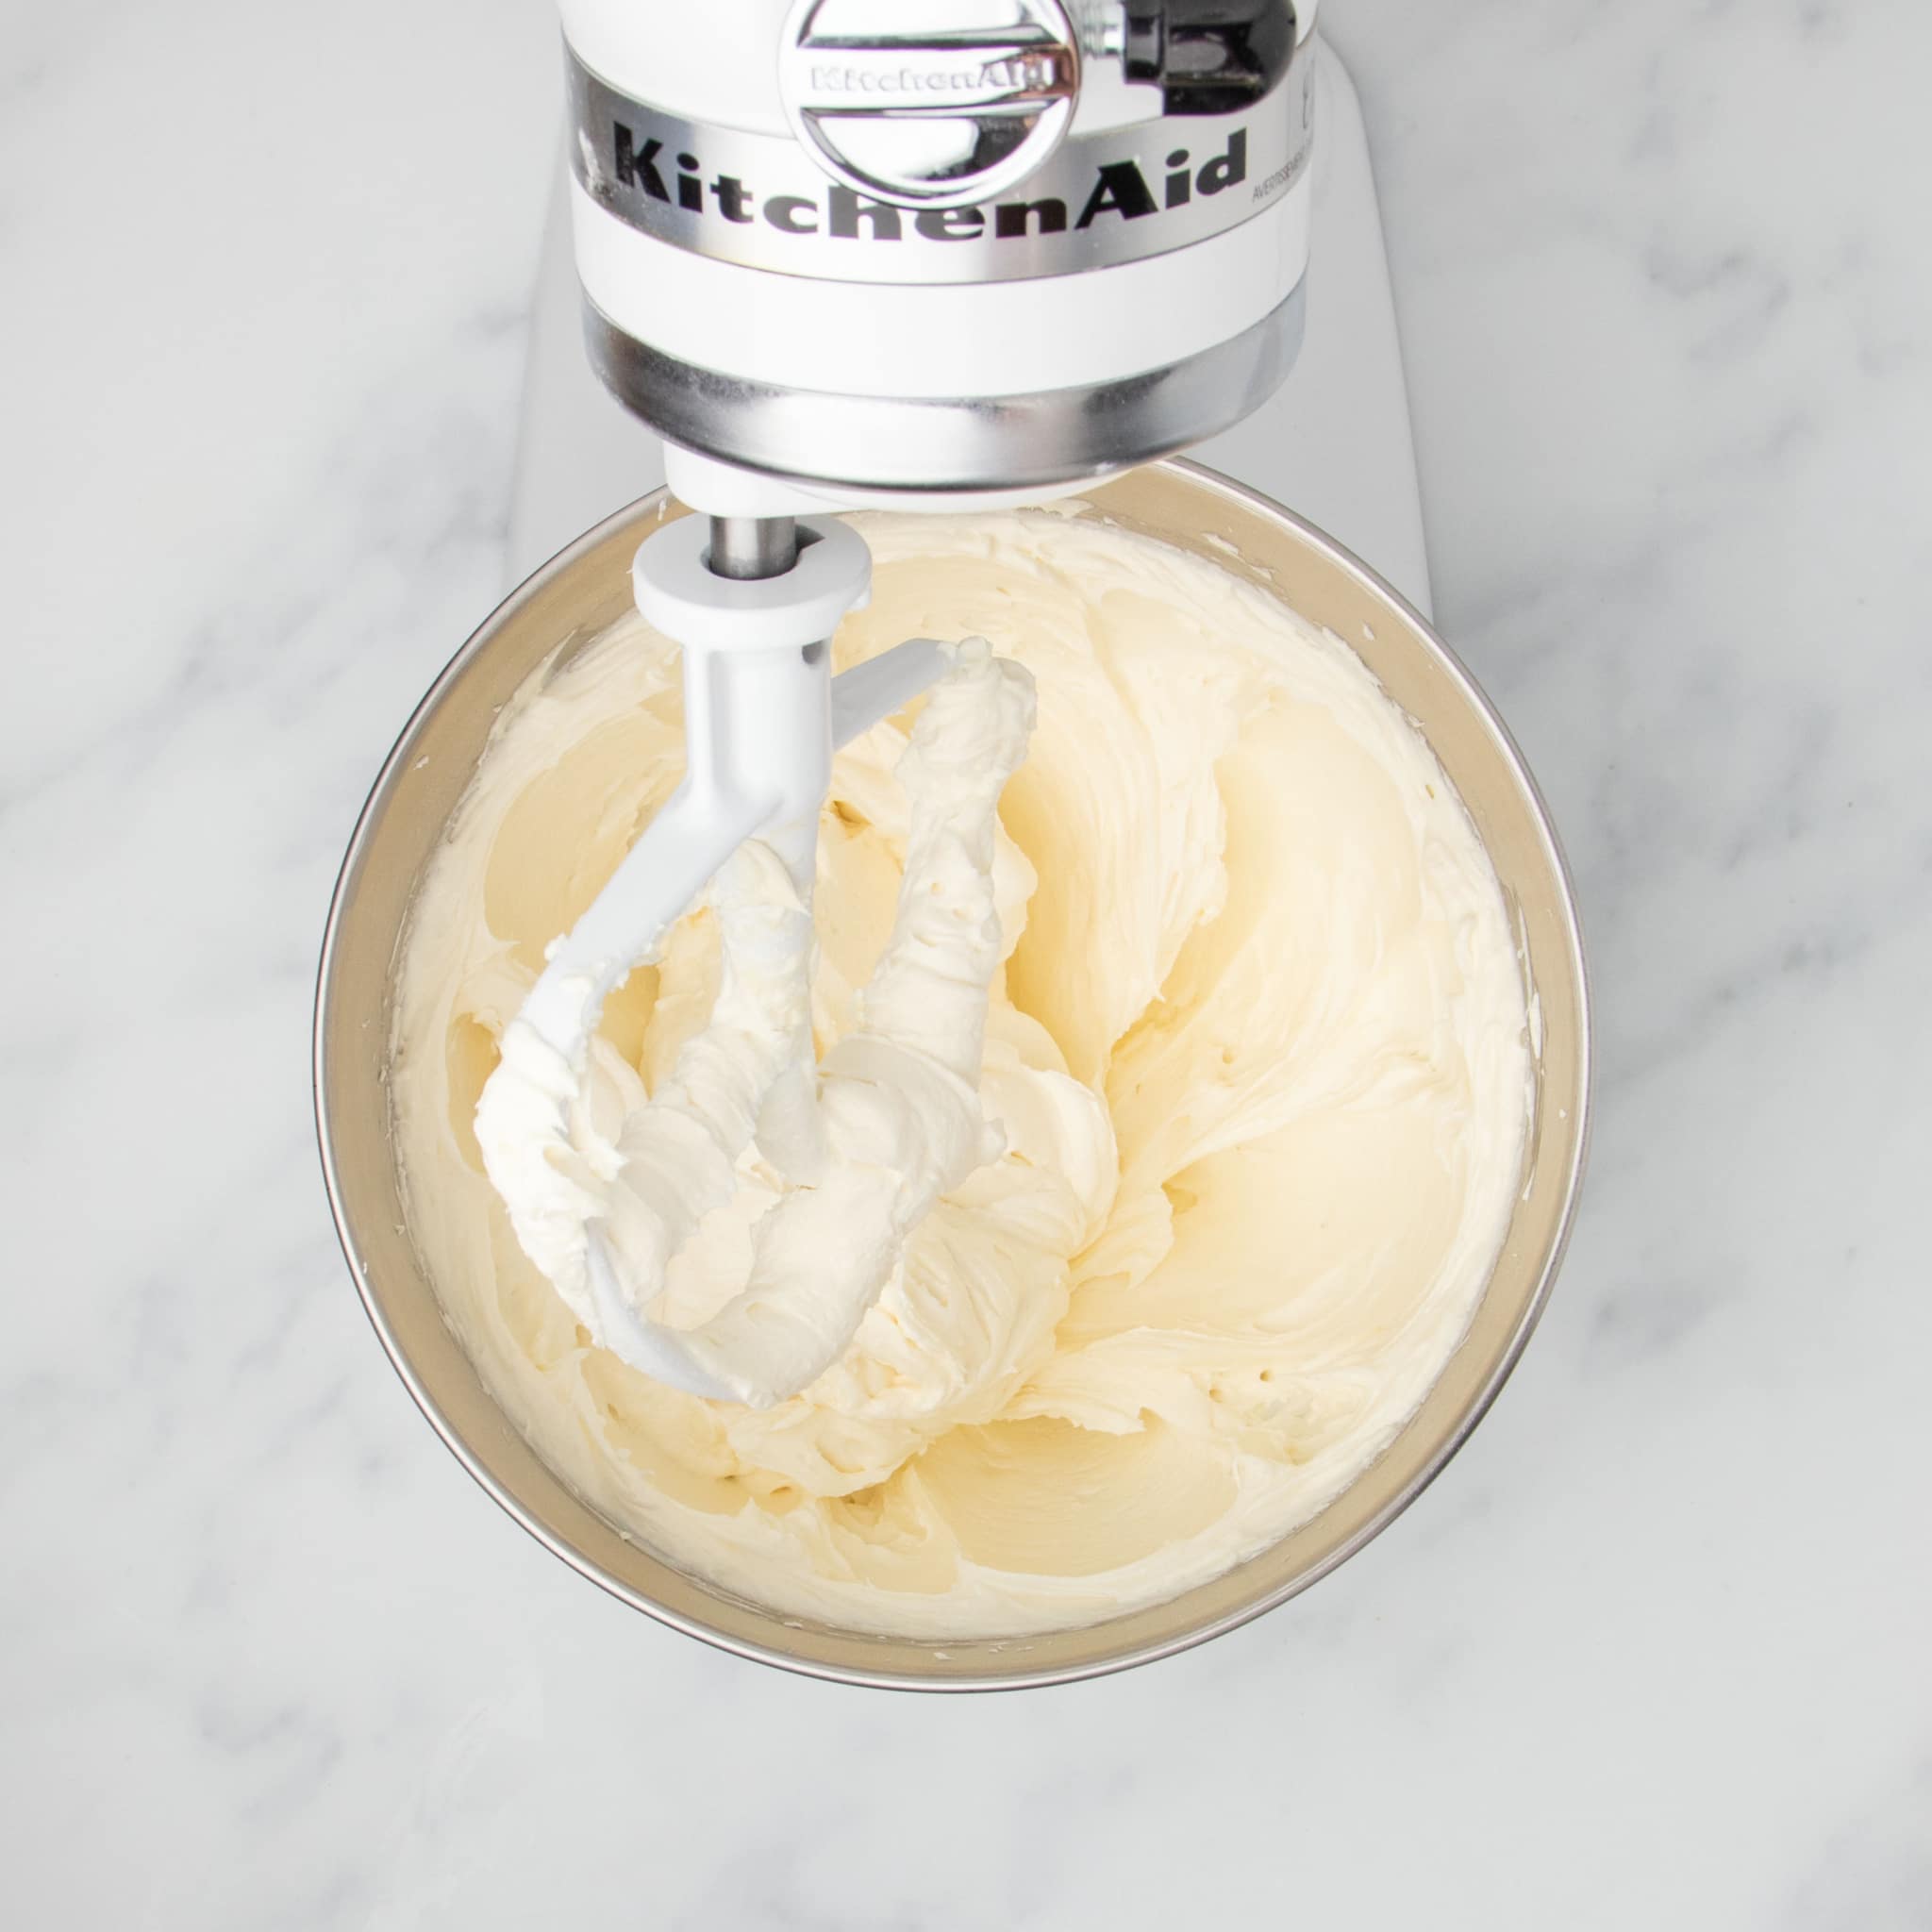
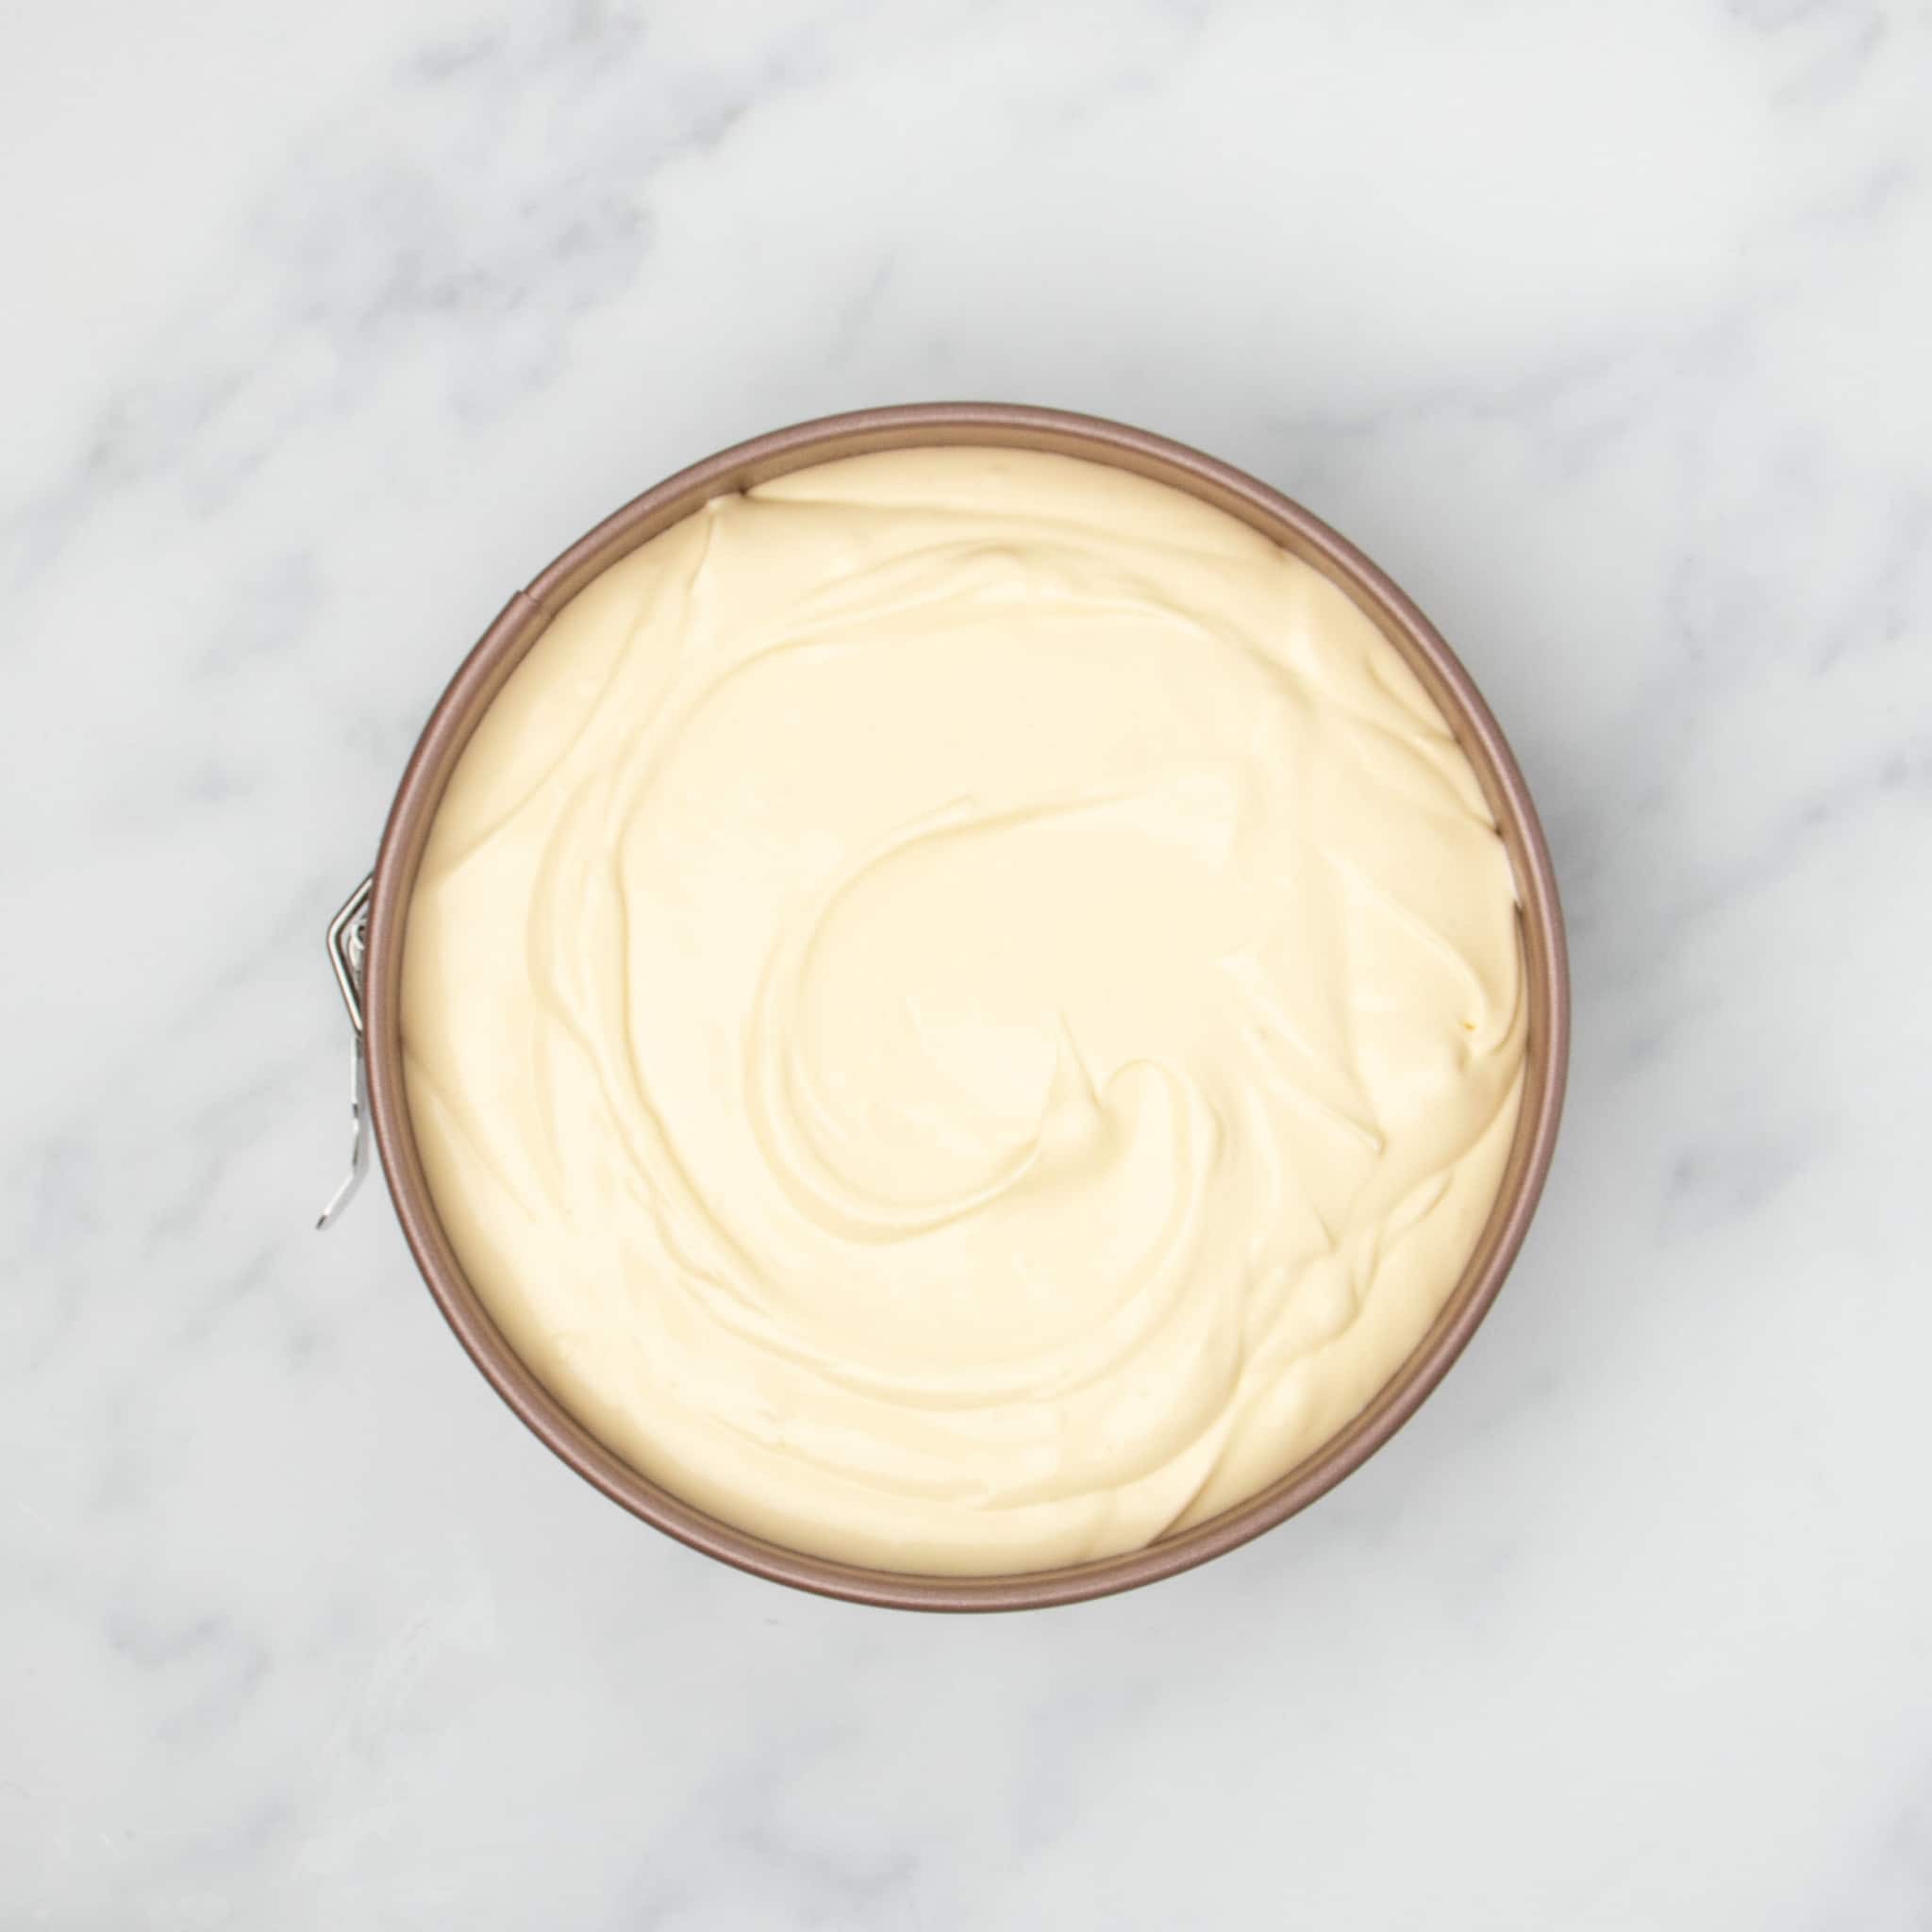
In a stand mixer (or a large bowl with a handheld mixer), combine three 8-ounce packages of softened cream cheese, sugar, cornstarch, salt, and vanilla. Beat on high until smooth and creamy.
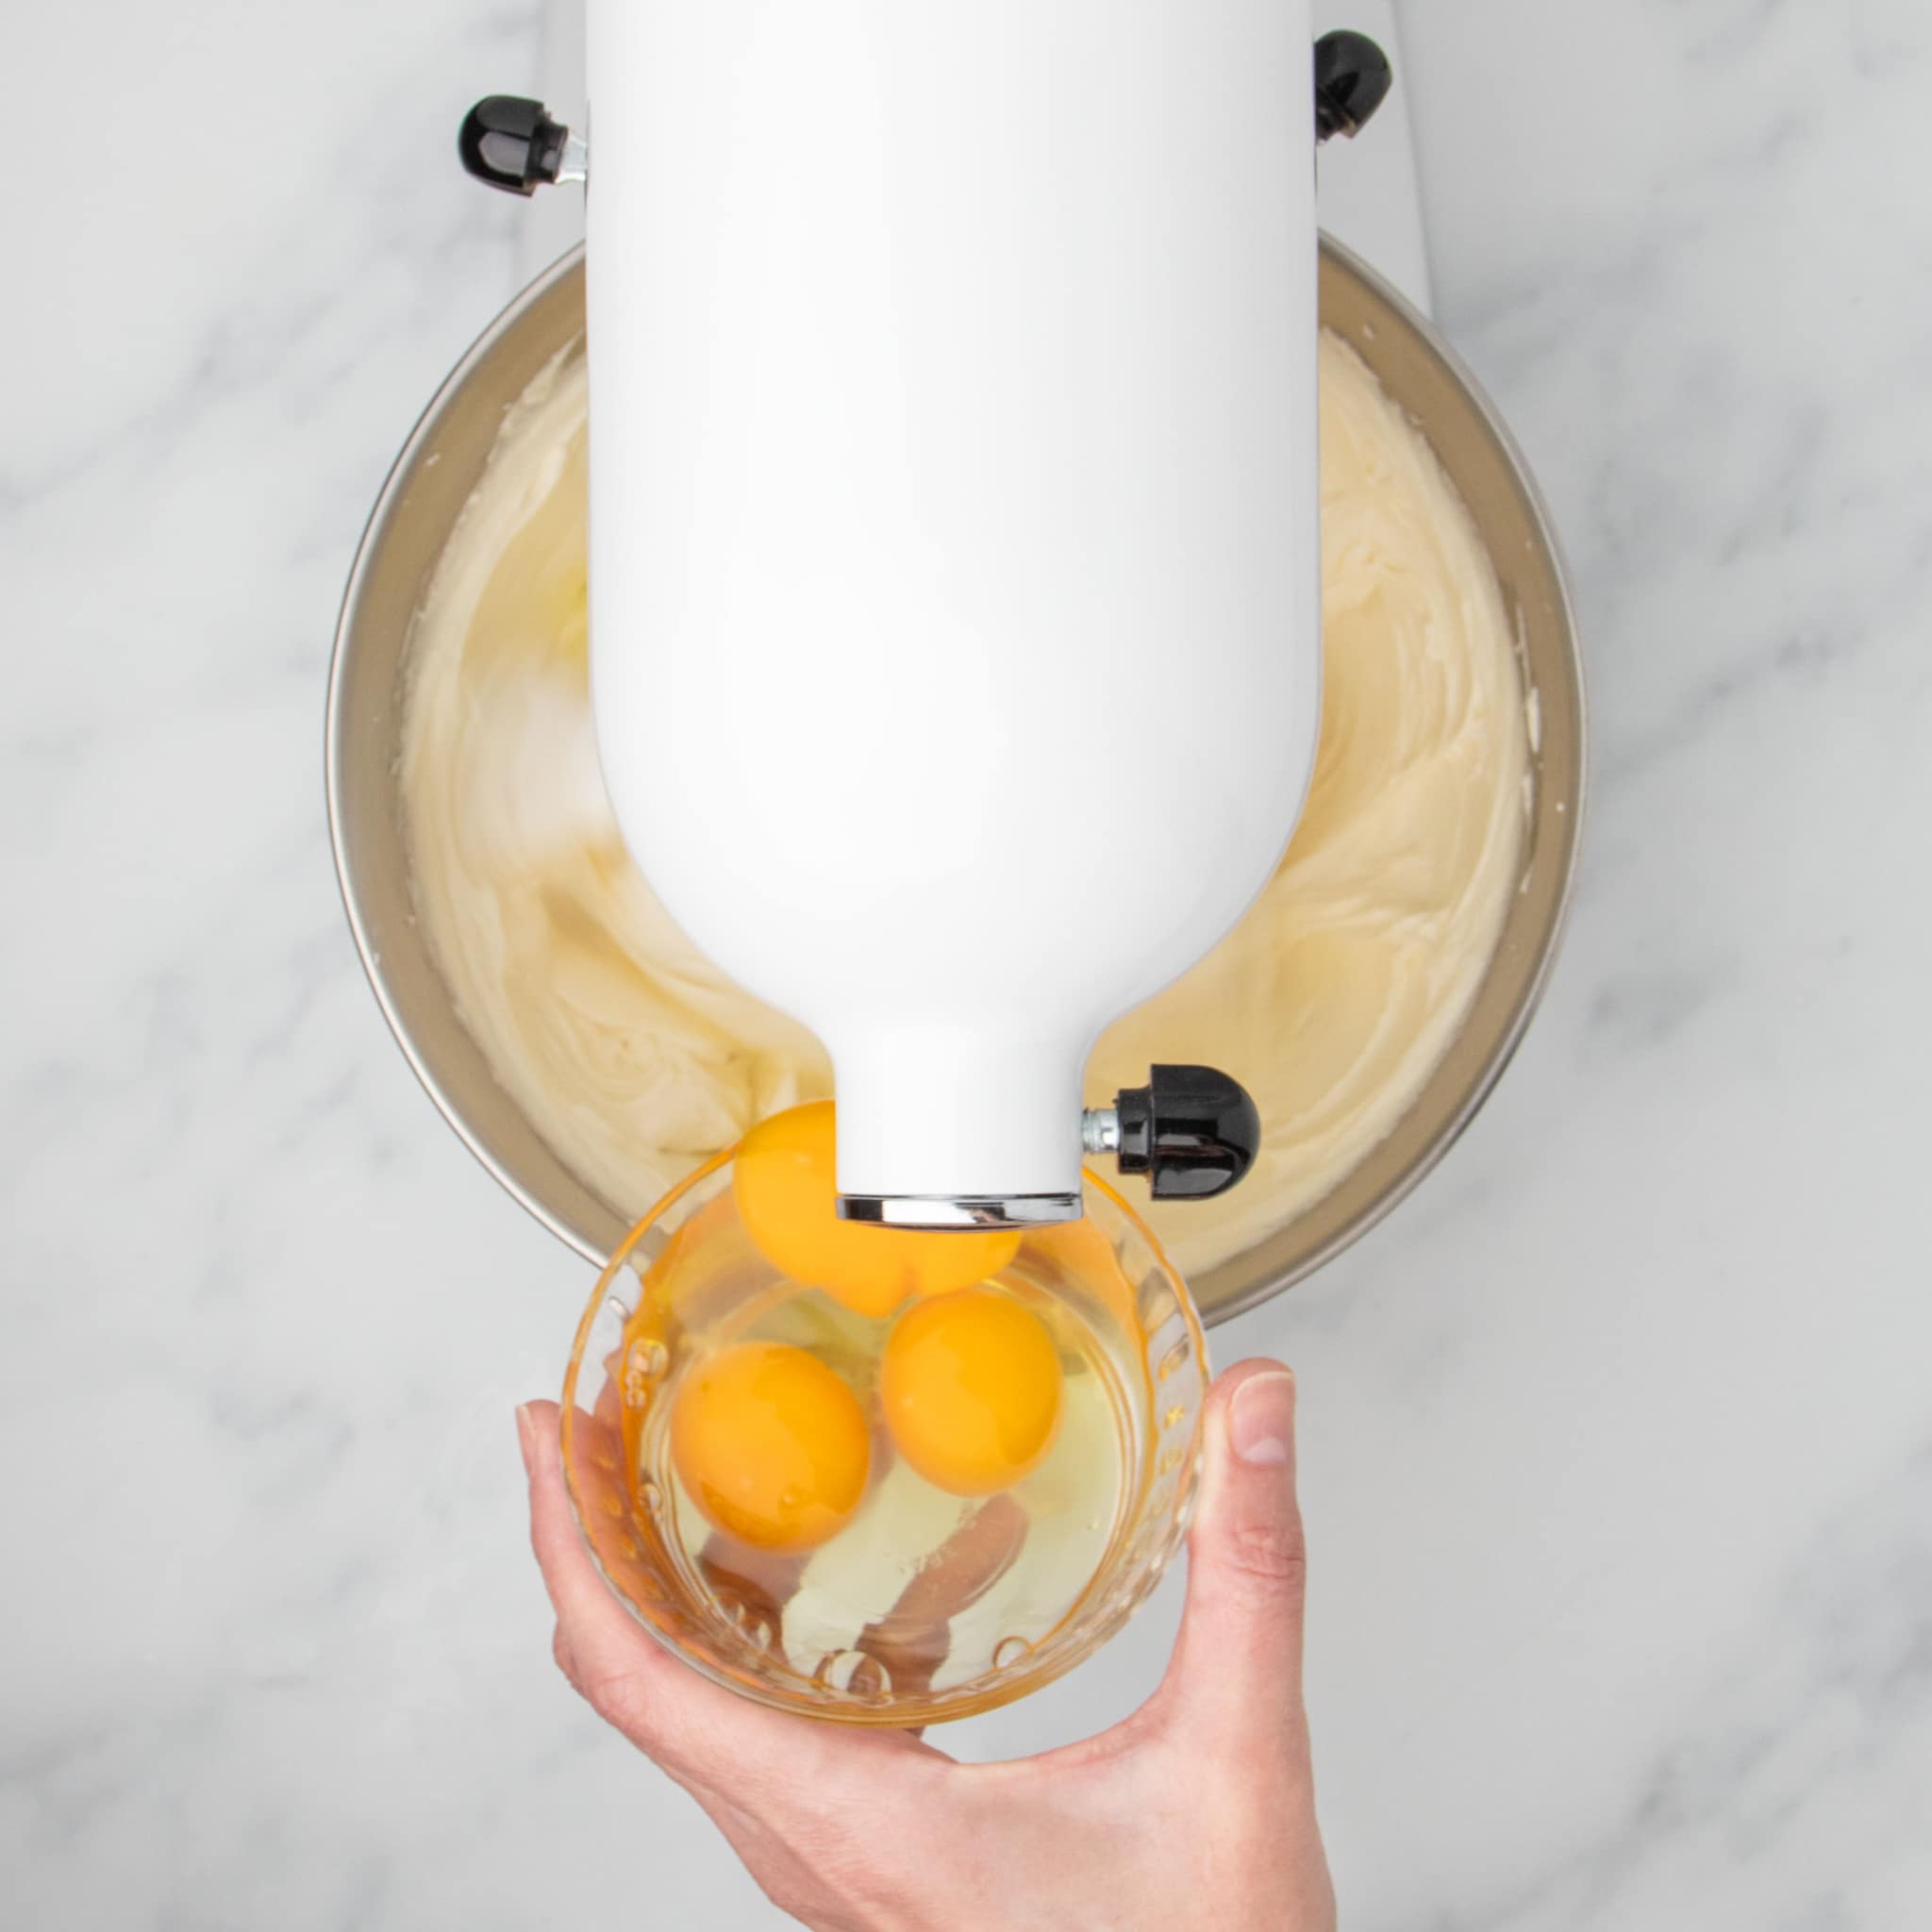
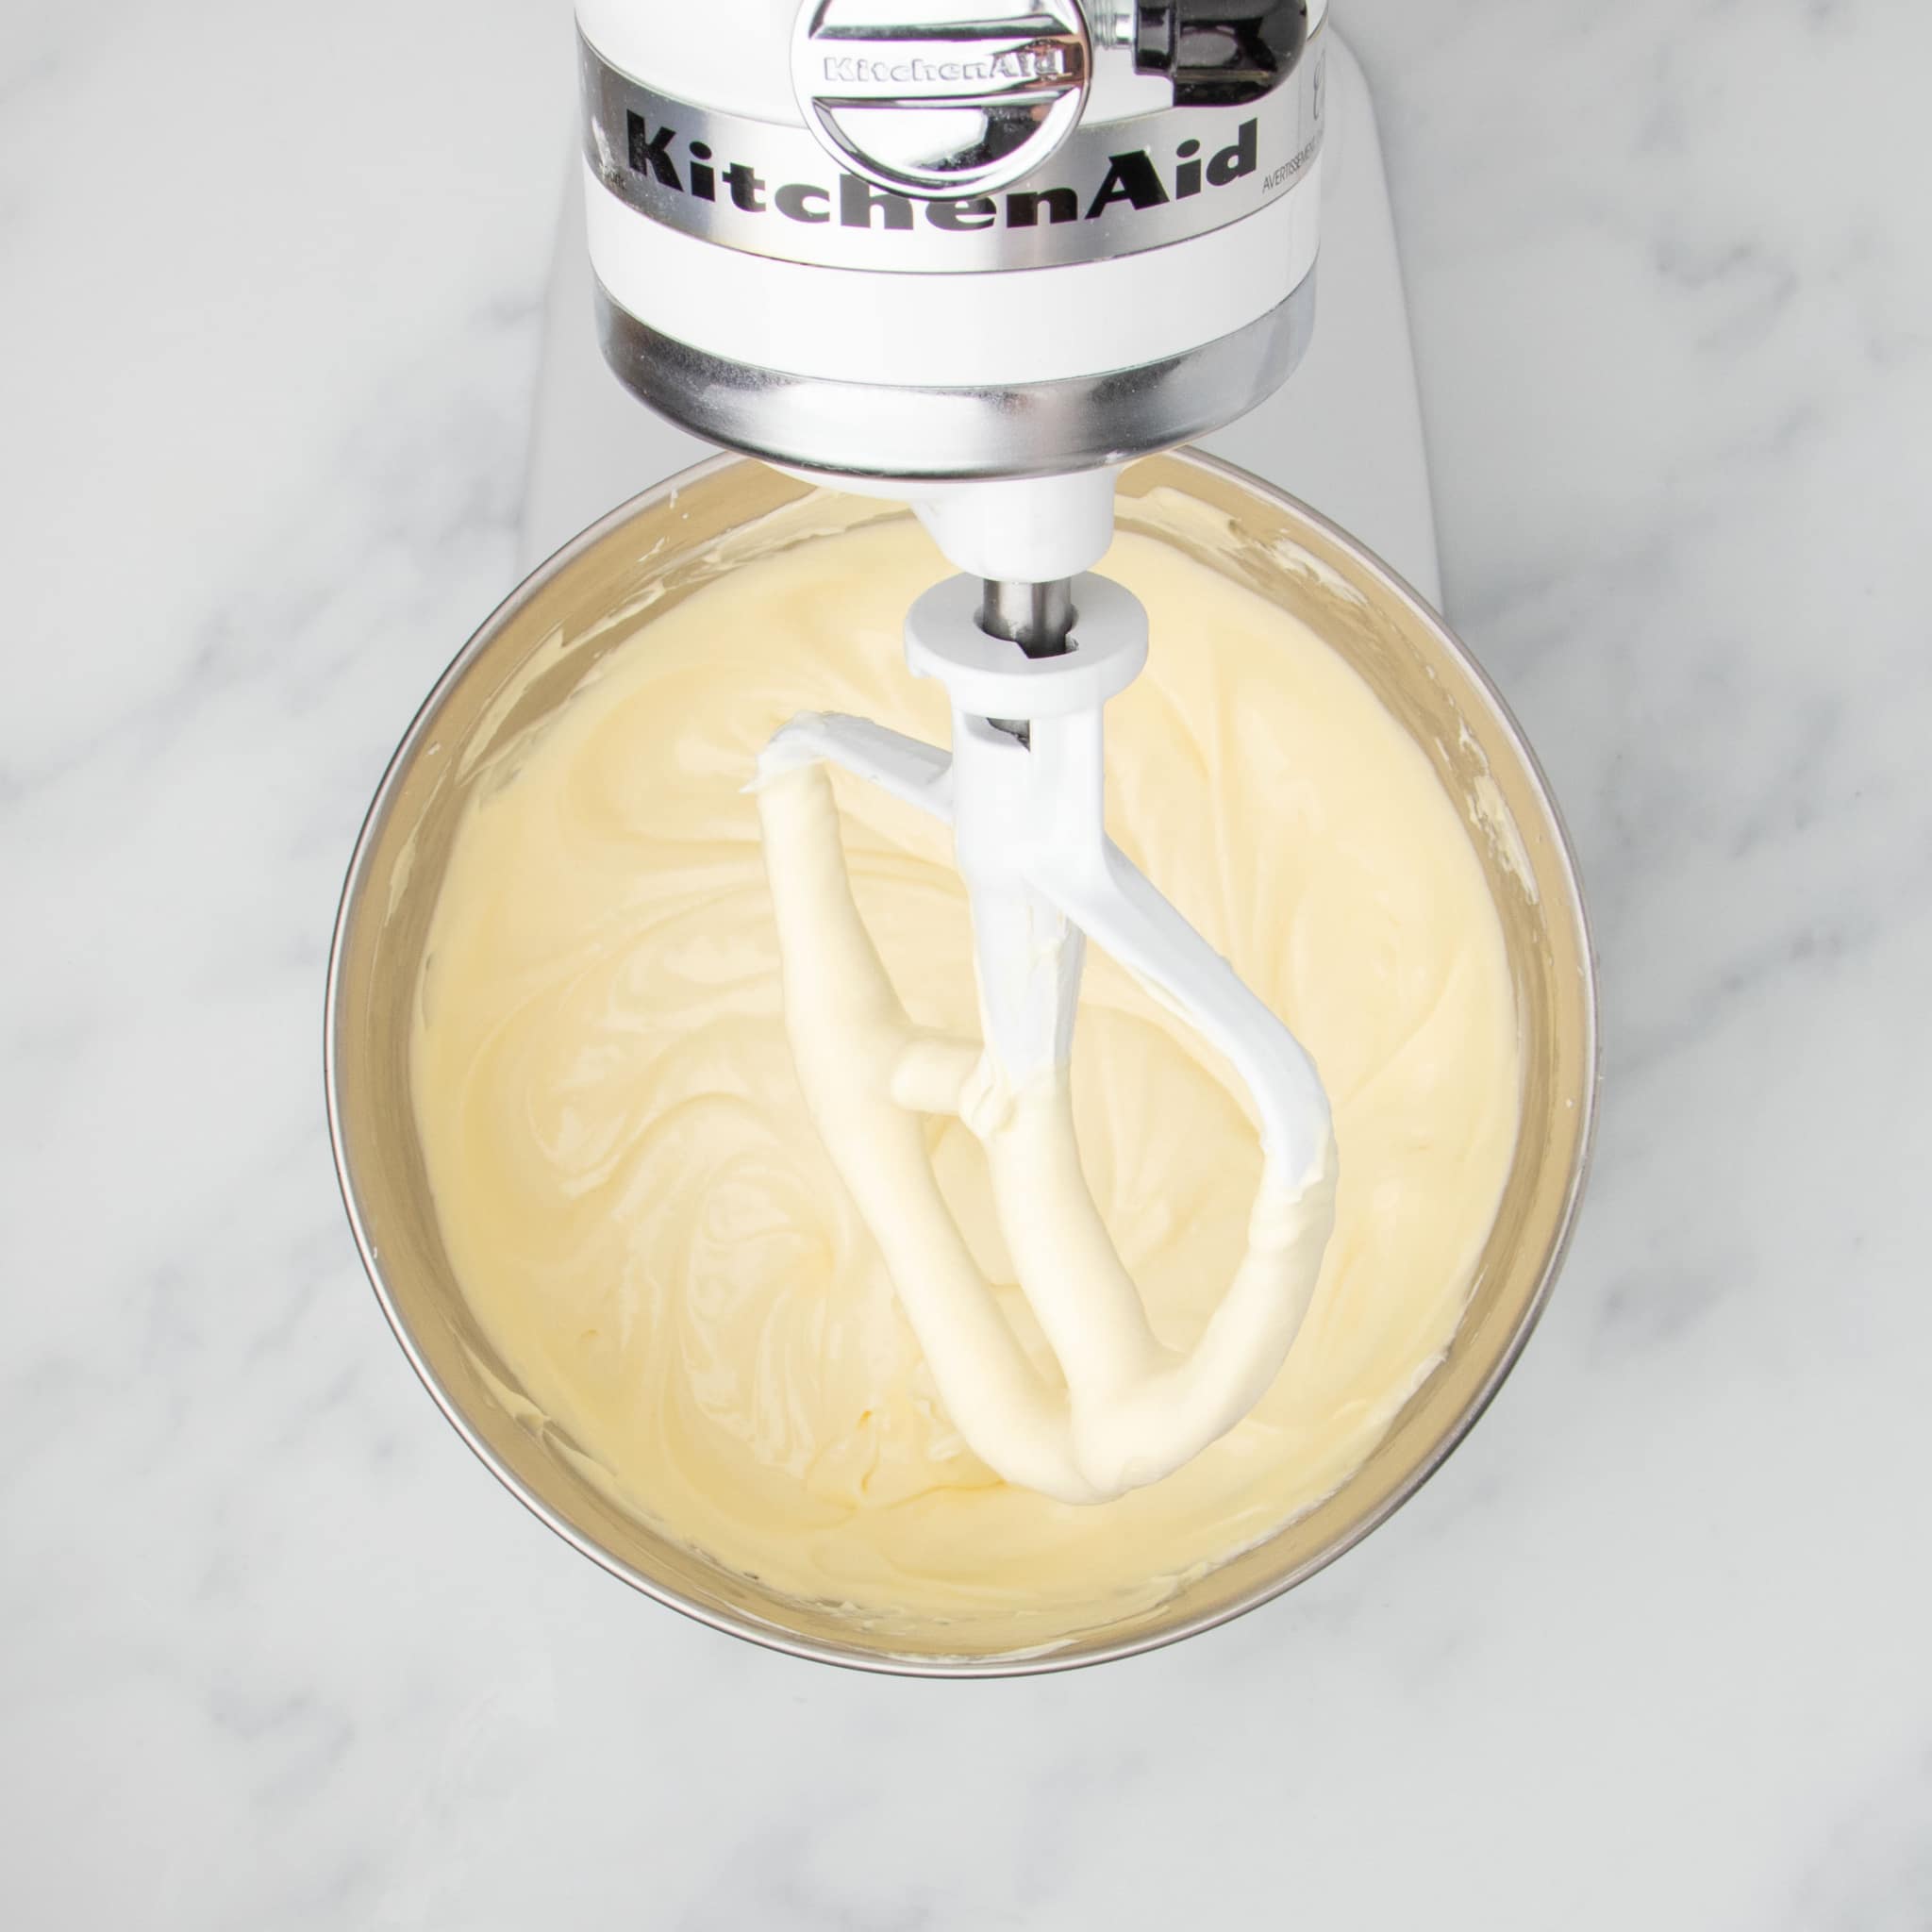
With the mixer on medium-low, add the eggs one at a time, mixing just until smooth—be careful not to overmix.
Bake and serve
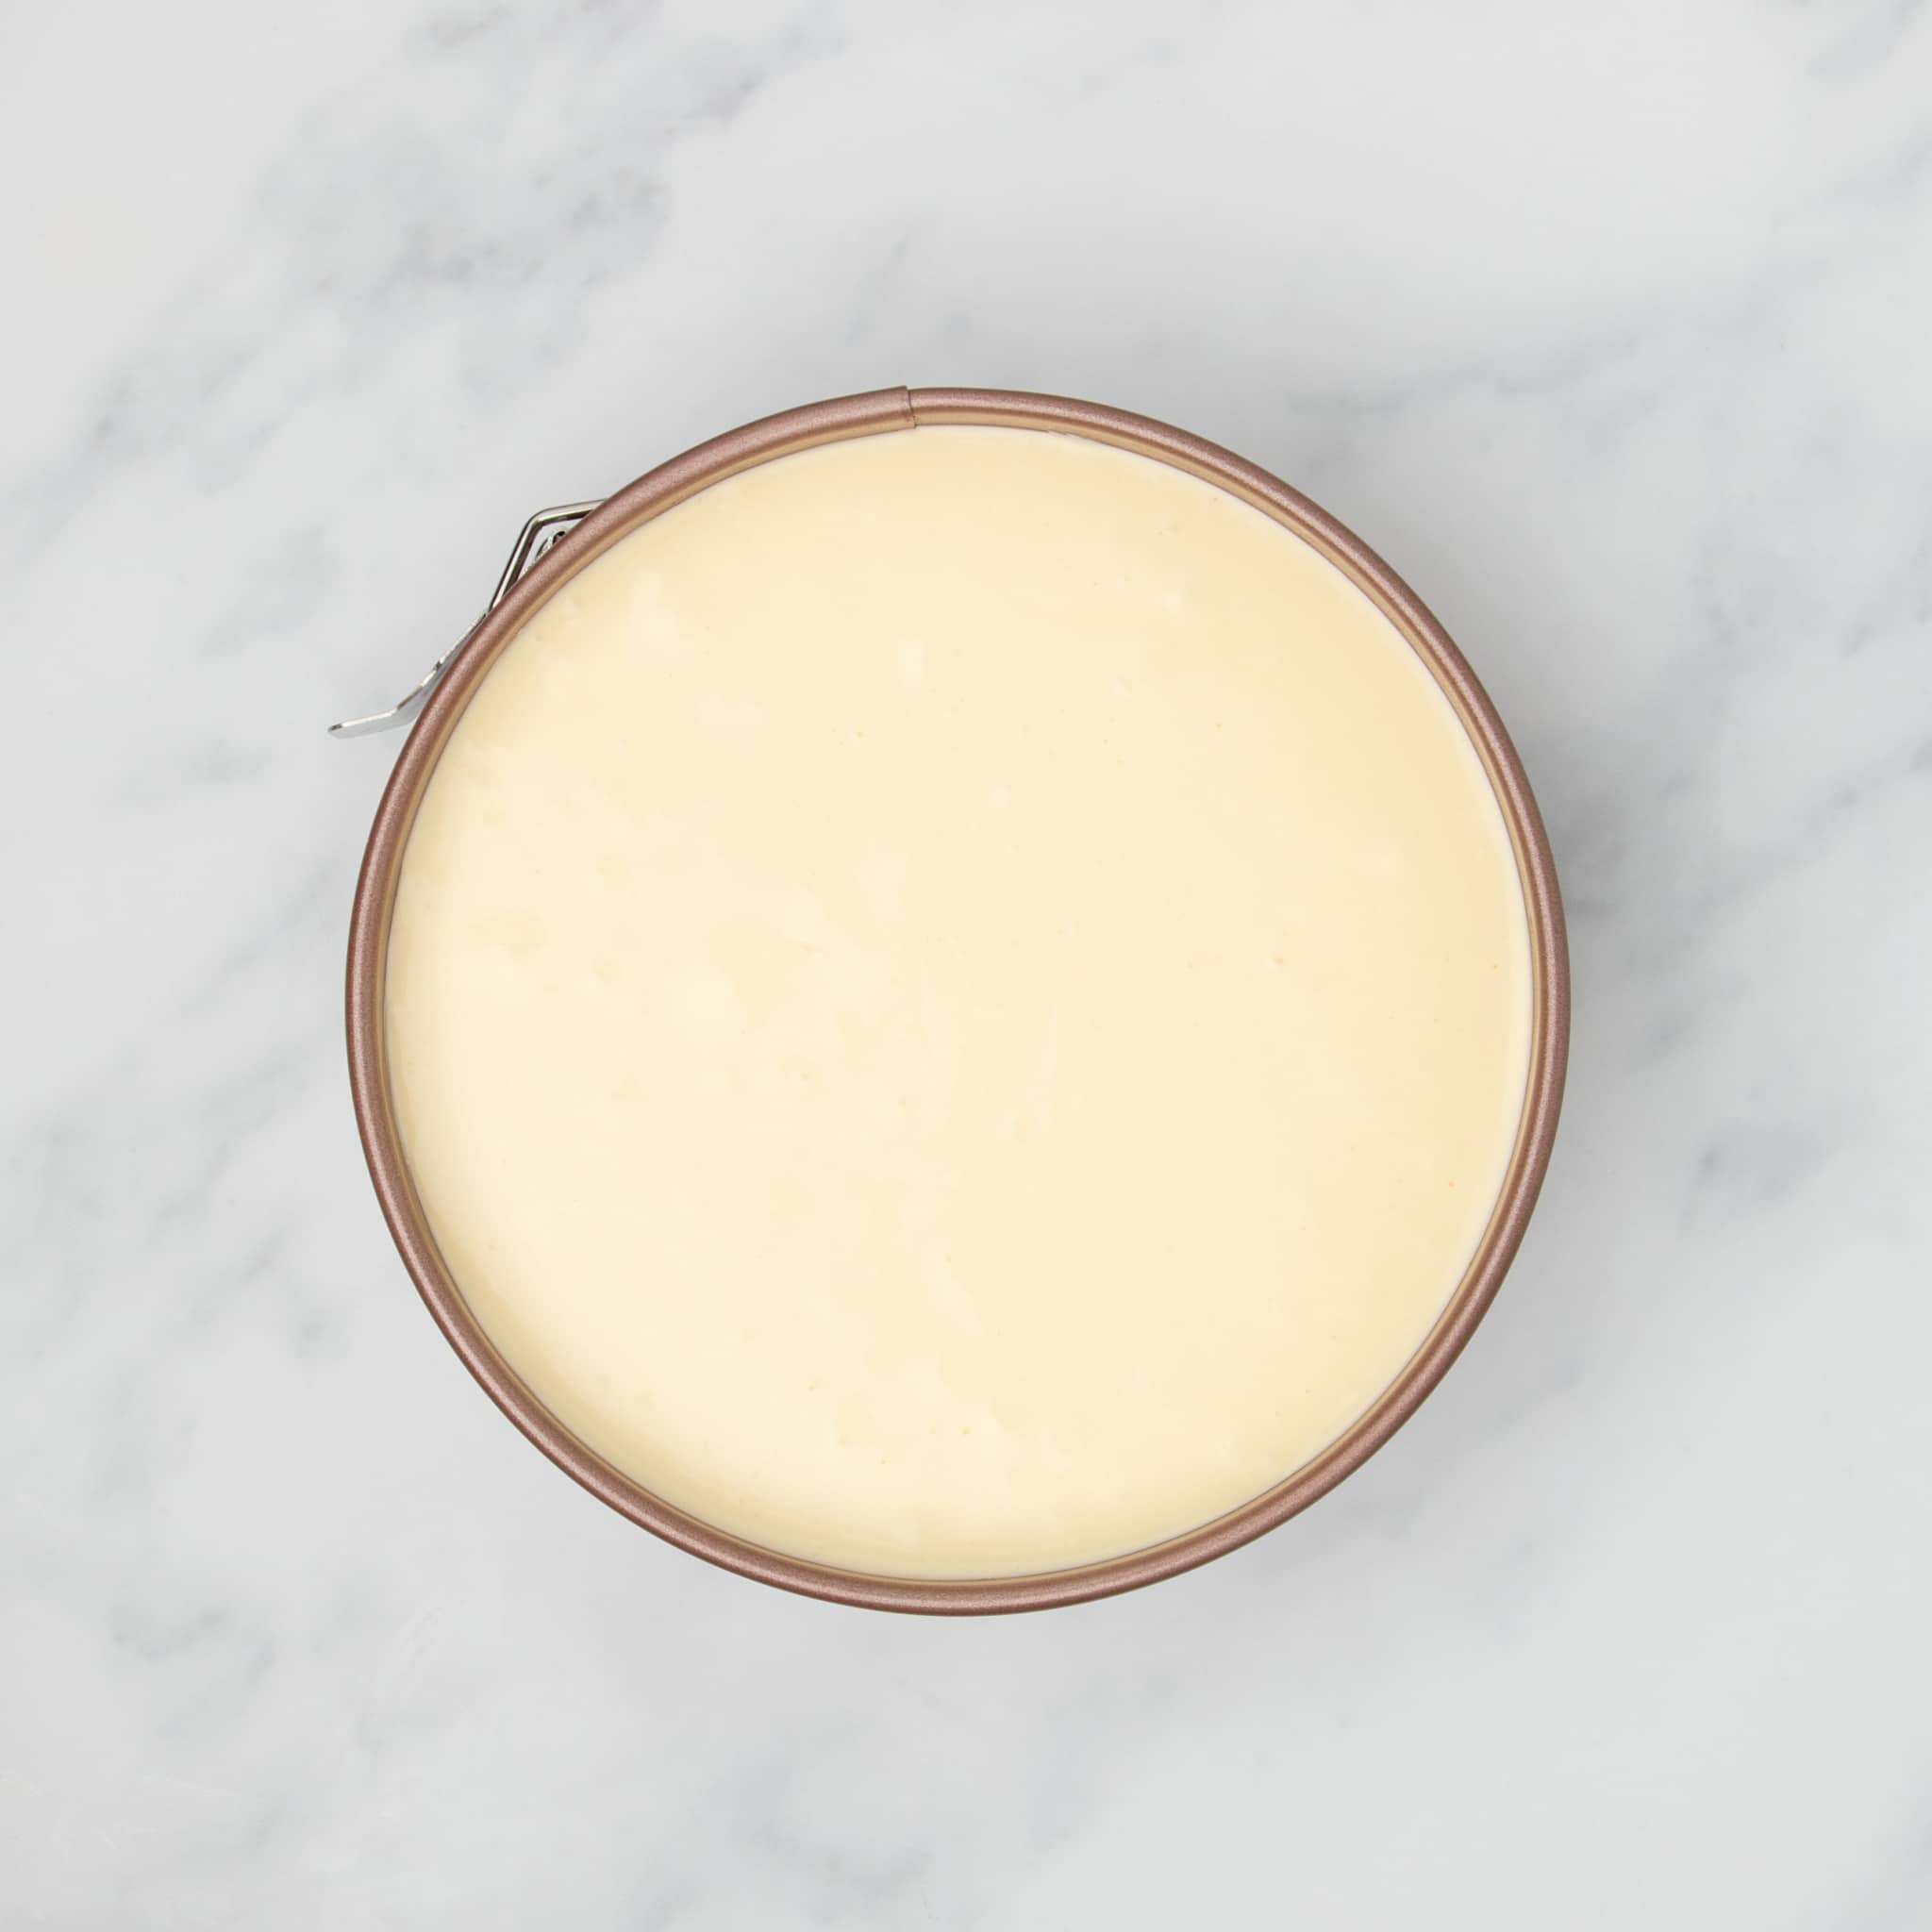
Pour the filling over the crust and smooth the top. Place a baking dish filled with very hot water on the bottom rack of your 300°F oven and the cheesecake on the middle rack.
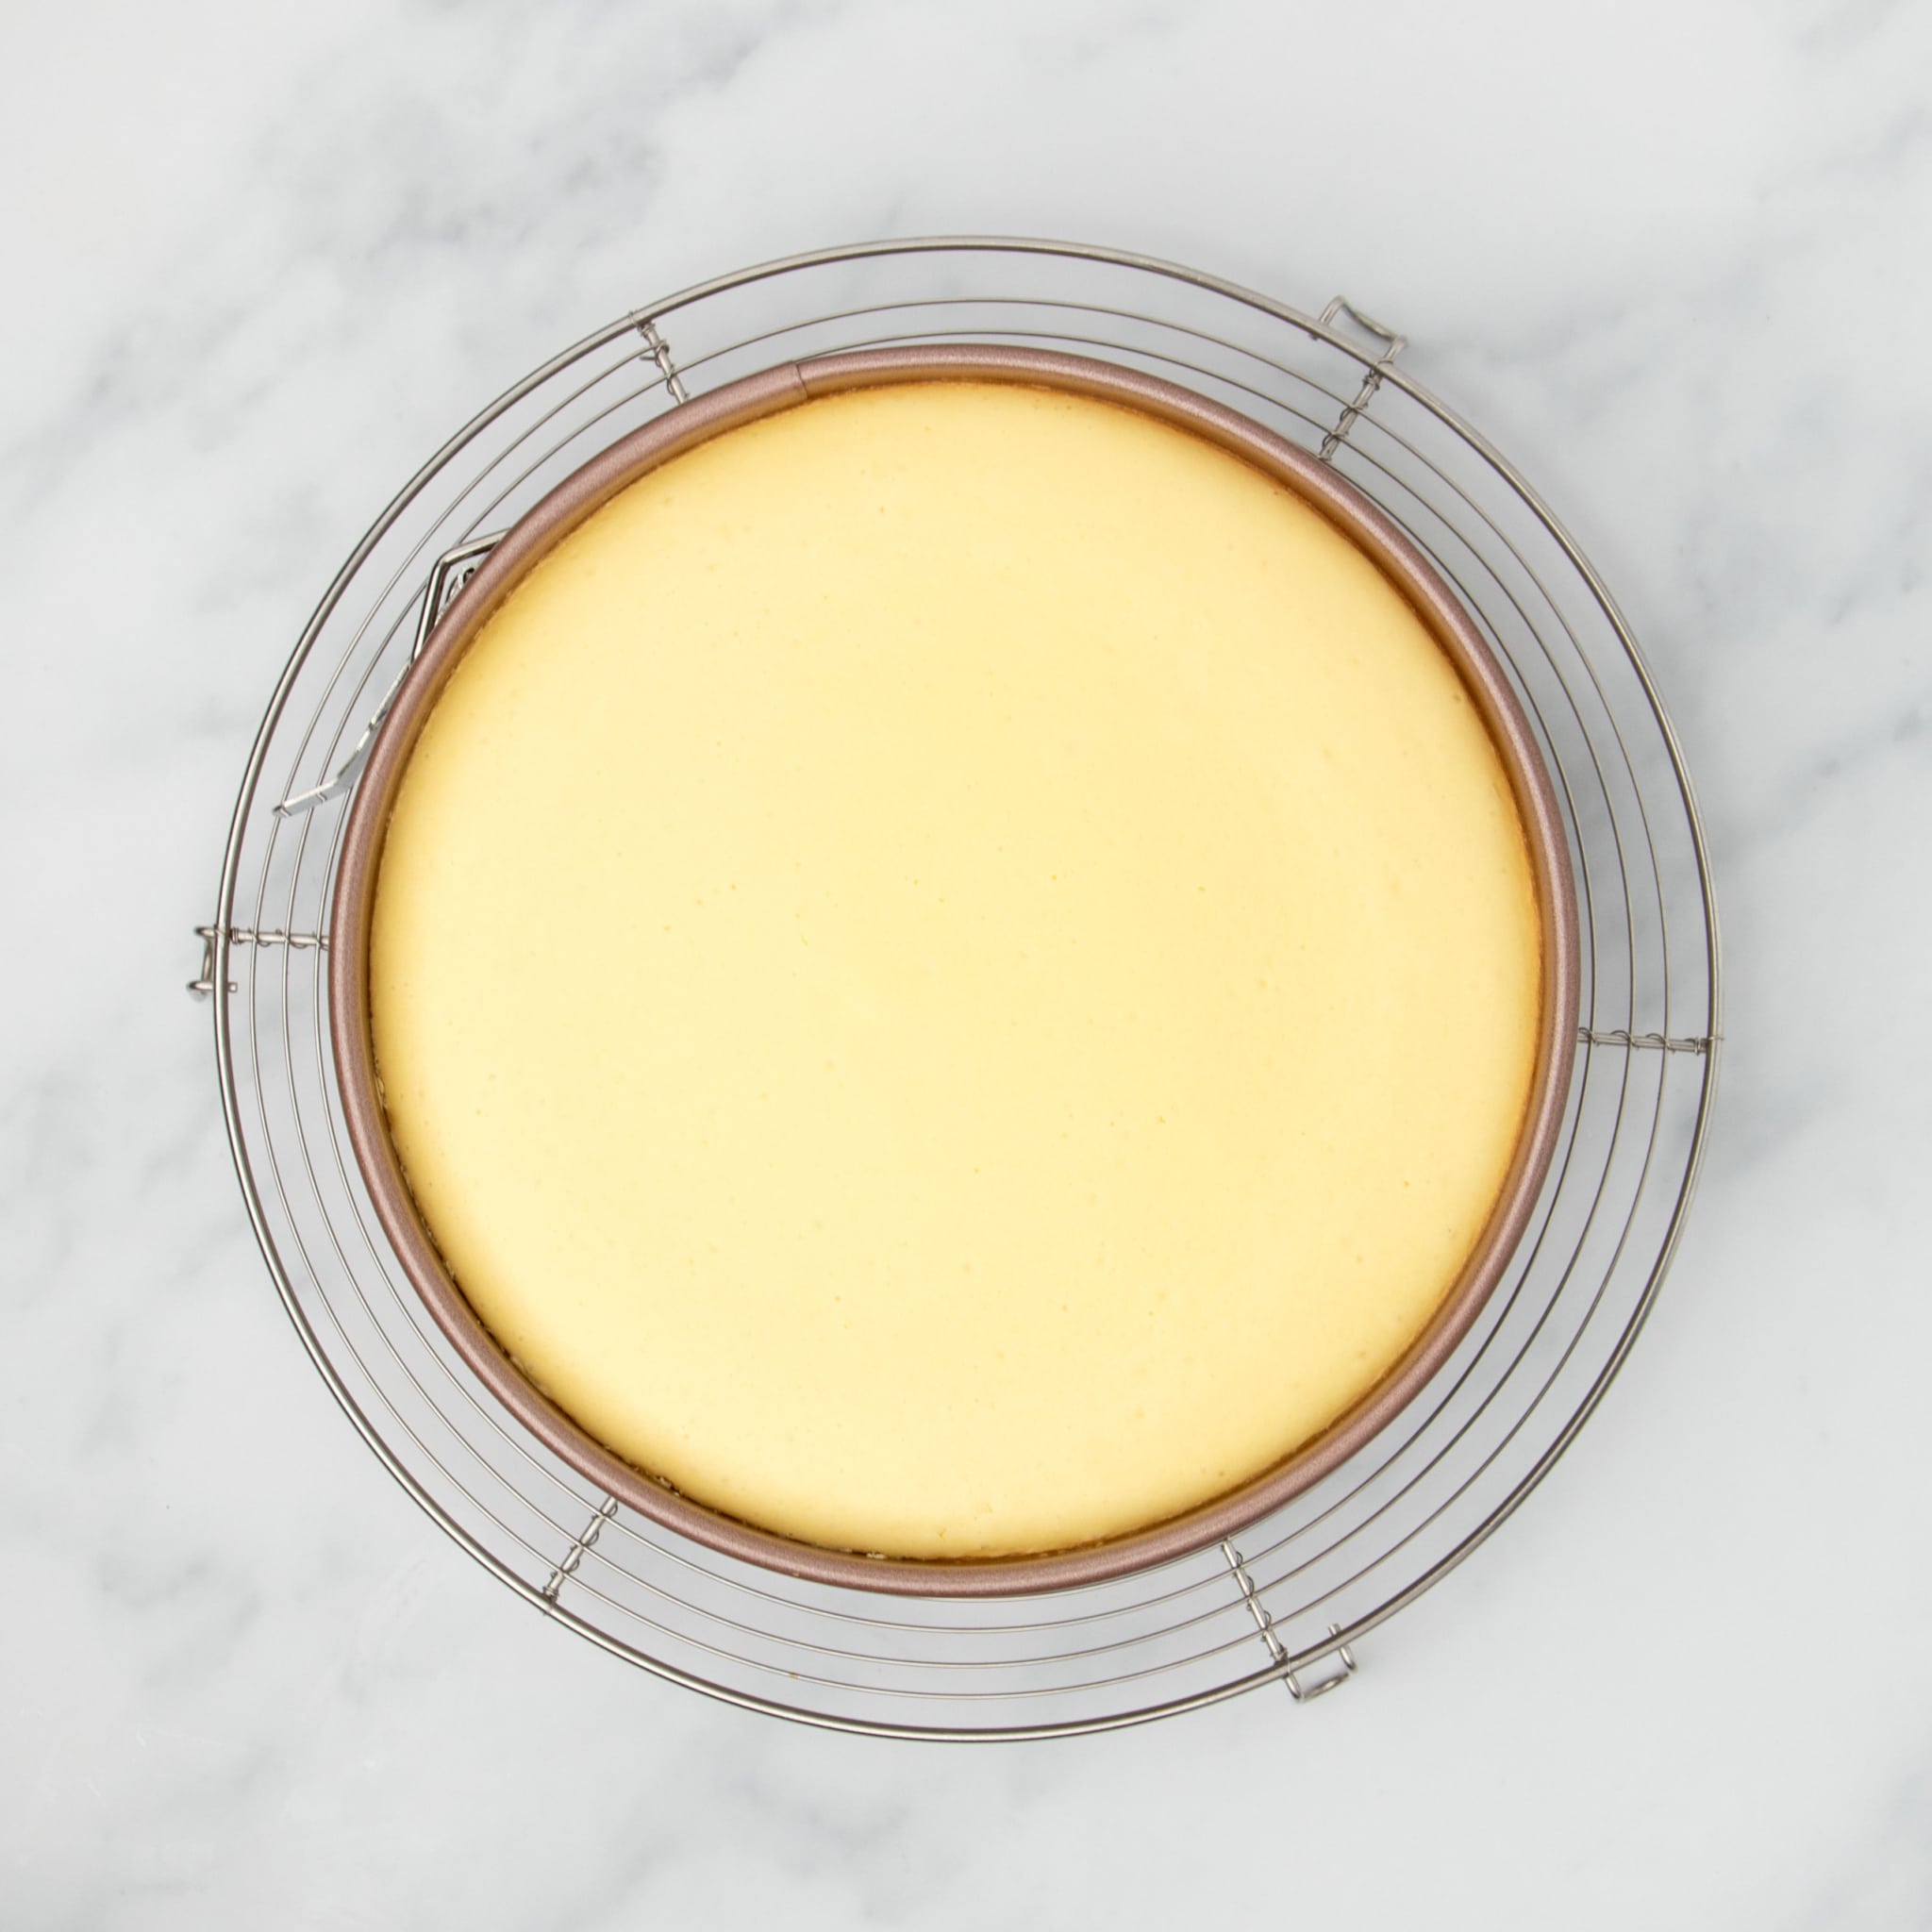
Bake for about 50 minutes, until the edges are set and only the center wiggles slightly when gently shaken. Prop the oven door open slightly and let the cake cool inside until the oven reaches about 200°F.
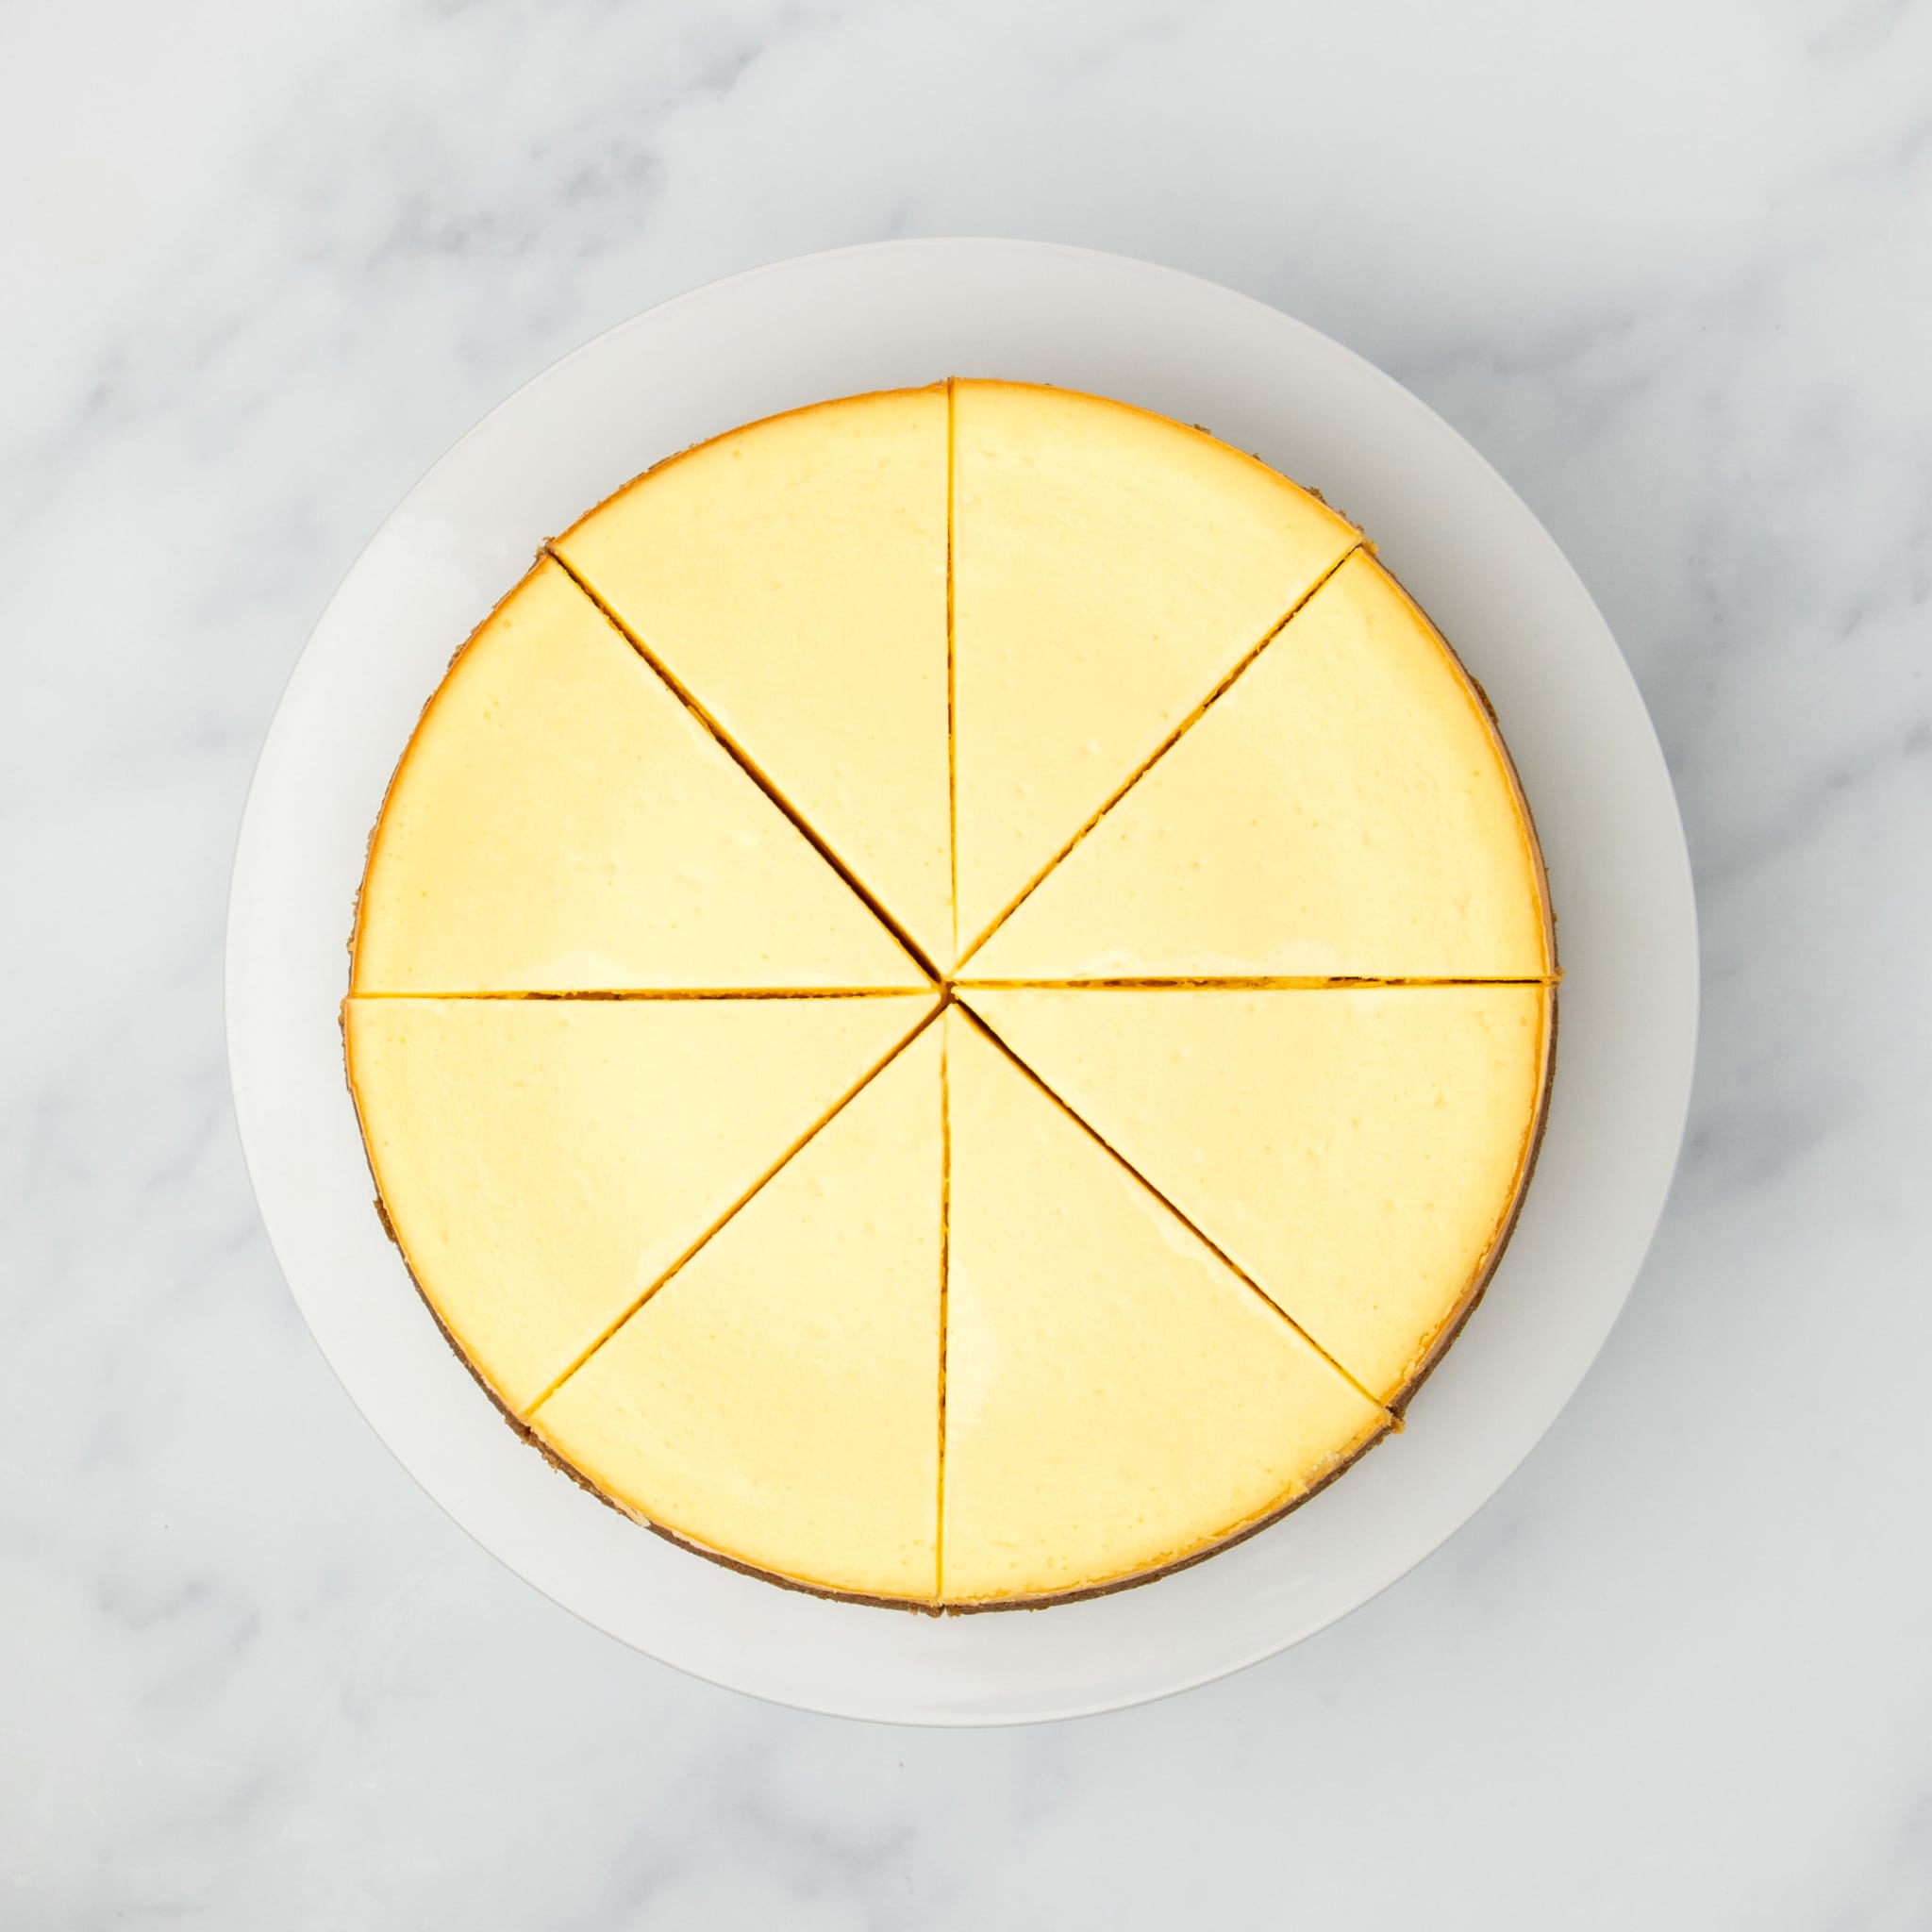
Remove the cheesecake and let it cool to room temperature, then chill in the fridge for at least 4 hours before slicing and serving.
Expert tips
No water bath needed
A water bath helps prevent cracks by keeping the temperature steady, but it can be messy. Instead, place a 9×13-inch baking dish filled with boiling water on the bottom rack of your oven while baking. This creates gentle humidity without risking water leaking into your cheesecake.
Avoid bubbles in the filling
Too many bubbles increase the chance of cracks. Beat all ingredients except the eggs vigorously first. Then add the eggs and mix just until smooth. After pouring the filling into the pan, gently tap it on the counter a few times to bring air bubbles to the surface.
Keep the oven door closed
Opening the oven door too soon can shock the cake, causing cracks or sinking. Let it cool gradually in the oven before opening the door.
Release the crust from the pan
Run a knife around the edge of the crust after the cheesecake has had about 10 minutes to cool. As your cake cools, it will contract and pull away from the edges of the pan. If the crust is stuck to the pan, this will cause tugging and ultimately cracking.
Use room temperature ingredients
For a smooth filling, the cream cheese and eggs for the filling must be at room temperature, at least 68°F. Float cold eggs in very warm water for 15 minutes. Unwrap and chop cold cream cheese and let it sit at room temperature so it warms up more quickly.
Ingredient substitutions
Dairy free
I have tried to make a dairy free cheesecake many times, and I have never liked the result. If I were to try a dairy free cream cheese alternative again, I would use the block-style Violife vegan cream cheese and add another 2 tablespoons (18 grams) cornstarch to this recipe to help provide enough structure.
Egg free
I'm not sure if it would work in such a simple recipe, but you may be able to replace the eggs with Just Egg brand plant-based eggs.
Corn free
Replace the cornstarch with tapioca starch, arrowroot, or potato starch. They all work just as well here.
Gluten Free Cheesecake Recipe
Equipment
- 1 8-inch springform pan
- Stand mixer or handheld mixer
- Roasting pan or casserole dish for filling with water and placing in the oven
Ingredients
For the graham cracker crust
- 1 ½ cups (225 g) gluten free graham crackers, crushed (See Recipe Notes)
- 8 tablespoons (112 g) unsalted butter, melted
For the filling
- 3 8-ounce (24 ounces) packages cream cheese, at room temperature
- ¾ cup (150 g) granulated sugar
- 3 tablespoons (27 g) cornstarch, or tapioca starch or arrowroot
- ¼ teaspoon kosher salt
- 1 ½ teaspoons pure vanilla extract
- 3 (150 g (weighed out of shell)) eggs, at room temperature
Instructions
Oven instructions
- Preheat your oven to 300°F. Grease well an 8-inch or 9-inch springform pan and line the bottom with a round of parchment paper. Place a large sheet of aluminum foil on the top oven rack.
- Pour 2 cups of hot water into a roasting pan or oven-safe casserole dish and place it on the bottom rack of the oven as it heats.
- In a medium-size bowl, place the cookie crumbs and melted butter and mix until the crumbs are moistened. Press the crumbs into the bottom and halfway up the sides of the prepared pan. Set the pan aside.
- In a large bowl with a hand mixer or the bowl of a stand mixer fitted with the paddle attachment, place the cream cheese, sugar, cornstarch, salt, and vanilla, and beat on high speed until very light and fluffy.
- Scrape down the sides of the mixing bowl at least once, and continue to beat. With the mixer on medium-low speed, add the eggs one at a time and mix just until smooth.
- Scrape the filling out of the bowl and on top of the crust in the prepared pan. Spread into an even layer and smack the bottom of the pan flat on the counter a few times to break up any large air bubbles.
- Place the pan on top of the aluminum foil on the top rack of the preheated oven, and bake for 50 minutes, or until most of the cake is set, but the 2 inches in the center are still somewhat loose when shaken from side to side. If necessary, continue to bake for another 5 to 10 minutes (10 to 15 minutes for an 8-inch pan).
- Once the cake is baked, turn off the oven and crack the oven door a bit, leaving the cake inside. Allow the cake to sit for about 30 minutes or until the oven temperature has reached about 200°F.
- Remove the cake from the oven and place it on a wire rack to cool for 10 minutes. Run a butter knife around the edge of the cake to make sure it will release cleanly from the pan as it shrinks. Allow the cake to cool, still in the pan, until it reaches room temperature.
- Cover and chill the cake, still in the pan, for at least 4 hours until set.
- Unmold the chilled cake and loosen the bottom from the pan. Transfer the cake carefully to a serving platter, slice with a hot, wet knife, cleaned between each cut, and serve chilled.
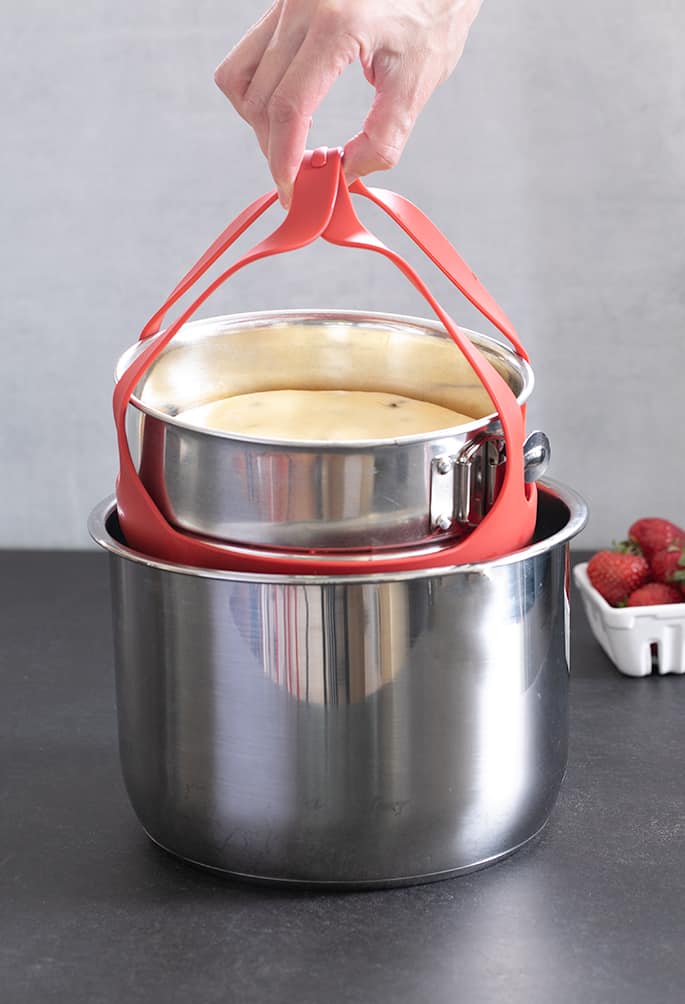
Instant Pot Instructions
- Grease and line a springform pan that fits your Instant Pot. Use the same recipe but reduce ingredients by one-third for the smaller pan.
- Add about an inch of water to the Instant Pot. Cover the top of the cheesecake pan with foil to keep condensation from dripping onto the cake. Place the pan in a silicone sling and lower it into the pot on top of the water.
- Seal the lid and set the Instant Pot to manual for 32 minutes. When cooking finishes, turn it off and let the pressure release naturally for 20 minutes.
- Carefully release any remaining pressure, open the lid, and remove the cheesecake pan. Let it cool to room temperature on a wire rack, then chill before serving.
Video
Notes
Nutrition
Nutrition information is automatically calculated, so should only be used as an approximation.

make ahead/leftovers
Storage instructions
Cheesecake needs at least 4 hours to chill, so it’s perfect for making ahead. Store it covered in the fridge for 5 to 7 days. To keep plastic wrap from sticking to the surface, place a few toothpicks on top before covering.
For longer storage, freeze the cheesecake for up to 3 months. Cool it completely first, then freeze whole (unwrap and tightly rewrap after frozen) or slice and wrap pieces individually. Defrost in the fridge overnight. Avoid thawing slices at room temperature to prevent uneven melting.
FAQs
Yes! Philadelphia cream cheese contains no gluten, whether block or whipped. This recipe uses the block kind.
Classic cheesecake uses cream cheese, sugar, and eggs. New York-style has more cream cheese and often sour cream or heavy cream, making it denser and richer.
Absolutely! Use a muffin tin with liners. Press a spoonful of crust into each liner, then fill 2/3 full with cheesecake batter. Bake for 15–20 minutes.
I prefer oven-baked cheesecake for a creamier, lighter texture. Instant Pot cheesecakes tend to be denser and crack more easily, even with careful pressure release.
More easy cheesecake recipes
For a fuss-free treat, try our no bake cheesecake with gelatin—it’s smooth, creamy, and ready in 2 hours or less.
Want cookies inside? Try our no bake Oreo cheesecake.
Or turn cheesecake into a fun snack with chocolate-dipped cheesecake bites.


I made this as a 2/3 recipe since i only had 2 blocks of cream cheese, and I added the eggs at the start, and baked it for the full time even though there was less ingredients (whoops!) and it still came out amazing!! I’m trying this again today for Easter, of course I have 3 blocks of cream cheese this time, haha. I’m doing it with a crushed gluten free Oreo crust!! this is the best and easiest cheesecake recipe ever!!
I have made this numerous times for gatherings
As always so good!
I’m really happy to hear that you love the cheesecake, Sharon!
At the top you say a gf cheesecake does not need water in the oven but in the directions in the recipe it instructs you to put a pan of water in the oven.
Could you please clarify?
Thank you
You don’t need a water bath, Mary, where the cheesecake is in the same pan as the water. This is an alternative way of achieving the same result by putting a pan of water separately in the oven.
Hi,
Have you ever done this recipe as a chocolate cheesecake? What would I need to change?
Daniel
Hi, Daniel, that’s an interesting question. No, I’ve never made this into a chocolate cheesecake, which would require adding melted chocolate and some recipe testing trial and error. I’m afraid I can’t just provide that as a modification. I do, however, have a recipe for a no bake chocolate cheesecake that you might like!
Hi, can I use a glass Pyrex dish instead of the springform pan in my Instapot?
Hi, Kolleen, if the dish is safe for your Instant Pot, then I don’t see why not!
Yes, it’s a Pyrex, so awesome, can’t wait to try this recipe!
I usually use commercial g free graham cracker crumbs but the next day the crust is soggy. I don’t like that at I don’t use a water bath. If I baked my own crackers would the bottom stay crisp?
I’m afraid I can’t say for sure why your crust is soggy, Marilyn, or that if you made your own graham crackers it wouldn’t be. It really depends on how you prepared the crust, what the ratio of other ingredients was, and how you made or baked the filling you used.
Do you remove the pan of water before baking the cheesecake or leave it in the oven while baking the entire cheesecake?
The pan stays in the oven, just as the recipe describes, Peggy. If you removed it, I would have been explicit!
Great Recipe!! Delish!
Haven’t tried this yet but was wondering if you have ever made the classic Italian Ricotta Cheesecake. Would love to see a recipe for this.
Hi, Maureen, I have made an Italian cheesecake, but I don’t have a recipe to share for it right now. I’ll put it on the list, though!
First time making a gluten free cheesecake and it was amazing!! I used gluten free crust as well and added a fruit topping. *chefs kiss* thanks for the recipe!!