
This post may contain affiliate links. Please read our disclosure policy.
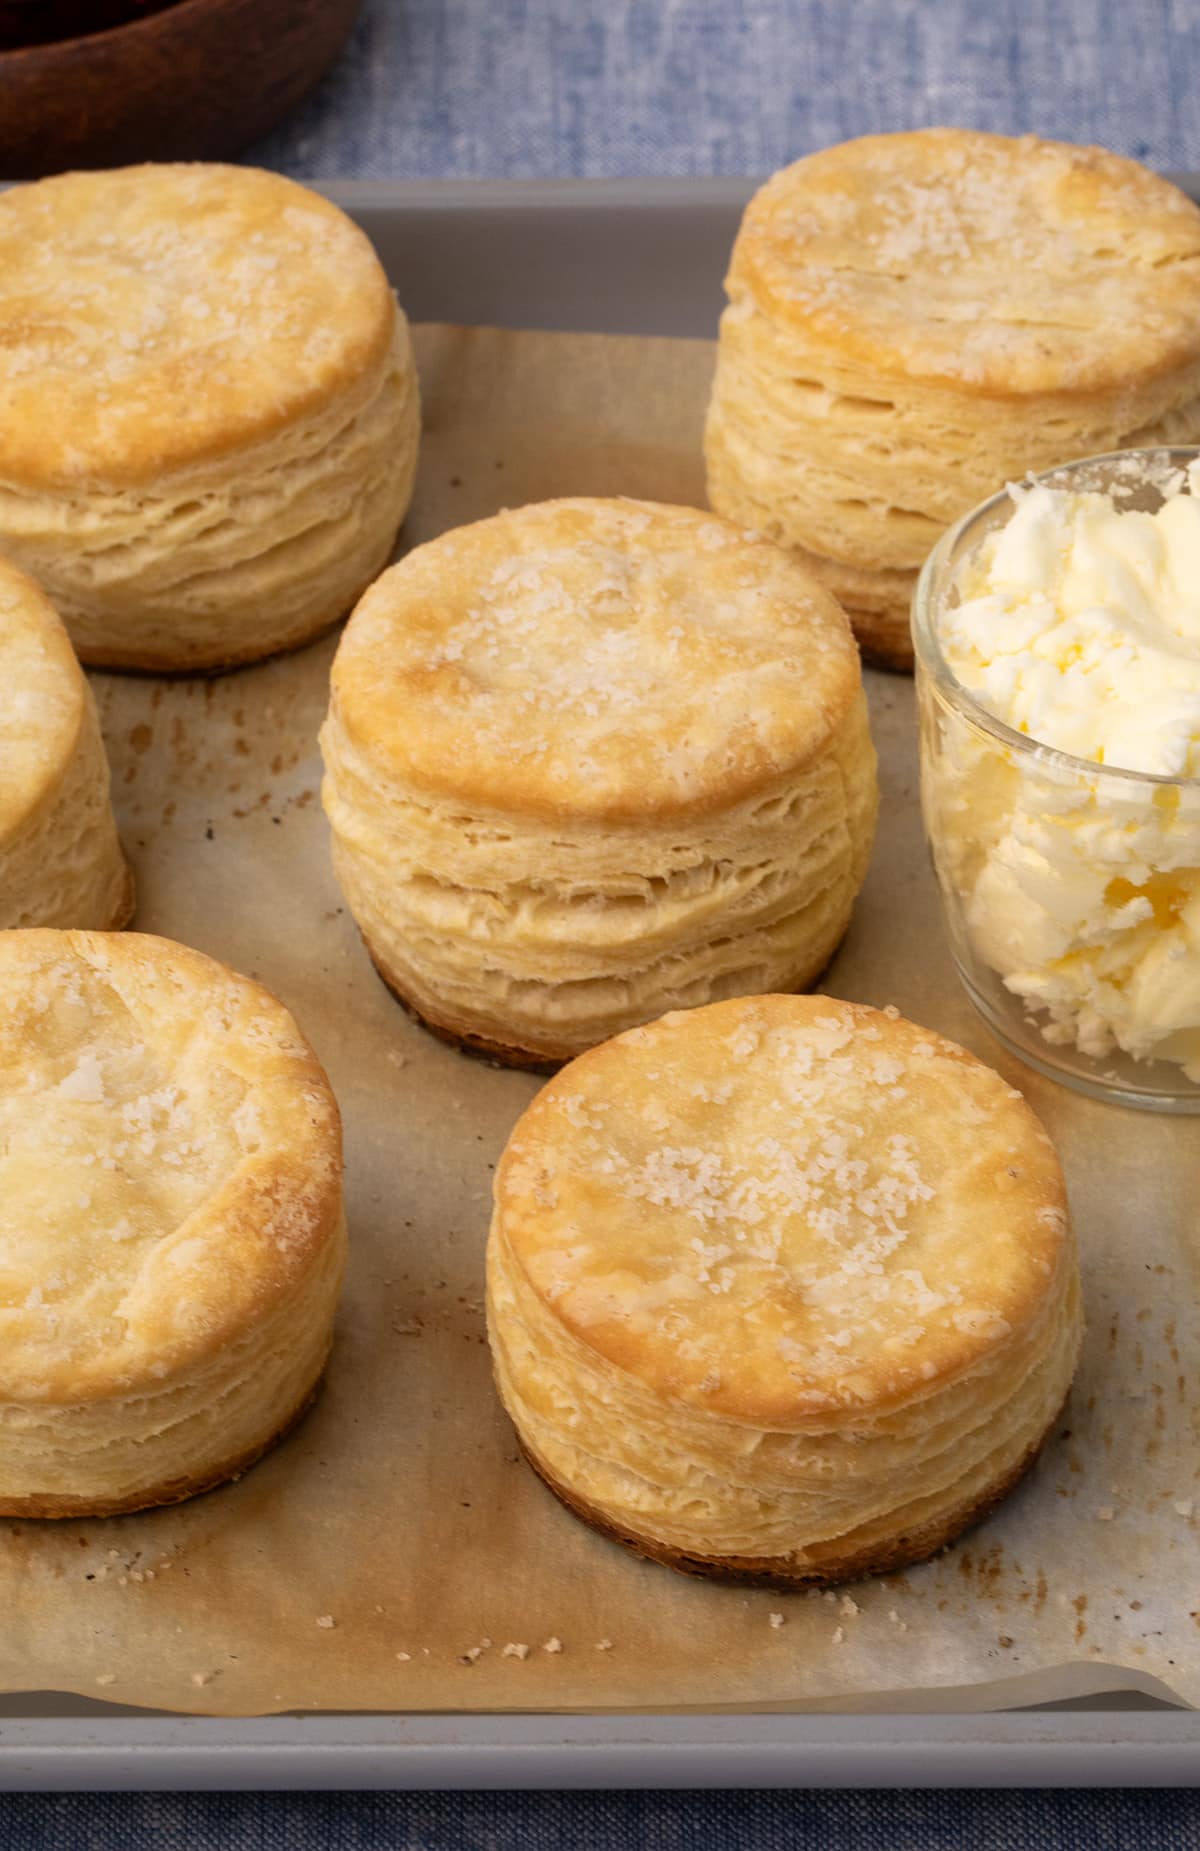
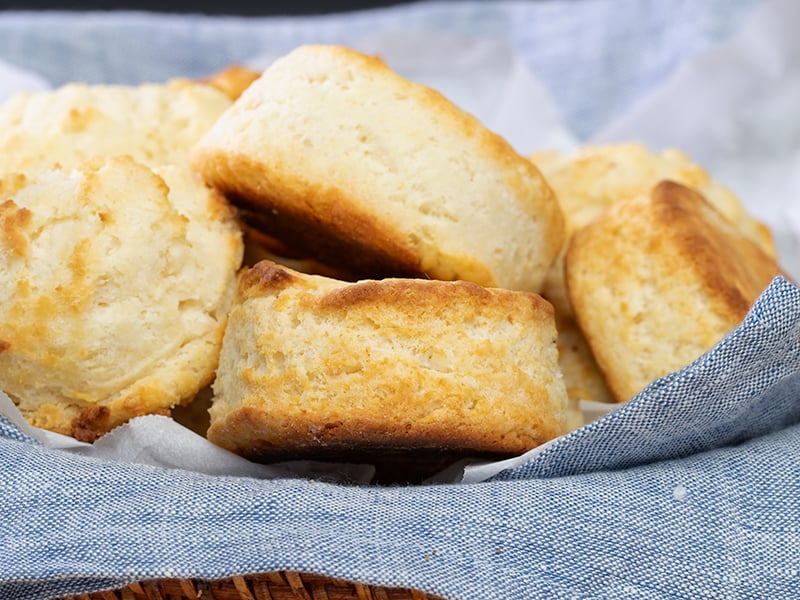
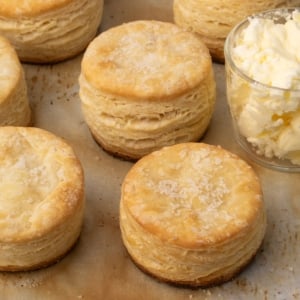
This gluten free biscuits recipe delivers perfect fluffy, buttery biscuits with a tender crumb that nobody will guess are gluten-free, and it's simple enough to learn by heart.
Craft stunning, pull-apart layered biscuits that are even better than the ones you remember from the can, with extra crispy bottoms from baking at high heat. I may not be a Southerner, but I've been taught by some of the best, and this recipe will turn out perfect biscuits that even the gluten-eaters will love!
Why this recipe works
I've tested and perfected this recipe with detailed instructions to deliver rich, buttery biscuits consistently, from your very first time making it. It may take a bit of time to create the dough, while keeping it ice cold, to create those layers, but you'll never regret it.
The right method, called “lamination,” is the key to classic layered biscuits that are soft and tender, not dense, inside, and crispy on the bottom and all around. Don't trust anyone who promises flaky biscuits without this process!
This recipe isn't difficult, though, and biscuits like Pillsbury Grands are well within your reach. You need a standard, well-balanced rice-based all purpose gluten free flour blend and basic pantry staples. No hard-to-find ingredients needed.
“My oh my. Those gluten free biscuits were so satisfying.
All y'all need to try this! And I forgot the Star Rating on the comment I just left. Disappointed there are only 5 – should have been 6!”
Recipe ingredients
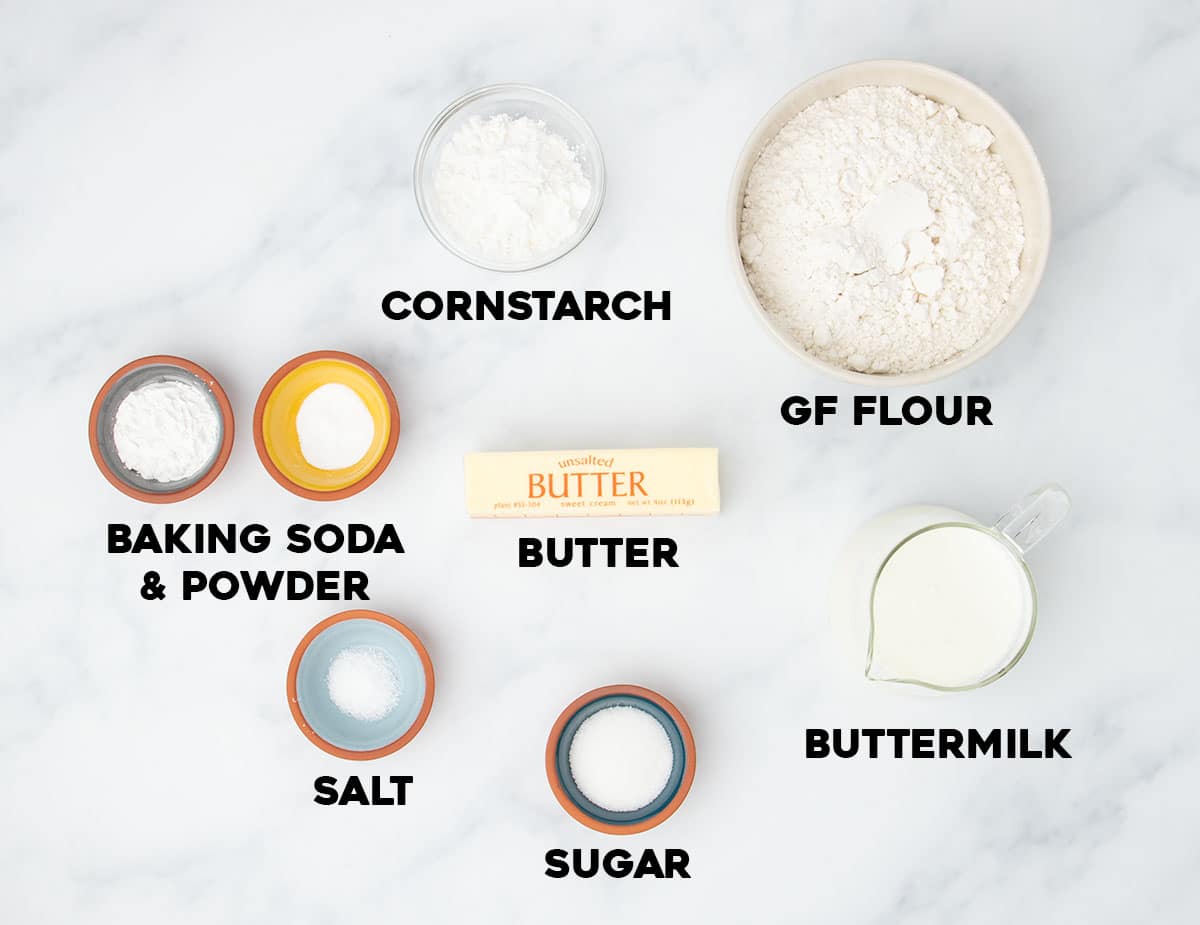
To get light, tender gluten free biscuits every time, it helps to understand what each ingredient does—and how to choose the right ones for ideal results:
- Gluten free flour: Use a high-quality all purpose gluten free flour blend made with finely ground rice flour. I highly recommend Better Batter’s original blend or Nicole’s Best multipurpose blend (with added xanthan gum) for the proper structure to create tender biscuits that hold their shape as they cool. If your choice is Bob's Red Mill 1-to-1 (in the blue bag), add 1/2 teaspoon more gum to avoid a crumbly texture since it has less than an optimal amount.
- Cornstarch: Lightens the crumb and softens the texture more, no matter which blend you're using.
- Baking powder and baking soda: Baking powder gives lift; baking soda helps the biscuits brown beautifully.
- Salt and sugar: Enhance flavor and help lock in moisture.
- Butter: Adds flavor and creates steam as cold butter layered between flour melts, lifting the dough to create those flaky layers like an accordion.
- Buttermilk: Brings the dough together and adds a subtle tangy flavor. It has the right moisture balance, unlike milk which would have too much water.

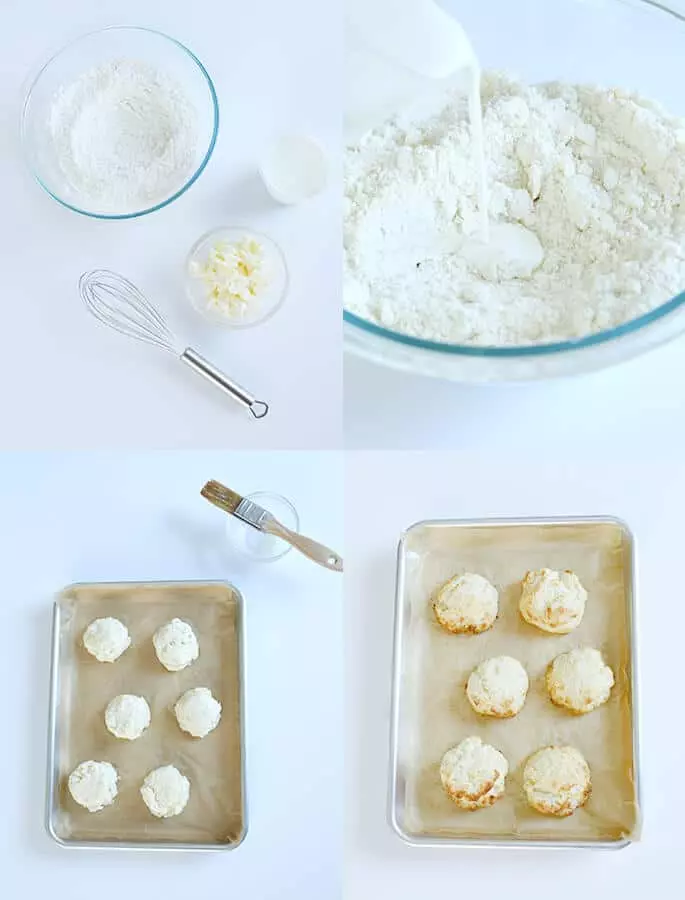
How to make gluten free biscuits (with step by step photos)
See the recipe card below for the precise ingredient amounts. Study the photos and instructions below, then make this recipe once, and you’ll know it from memory forever:
Whisk dry ingredients
Whisk together the gluten free flour blend plus xanthan gum, cornstarch, baking powder, baking soda, salt, and sugar in a large bowl. There's a lot of baking powder, so whisk well to avoid clumps.
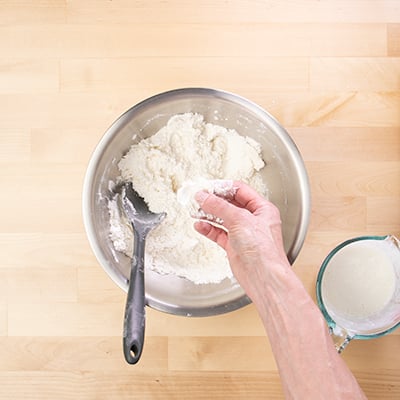
Add butter chunks
Use a bench scraper or sharp knife to cut cold butter into ¾-inch pieces, toss them in the dry ingredients, and flatten into flat shards with your fingers. These create steam pockets for flaky layers, so keep them large. No small peas of butter, which melt too soon and make hard biscuits! If anything seems greasy, pop the bowl in the refrigerator until it firms back up.
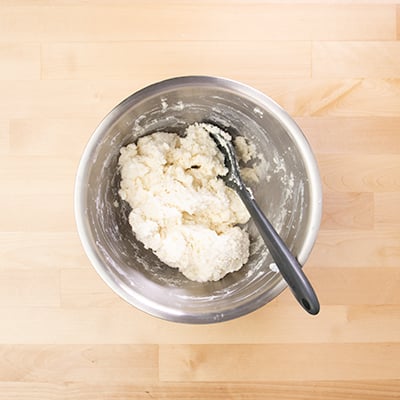
Bring the dough together
Stir in 3/4 cup cold, thick buttermilk to bring the dough together. Isolate any dry, crumbly spots and add more buttermilk right to those areas, mixing it in until everything is just moistened. That way you can add just enough moisture without making the dough too wet.
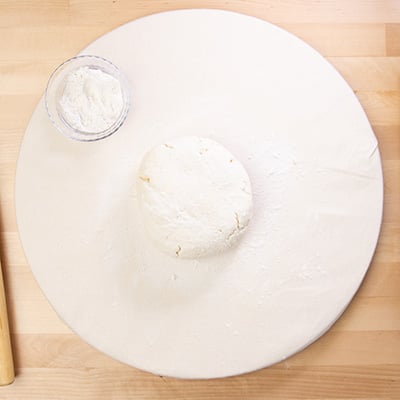
Laminate the dough
Press the raw dough into a disk. Everything should hold together well, but you don't want a wet dough or you'll end up adding too much flour during shaping, which can lead to tasteless biscuits.
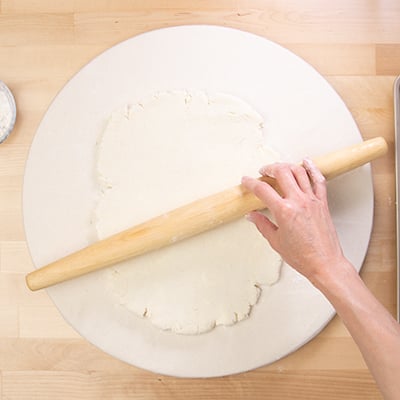
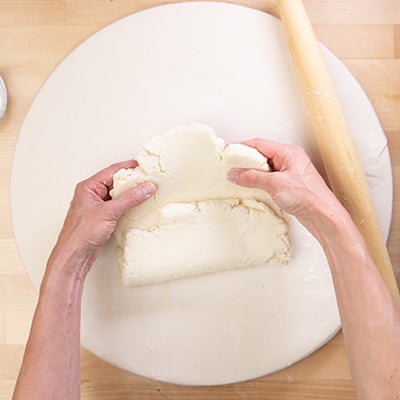
Sprinkle a bit of flour on a flat surface and roll the dough out ¾-inch thick, then fold it in thirds like a business letter. Repeat the roll-and-fold 1 to 2 more times to build layers that multiply like gluten free puff pastry. This process is called lamination, and it's how we build multiplying layers of butter-studded dough.
This is how we create dozens of paper-thin layers of butter and dough, which create the pull-apart texture of Grands biscuits when baked.
Chill the dough just enough
At any point during shaping, if the dough doesn't seem cold to the touch, wrap it lightly in plastic wrap and refrigerate it just until it's firm so the butter stays cold right up until it hits the oven and expands to create flaky layers. Don't chill until the dough is too hard to shape, though.
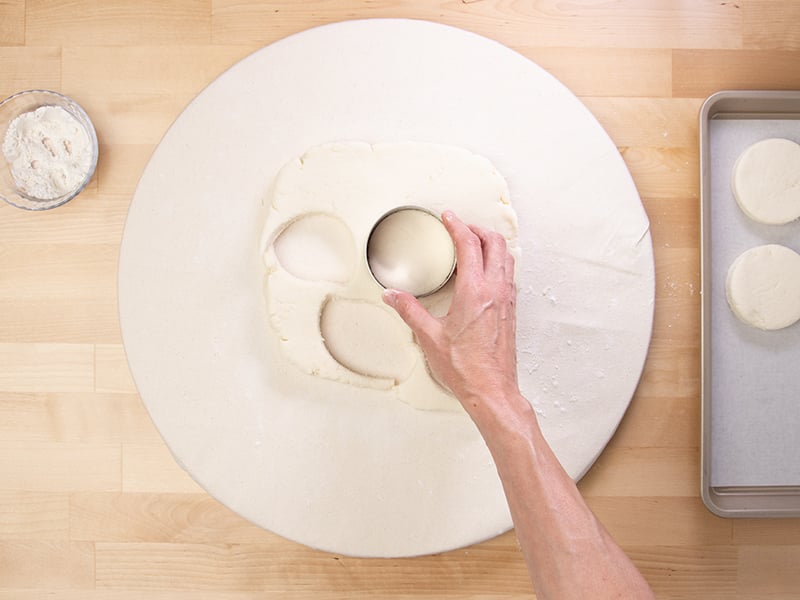
Cut out rounds
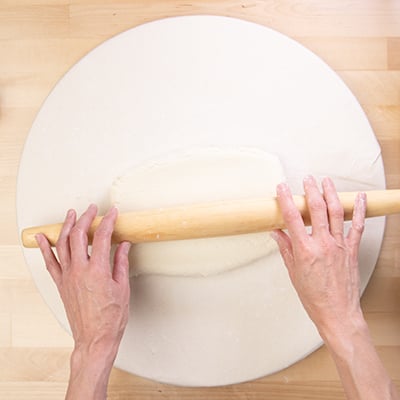
Press and roll the smooth, layered dough until it's about 1 inch thick. Flour a round 2-inch biscuit cutter so it doesn't stick, and press straight down, no twisting, to cut out shapes. Those sharply defined sides help the biscuits rise tall.
Bake the biscuits
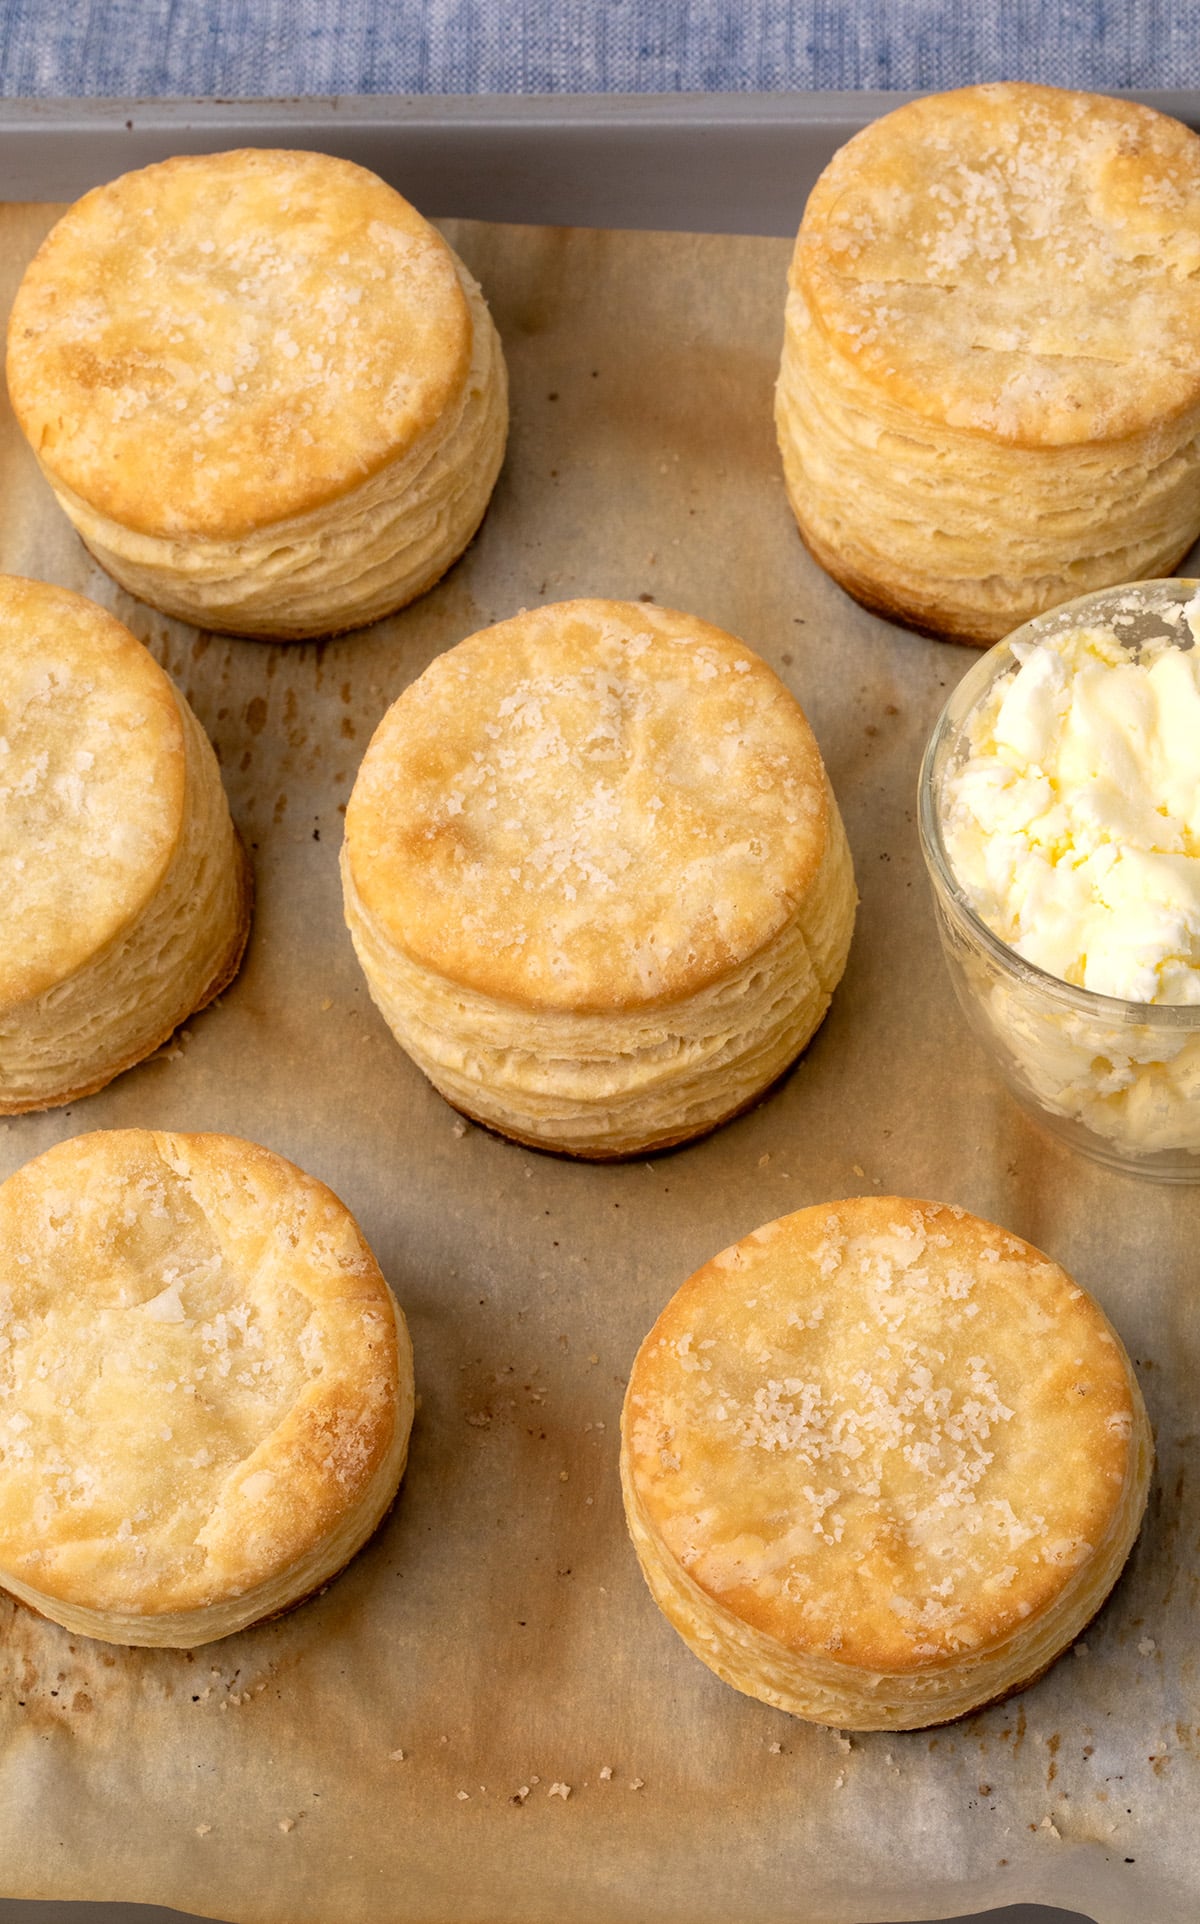
Bake at 425°F until puffed and pale golden. The biscuits will grow taller as they bake from the baking powder and soda, but also from the expansion of the layers. As the cold butter in each layer expands, it will separate the layers like the pleats on an accordion.
Expert tips
Here’s how to make this recipe work right from the very first time:
Keep everything cold
Cold butter and cold buttermilk help your biscuits rise tall and bake tender as the butter expands up and out during baking. If your dough starts to feel soft or at all greasy, stop and chill it before continuing.
Create wide, flat butter shards
In my experience, tools like pastry blenders tend to break the butter down too small, which leads to flatter biscuits. You want visible pieces of butter—those cold, solid pieces create steam as they melt rapidly which work with the baking powder to separate the biscuit layers during baking.
Think like a builder
As you work through this recipe, it might help to think of yourself like a builder following an architect's plans. Measure your flour blend, cornstarch, and butter precisely by weight, and laminate the dough to create the proper physical structure. Your reward will those buttery, flaky, accordion-style layers!
Ingredient substitutions
No buttermilk
Use half plain yogurt (or sour cream) and half milk by volume. You can also use plain cultured kefir instead of buttermilk without any other changes.
Dairy free
Combine ½ cup plain nondairy yogurt with ½ cup unsweetened dairy free milk, and swap the butter for half block-style vegan butter like Melt or Miyoko's Creamery, half shortening like Spectrum or Crisco brand. That combination should balance the moisture and keep the dough from leaking butter.
Corn free
Choose a flour blend that’s corn-free (like Better Batter or Bob's 1-to-1), and replace the cornstarch in the recipe with arrowroot or potato starch.
Storage instructions
Short-term:
Store baked biscuits in an airtight container at room temperature for up to 12 hours. After that, they may begin to dry out.
To freeze baked biscuits:
Let them cool completely, then freeze in a single layer. Once frozen, transfer to a freezer-safe bag and freeze for up to 2 months.
To reheat:
Defrost at room temperature. To revive their texture, sprinkle lightly with water and warm in a 300°F oven or toaster oven until heated through.
To freeze raw biscuit dough:
Freeze shaped biscuits in a zip-top bag or container. Bake straight from frozen. Start at 400°F for 5 minutes, then increase to 425°F to finish baking. Add a few extra minutes to the total bake time.
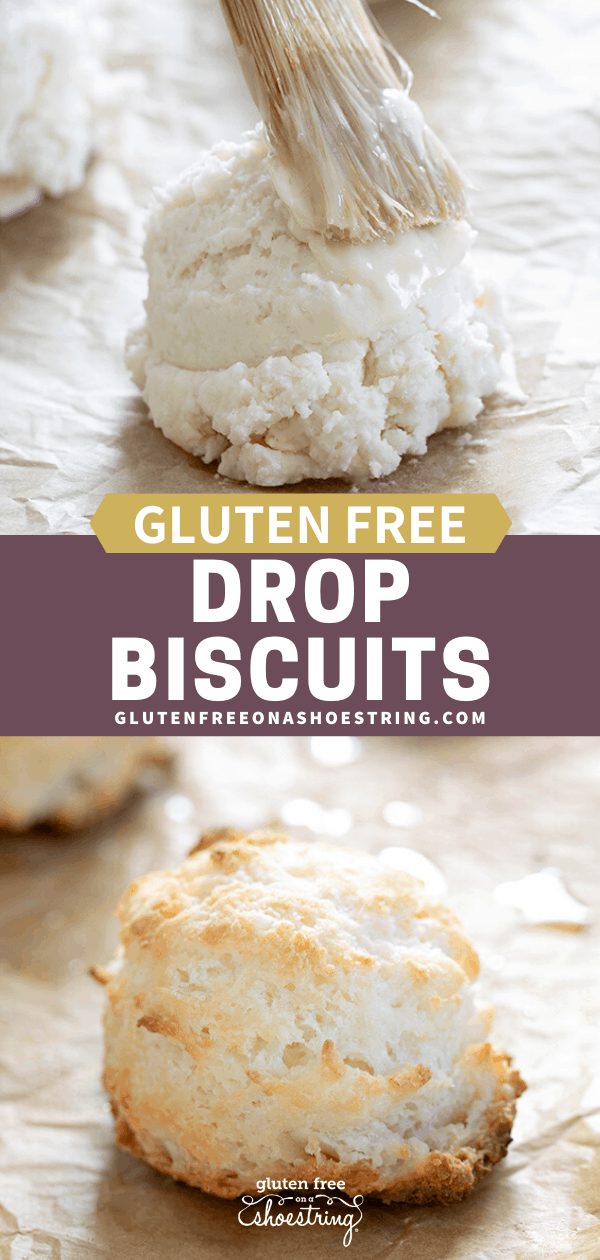
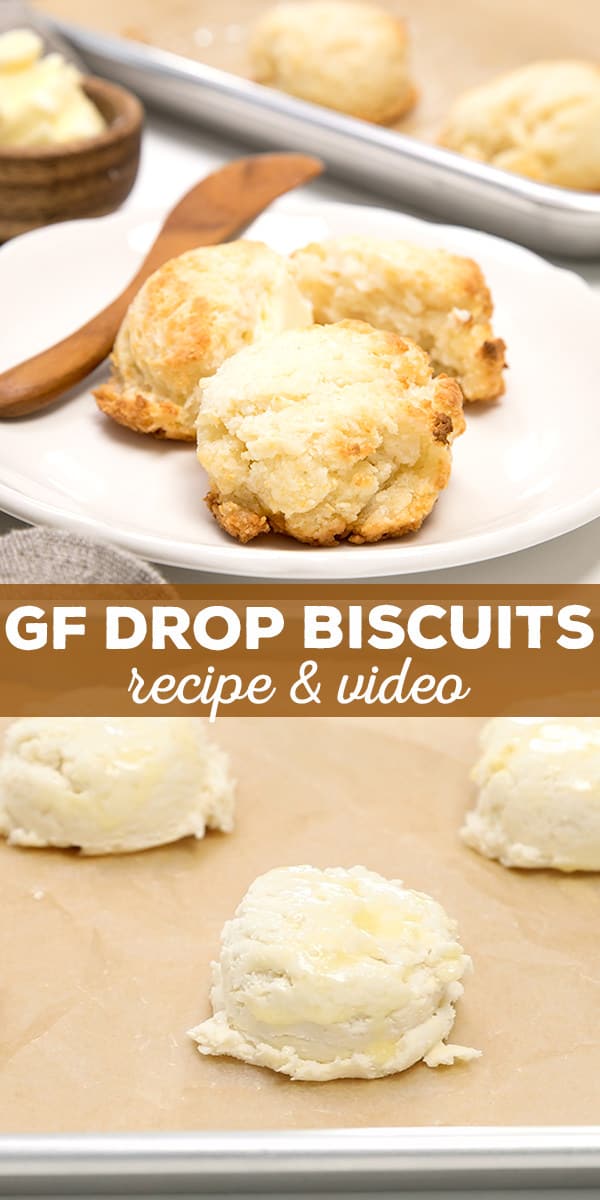
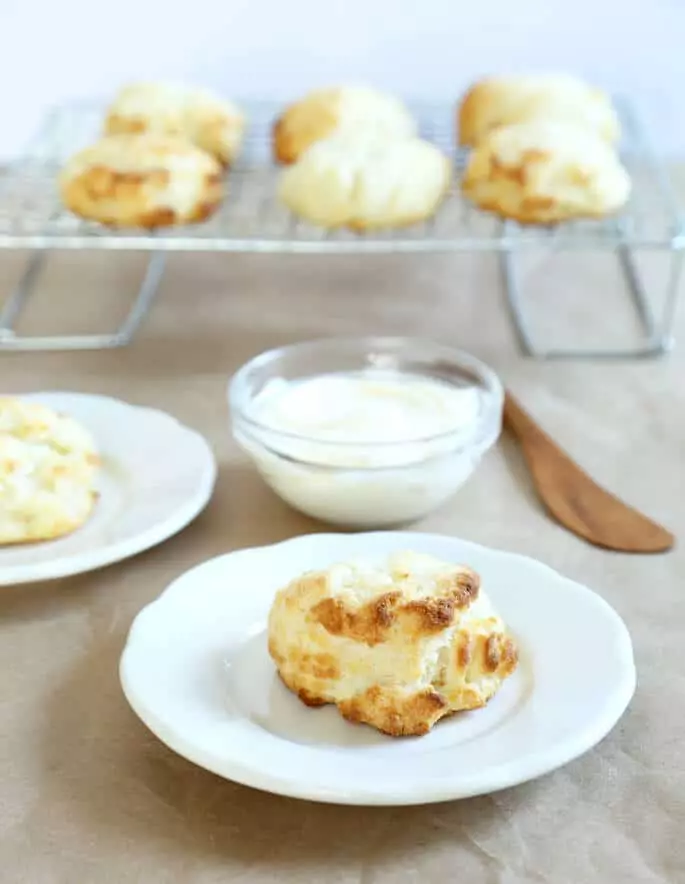
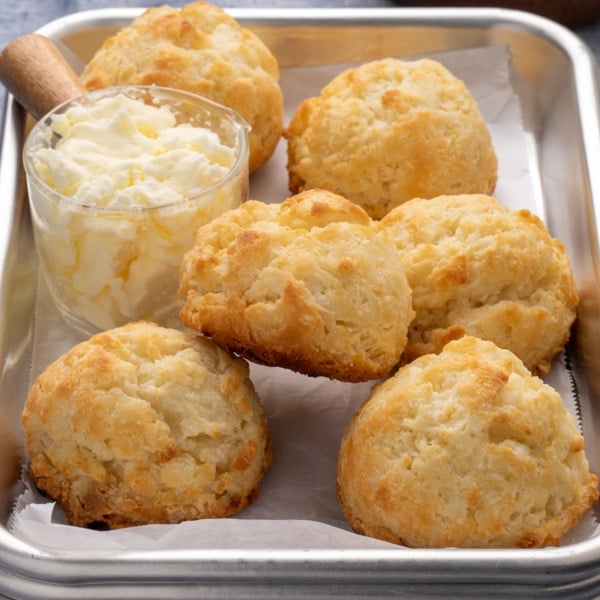
Looking for drop biscuits?
This recipe is designed for layered, flaky biscuits, like the kind you remember from the can. For a scoop-and-bake style, head over to our gluten free drop biscuits recipe.
Gluten Free Biscuits Recipe
Ingredients
- 1 ¾ cups (245 g) all purpose gluten free flour blend, plus more for sprinkling (See Recipe Notes)
- 1 teaspoon xanthan gum, omit if your blend already contains it
- ¼ cup (36 g) cornstarch, (or try potato starch or arrowroot)
- 1 tablespoon baking powder
- ½ teaspoon baking soda
- ½ teaspoon kosher salt
- 1 tablespoon (12 g) granulated sugar
- 8 tablespoons (112 g) unsalted butter, chilled
- ¾ cup (6 fluid ounces) buttermilk, chilled, plus more as necessary
- 1 tablespoon (14 g) unsalted butter, melted
- Coarse salt, for sprinkling, optional
Instructions
- In a large bowl, whisk together the flour blend, xanthan gum, cornstarch, baking powder, baking soda, salt, and sugar.
- Cut the cold butter into ¾-inch cubes. If it begins to soften, chill until firm again.
- Add the butter to the dry ingredients and toss to coat. Flatten each piece between your fingers to create thin shards.
- Add 3/4 cup of cold buttermilk and mix to bring the dough together.
- Add more cold buttermilk by the tablespoon directly to dry patches in the biscuit dough and mix to combine. You will probably need at least another 2 tablespoons of buttermilk.
- Press the dough into a rough disk. If it no longer feels cold, chill for 5–10 minutes.
- Dust a flat surface very lightly with flour, place the disk of dough on top, and roll the dough into a rectangle about ¾-inch thick. Fold into thirds like a business letter, then roll out again.
- Repeat the fold-and-roll 1 or 2 more times to build layers, chilling as needed if the butter begins to soften.
- After the final fold, roll the dough a bit less than 1-inch thick. Cut into 2 1/2-inch rounds using a lightly floured biscuit cutter. Cut in one swift motion and shake the biscuit round out of the cutter.
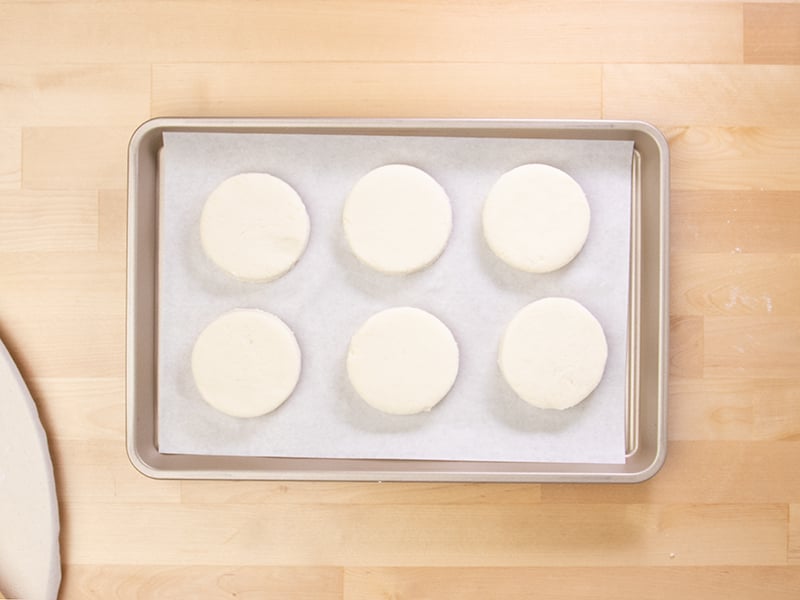
- Place the rounds 2 inches apart on the prepared baking sheet. Gather and reroll scraps as needed.
- Brush the tops of the shaped raw biscuits with the melted butter, and sprinkle lightly with optional coarse salt.
- Chill the shaped biscuits until firm. While the biscuits chill, preheat the oven to 425°F.
- Bake in the center of the preheated ove for about 15 minutes, until very puffed and pale golden. Allow the biscuits to cool briefly before serving. If they have leaked any of the butter during baking, they should reabsorb it as they cool.
Video
Notes
I recommend Better Batter's original blend gluten free flour and Nicole's Best multipurpose blend. Bob's Red Mill 1-to-1 Gluten Free Baking Flour should also work, as long as you add 1/2 teaspoon additional xanthan gum to avoid having crumbly biscuits. Cup4Cup has changed its formula and I no longer recommend it. To make your own blend, including a blend that is just like the old Cup4Cup, visit my all purpose gluten free flour blends page for DIY “mock” recipes.
Nutrition
Nutrition information is automatically calculated, so should only be used as an approximation.

FAQs
Yes, but keep a close eye on them—cast iron holds heat more intensely than a baking sheet, so the bottoms may brown faster and may burn suddenly.
No, it doesn’t provide the same thick texture and acidity needed to help lift and tenderize the dough that actual prepared buttermilk does.
That’s usually from butter that wasn't cold and solid enough before it went into the oven, so it melted into the dough rather than expanding quickly and making the biscuits light.
Yes! Freeze shaped biscuits in a single layer. Once frozen, store in a freezer-safe bag. Bake from frozen using the method in the storage section above.
Start with very cold butter, even placing it in the freezer briefly after chopping it. Toss it in the dry ingredients before flattening it, so the warmth of your hands doesn't begin to melt it. And chill the dough until firm again any time the dough starts to feel at all oily.


Wow. I have been backing GF for 15 years. Best GF biscuit recipe! Not grainy and so tender. Keeper!
Great to hear, Kari. Thanks for sharing your experience!
Hi Nicole
Regarding your GF biscuit recipe – when you say add add 1/2 teaspoon additional xanthan gum to avoid having crumbly biscuits when using Bob’s 1-1 – do you mean add the 1/2 tsp to the already stated 1 tsp, resulting in 1 1/2 tsp or should I add 1/2 tsp only.
Thank you
Hi, Elaine, you only add 1/2 teaspoon, since Bob’s has xanthan gum but doesn’t have enough.
Your recipe so far has been the best one yet. I also make it the regular way as well as GF. I have made it GF sourdough as well as regular sourdough still using your method for ingredients except I use regular al-purpose four.
I’m 70 yrs. young have been baking biscuits most all of my life. As GF or regular type of biscuits your recipe is really good. NOT DRY at all. Thank you for sharing your recipe.
That’s great to hear, Linda! I’m glad you haven’t had to give up your favorite foods (or making them) being gluten free.
When I use the one whole tablespoon of baking powder the biscuits have a bad taste because it seems way too much baking powder. I’m just wondering if it’s me , my taste buds? I didn’t use buttermilk but I can’t imagine that helping in the baking soda flavor
If you’re using baking soda mistakenly instead of baking powder, using an aluminum-based baking powder, or an expired baking powder, those can all cause bitterness, Onel. And you can’t make this recipe successfully without buttermilk or an equivalent as I describe in the recipe.