
This post may contain affiliate links. Please read our disclosure policy.
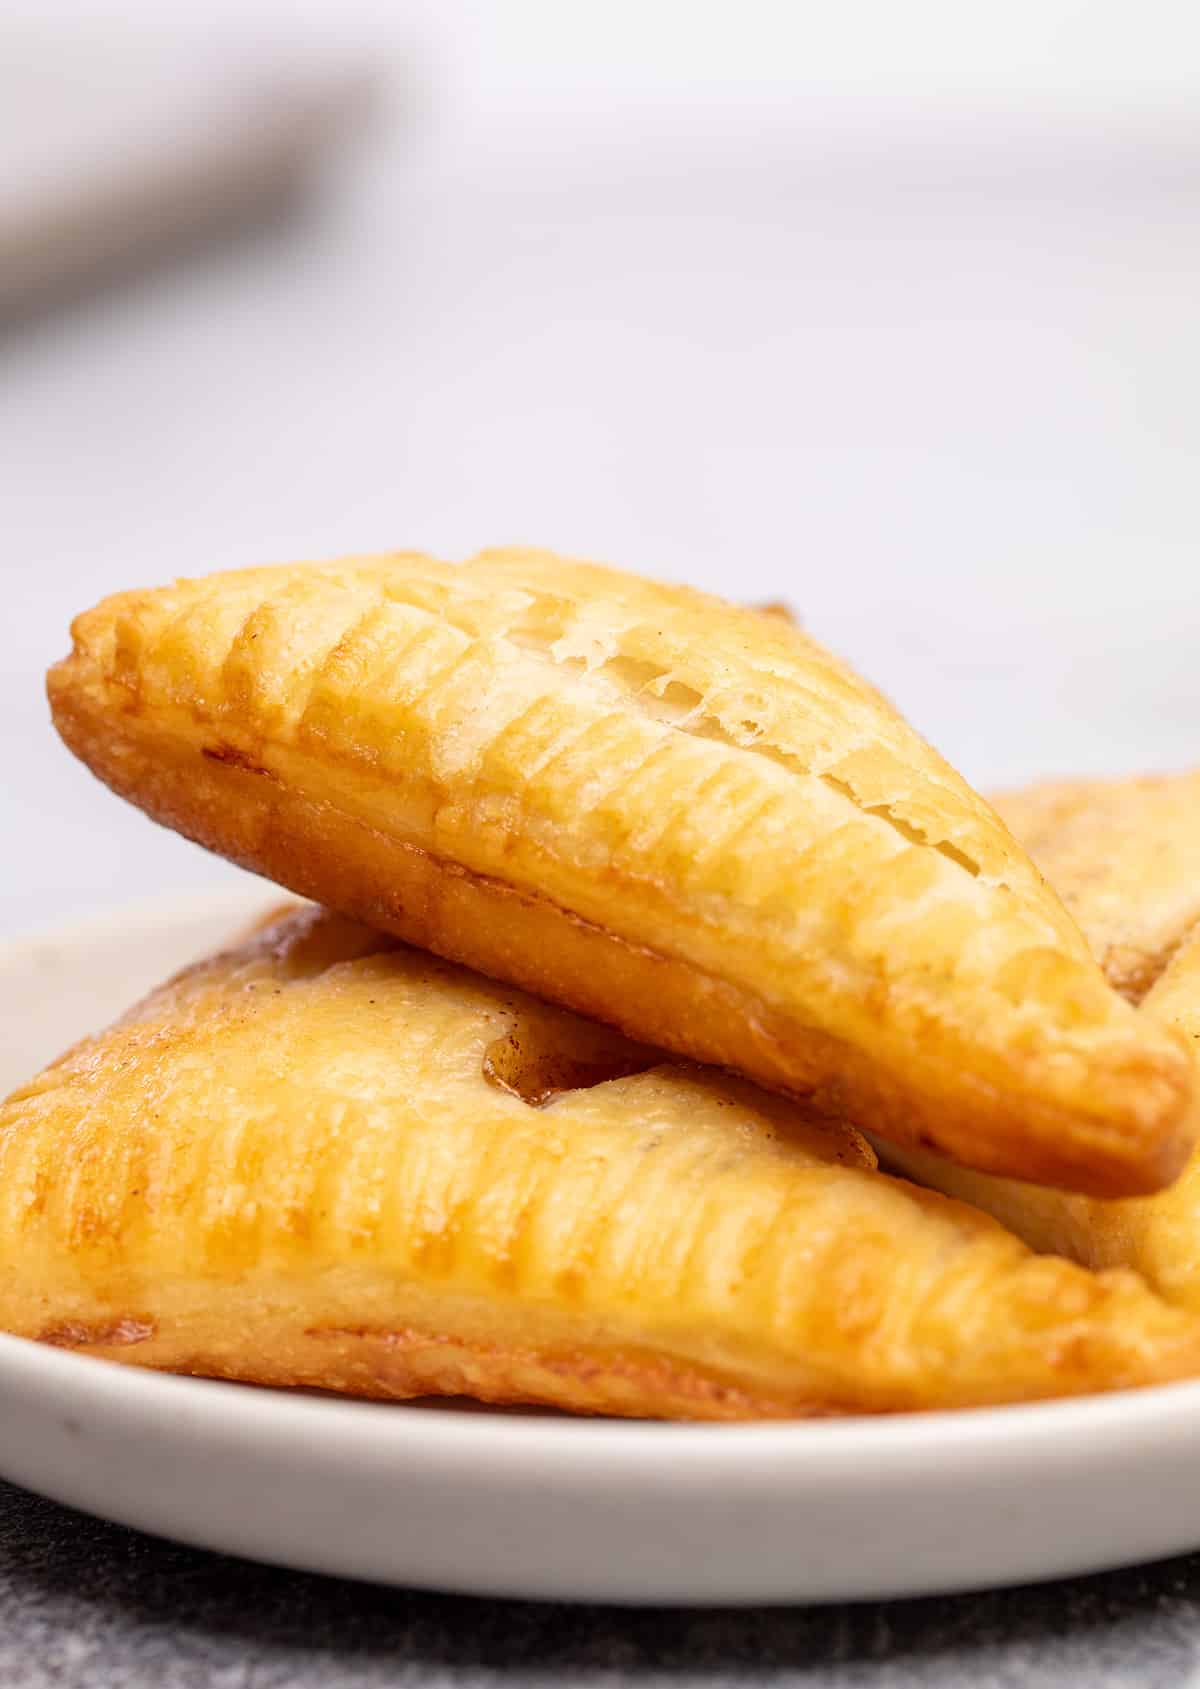
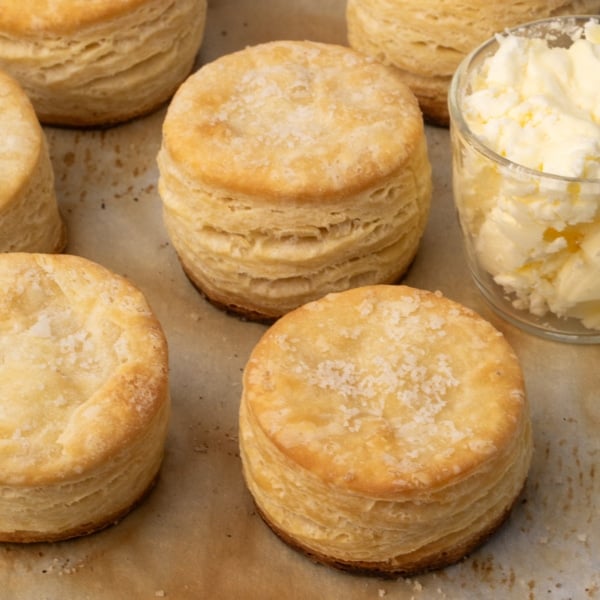
This gluten free puff pastry is light, crisp, and buttery, with layer upon layer of flake. It makes about 3 standard-size sheets—perfect for pies, tarts, turnovers, and more.
I’ll show you exactly how to create those signature layers at home. No fancy tools or guesswork—just cold ingredients, a little technique, and reliable step-by-step guidance.
my take
Why you'll love this recipe
- Classic taste, crisp texture: Buttery, flaky, golden brown, and rich—just like traditional puff pastry.
- Only 4 ingredients: All you need is gluten free flour blend, butter, cold water, and salt.
- Step-by-step guidance: Learn not just what to do, but why—so you can troubleshoot and succeed every time.
- Use it anywhere: From savory pies to sweet tarts, this dough works anywhere you’d use puff pastry.
How to make gluten free puff pastry
Puff pastry is made in two parts: the base dough and the butter packet. The dough is a simple mix of flour, water, and a bit of butter. The butter packet is really just butter, with a touch of flour.
You’ll prepare each part separately, then combine them into one stackable dough—the foundation for all those flaky layers.
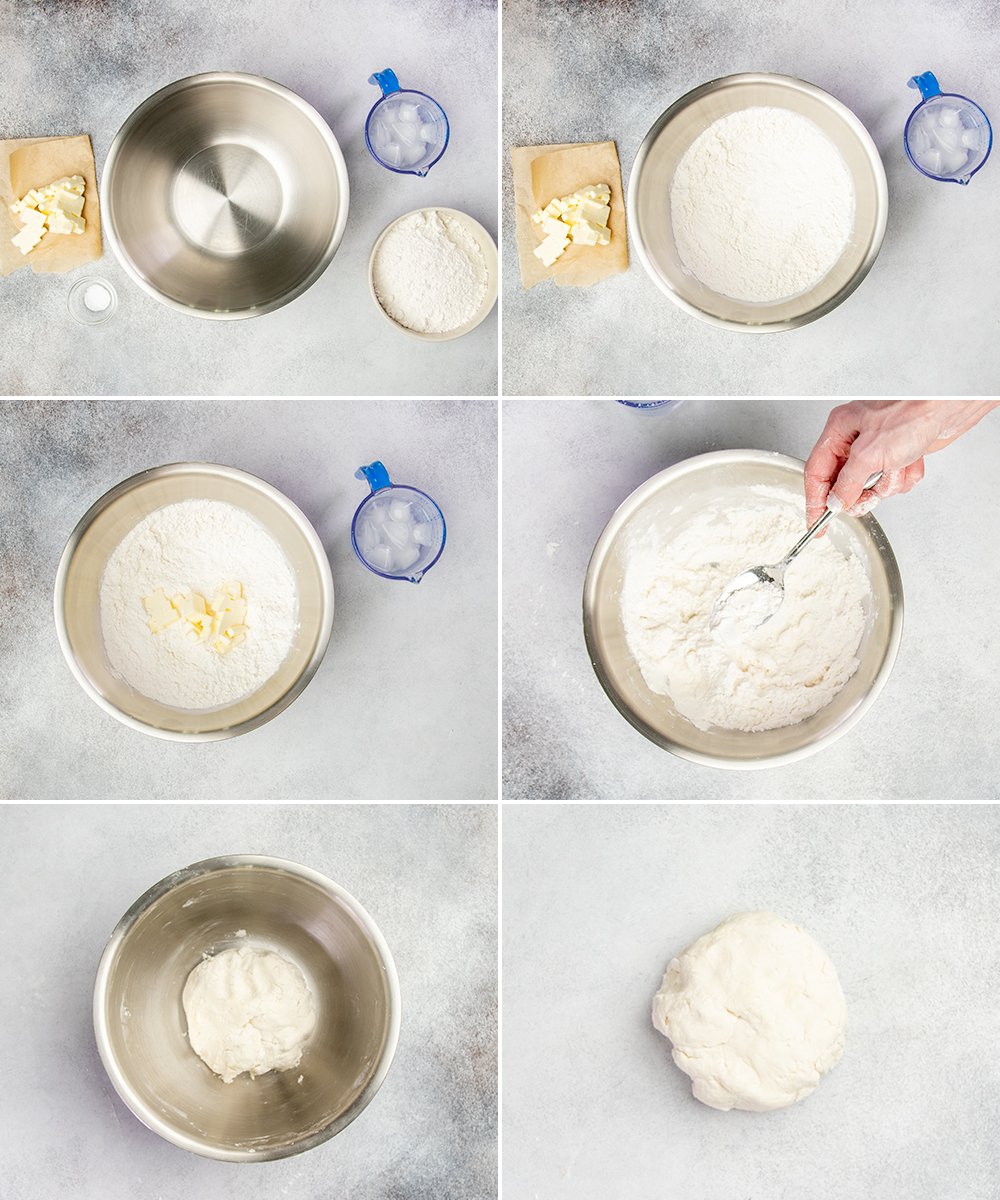
Make the base dough
The base dough surrounds the butter packet and holds the structure—just like gluten free pie crust. Here's how to make it:
- Whisk the flour blend and salt.
- Toss in cold, chopped butter and press each piece flat between your fingers.
- Add ice water a bit at a time, just until the dough holds together.
- Press into a disk, wrap tightly, and chill.
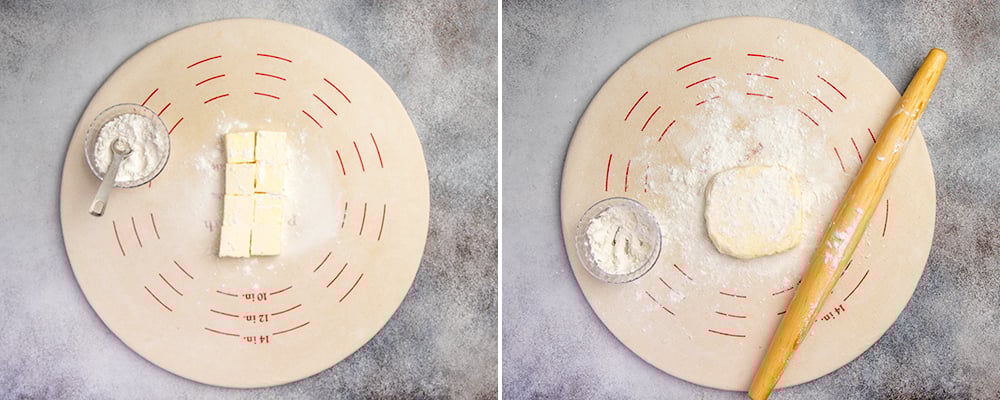
Make the butter packet
For the butter packet, you’ll shape cold butter into a flat, even square that’s ready to laminate.
- Cut 2 sticks of cold butter into 8 equal chunks.
- Arrange into a 2-by-4 grid on a floured surface. Dust with more flour.
- Pound and roll the butter until the pats press together.
- Fold and roll again until you have a cohesive 4-inch square—cold but pliable.
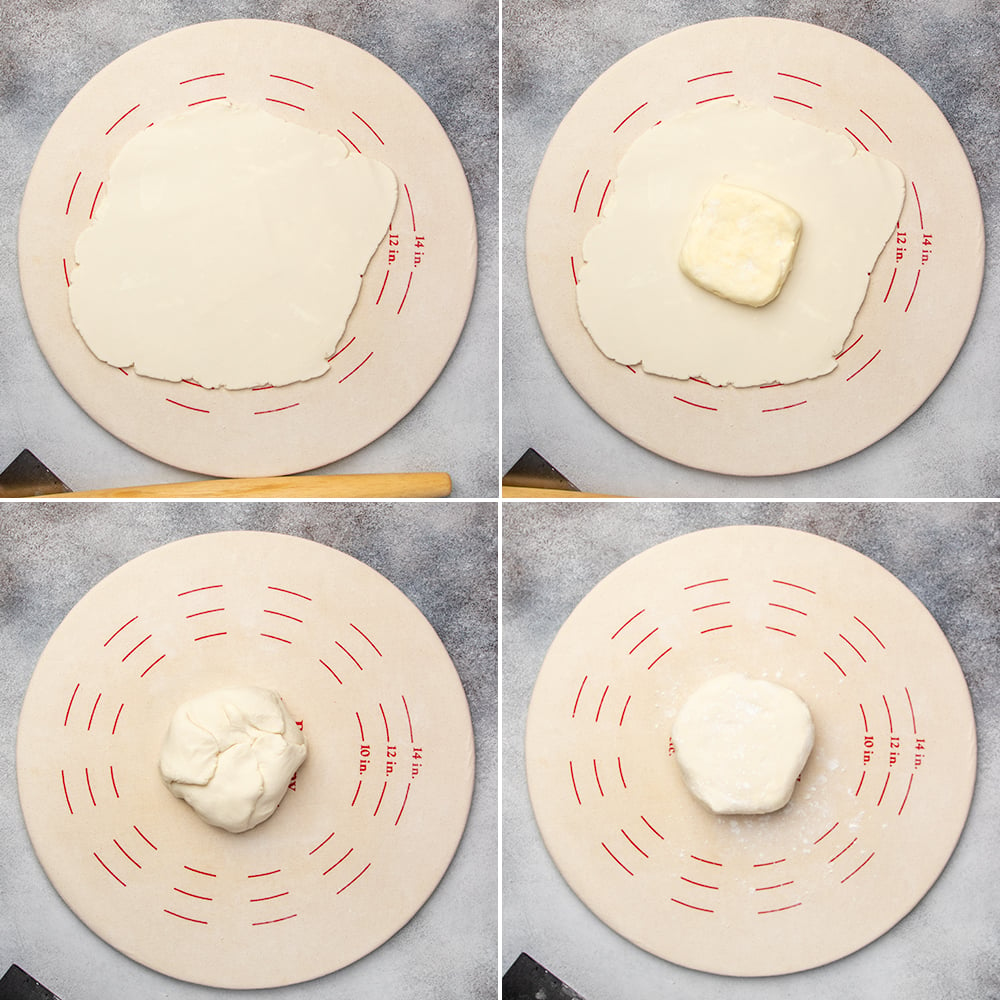
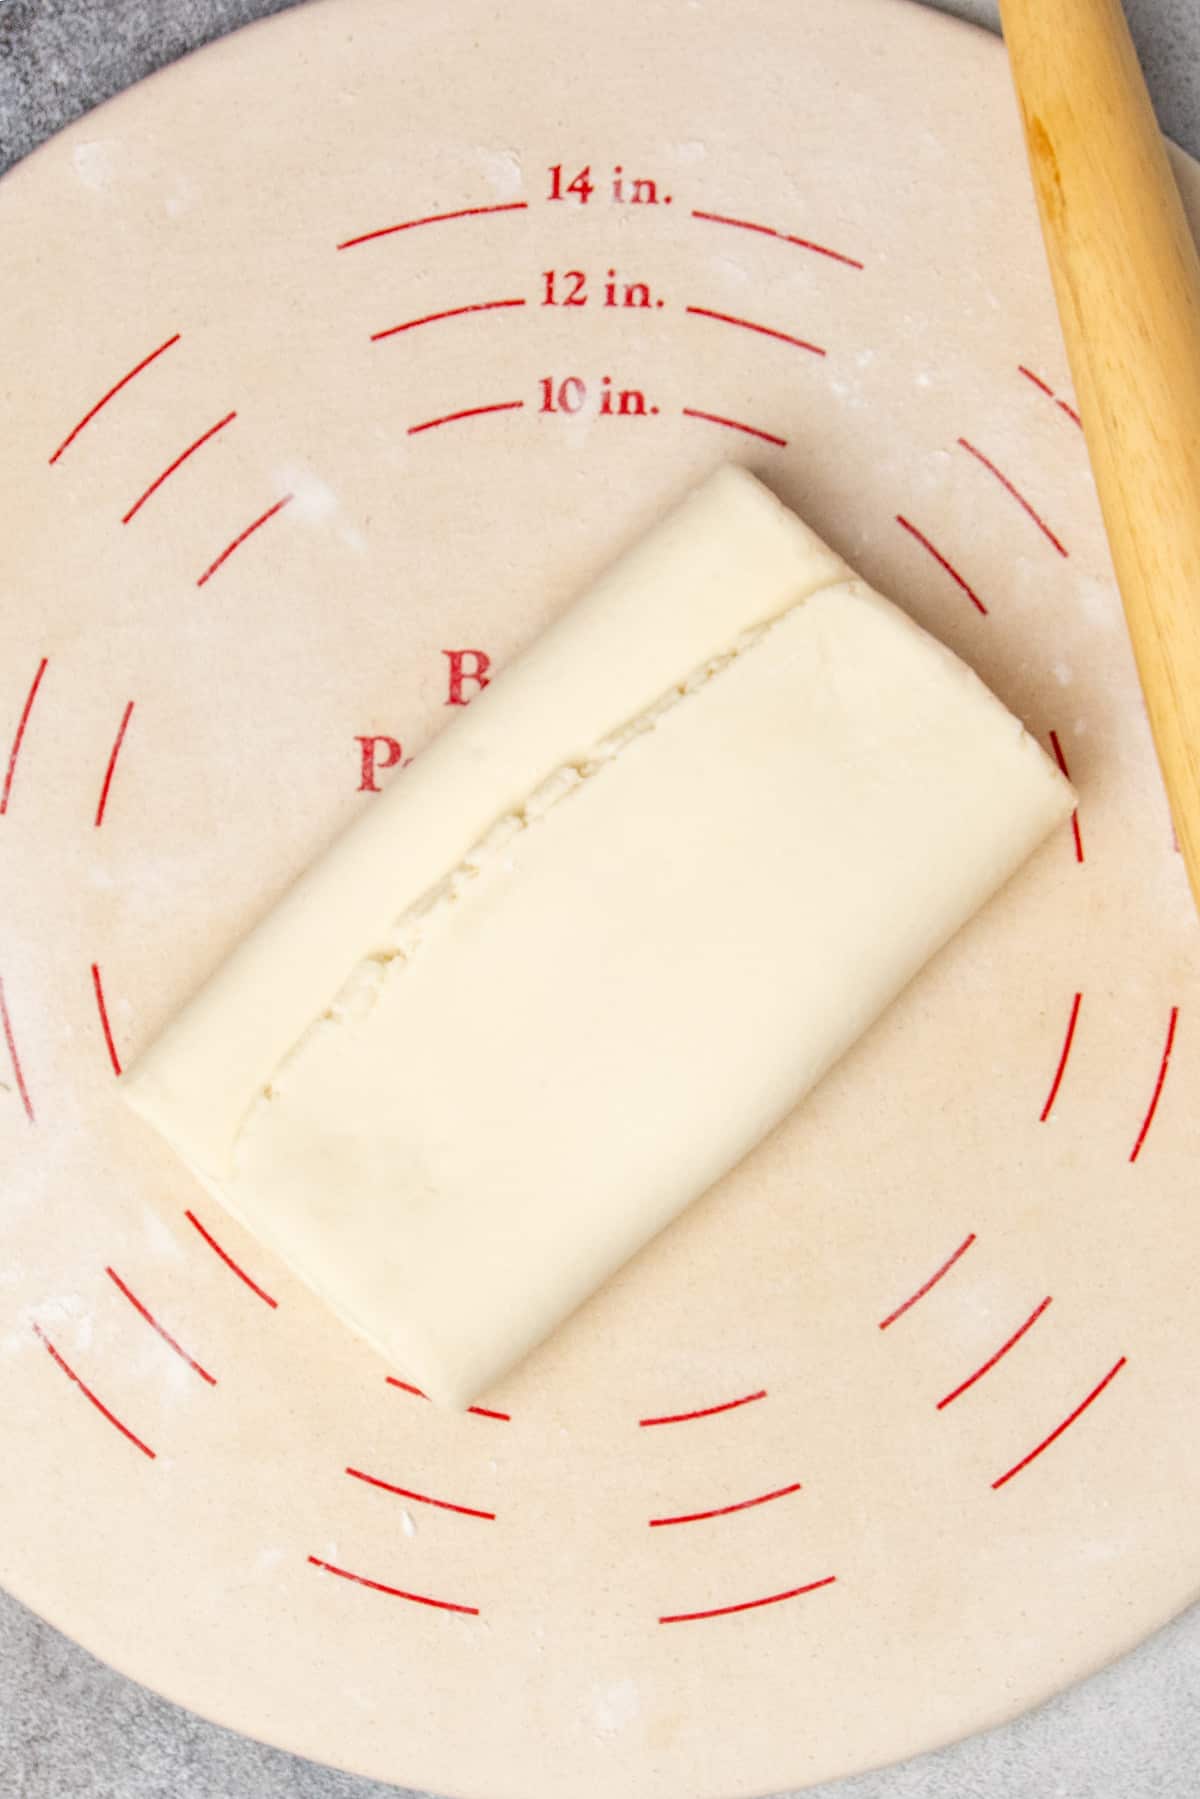
Combine base dough and butter packet
Time to bring the dough and butter together.
- Roll the base dough into a 6-inch square.
- Place the butter packet in the center, turned 45° like a diamond. Lightly score its outline.
- Set the butter aside.
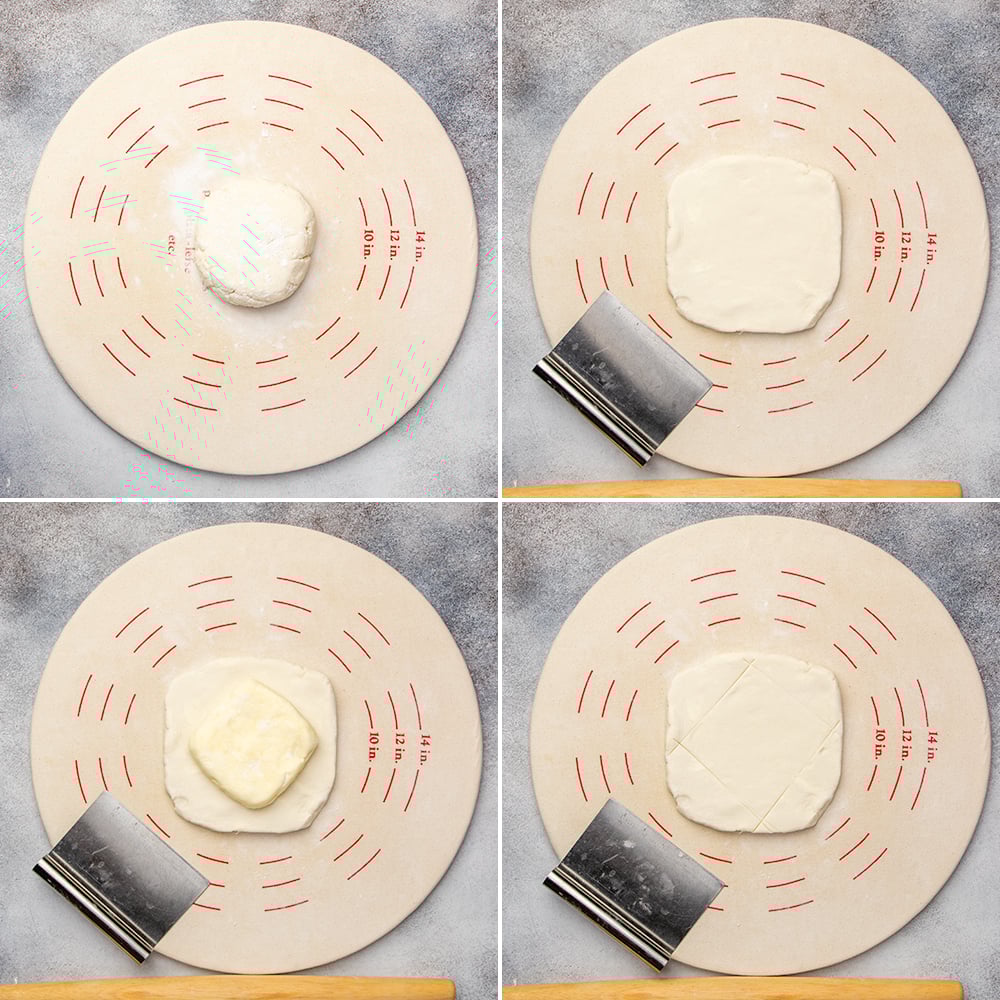
- Roll out the 4 corners of the dough from each scored edge, creating flaps.
- Return the butter packet to the center. Fold the flaps over it to seal, like closing a box.
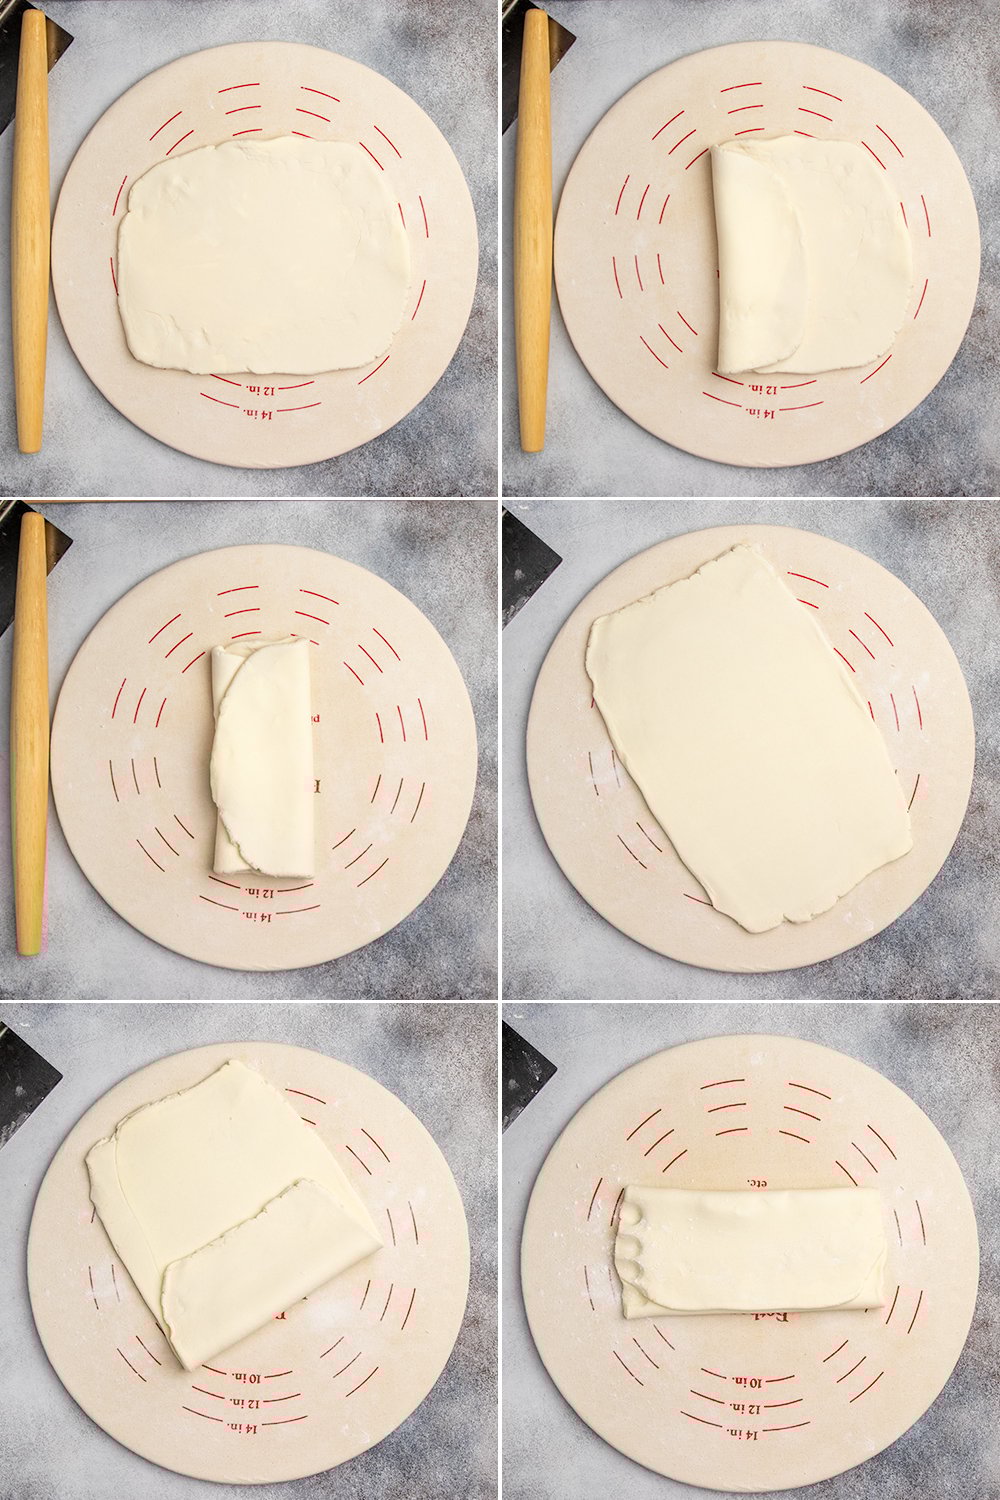
Roll and fold the dough (lamination)
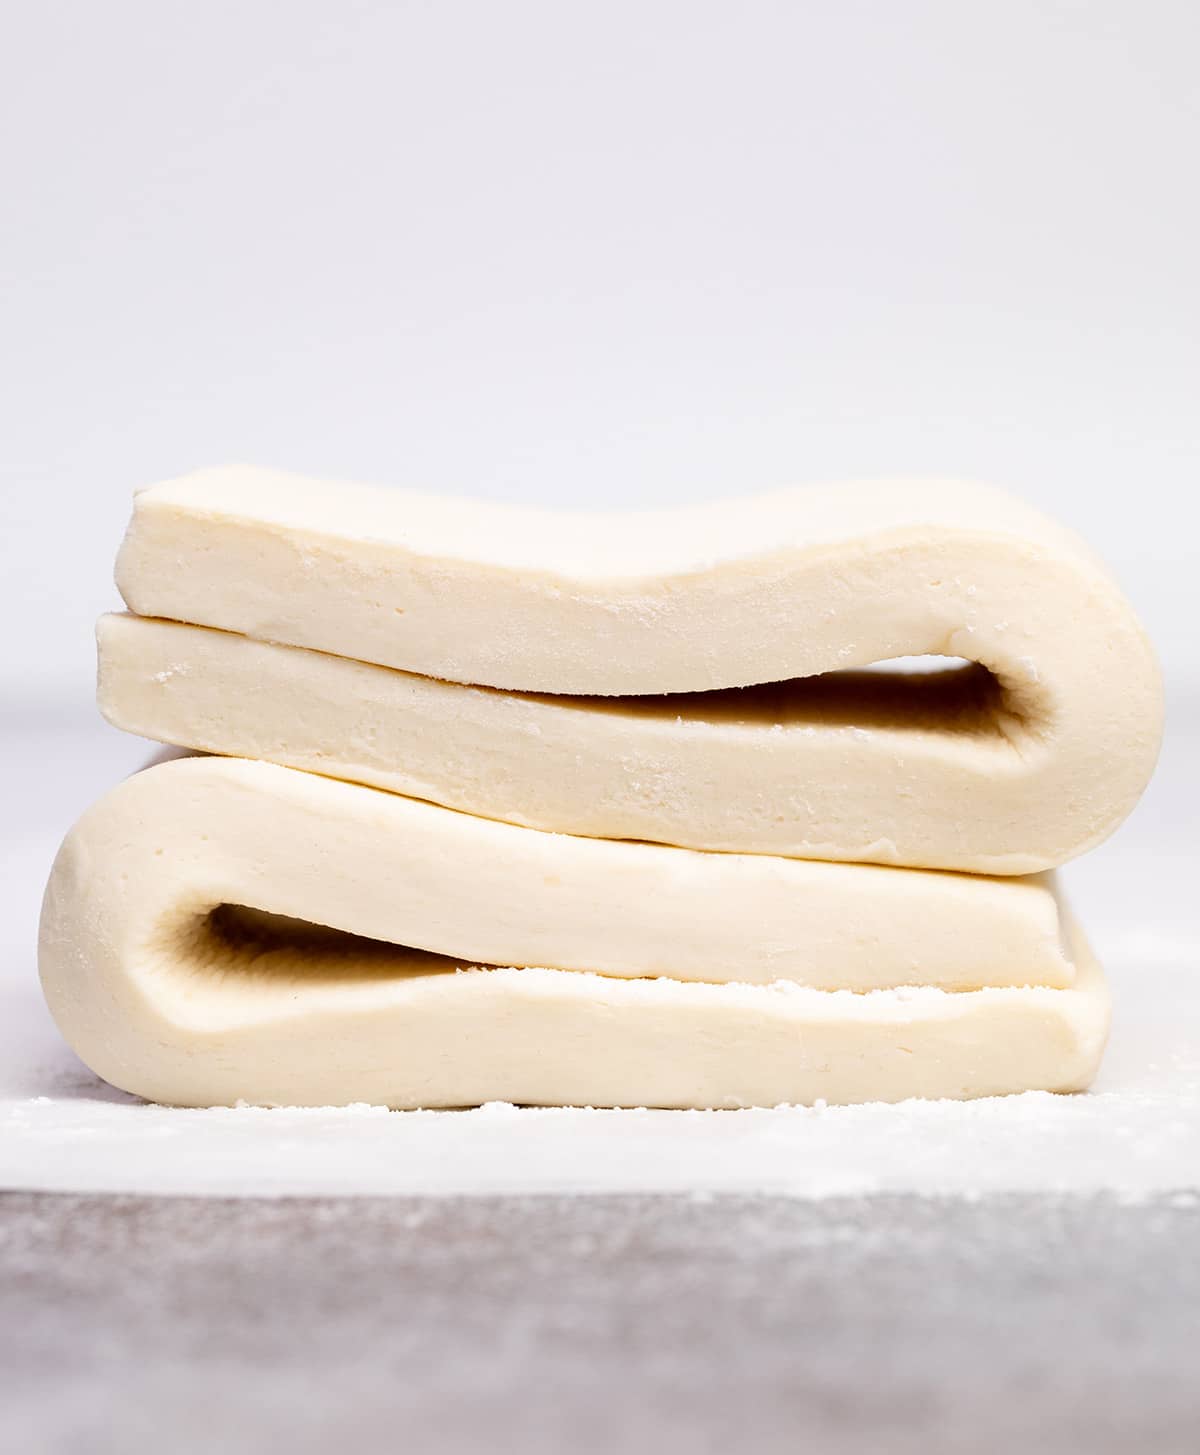
Lamination is what builds puff pastry’s signature layers. With each “turn”—rolling and folding—you multiply those layers exponentially.
- Each turn: Roll the dough into a rectangle, then fold it in thirds like a business letter. That’s one turn.
- Total turns: Do 6 turns total, chilling the dough for 30 minutes after every 2.
To use right away: Complete all 6 turns, chilling in between. After the final chill, roll the dough out to your desired thickness and use it to make a tart, turnover, or other pastry.
To use later: Complete only 4 turns, wrap tightly, and refrigerate. Later, before baking, let the dough warm just enough to roll smoothly, then finish the last 2 turns and chill once more.
Expert Tips
Keep the butter cold
Cold butter is what creates puff pastry’s flaky layers. As it hits the hot oven, the butter releases steam and lifts each sheet of dough. If it melts too soon, you lose the layers.
But don’t let the dough crack
If your dough breaks as you roll or wrap, it’s likely too cold. Let it warm slightly until pliable—just enough to bend, not melt.
Add water gradually
Start with less and add only as needed. If you go too far, sprinkle in a touch of flour to rebalance.
Track your turns
Lamination requires precision. After every two turns, press a floured knuckle into the dough to mark your place—2 marks for 2 turns, 4 for 4, and so on.
Stop at six turns
More turns don’t mean more flake. After 6, the butter layers get too thin to lift the dough, and you’ll lose that airy texture.
Flour as needed
The dough recipe uses the bare minimum flour for tenderness, so it can handle a sprinkling of flour during shaping. If it gets sticky or the butter starts peeking through, dust lightly and keep rolling.
Ingredient substitutions
To make it dairy free:
Swap the butter for a firm vegan butter like Melt or Miyoko’s Creamery. Just note—they’re softer than dairy butter, so your layers may be a bit less defined. Avoid Cup4Cup flour if you’re dairy free, since it contains milk powder.
For best water:
Use filtered, ice-cold water (measure before adding ice). Avoid spring or sparkling water, which can leave off flavors or impact texture.
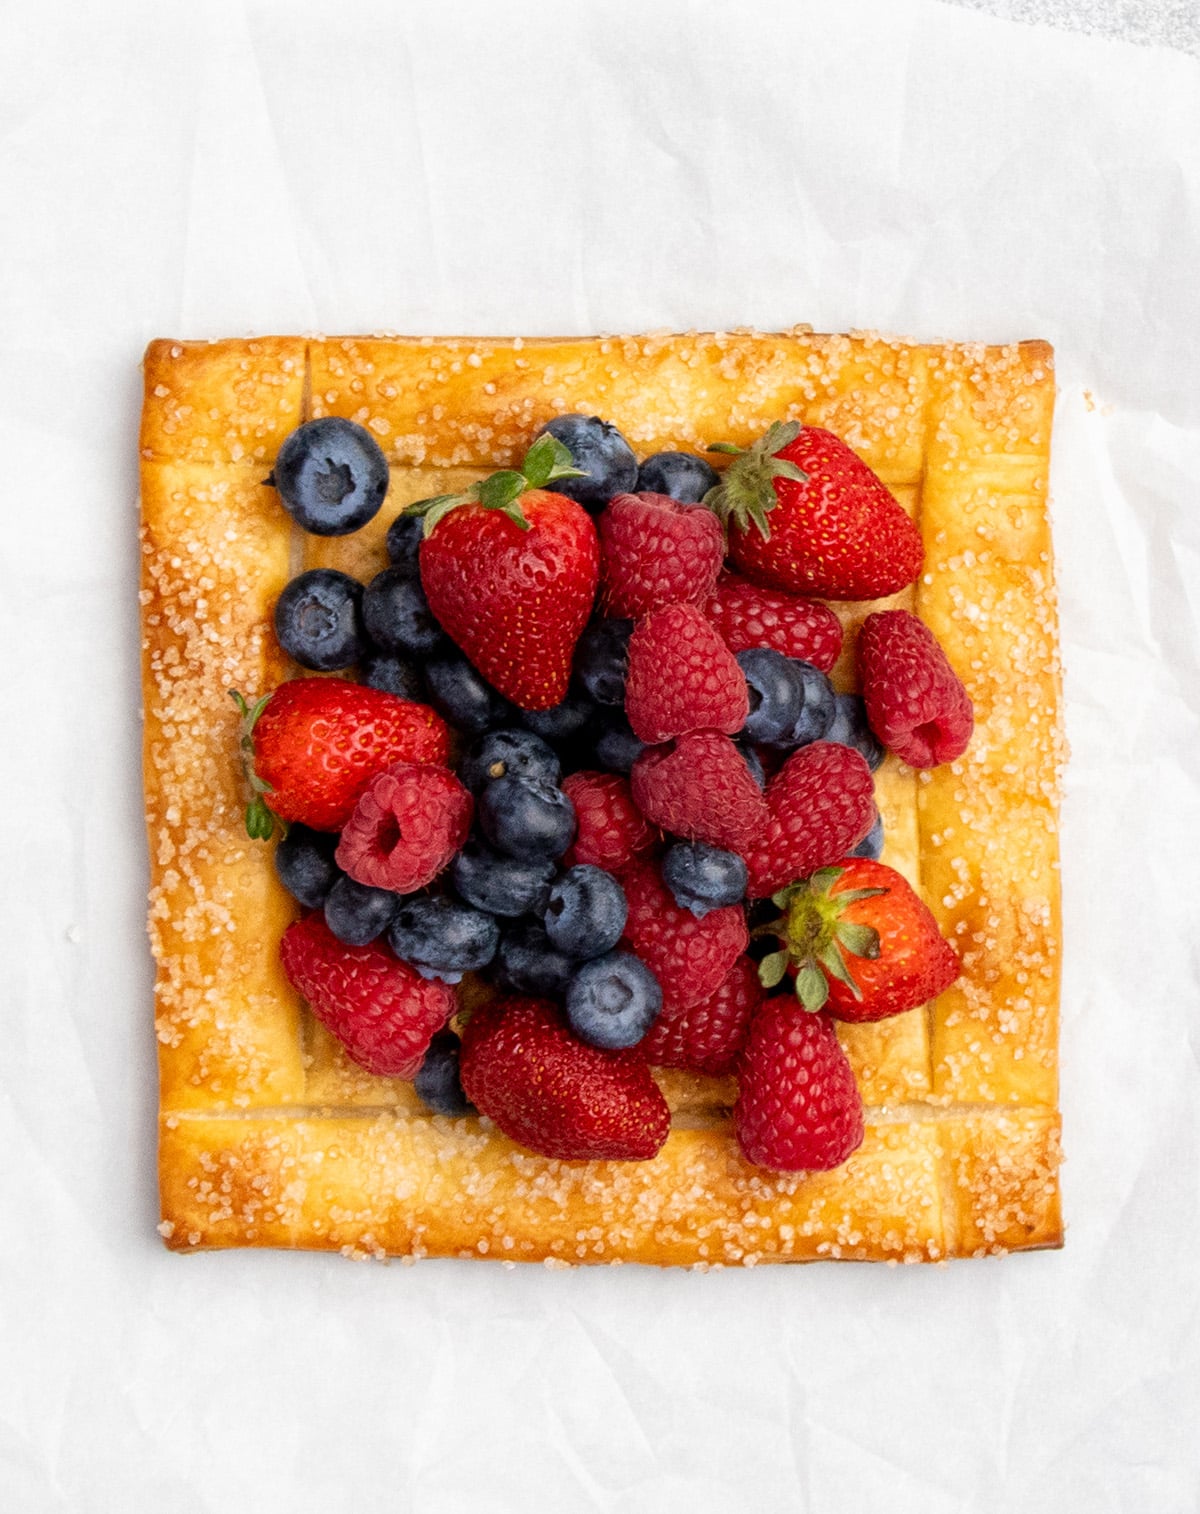
How to use this dough
This pastry works beautifully in both sweet and savory recipes:
- Make an open-face apple tart or use it as a crust for a rustic gluten free strawberry galette.
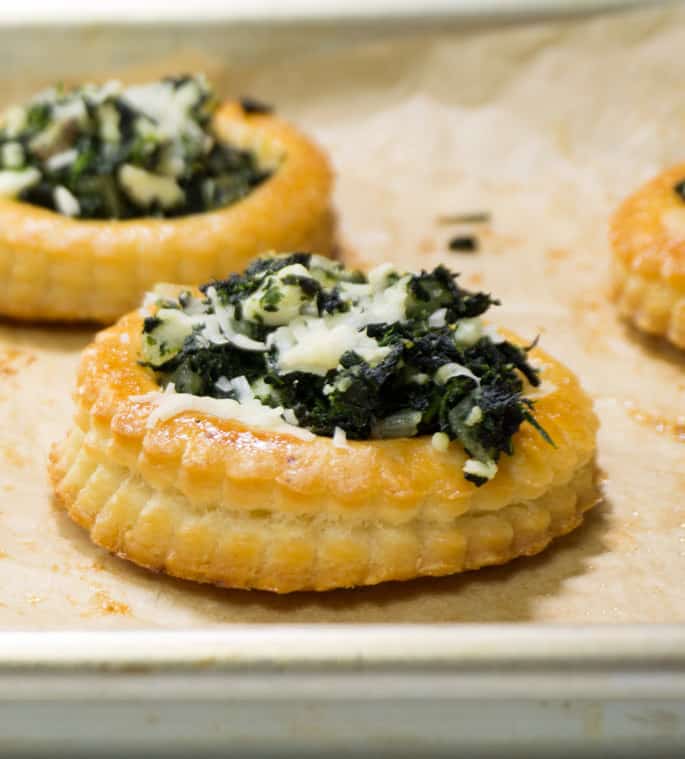
- Try it as the base for a gluten free asparagus tart or a golden topper for gluten free chicken pot pie.
- Cut and fill with pastry cream or whipped cream and berries for an elevated gluten free strawberry shortcake.
Gluten Free Puff Pastry Recipe

Equipment
- French rolling pin the kind that tapers on the ends, not the the kind with handles
- Metal bench scraper or knife or other straight edge
Ingredients
For the base dough
- 2 cups (280 g) all purpose gluten free flour blend, plus more for sprinkling (See Recipe Notes)
- 1 teaspoon xanthan gum, omit if your blend already contains it; use a heaping 1 teaspoon
- ¾ teaspoon kosher salt
- 4 tablespoons (56 g) unsalted butter, diced and kept cold
- ½ cup (4 fluid ounces) cold water, iced (ice doesn’t count in volume measurement), plus more as necessary
For the butter packet
- 4 tablespoons (35 g) all purpose gluten free flour blend, plus more for sprinkling (See Recipe Notes)
- 16 tablespoons (224 g) unsalted butter, very cold
Instructions
First, make the base dough.
- In a large bowl, place the 2 cups flour and salt, and mix or whisk to combine well. Add the chopped unsalted butter and toss to combine. Press each chunk of butter flat between your thumb and forefinger.
- Create a well in the dry ingredients, and add 1/2 cup of ice water to the center. Stir the mixture to combine. Add more ice water by the tablespoon until the dough stays together when pressed.
- Press the dough into a ball, place it onto a piece of plastic wrap and wrap tightly. Place in the refrigerator to chill until firm while you make the butter packet.
Make the butter packet.
- Dust a sheet of parchment paper or bare flat surface with 2 tablespoons of flour. Chop the two sticks of butter each by cross-section into 4 equal-sized chunks of 2 tablespoons each. You'll have 8 pats of butter.
- Arrange the pats of butter on top of the flour into 4 groups of 2 pats, touching one another, making a grid 2 wide by 4 tall. Sprinkle the butter with the remaining 2 tablespoons flour.
- Using a French rolling pin, pound the butter to begin to flatten it and to press the pats of butter together. Press and roll the rolling pin until the pats join together and make one butter packet about 1/2-inch thick, sprinkling lightly with extra flour as necessary to prevent sticking.
- If the butter starts to get greasy, sprinkle it lightly with flour, and refrigerate it until it firms up.
- Fold the butter in half, and roll and pound it again until flat, and repeat the process until you have a butter packet that is about 4-inches square.
- Wrap the butter packet tightly in plastic wrap and place it in the freezer to chill for about 5 minutes, or in the refrigerator for about 20 minutes, or until beginning to firm.
Combine base dough and butter packet.
- Remove the chilled base dough from the refrigerator, and place it on a lightly floured surface. Sprinkle lightly with more flour, and press and roll the dough until it is smooth, folding it over on itself as necessary.
- Press it into about a 6-inch round. Unwrap and place the chilled butter packet in the center of the round of dough.
- Lightly score the perimeter of the butter packet, and set the butter packet aside.
- Dust the top of the dough once more with flour, and roll out the dough from the 4 scoring marks and out, away from the center of the dough, to create 4 flaps.
- Dust with more flour as necessary to prevent the rolling pin from sticking to the dough and move the dough frequently.
- Place the butter packet back in the center of the dough, and fold the 4 flaps onto the butter like you would the bottom of a cardboard box. Press the dough around the butter packet to seal it in.
Complete "turns" 1 and 2.
- Sprinkle the top of the dough with flour, and roll the dough away from you into a long rectangle that is about 5-inches wide x 12-inches long.
- Whenever you're handling the raw dough, sprinkle it lightly with flour to prevent sticking, and shift and turn the dough frequently. Starting at a short side, fold the rectangle in thirds as you would a business letter. This is the first "turn."
- You will do two turns at a time, and then wrap and refrigerate the dough in between.
- Turn the dough 90° so the short side of the folded dough is facing you. Roll the dough away from you again into another long rectangle, in approximately the same size and shape as before (5 inches x 12 inches).
- Fold in the same manner, once again, starting at a short side and folding in thirds like you would a business letter
- You have just completed the first two “turns.” With a floured knuckle, make two impressions on the dough, to represent the completion of two turns.
- Cover the dough with plastic wrap tightly and place in the refrigerator for at least 30 minutes.
Complete the 3rd & 4th turns.
- Remove the chilled dough from the refrigerator. Unwrap it, and lightly flour the outside once again.
- With a short side of the folded dough facing you, roll away from you and into a long rectangle the same size as before, about 5 inches wide x 12 inches long. This is turn #3.
- Turn the dough 90° so the short side of the folded dough is facing you. Sprinkle the dough lightly with extra flour if any spots become sticky. Roll the dough away from you again into another long rectangle, in approximately the same size and shape as before (5 inches x 12 inches).
- Fold in the same manner, once again, starting at a short side and folding in thirds like you would a business letter.
- You have just completed the second two “turns” (numbers 3 and 4). With a floured knuckle, make four impressions on the dough, to represent the completion of 4 turns in total so far.
- Cover the dough with plastic wrap tightly and place in the refrigerator for at least 30 minutes.
- If you plan to use the dough today, continue on to the final steps of preparation. If not, keep the dough, wrapped very tightly, in the refrigerator until about 1 hour before you'd like to use it. When you're ready, remove the wrapped dough from the refrigerator, and resume the recipe as instructed below.
Complete the final 2 turns (#5 and #6).
- Remove the chilled dough from the refrigerator. If the dough is too stiff to roll, allow it to sit at room temperature for 15 to 20 minutes. When it's ready, unwrap it, and lightly flour the outside once again.
- Turn the dough 90° so the short side of the folded dough is facing you. Sprinkle the dough lightly with extra flour if any spots become sticky. Roll the dough away from you again into another long rectangle, in approximately the same size and shape as before (5 inches x 12 inches).
- Fold in the same manner as before, starting at a short side and folding in thirds like you would a business letter. This is turn #5.
- One final time, turn the dough 90° so the short side of the folded dough is facing you. Sprinkle the dough lightly with extra flour if any spots become sticky. Roll the dough away from you again into a final long rectangle, in approximately the same size and shape as before (5 inches x 12 inches).
- Fold in the same manner as before, starting at a short side and folding in thirds like you would a business letter. You have completely the final turn.
- Wrap tightly and refrigerate for at least another 30 minutes.
- It is now ready to be rolled out and used in any recipe that you would otherwise use conventional puff pastry. This full recipe makes the equivalent of about 3 sheets of conventional frozen packaged puff pastry.
Using the dough
- Use the fully prepared puff pastry sheet anywhere you would have used a conventional sheet in the past. See recipe notes for suggestions.
Video
Notes
For best results, use Better Batter’s original blend or my Nicole’s Best multipurpose blend. Bob’s Red Mill 1-to-1 should also work—but you'll need to add at least an extra ½ teaspoon xanthan gum to the base dough. I don’t recommend Cup4Cup anymore, since the new formula doesn’t perform as well. Prefer DIY? Use one of my mock all purpose gluten free flour blends. Yield info
This recipe makes about 2 pounds of dough—enough for 3 sheets of puff pastry, rolled to 10×10-inch squares. One sheet is the serving size used for the nutrition estimate. Uses
Use in place of pie crust or any other pastry in:
Nutrition
Nutrition information is automatically calculated, so should only be used as an approximation.
make ahead/leftovers
Storage instructions
Baked puff pastry:
Let baked goods cool completely, then wrap tightly. Store at room temperature for up to 2 days, or refrigerate for another 2 days after that.
To refresh: Sprinkle lightly with lukewarm water and warm in a 300°F oven for about 5 minutes.
Unbaked dough:
If shaped and ready to bake, wrap tightly and freeze for up to 3 months. Bake from frozen—just add a few extra minutes to the bake time.
Make-ahead dough:
After 4 turns, wrap tightly and refrigerate for up to 5 days or freeze for 3 months. When ready to use, let the dough warm slightly until rollable, then complete the final 2 turns, chill again, and use.
FAQs
Traditional puff pastry (like this one) uses a cold butter packet folded into a base dough, then laminated with multiple turns and chill periods.
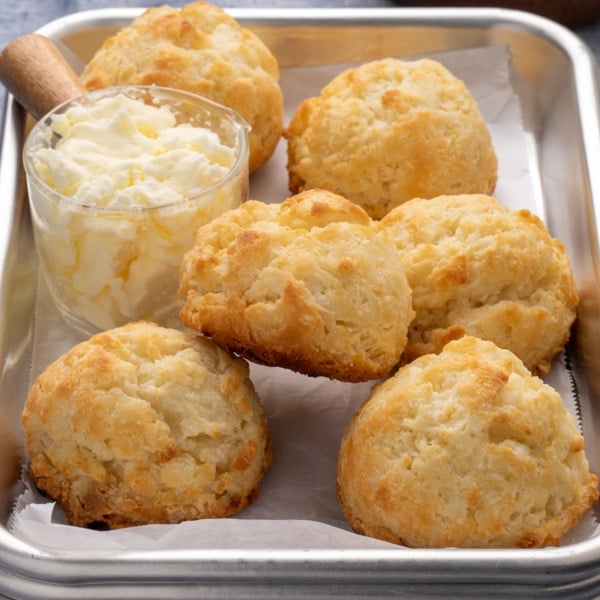
Rough puff, or quick puff, skips the butter packet and mixes chunks of cold butter directly into the dough. It’s faster, but doesn't have as many distinct layers, more like gluten free biscuits.
You’ll get about 2 pounds of dough—enough for 3 sheets, each around 10×10 inches. That’s about 30% more than a typical 2-sheet box from the store.
Yes—just adjust the “yield” in the recipe card. Keep in mind the step-by-step instructions won’t change, so you’ll need to scale sizes proportionally.
A few brands like Schär and GeeFree make GF pastry, but I haven’t tested them myself—so I can’t say how they compare.
The most common issue is warm butter—it may have melted into the dough instead of staying in distinct layers.
Other possible causes: too many turns (more than 6), or re-rolling after refrigerating or freezing, which can compress the layers.
Warm butter is usually the culprit. If it softens too much during shaping, it melts into the dough and leaks during baking.


Quick question. Will King Arthur’s measure for measure flour work in this puff pastry recipe? It has has xanthan gum and cellulose gum in the mix. I also have King Arthur all purpose flour without the xanthan gum. Thank you. Laurie
I’m afraid I recommend against KAF’s regular all purpose gluten free blends, and it will not work at all in a recipe like this one that requires a very well-balanced blend with a lot of structural support that isn’t too drying due to an overabundance of starch. KAF’s regular blends just don’t pass that test.
Could you let me know about how many grams of puff pastry this makes? I’m working with a Beef Wellington recipe that lists amounts in grams.
Thank you! I’m such a huge fan of your recipes, and always turn to you when I need something failsafe and delicious!
Hi, Monica, all the information I can really provide is in the Notes section of the recipe card. I hope that helps!
I asked how long to cook this and temp. Did I miss it?
Michelle, you use this puff pastry like you would packaged puff pastry that you may have purchased in the past, or like a pie crust. I provide some suggestions for uses in the notes section of the post. I hope that’s helpful.
I was testing out multiple GF puff pastry and rough puff doughs. I just used this recipe to make apple turnovers for my son’s birthday. This recipe has got to be the absolute best gluten free puff pastry. The pastry rises almost identically to regular puff, its tender and flaky with a lovely taste. This is also relatively easy to make assuming your comfortable making pastry in the first place. Thank you for excellent recipe.
You’re so welcome, William. Puff pastry is really all about architecture, and the right gluten free flour in the right proportions can actually make an even better pastry than conventional flour. So glad you had a good experience! Thank you for sharing that.
You have not included baking instructions. Time temp etc
This is a recipe for the pastry dough itself. You use it wherever and exactly however you’d use puff pastry in any sense, Janice.
CAn I use vegan butter? My son is also dairy free…
Do you think this could be rolled out very thin & used to make baklava?
Baklava uses filo rather than puff pastry. That is individual layers of dough painted with oil in between.
It might work to omit the butter packet, and roll it thin then brush the layers with melted butter as you would with normal filo.
I think if you used the butter packet rolling it as thin as possible would smash the layers into one anyway.
This video is awesome. I was reluctant before but now I am anxious to try it!!! Thanks
Well what could be better than that, Erika? Go for it!!
thank you, thank you, thank you for this!!! it’s been such a long time since i’ve had croissants (or anything with laminated dough)…so excited to bake these again! :D