
This post may contain affiliate links. Please read our disclosure policy.
The lightest, flakiest gluten free chocolate biscuit donuts are ready in a snap when you start with a simple gluten free biscuit dough. Make the dough weeks ahead of time!

Table of Contents
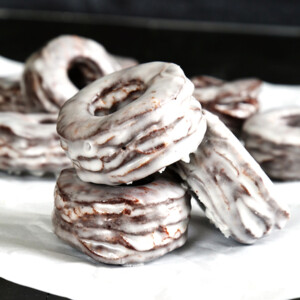
Please welcome the lightest, flakiest (and easiest!) glazed chocolate gluten free biscuit donuts in the whole wide world (too much?). There's no yeast in these donuts, though, so if you're looking for more classic gluten free donuts, you'll need our yeast-raised recipe.
Please know this, though: the glaze is a must (the donuts themselves are rich and chocolatey, but only lightly sweet; and the glaze keeps them fresh while uncovered at room temperature for at least a day)—and it must be thick. Otherwise, it runs right off the donut. What a shame that would be!
The decadent but simple chocolate gluten free biscuit dough can be made way, way, way ahead of time, too. Since it's not a yeasted donut dough, it can be made and frozen for at least 2 months. Just wrap it tightly. You can defrost it slightly in the refrigerator for a bit if it's difficult to cut into shapes, but I usually have no trouble working with it right from the freezer. The layers you create by folding and turning it a few times (all explained in the instructions below) will pay off big time when you fry these babies. See for yourself!

If you really want to gild the lily, replace about 2 tablespoons of the confectioners' sugar in the glaze with unsweetened cocoa powder and make the glaze a chocolate one. The donuts are so rich and chocolatey that I restrained myself. But if you can't, I understand. No judgments here.
Glazed Chocolate Gluten Free Biscuit Donuts
Ingredients
For the biscuit donuts
- 1 ¾ cups (245 g) all purpose gluten free flour blend, plus more for sprinkling (I used Better Batter; please click thru for full info on appropriate blends)
- ¾ teaspoon xanthan gum, (omit if your blend already contains it)
- ½ cup (40 g) unsweetened cocoa powder
- 7 tablespoons (42 g) nonfat dry milk powder
- ¼ cup (50 g) granulated sugar
- 1 ½ teaspoons baking powder
- ¼ teaspoon baking soda
- ½ teaspoon kosher salt
- 8 tablespoons (112 g) unsalted butter, cut into large chunks and chilled
- ⅞ cup (7 fluid ounces) buttermilk, chilled (not nonfat)
- Oil, for frying (I used a combination of equal parts canola oil and Spectrum nonhydrogenated vegetable shortening)
For the glaze
- 2 cups (230 g) confectioners’ sugar
- 2 tablespoons milk, plus more by the 1/4 teaspoonful if necessary
Instructions
Make the biscuit dough.
- In a large bowl, place the flour, xanthan gum, cocoa powder, nonfat dry milk, sugar, baking powder, baking soda and salt, and whisk to combine well. Add the chopped butter, and toss to coat. Place each piece of butter between your floured thumb and forefinger to flatten. Create a well in the center of the flour mixture and pour in the buttermilk. Mix with a large spoon or spatula until the dough begins to come together.
Shape the biscuit dough.
- Turn the dough out onto a lightly floured surface and dust the top of the dough with a bit more flour. Roll out with a rolling pin into a thick rectangle. Fold the rectangle in half lengthwise, dust again lightly with flour, and roll out again into a thick rectangle. Once more, fold the rectangle in half lengthwise, and fold again widthwise to create a much smaller, thicker rectangle. Dust lightly with flour, and one final time roll the dough into a rectangle that is about 3/4-inch thick.
- Using a well-floured 2 1/2-inch round donut-cutter (or a combination well-floured 2 1/2-inch round cookie cutter and a well-floured 1 1/4-inch cutter for the center), cut out 8 donut shapes from the biscuit dough. Place on a rimmed baking sheet. Take the 8 small cut-outs from the center of each donut shape, and roll each lightly into a round between your palms. Using a 1 1/4-inch round cutter, cut out more small rounds from the remaining biscuit dough, and roll those each into a round between your palms. You don’t want to apply too much pressure or you’ll compress the layers. Place the small rounds on the baking sheet as well, and place the baking sheet in the freezer to chill while you prepare the frying oil.
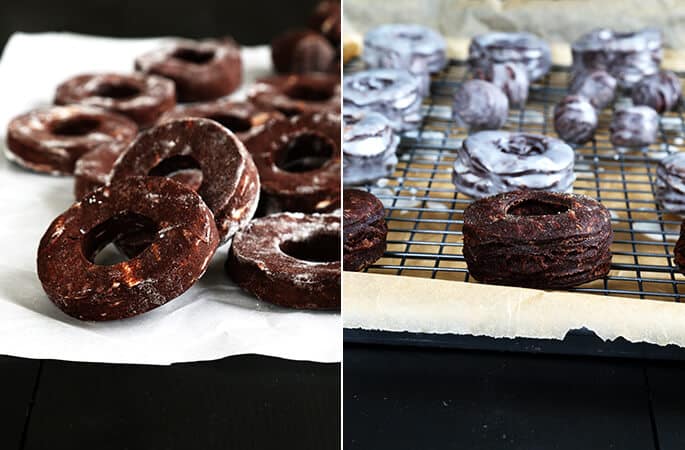
Fry the donuts.
- In a medium-size, heavy-bottom pot or fryer, place about 3-inches of frying oil. Clip a deep-fry/candy thermometer to the side of the pot or fryer, and place the oil over medium heat. Bring the oil temperature to 325°F. Remove the biscuit dough shapes from the freezer, and fry in small batches until well-puffed and firm to the touch (3 to 5 minutes for the donuts and about 2 minutes for the holes). Do not crowd the oil at all. The dough will first turn lighter in color in the frying oil, and then darker. You must judge doneness by color and firmness as browning won’t be obvious. Remove each batch from the fryer and place on paper towel-lined plates to drain and cool completely.
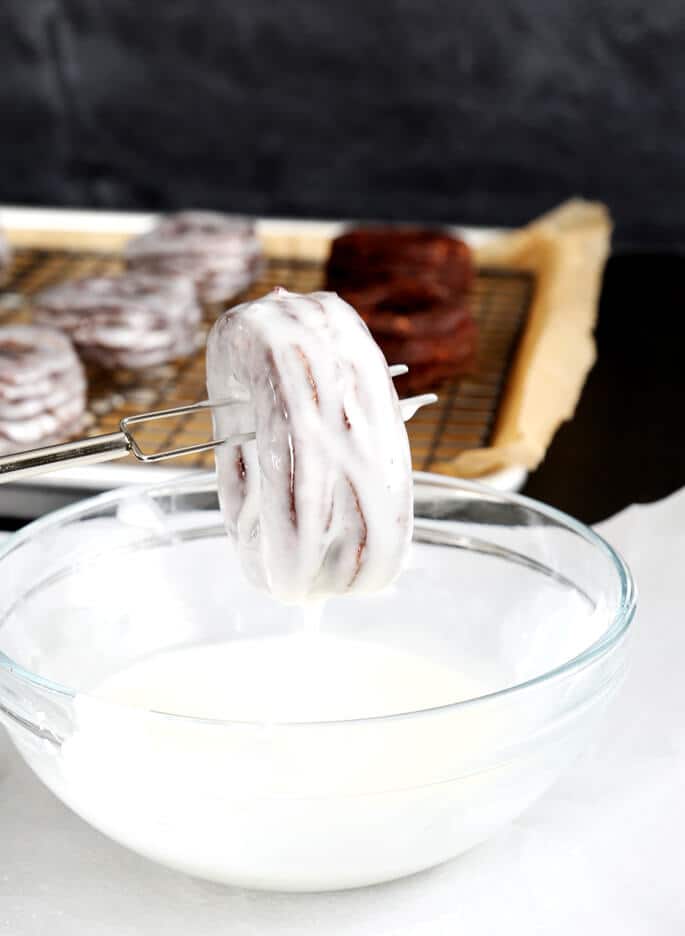
Make the glaze.
- In a medium-size bowl, place the confectioners’ sugar and 2 tablespoons of milk. Mix well, until a thick paste forms. Add more milk by the 1/4-teaspoon, mixing to combine well, until the glaze falls off the spoon slowly, in a thick but pourable glaze. Add milk very slowly, as it is much easier to thin, than to thicken, the glaze. If you do thin the glaze too much, add more confectioners’ sugar a teaspoon at a time to thicken it. Immerse each cooled donut and donut hole in the glaze and lift out with the tines of a fork or chocolate dipping tool, allow excess glaze to drizzle off, and place on a wire rack to allow any excess glaze to drip off. Allow the glaze to set at room temperature before serving. The glaze will keep the donuts fresh, uncovered on the kitchen counter, for at least a day.
Nutrition information is automatically calculated, so should only be used as an approximation.


These look just heavenly!
Can I substitute the dry milk with a small amount of liquid milk?