
This post may contain affiliate links. Please read our disclosure policy.
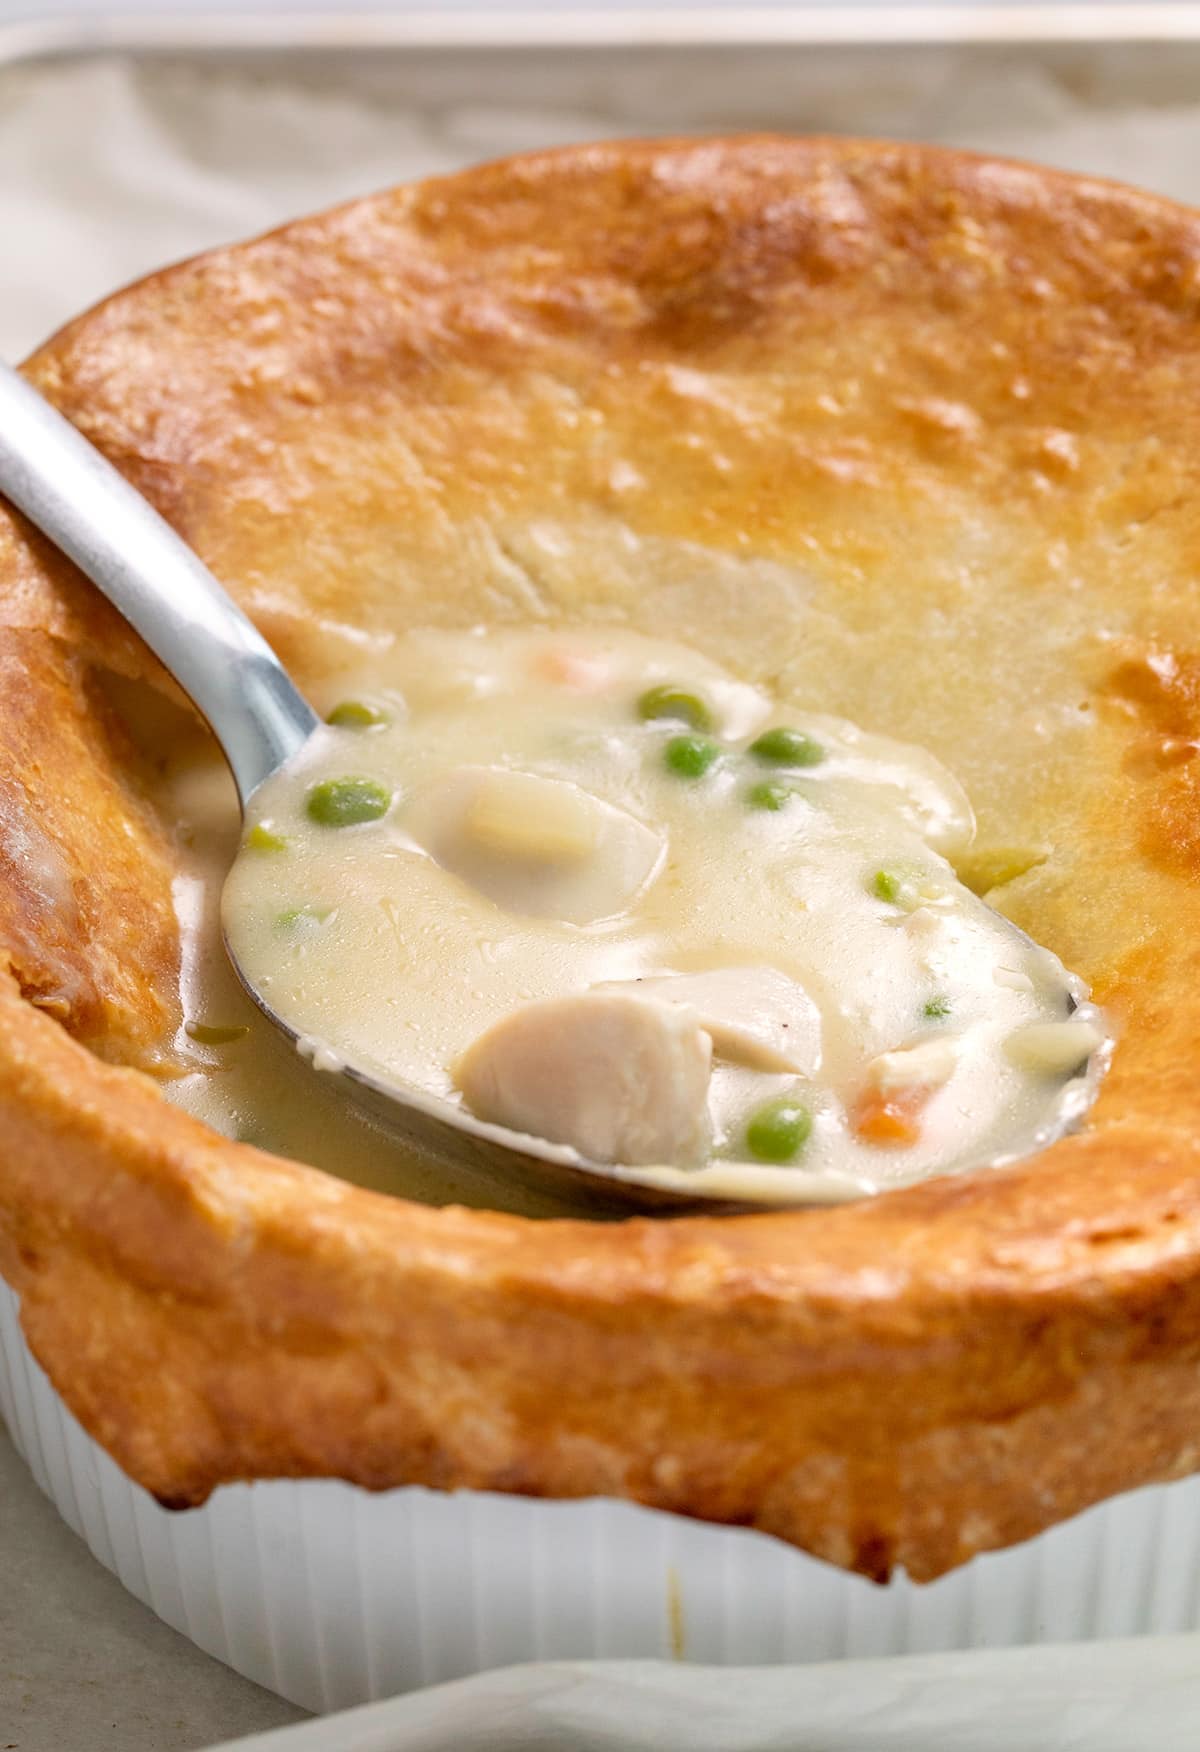
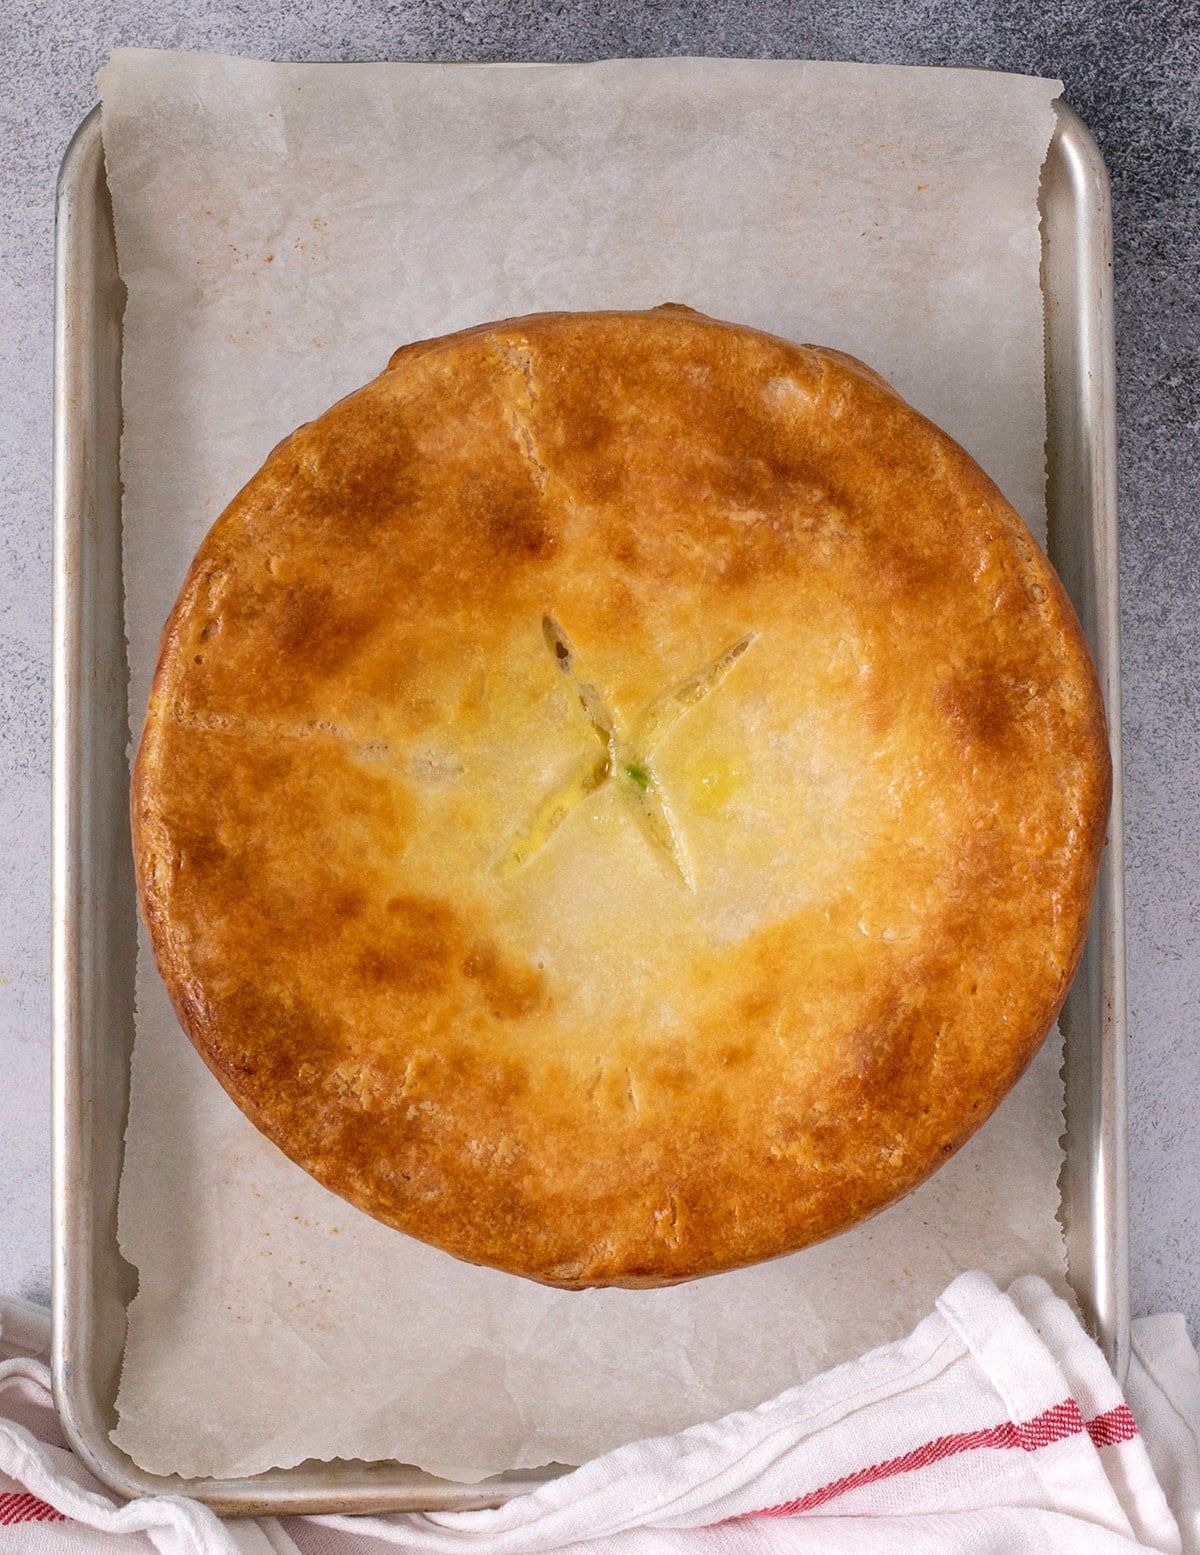
Warm up from the inside with this gluten free chicken pot pie, thickened easily with a basic gluten free flour blend and packed with white meat chicken cooked to perfection. Topped with the best gf pie crust, of course!
Why this recipe works
This gluten free pot pie recipe is filling, comforting, and so tasty. And, because it's only one crust, there's not too much pastry, and you can really pack in that lovely filling.
It's also really versatile, since although it's a chicken pot pie, you can substitute turkey if you have leftovers – it's a great way to use up the rest of your Thanksgiving turkey. And, if you don't want to make fresh chicken, you can use leftovers or pre-cooked, too.
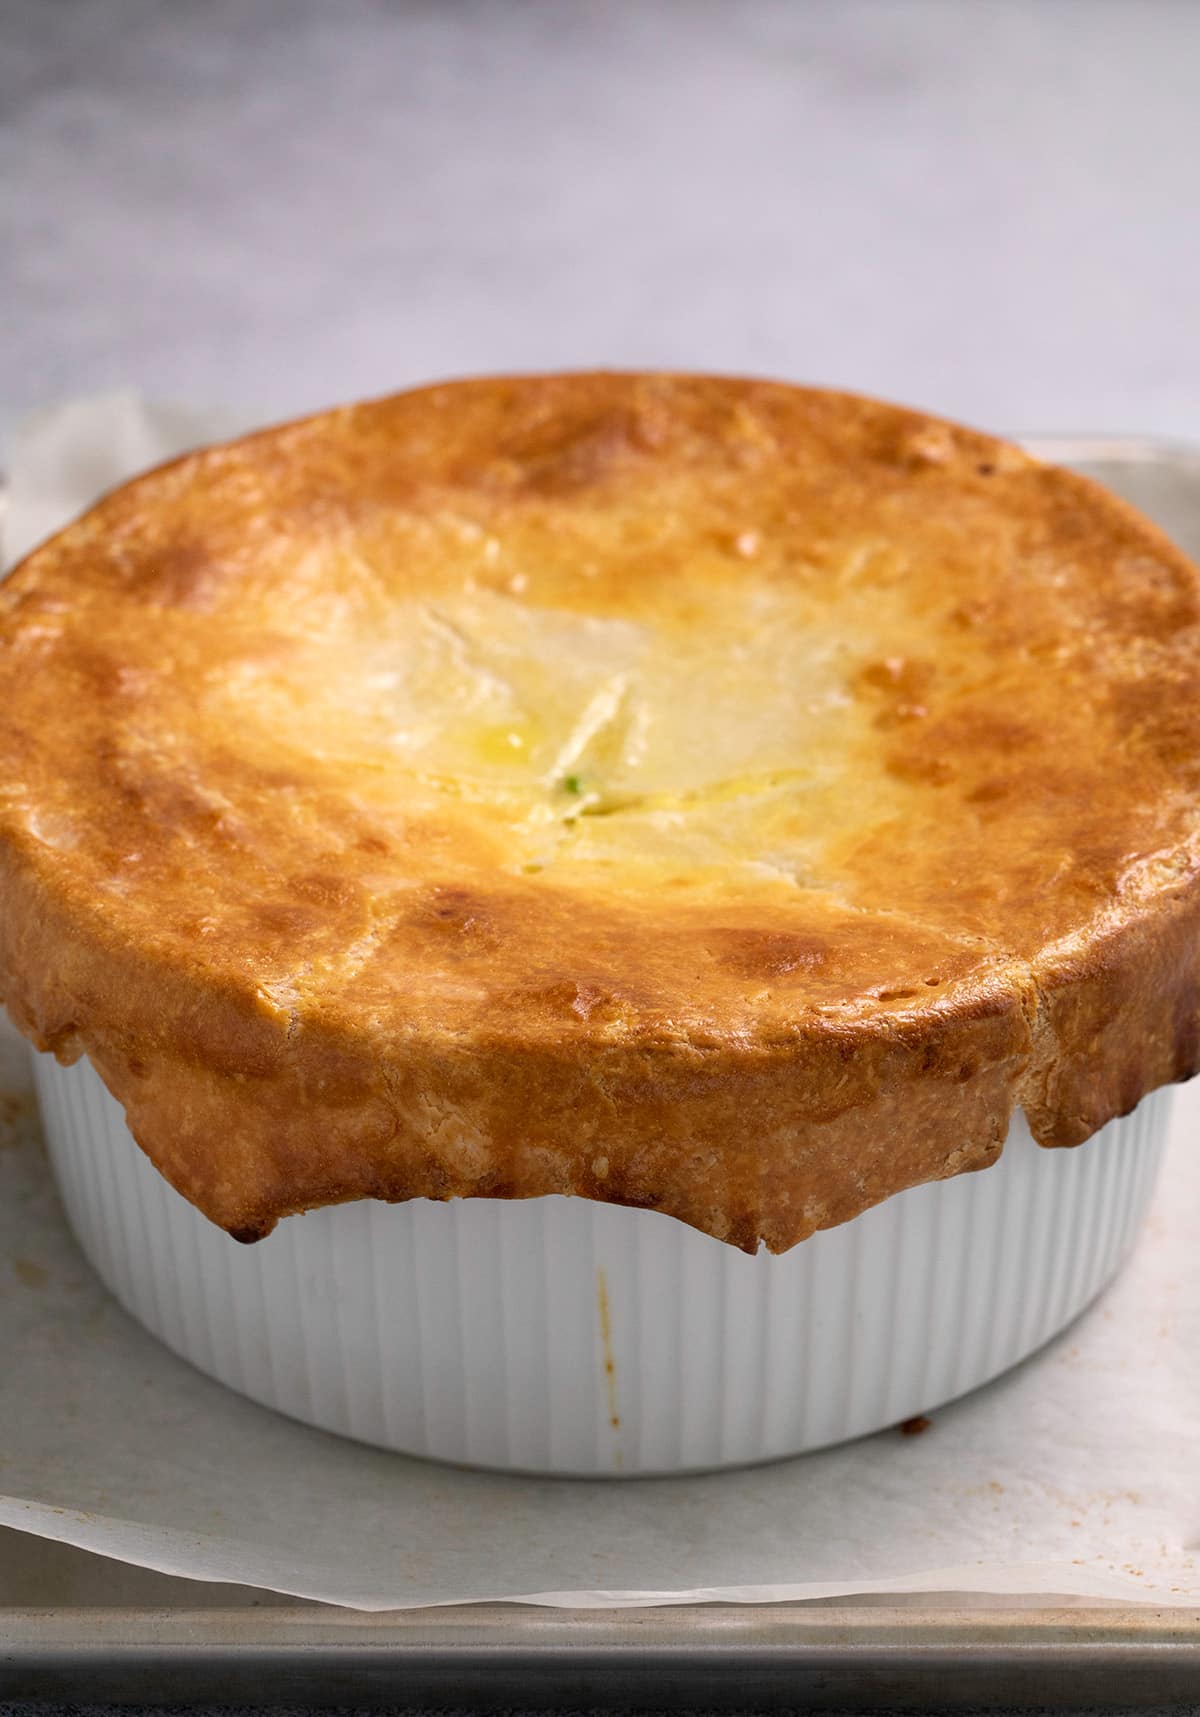
I prefer to make chicken pot pie as more of a rich and thick soup style filling with a pie crust baked on top. The filling is cooked completely first, on the stove top. Then, the pie crust is added and baked on top of the filling until golden brown.
When you make a double crust pie, your chicken pot pie tends to contain more crust than filling, and must be made in a pie plate, not a casserole dish.
How to make a double crust gluten free chicken pot pie
If you prefer a chicken pot pie with a double crust in a pie plate (one on the bottom of the pie plate, one on top), we can make that happen. Simply double the pie crust recipe, and follow the instructions in the pie crust post to blind bake the bottom crust.
You'll either want to make less filling or make multiple pies, since the filling here is for a casserole dish. Once you smell and then taste the filling, I don't think you'll want to reduce the recipe, though.
How do you cook the chicken
You can cook the chicken in the same manner in which you sauté the onions in this recipe. Slice the raw chicken into a large dice, with pieces about 1-inch square. Cook the chicken in the butter and oil, after or even with the chopped onions, for about 5 minutes.
I prefer to cook the chicken separately, since you can make it ahead of time that way—and I make extra to use in other recipes. Any chicken that has been seasoned plainly, preferably with just salt, pepper, and a bit of olive oil, works for this recipe—and for any recipe where you might use rotisserie chicken. Of course, you can use rotisserie chicken, but my family doesn't care for that.
Using skinless boneless chicken breasts
My favorite way to cook it for a recipe like this is in a casserole dish with the meat covered completely with parchment paper. The parchment paper acts like the skin of the chicken would, and locks in moisture during cooking.
Place the breasts in a lined or greased dish, allowing for some space between the breasts. Drizzle the meat lightly with olive oil, sprinkle lightly with salt and freshly ground black pepper, and cover completely with parchment paper placed directly on top of it, covering the chicken completely.
Preheat your oven to 400°F. Place the dish in the hot oven and cook for about 20 minutes or until an instant-reader thermometer inserted into the thickest portion of each breast reads at least 165°F. Allow to rest outside the oven, still covered, for 10 minutes before chopping.
To make this chicken for later use, allow the chicken to cool completely while still covered with the parchment paper. Wrap the chicken tightly with freezer-safe wrap, and freeze until you're ready to use it. Defrost in the refrigerator overnight before using in this recipe, for chicken salad, or anywhere you might use cooked rotisserie chicken.
Ingredient substitutions
Dairy free
For information on dairy in the gluten free pie crust, please click through to that post. To replace the butter in the filling, try using vegan butter (Melt and Miyoko's Kitchen brands are my favorite). You could also use Earth Balance buttery sticks, but reduce the salt in the filling.
The milk in the filling can be nondairy, but if you are using something that is relatively thin, like unsweetened almond milk, use less. For a creamy soup, there really isn't a lot of essential dairy in this recipe
Egg free
The only egg in this recipe is in the egg wash used to help the pie crust brown. In place of the egg wash, try using cream.

Make ahead suggestions
You can make the crust, wrap it tightly in plastic wrap, and store it in the refrigerator for up to 5 days or in the freezer for 3 months.
And you can make up the filling and refrigerate it for up to 3 days. Then, when you're ready, you just reheat the filling and proceed with the recipe.
Storage suggestions
You can store your baked chicken pot pie in the refrigerator for 3 days. And you can reheat it a 300°F oven, making sure it's piping hot throughout.
For longer storage, you can freeze the unbaked chicken pot pie. Make sure you use a freezer-safe casserole dish.
Once you've made the filling, place it in the casserole dish, and let it cool completely. Assemble the pie, then wrap the whole thing, including the dish, tightly in plastic wrap before freezing for up to 3 months. Then, thaw it completely and finish the recipe as directed.
Gluten Free Chicken Pot Pie Recipe

Equipment
- Rolling pin for extra flaky gf pie crust
Ingredients
- 1 recipe extra flaky gluten free pie crust, <—CLICK FOR RECIPE (see Recipe Notes)
- 6 tablespoons (84 g) unsalted butter
- 3 tablespoons (42 g) extra virgin olive oil
- 2 large yellow onions, peeled and chopped
- ½ teaspoon kosher salt, plus more to taste
- ⅛ teaspoon freshly ground black pepper, plus more to taste
- 1 ½ pounds skinless boneless chicken breasts, cooked and cubed (see Recipe Notes)
- ½ cup (70 g) gum-free gluten free flour blend, (46 g superfine white rice flour + 15 g potato starch + 9 g tapioca starch/flour)
- 4 cups (32 fluid ounces) chicken stock
- ½ cup (4 fluid ounces) whole milk or cream
- 12 ounces frozen peas and carrots, thawed slightly
- Egg wash, (1 egg + tablespoon milk, beaten)
Instructions
- First, prepare the pie crust according to the recipe instructions.
- On a lightly floured piece of parchment paper, roll out the dough into a rectangle about 1/8-inch thick. Place the rolled-out dough, still on the paper, in the refrigerator to chill while you make the filling.
- Preheat your oven to 375°F. Grease a round ovenproof baking dish at least 10 inches in diameter, and set it aside. Alternatively, grease 4-oven proof baking dishes at least 6 inches in diameter each.
- In a large saucepan, melt the butter over medium heat. Add the olive oil, and the onions, and mix to combine and coat the onions in the oil and butter.
- Add the salt and pepper, and mix to combine. Sauté the onions, stirring occasionally, until translucent but not browned, about 6 minutes.
- Add the flour slowly, mixing constantly, until the flour is well incorporated. Continue to cook for about 2 minutes or until the mixture begins to smell a bit nutty.
- Add the chicken stock and then the milk or cream in a slow, steady stream, mixing constantly.
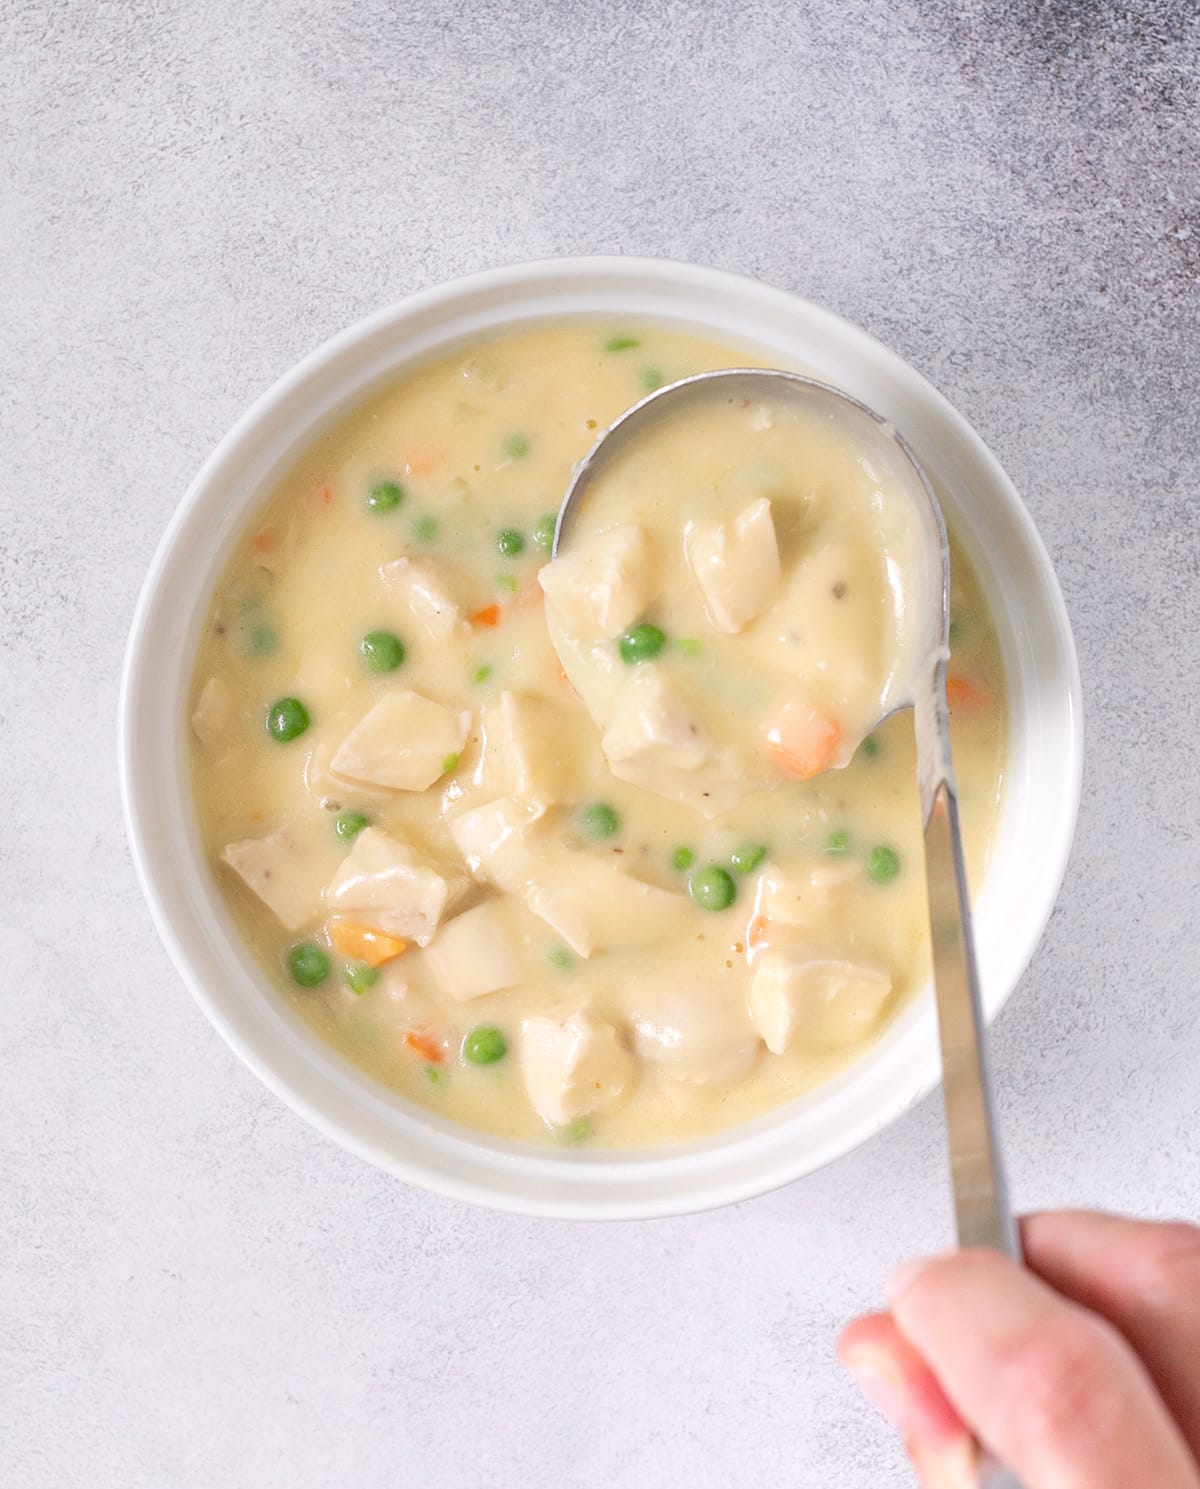
- Raise the heat to medium high and cook, stirring occasionally, until the mixture begins to simmer and thicken. Once the mixture is simmering, add the thawed mixed vegetables and cooked chicken, and mix to combine.
- Fill the prepared baking dish(es) with filling.
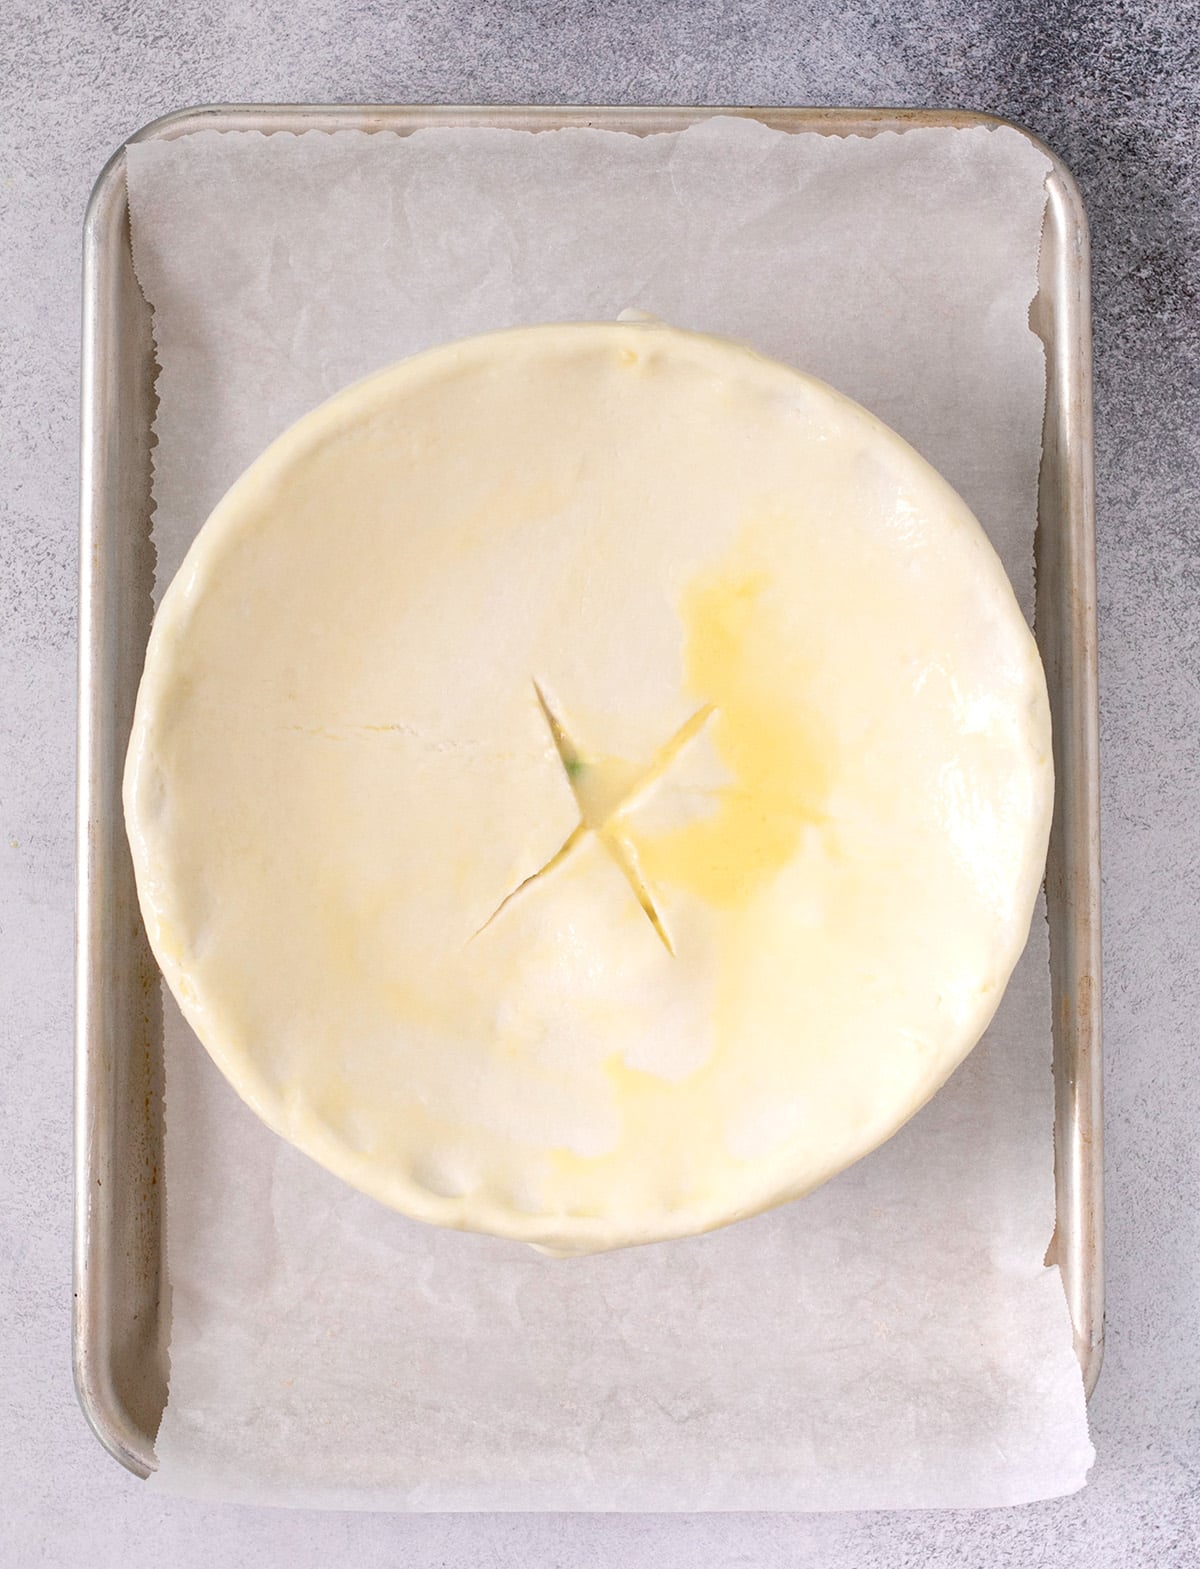
- Remove the pastry dough from the refrigerator. Turn it over, and place it on top of the filling in the baking dish(es).
- Gently remove the parchment paper from the top, and crimp or pinch the edges to secure. Trim excess pie crust using a sharp knife or kitchen shears.
- Using a sharp knife, carefully slice an X in the middle of the pie(s) to allow steam to escape during baking. With a pastry brush, brush the top of the crust(s) with the egg wash.
- Place the baking dish(es) on a rimmed baking sheet to catch any overflow or drips. Place in the center of the preheated oven and bake for about 35 minutes, or until the top is lightly golden brown all over. Serve immediately.
Video
Notes
Place in a 400°F oven and cook for about 20 minutes or until an instant-reader thermometer inserted into the thickest portion of each breast reads at least 165°F. Allow to rest outside the oven, still covered, for 10 minutes before chopping. To make this recipe ahead. You can make the entire pie, assembled and topped with crust, ahead of time. Just allow the pie to sit until the filling has cooled before covering with the pie crust.
Place the baking dish in the freezer, uncovered, until the crust is frozen. Cover tightly, and return to the freezer. Defrost overnight in the refrigerator before baking as instructed.
Nutrition information is automatically calculated, so should only be used as an approximation.

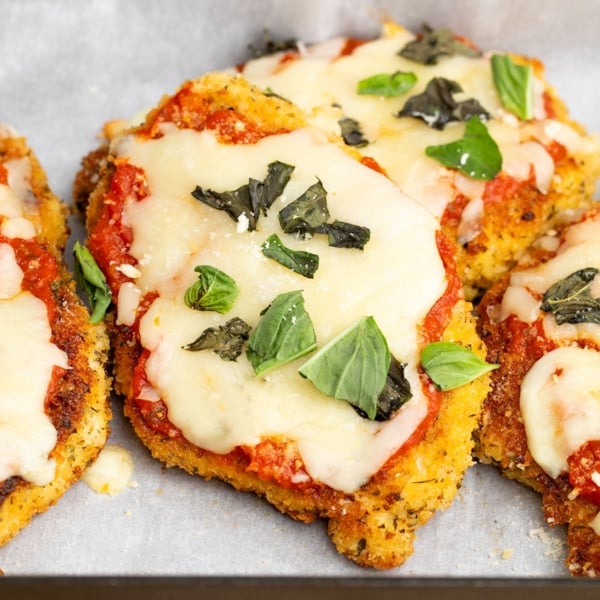
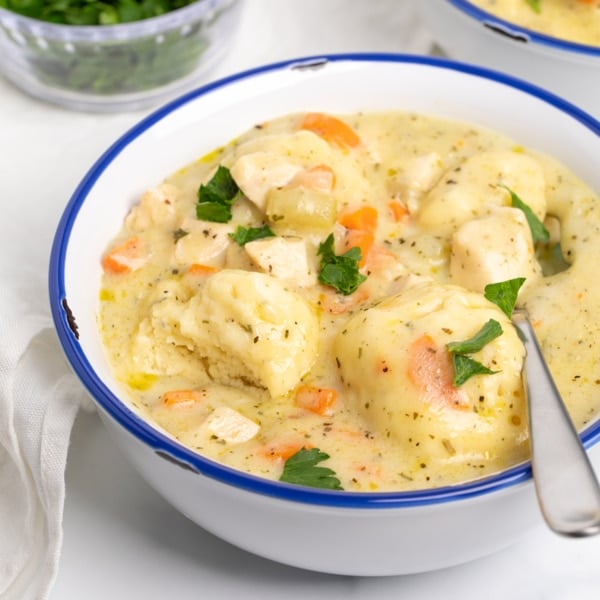
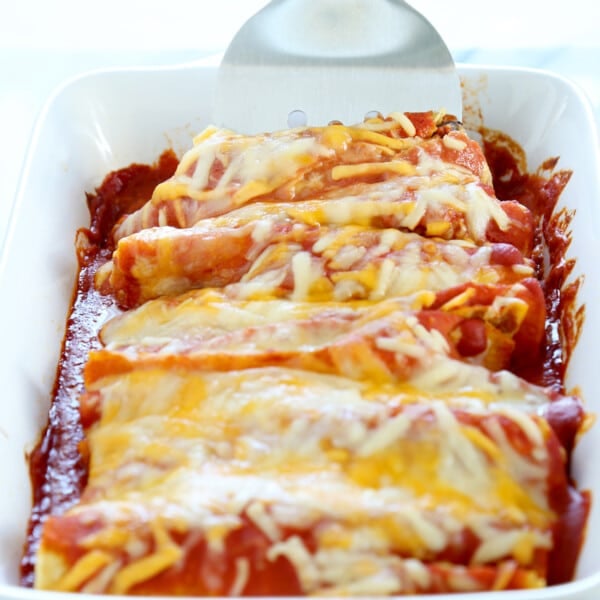
Other gluten free chicken dinner recipes you'll love
Finding gluten free dinner recipes every night to please the whole family can be exhausting. But here are a few of my favorite gluten free chicken recipes.


could you use 1/2 leftover gravy in place of the milk
Hi, Roxanne, I don’t recommend that, since gravy is thickened with flour-based roux, so it has a very different consistency than milk or cream.
looks great. we have been missing chicken pot pie. we used to serve the pie over steamed fresh broccoli. yum
Hi Nicole I believe that you recently showed a Chicken Pie Recipe made in a Cast Iron Skillet, I must have lost it, Could you send that recipe to me please when you get a chance. Thank You Dan S.
I’m afraid I don’t have a recipe like that, Daniel. I have a recipe for gluten free chicken and dumplings, if that’s what you mean? Other than that, I’d recommend just searching around the blog. All the recipes I have for free are searchable here on the blog.
This is beyond delicious! No one could believe it was GF and dairy free (I used almond milk). Added a little thyme and sage and used some leftover turkey I had frozen from Christmas. Otherwise followed the recipe as written. The crust was to die for! Can’t wait to make again and again and again.
So glad you were able to use your dairy free substitute, and frozen turkey and really enjoyed the pot pie, Stephanie! Thanks so much for sharing your experience.
If I make the entire pot pie and freeze it, about how long can it stay in the freezer?
Hi, Maggie, if it’s wrapped very tightly, and frozen at a consistent temperature, it can lost quite a while (at least a month, I’d say). Spoliation is not really the issue. Freezer burn is, from any air that gets in.
Just made this tonight and it turned out beautifully! My husband isn’t gf (or a huge chicken pot pie fan) but he raved about it. I’ll definitely be making it again soon! I was also able to FINALLY make gluten free pie crust!! I’ve tried several times and it always ends in tears but this pie crust recipe is my new go to. Thank you so much for all you do. Your recipes never fail!
Aw, Jess, I’m so sorry you’ve had an unfortunate history with pie crust. I think the extra flaky crust is perfect for confidence-building, since the addition of sour cream actually makes it easier to roll out. So glad you loved the whole thing. Cheers to your continued success and building confidence!